

Page 1
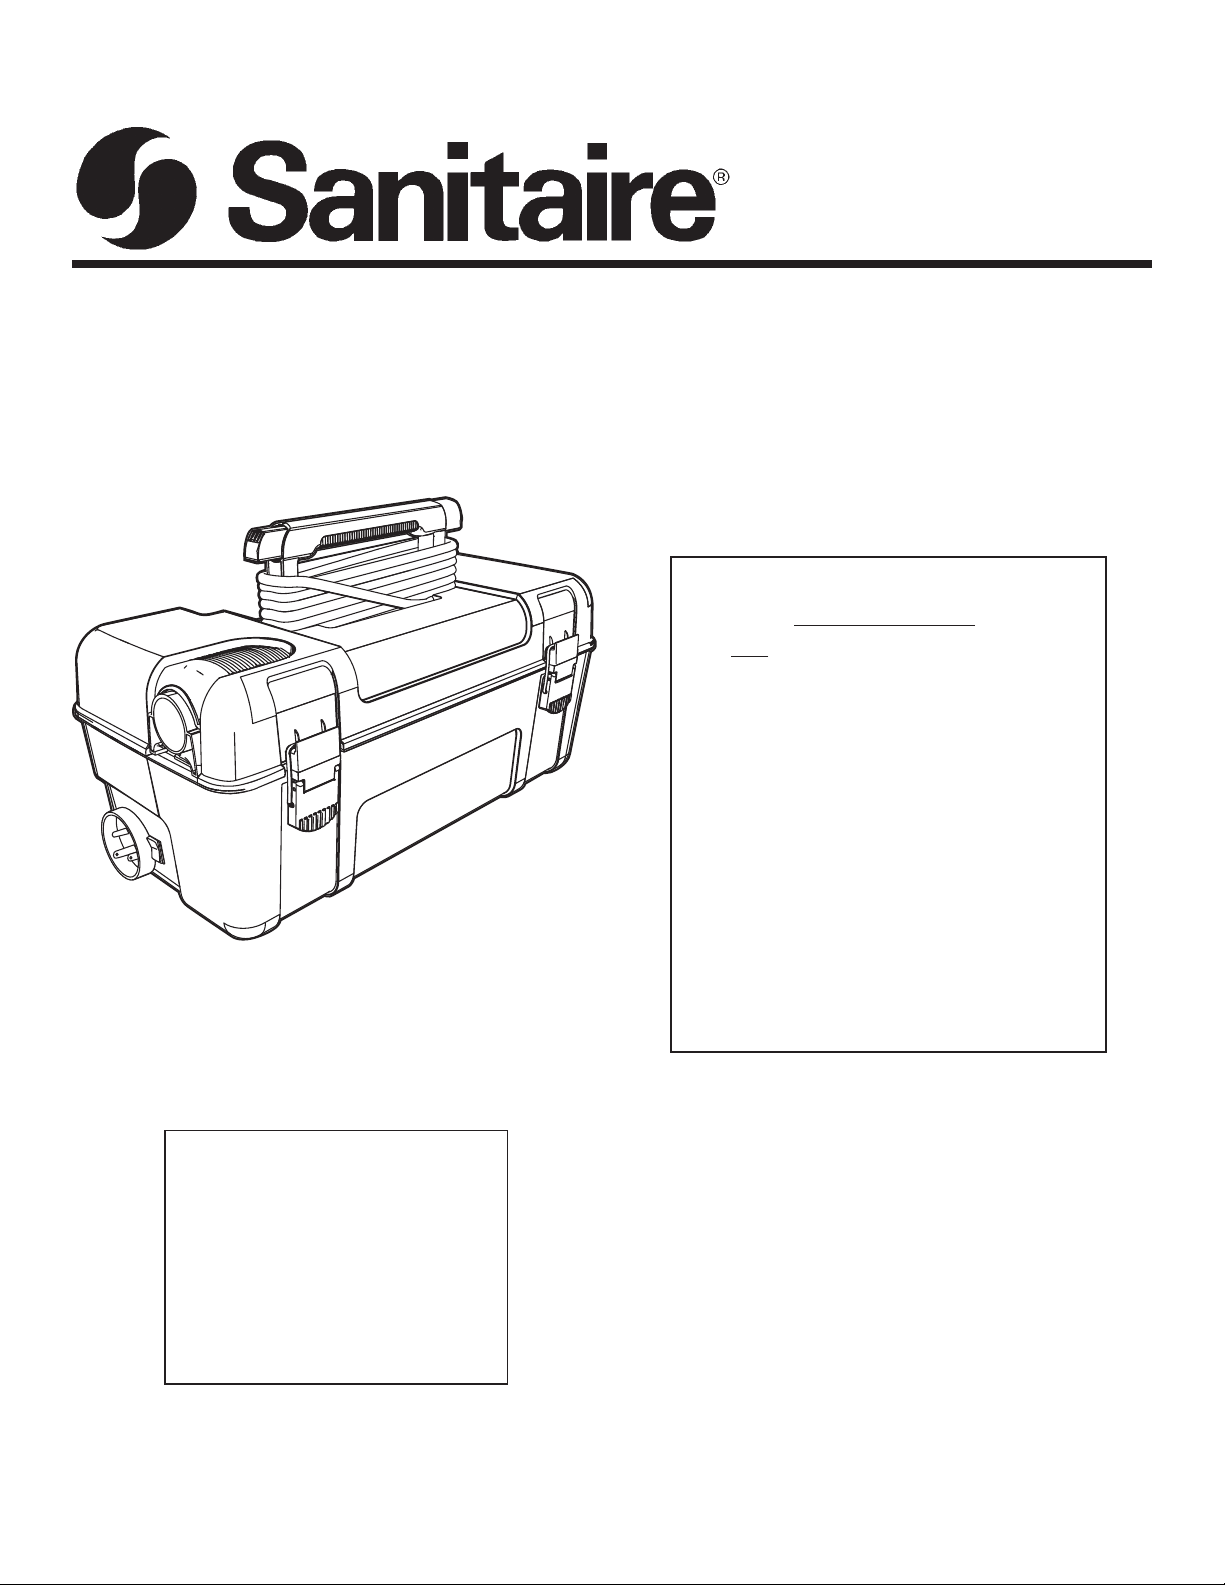
Commercial
Vacuum Cleaner
Owner’s Guide
1040 Series
IMPORTANT
Do not return this product to the
store.
For assembly problems or questions and
replacement of broken or missing items
contact: Eureka’s Customer Service Division
toll free at 1-800-282-2886*, 8 a.m. to 7:30
p.m., (CST), Monday - Friday and 10 a.m. to
6:30 p.m. Saturday.
To order replacement parts and accessories
contact Eureka’s Customer Service Division
toll free at 1-800-282-2886*, 8 a.m. to 7:30 p.m.,
(CST), Monday - Friday and 10 a.m. to 6:30 p.m.
Saturday, or visit our web site,
www.sanitairevac.com.
*En Mexico llame al 5670-6169.
Please Retain
Index
Important Information ............... 2-3
How To Use ............................... 3-4
Routine Maintenance
Dust Bag ................................... 5
Pre-Motor Filter ..........................5
Storage ...................................... 5
Problem Solving
Guide ......................................... 5
Warranty ...................................... 5
Part No. 73205A (09/03) Printed in China
We suggest you record the model, type and serial numbers
below. They are located on the silver rating plate on your cleaner.
For prompt and complete service information, always refer to
these numbers when inquiring about service.
Model & Type__________________________________
Serial No. _____________________________________
It is also important to keep your receipt as proof of date of
purchase.
©2003 White Consolidated, Ltd.
Page 2
IMPORTANT SAFEGUARDS
When using an electrical appliance, basic precautions should always be followed, including the following:
READ ALL INSTRUCTIONS BEFORE USING THIS VACUUM CLEANER.
WARNING
To reduce the risk of fire, electric shock, or injury.
• Do not use on wet surfaces. Do not expose to rain, store
indoors in a cool, dry place.
• Do not leave vacuum cleaner when plugged in. Turn off
the switch and unplug the electrical cord when not in use
and before servicing.
• Do not allow to be used as a toy. Close attention is
necessary when used by or near children.
• Use only as described in this manual. Use only
manufacturer’s recommended attachments.
• Use only with cordset provided.
• Do not use with damaged cord or plug. If vacuum cleaner
is not working as it should, has been dropped,
damaged, left outdoors, or dropped into water, return it to a
service center before using.
• Do not pull or carry by cord, use cord as a handle, close a
door on cord, or pull cord around sharp edges or corners.
Keep cord away from heated surfaces.
• Connect to a properly grounded outlet only. (Refer to
Grounding Instructions).
• Do not exceed combined electrical rating of cordset (13
amps). Vacuum (6 amps), plus attachment (7 amps
maximum if vacuum is running).
• Do not use extension cords or outlets with inadequate
current carrying capacity.
• Turn off all controls before unplugging.
• Do not unplug by pulling on cord. To unplug, grasp the plug,
not the cord.
• Do not handle plug or vacuum cleaner with wet hands or
operate without shoes.
• Cover unused receptacle when not in use, cover provided
on cord.
• Do not put any object into openings. Do not use with any
opening blocked; keep free of dust, lint, hair, and anything
that may reduce airflow.
• This vacuum cleaner creates suction. Keep hair, loose
clothing, fingers, and all parts of body away from openings
and moving parts.
• Do not pick up anything that is burning or smoking, such
as cigarettes, matches, or hot fireplace or barbeque ashes.
Live sparks or embers could start a fire in waste material
inside the tank.
• Do not use without dust bag or motor filter in place, or
with a damaged filter.
• Use safety goggles to avoid the discharge air as particles
in the air could cause eye damage.
• Use extra care when cleaning on stairs.
• Do not use to pick up flammable or combustible liquids
such as gasoline, or use in areas where they may be
present.
• Do not store flammable or corrosive fluids in toolbox.
• Keep your work area well lighted.
• Unplug electrical appliances before vacuuming them.
SAVE THESE INSTRUCTIONS
GROUNDING INSTRUCTIONS
This appliance must be grounded. If it should malfunction or breakdown, grounding provides a path of least resistance for
electric current to reduce the risk of electric shock. This appliance is equipped with a cord having an equipment-grounding
conductor and grounding plug. The plug must be plugged into an appropriate outlet that is properly installed and grounded in
accordance with all local codes and ordinances.
DANGER
Improper connection of an equipment-grounding conductor can result in risk of electric shock. Check with a qualified electrician
or service person if you are in doubt as to whether the outlet is properly grounded. Do not modify the plug provided with the
appliance. If it will not fit the outlet, have proper outlet installed by a qualified technician.
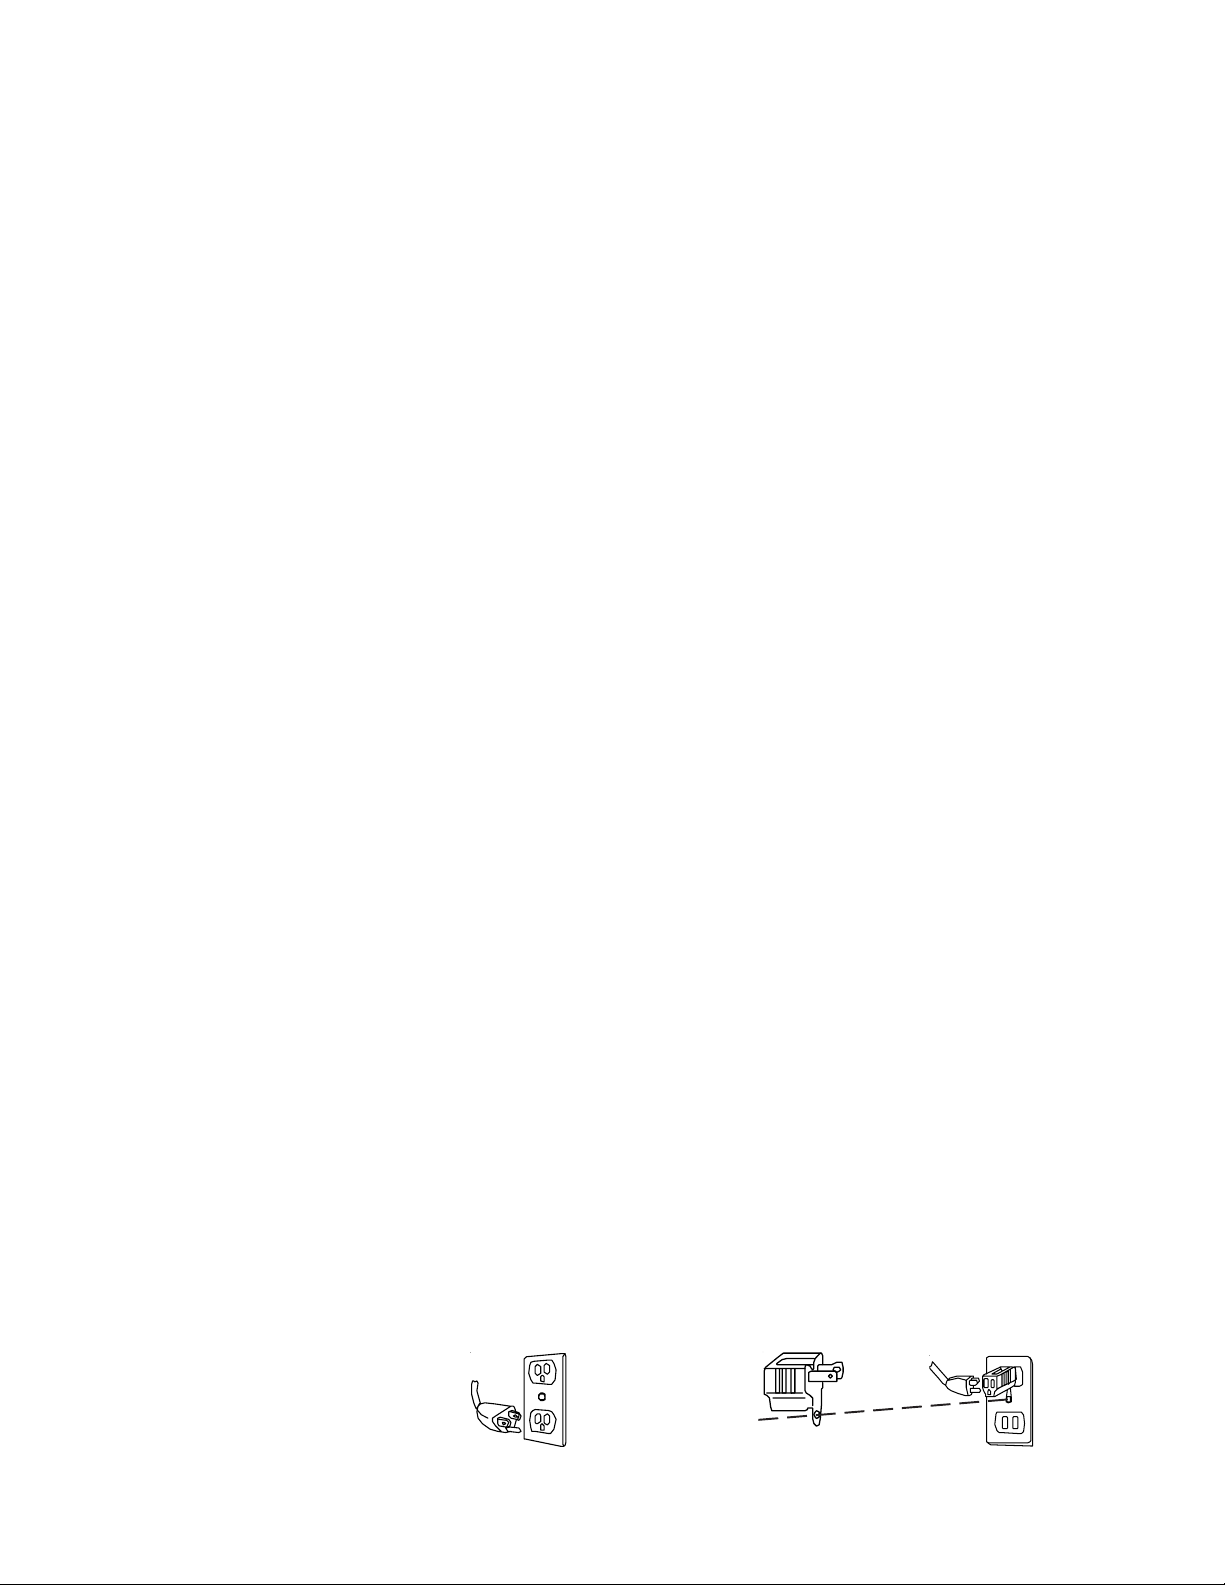
This appliance is for use on a nominal 120 volt circuit and has a grounding plug that looks like the plug illustrated in Figure A.
A temporary adapter which looks like the adapter illustrated in Figure B may be used to connect this plug to a two-pole
receptacle, as shown, if a properly grounded outlet is not available. The temporary adapter should be used only until a properly
grounded outlet, Figure A, can be installed by a qualified electrician. The green colored rigid ear, lug, or the like extending from
the adapter must be connected to a permanent ground such as a properly grounded outlet box cover. Whenever the adapter is
used, it must be held in place by a metal screw.
NOTE: In Canada, the use of a temporary adapter is not permitted by the Canadian Electrical Code.
Grounding Blade is
Longest of the Three
Blades
Grounded Outlet Box
Figure A
Metal Screw
Grounding
Tab
Grounded Outlet BoxAdapter
Figure B
2
Page 3
GENERAL INFORMATION
The cleaner is designed to pick up dirt and dust particles. Avoid picking up hard or sharp objects with the cleaner to prevent
hose clogs.
If an extension cord is used it must be 3 wire, grounded type and marked SJTW (suitable for outdoor use) 16 AWG
minimum.
Service Information
The instructions in this booklet serve as a guide to routine maintenance. For additional service information telephone our toll
free number for the nearest Eureka/Sanitaire Authorized Warranty Station. You should know the model, type and serial
numbers when you call: USA: 1-800-800-8975 Mexico: 5670-6169
Canada: 1-800-282-2886
If you prefer, you can write to The Eureka Company, Service Division, 807 North Main Street, Bloomington, Illinois 61701, USA.
In Canada write to The Eureka Company, 866 Langs Drive, Cambridge, Ontario N3H 2N7. Refer to The Sanitaire Limited
Warranty for complete service information.
DO NOT OIL the motor at any time. The bearings are permanently lubricated and sealed.
Thermal Cut Off
This vacuum cleaner has a special thermostat that protects the cleaner in case of motor overheating. If the cleaner suddenly
shuts off, push the on/off switch off (0) and unplug the cleaner. Check the cleaner for a possible source of overheating such as
a full dust bag, a blocked hose or clogged filter. If these conditions are found, fix them and wait at least 30 minutes before
attempting to use the cleaner. After the 30 minute period, plug the cleaner back in and push the on/off switch on (l). If the cleaner
still does not run, then take it to a Eureka/Sanitaire Authorized Service Center for repair.
HOW TO USE
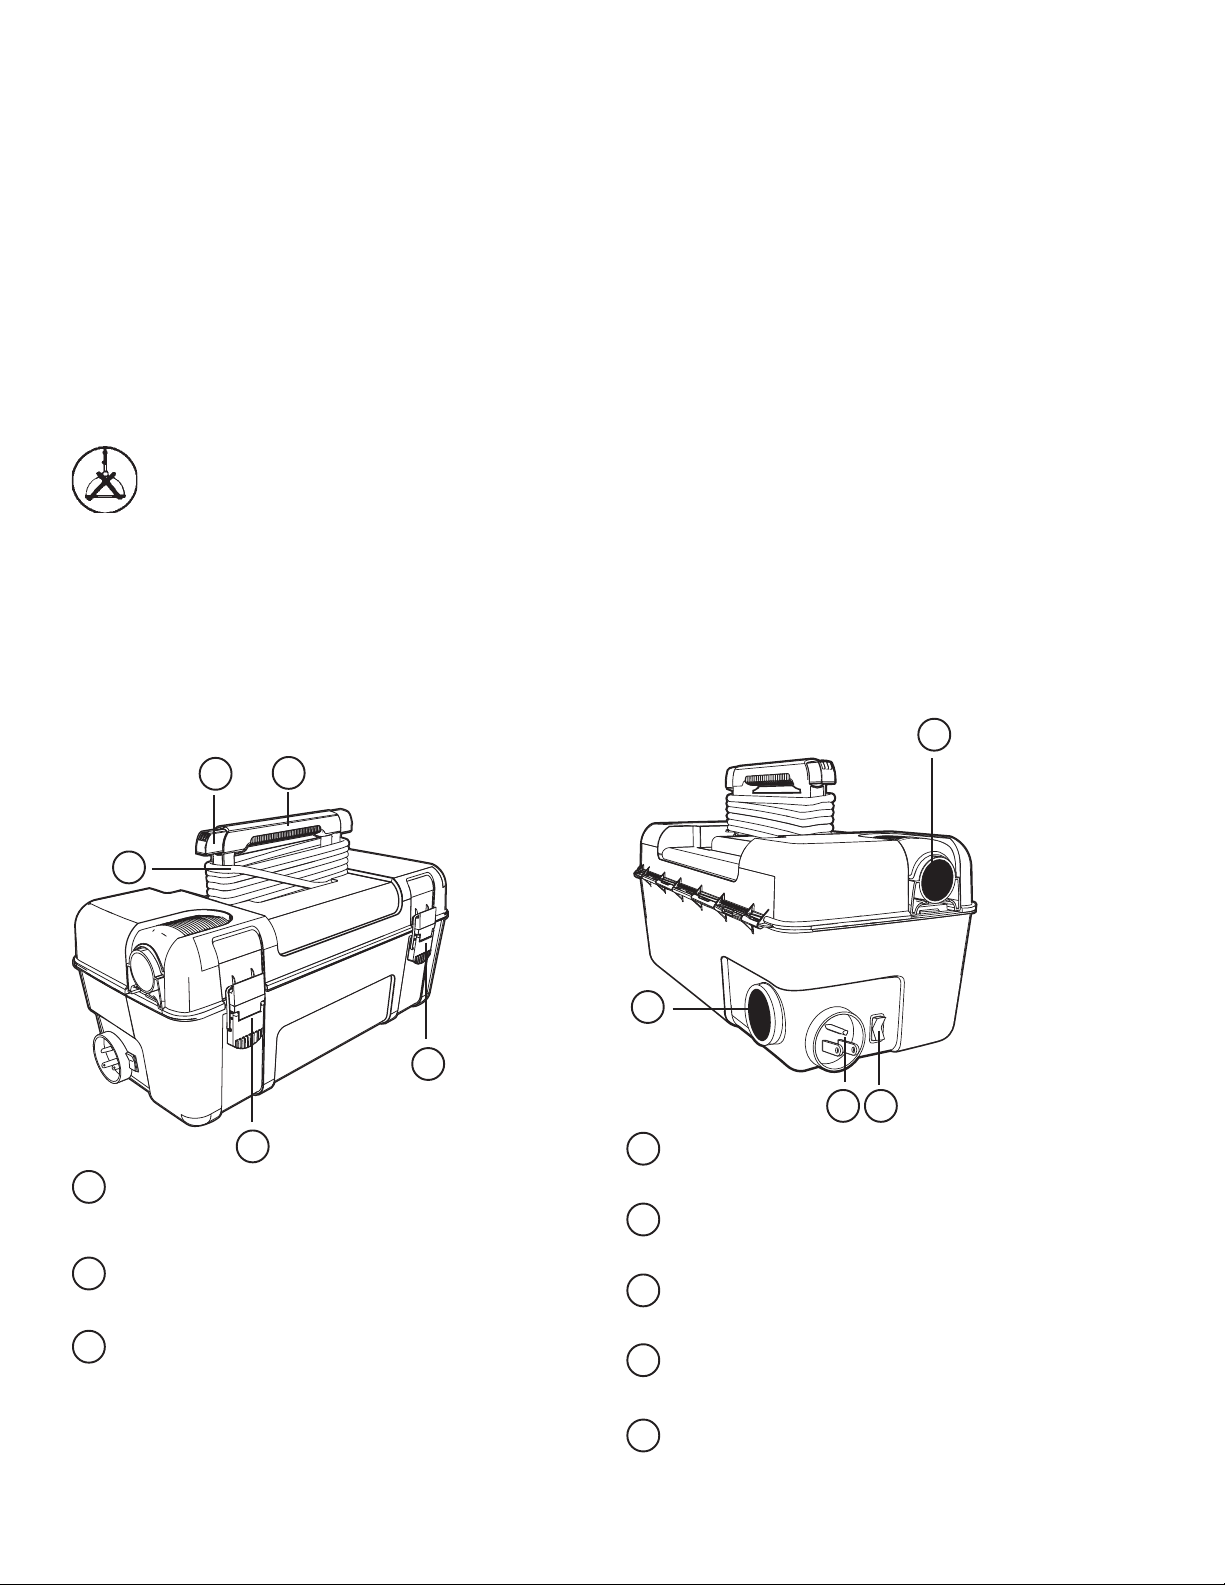
2
3
Carrying Handle. Use this handle to carry unit from one
1
place to another. The handle can also be used for electrical
cord storage.
Quick Cord Release Button. Press in on button for quick
2
access to electrical cord.
Electrical Cord. The electrical cord can be stored
3
wrapped around the handle or inside the tool box
compartment.
1
4
4
5
8
67
Tool Box Lid Latches (2). Lift up on latch to release the
4
tool box lid.
5
Suction Inlet. Insert the end of the hose in the inlet to
use vacuum function.
6
On/Off Switch. International symbol I means On,
International symbol O means Off.
7
Electrical Socket. The large end of the electrical cord
plugs into this socket, the other end into a wall outlet.
DANGER: Electrical cords can be hazardous. Please
read safety instructions on electrical cord.
8
Blower Port. Insert the end of the hose into the blower
port to use the blower function.
3
Page 4

HOW TO USE (continued)
Electrical Cord - For shipping purposes, the electrical
cord is stored inside the tool box . Open lid latches, lift tool
tray up, to remove electrical cord.
Suction Inlet. Insert larger end of hose into suction
inlet to use as a vacuum.
LiftTool Tray
Outlet
Cover
Plug round end of electrical cord into the tool box, as shown
above. Plug the other end of electrical cord into electric
socket.
The electrical plug has been designed so an electric tool or
appliance can be plugged directly into it.
Cover unused receptacle when not in use with outlet cover
(attached to cord as shown).
Extension Cords
NOTE: If an extension cord is used, make sure the plug
connection does not come into contact with any
liquid. Use a grounded extension cord with 3-prong
plug and 3-pole receptacle; 16 gauge, SJTW type.
Loop the cords to prevent unplugging. Suitable for
outdoor use.
Suction
Inlet
Accessories - The accessories are stored on the inside
of the tool box lid. There are diagrams on the inside of the lid
to help with placing them back in the correct location.
1. To use accessories remove
hose from top of the lid by
lifting up.
2. Place desired accessory onto
end of hose or crevice wand.
Dusting/
Upholstery
Crevice
Wand
Floor Tool
Hose or
Wand
Brush
ON/OFF Switch. International symbol I means On,
International symbol O means Off.
Dusting/Upholstery Brush is for furniture, blinds,
books, lamp shades, shelves, curtains, draperies, cushions
and fabrics.
Crevice Wand cleans corners, stairs, baseboards, and
ON/OFF
Switch
between cushions.
Floor Tool cleans bare floor surfaces.
Blower Port. Insert larger end of hose into the blower port
to use as a blower.
NOTE: Always wear safety goggles
(not provided). Never point
blower toward people,
animals or objects that may
be injured/damaged by
flying debris. These units
must NOT be used to power
Blower Port
a paint sprayer or to supply
air to any other sprayer.
Helpful Information:
Listen to your cleaner. If you notice a change in the sound of the motor or a change in performance, it could simply indicate
a common usage or maintenance issue such as, possible blockage in hose, dirty filter or full dust bag. These are all easy
to fix and the instructions are included in this owner’s guide. Becoming familiar with the information in this guide will help
you to get the best possible performance from your new cleaner for many years to come.
4
Page 5

ROUTINE MAINTENANCE
Emptying the Dust Bag and Installing or
Cleaning the Pre-Motor Filter:
The instructions in this booklet serve as a guide to routine
maintenance. To avoid unnecessary service calls, check the
dust bag and filter often. We suggest emptying the dust bag
after every use.
NOTE: When vacuuming carpet fresheners or cleaners,
powder, plaster dust, or similar fine substances,
the dust bag and filter will require more frequent
maintenance.
CAUTION: Turn off the switch and unplug the electrical
1
Bag Compartment Lid
cord before changing the dust bag or filter.
Never operate the vacuum cleaner without the
dust bag or filter in place.
Open the tool box. Lift up on the dust bag compartment
lid.
NOTE: Turn off the switch and unplug the electrical cord
before servicing.
PROBLEM SOLUTION
Motor will not • Push plug securely into outlet, at each end.
start. • Try another outlet.
Motor suddenly • Page 5.
stops.
Does not pick • Clean or replace the filters. Hint: If picking up fine
up debris. dust, the filters may
Missing parts. • Call 1-800-438-7352 between 8:00 a.m. and 4:45
Questions? • Call 1-800-282-2886 between 8 a.m. to 7:30 p.m.,
•
Check circuit breaker.
substance tends to reduce suction when it blocks
the air flow through the filter(s).
• Empty dust bag.
• Be sure hose is secure in suction inlet.
• Remove any blockages from the hose that restrict
the airflow.
p.m., (CST), Monday - Friday. Know the model and
serial numbers when you call.
(CST), Monday - Friday and 10 a.m. - 6:30 p.m.
(CST) Saturday. Know the model and serial
numbers when you call.
not look dirty but a fine
Lift the dust bag out of compartment. While the dust bag
2
is out of the cleaner, check the pre-motor filter to see if it
needs to be cleaned. Pull it up out of the two brackets
holding it in place.
Dust Bag
Pre-Motor Filter
Two
Brackets
To clean the pre-motor filter, you can vacuum it with another
3
vacuum or wash it under running water. The filter must
be completely dry before reinstalling in the cleaner.
To empty cloth dust bag, hold dust
4
bag over a waste container and
slide the bottom clamp off the dust
bag. Shake debris into waste container. Reposition plastic clamp at
base of dust bag.
Reinstalling the Pre-Motor Filter and Dust
Bag:
1
To replace the pre-motor filter, slide it down between the
two brackets in the dust bag compartment. Make sure
the filter is pushed all the way down to the bottom of the
brackets.
Put the dust bag back in the bag compartment and close
2
the bag compartment lid.
Storage:
Store indoors in a cool, dry place. Do not expose to rain.
5
Page 6

6
Page 7

THE SANITAIRE® COMMERCIAL
LIMITED WARRANTY
WHAT THIS WARRANTY COVERS
Your Sanitaire commercial cleaner is warranted to be free from all defects in material and workmanship in normal use FOR
A PERIOD OF ONE YEAR. The warranty is granted only to the original purchase of the cleaner. The warranty is subject to the
following provisions.
WHAT THIS WARRANTY DOES NOT COVER
• Parts of the cleaner that require replacement under normal use, such as bumpers, bags, and hoses.
• Damages or malfunctions caused by negligence, abuse, or use not in accordance with the Owner’s Guide.
• Defects or damages caused by unauthorized service or the use of other than Genuine Eureka parts.
WHAT THE EUREKA COMPANY WILL DO
The Eureka Company will, at its option, repair or replace a defective cleaner or cleaner part that is covered by this warranty.
As a matter of warranty policy, the Eureka Company will not refund the consumer’s purchase price.
WARRANTY REGISTRATION
Please fill out and return the warranty registration card accompanying your cleaner.
OBTAINING WARRANTY SERVICE
To obtain warranty service you must return the defective cleaner or cleaner part along with proof of purchase to any Eureka/
Sanitaire Authorized Warranty Station. You will find the nearest location in the Yellow Pages under “Vacuum Cleaners–Service
and Repair." Be certain that the Warranty Station is “Eureka/Sanitaire Authorized."
For the location of the nearest Eureka/Sanitaire Authorized Warranty Station or for service information, telephone toll free:
USA: 1-800-800-8975
Mexico: 5670-6169
Canada: 1-800-282-2886
If you prefer, you can write to: In Canada write to:
The Eureka Company The Eureka Company
Service Division 866 Langs Drive
807 North Main Street Cambridge, Ontario N3H 2N7
Bloomington, IL 61701, USA
If it is necessary to ship the cleaner outside your community to obtain warranty repair, you must pay the shipping charges
to the Eureka/Sanitaire Authorized Warranty Station. Return shipping charges will be paid by the Warranty Station. When
returning parts for repair, please include the model, type, and serial numbers from the data plate on the cleaner.
FURTHER LIMITATIONS AND EXCLUSIONS
Any warranty that may be implied in connection with your purchase or use of the cleaner, including any warranty of
MERCHANTABILITY or any warranty for FITNESS FOR A PARTICULAR PURPOSE is limited to the duration of this warranty.
Some states do not allow limitations on how long an implied warranty lasts, so the above limitations may not apply to you.
Your relief for the breach of this warranty is limited to the relief expressly provided above. IN NO EVENT SHALL EUREKA
BE LIABLE FOR ANY CONSEQUENTIAL OR INCIDENTAL DAMAGES THAT YOU MAY INCUR IN CONNECTION WITH
YOUR PURCHASE OR USE OF THE CLEANER. Some states do not allow the exclusion or limitation of incidental or
consequential damages, so the above limitation or exclusion may not apply to you.
This warranty gives you specific legal rights. You may also have other rights which vary by State.
THE EUREKA COMPANY
Bloomington, Illinois 61701
7
Page 8

©2003 White Consolidated, Ltd.
Part No. 73205A (09/03) Printed in China
 Loading...