

SANHO HyperDrive COLORSPACE UDMA2, HyperDrive iUSBportCAMERA Instructions Manual

Getting Started
Thank you for purchasing the HyperDrive SPACE Memory Card
Backup Device. In your hand is the most advanced memory card
backup and portable storage device with currently the world's
fastest card backup and USB transfer speed, the longest battery
performance in its class and a reliable system that can safely store
and manage all your precious photos and digital content.
Please read this manual carefully before using the product to
ensure proper operation.
Kindly inspect the contents of the package and contact your local
dealer if there are any missing items or defects. Included in the
package are the following items:
HyperDrive SPACE Memory Card Backup Device
USB cable
AC power adapter
Car charger
Screwdriver
Instruction manual
Carrying case
The HyperDrive SPACE is available both with and without an
internal hard drive. Please check with your local dealer if your unit
already comes installed with a hard drive. The HyperDrive requires
a hard drive to operate.
Your local dealer may be able to help you to install the hard drive.
You can also purchase and install your own hard drive, as
recommended by your local dealer.
The information contained within this manual is correct at the time
of printing. Due to continual improvements being made to our
product, you are advised to visit our website or check with your
local dealer for the latest information and updates.

CAUTION!CAUTION!
Safety Instructions
Using inappropriate batteries in the HyperDrive may prevent it
from functioning normally and may even damage the product.
Please use only the provided battery or batteries from HyperDrive
authorized sources.
Please observe the correct polarity when inserting the battery. A
wrongly inserted battery may prevent the HyperDrive from
functioning normally. Serious damage may occur if the battery is
short-circuited and may even result in fire.
Use only the provided AC adapter or car adapter. Use of other
adapters or chargers with electrical ratings outside that of the
HyperDrive operating requirements run the risk of electric shock,
property damage or personal injury.
If the HyperDrive emits any burnt smell, excessive heat or smoke
during battery charging, turn off the power supply immediately and
contact your local dealer. Be careful when removing the battery as
the battery may be very hot.
Do not operate the Hyperdrive in wet or moist environments and do
not operate the HyperDrive with wet hands. If water enters the
HyperDrive, immediately remove the batteries and return the
HyperDrive to your local dealer for inspection. Do not use the unit
as there is a danger of short-circuit resulting in fire.

Table Of Contents
Instructions 1
Basic
Battery Charging (via USB) 2
Battery Charging (via AC Power) 3
Turning on HyperDrive 4
Auto Start HyperDrive 4
Turning off HyperDrive 5
Formatting Hard Drive 6
Copy Memory Card to HyperDrive 7
Error Handling During Copy 8
Setup
Date & Time 10
Folder Name 11
Backup Time Stamping 11
Transfer Speed 12
Verification 13
Hard Drive Mode 14
Startup 14
Advance
Erase Memory Card 15
Restore Factory Settings 16
Check Remaining Hard Drive Space 16
Browse/Delete Files/Folder 17
Copy Files/Folders back to Memory Card 18
Connecting HyperDrive to Computer via USB 19
Safely Disconnecting HyperDrive from USB 20
Maximizing Memory Card Backup Speed 21
Hard Drive Installation/Replacement 22
Battery Installation/Replacement 23
Specifications 24
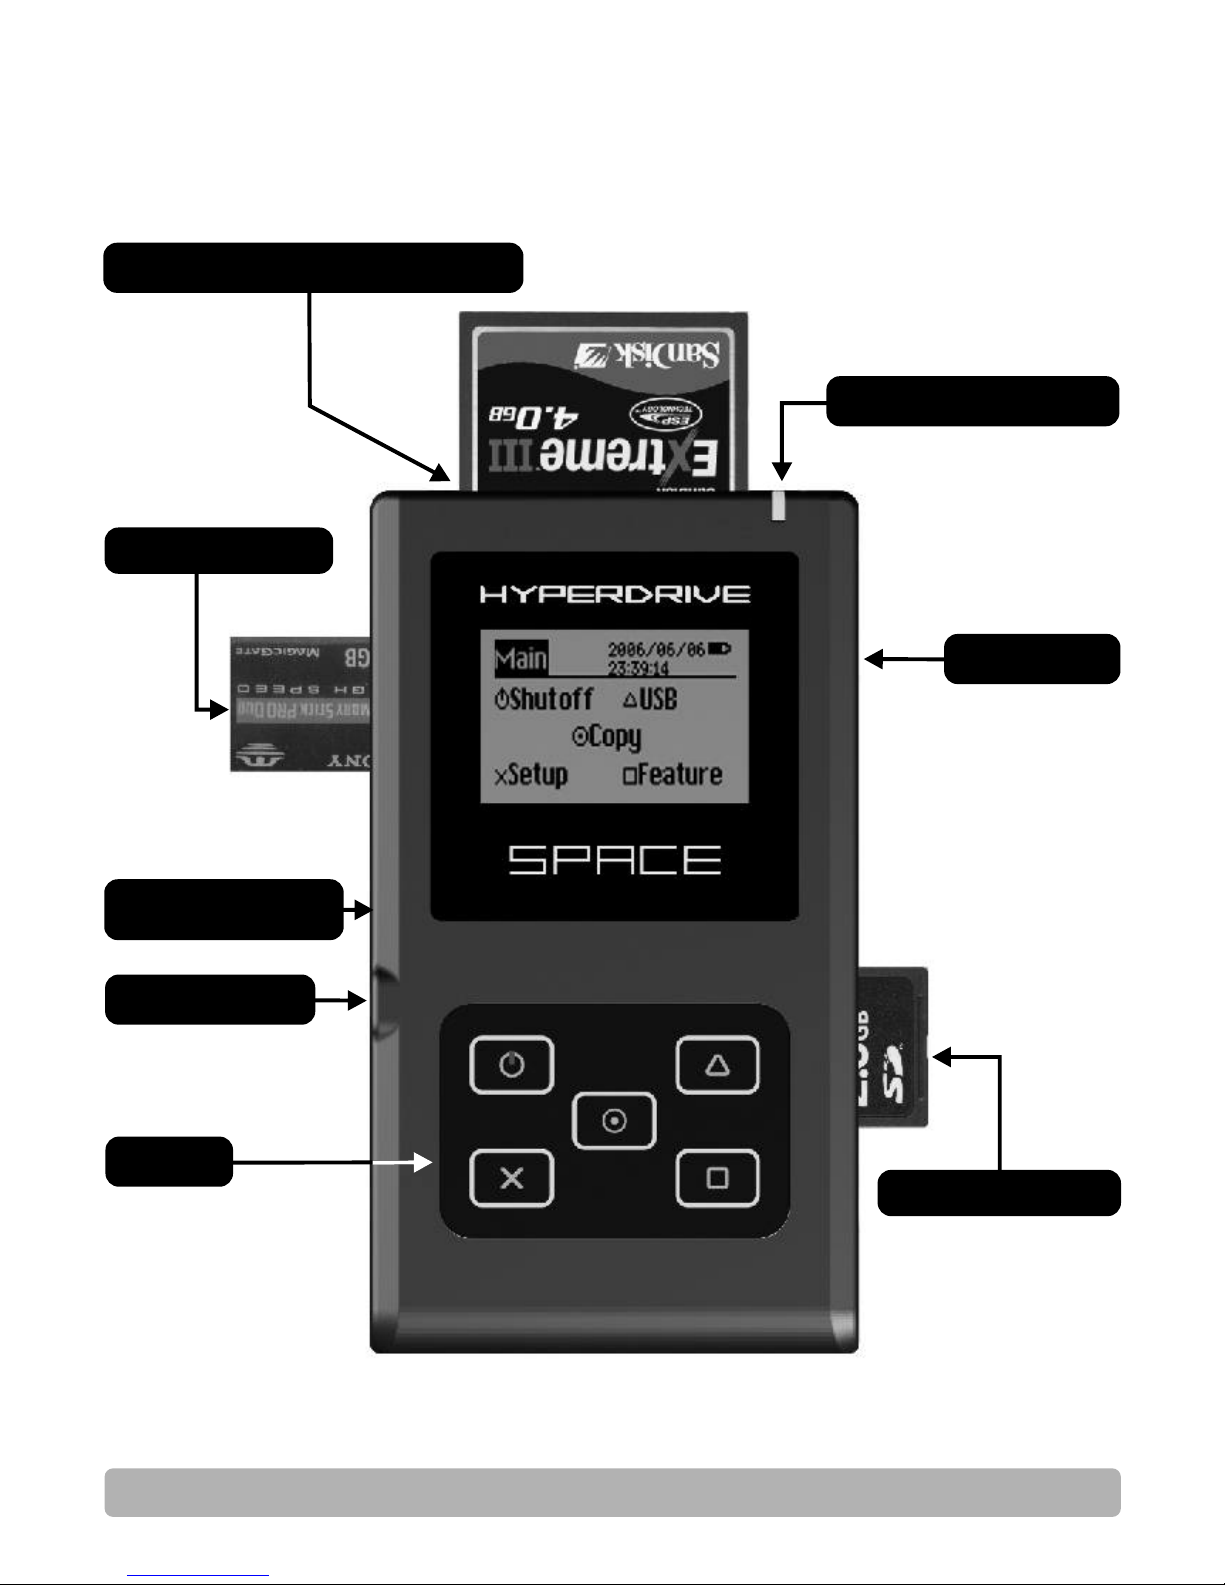
USB Socket
LED Status Indicat or
1
DC Power Sock et
AU X S ocket
(cu r rently not i n u se)
SD/MMC/xD Slot
MS/MS Duo Slot
Keypad
Instructions
CompactFlash, Mi croDrive Slot
使用前的准备
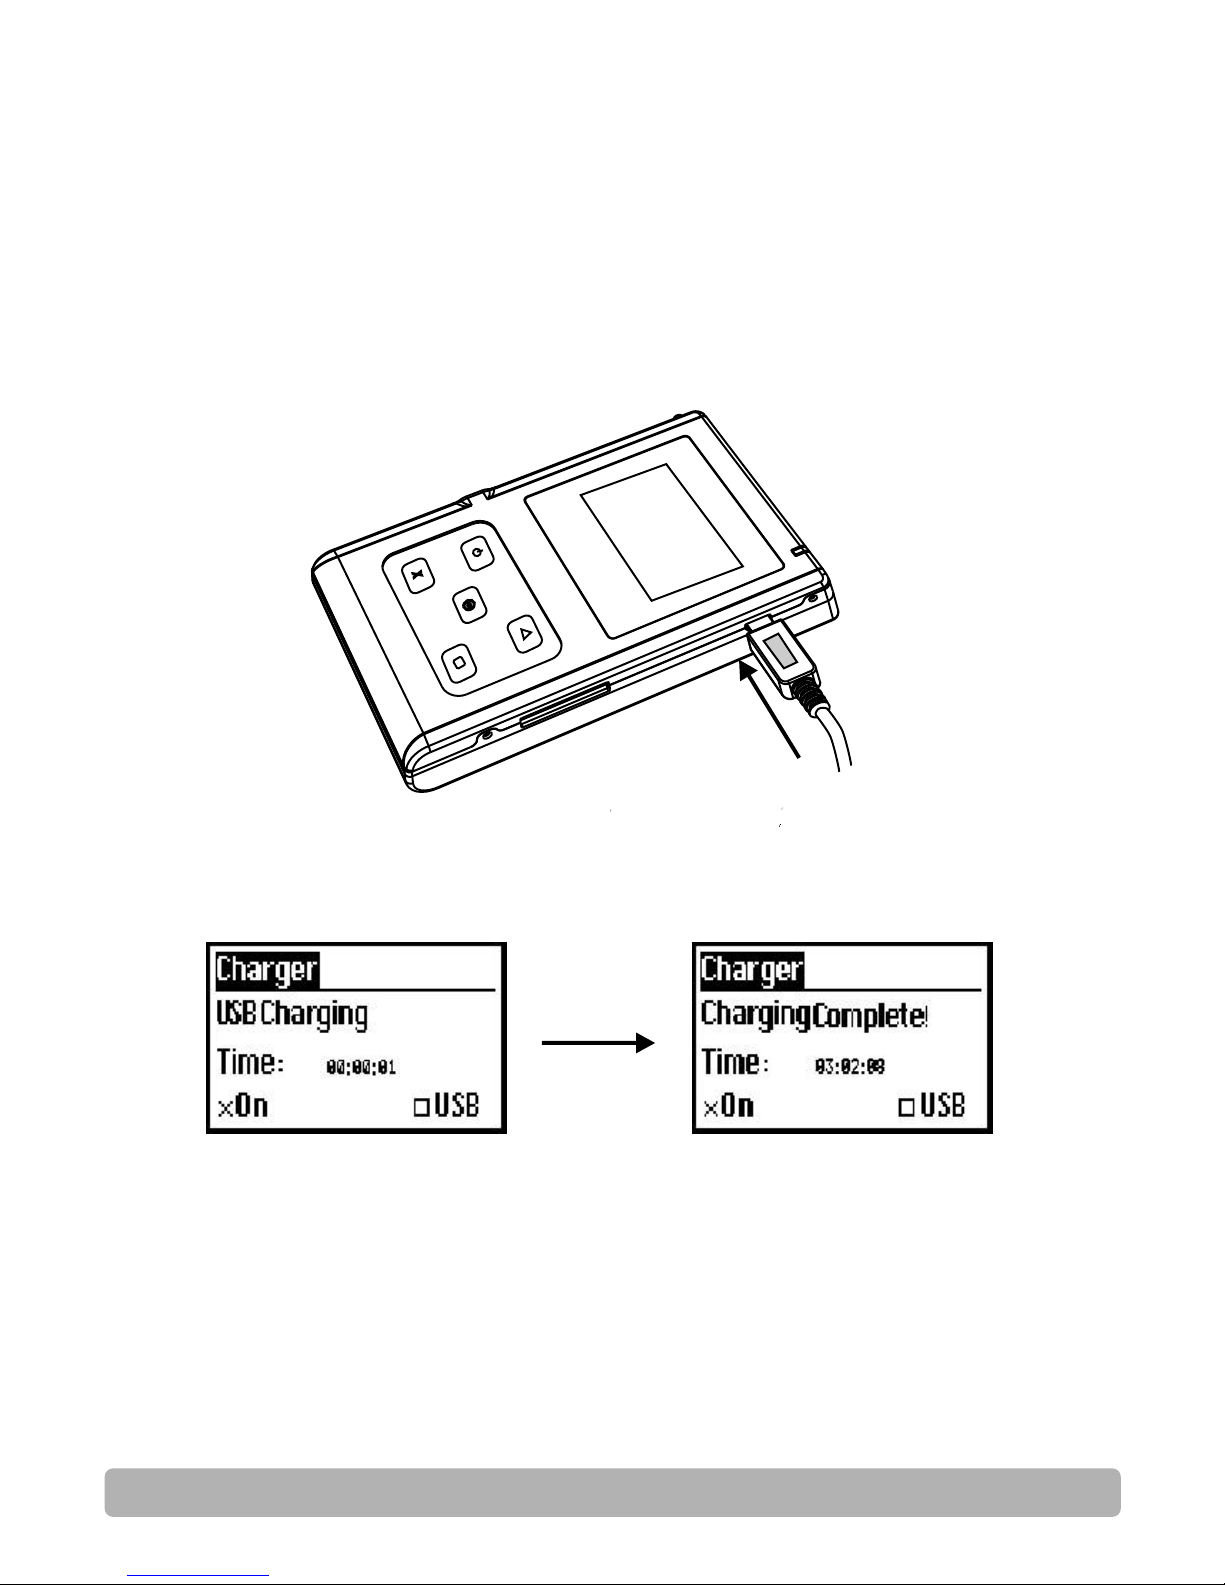
Without turning on the HyperDrive, plug in the USB cable into the
USB socket on the HyperDrive (as shown in diagram) and connect
the other end to your computer or a compatible USB power source.
When connected via USB, the HyperDrive will charged at 5V,
500mA.
You will see the following display screen when battery charging is
in progress.
Battery Charging (via USB)
2
Note:
You can still charge the battery via USB when the unit is turned on, but
you will not see the above battery charging display screen. Charging
will automatically stop when the battery is full.
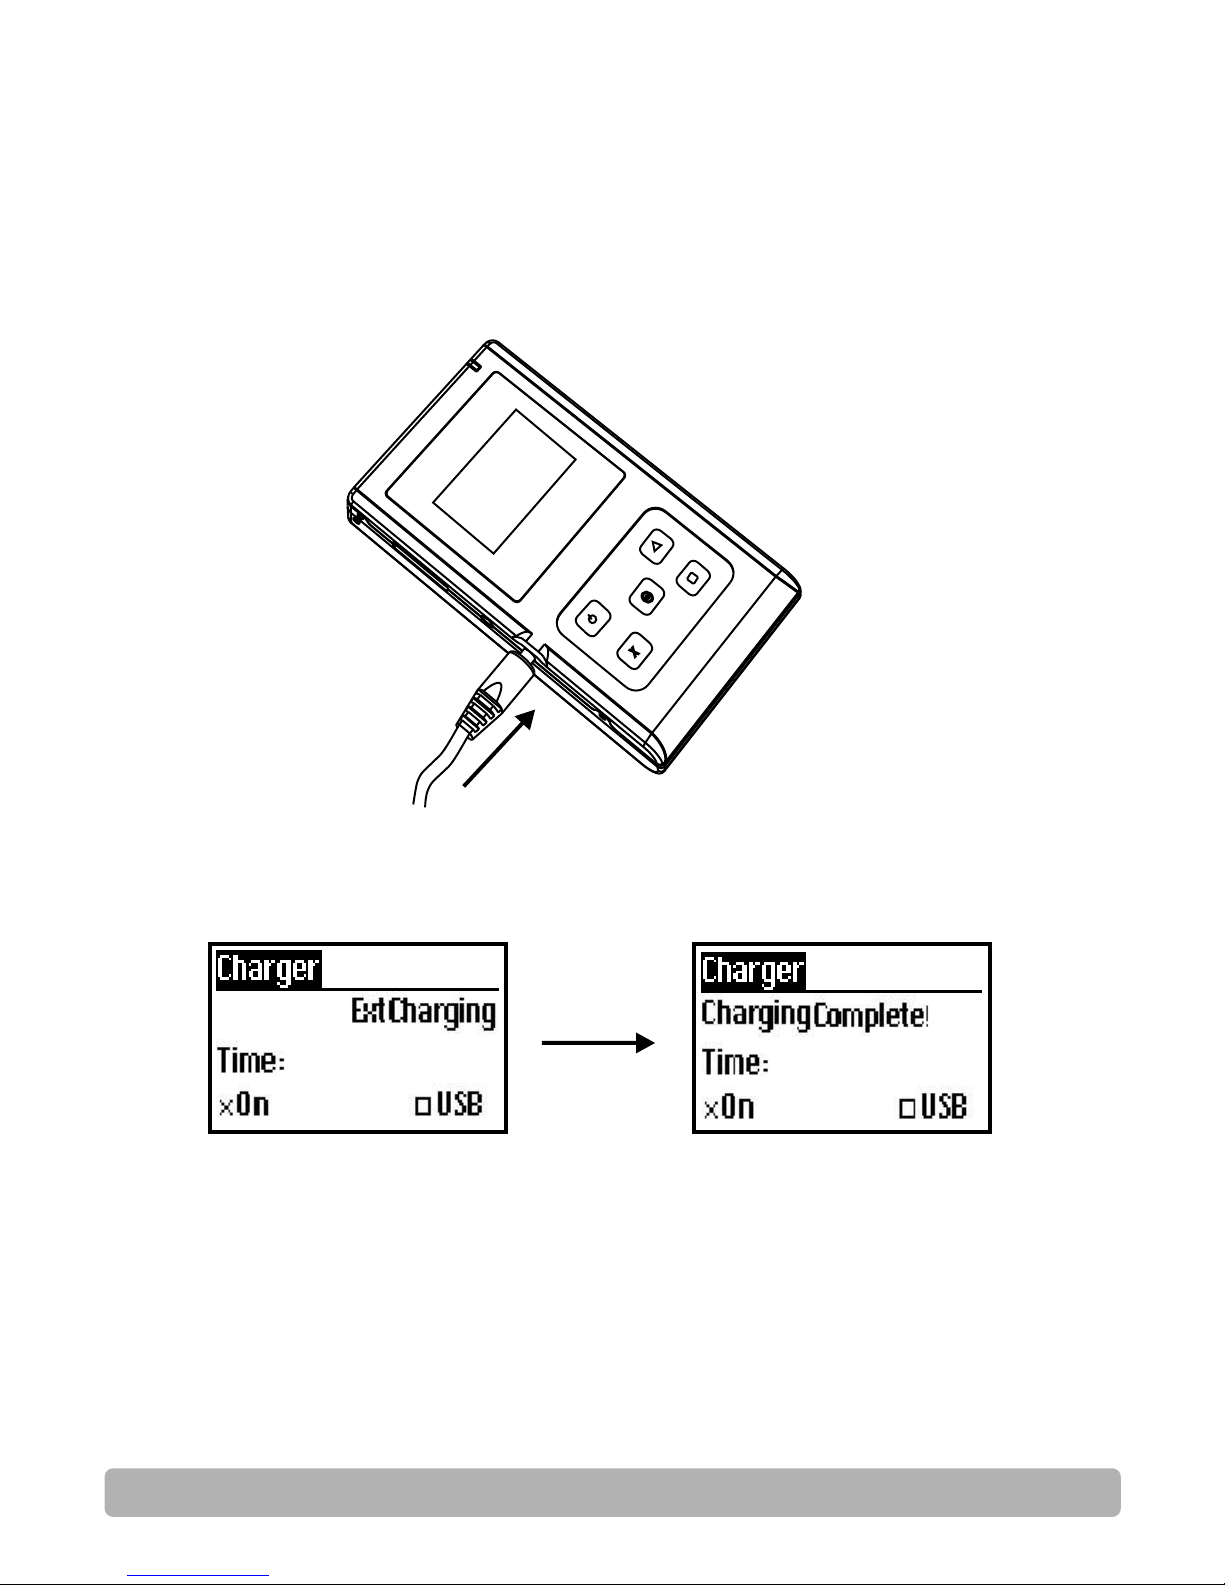
Without turning on the HyperDrive, plug in the AC adapter to the
DC socket on the HyperDrive (as shown in diagram). When
connected via DC, the HyperDrive will be charged at 5V, 1A.
Battery Charging (via AC power)
You will see the following display screen when battery charging is
in progress.
Note:
You can still charge the battery via AC adapter when the unit is turned
on, but you will not see the above battery charging display screen.
Charging will automatically stop when the battery is full.
3
02 :42: 0 202 :42: 0 2
00 :00: 0 100 :00: 0 1
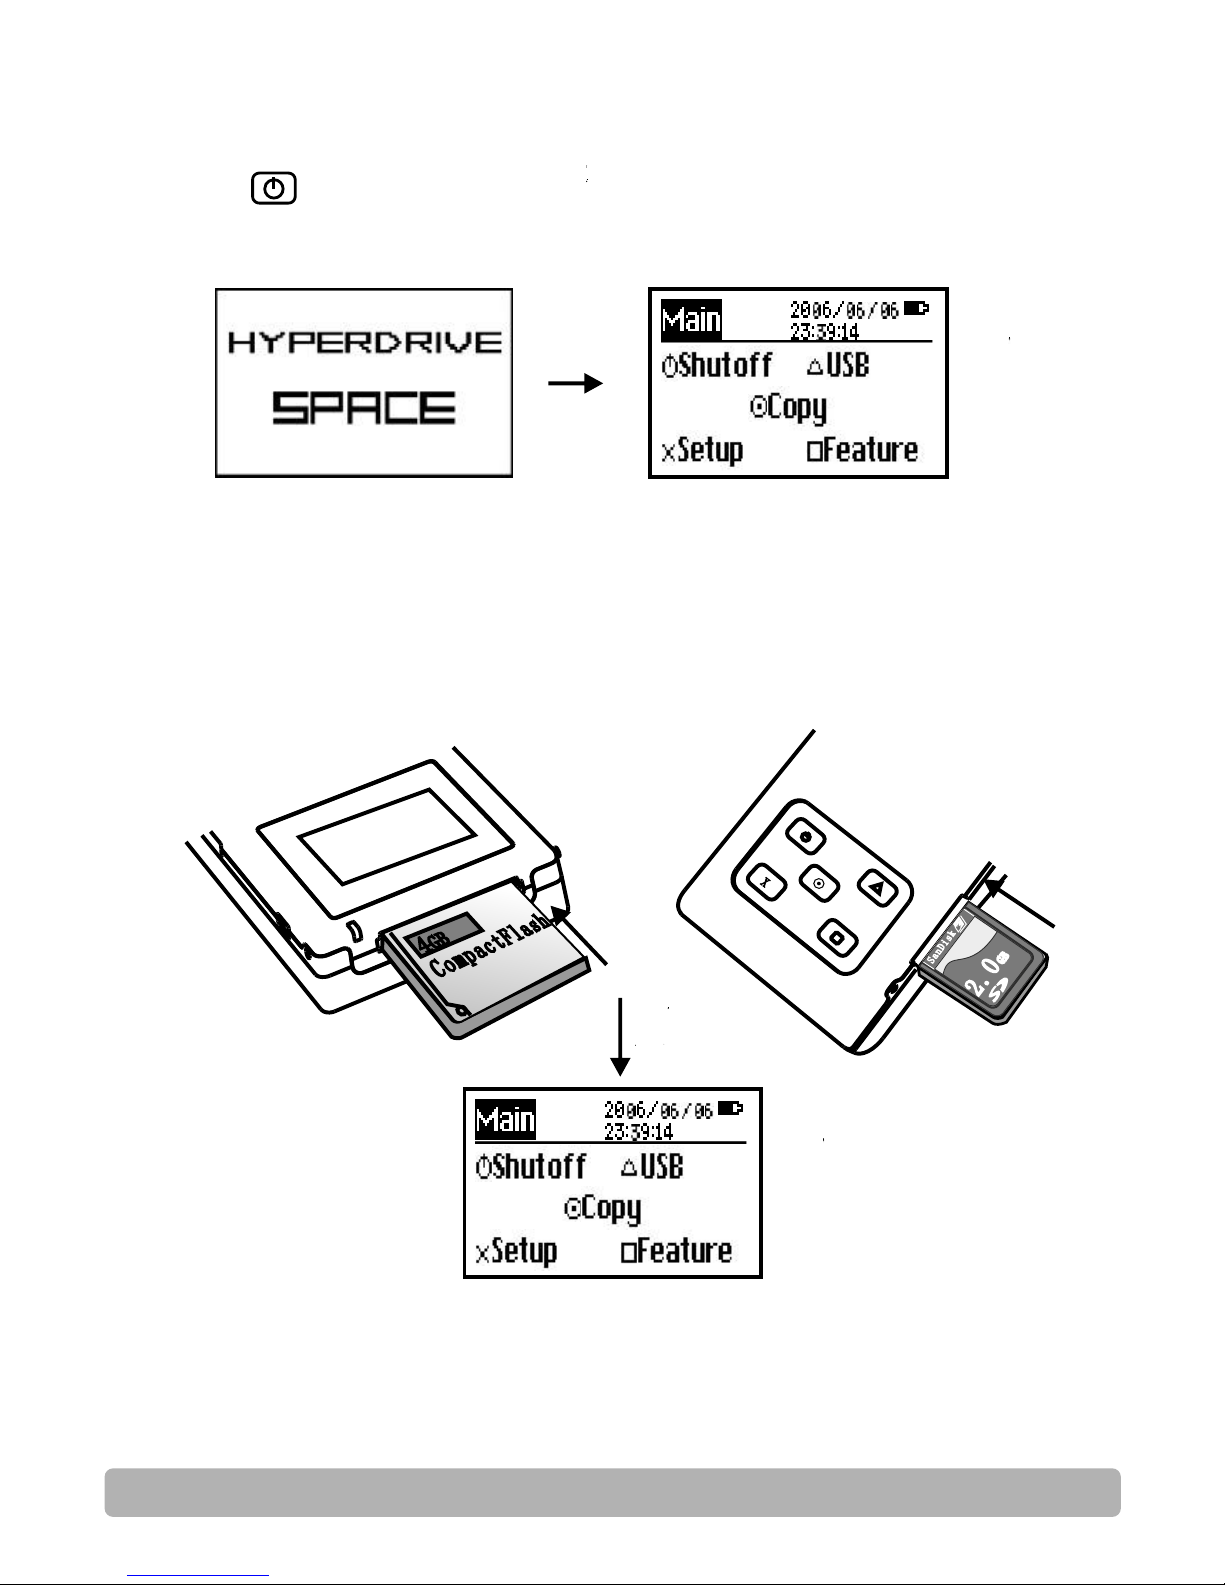
Turning on HyperDrive
When inserting any type of memory card or microdrive, the
Hyperdrive will auto switch on.
Auto Start HyperDrive
4
Press the but ton for 1 second, You will see the following
startup screen and then the Main Menu:
Note:
If the HyperDrive was turn on automatically by memory card
insertion, removal of the memory card will also automatically turn off
the HyperDrive.

Turning off HyperDrive
From the Main Menu, press the button to turn off the
HyperDrive.
From any screen, you can also press the button continuously for
5 s to turn off the HyperDrive.
5
CAUTION!
Ensure that all memory cards are removed from
the HyperDrive, otherwise the HyperDrive will
not be able to shut down completely and will
continue to consume a small amount of battery
power. If the card remains in the unit, the
battery may be exhausted in a week's time.
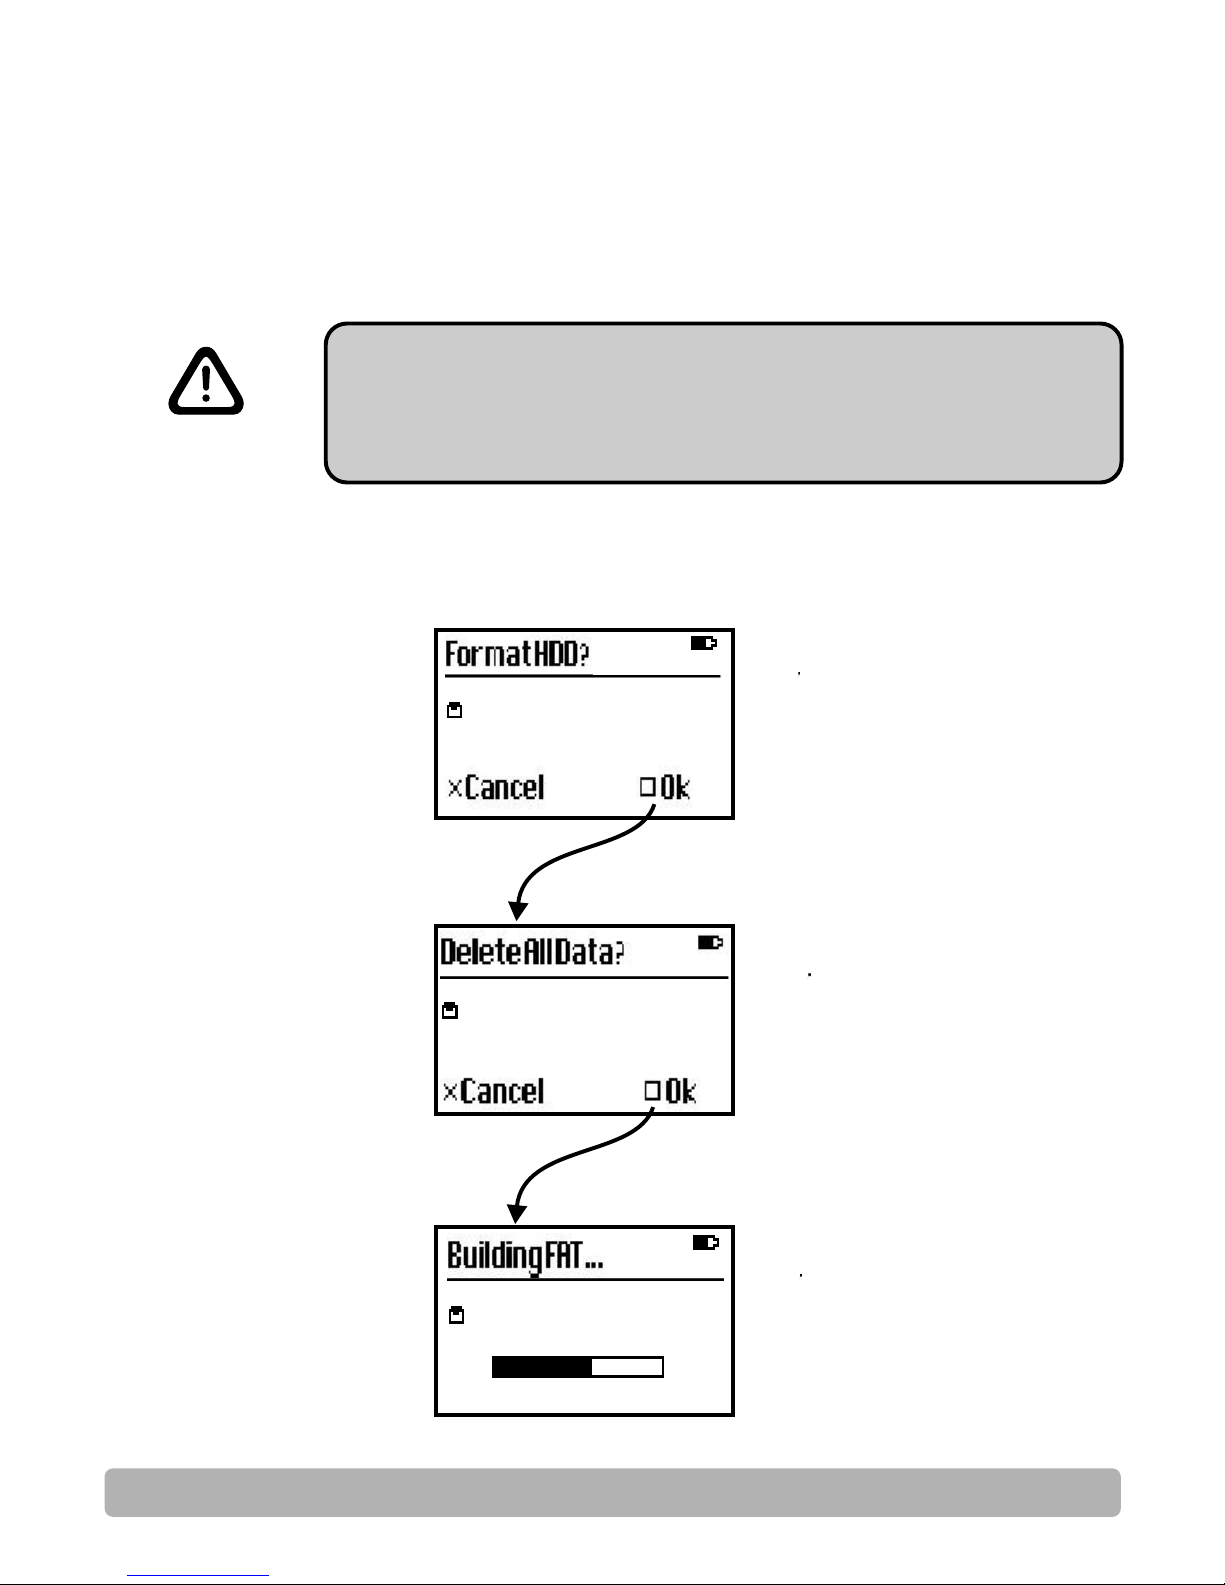
The HyperDrive can only operate with FAT32 formatted hard
drive.If your hard disk is brand new or not in FAT32 format,you will
need to follow the steps below to format the hard drive.
CAUTION!
Formatting the hard drive will delete all the
data on the hard drive including the
partitions. Please ensure that the hard drive
does not have any data that you may require.
Formatting Hard Drive
6
Select Feature->Advance->Format:
14 9.05 GB, S T91 6 082 1A14 9.05 GB, S T91 6 082 1A
14 9.05 GB, S T91 6 082 1A14 9.05 GB, S T91 6 082 1A
14 9.05 GB, S T91 6 082 1A14 9.05 GB, S T91 6 082 1A
 Loading...