

Sangoma VEGA 100G, VEGA 200G, VEGA400G Quick Start Manual
100G /200G
QUICK START GUIDE
V E G A10 0 G VEGA200G
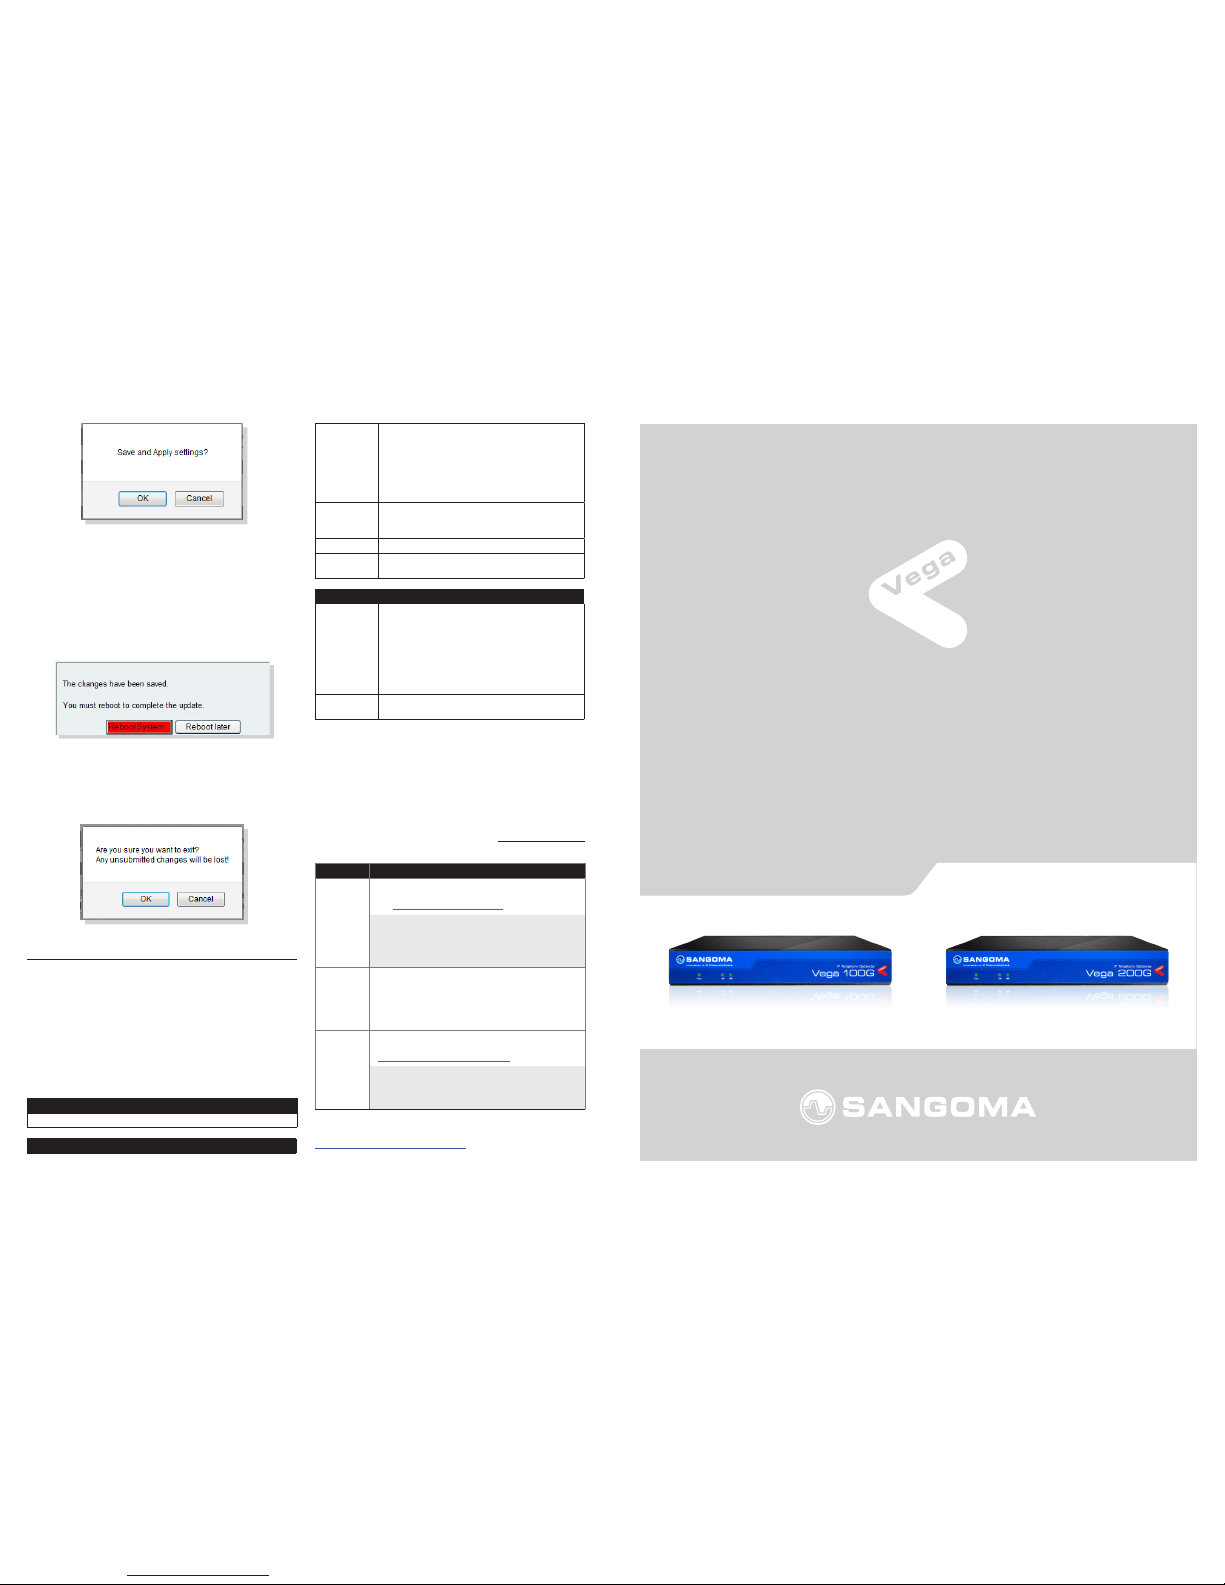
Selecting OK to the above question will activate most
Quick Cong settings. Some parameters, like the IP
address of the Vega, will however require the Vega to
be re-booted. If a reboot is required the Vega will ask
whether this should occur immediately or whether you
wish to do it manually later. If later is selected, the reboot
button on the left hand side menu will be left RED to
indicate that a reboot is still required to activate certain
new parameters.
If you decide that you want to abandon the changes just
made in Quick Cong then select Exit. A conrmation
request will be displayed, select OK to exit or cancel to
return to the Quick Cong pages.
6. Archive the Conguration
Save the conguration in an archive, off the Vega,
by selecting Expert Cong > System, then in the
Conguration section select the Download button and
save the le cong .txt.
Certications
Safety
IEC 60950-1/A1:2009
Tele com
FCC part 68
ACTA Registration Number:
SANISNANVEGAX00G
Ringer Equivalence Number (REN): NA
Facility Interface Code ( FIC): 04DU9.BN, 04DU9.
DN, 04DU9.1KN, 04DU9.1SN
Service Order Code ( SOC): NA
USOC Jack Type: RJ45
IC CS- 03,
Issue9,
Part VI
IC Registration Number: 56 68A-VEGA X00G
TBR4 European Standard
AS/ACIF
S038
Australian Standard
EMC (Pending)
Emissions:
EN 55 022:2010
EN 55022:20 06 inc A1:2007 & A2:2010
VCCI (V-3 /2012.04), AS/NZS CISPR 22
SANS 222:20 06 / CISPR 22:2006
FCC/CFR 47:Part 15
Canadian Standard ICES- 003:Issue 5
EN 61000- 3-2:2006 inc A1/A2:2009
EN 61000-3-3:2008
Immunity:
EN 55 024:2010
SANS 224:1997 / CISPR 24:1997
Warranty
Standard 12-month warranty is included. Additional
warranty services available, contact your Sales
representative for more information.
How to Get Support
If you encounter problems, please visit wiki.sangoma.com
or contact your authorized reseller directly.
Typ e Description
1
ST
LINE
SUPPORT
Visit the online knowledge base
at wiki.sangoma.com
Our knowledge base co ntains hundreds of step-bystep tutorials, guides and troubleshooting information
to help you nd what you’re looking for and get b ack
to work as quickly as possibl e.
2
ND
LINE
SUPPORT
Contact your Point-of-Purchase
(Reseller/Distributor)
3
RD
LINE
SUPPORT
Contact Sangoma Support at
support.sangoma.com
Log onto our online suppor t portal to submit your
support requests d irectly with Sangoma customer
Engineers, processed in a priority sequence.
End-User License Agreement
http://ww w.sangoma.com/legal /
P17-175 70_ 3.0
Congratulations on your purchase of a Vega Voice Over
IP gateway. This Quick Start Guide will assist you through
the process of conguring your new gateway.
If you would like further details about the parameters
you are conguring or you want to know more about the
capabilities of your Vega, please visit wiki.sangoma.com
and start by looking at the Quick SIP Cong reference
guide available in the Vega > Conguration section.
1. Before you Start
We advise that before connecting and using your Vega
for the rst time, you visit wiki.sangoma.com and read
the ‘Safety and Compliance Information’ document which
contains important details that you should be aware of.
2. Connecting your E1/T1 Vega
Connect your Vega using its telephony, Earth point,
power and LAN connections.
Both the Vega 100G and Vega 200G have both E1/T1
ports activated. The capacity of simultaneous VoIP calls
that can be made is as follows:
Model Number of Simultaneous VoIP Calls
Vega 100G 30
Vega 2 00G 60
⚠
WARNIN G
The Earth point on your Vega must be connected
to a suitable earth. It serves a dual role as a
safety Earth and it also stops noise on telephone
lines in electrically noisy conditions.
LAN interfaces 1 and 2 support 10, 100 or 1000 mbps
connections and as default are congured to negotiate to
the highest bitrate.
It is important that if both LAN 1 and LA N 2 are to
be used that they are connected to separate (nonoverlapping) subnets.
3. Getting an IP address
Vega 100G/200G use DHCP to pick up an IP address
for LAN 1. LAN 2 has a default xed IP address of
192.168.168.2 / 255.255.255.0.
Each LAN interface is handled independently:
* If LAN 1 fails to get an IP address from the DHCP
server, for example, because there is no DHCP server on
the LAN, then the Vega will default the IP address of LAN
1 to
169.254.x.y where x and y are the decimal versions of
the last two bytes of the LAN 1 MAC address.
* LAN2 can be congured to be DHCP or another static
IP address and once that is done the xed address of
192.168.168.2 will no longer be used.
The MAC addresses for LAN 1 and LA N 2 can be found
on the rear of the Vega gateway near the ethernet ports.
The LAN 1 MAC address is always the lower, even
number and the LAN 2 MAC address is the LAN 1 M AC
address plus 1.
A calculator that will calculate the 169.254.x.y address from
the MAC address is available in the Vega Tools section of wiki.
sangoma.com
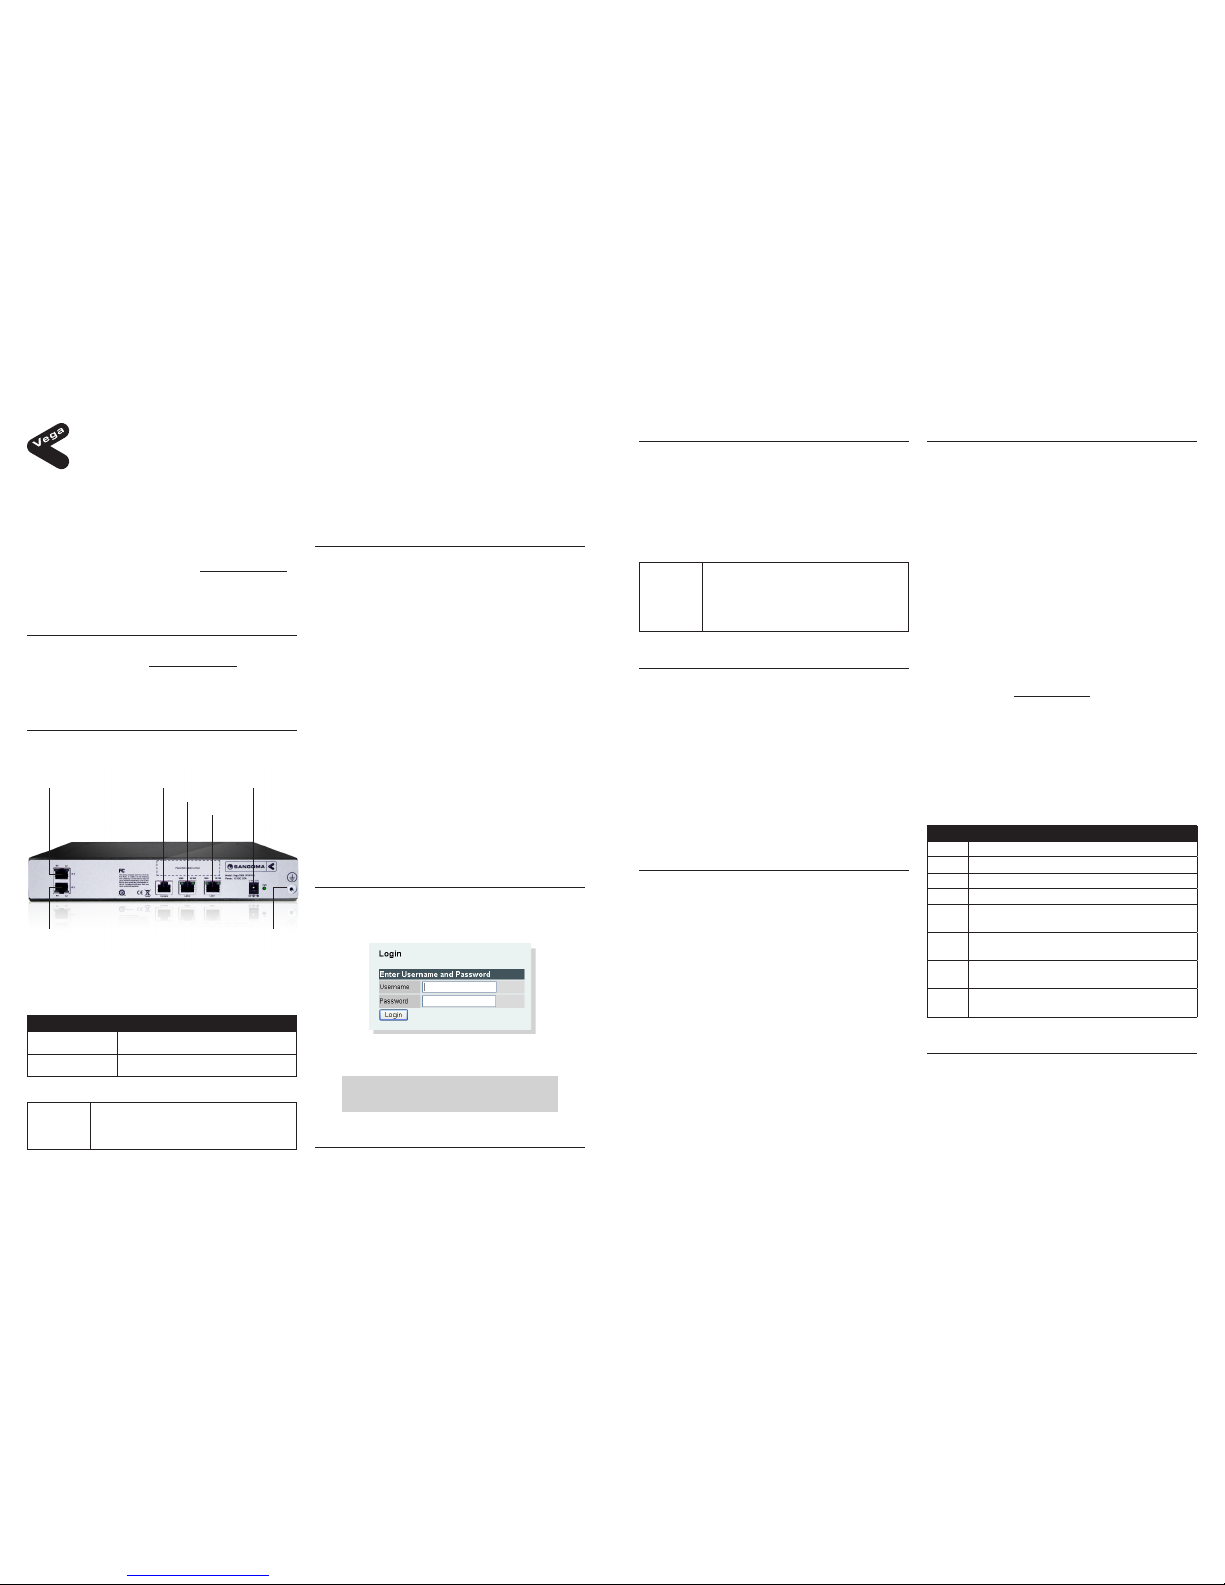
4. Logging into the Vega
Enter the IP address of your Vega gateway into the
address line of your web browser and press enter or
select ‘Go’. The Vega will present you with a login screen:
Enter the username and password.
By default these are set to:
Username = admin
Password = admin
100G/200G
QUICK START GUIDE
E1/T 1: 2 Serial (RS232) DC Power
LAN 2
LAN 1
E1/T 1: 1 Earth
Point
5. Conguring your Vega
Select Quick Cong. If a warning message appears
informing you that there is already conguration applied,
you can remove the existing settings and start from
the beginning by selecting ‘Continue’ then ticking the
‘New Install ?’ option. This will ensure that any old,
unwanted conguration is removed as you submit your
new settings. Do not tick this option if you are simply
amending existing conguration.
⚠
WARNIN G
To exit Quick Cong ALWAYS use either the
Submit or Exit buttons adjacent to the Quick
Cong tabs.
DO NOT use the navigation entries on the left
hand menu, as using these may cause you to lose
settings that you want to keep.
a) Basic Cong
Start by selecting the basic cong tab. If this is a new
installation, ensure that the ‘New Install ?’ option is
ticked .
Select the country and choose which emergen cy
numbers are appropriate for the location of the Vega.
Then select the LAN settings and change the login
password if required.
Note: If the LAN settings have previously been statically
congured, ensure these settings are correctly reected on the
Basic Cong page. Failure to do this may result in the IP address
changing and the Vega becoming inaccess ible over the LAN.
b) VoIP
REGISTRATION MODE:
Depending on the installation, if registration is required, it
can be congured as one registration per gateway.
OUTBOUND PROXY:
Choose whether calls should be sent direct to the service
provider or through an outbound proxy.
Note: The elds available to congure on the remainder of this tab
are affected by the values chosen in the above two settings.
Congure the remaining settings, typi cally the values
will be pro vided by your VoIP service provider or system
administrator.
All IP address entries may be provided as dotted decimal
values (a.b.c.d) or as DNS names (e.g. SIP.sangoma.com).
Congure the codec lineup for this installation in
preference order.
e) E1/T1 Cong
Start by conguring the Port Setting section. As these
values relate to the physical interface connectivity, once
you have set these values you should never have to return
to recongure them.
Choose the required protocol; the framing will usually be
set correctly by leaving the Vega set to ‘auto’.
Select NT (Network) on each Vega interface that is
connected to a PBX interface which is congured as
TE (Terminal Equipment). Ensure NT is not ticked if the
interface is connected to the ISDN network (which is NT)
or is connected to an NT interface on the PBX.
E1/T1 interface 1 is wired as TE and E1/T1 interface 2 is
wired as NT. If this default conguration is changed by the
user then it may be necessary to use cross-over cables in
order to activate the link.
Tip: See the guide on wiki.sangoma.com for more information on
the pinouts and the correct cable conguration.
The number of channels setting only needs to be
changed from auto if the interface is being plugged into a
‘fractional E1’ or a ‘fractional T1’ where only a proportion
of the full number of channels available on the E1 or T1
are being used.
Now congure the ‘Telephone Connections’ details.
Regular Expressions
. Any single digit
[abc]
Range of digits ‘a’, ‘b’ and ‘c’
[a-d] Range of digits ‘a’ thru ‘d’
[^abc] Range of digits excluding ‘a’, ‘b’ and ‘c’
*
Previous character or regular expression
repeated 0 or more times
+
Previous character or regular expression
repeated 1 or more times
?
Previous character or regular expression
repeated 0 or 1 times
\
Turn off the regular expression meaning of the
following character, e.g. \* = DTMF *
f) Saving your Conguration
Press Submit to save, apply and activate the changes
made using Quick Cong. Pressing Submit will bring up a
conrmation request. Select OK to continue and activate
the changes or Cancel to take you back to the Quick
Cong pages.
 Loading...