

Page 1

IT GUIDA ALL INSTALLAZIONE E USO
EN OPERATIING AND INSTALLATION INSTRUCTIONS
Frigo-Congelatore
F
ridge-Freezer
Page 2

Cara Cliente, Caro Cliente,
Avete appena acquistato frigo-congelatore SAN GIORGIO e vi ringraziamo per la vostra scelta.
In questo elettrodomestico abbiamo messo tutta la nostra passione e la nostra esperienza affinché
risponda al meglio ai vostri bisogni. Innovativo ed efficiente, l’abbiamo concepito perché sia sempre anche di facile utilizzo.
Nella gamma dei prodotti SAN GIORGIO, troverete anche una vasta scelta di forni, di piani cottura,
di cappe aspiranti, di lavastoviglie, di lavatrici, di asciugatrici, e freezer che potrete coordinare al
vostro nuovo frigo-congelatore SAN GIORGIO.
SAN GIORGIO
Al fine di migliorare costantemente i nostri prodotti, ci riserviamo il diritto di apportare le modifiche tecniche, funzionali od estetiche necessarie alla loro evoluzione.
Importante:
Prima di usare il vostro elettrodomestico per la prima volta, raccomandiamo di leggere con attenzione la guida
d’installazione e d’utilizzo per prendere dimestichezza più rapidamente col suo funzionamento.
Page 3
030405
Page 4
Page 5
Page 6
06
•Svitare e togliere la parte superiore del frigorifero.
•Smontare la cerniera superiore allentando le 3 viti poi sfilare la
porta superiore.
•Sganciare la cerniera dalla porta togliendo la piastra di copertura
della porta.
•Svitare la cerniera intermedia e sfilare la porta inferiore.
•Togliere i tappini del lato opposto e inserirli nei fori lasciati liberi
dalla cerniera intermedia
•Invertire la cerniera inferiore (piedino incluso) col piedino opposto
•Svitare il blocco metallico fermoporta situato al disotto della porta
inferiore e avvitarlo saldamente sul lato opposto
•Infilare la porta inferiore nel perno della cerniera poi avvitare la cerniera intermedia per terminare il montaggio di questa porta.
•Infilare la porta superiore nel perno della cerniera intermedia.
•Avvitare la cerniera superiore dopo aver agganciato e sistemato la
porta superiore.
•Montare ed avvitare di nuovo la parte superiore dell’apparecchio
per terminare l’operazione.
•Se il frigorifero viene dotato di maniglie verticali, non dimenticate
di spostarle sulla parte opposta.
B
B
D
D
E
E
C
E
A
Page 7
07
Page 8

08
C
C
B
A
E
F
C
G
Zone la plus froide
A
C
B
F
E
G
C
D
Zona piu fredda
Page 9

09
Page 10

10
Page 11

Page 12

ENCONTENTS
• Safety instructions
______________________________________
03
1 / INSTALLING YOUR APPLIANCE
• Electrical connection
_____________________________________
04
• Before connecting your appliance
__________________________
04
• Environmental protection
_________________________________
04
• Recycling ______________________________________________ 04
• Description of your appliance ______________________________ 05
• Reversing the door opening direction _______________________ 05
2 / HOW TO USE YOUR APPLIANCE
• Using the refrigerator compartment
_________________________
06
• Using the freezer compartment ____________________ 06
• Food safety (depending on the model)
_______________________
07
3 / ONGOING MAINTENANCE OF YOUR APPLIANCE
• Defrosting
______________________________________________
08
• Cleaning your appliance
__________________________________
08
• Changing the light bulb ___________________________________ 08
4 / PARTICULAR MESSAGES, INCIDENTS
• Operating problems
______________________________________
09
5 / AFTER-SALES SERVICE
_____________________________________
10
02
Page 13

This appliance has been designed for preserving and freezing
food, preserving deep-frozen food and producing ice cubes. Any
other use would be inappropriate.
Your appliance must be installed in accordance with the instructions in this manual; faulty installation could result in damage to
the appliance.
For any problems regarding the appliance’s operation, please
always only contact the approved After-Sales Service centres or a
suitably qualified professional.
Disconnect your appliance prior to performing any maintenance
operation. Unplug it; do not pull on the power cable.
If this freezer is replacing another one with a catch, spring, lock or
other closing system, remember to destroy the closing mechanism
or, better still, remove the door from your old appliance to avoid
anyone becoming trapped inside (children playing, animals, etc.).
Once you have unpacked the appliance, ensure that it is not damaged. If it is, any damage must be notified to the retailer witching 24
hours of delivery. The materials used for the packaging are 100%
recyclable (cardboard, PE bubble wrap, EPS, etc.). Keep these
materials out of children’s reach..
For your appliance to operate optimally, install it away from any heat
sources and ensure that air can circulate well all around it (see
“Installing your appliance”).
Caution :
Your appliance’s refrigeration circuit is filled with isobutane refri-
gerant (R600a), a natural, non-polluting gas that is, however,
inflammable. Ensure that none of the components in your
appliance’s refrigeration circuit is damaged during transport or
installation. If you detect any damage, keep your appliance away
from flames and any sources of ignition and ventilate the room in
which it is located.
03
SAFETY INSTRUCTIONSEN
Page 14

INST
Important:
Before installing your appliance please carefully read the safety ins-
tructions in order to avoid some minor inconveniences.
Install the appliance in a dry, well-ventilated room, away from any
heat source. Leave a minimum distance of 10cm between the top of
your appliance and any unit above it. If your installation does not
permit this, leave 5cm between the top of the casing and any kitchen unit fixed to the wall and a gap of 2.5cm on each side of the
appliance.
If your appliance must be installed next to another refrigerator or
freezer, do not attach the two appliances together to avoid condensation forming on the outside.
Your appliance’s climate class is shown on the identification plate.
It determines the ambient temperature range for which the refrigeration unit has been designed to ensure that the appliance will operate correctly.
Climate class Ambient temperatures
N
16° to 32°
ST 18° to 38°
T 18° to 43°
ELECTRICAL CONNECTION
Socket characteristics: 220-240V with Earth.
Do not use extension leads or adaptors.
The cable must not be in contact with the compressor.
Do not trap the cable under the appliance.
The appliance’s electrical installation s provided with an Earth. For
your safety’s sake, connect the appliance to a socket fitted with an
efficient Earth (in accordance with the prevailing electrical installation safety regulations).
The manufacturer declines any responsibility for any damage caused through lack of Earthing.
BEFORE CONNECTION
• Clean the inside of your appliance with warm water and bicarbonate of soda. Rinse and dry thoroughly.
• Wait 2 hours before switching on to ensure that the oil in the compressor has stabilized.
RECYCLING
The packaging materials for your appliance are made from recyclable materials. Participate in recycling them and thereby contributing
to protecting the environment by disposing of them in the municipal
containers provided for this purpose.
Your appliance also contains many recyclable materials. It is therefore marked with this logo to inform you that worn-out appliances
should not be mixed in with other waste. The recycling that your
manufacturer arranges can then be done in optimum conditions n
accordance with European Directive 2002/9/EEC regarding waste
electrical and electronic equipment. Please contact your local town
hall or your dealer for the worn-out appliances collection points nearest to your home. We thank you for collaborating in protecting the
environment.
EN
1 /
INSTALLATION
ENVIRONMENTAL PROTECTION
This appliance contains no refrigerant gases harmful to the ozone
layer in its refrigeration circuit and its insulation materials. It must
not be disposed of with normal urban waste and scrap metal in
order to avoid damage to the refrigeration circuit, particularly at the
rear of the appliance. Contact your local town hall for information on
the collection of this type of appliance.
04
Page 15

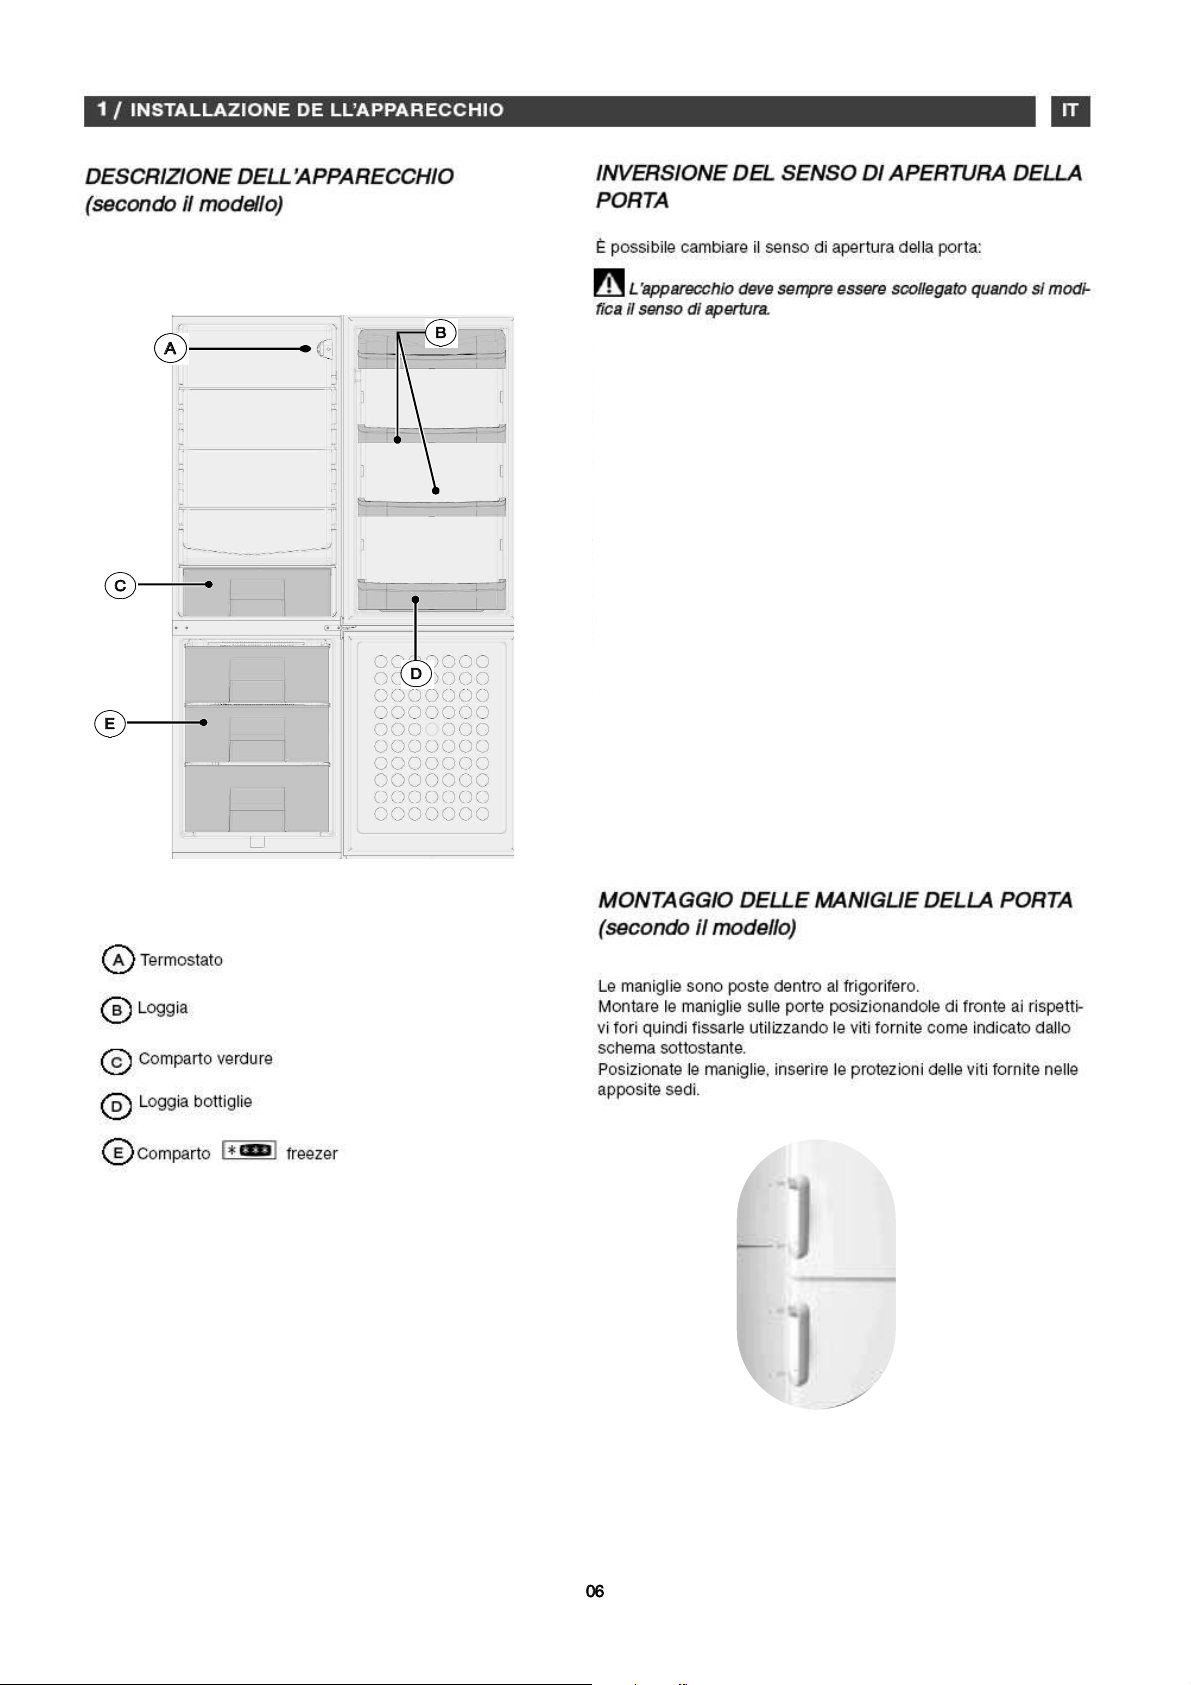
DESCRIPTION OF YOUR APPLIANCE
(depending on the model)
Freezer compartment
1 /
INSTALLATIONEN
IREVERSING THE DIRECTION THE DOORS
OPEN
You can alter the direction in which the doors open if you wish:
The appliance must always be disconnected from the power
supply when changing the direction the doors open.
•Unscrew and take off the top cover.
•Take off the upper hinge by removing the 3 screws and then
remove the upper door.
•Release the hinge from the door by removing the door hole cover
•Unscrew the middle hinge and remove the lower door
•Take off the front hole covers and fix them on the previous location
of the middle hinge
•Swap over the lower hinge (foot included) and the opposite foot
•Unscrew the metal door stop located on the bottom of the lower
door and screw it properly on the opposite side.
•Adjust the lower door on the hinge pin and fit the middle hinge to
finish the assembling of this door
•Put the upper door on the middle hinge pin
•Screw the upper hinge after having adjusted the door on it
•Assemble and screw the top cover to finish the handling
•If your appliance is fitted with vertical handles, remember to move
them to the opposite side.
05
Thermostat
Door shelves
Vegetable compartment
Bottle shelf
FITTING THE DOOR HANDLES
(depending on the model)
The handles are located inside the refrigerator. Fit the handles on
the doors, positioning them opposite the respective holes and fasten them with the screws provided as shown in the diagram below.
Once the handles are in place, insert the screw covers supplied in
the spaces provided for this purpose
A
B
C
D
E
B
B
D
D
A
E
C
E
E
Page 16

USING THE FREEZER COMPART-
MENT
USING THE REFRIGERATOR COMPARTMENT
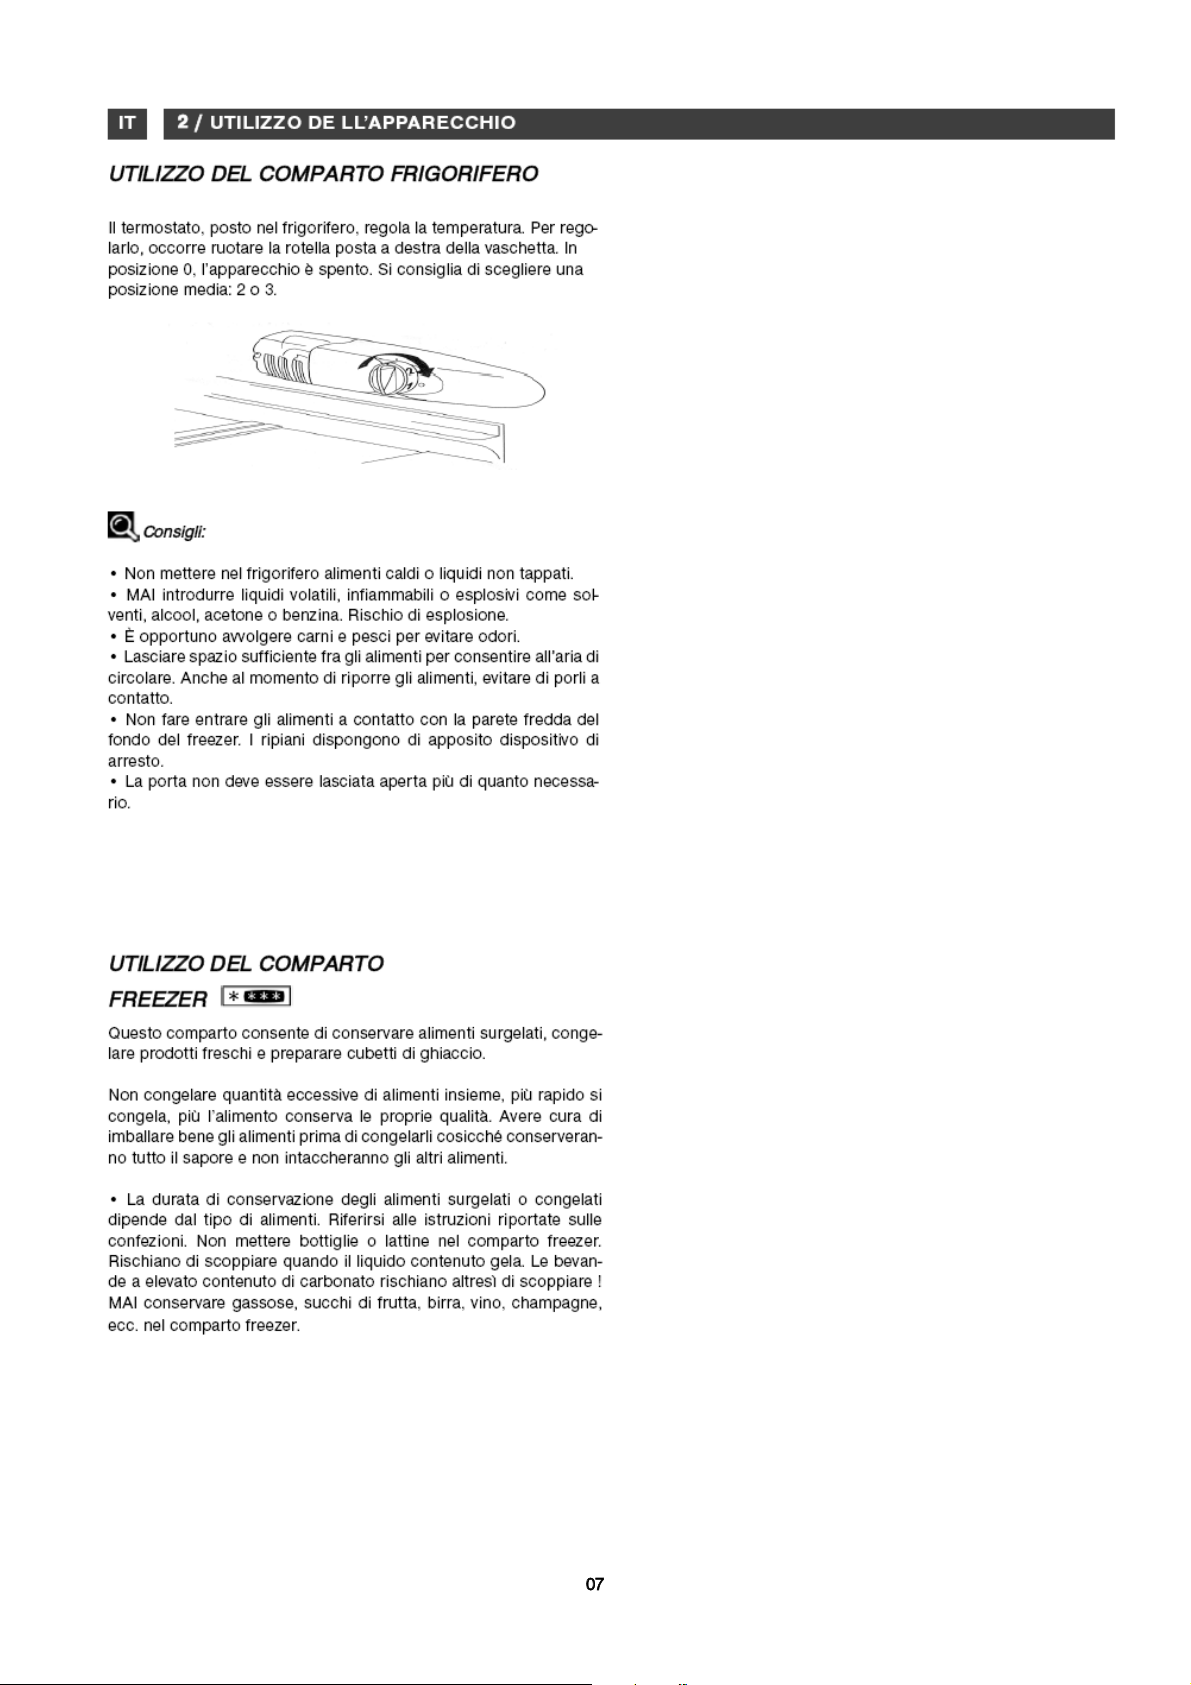
The thermostat in the refrigerator controls the temperature. To set
it, you must turn the knurled wheel inside the refrigerator on the
right-hand side. When set to position 0, the appliance is OFF.
We recommend that you select a middle position: 2 or 3.
EN
2 /
USING YOUR APPLIANCE
Advice:
• Do not put hot food or unsealed liquids into the refrigerator.
• NEVER introduce volatile, inflammable or explosive fluids such as
alcohol, acetone or petrol because of the risk of explosion.
• It is advisable to wrap meat and fish to avoid odours.
• Leave sufficient space between the foodstuffs to enable air to circulate correctly between them. Similarly, when storing them, avoid
putting food items in contact with each other.
• Do not place food items in contact with the cold wall at the back
of the refrigerator. The shelves have a stop to avoid this.
• The door should not be left open any longer than necessary.
This compartment enables you to preserve frozen food, freeze
fresh produce and to produce ice cubes.
Do not freeze too large an amount of food at one time; the faster the
food is frozen, the longer it preserves its qualities. Similarly, ensure
that your food items are well wrapped before freezing them so that
they retain all their flavour and do not spoil other items.
The preservation times for frozen and deep-frozen foods depends
on the type of food concerned. Please refer to the instructions on
the packaging. Do not place bottles or cans in the ice box. They may
split when their contents freeze. Highly carbonated drinks may even
explode! NEVER keep lemonade, fruit juice, beer, wine, champagne,
etc. in the freezer – ice box compartment.
06
Page 17

FOOD SAFETY
(depending on the model)
Explanation of the coldest area by means of signs.
The symbol opposite indicates the location of the coldest area
in your refrigerator, whose temperature is + 4°C.
You will store here meat, poultry, fish, cooked meats, prepared dishes, ready-made salads, egg or cream-based dishes and pastries,
fresh pasta, pastry, pizza/quiches, fresh produce and raw milk
cheese, ready-to-use vegetables sold in plastic bags and, in general, any fresh produce whose consume-by date is associated with
storage at a temperature of +4°C or below.
T
emperature indicator:
Adjust your thermostat
Correct temperature
The temperature indicator enables you to check that your refrigerator is working correctly.
The indicator displays “OK” when the coldest area reaches an average temperature of ± 4°C (4 hours after being switched on). If the
temperature is above + 4°C, the indicator remains black. The user
must then lower the temperature of the refrigerator by adjusting the
thermostat.
Freezing fresh foodstuffs or storing frozen foods
Dairy products, cheese
Meat, cooked meats, fish
Fruit and vegetables
Drinks, butter and eggs
Condiments
Drinks
EN
2 /
USING YOUR APPLIANCE
OK
B
A
E
F
07
Warning:
Opening the refrigerator’s door for a prolonged period causes the
refrigerator’s internal temperature to rise. To measure the tempera-
ture correctly, the temperature indicator must be read within
30 seconds. Similarly, it should also be taken into account that
the temperature is nor completely uniform throughout the compart-
ment, for which reason there are appropriate areas for each type of
foodstuff.
C
G
Coldest area
A
C
B
F
E
G
A
B
C
D
F
E
G
C
D
Page 18

DEFROSTING
Your refrigerator has an automatic defrosting system. The
appliance’s rear surface becomes covered with frost when the com-
pressor is working and defrosts when the compressor is off. When
the frost melts, the water evaporates by itself.
The compartment must always be defrosted when the
layer of frost is approximately 4mm thick. In any case, this compartment must be defrosted at least once a year.
You may use the plastic spatula supplied with the appliance but
never use any metal item or an electrical appliance.
Disconnect your refrigerator before proceeding to defrost it.
• Pack your frozen food in a freezer bag and keep it cool.
• Leave the door open and sponge away the melt water as it forms.
• To accelerate the defrosting process, you can place a bowl of hot
water in the compartment and close the door.
• Once defrosting is complete, proceed to clean your appliance.
CLEANING AND MAINTENANCE
Switch off your refrigerator before proceeding to clean it.
We recommend that you clean and disinfect your appliance
regularly
• Clean the interior with water and bicarbonate of soda using a
sponge or a dishcloth to prevent any bad smells occurring.
• Never, under any circumstances, use solvents or abrasive detergents because these could damage the interior of your appliance.
Also do not put any of the interior’s accessories in the dishwasher.
• We recommend that you dust the back of the appliance with a
cloth once a year because if it is dirty, your refrigerator’s output
reduces and its consumption increases.
CHANGING THE LIGHT BULB
Disconnect your appliance before proceeding to change the
light bulb.
• The bulb is behind the thermostat panel. Remove the grill.
• Remove the bulb by unscrewing it counter-clockwise.
• Insert a new bulb of the same power as its predecessor.
• Replace the grill, reconnect the appliance and switch it on.
08
3 /
ON-GOING MAINTENANCE OF YOUR APPLIANCE EN
Page 19

OPERATING PROBLEMS
There are some noises that it is quite normal for a refrigerator to make:
• The refrigerant gas can produce a gurgling sound as it travels through the circuits.
• The compressor may produce a buzzing noise, which can be more noticeable during start-up.
• The “cracking” noise produced by expansion and contraction of the materials used.
TECHNICAL ASSISTANCE DEPARTMENT
If you have already performed the indicated checks and your problem still persists, DO NOT ATTEMPT TO MAKE ANY REPAIRS YOURSELF. Contact your nearest Technical Assistance Department.
PROBLEM SOLUTION
The appliance does not work.
Check that the plug is correctly connected, that the fuse hasn’t
blown or that the circuit-breaker has not jumped.
The refrigerator vibrates or is noisy. Check that it is level. Adjust the feet.
The refrigerator gets too cold or not cold enough.
Check the position of the thermostat and set it to a more suitable
temperature.
The refrigerator’s bulb does not light.
Check the bulb and replace it if necessary. If the problem persists,
check that your appliance is connected.
The compressor does not start after a change in the temperature.
This is normal; the compressor will restart after a certain time.
There is water on the floor or on the shelves.
The hole for draining away the defrosting water must be blocked.
Unblock it with a knitting needle.
EN
4 /
PARTICULAR MESSAGES, INCIDENTS
09
THIS APPLIANCE COMPLIES WITH EEC DIRECTIVES
73/23, 93/68, 89/336, 96/57, 92/31, 94/62
Page 20

Any work on your appliance must be performed by a Brandt-accredited qualified professional.
When you call, please mention the complete reference for your machine (model, type, serial number): this information is provided on your
guarantee certificate and the information plate on your appliance.
ORIGINAL SPARE PARTS: when any maintenance work is being performed, ask that only certified original spare parts be used.
EN
5 /
AFTER-SALES SERVICE
10
Page 21

FAGORBRANDT SAS- Locataire Gérant- société par actions simplifiée au capital de 20.000.000 Euros - RCS Nanterre 440 303 196
KH-COMBI SAN GIORGIO - 01/0 -AVC328/AVC348/S8
 Loading...