

Sandstrom SWC32B11 Instruction Manual

Instruction Manual
Wine Cooler
SWC32B11
SWC32B11_IB_final110526.indd 1 5/26/11 6:25 PM

SWC32B11_IB_final110526.indd 2 5/26/11 6:25 PM

Contents
Unpacking .................................................................................................................................... 4
Installation ................................................................................................................................... 5
Location ..................................................................................................................................................................... 5
Installing the Door Handle ..................................................................................................................................5
Reversing the Door Swing ................................................................................................................................... 6
Levelling the Unit ................................................................................................................................................... 7
Cleaning Before Use .............................................................................................................................................. 7
Before Using Your Unit ..........................................................................................................................................7
Product Overview ........................................................................................................................ 8
Control Panel ............................................................................................................................................................8
Operation ..................................................................................................................................... 9
Switching On Your Wine Cooler ........................................................................................................................ 9
Using the Humidier ............................................................................................................................................. 9
Filling Water into Humidier ............................................................................................................................10
Stacking the Wine Bottles .................................................................................................................................10
Noises Inside the Wine Cooler .........................................................................................................................10
Storing Wine in Your Wine Cooler ...................................................................................................................11
Filling Your Wine Cooler .....................................................................................................................................11
Space Around the Wine Cooler .......................................................................................................................11
Keep the Door Closed .........................................................................................................................................11
Cleaning ..................................................................................................................................... 12
Cleaning the Inside of the Wine Cooler ........................................................................................................12
Cleaning the Outside of the Wine Cooler ....................................................................................................12
Cleaning Tips ..........................................................................................................................................................12
Maintenance ..............................................................................................................................13
Changing the Internal Light .............................................................................................................................13
Care When Handling ...........................................................................................................................................13
Installation ..............................................................................................................................................................13
Servicing ..................................................................................................................................................................13
Switching O for Long Periods of Time ........................................................................................................13
Disposal ...................................................................................................................................... 13
Specication .............................................................................................................................. 14
Safety Warnings ......................................................................................................................... 15
SWC32B11_IB_final110526.indd 3 5/26/11 6:25 PM
4
Unpacking
Remove all packaging from the unit. Retain the packaging. If you dispose of it please do so according to
local regulations.
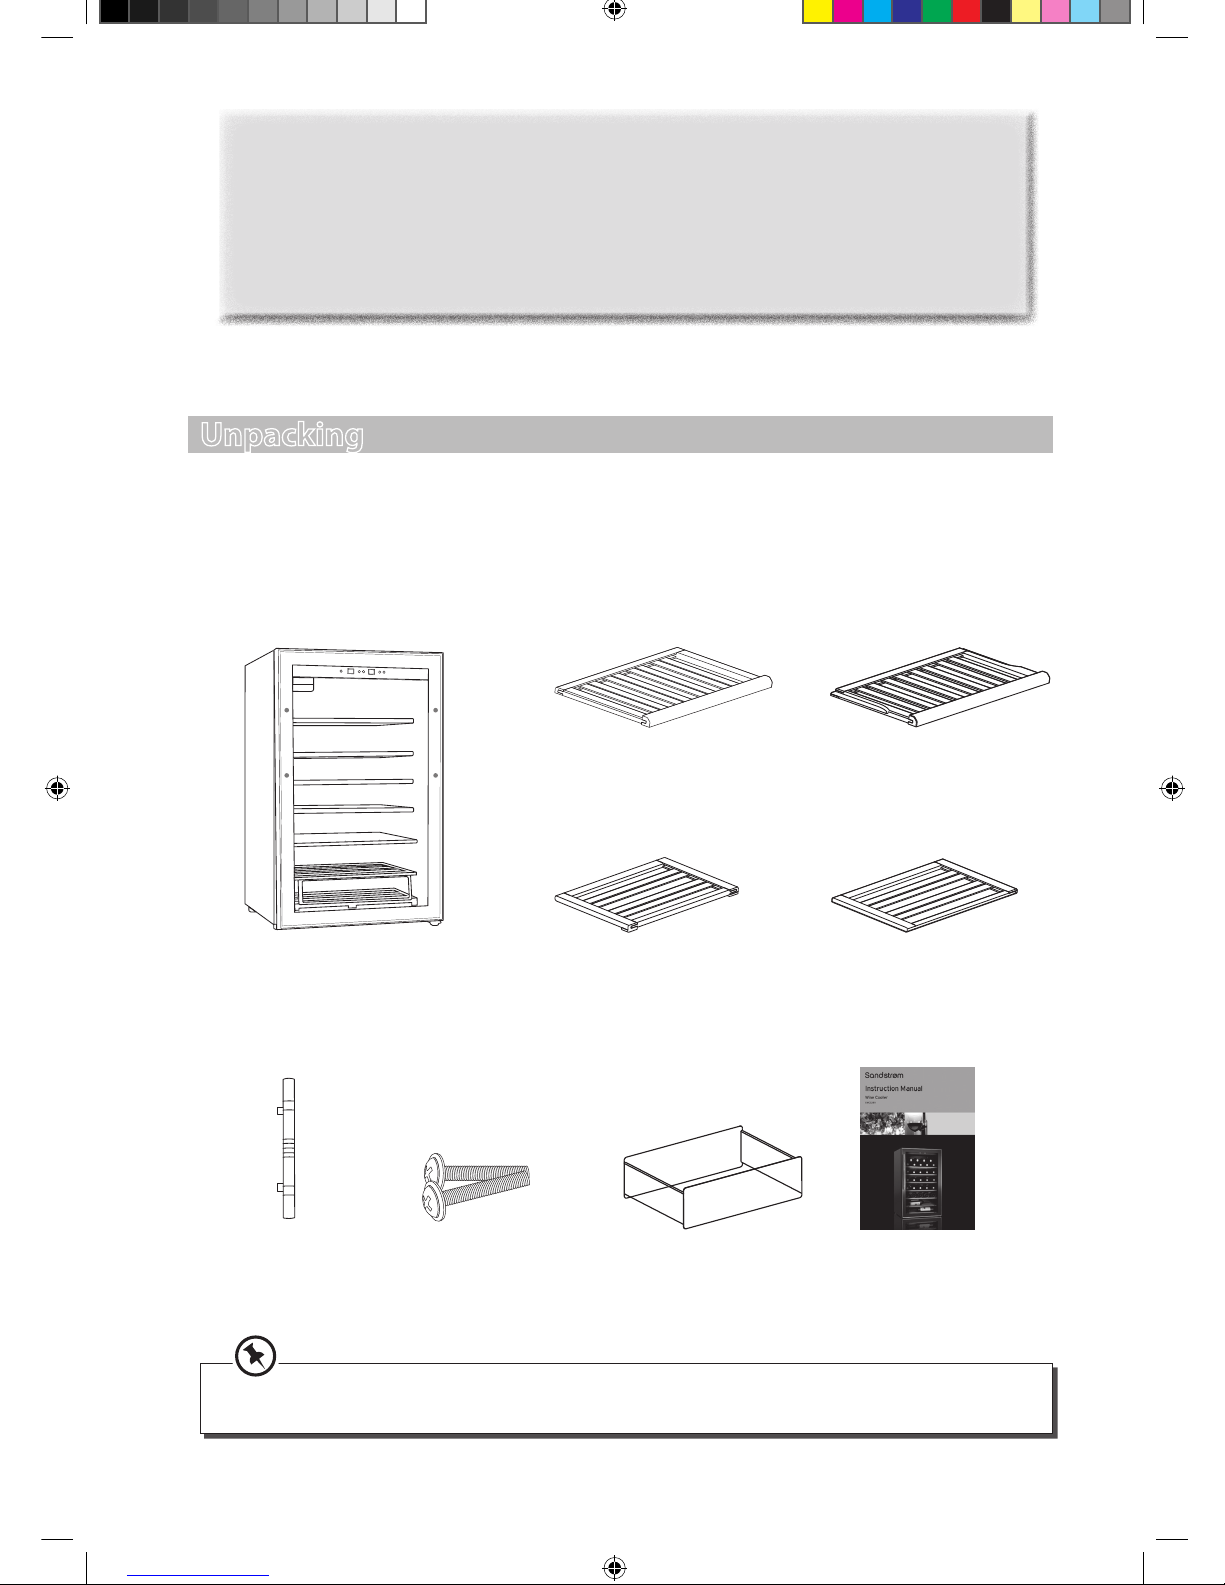
The following items are included:
The Main Unit
Adjustable Shelves x 4
P.N.: MCJ-01H
Lower Bottle Rack Shelf x 1
P.N.: MCJ-03H
Upper Bottle Rack Shelf x 1
P.N.: MCJ-04H
Bottle Rack
P.N.: CJJ-27
Door Handle
P.N.: TY02-62A
Screws x2
P.N.: GB818-85
Smaller Shelf
P.N.: MCJ-02H
Instruction Manual
P.N.: SWC32B11-001
Thank you for purchasing your new Sandstrøm Wine Cooler.
We recommend that you spend some time reading this instruction manual in order that you
fully understand all the operational features it offers.
Read all the safety instructions carefully before use and keep this instruction manual for
future reference.
If items are missing, or damaged please contact Partmaster (UK only).
Tel: 0844 800 3456 for assistance.
SWC32B11_IB_final110526.indd 4 5/26/11 6:26 PM

INSTALLATION
Location
When selecting a position for your unit make sure the floor is flat and firm, and that the room is well
ventilated with an average room temperature of between 16°C and 32°C. Avoid locating your unit near
a heat source, e.g. a cooker, boiler or radiator. Avoid direct sunlight. If you are placing your unit in an
outbuilding such as a garage or annex ensure that the unit is placed above the damp course, otherwise
condensation will occur on the cabinet. Never place the unit in a wall recess or into fitted cabinets or
furniture.
When installing the unit, ensure that 2 cm of free space is left at both sides and 3 cm at the rear of the
unit. The door can open to the right or the left, depending on what better suits the location. Please
ensure there is adequate space for the door to fully open.
Should you wish to move the unit to another location
and reverse the door, see the “Reversing the Door
Swing” Section.
• If you want to have the door swing reversed, we recommend that you contact a qualified
technician. You should only try to reverse the door yourself if you believe that you are qualified
to do so.
• All parts removed must be saved to do the reinstallation of the door. You should rest the unit
on something solid so that it will not slip during the door change process. Do not lay the unit
flat as this may damage the coolant system. Ensure the unit is unplugged and empty.
Do not over tighten the screws as you may damage
the glass door.
Installation
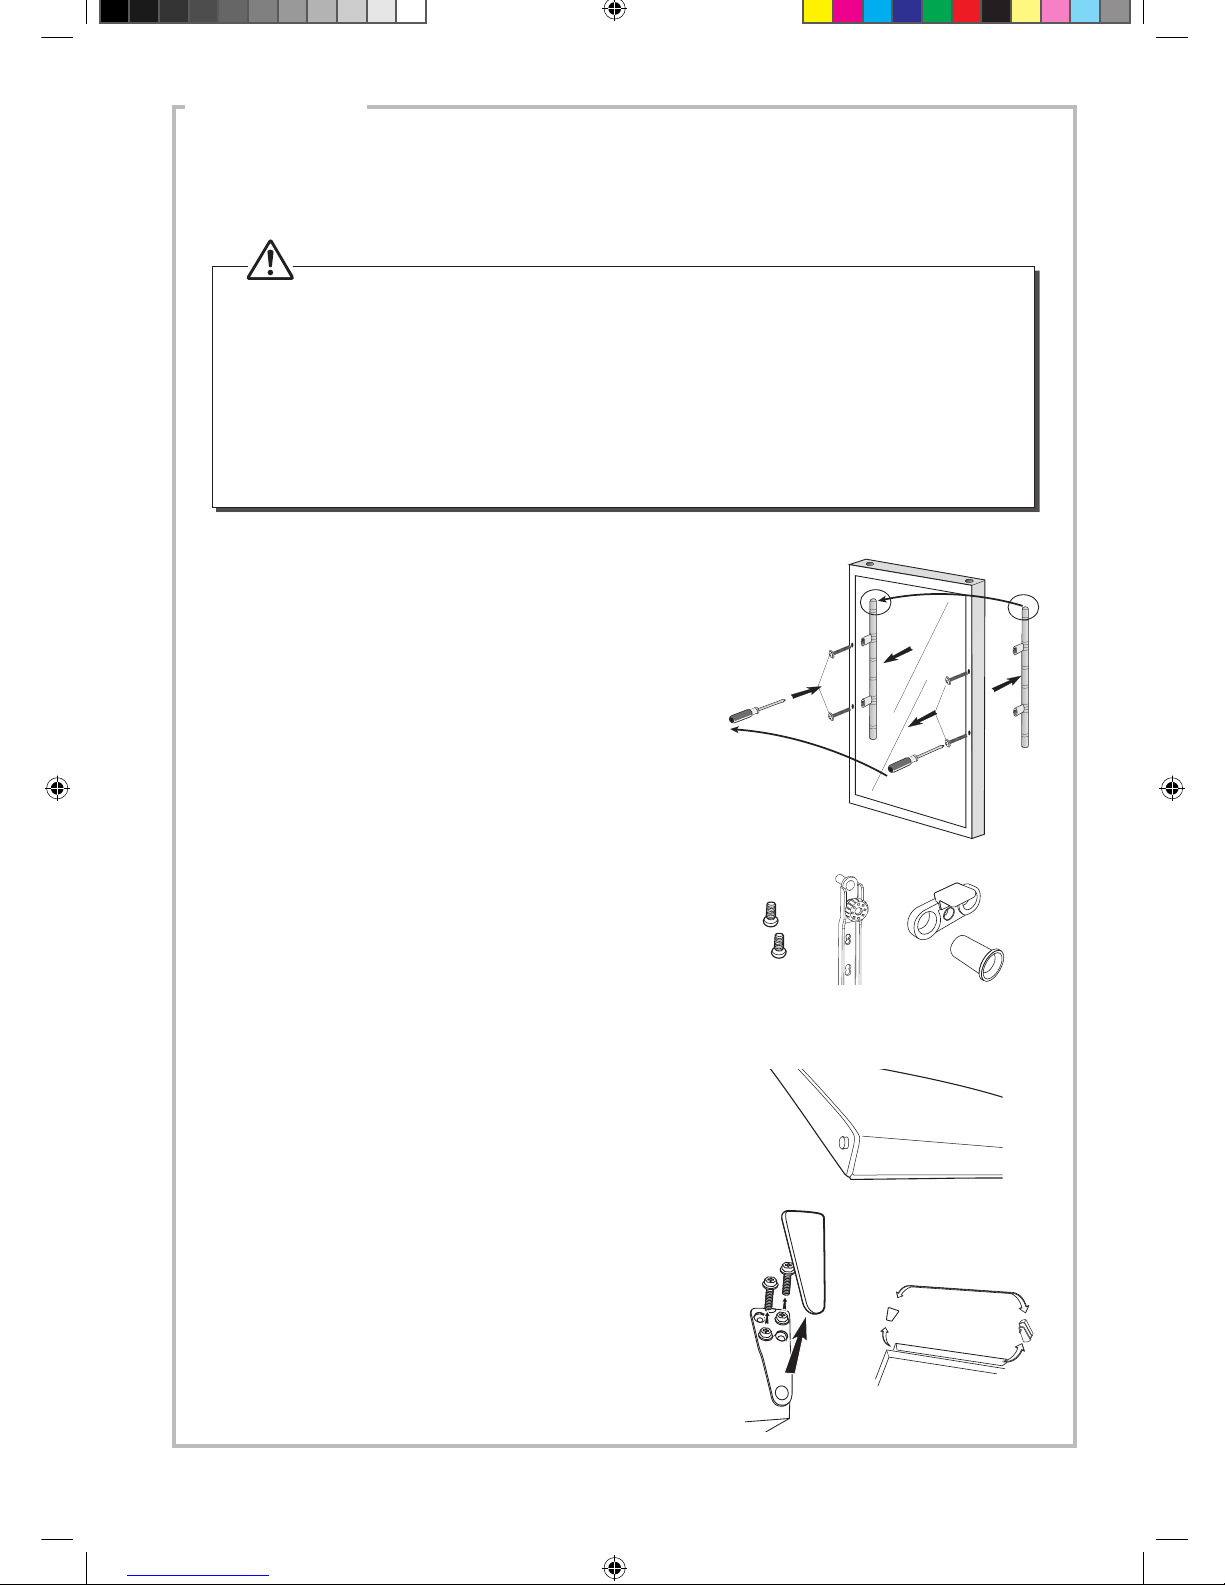
Installing the Door Handle
1. Remove the 2 decorated caps on the left hand side of the
front of the glass door.
2. Position the door handle over the 2 screw holes.
3. Using a screwdriver and the supplied screws carefully
screw the door handle to the glass door.
Decorated Caps
5
SWC32B11_IB_final110526.indd 5 5/26/11 6:26 PM
INSTALLATION
11. Re-attach top hinge bracket to where they was located on
the opposite side (right to left).
8. Unscrew and remove the lower hinge bracket. Unscrew the
levelling feat and place it to opposite side.
9. Place the two screws, the bottom bracket and the levelling
feet to one side.
10. Lift the door and place it on a padded surface to prevent
scratching it.
4. Remove the decorated caps on the glass door.
5. Unscrew the two screws that hold the door handle and then
transfer the handle other side.
6. Place the decorated caps back to glass door.
7. Tilt the unit carefully. 2 people are required to tilt the unit
during the door reversing process.
• Ensure the unit is unplugged and empty.
• Adjust the two levelling feet to their highest position.
• To take the door off it is necessary to tilt the unit backwards. You should rest the unit on
something solid, e.g. a chair just below the top panel.
• All parts removed must be saved to do the reinstallation of the door. You should rest the unit
on something solid so that it will not slip during the door reversing process.
• Do not lay the unit flat as this may damage the coolant system.
• We recommend that 2 people handle the unit during assembly.
Reversing the Door Swing
Tools required: Philips style screwdriver / Flat bladed screwdriver / Hexagonal spanner.
6
SWC32B11_IB_final110526.indd 6 5/26/11 6:26 PM
 Loading...