

Sandstrom SHFGLC11 Instruction Manual
Instruction Manual
Hi-Fi with Docking for iPhone and iPod
SHFGLC11
(iPhone and iPod not included)


Contents
Unpacking ..................................................................................................................................5
Product Overview ......................................................................................................................6
Front View .............................................................................................................................................................6
Top View ................................................................................................................................................................6
Rear View ...............................................................................................................................................................7
LCD Display Window ......................................................................................................................................... 7
Remote Control ..........................................................................................................................8
Remove the Insulating Strip from the Remote Control ..........................................................9
Battery Replacement for the Remote Control .........................................................................9
Handling the Battery ......................................................................................................................................... 9
Handling the Remote Control .....................................................................................................................10
Remote Control Operation Range ..........................................................................................10
Wall Mounting .........................................................................................................................10
Connections .............................................................................................................................11
Mains Power .......................................................................................................................................................11
Using Earphones...............................................................................................................................................11
Playing music from an Audio Device ........................................................................................................12
Playing Music from a USB Device or a Memory Card ..........................................................................12
Compatible Disc Types ............................................................................................................13
Basic Operation .......................................................................................................................13
Powering ON/OFF ............................................................................................................................................13
Selecting Modes ...............................................................................................................................................13
Adjusting the Volume .....................................................................................................................................14
Clock Setting ......................................................................................................................................................14
Timer Clock Setting .........................................................................................................................................14
Sleep Timer Setting .........................................................................................................................................15
EQ Control ...........................................................................................................................................................15
CD / MP3 / WMA Operation .....................................................................................................16
Playback ...............................................................................................................................................................16
To Pause Playback ............................................................................................................................................17
To Stop Playback ...............................................................................................................................................17
Skipping to Another Track ............................................................................................................................17
ID3 Operation (For MP3 / WMA Mode) .....................................................................................................17
Repeat Playback ................................................................................................................................................18
Random Playback .............................................................................................................................................18
Intro Playback ....................................................................................................................................................19
Programmable Playback ................................................................................................................................19
USB Operation .........................................................................................................................20
Memory Card Operation .........................................................................................................21
3

AUX Operation .........................................................................................................................21
iPod Operation .........................................................................................................................22
Inserting the iPod and Selecting iPod Mode..........................................................................................22
iPod Playback .....................................................................................................................................................23
iPod MENU Mode .............................................................................................................................................24
Charging Your iPhone/iPod ..........................................................................................................................24
FM Operation ...........................................................................................................................25
Searching for a Station Manually ................................................................................................................25
Searching for a Station Automatically ......................................................................................................25
Selecting Mono / Stereo ................................................................................................................................25
Presetting Stations ...........................................................................................................................................26
Tuning in to a Preset Station ........................................................................................................................26
For Better Reception .......................................................................................................................................26
Maintenance ............................................................................................................................27
Handling Discs ...................................................................................................................................................27
Cleaning Discs ...................................................................................................................................................27
Storing Discs ......................................................................................................................................................27
Cleaning the Unit .............................................................................................................................................27
Hints and Tips ..........................................................................................................................28
Specication ............................................................................................................................29
Safety Warnings .......................................................................................................................30
4
Thank you
iPhone and iPod
for purchasing your new Sandstrøm
.
Hi-Fi with Docking for
We recommend that you spend some time reading this instruction manual in
order that you fully understand all the operational features it oers. You will also
nd some hints and tips to help you resolve any issues.
Read all the safety instructions carefully before use and keep this instruction
manual for future reference.
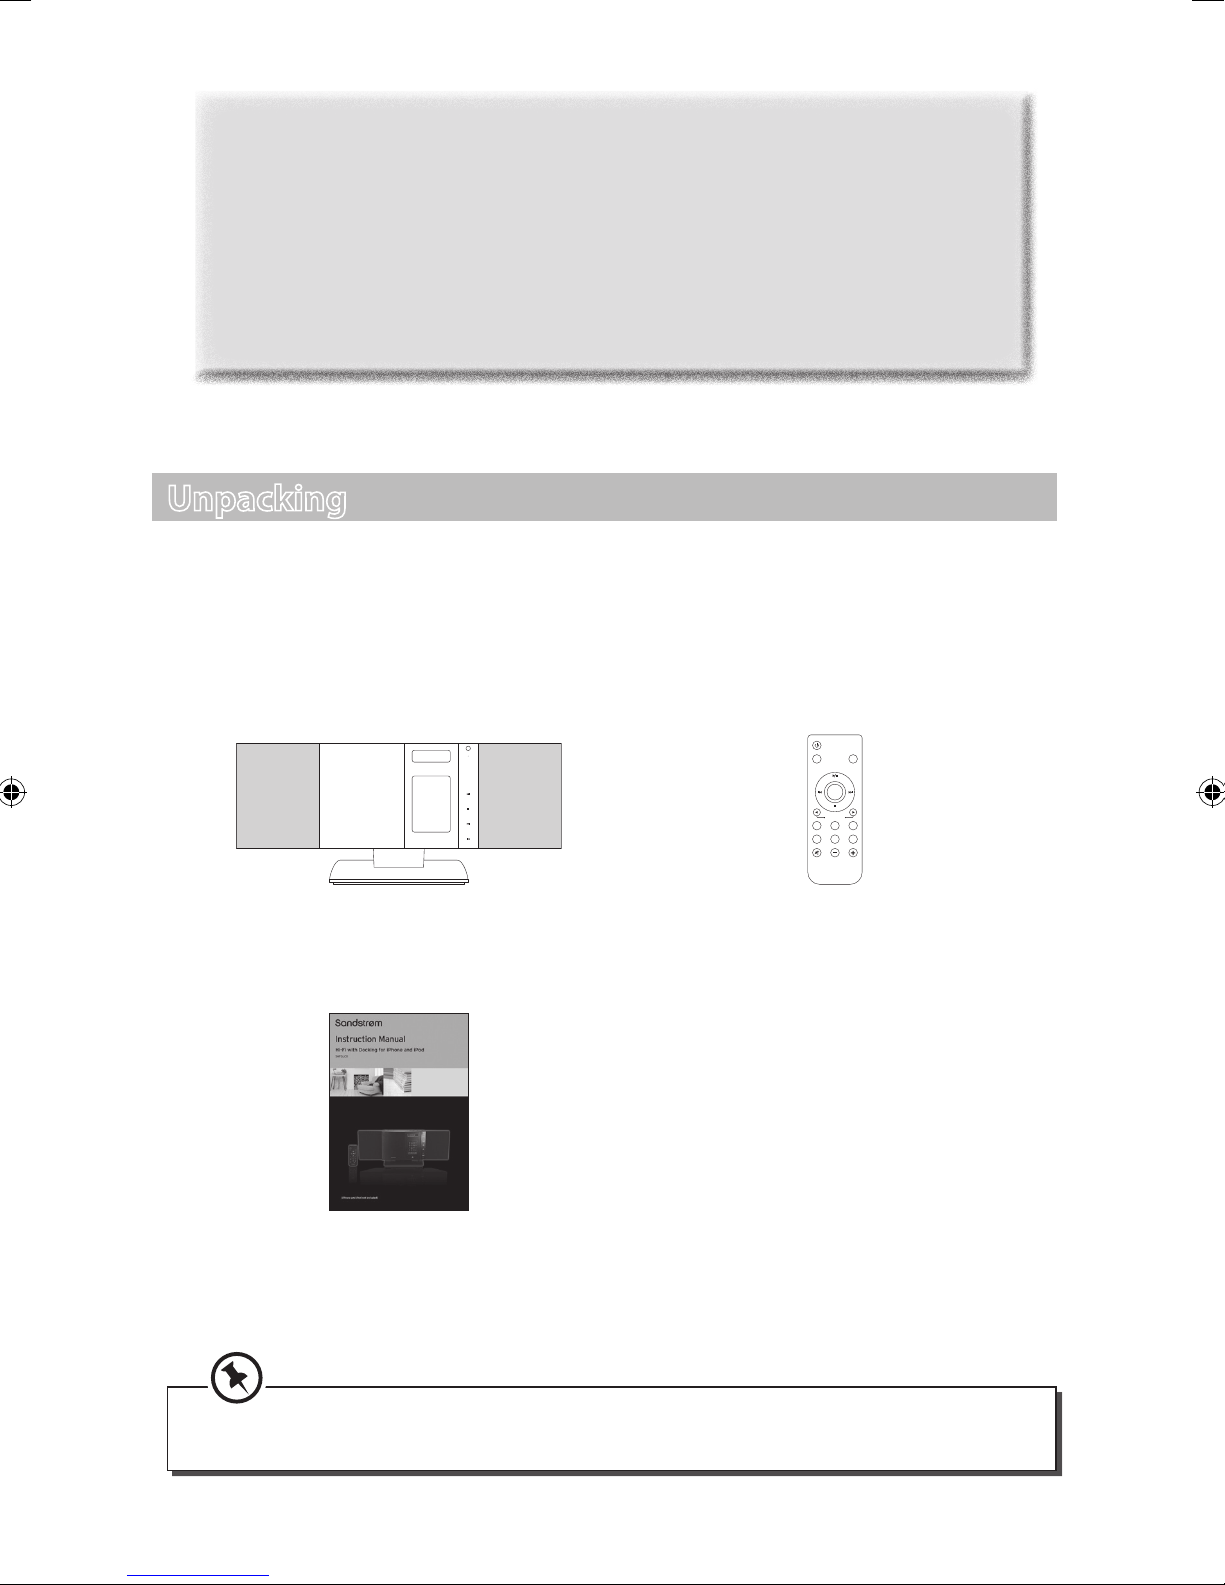
Unpacking
Remove all packaging from the unit. Retain the packaging. If you dispose of it please do so
according to local regulations.
The following items are included:
FUNCTION
MODE
ENTER
MENU
SKIP TUNE
SEARCH
The Main Unit Remote Control
(P.N.: 070-0019LF-01L0)
Instruction Manual
(P.N.: SHFGLC11-001)
ON/OFF
DISPLAY
ENTER
MODE
MENU
PRESET/FOLDER
REPEAT
RANDOM
INTROEQ
MUTE VOLUME
FUNCTION
TIMER
SLEEP
If items are missing or damaged, please contact Partmaster (UK only).
Tel: 0844 800 3456 for assistance.
5
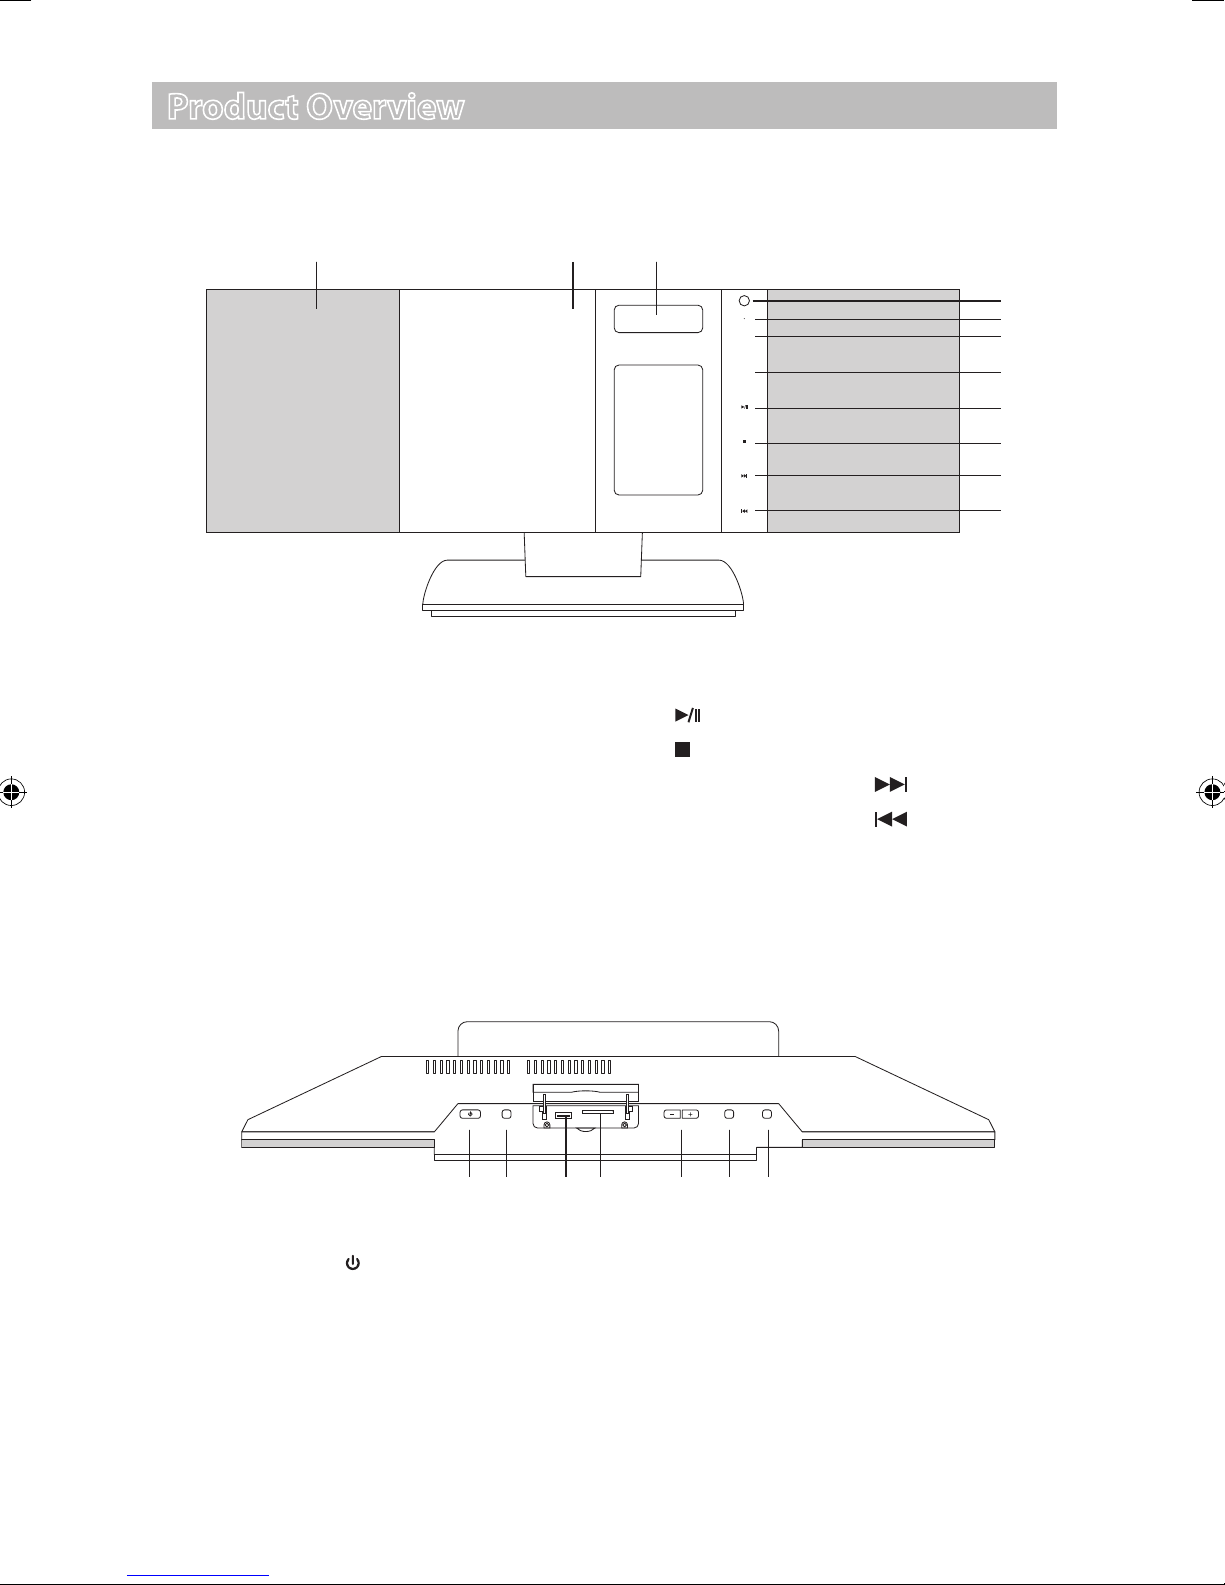
Product Overview
Front View
1 2 3
FUNCTION
4
5
6
MODE
7
1. Speakers
2. CD/iPod Door
3. LCD Display Window
4. IR Sensor
5. STANDBY Indicator
6. FUNCTION Icon
Top View
ENTER
MENU
SKIP TUNE
SEARCH
7. MODE Icon
8.
9.
ENTER Icon
MENU Icon
10. SKIP/TUNE SEARCH
11. SKIP/TUNE SEARCH
8
9
10
11
Icon
Icon
1. ON/OFF Button
2. CD OPEN/CLOSE Button
3. USB Port
4. MEMORY CARD Port
6
DISPLAYVOLUMECD OPEN/CLOSEON/OFF iPod OPEN/CLOSE
1 2 3 4 5 6 7
5. VOLUME +/– Buttons
6. DISPLAY Button
7. iPod OPEN/CLOSE Button

Rear View
1. POWER ON/OFF Button
2. Mains Cable
3. FM Aerial
LCD Display Window
4
RA N DO M
AC~
FM ANT.
21 3 4 5
4. Earphones
5. LINE IN Socket
2 31
AL BU MIN T RO
RE P EAT A LL A LB UM
ME MO R Y
LINE IN
Socket
KH z
MH z
5
6
1. SLEEP Indicator
2. TIMER Indicator
3. TIMER / RADIO MEMORY
NUMBER Indicator
4. VOLUME LEVELS Indicator
5. STEREO Indicator
6. TRACK / NUMBER / TIME Indicator
7
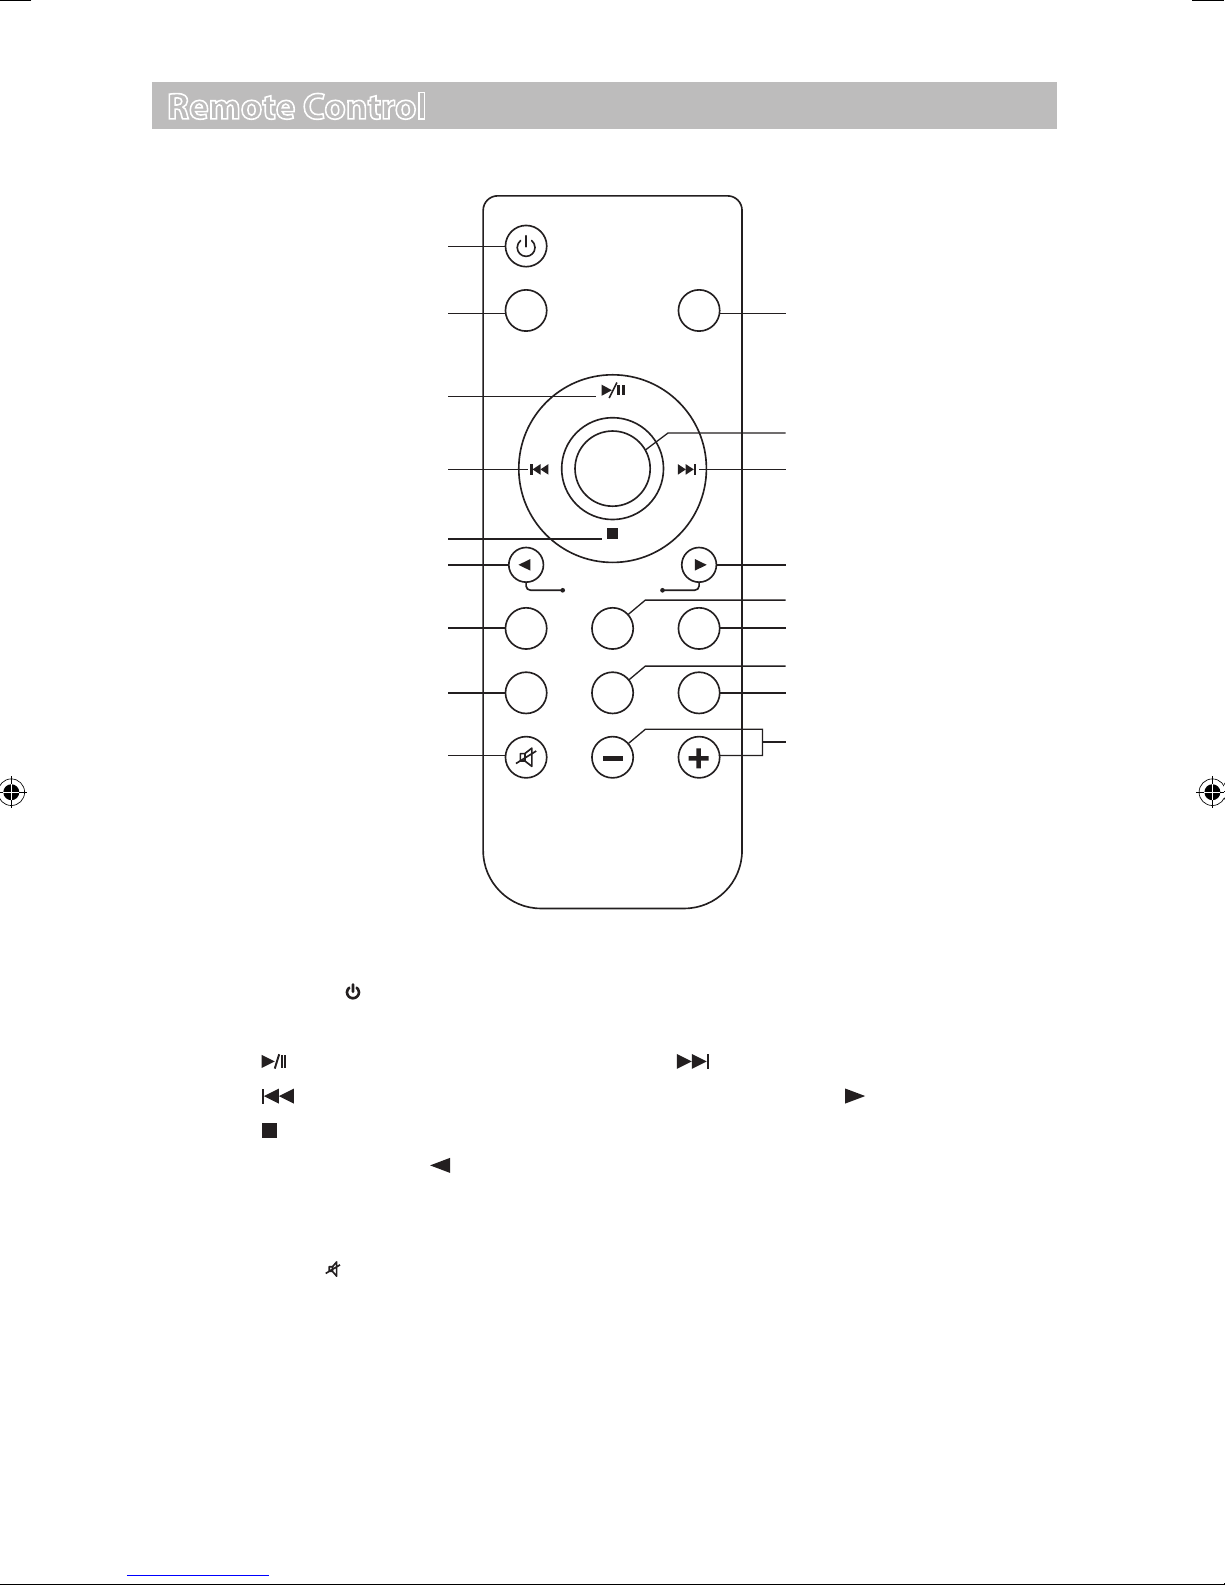
Remote Control
1
ON/OFF
2
DISPLAY
3
ENTER
FUNCTION
10
11
4
5
6
7
REPEAT
8
9
MUTE VOLUME
MODE
MENU
PRESET/FOLDER
RANDOM
INTROEQ
TIMER
SLEEP
12
13
14
15
16
17
18
1. ON/OFF Button
2. DISPLAY Button
3.
4.
5.
ENTER Button
Button
MENU Button
6. PRESET/FOLDER
7. REPEAT Button
8. EQ Button
9. MUTE
Button
8
Button
10. FUNCTION Button
11. MODE Button
12.
Button
13. PRESET/FOLDER
14. RANDOM Button
15. TIMER Button
16. INTRO Button
17. SLEEP Button
18. VOLUME +/– Buttons
Button
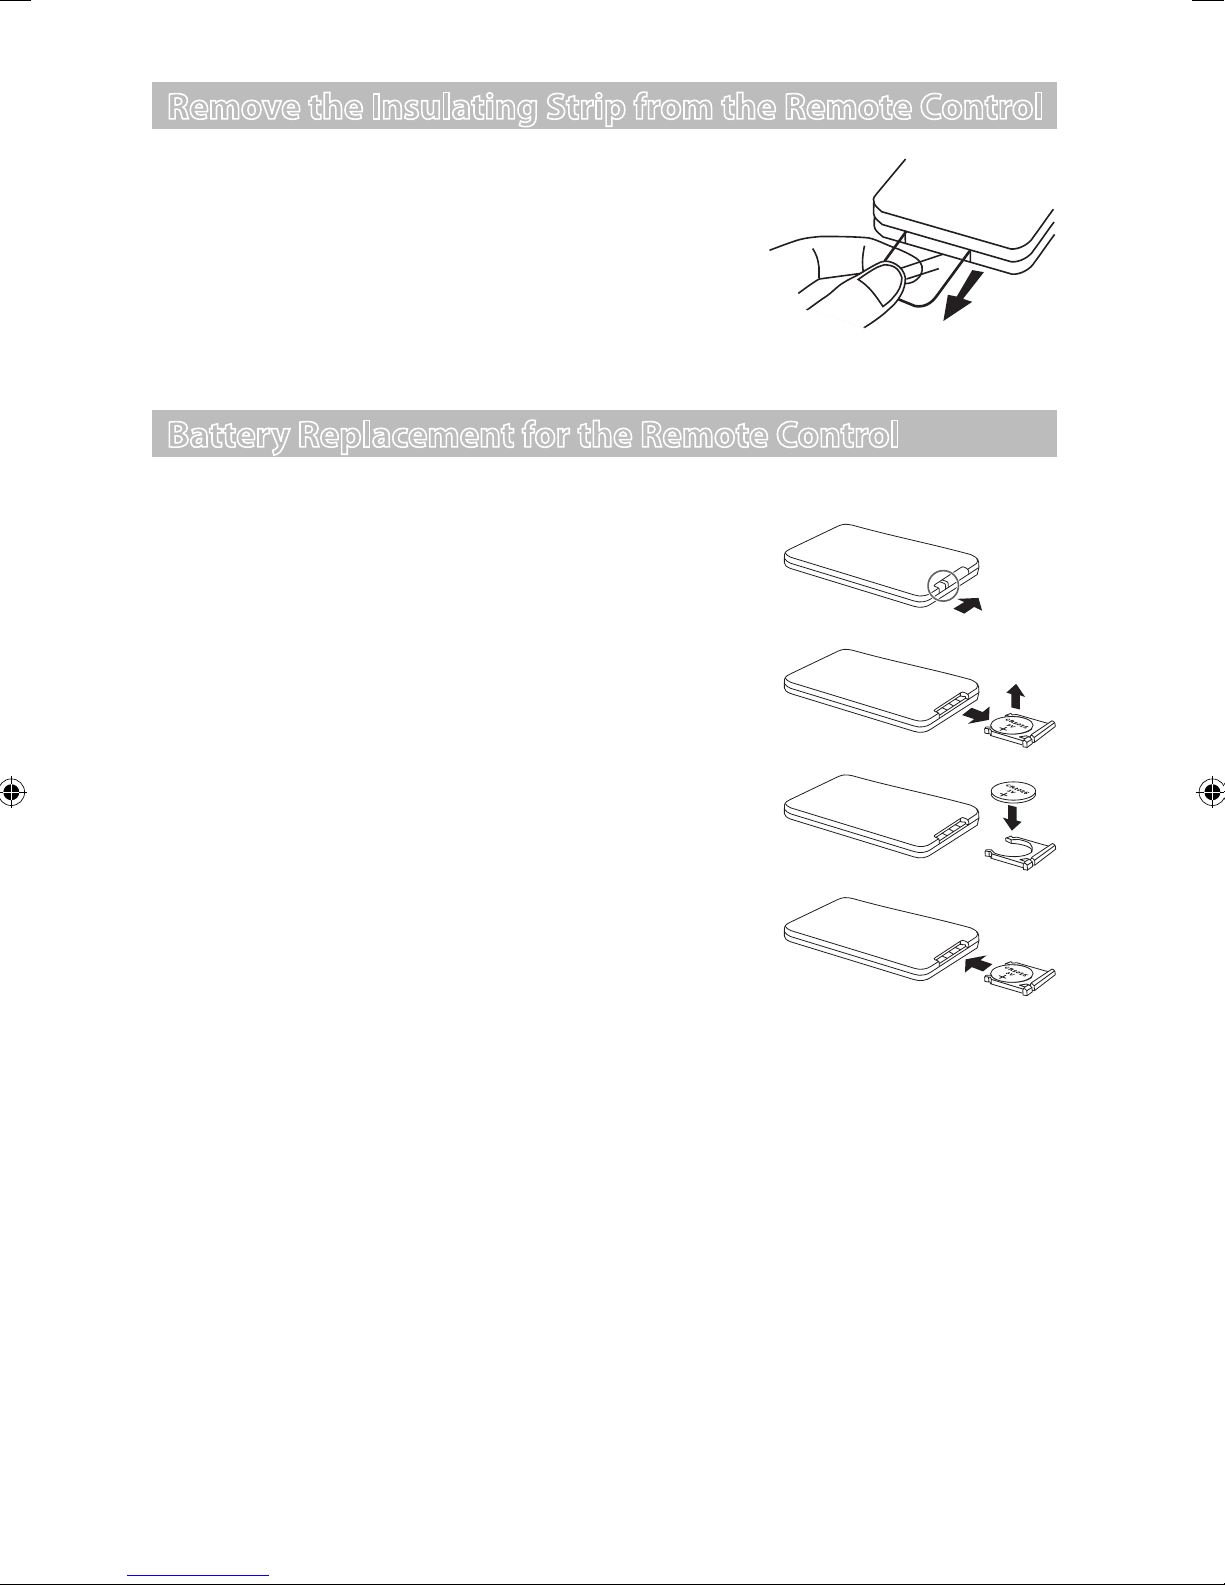
Remove the Insulating Strip from the Remote Control
Remove the insulating mylar strip from the battery if
the battery is being used for the rst time. It is located
at the bottom back side of the remote control.
Battery Replacement for the Remote Control
The remote control requires a CR2032, 3V Lithium battery.
1. Slide and hold the battery release tab in the
direction of the arrow.
2. Pull out the battery holder and remove the old
battery.
3. Replace with a new one battery.
4. Insert the battery holder back into the remote
control.
Handling the Battery
1. Improper or incorrect use of batteries may cause corrosion or battery leakage, which
could cause re, personal injury or damage to property.
2. Install the battery correctly by following the polarity (+ and –) indications in the battery
compartment.
3. When the battery is exhausted, the remote control will not function.
4. Only use the battery type indicated in this manual.
5. Do not dispose of the used battery as domestic waste. Dispose of it in accordance with
the local regulations.
6. Small button cell batteries such as the one used in the remote control are easily
swallowed by young children and this is dangerous. Keep loose button cells away from
young children and make sure that the battery holder tray is secure in the remote control.
Seek medical advice if you believe a cell has been swallowed.
9
Handling the Remote Control
• Take care of your ngernails when you press and hold the battery release tab.
• Do not drop or cause impact to the remote control.
• Do not spill water or any liquid on the remote control.
• Do not place the remote control on a wet object.
• Do not place the remote control under direct sunlight or near sources of excessive heat.
• Remove the battery from the remote control when not in use for a long period of time, as it
could cause corrosion or battery leakage and may result in physical injury and/or property
damage including re.
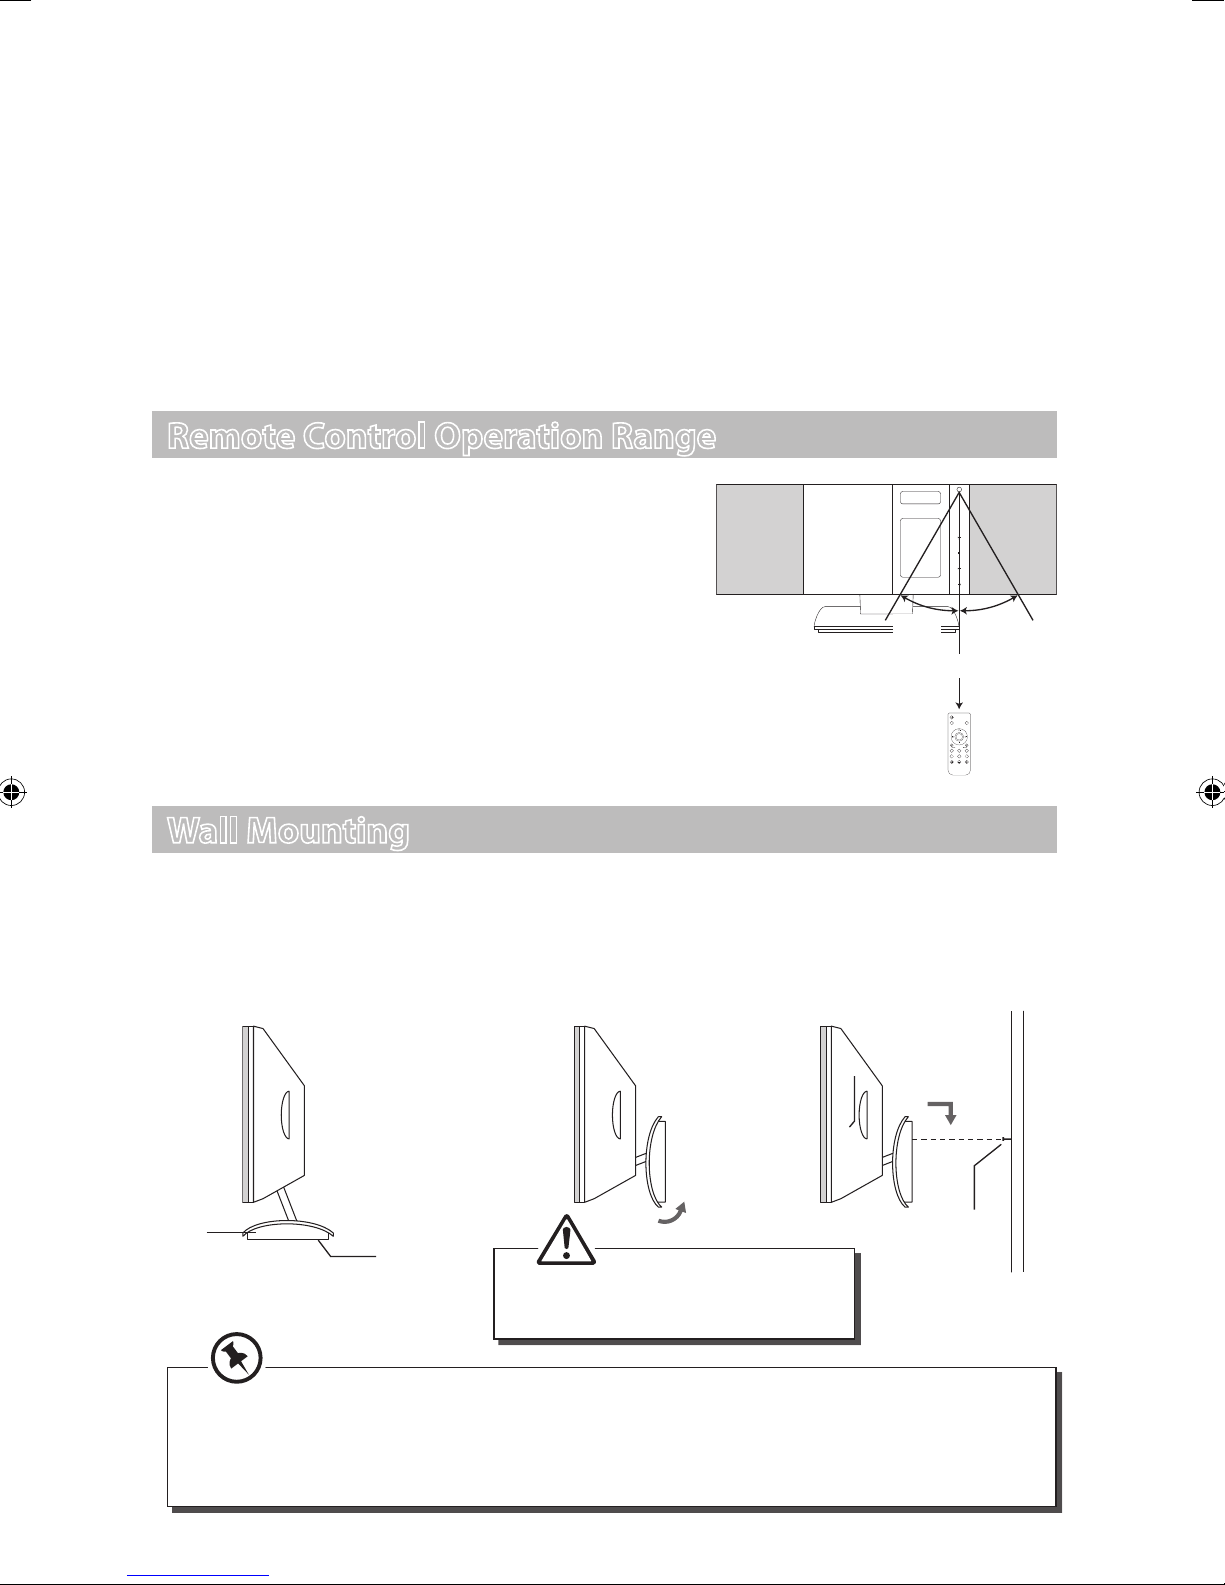
Remote Control Operation Range
Point the remote control at the unit no more than 5
metres from the remote control sensor and within 60°
of the front of the unit. The operating distance may
vary depending on the brightness of the room.
FUNCTION
MODE
ENTER
MENU
SKIP TUNE
SEARCH
30° 30°
Within about 5m
ON/OFF
DISPLAY
FUNCTION
ENTER
MODE
MENU
PRESET/FOLDER
REPEAT
TIMER
RANDOM
SLEEP
INTROEQ
MUTE VOLUME
Wall Mounting
Fix the two screws (Size: 3.5*25BA) (not included) onto the wall. They should be parallel to each
other. The distance between the two screws should be 140 mm.
Flip the base stand upward and attach the mounting hold to the screws by following the arrow
direction to mount the unit onto the wall.
Mounting
hold
Base
stand
Mounting
hold
The wall where the Base stand unit is to be installed must be capable of long-term
support of the total load of the Hi-Fi System unit. Measures should also be taken to
ensure sucient strength to withstand the force of earthquakes, vibrations and other
external forces. Incorrect installation can cause the Hi-Fi System to fall and cause injury.
10
Screw
Please mind your ngers when
ipping or adjusting the stand.
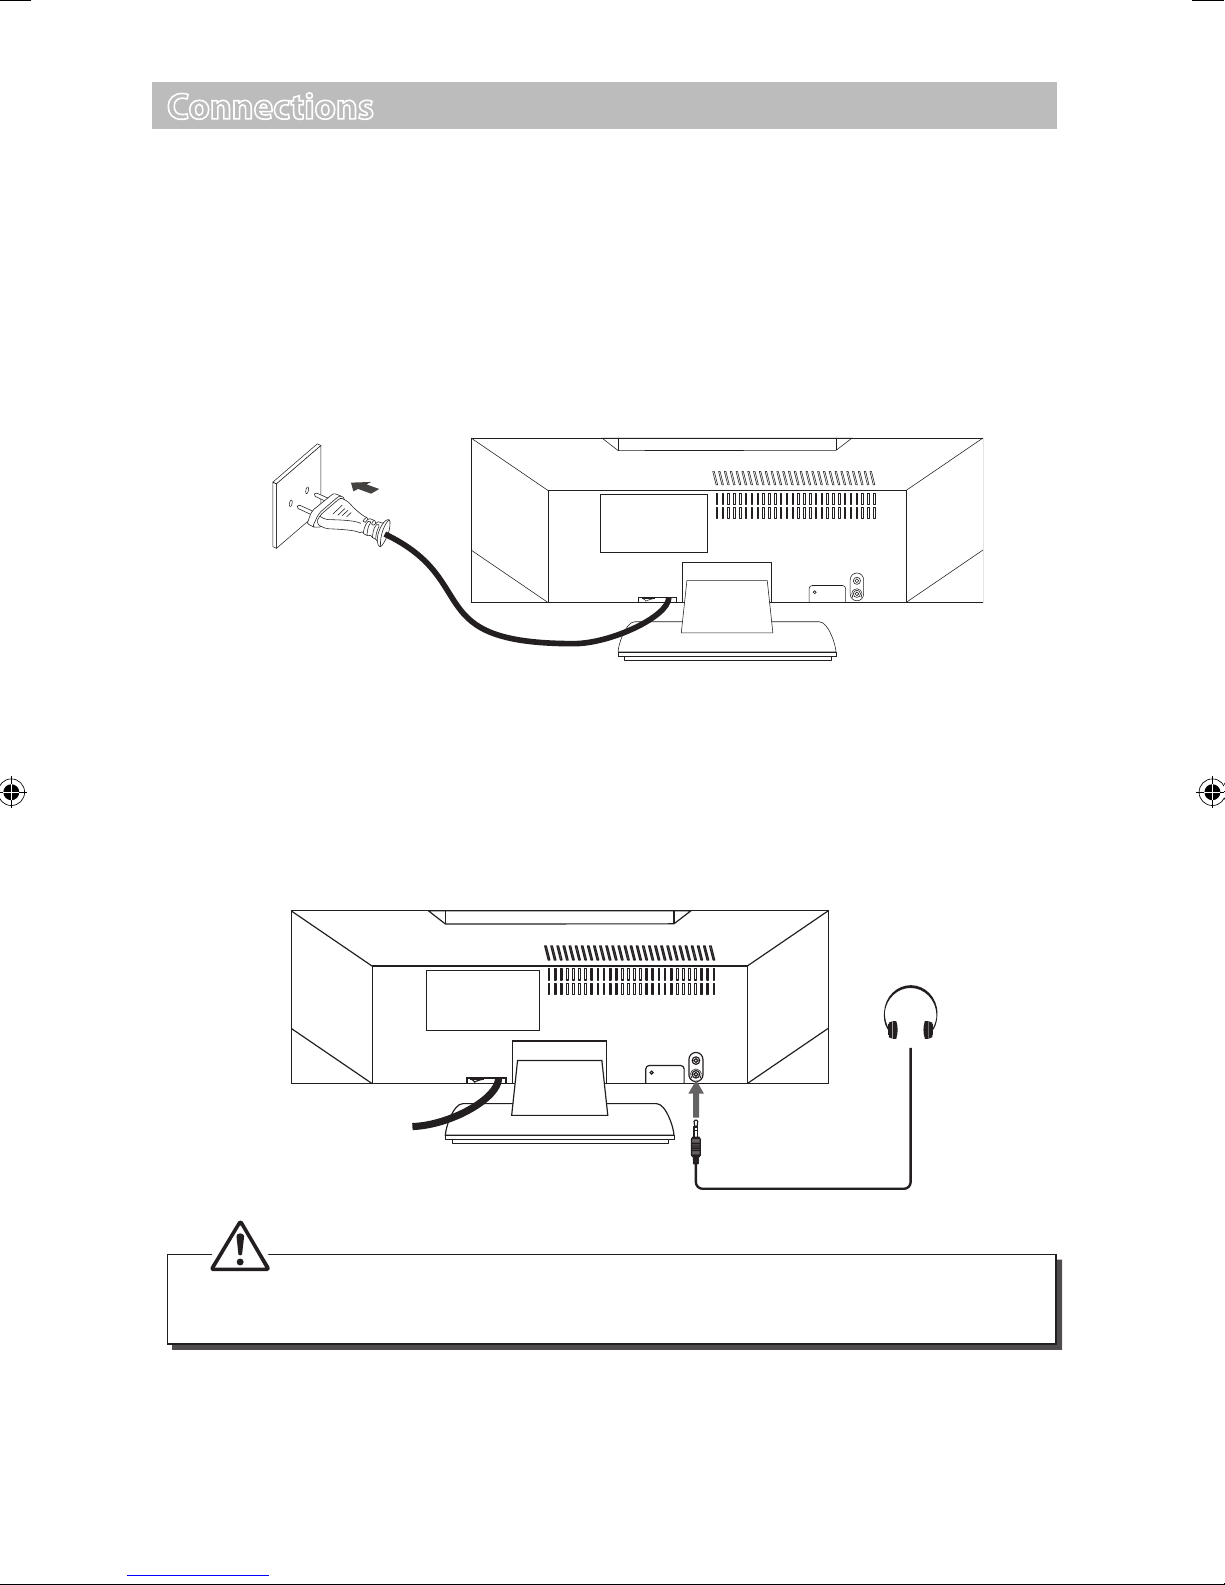
Connections
Mains Power
• This unit was designed to operate with an AC 230-240V ~50Hz power supply.
• Connecting the unit to any other power source may cause damage to the unit. Unwind
the mains cable to its full length. Connect the mains plug to a mains socket. Make sure the
mains plug is fully inserted into the mains socket. The unit is now connected and ready to
use.
• To switch the unit o completely, switch the POWER ON/OFF switch to the OFF position or
withdraw the mains plug from the mains socket.
LINE IN
AC~
FM ANT.
Using Earphones
Turn down the volume before connecting the earphones. Slowly raise the volume with the
earphones on until you reach your desired volume. When earphones are connected, the
speaker is automatically muted.
Rear Side of the unit
LINE IN
AC~
Long-term exposure to loud music may cause hearing damage. It if best to avoid
extreme volume when using earphones, especially for extended periods.
FM ANT.
11
 Loading...