

Page 1
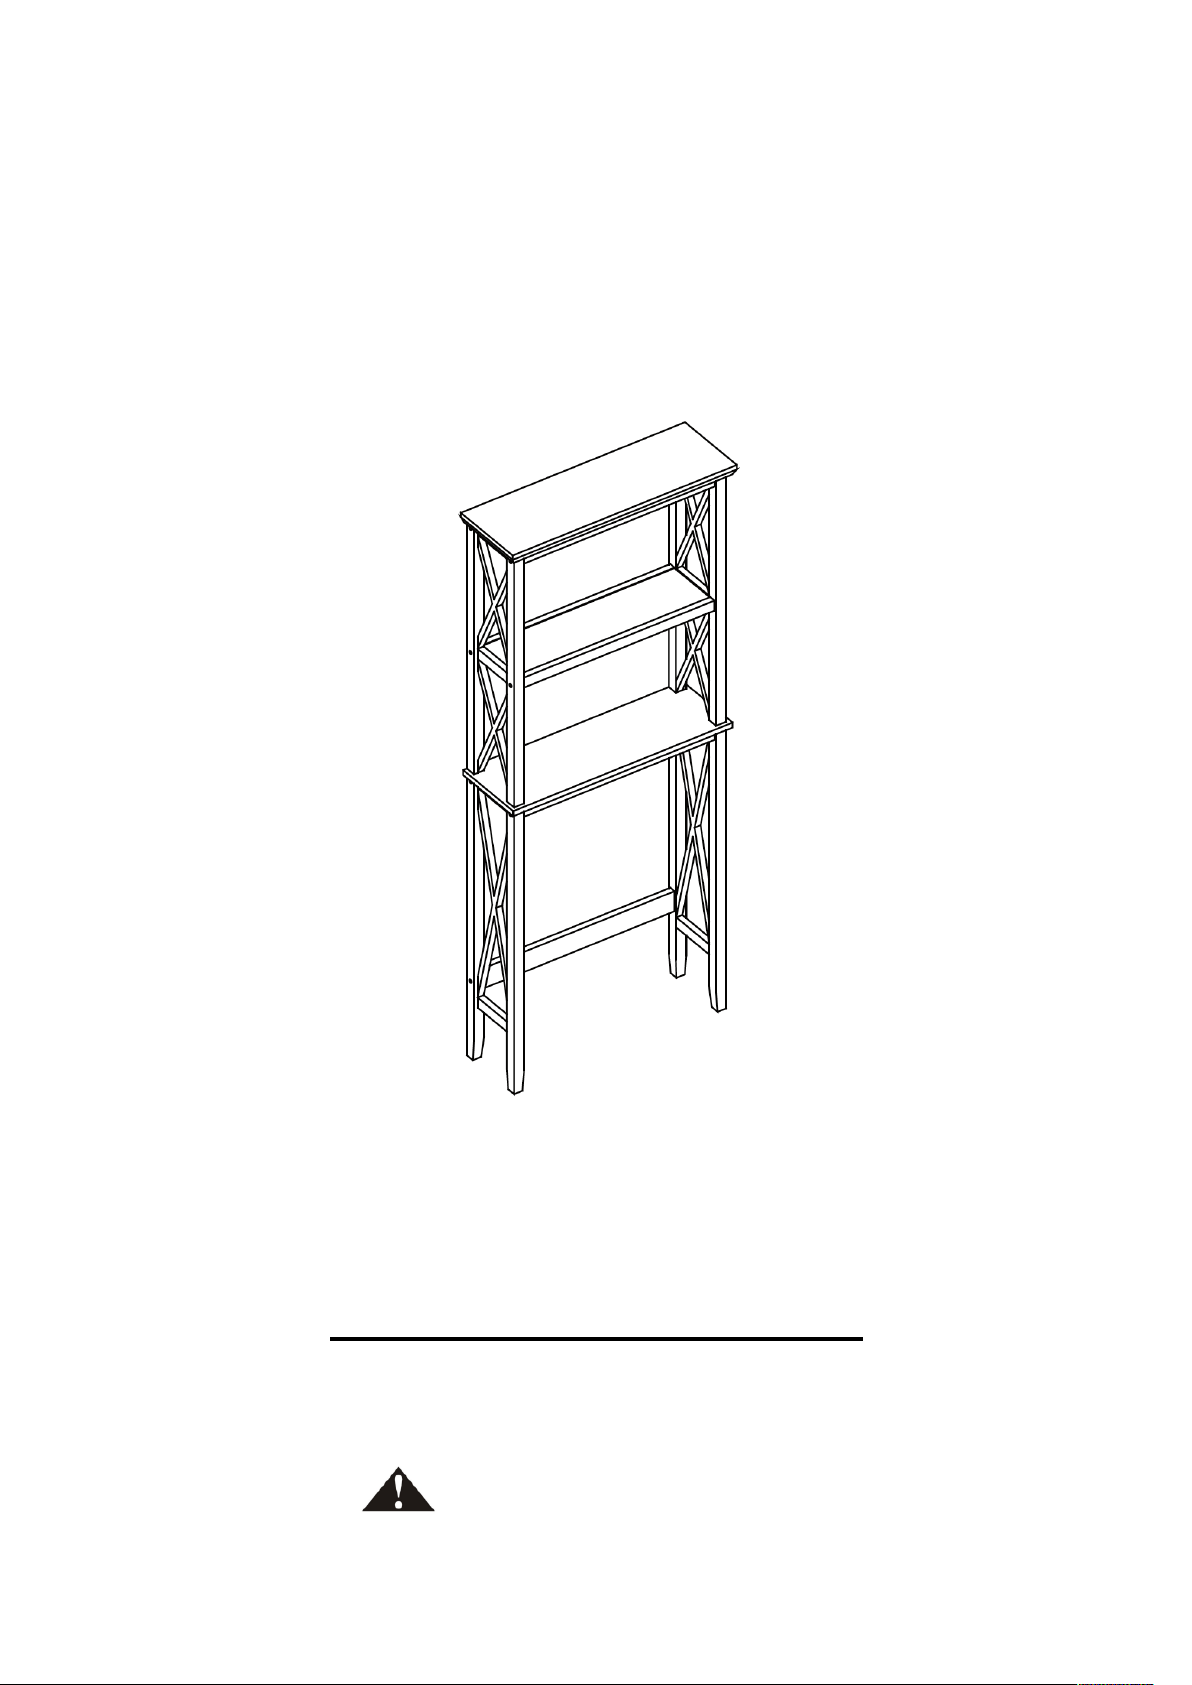
ASSEMBLY INSTRUCTIONS
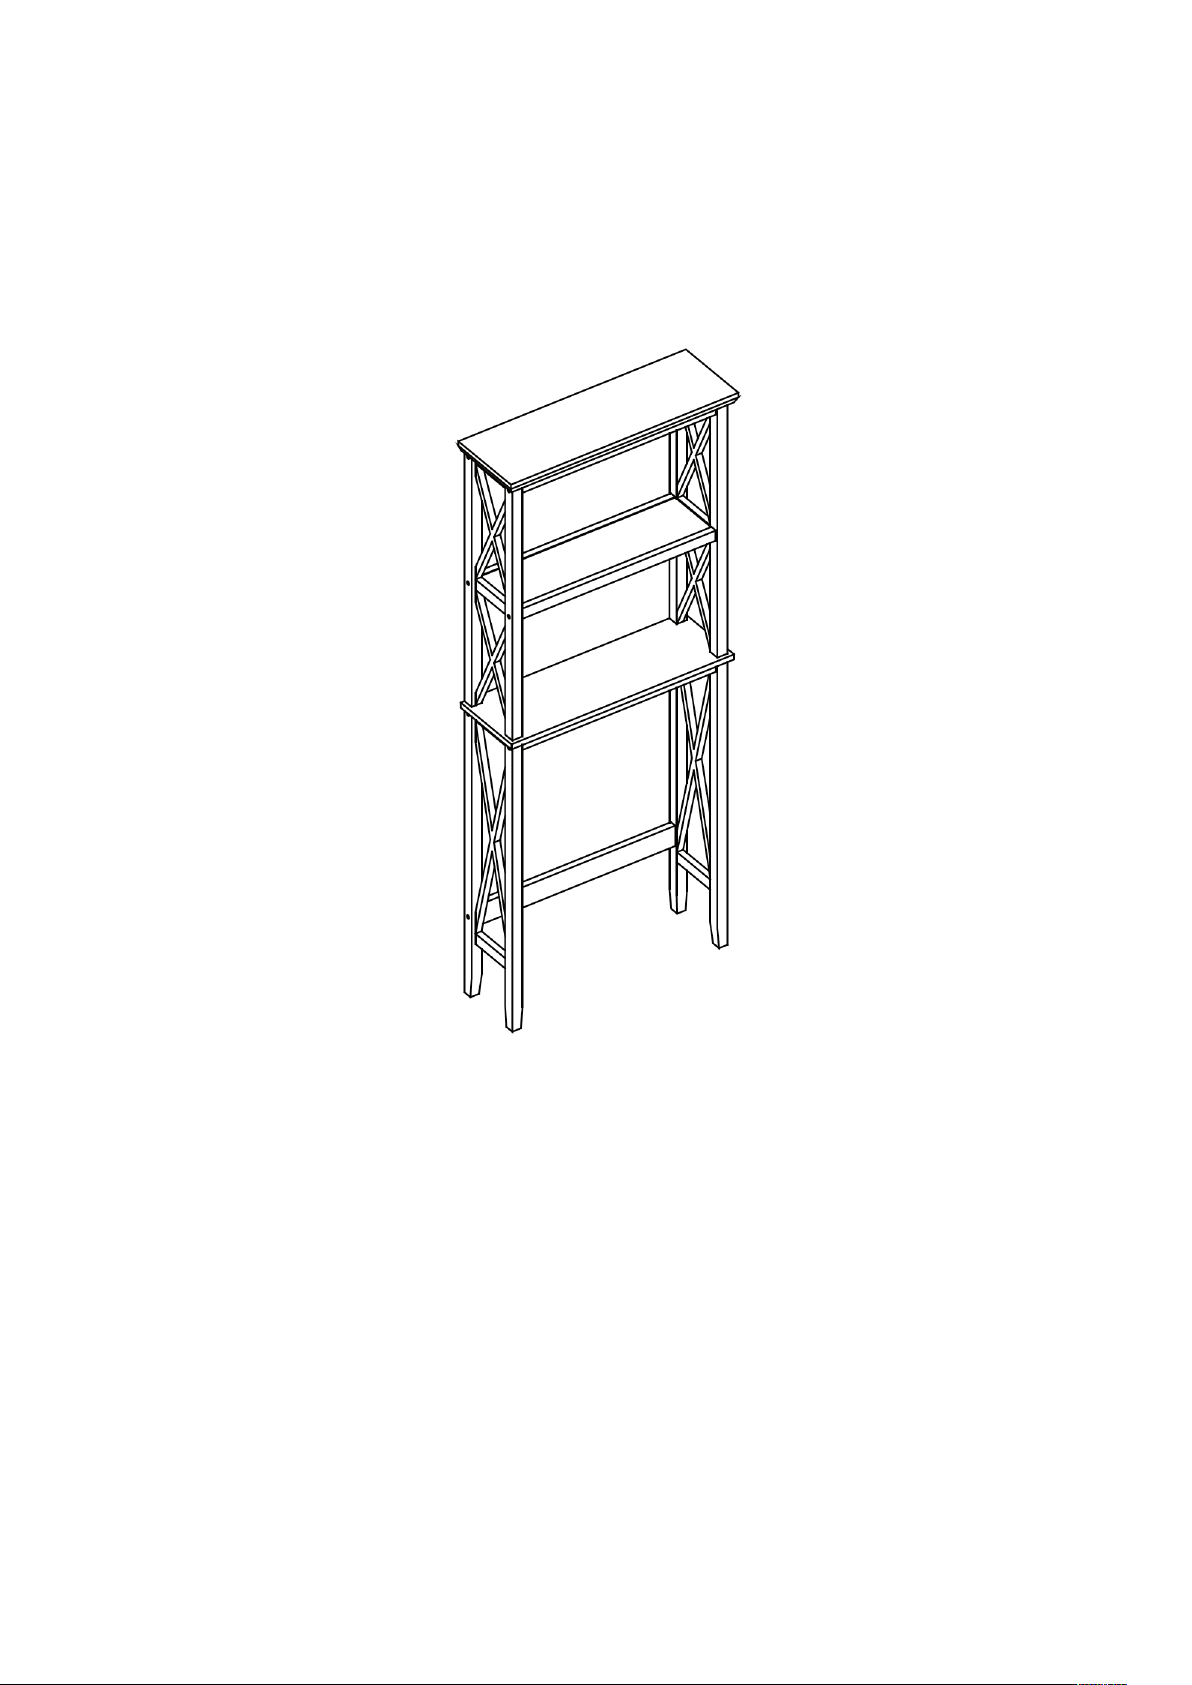
X-Frame Bath Spacesaver
ADULT ASSEMBLY REQUIRED
This product requires assembly by an adult because of small parts. Care should be taken
in unpacking and assembling this item to keep small parts away from children. During assembly
children should be kept away from the product due to possible risk of injury.
WARNING SEE FULL WARNING ON PAGE 2
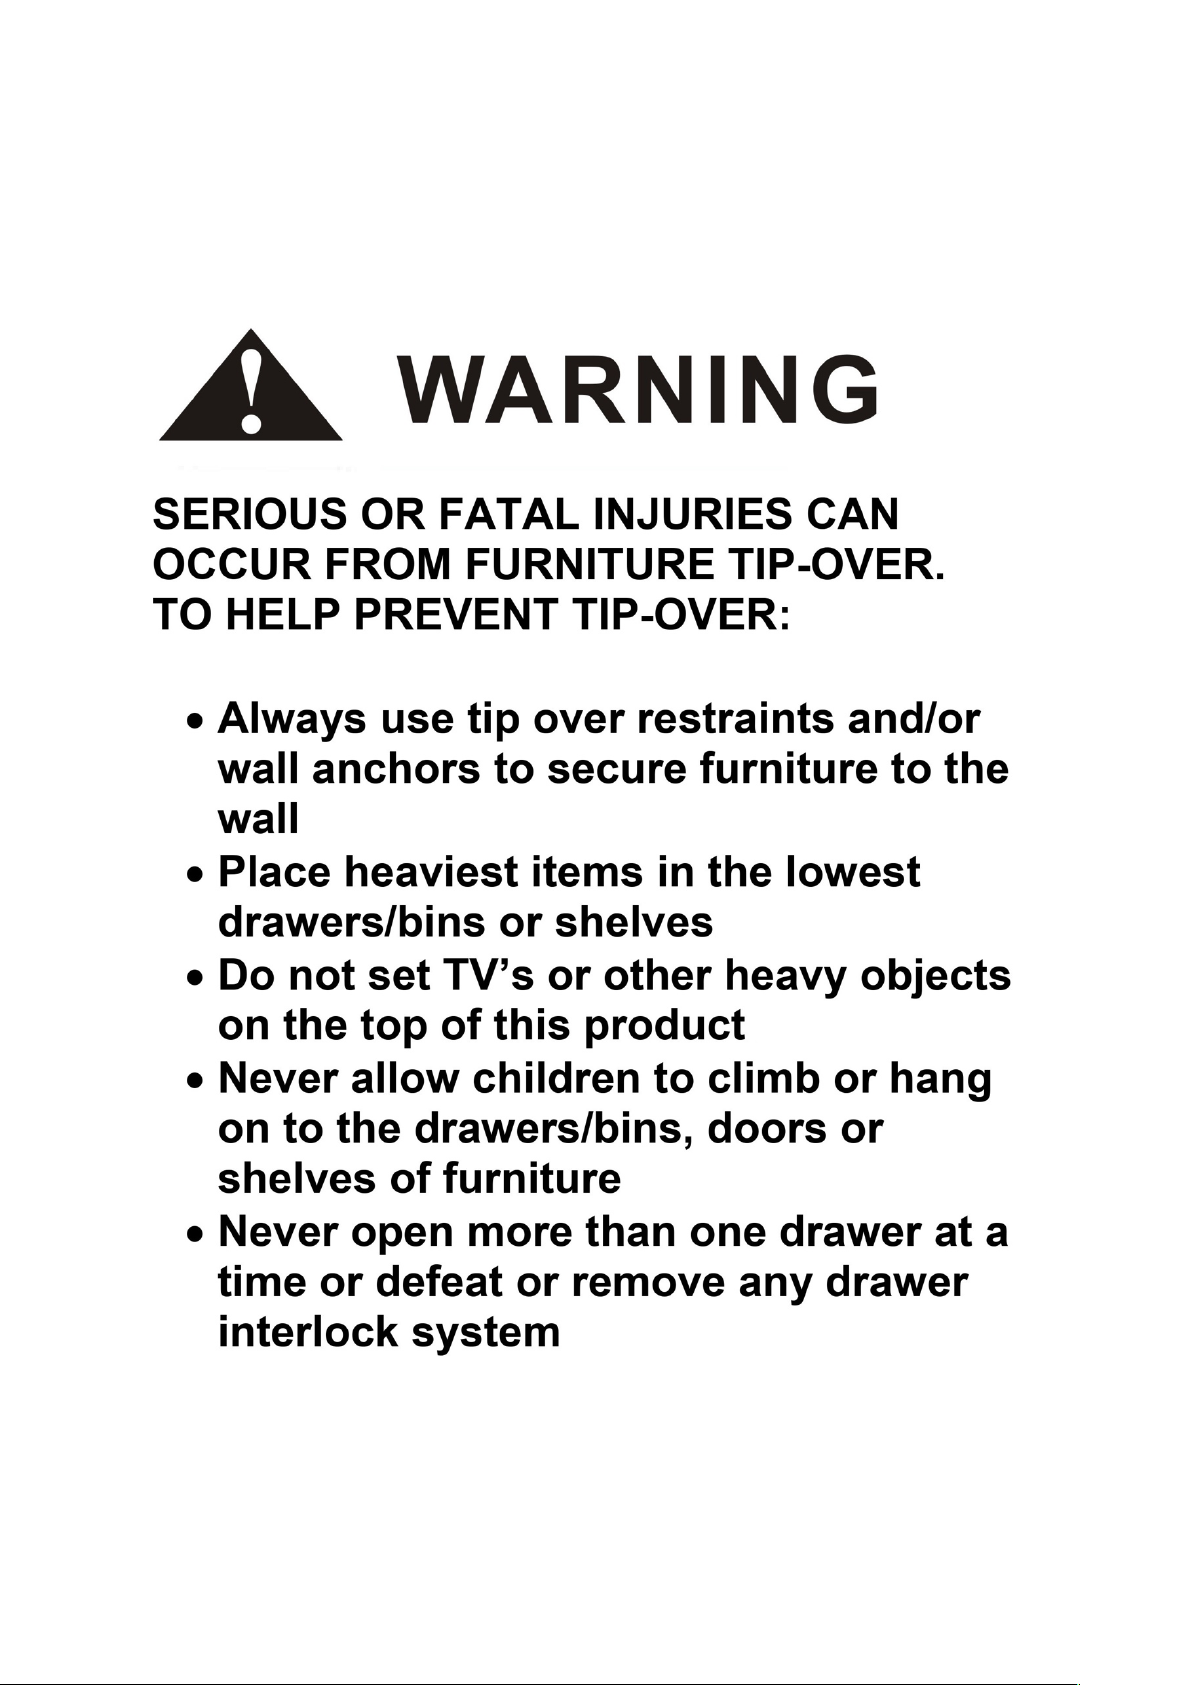
Young children can be seriously injured or killed if furniture tips over. Don’t use
this item for a TV stand or place heavy objects on top of item. Always use
angle-braces or anchors to secure furniture to the wall.
Page 2
THIS SHELF UNIT WILL HOLD UP TO 25 POUNDS PER SHELF OR A TOTAL OF 75 POUNDS.
DO NOT LOAD EACH SHELF WITH MORE THAN 25 POUNDS OR 75 POUNDS TOTAL
WEIGHT. IF OVERLOADED WITH MORE THAN 25 POUNDS PER SHELF OR 75 POUNDS
TOTAL WEIGHT, THIS MAY CAUSE DAMAGE TO THE SHELF AND MAY CAUSE SERIOUS
INJURY OR DEATH.
Page 3
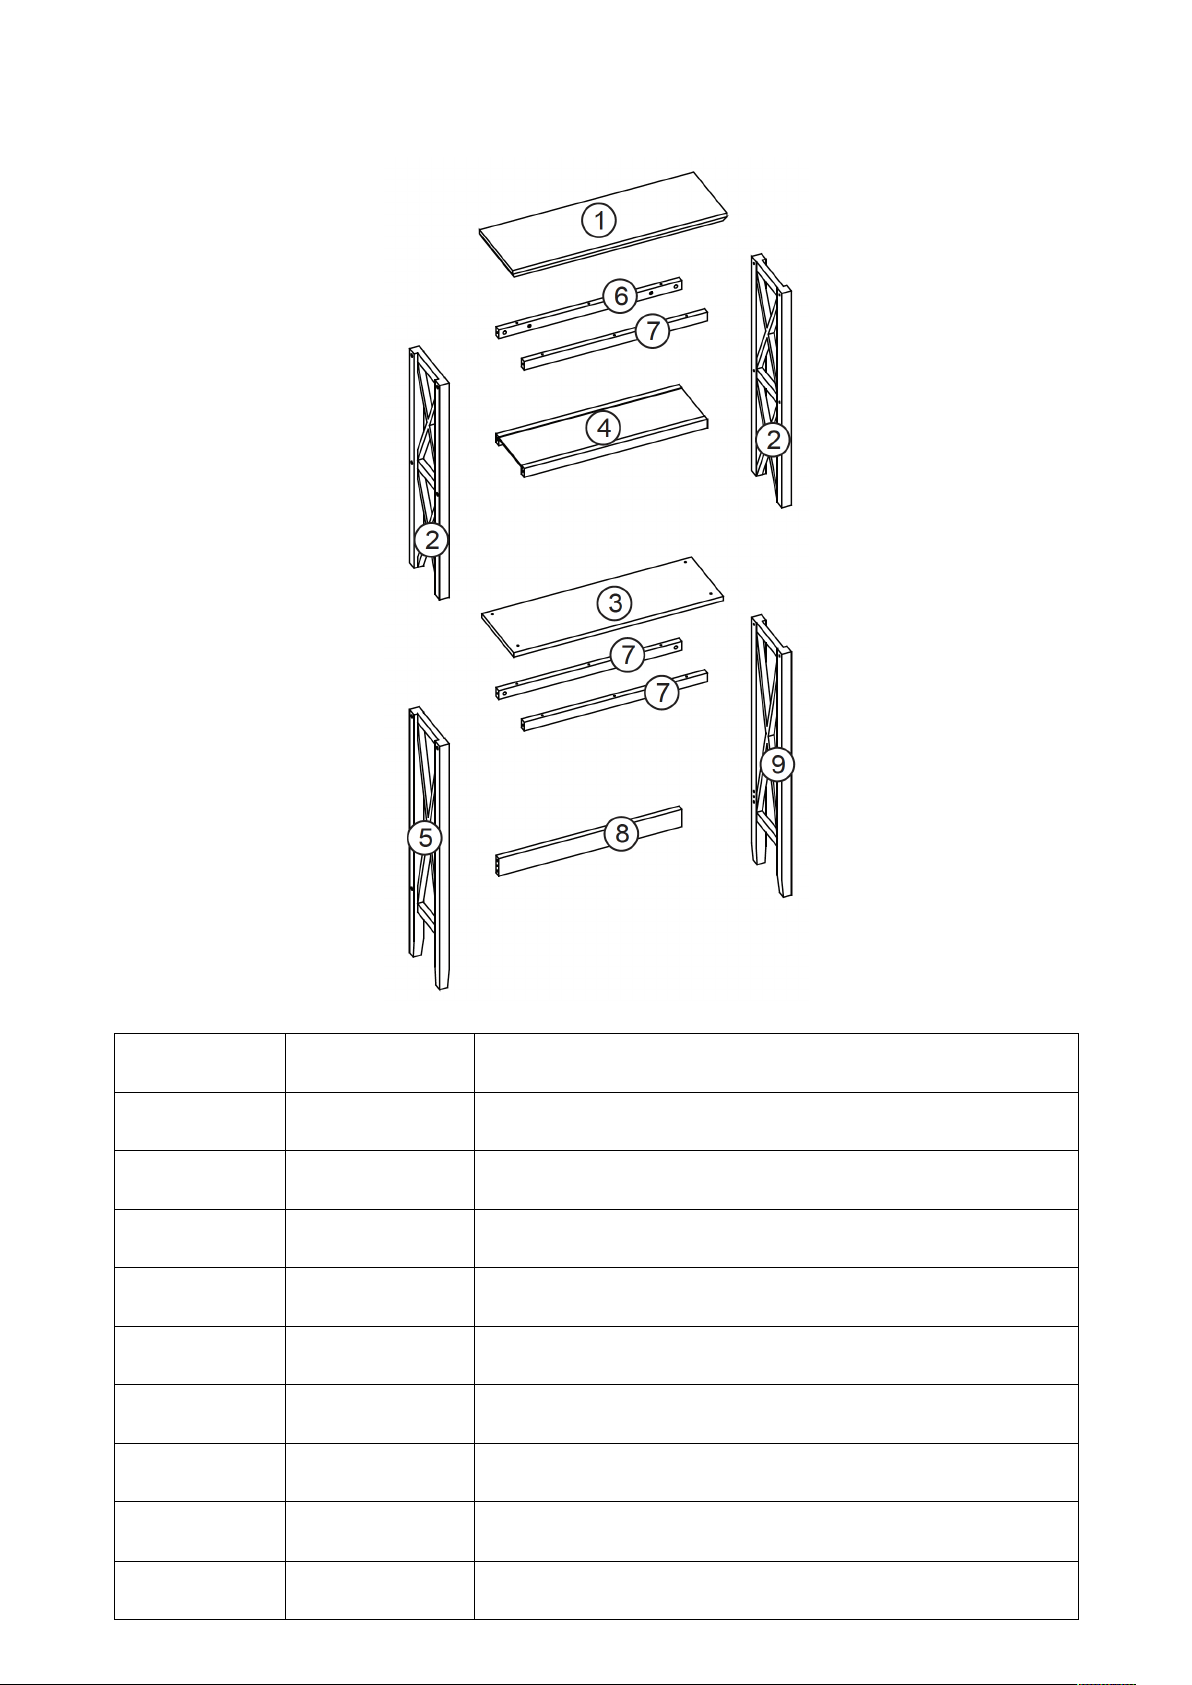
PARTS LIST
NO
QTY
DESCRIPTION
1
1PC
Top Board
2
2PCS
Upper Side Frame
3
1PC
Bottom Board
4
1PC
Shelf
5
1PC
Lower Left Side Frame
6
1PC
Upper Rear Cross Bar
7
3PCS
Cross Bar
8
1PC
Lower Rear Cross Bar
9
1PC
Lower Right Side Frame
Page 4
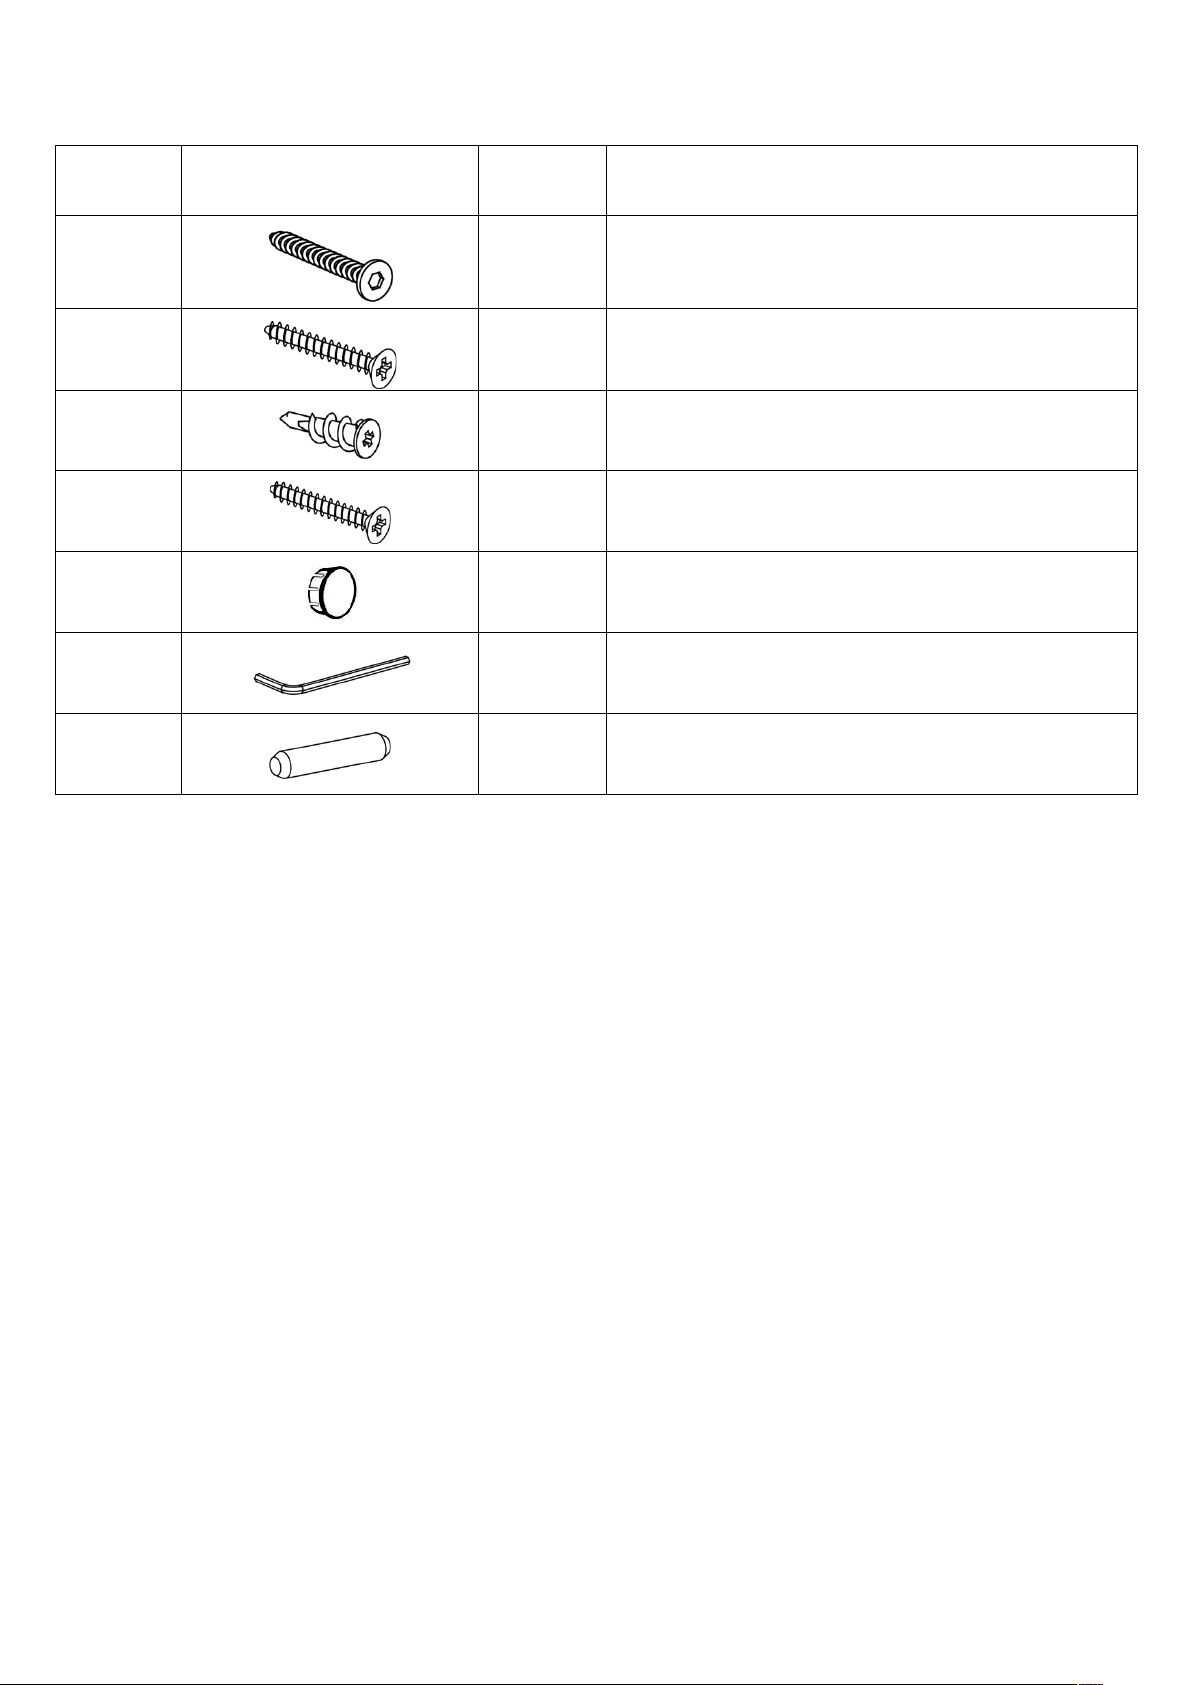
PARTS LIST
NO
PARTS
QTY
DESCRIPTION
A
18PCS
Screw (5x45mm)
B
12PCS
Screw (4x35mm)
C
2PCS
Plastic Anchor
D
2PCS
Screw (4x60mm)
E
14PCS
Plastic Cap
F
1PC
Allen Wrench
G
4PCS
Wood Dowel
TOOLS NEEDED FOR ASSEMBLY: PHILIPS SCREWDRIVER (NOT INCLUDED)
THE USE OF A POWER SCREWDRIVER IS NOT RECOMMENDED FOR ASSEMBLY
DO NOT USE ITEM IF ANY PARTS ARE MISSING OR DAMAGED
Page 5
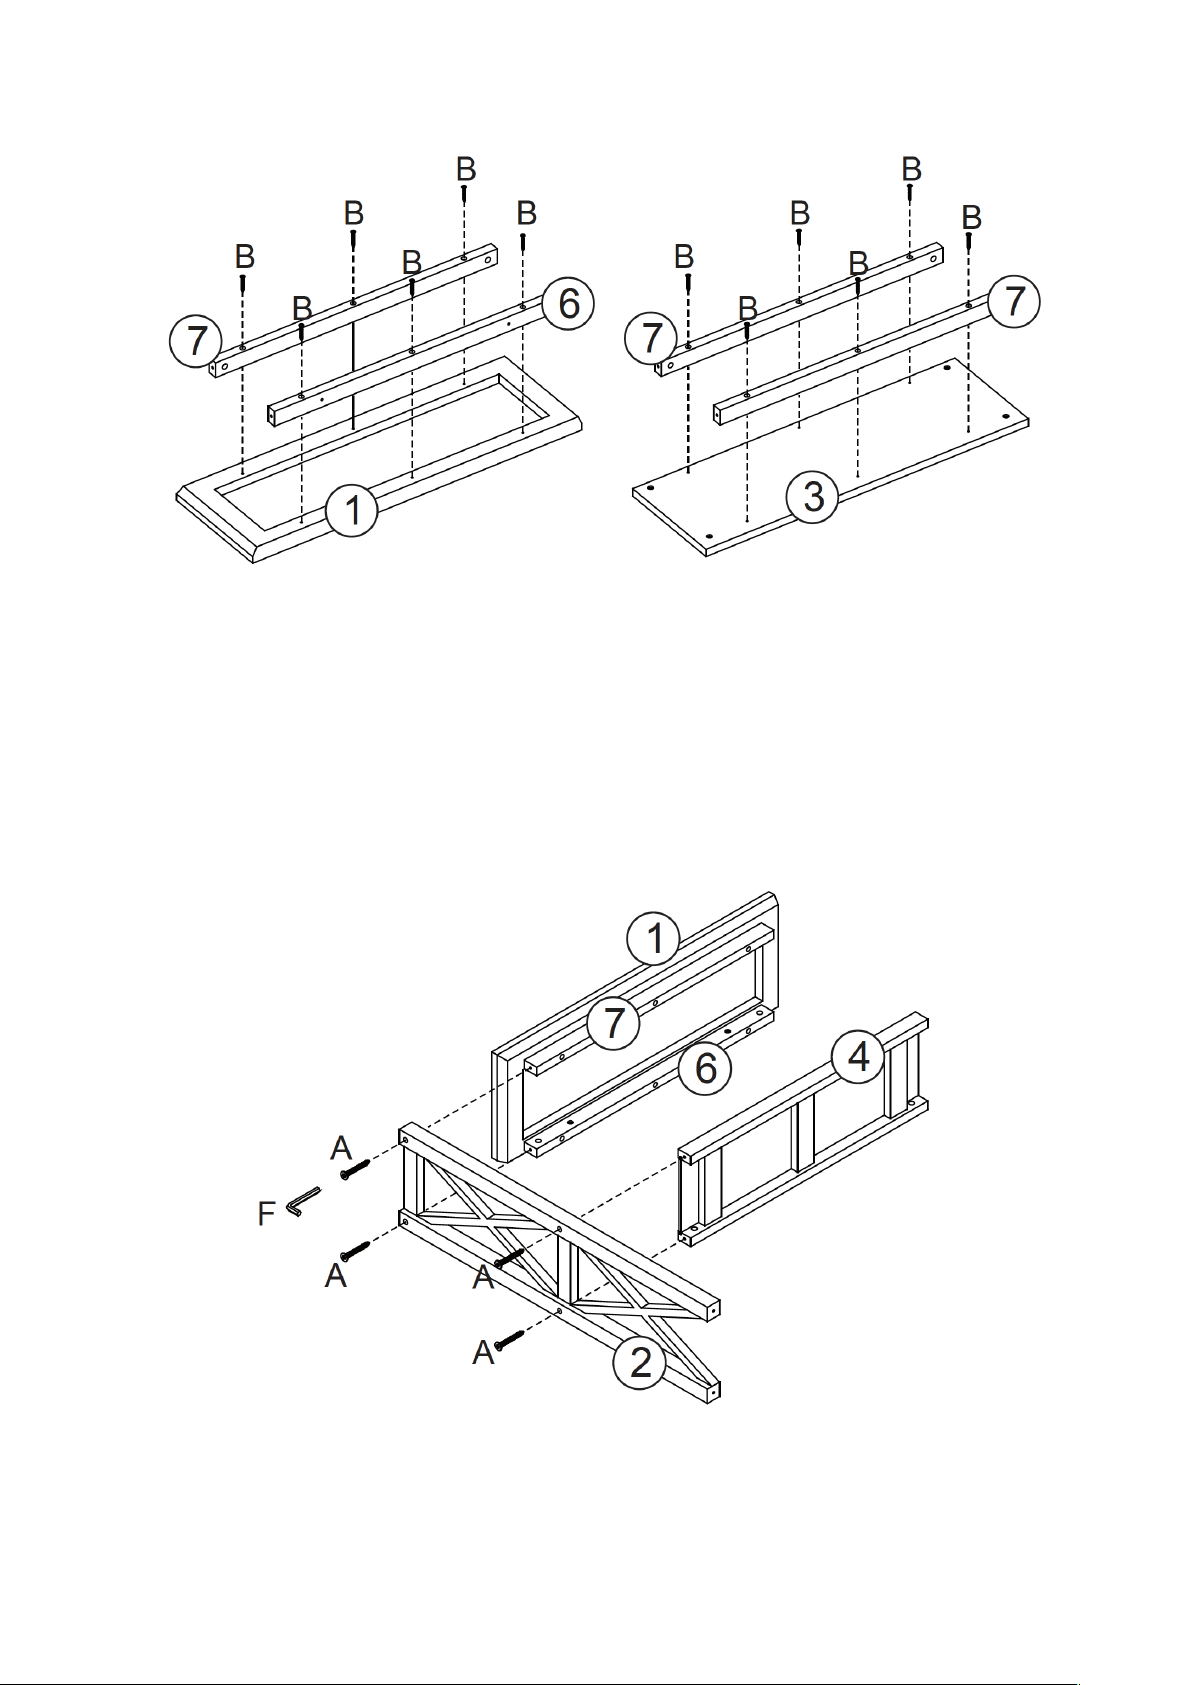
STEP 1
1. Place top board (1) and bottom board (3) upside down on a soft padded surface.
2. Attach upper rear cross bar (6) to top board (1) by inserting 3 screws (B) through holes
on upper rear cross bar (6) and tighten to top board (1).
3. Repeat step above to assemble 1 cross bar (7) to top board (1).
4. Attach 1 cross bar (7) to bottom board (3) by inserting 3 screws (B) through holes on
cross bar (7) and tighten to bottom board (3).
5. Repeat step above to assemble other cross bar (7) to bottom board (3).
STEP 2
1. Attach 1 upper side frame (2) to top board (1) by inserting 2 screws (A) through holes on
upper side frame (2), then tighten to upper rear cross bar (6) and cross bar (7) by using
Allen wrench (F). When tightening, slightly push screw in to catch inner thread.
2. Attach shelf (4) to upper side frame (2) by inserting 2 screws (A) through holes on upper
side frame (2) and tighten to shelf (4) by using Allen wrench (F).
Page 6
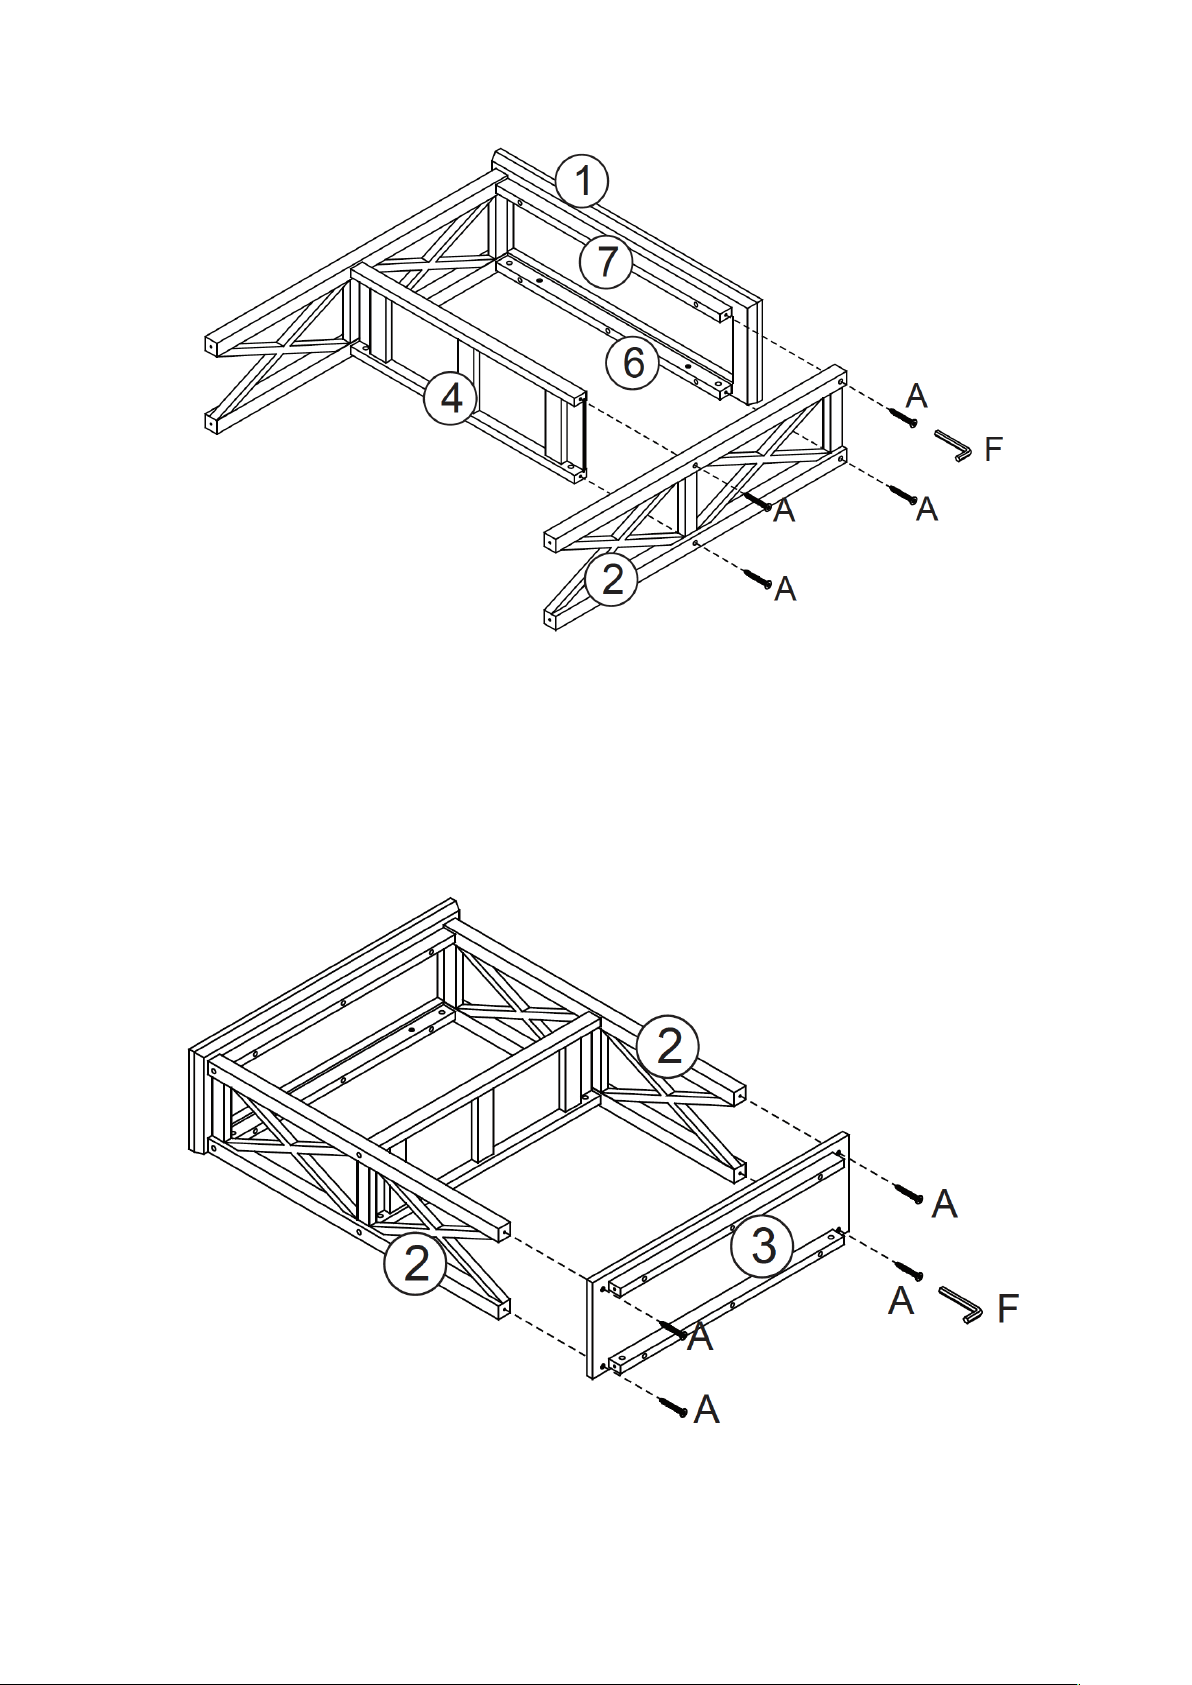
STEP 3
1. Repeat Step 2 to assemble other upper side frame (2).
STEP 4
1. Attach bottom board (3) to bottom side of 2 upper side frames (2) by inserting 4 screws (A)
through holes on bottom board (3), then tighten to 2 upper side frames (2) with Allen
wrench (F).
Page 7
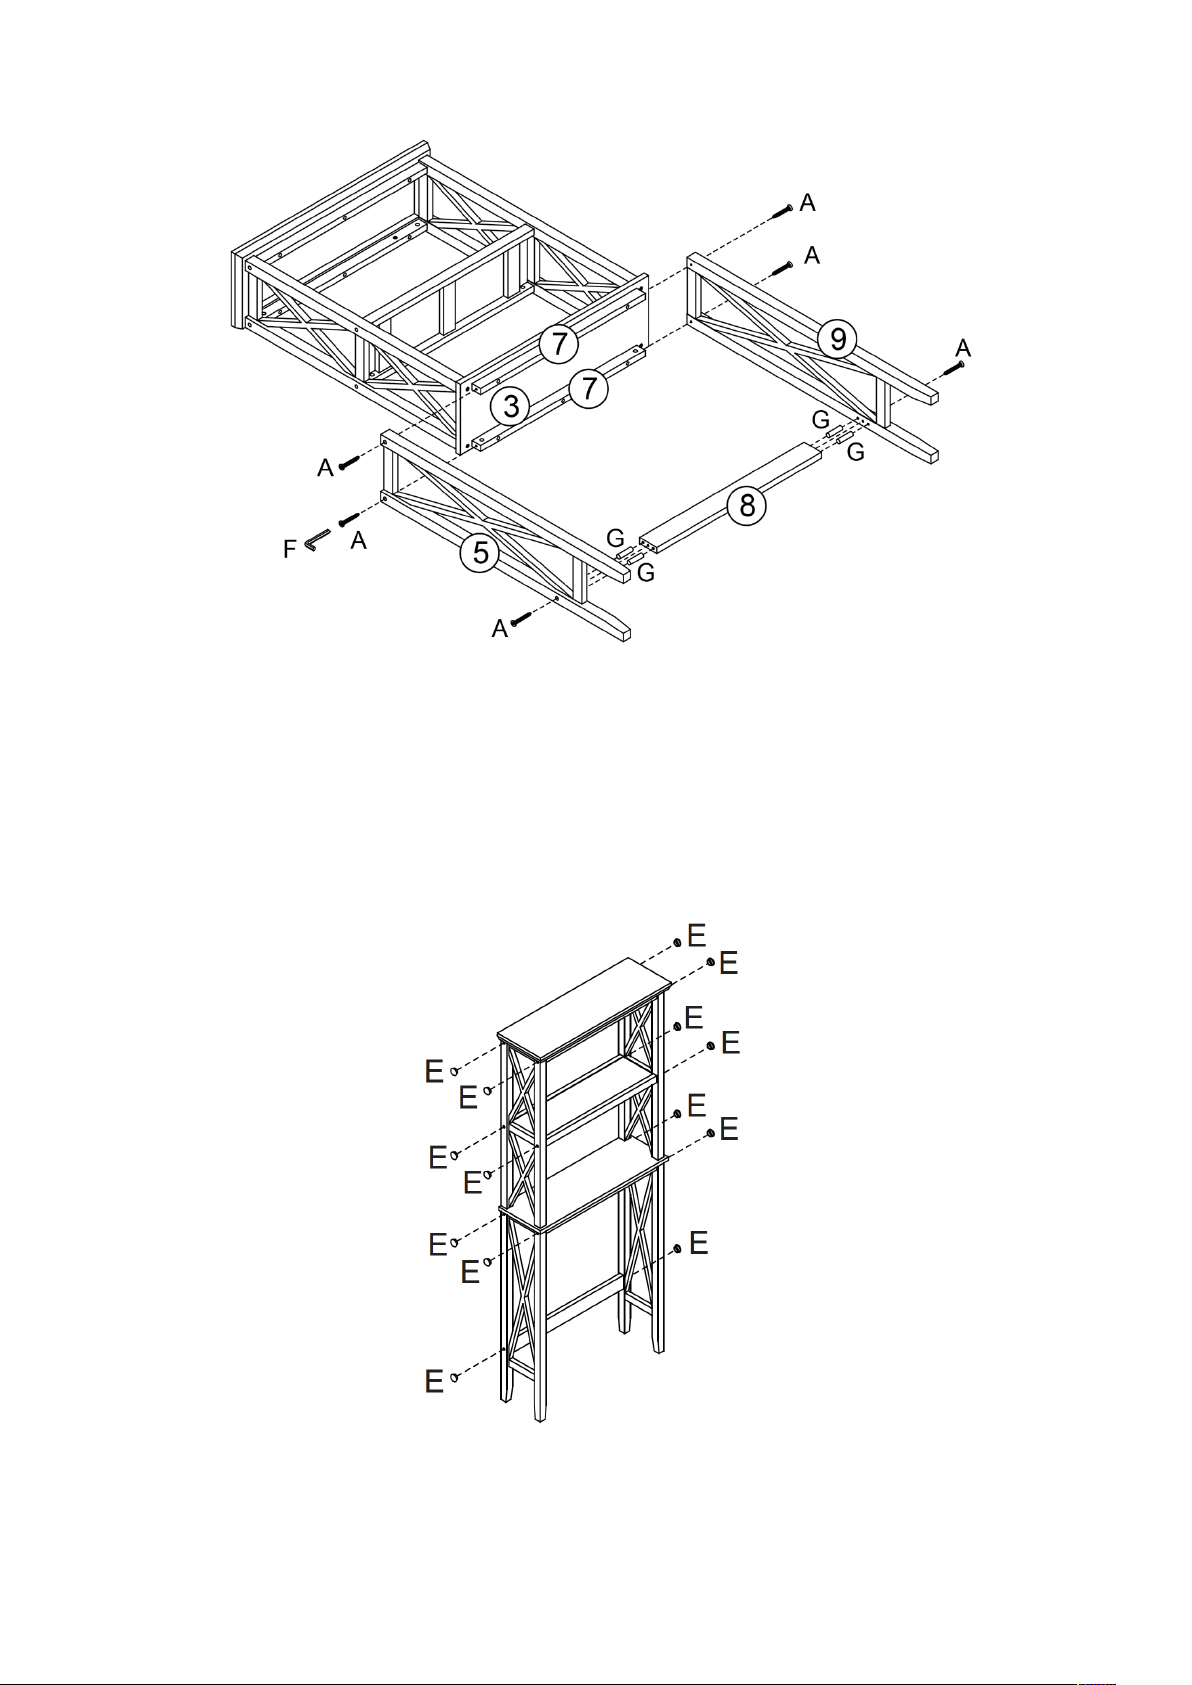
STEP 5
1. Insert 4 wooden dowels (G) into holes on lower rear cross bar (8).
2. Attach 1 lower left side frame (5) to bottom board (3) and lower rear cross bar (8) by
inserting wooden dowels (G) into holes on lower left side frame (5) and inserting 3 screws
(A) through holes on lower left side frame (5), then tighten to 2 cross bars (7) on bottom
board (3) and lower rear cross bar (8) with Allen wrench (F).
3. Repeat above steps to assemble lower right side frame (9) to 2 cross bars (7) on bottom
board (3) and lower rear cross bar (8).
STEP 6
1. Press 14 plastic caps (E) into screw holes on both upper side frames (2) and both lower
side frames (5).
*Tip: If added pressure is needed to keep plastic caps in place – cover caps with a piece of paper and tap
lightly with hammer to secure cap.
Page 8
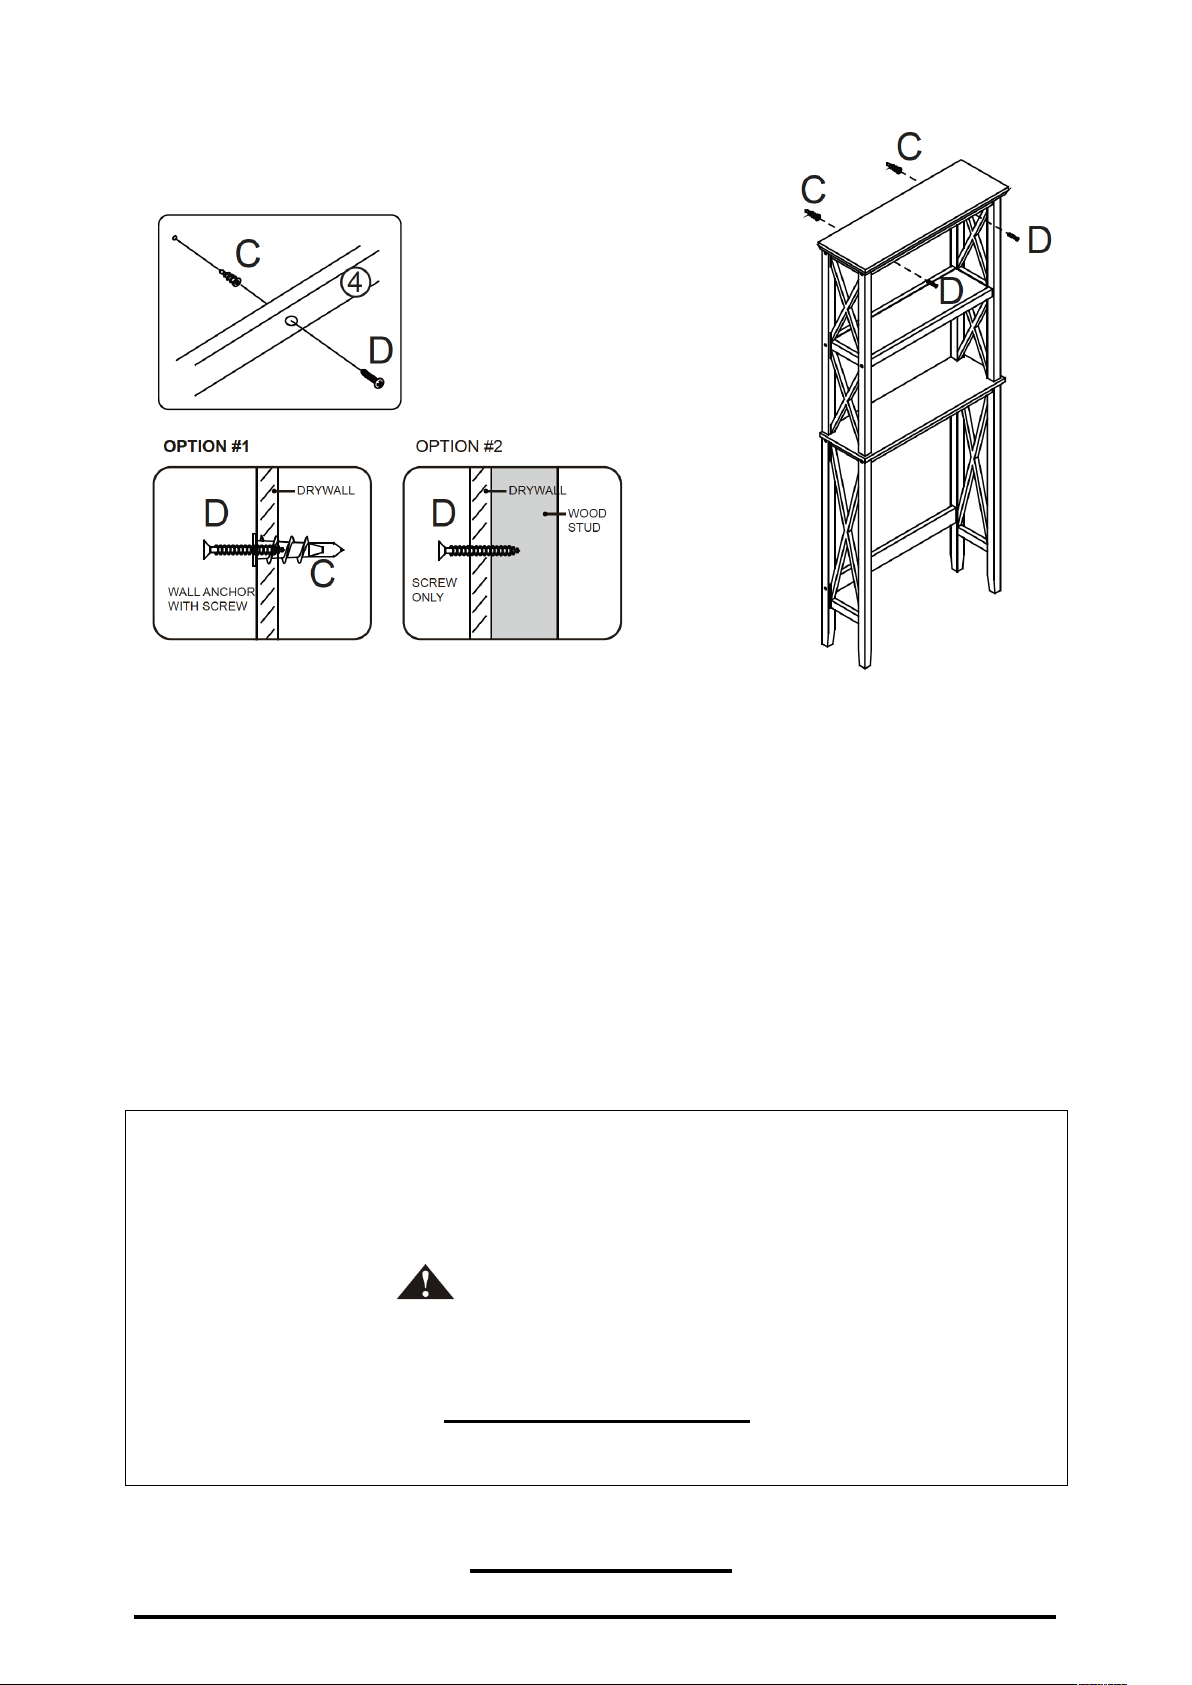
STEP 7
ATTENTION ADULTS: Cabinet should be checked periodically for damage or
loose screws/parts. Take appropriate action necessary to correct hazards such as
tightening of screws and taking any damaged parts away from children.
WARNING Please make sure your item is
secured to the wall, per assembly instructions.
CARE INSTRUCTIONS:
Wipe clean with a water dampened cloth. Wipe dry with clean cloth.
Option #1: Securing to Drywall
1. Position shelf against wall in desired location. Using a pencil, make 2 small marks on wall
through holes on inside of shelf. Move shelf away from wall and screw 2 plastic anchors (C)
into wall on pencil marks.
2. Place shelf against wall, insert 2 screws (D) through holes on inside of shelf, then tighten to
plastic anchors (C).
Option #2: Securing to Drywall and Wood Stud
1. Position shelf against wall in desired location. Insert 2 screws (D) through holes on inside of
shelf, then tighten through drywall and into wood stud.
IMPORTANT:
Keep assembly instructions for future reference.
Page 9
Enjoy your new Spacesaver!
 Loading...