

Page 1
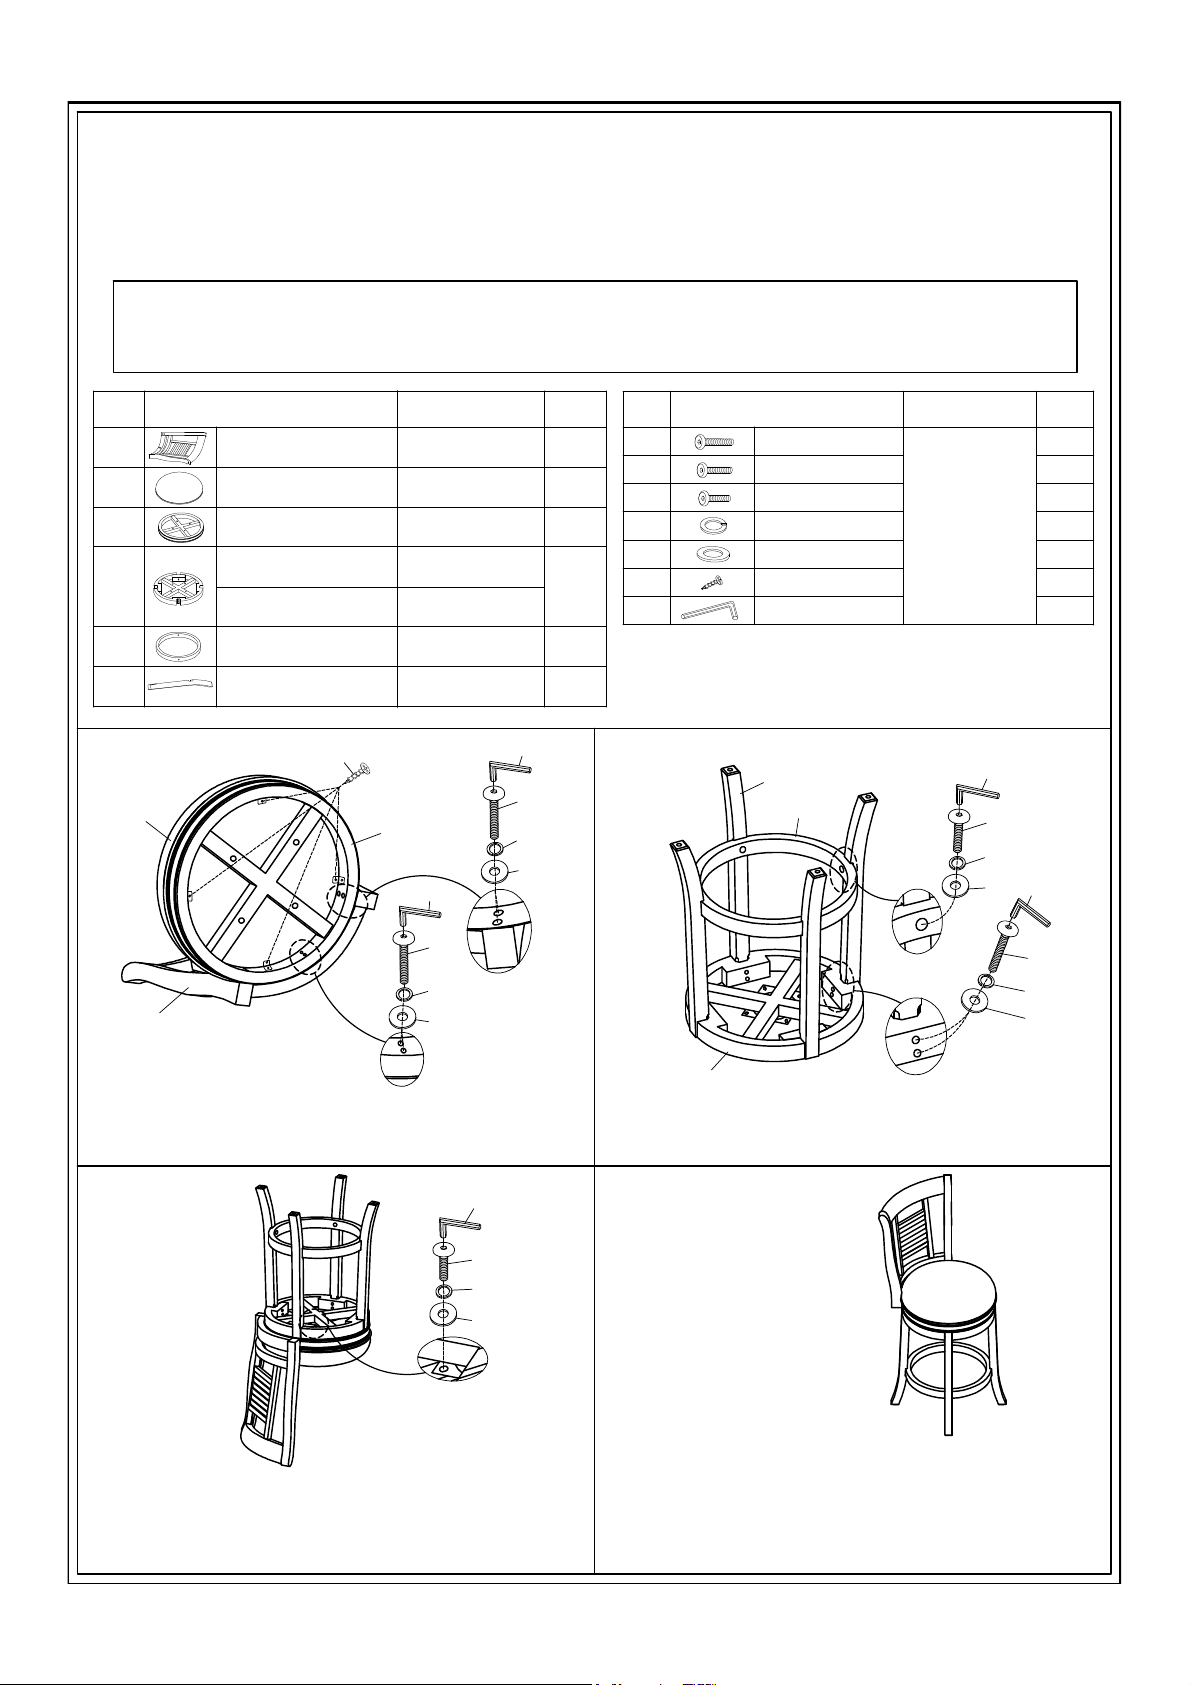
STEP 1:
ASSEMBLY INSTRUCTIONS
Thank you for purchasing this quality product. Be sure to check all packing material carefully for
small parts, which may have come loose inside the carton during shipment. Identify and count all
parts and compare with the HARDWARE LIST below.
HARDWARE LIST
NO.
Stool back
1
Don't tighten any bolts until all bolts on a step have been started!
Bonded Fabric seat
Top ring
Metal swivel
Middle ring
Bottom ring
Leg
4
Q'TY
14
4
4
22
2
3
1/4"*1"
4
1/4"*19mm5
1
PARTSNO
6
7*15mmL
7
22
4
1
Allen Wrench
1/4"*2"
1/4"*1-1/2"
1/4"
1. Attach the Stool back(A) to the Top ring(C) using Bolts(7+1+4+5)
to tighten, as shown.
2. Attach the Bonded leather seat(B) to the(A+C), using
Screws(6) to tighten, as shown .
STEP 2:
STEP 3: STEP 4:
1.Right side up the stool.
2.It's complete for using.
A
B
C
D
E
F
7
3
4
5
7
1
4
5
7
2
4
5
7
1
4
5
4
5
6
Pre-assy
1
1
1
1
Caution: 1. All bolts must be tightened mandatorily in each step.
PARTS LIST
A
NO.
Q'TY
B
C
D
E
F
PARTSNO
7
1
B2-303-26FP1
B2-303-26FP2
B2-303-26FP3
B2-303-26FP4
B2-303-26FP5
B2-303-26FP6
B2-303-26FP7
B2-303-30FP7
B2-303-26FP8
1. Attach the four Legs(F) to the Middle Ring(D), using Bolts(7+1+ 4+5)
to tighten, as shown
2. Attach the Bottom Ring(E) to the Legs, using Bolts (7+2+ 4+5) to
tighten, as shown.
1. Upside down the Wooden Seat Back(STEP1) and put it on
a smooth and stable working stand.
2. Attach the Stool Base(STEP2) to the Seat w/ pre-assembly
Seat Back(STEP 1), using a Phillips head screwdriver
(not included) and Bolts(7+3+4+5) to tighten, as shown.
2. It is also recommended to periodically check
If you find that your furniture has a missing or damaged part, contact the
dealer from which you purchased this product, they will be happy t o
assist you. Thank you for making American Woodcrafters a part of your
home.
bolts and re-tighten as needed. "
 Loading...