

Page 1
A
B
C
D
E
F
G
H
Thank you for purchasing this quality product. Be sure to check all packing material carefully for small parts that may have
come loose inside the carton during shipment.
ASSEMBLY INSTRUCTIONS
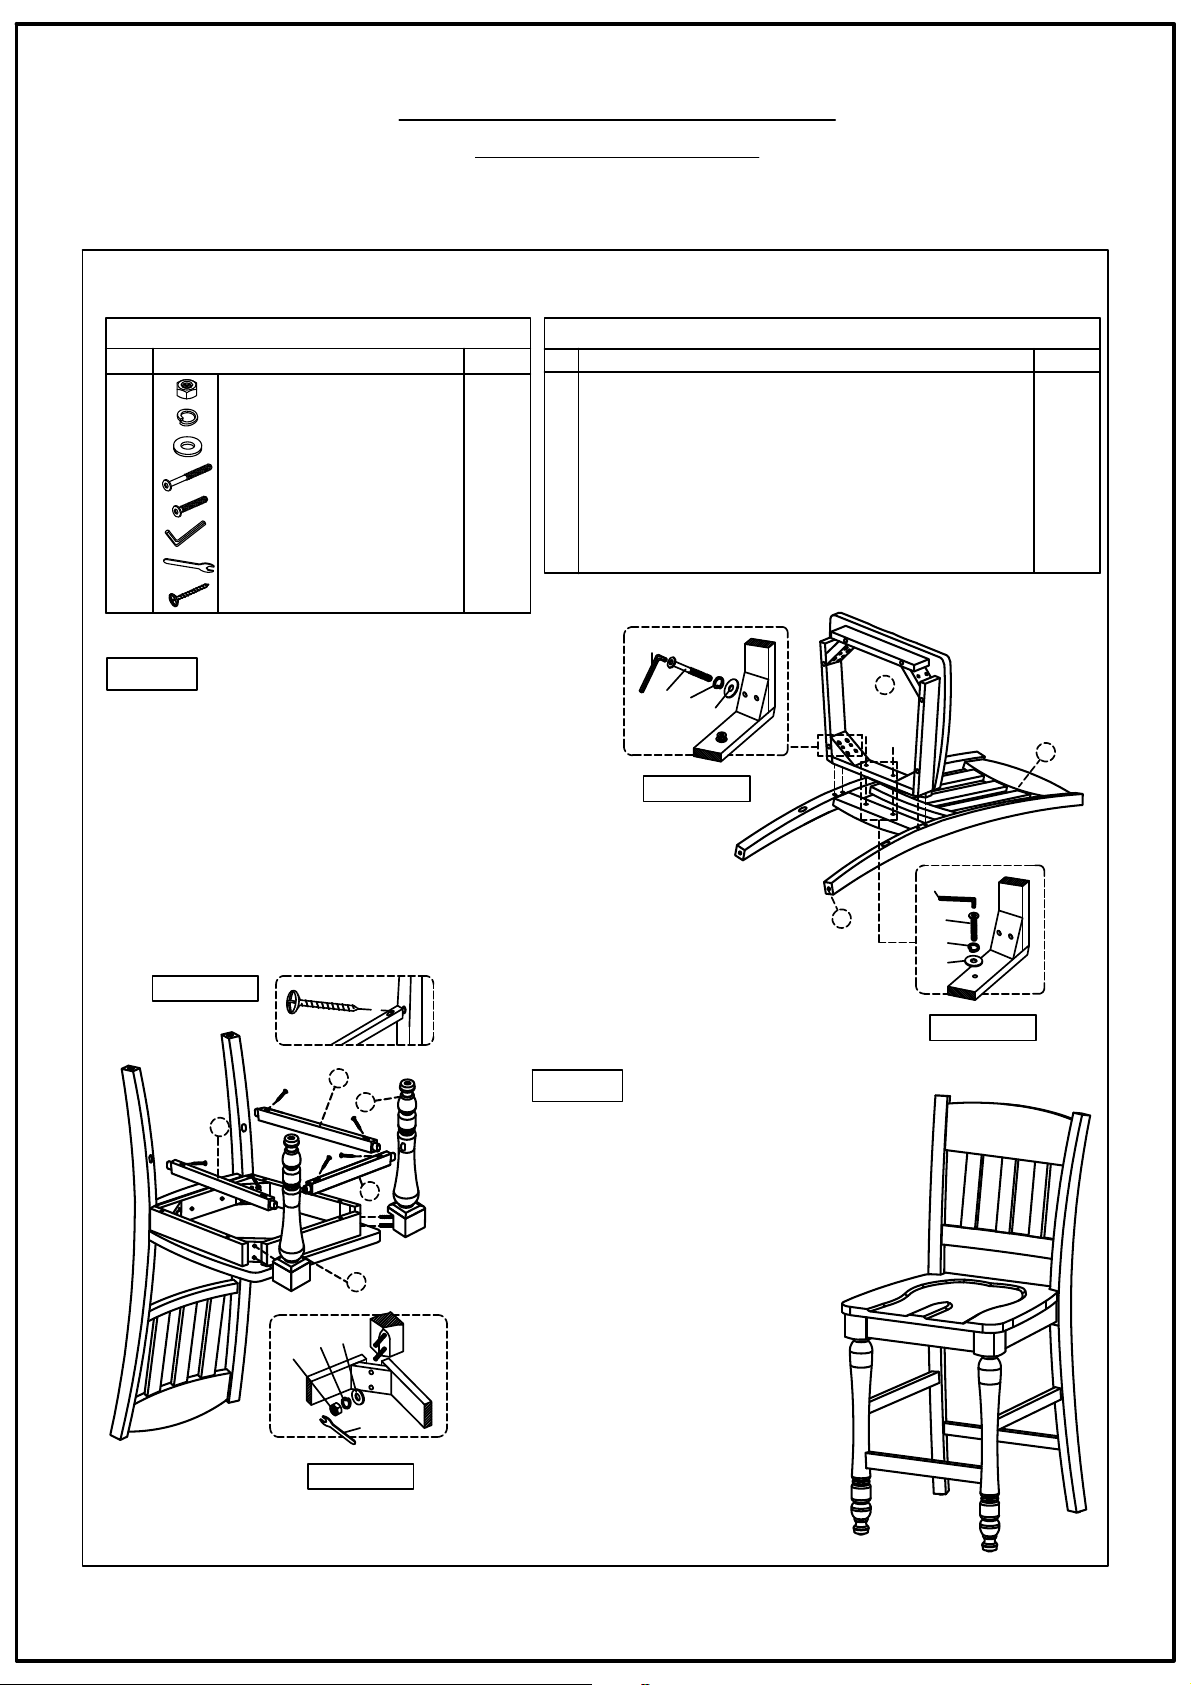
- Carefully lay Chair Back flat on a smooth flat surface
to prevent scratches.
- Attach Complete Seat to Chair Back by inserting a Flat
Washer (C), Lock Washer (B) with Short Bolt (E) into
each of the hole on the back rail of the seat. Attach the
Long Bolt(D), Lock Washer (B) and Flat Washer (C)
into each of 2 holes in the Complete Seat corners.
(See Detail A & B).
- Tighten screws with provided Allen Key (F) by turning
clockwise until secure.
- Carefully turn Chair upside
down and attach each Leg to the
front corners of the Complete
Seat.
- Place Flat Washer (C), Lock
Washer (B) and Nut (A) on for
each bolt, using provided Key
Wrench (G).
- Do not fully tighten the Nuts at
this stage until all the parts are
in position (See Detail C).
- Insert 2 Side Stretchers
between the Front Legs, fasten
with Wood Screw using
phillíp-head screwdriver. (not
provided). (See Detail D)
- Be sure to tighten all screws
and nuts prior to using Chair.
DETAIL D
DETAIL A
DETAIL B
Chair Back
Complete Seat
Right Facing Front Leg
Left Facing Front Leg
Right Facing Side Stretcher
Left Facing Side Stretcher
Front Facing Side Stretcher
Floor glide
1
2
3
4
5
6
7
8
Q'Ty
Description
STEP 1
STEP 2
Q'Ty
Key Parts
DETAIL C
No
C
B
F
D
F
C
B
E
8
1
2
4
3
6
5
7
H
A
B
C
G
Hexa Nut Ø8
Lock Washer Ø8
Flat Washer Ø8
Long Bolt Ø7.8 x 80mm
Short Bolt Ø7.8 x 35mm
Allen Key
Key Wrench
Screw Ø4 x 40mm
4 pcs
10 pcs
10 pcs
4 pcs
2 pcs
1 pc
1 pc
6 pcs
1 pc
1 pc
1 pc
1 pc
1 pc
1 pc
1 pc
4 pcs
COUNTER STOOL
Hardware kit
No
Description
 Loading...