

Page 1
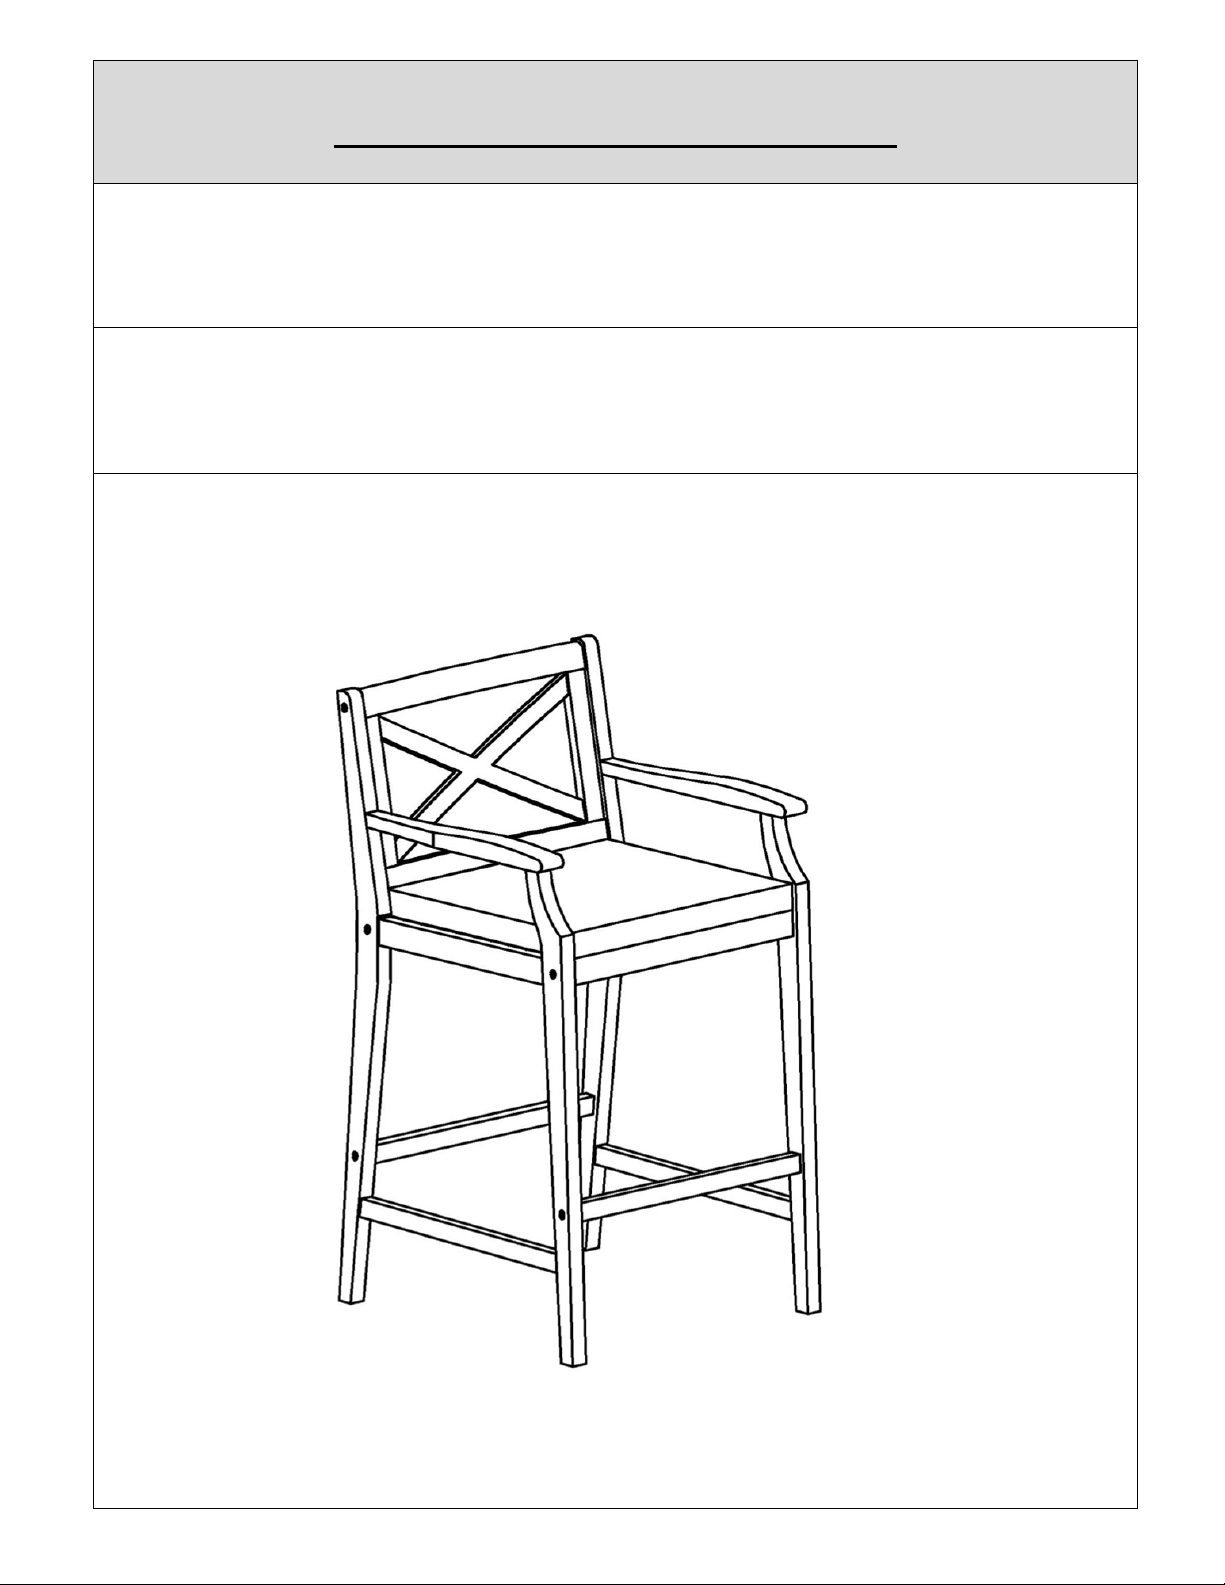
Assembly Instructions
Caution: You must read this before you proceed
Chair
1
Page 2
②
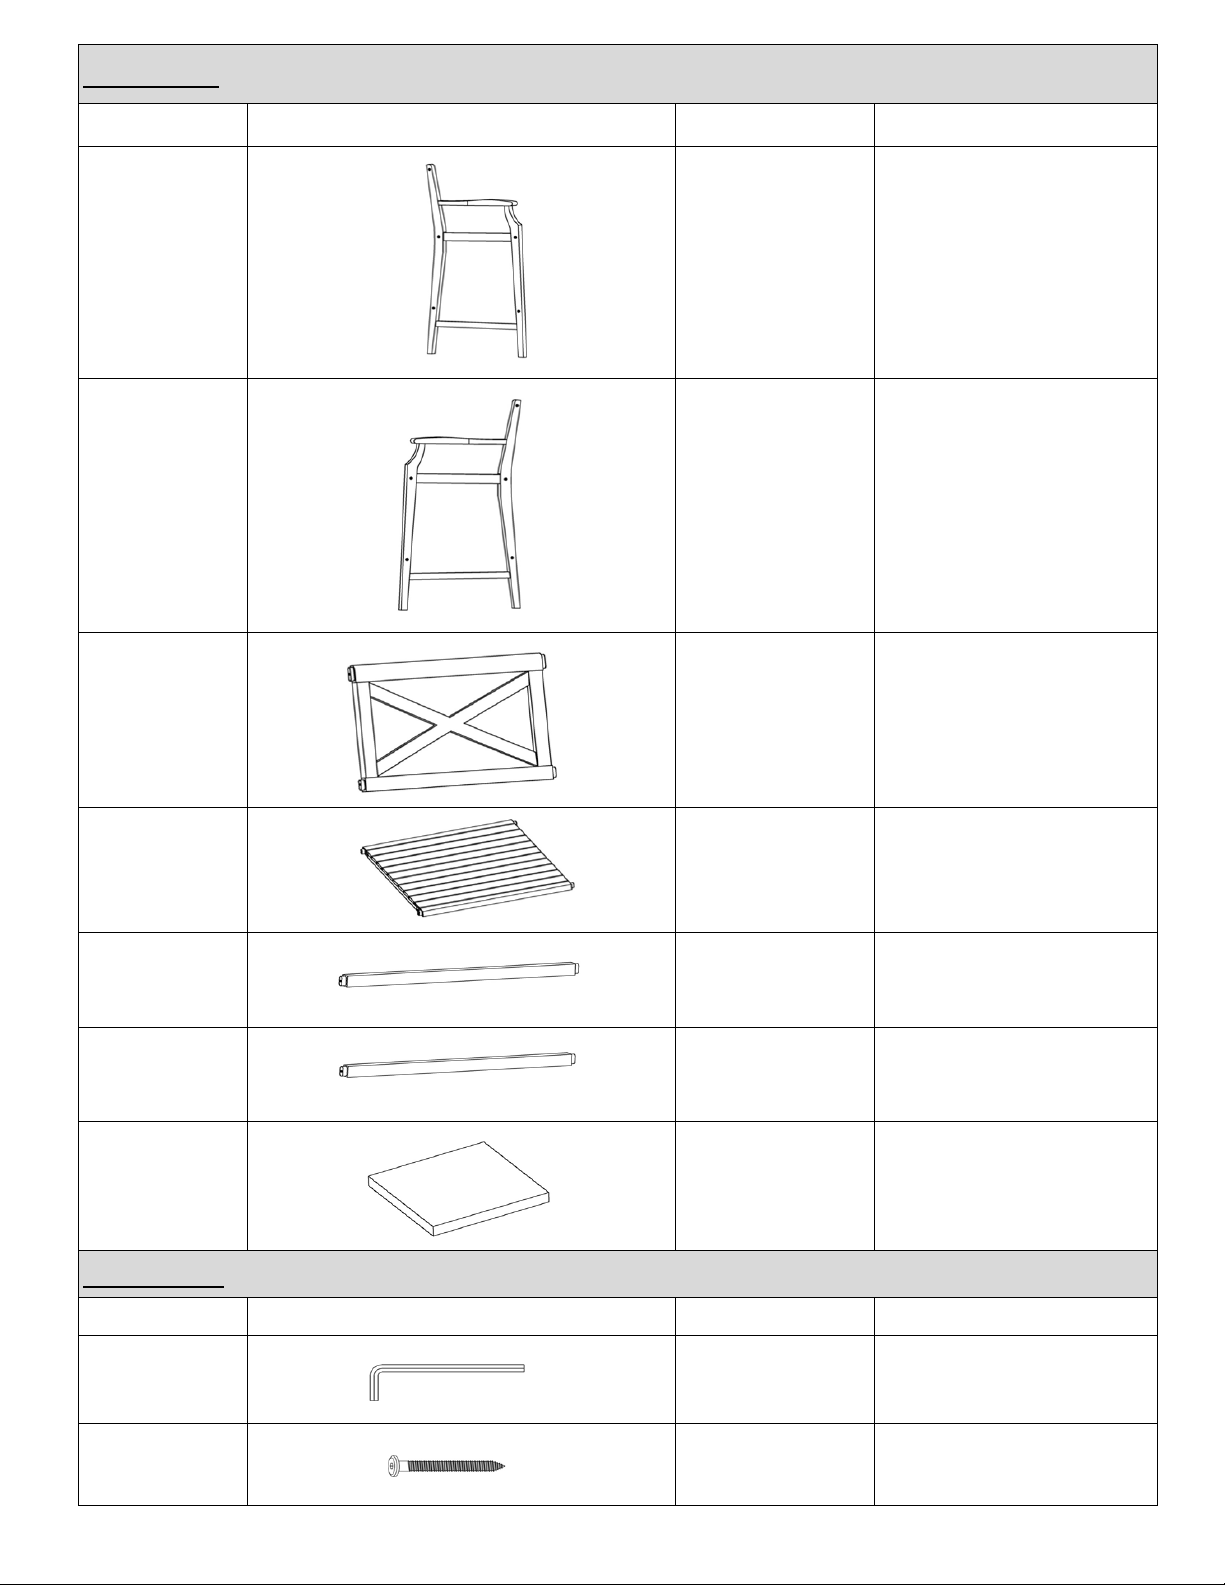
Parts List
No. Picture Description QTY
A Left Leg Panel 1
B Right Leg Panel 1
C Backrest Panel 1
D Seat Panel 1
E Back Footrest 1
F Front Footrest 1
G Seat Cushion 1
Hardware
No. Picture Description QTY
①
Allen Key
Screw (M6*60mm) 11
1
2
Page 3
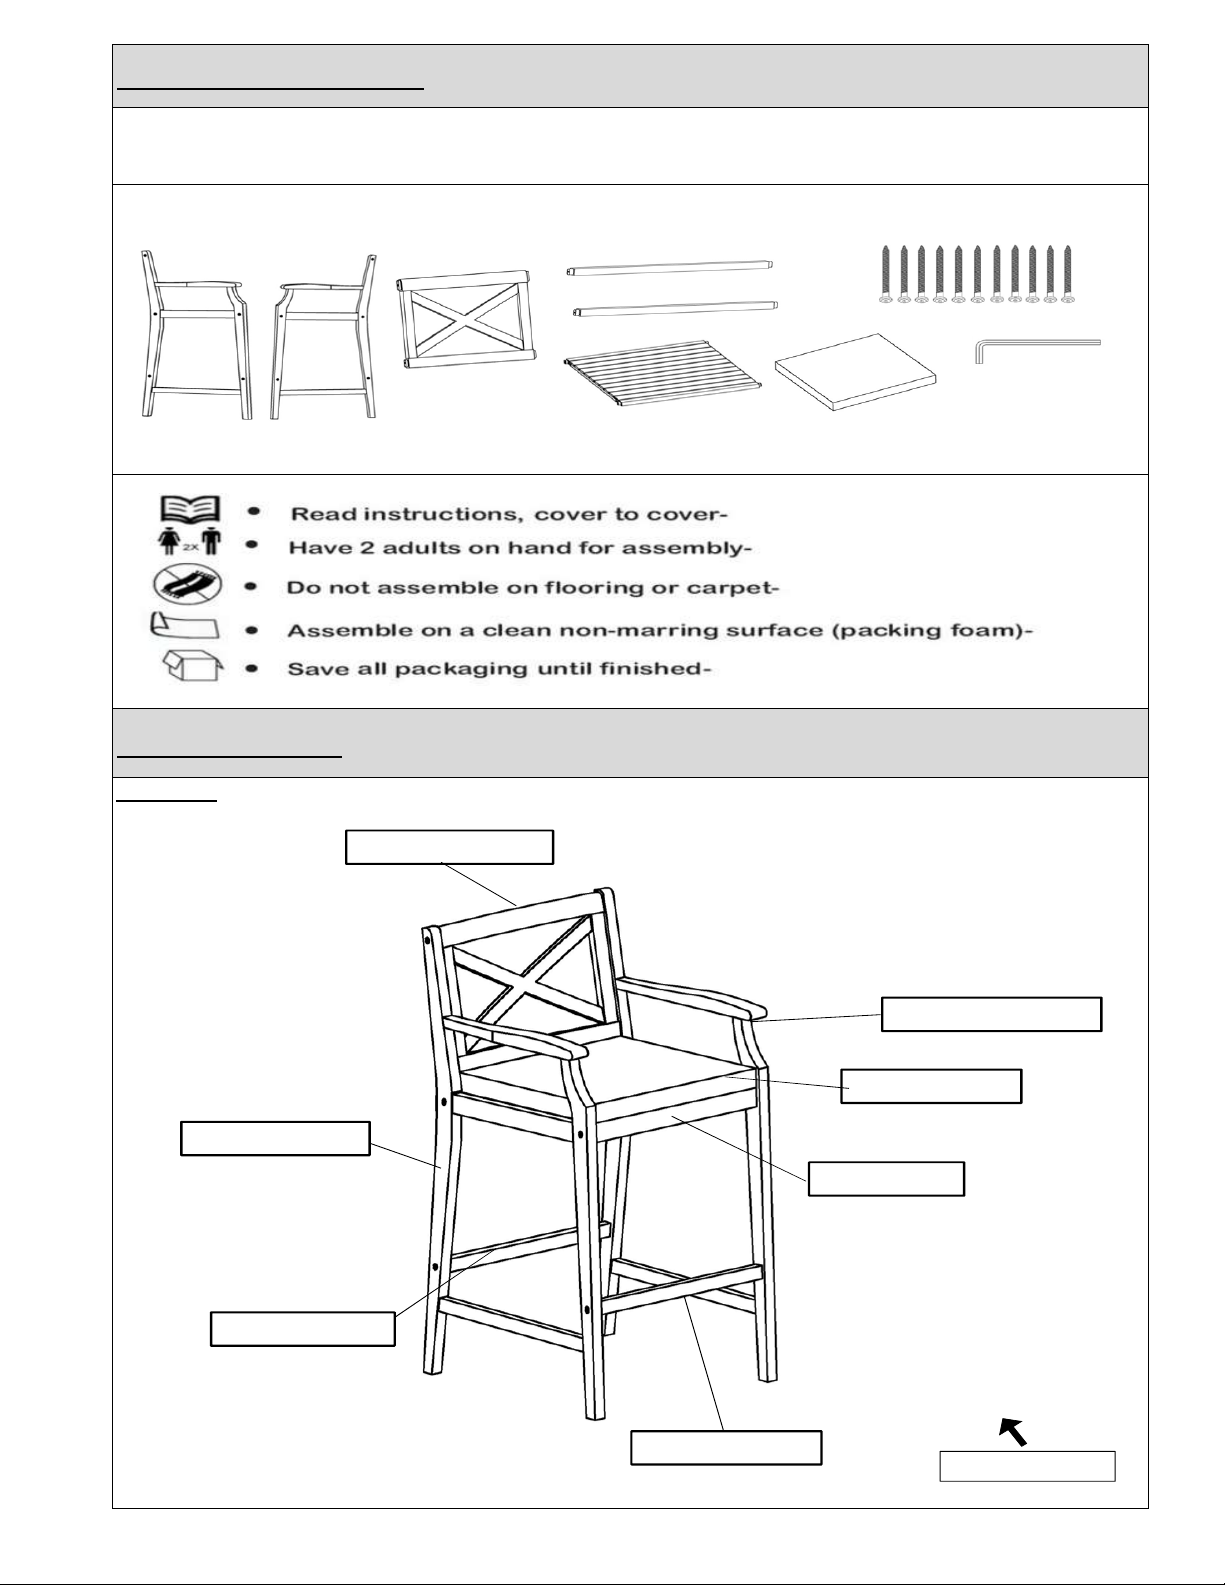
Assembly Preparation
Before Beginning Assembly:
Assembly Steps
Overview
Left Leg Panel (A)
Backrest Panel (C)
Right Leg Panel (B)
Seat Cushion (G)
Seat Panel (D)
Back Footrest (E)
Front Footrest (F)
FRONT FACING
3
Page 4
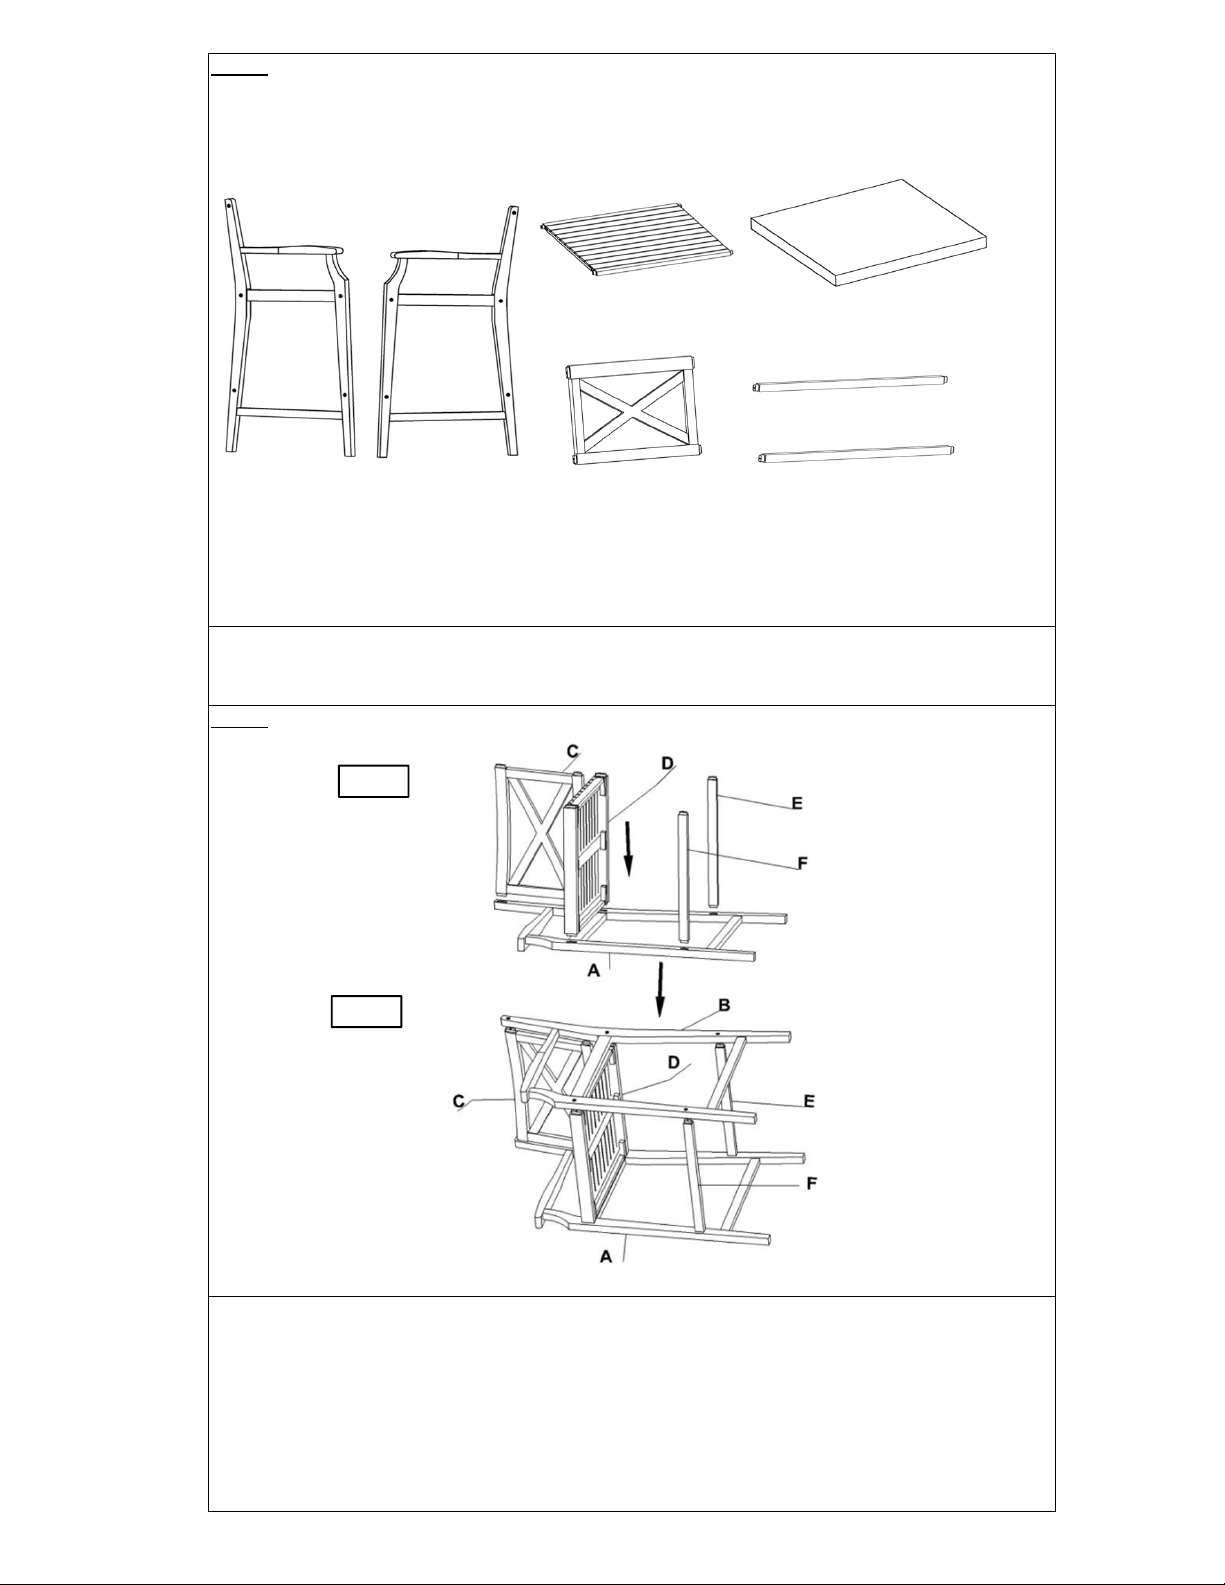
Step 1
Unpack and place all parts on a clean, non-marring surface.
Step 2
2.1
2.2
2.1) Insert Backrest Panel(C), Seat Panel(D) and Footrests(E, F) onto Left Leg Panel(A)
as shown above.
2.2) Insert Right Leg Panel(B) onto Backrest Panel(C), Seat Panel(D) and Footrests
(E, F) as pictured.
4
Page 5
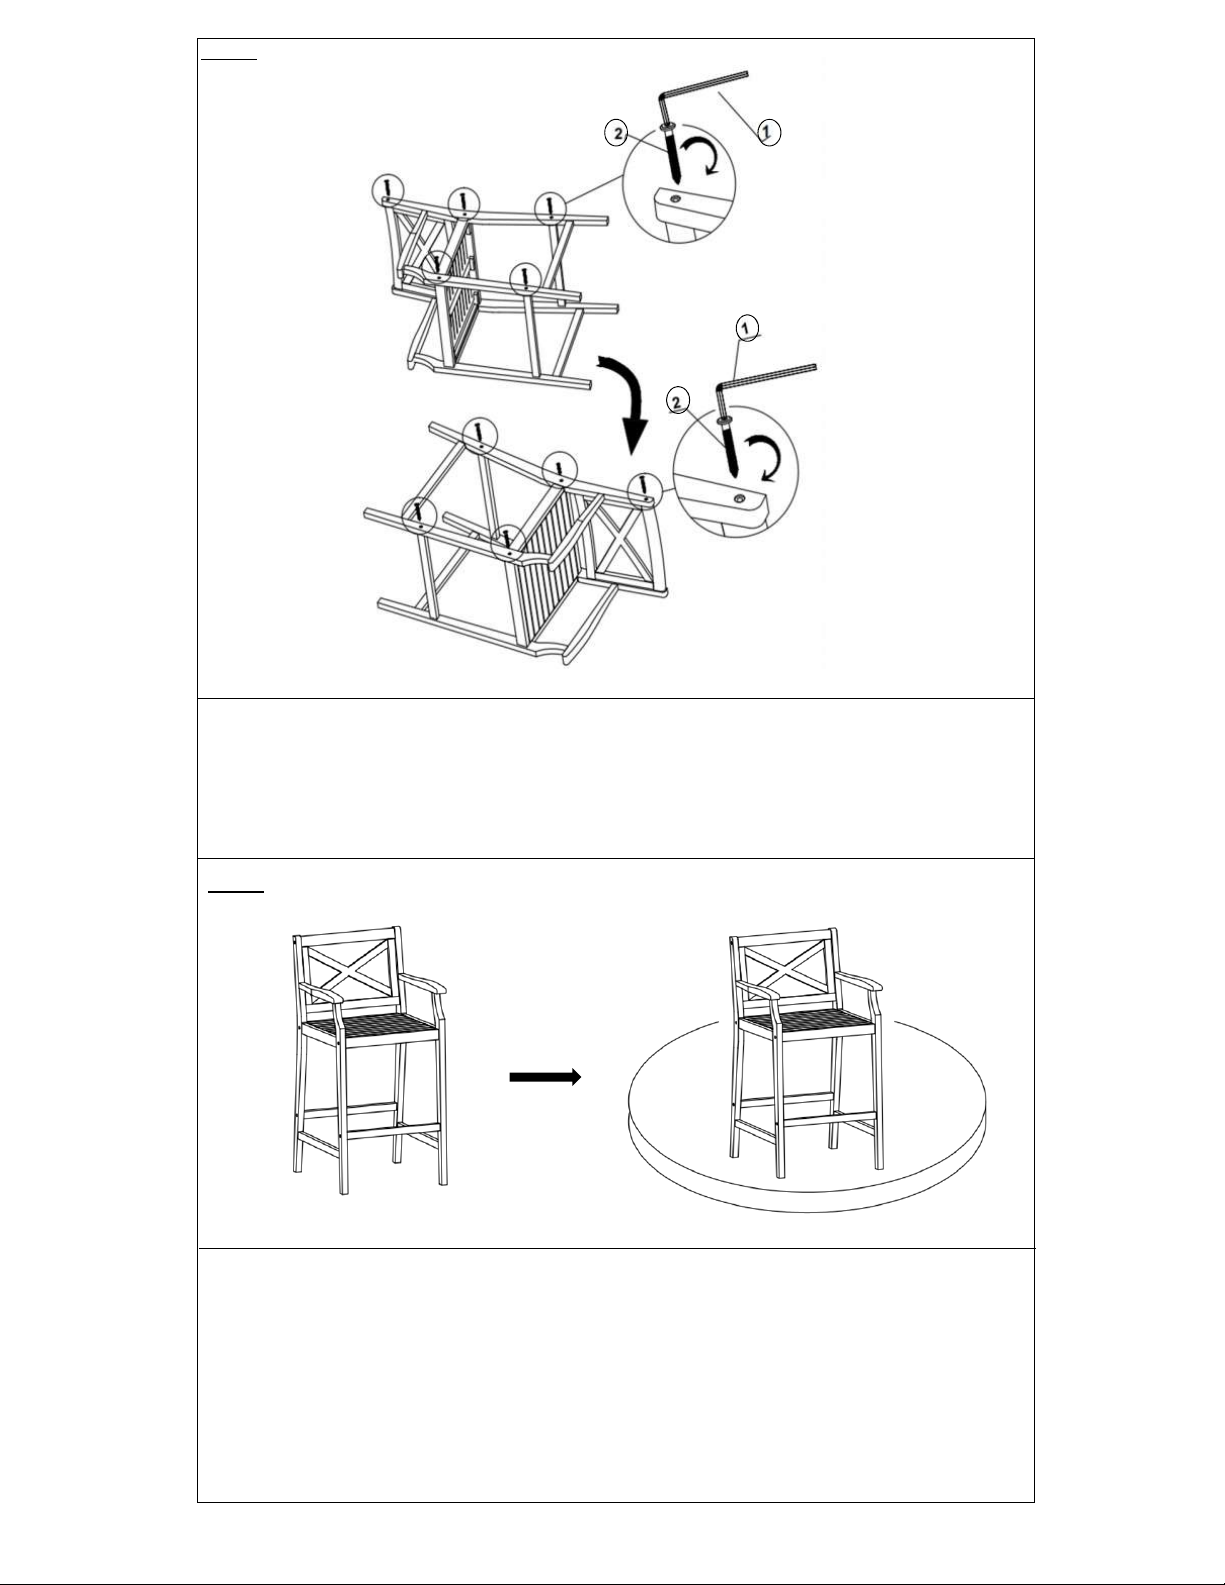
Step 3
Attach Right Leg Panel(B) to Backrest Panel(C), Seat Panel(D) and Footrests(E, F)
using Screws(②) with Allen Key(①).With assistance from your adult partner, carefully
turn the Chair over onto the opposite side.
Attach Left Leg Panel(A) to Backrest Panel(C), Seat Panel(D) and Footrests(E, F) using
Screws(②) with Allen Key(①).
Do not fully tighten the Screws.
Step 4
Stand the Chair up, with assistance from your adult partner.
Exert pressure floorwards, onto the Chair with both your hands.
This pressure will help the Legs and Chair reach full alignment status.
Check for wobbles on a LEVEL surface.
If no wobbles are found proceed to tighten the Screws in a sequential manner,
until evenly secured.When tightening the Screws tighten sequentially.
Do not tighten any Screw fully and then move on towards the next one.
If there are still wobbles, loosen the Screws and excute the same above
process.
5
Page 6
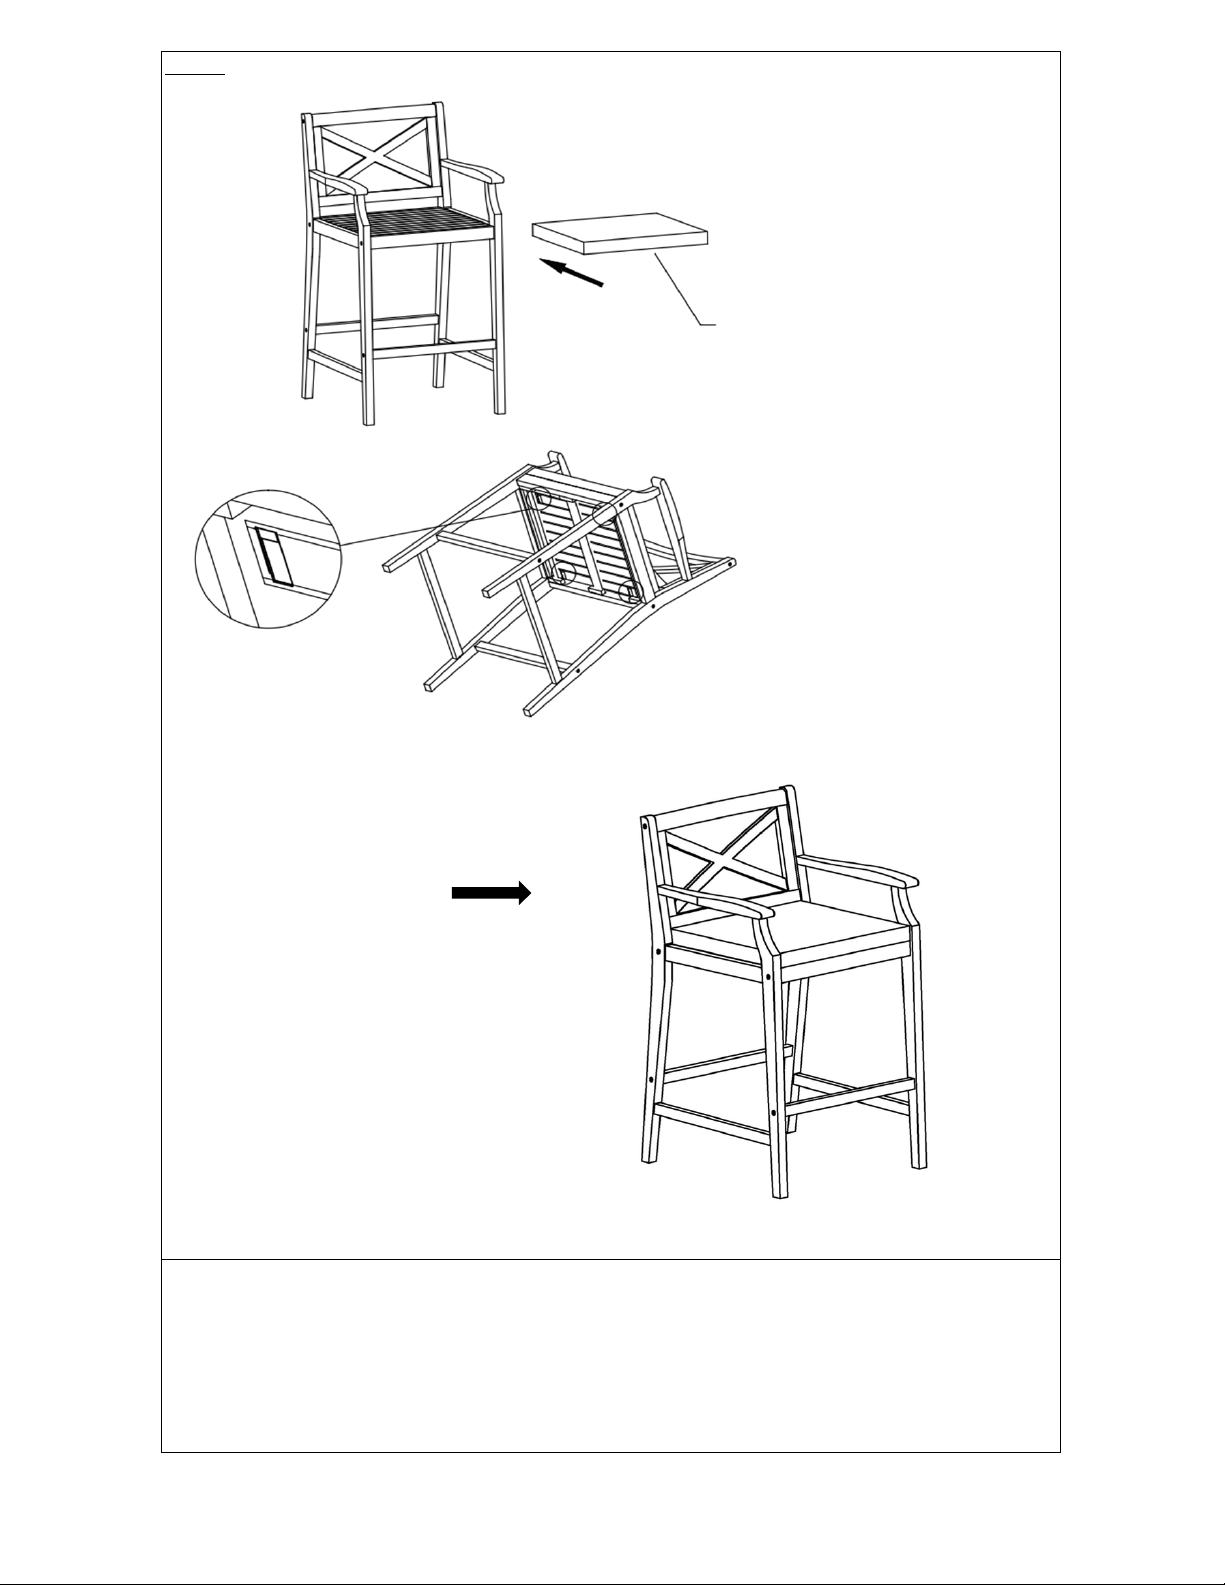
Step 5
G
Inspect the Chair and make sure all parts are connected.
Place Seat Cushion(G) on to the Chair.
Lay the Chair down and tie the velcro straps on Seat Cushion(G) to Seat Panel(D) as
shown above.Your Chair is ready for use.
This Chair can only be used on a flat, level surface.
6
Page 7
7
 Loading...