

Page 1
ASSEMBLY INSTRUCTION
SOFA TABLE WITH 2 DRAWERS
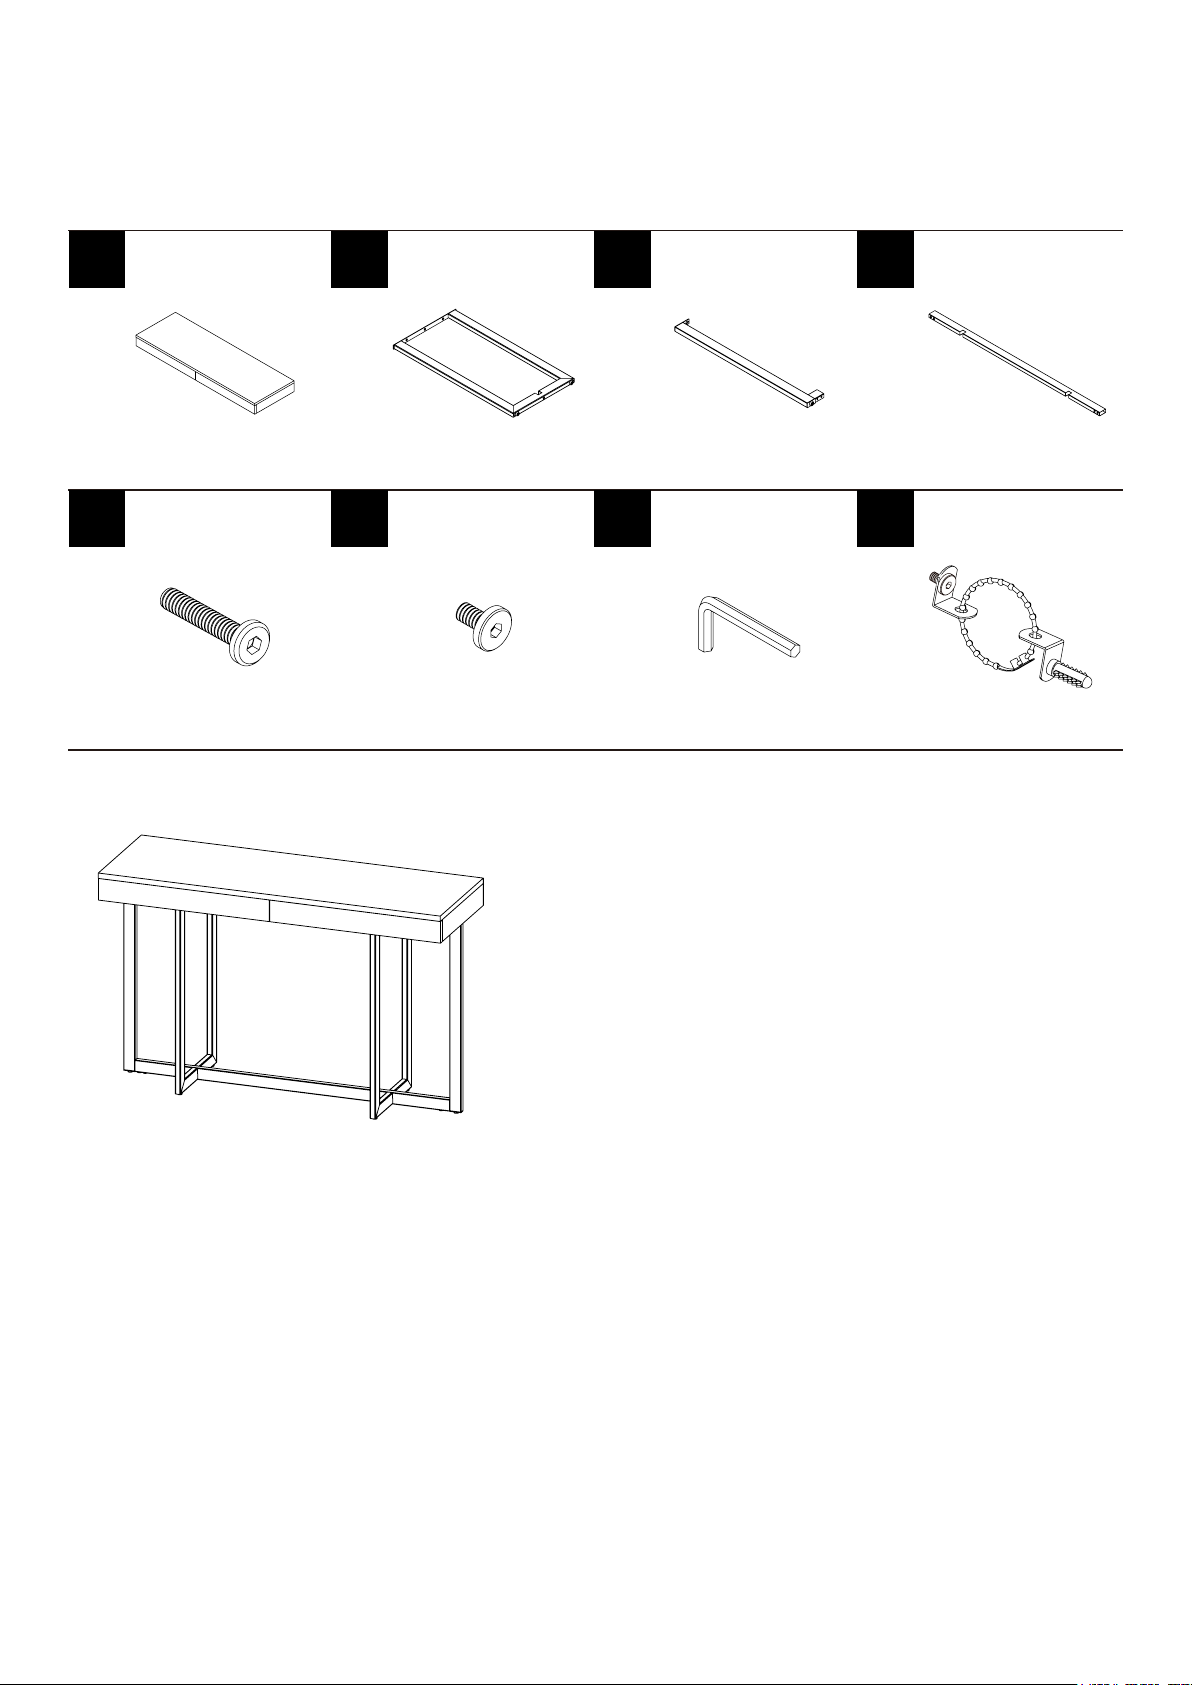
Table Top
A B C D
1PC 2PCS 2PCS 1PC
Bolt
E
1/4”x1-1/4”xØ13
2PCS 14PCS
Middle Table
Base
Bolt
F
F
1/4”x1/2”xØ13
Side Leg Post Cross Bar
Allen Wrench
G
4MM
1PC
H
Anti-Tipping HW
2SETS
This page lists all the contents included in the box.
Please take the time to identify the hardware as
well as the individual components to this product.
As you unpack and prepare for assembly, place
the contents on a carpeted or padded area to
protect them from damage.
1
Page 2
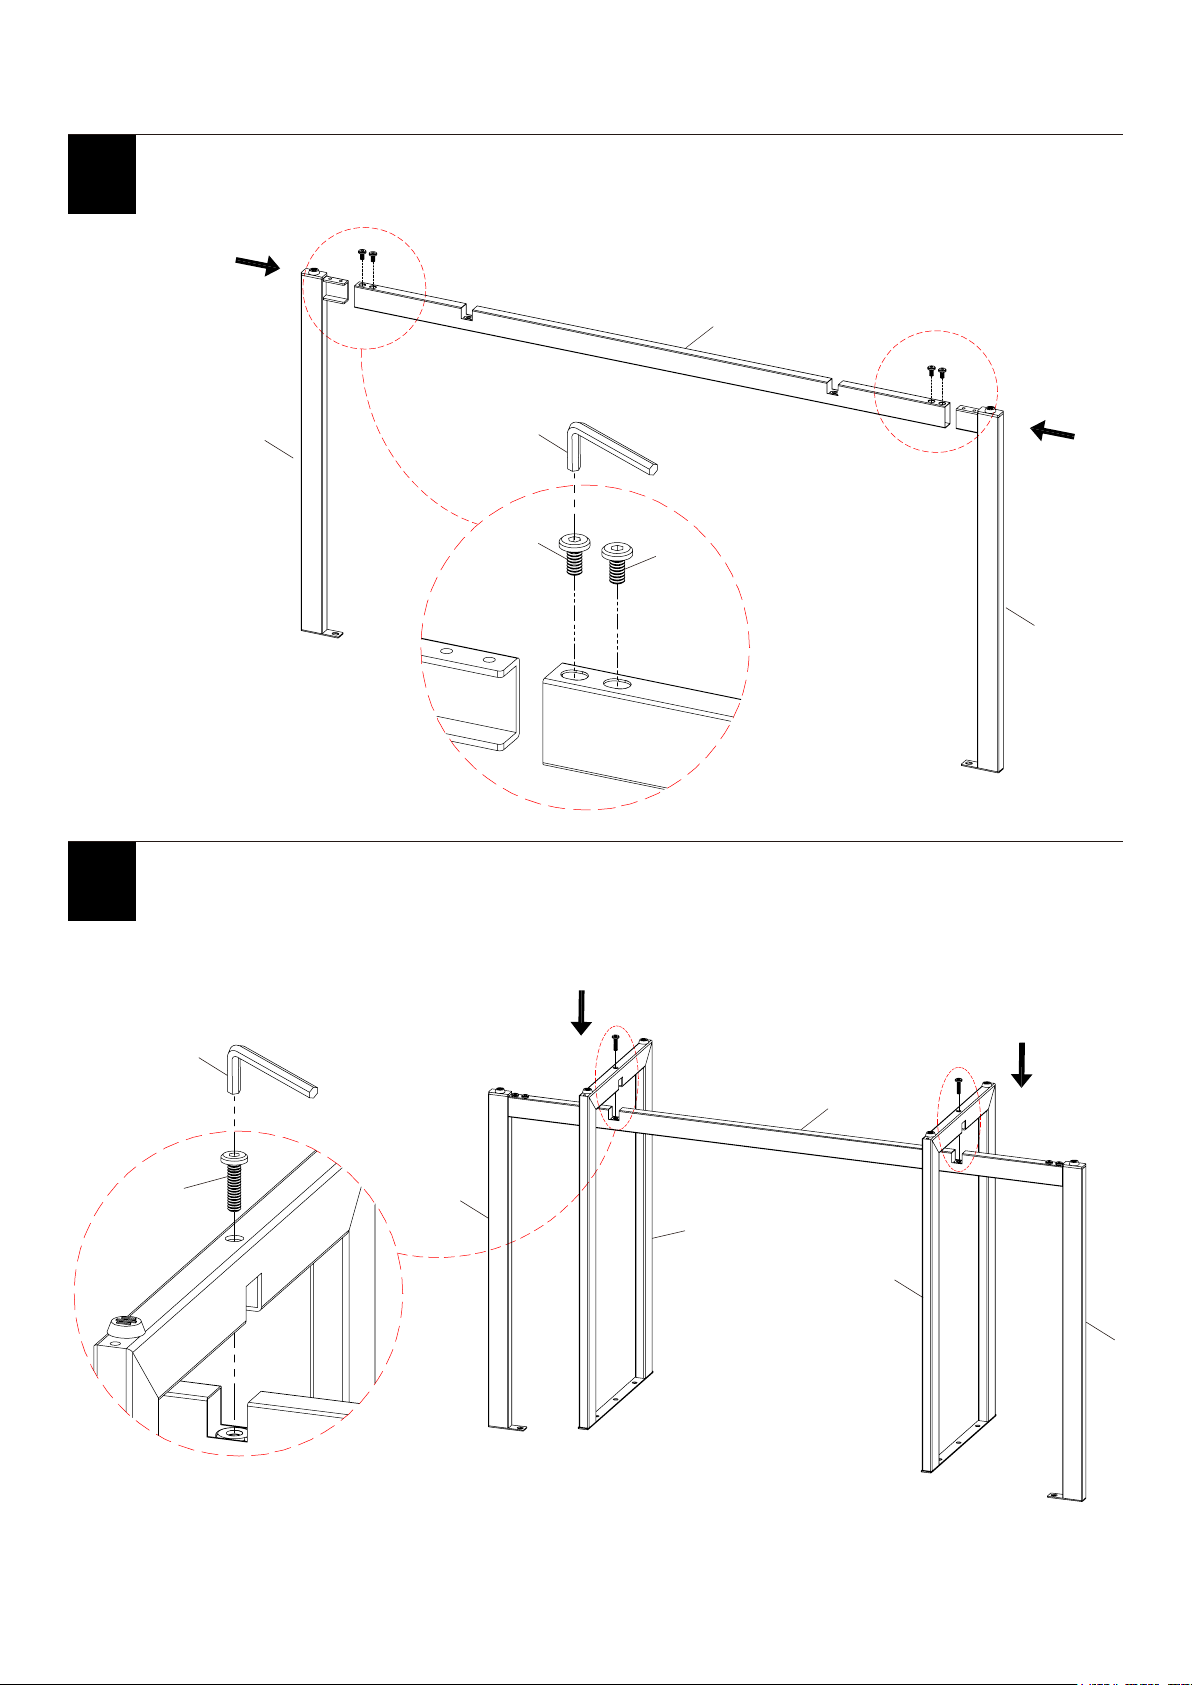
***Do not tighten screws & bolts until the entire unit is completely assembled.
Assemble both Side Leg Post (C) to the Cross Bar (D), then using the Bolt (F) by Allen
1
Wrench (G).
D
C
Attach both Middle Table Base (B) to the assembled Cross Bar (D) as bellow shown, then
2
using the Bolt (E) by Allen Wrench (G).
G
F
F
X 2
C
X 2
E
G
D
C
B
B
C
2
Page 3

***Do not tighten screws & bolts until the entire unit is completely assembled.
Attach the Table Top (A) to the Side Leg Post (C) and Middle Table Base (B) as bellow
3
shown, then using the Bolt (F) by Allen Wrench (G).
D
C
B
B
C
X 8
G
A
F
3
Page 4
4
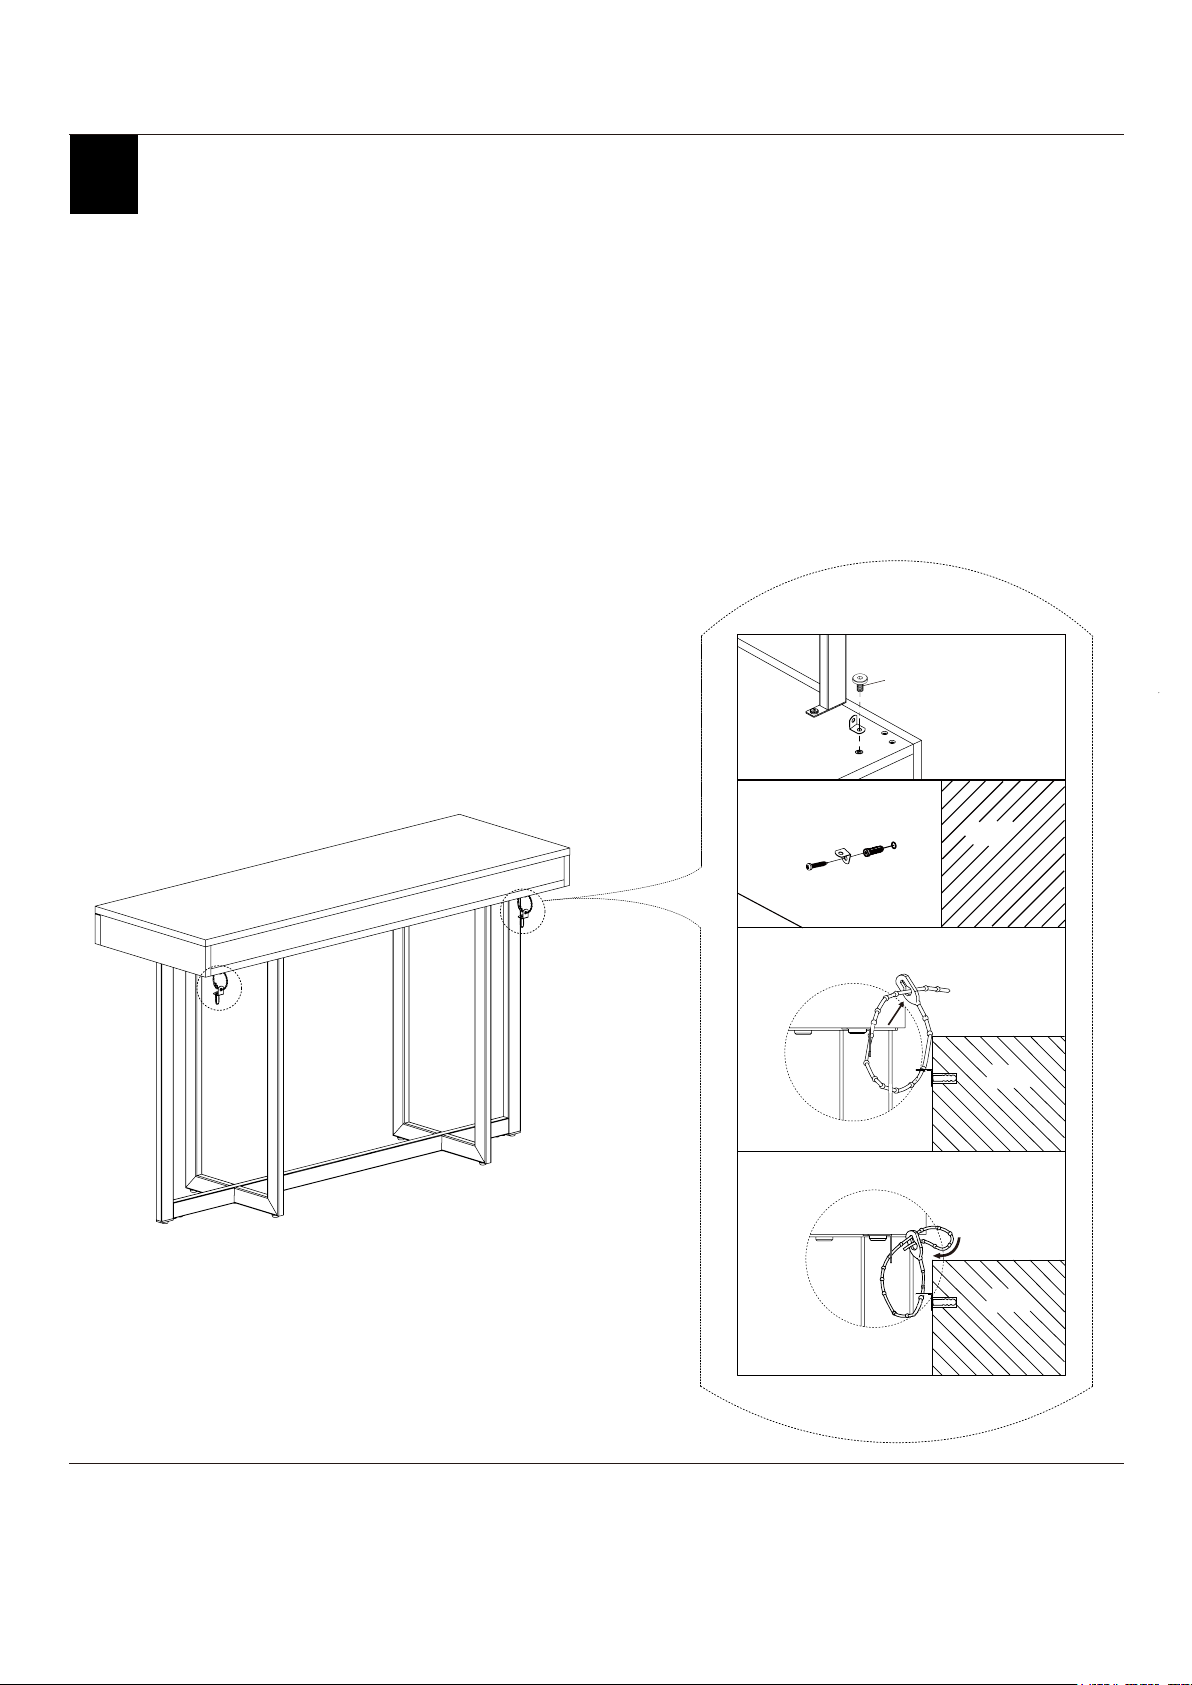
***Do not tighten screws & bolts until the entire unit is completely assembled.
*NOTE: WE RECOMMEND THAT YOU ATTACH THE PRODUCT TO YOUR WALL
AS A SAFETY PRECAUTION USING ANTI-TIPPING HW (H) AS BELOW
INSTRUCTION.
Attach Mounting Plate to the
Mounting Plate extend DOWNWARD.
Drill 2 holes in your wall approximately 2” (Inches) BELOW the corresponding
positions of Mounting Plate and insert Wall Anchor as shown.
*NOTE: You may need to tap LIGHTLY with a rubber mallet.
Now connect the corresponding Mounting Plate with Connection Strap and tighten as
described before locking in place.
Table Top
(A) by using the Bolt (F), make sure the
1
F
A
2
Wall
Wall
3
Wall
4
Wall
Cleaning & Care
Treat surface with care. Surface is resistant to scratches but is not scratch resistant. Clean surfaces
with a dry or damp soft cloth. Do not use abrasive cleaners. Hardware may loosen over time.
Periodically check that all connections are tight.
4
 Loading...