

Page 1
ASSEMBLY AND INSTALLATION
INSTRUCTIONS
WARNING: Turn off the main power at circuit breaker before installing fixture.
WARNING:
AVERTISSEMENT: Coupez la source d’alimentation principale au panneau
WARNING:
TO A L SHOCK, BE SURE TO SHUT OFF
POWER BEFORE INSTALLING OR SERVICING THIS FIXTURE.
central de disjoncteurs avant d’installer le luminaire.
NOTE: 1. Before installing, consult local electrical codes for wiring and grounding requirements.
2. READ
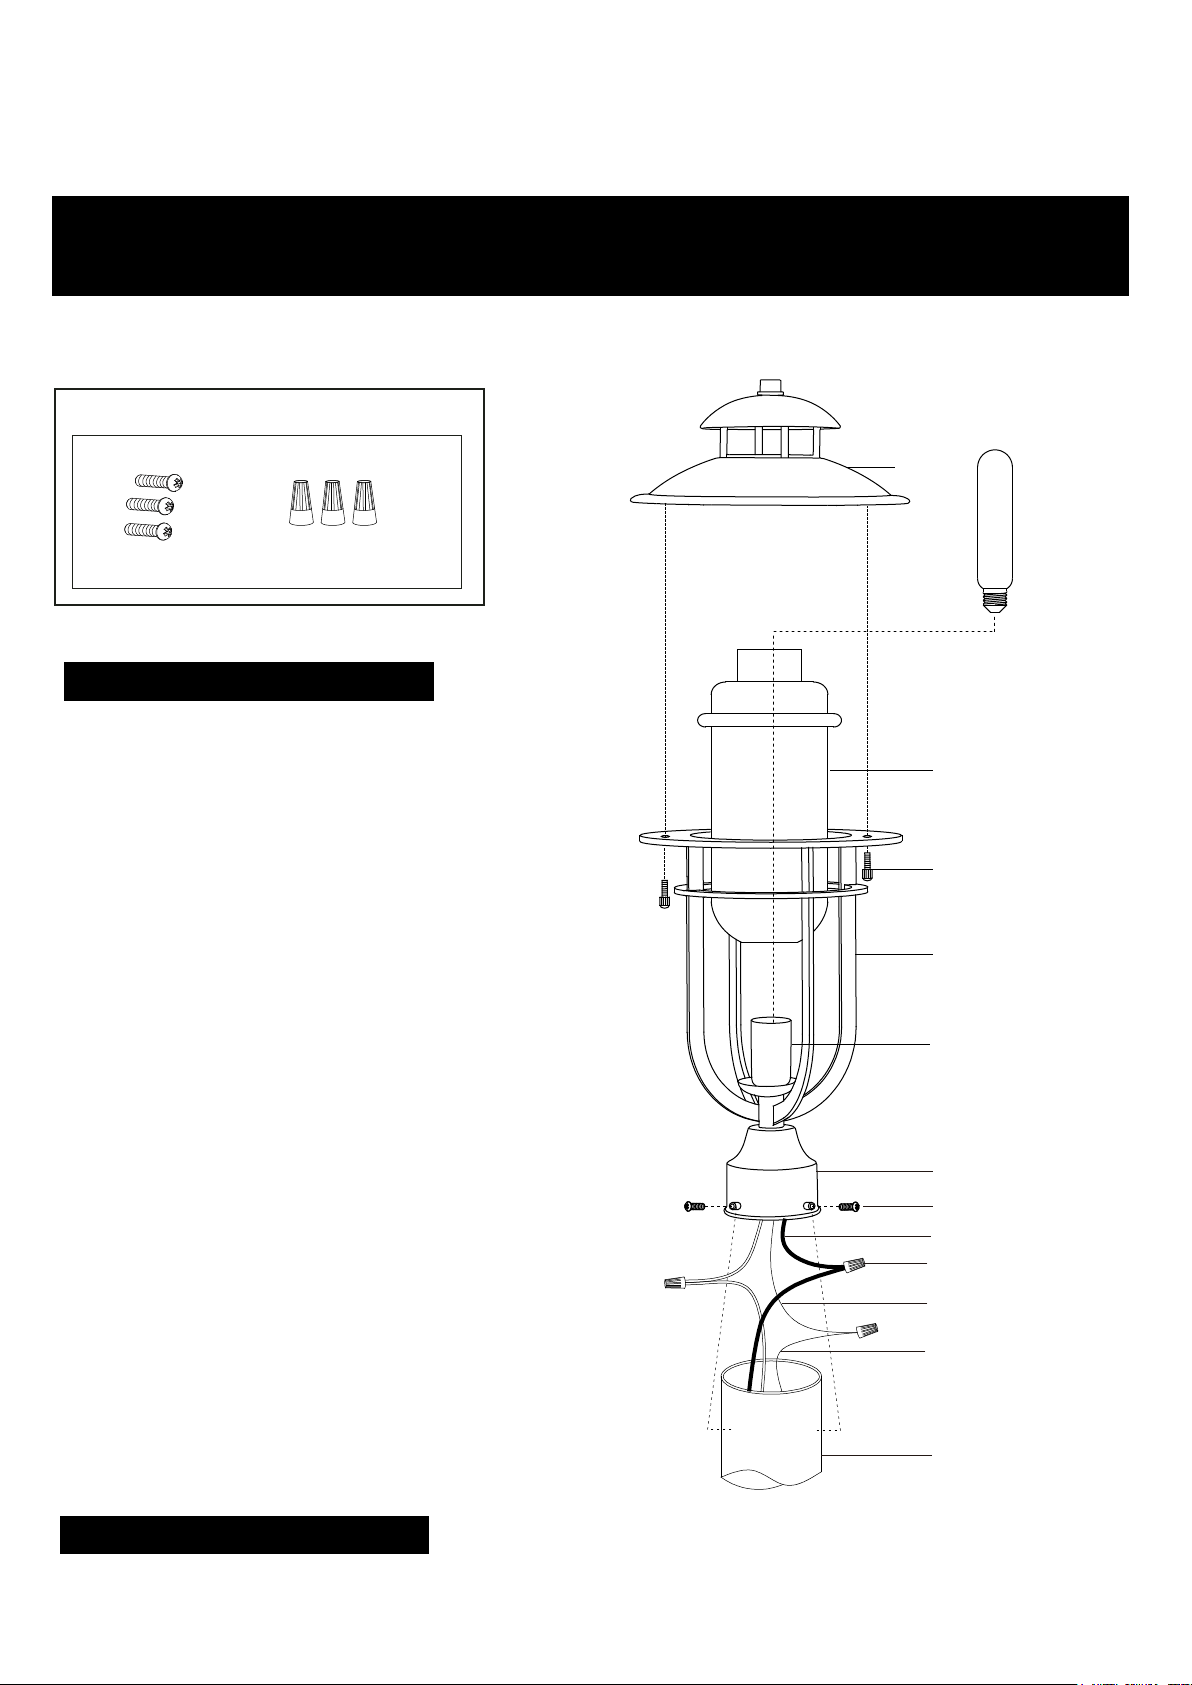
Hardware Package (included):
Fitter Screw (A)
Installation Steps
Turn off the power at fuse or circuit box
1. Remove the three set screws, the cover from the fixture.
2. Pull out the wires and grounding wire from the post.
Make wire connections using the wire connectors
• The hot wire (usually balck insulation) from the
fixture to the black wire from the post.
• The neutral wire (usually white insulation) from
the fixture to the white wire from the post.
• The grounding wire (usually green insulation or
bare wire from the fixture to the grounding wire
from the post.
Carefully put the wires back into the post.
3. Install a bulb (not included). See relamping label
at socket area or packaging for maximum allowed
wattage.
AND SAVE THESE INSTRUCTIONS.
Max.60W Type T10 Bulb
(not included)
Cover
Wire Connector (B)
Glass Shade
(B):
Set Screw x 3
Fixture
Socket
4. Attach the glass shade into the fixture.
5. Place the fitter on the top of the post, and then
secure it with fitter screws (A).
NOTE: With silicone caulking compound,
caulk completely around where the fitter
meets with the post surface to prevent water
from seeping into the post.
6. Attach the cover to the fixture, then secure
it with the bolt nut assemblies.
Turn on the power at fuse or circuit box
Fitter
Fitter Screw (A)
Fixture Wire
Wire Connector (B)
Fixture Grounding Wire
Post Grounding Wire
Post
Page 2
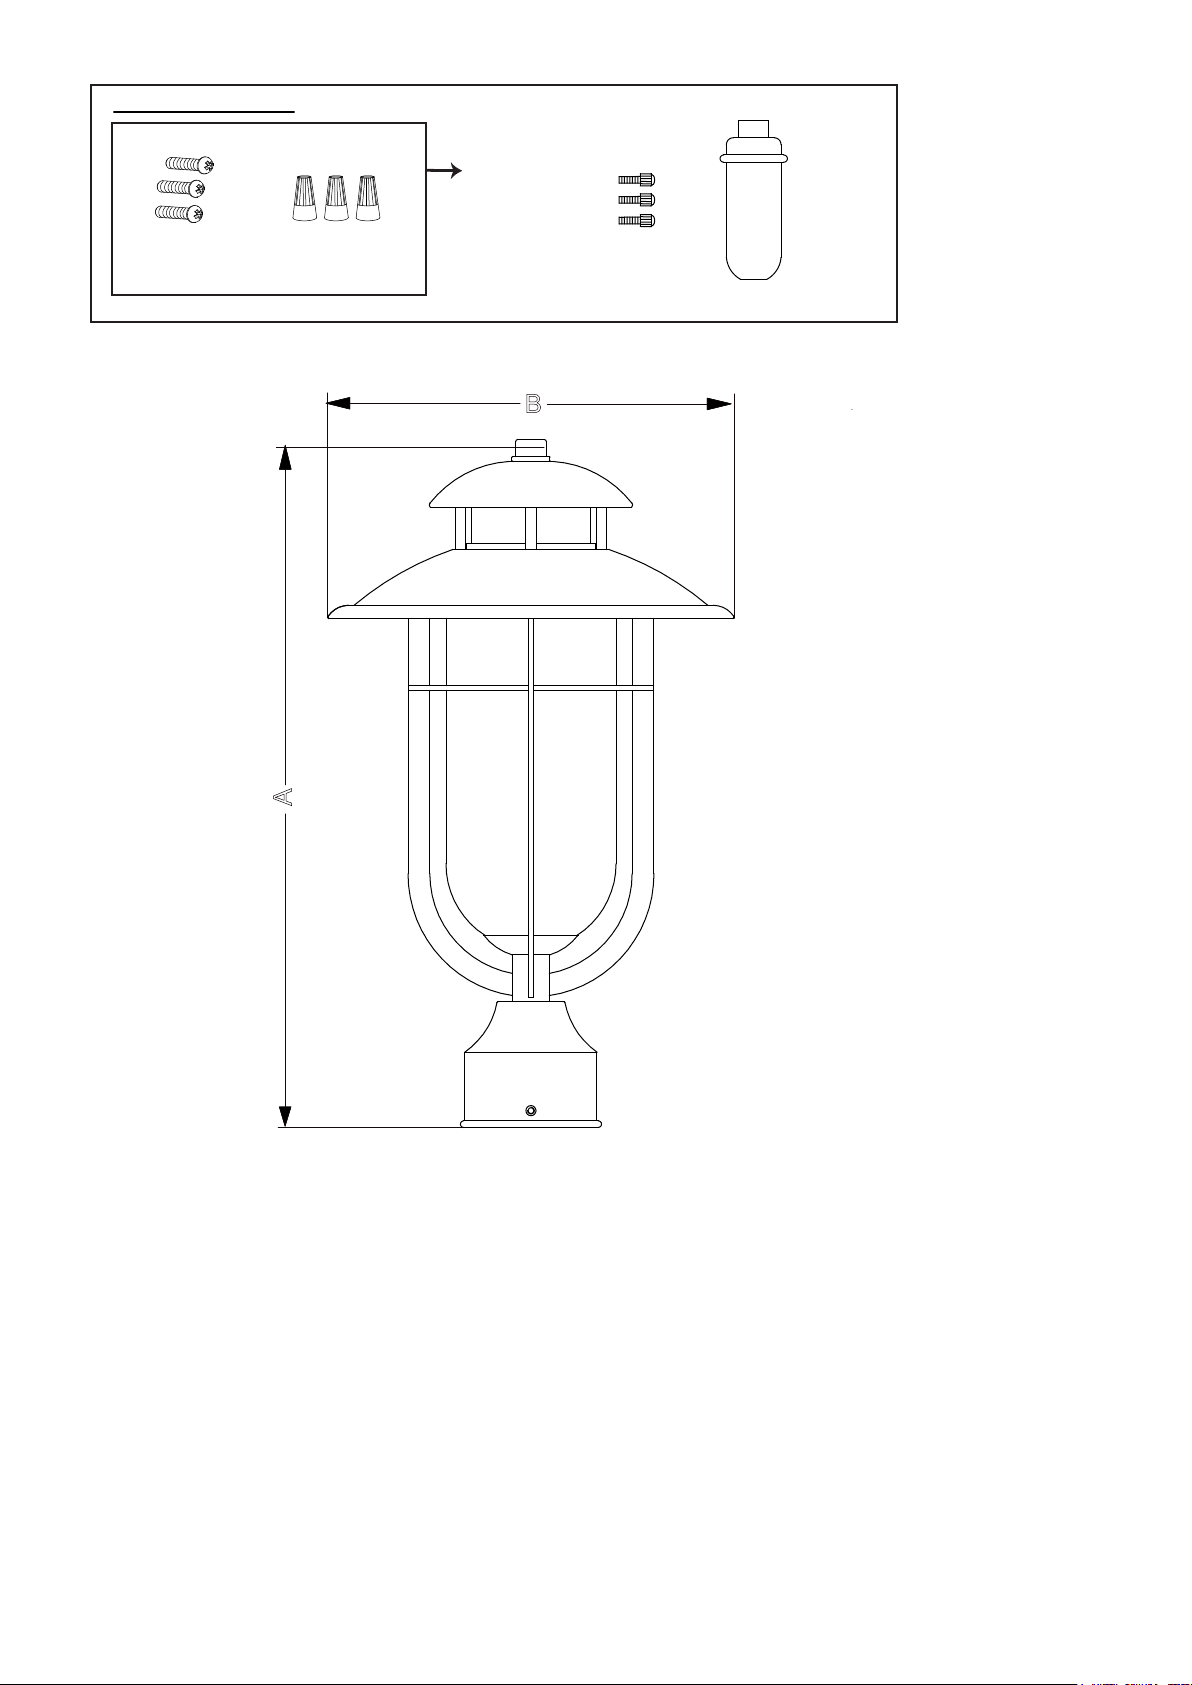
The following parts are available for re-order if damaged or missing.
Spare Parts List:
Assembly Kit
6187MM (1SET)
Fitter Screw (A)
Wire Connector (B)
Set Screw
6188SER
B
Glass Shade
X1
10140CS
A
A: 16"
B: 9-1/2"
 Loading...