

Page 1

Thank you for purchasing this quality product. Be sure to check all packing material carefully for small parts which may
have come loose inside the carton during shipment. Separate, identify and count all parts and hardware. Compare with
the parts list to be sure all parts are present.
IMPORTANT : PLEASE READ INSTRUCTION BEFORE STARTING THE ASSEMBLY.
"DO NOT TIGHTEN SCREWS UNTIL COMPLETELY ASSEMBLED"
"DO NOT OVERTIGHT ANY HARDWARE"
WARNING : SMALL PARTS AND HARDWARE NOT FOR CHILDREN UNDER 3 YEARS. ADULT ASSEMBLY REQUIRED.
Skip the power trip this time.
ASSEMBLY INSTRUCTION
PAGE 1 OF 5
TABLE OF CONTENTS
HARDWARES LIST
PARTS LIST
PARTS' LOCATION
ASSEMBLY STEPS
ASSEMBLY COMPLETED
PAGE 2
PAGE 2
PAGE 3
PAGE 4
PAGE 5
Page 2

ASSEMBLY INSTRUCTION
ITEM
A
B
C
D
DESCRIPTION
JCBC SCREW M6 x 40MM
SPRING WASHER M6 x 13MM
FLAT WASHER M6 x 19MM
M4 ALLEN KEY (65MM)
QTY
8 PCS
8 PCS
8 PCS
1 PC
DRAWING
HARDWARES LIST
PAGE 2 OF 5
ITEM
1
2
3
DESCRIPTION
MIRROR
MIRROR SUPPROT RAIL
DRESSER
QTY
1 PC
2 PCS
1 PC
DRAWING
PARTS LIST
Page 3

ASSEMBLY INSTRUCTION
PARTS ' LOCATION
PAGE 3 OF 5
3
2
2
1
Page 4
ASSEMBLY INSTRUCTION
ASSEMBLY STEPS
PAGE 4 OF 5
2
2
1
D
A
B
C
2
1
D
A
B
C
2
1
2
3
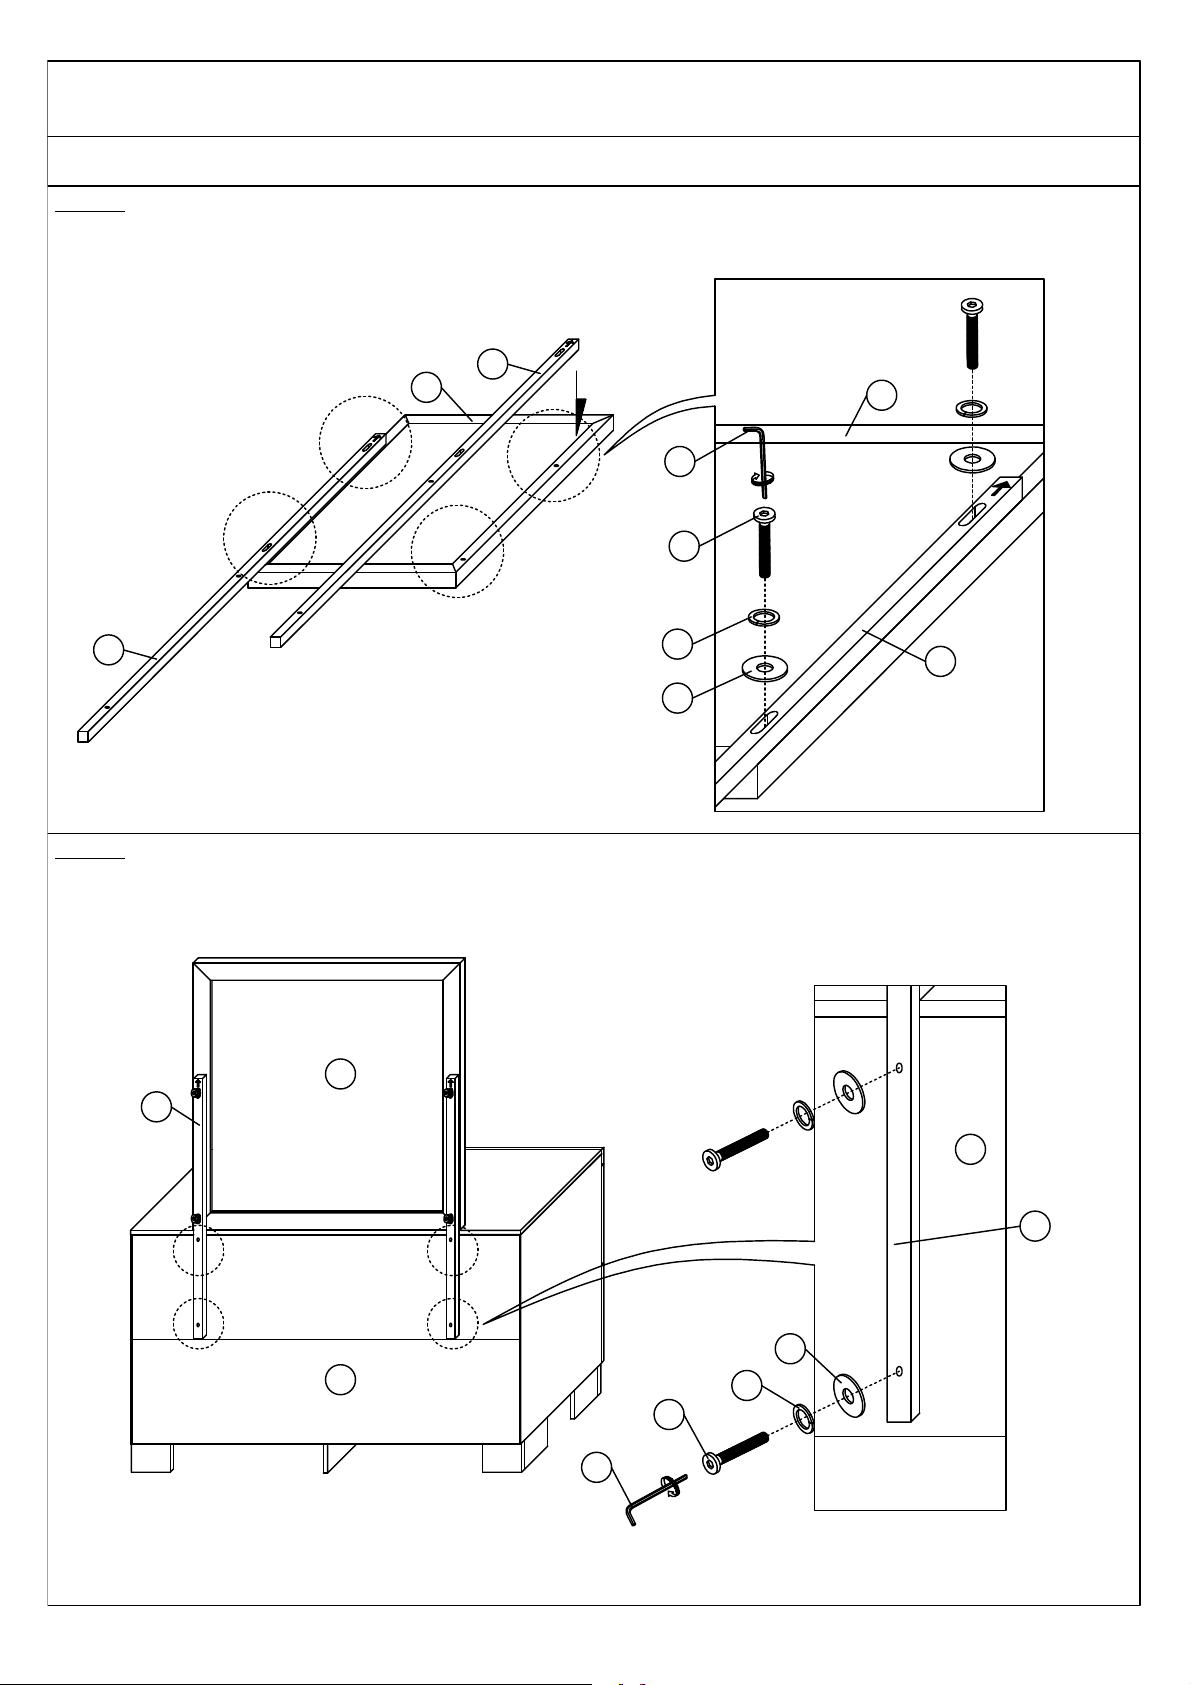
STEP 1
STEP 2
Align the positon of hole and put the MIRROR SUPPORT RAILS (2) on the MIRROR (1). Then insert 4 pieces JCBC
SCREW (A), SPRING WASHER (B) and FLAT WASHER (C) as shown.
3
Align the position of hole then insert 4 pieces JCBC SCREW (A),SPRING WASHER (B) and FLAT WASHER (C) to
combine the MIRROR SUPPORT RAILS(2) and DRESSER(3) as shown.
Page 5

PAGE 5 OF 5
ASSEMBLY COMPLETED
STEP 3
ASSEMBLY INSTRUCTION
 Loading...