

SanDisk SDMX11R-002GK-A57 - Sansa Clip 2 GB MP3 Player, SDDR-89-A15 - ImageMate 12-In-1 Memory Card Reader USB, Cruzer Micro MP3 Companion User Manual
Page 1

Contents
1. Cruzer Micro MP3 Companion
2. Clip
3. Earbuds
4. AAA Alkaline Battery
5. Quick Start Guide
Getting Started
1. Insert AAA Alkaline Battery
a. Slightly push down the battery door and pull outward
from the MP3 companion
b. Insert one AAA Alkaline battery with the positive side
facing out
c. Close the battery door until it locks in place
2. Place songs on the Cruzer Micro USB Flash Drive
(UFD)
a. You can Drag and drop files onto the Cruzer Micro or
transfer using your favorite Music software
b. Cruzer Micro MP3 Companion can use MP3 and
WMA files
3. Insert the Cruzer Micro into the Cruzer Micro MP3
Companion
a. Insert the side that the capacity is Facing the LCD
screen of the Cruzer Micro MP3 companion
b. Make sure it is snuggly in the Socket
4. Turn on the Cruzer Micro MP3 Companion
Basic Operation Manual
1. Using your player
a. To turn on your Player
i. Press and Hold the Play and Pause button until your
player turns on
ii. The SanDisk logo will appear on your player and it will
begin to operate
Page 2

b. To Turn off your Player
i. Press and hold the Play and Pause button until after the
Goodbye message disappears
2. Music Playback
a. Player continues to play where it left off if the unit was
turned off while playing
b. If it starts “FRESH”, it will start playing with the first
song in the Root Directory. (Or the first song in the
First directory if there are no songs on the root)
c. If no tracks are available, instead of the artist/track
information it will say “No Song”
d. To play the next song, press the “Menu Selection”
button lightly to the right once
e. To Fast forward hold the “Menu Selection” button to
the right
f. To Fast Reverse hold the “Menu Selection” button to
the left
g. To play previous song, press the “Menu Selection”
button to the left
3. Music Playback Display
• Artist name – track name (scrolling)
• Elapsed time
• Track #/Total#
• Play/Pause state
• EQ selection
• Battery indicator
a. Artist Track information is derived from the MP3 tag.
If not available, the file name will be displayed.
(Without the MP3 extension)
b. If the “Artist name-Track name” is to long to display
on screen, it will scroll across screen. (It will repeat
after the last letter leaves the scream on the left)
c. It will continue to scroll in a loop for the entire time
the song is playing
4. Volume Control Display
a. Press the Volume control up (+) button once to move
the volume up 1 level
b. Press the Volume control down (-) button once to
move the volume down 1 level
c. Press and hold the volume up button to continuously
move the volume up
Page 3
d. Press and hold the volume down button to
•Shuffle Repeat
continuously move the volume down
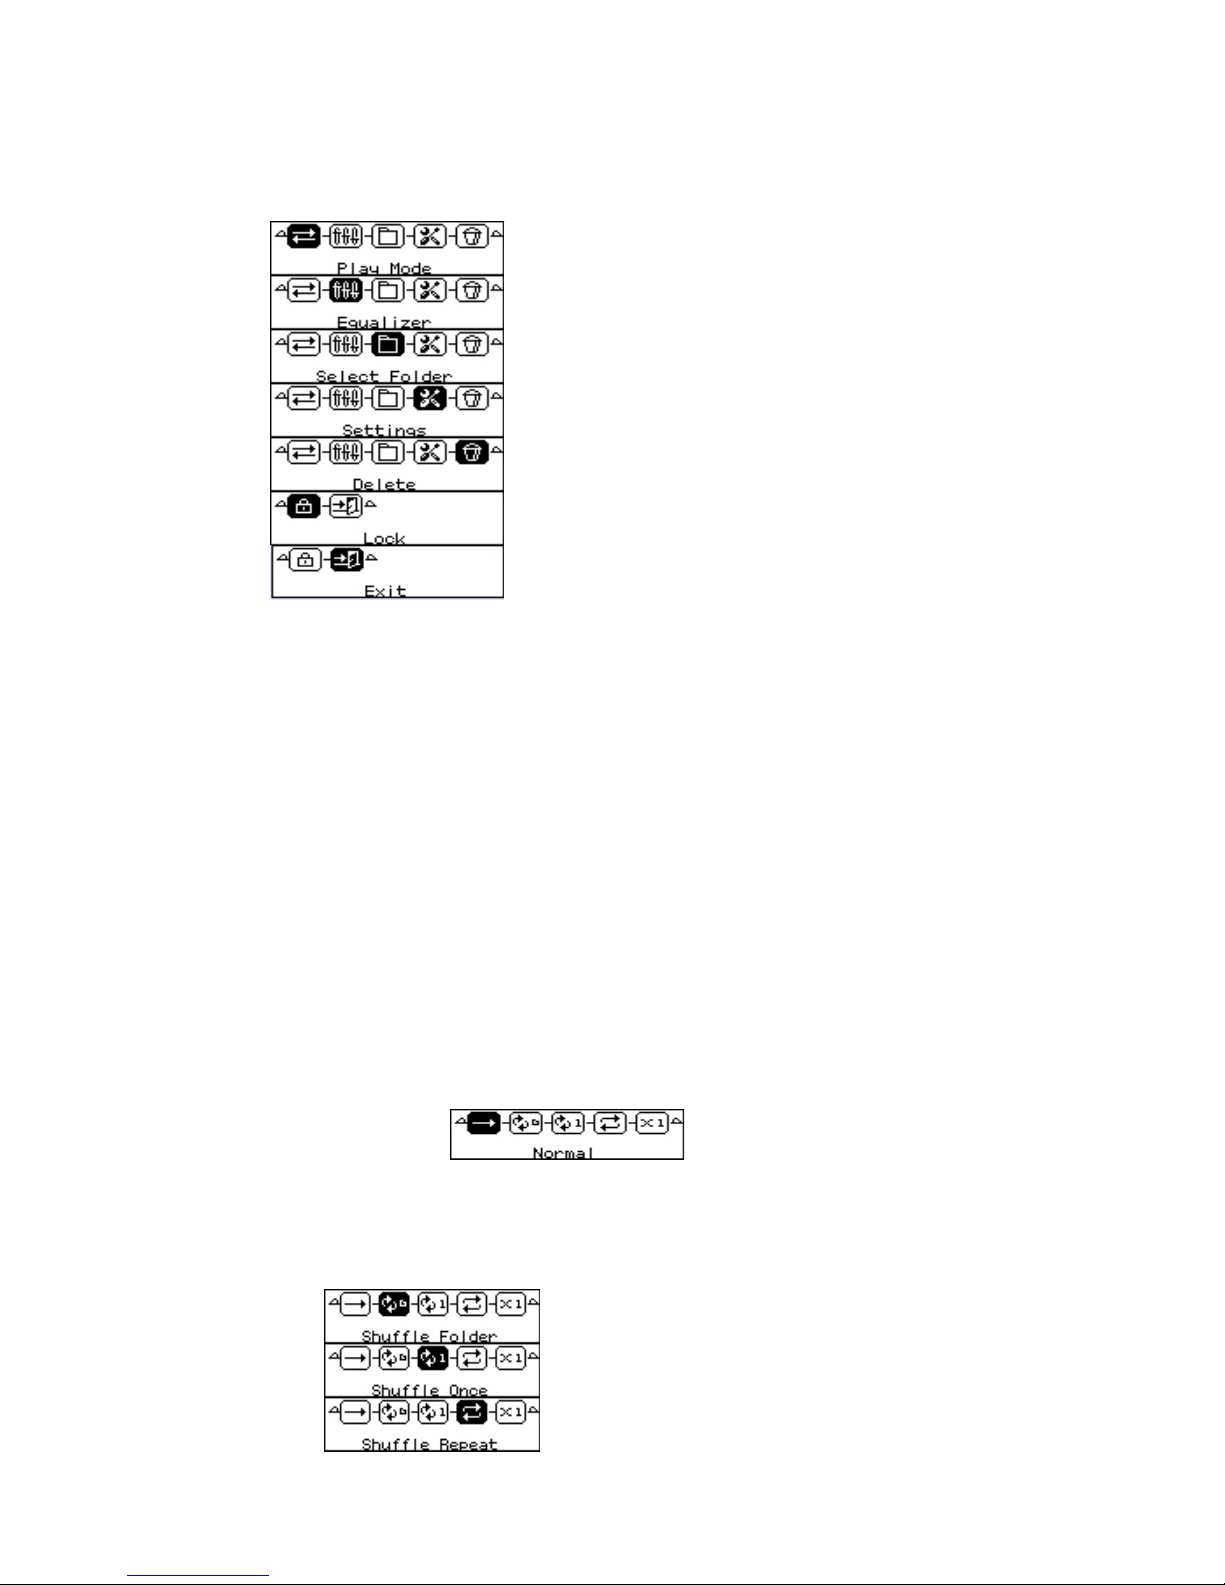
5. Menu Display
• Play mode
• Equalizer
• Select Folder
• Settings
• Delete
• Lock
• Exit
a. Press and hold the “Menu Selection” button to enter
the Menu display
b. To move forward through the menus press the “Menu
Selection” button to the right once to move to the next
selection. Holding the button to the right will scroll
through all options quickly
c. To move backward through the menus press the “Menu
Selection” button to the left once to move to the
previous selection.
d. To Exit the Menu Display, move to the Exit selection
and press once. Player will automatically exit the
Menu mode if you leave it idle for several seconds
6. Menu_Play mode
a. Normal
i. Selecting Normal means Normal mode is enabled, each
track is played in a standard order from the first track to
the last track
b. Shuffle
•Shuffle Folder
•Shuffle Once
Page 4
i. Selecting Shuffle means Shuffle mode is enabled.
Shuffle mode can be used to shuffle all tracks once (or
all tracks in one folder) or to shuffle all tracks repeatedly
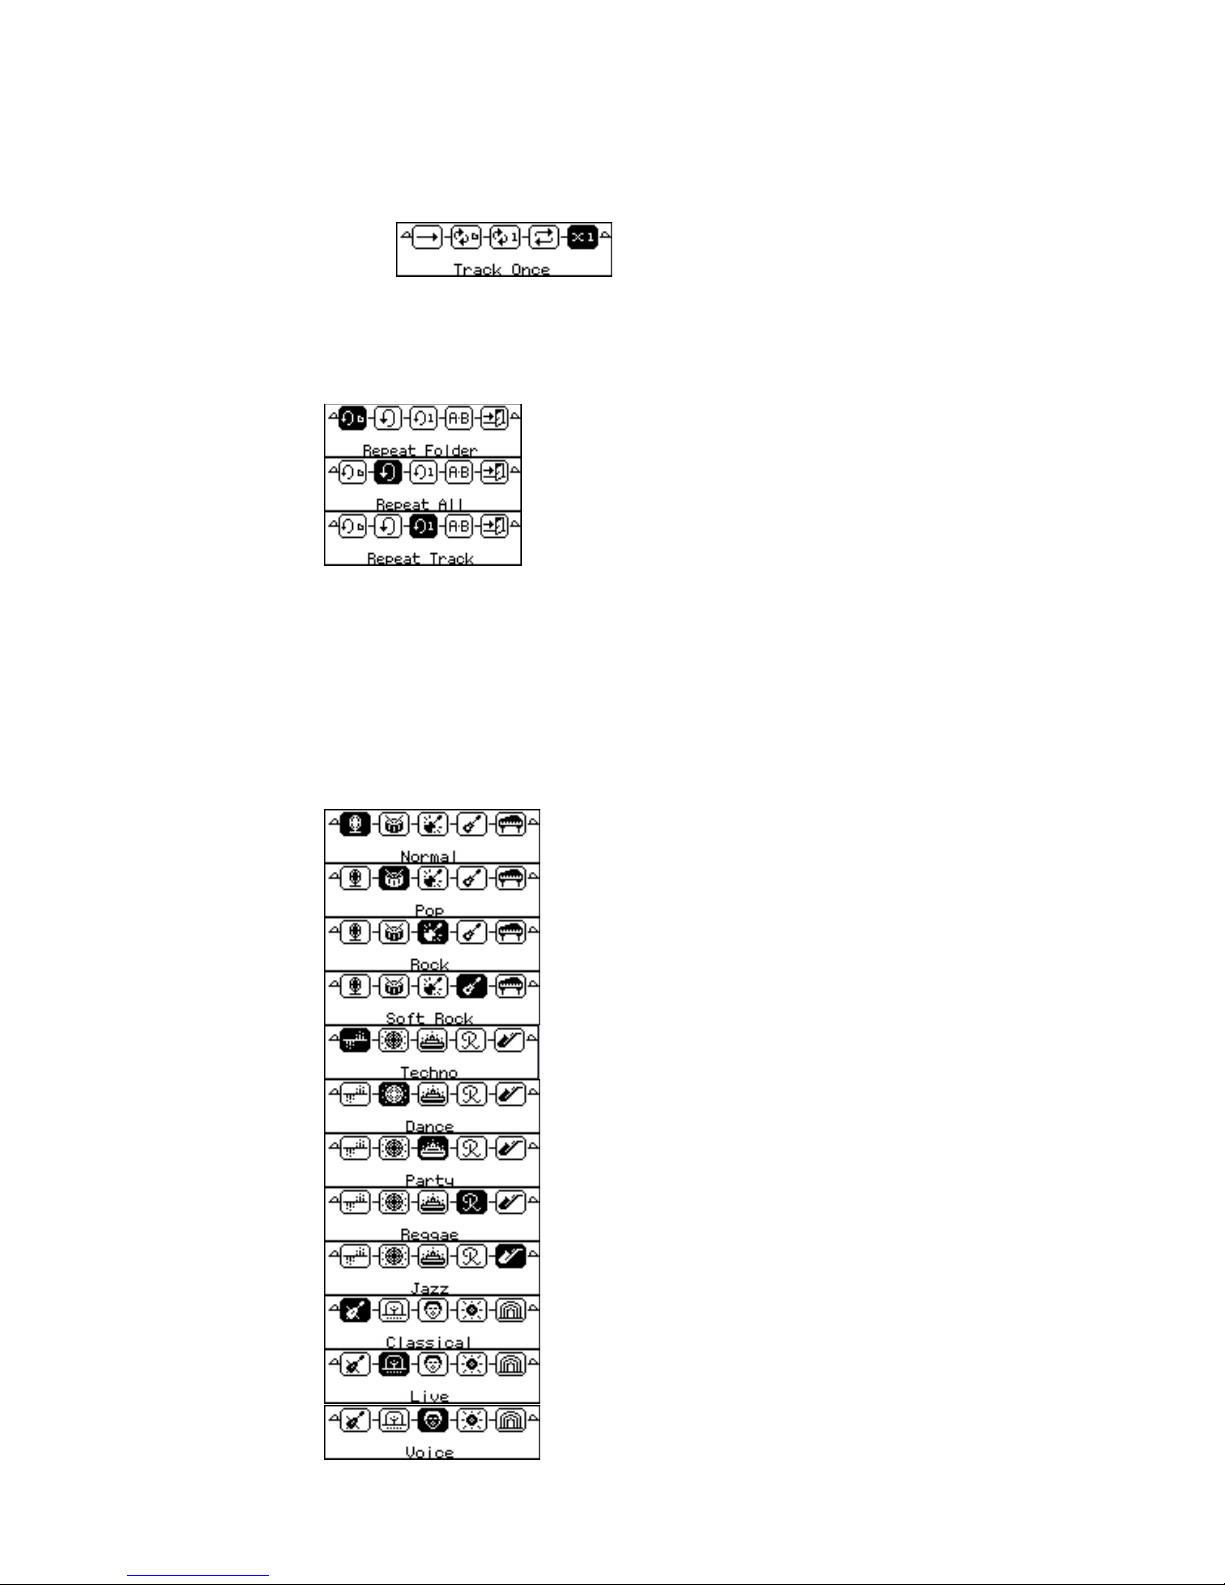
c. Track Once
i. Selecting Track Once means Track once mode is
enabled and playback will end once current track ends
d. Repeat
• Repeat Folder
• Repeat All
• Repeat Track
i. Selecting Repeat means Repeat mode is enabled. This
offers 3 choices. You can repeat a single track, all tracks
or all tracks in a folder
7. Menu_Equalizer
a. Your player allows you to enhance your listening
experience
b.
• Normal
• Pop
• Rock
• Soft Rock
• Techno
• Dance
• Party
• Reggae
• Jazz
• Classical
• Live
• Voice
• Bass Boost
Page 5

8. Menu_Folder
a. You can move to the ROOT folder by selecting the
folder icon in the menu list and pressing the “Menu
selection” button down once. Once you have selected
the ROOT folder your player will return to “Play”
mode
b. You may also select any other folders on the Cruzer
Micro using this icon
c. To Exit the Folder options select the Exit icon and
press the “Menu Selection” button down once
9. Menu_Setting
a. Selecting the Settings Button produces the following
selections
Contrast: Use this icon to select the players contrast
Backlight: Use this icon to choose the length of time for
the backlighting to remain active
Language: Choose the language displayed on Player
Idle Shutdown: Sets the length of time the player can be
idle before shutting down
Information: Contains information for your player
LCD Orient: reverses orientation of the text
Factory Setting: Returns the player to factory Settings
Page 6

b. To move forward through the menus press the “Menu
Selection” button to the right once to move to the next
selection
c. To move backward through the menus press the “Menu
Selection” button to the left once to move to the
previous selection
d. To Exit the Menu Display, move to the Exit selection
and press once
10. Menu_Lock
a. Allows you to Lock or un-lock your player
b. While locked no buttons will be usable
c. Contains a Lock icon, and Un-lock icon and an Exit
Icon
Warranty
(Insert Warranty here)
Register On-Line
Please register your Cruzer Micro MP3 Companion at
http://www.sandisk.com/retail_technical_support_registrat
ion.asp
Technical Support
Technical support is available M-F 7am-4pm PST
To call toll free the number is 1-866-726-3475
Or email support at support@sandisk.com or for European
customers europesupport@sandisk.com
Specifications
1. Audio output = 5mW
2. Freq. Response = 20 ~ 20 KHz
3. THD = 0.05%
4. SNR = up to 90dB
5. ID3 tag support (v.1 & 2)
6. Supports MP3 and WMA file formats
7. Battery Life standard name brand AAA = Up to 7 hours with included ear buds
and using only MP3 files
Page 7

8. MP3 Companion saves settings when you power it off. When you power it back
on it will resume at same location as where it left off
9. Read only files may not be deleted in the MP3 Companion
Basic Troubleshooting
1. If the unit will not power on, check the following
a. Check to make sure the cap for the battery is securely locked in place
b. Check to make sure the battery is inserted correctly. (Positive side up)
c. Check to make sure the battery is still good
2. If the display says “No Song”, check the following
a. Check to Make sure the Cruzer Micro is securely inserted in the MP3
Companion
b. Check to make sure the files on the Cruzer Micro are MP3 or WMA file
formats
3. If you can not hear any music but it appears to be playing
a. Check and make sure the ear buds are securely inserted
b. Check to make sure the volume level is adjusted high enough
c. Check to make sure the ear buds are functioning properly
 Loading...