

1

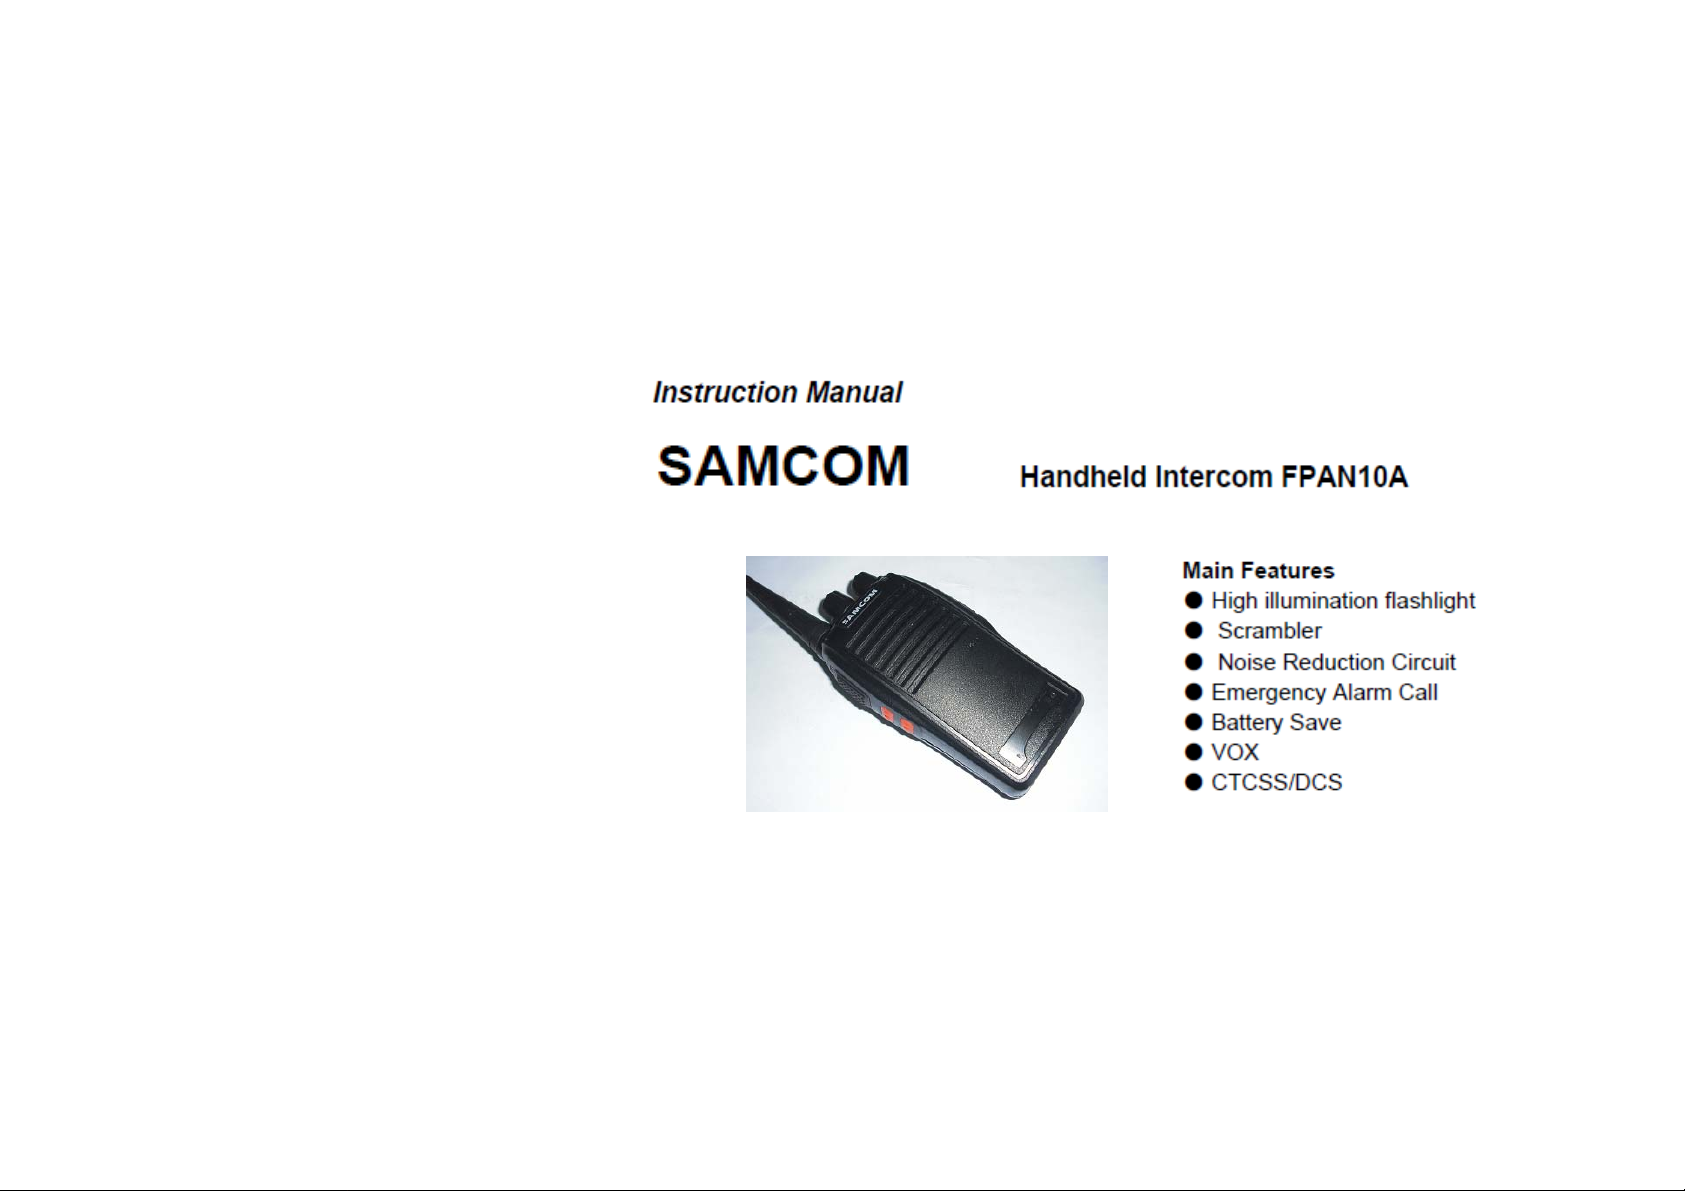
□ SAMCOM assumes no responsibility of any damages or loss
resulting from the use of this Manual.
□ SAMCOM assumes no responsibility for any loss or claims by third
parties which may arise through the use of the FPAN10A.
□ SAMCOM assumes no responsibility for any damage or loss
caused by deletion of data as a result of malfunctions, repair or
battery replacement.
2

CONTENTS
1. Get Acquaint
■ Installing Battery
■ Installing Antenna
■ Installing Belt Clip
■ Installing optional Speaker/Micrphone
2. Basic Operation
■ Turn Transceiver on
■ Control Volume
■ Select the channel
■ Receiving operation
■ Transmit operation
3

■ Battery Low alert
3. Battery Charging
4. Additional functions
■ Time out Timer
■ Scan
■ Voice Prompt
■ Voice Operated Transmission ( VOX )
■ Battery Saving
■ Busy Channel Lockout ( BCL )
■ CTCSS / DCS
4
5. Important Precaution
1. Getting Acquaint
5
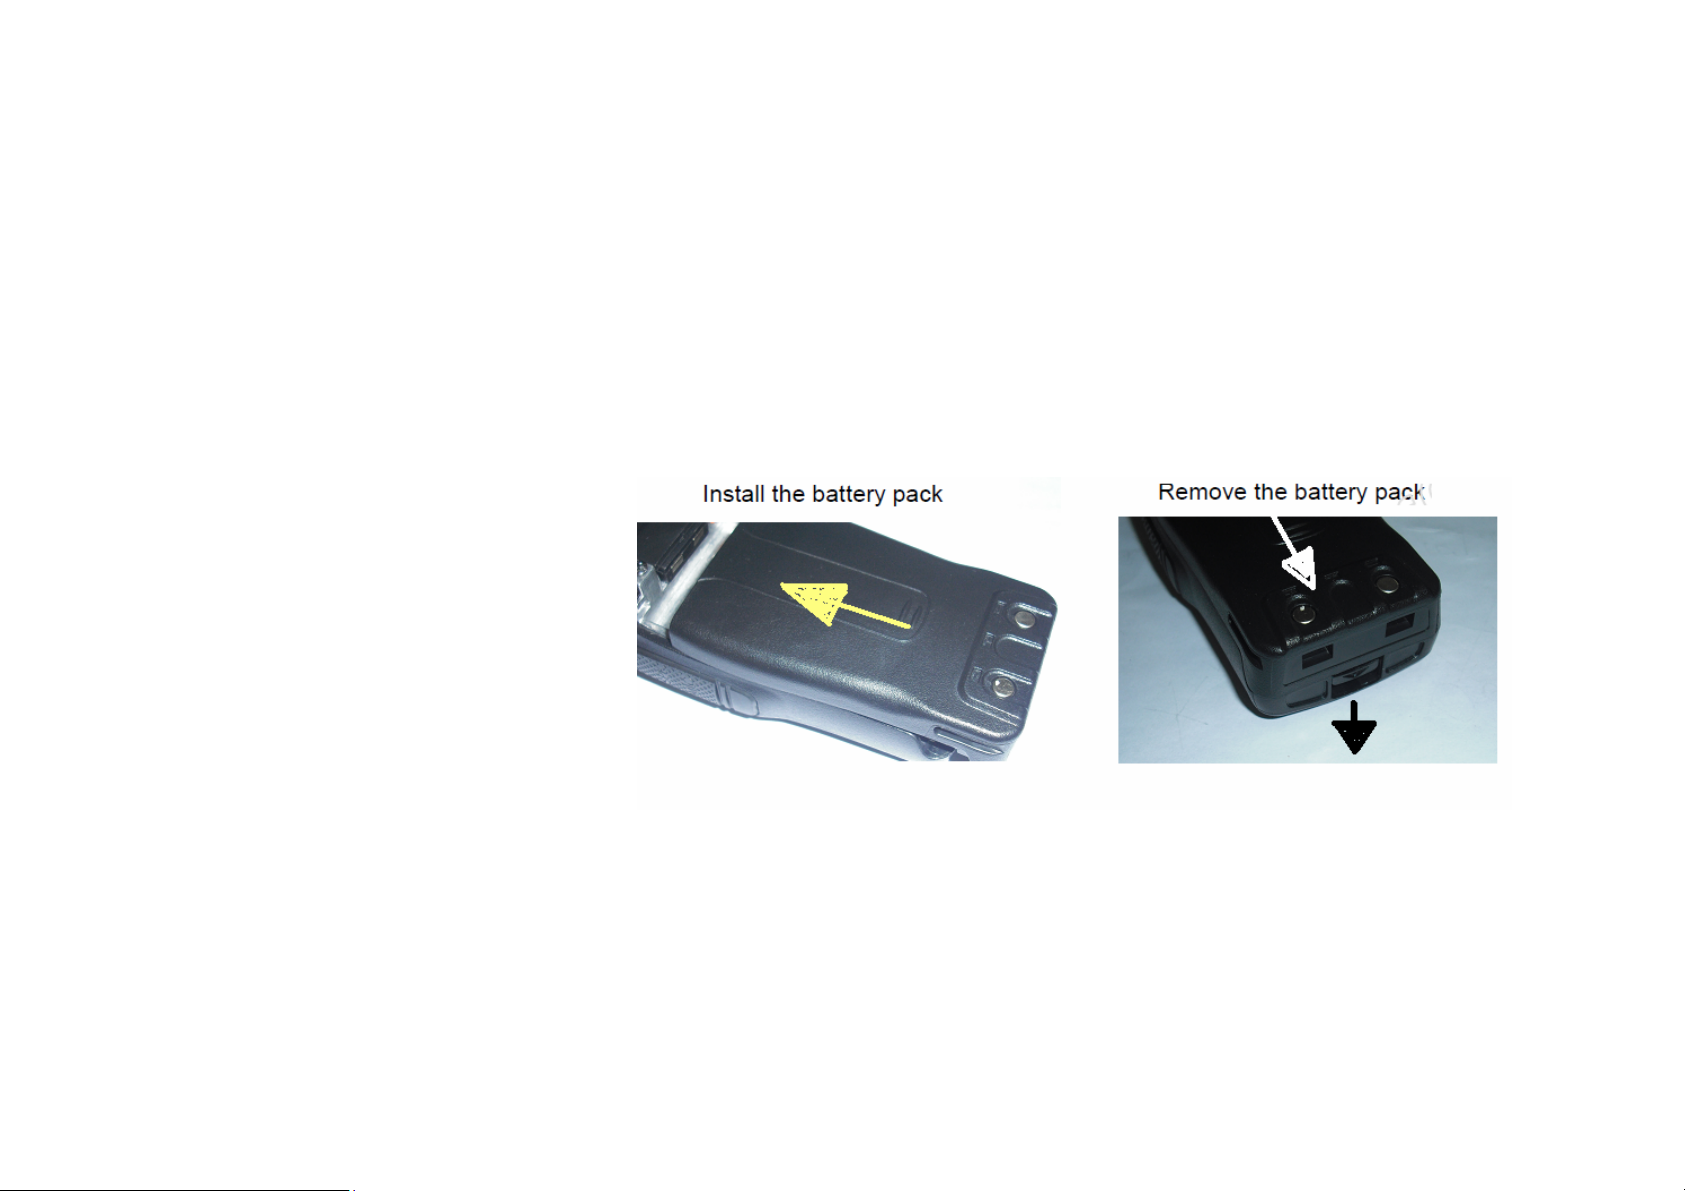
■ Installing the battery.
6
■ Installing the Antenna
Screw the Antenna into the antenna connector on the top of
transceiver.
■ Installing the Belt Clip
Belt clip need to be fixed by 2 pcs of screws on the back side of
transceiver.
7

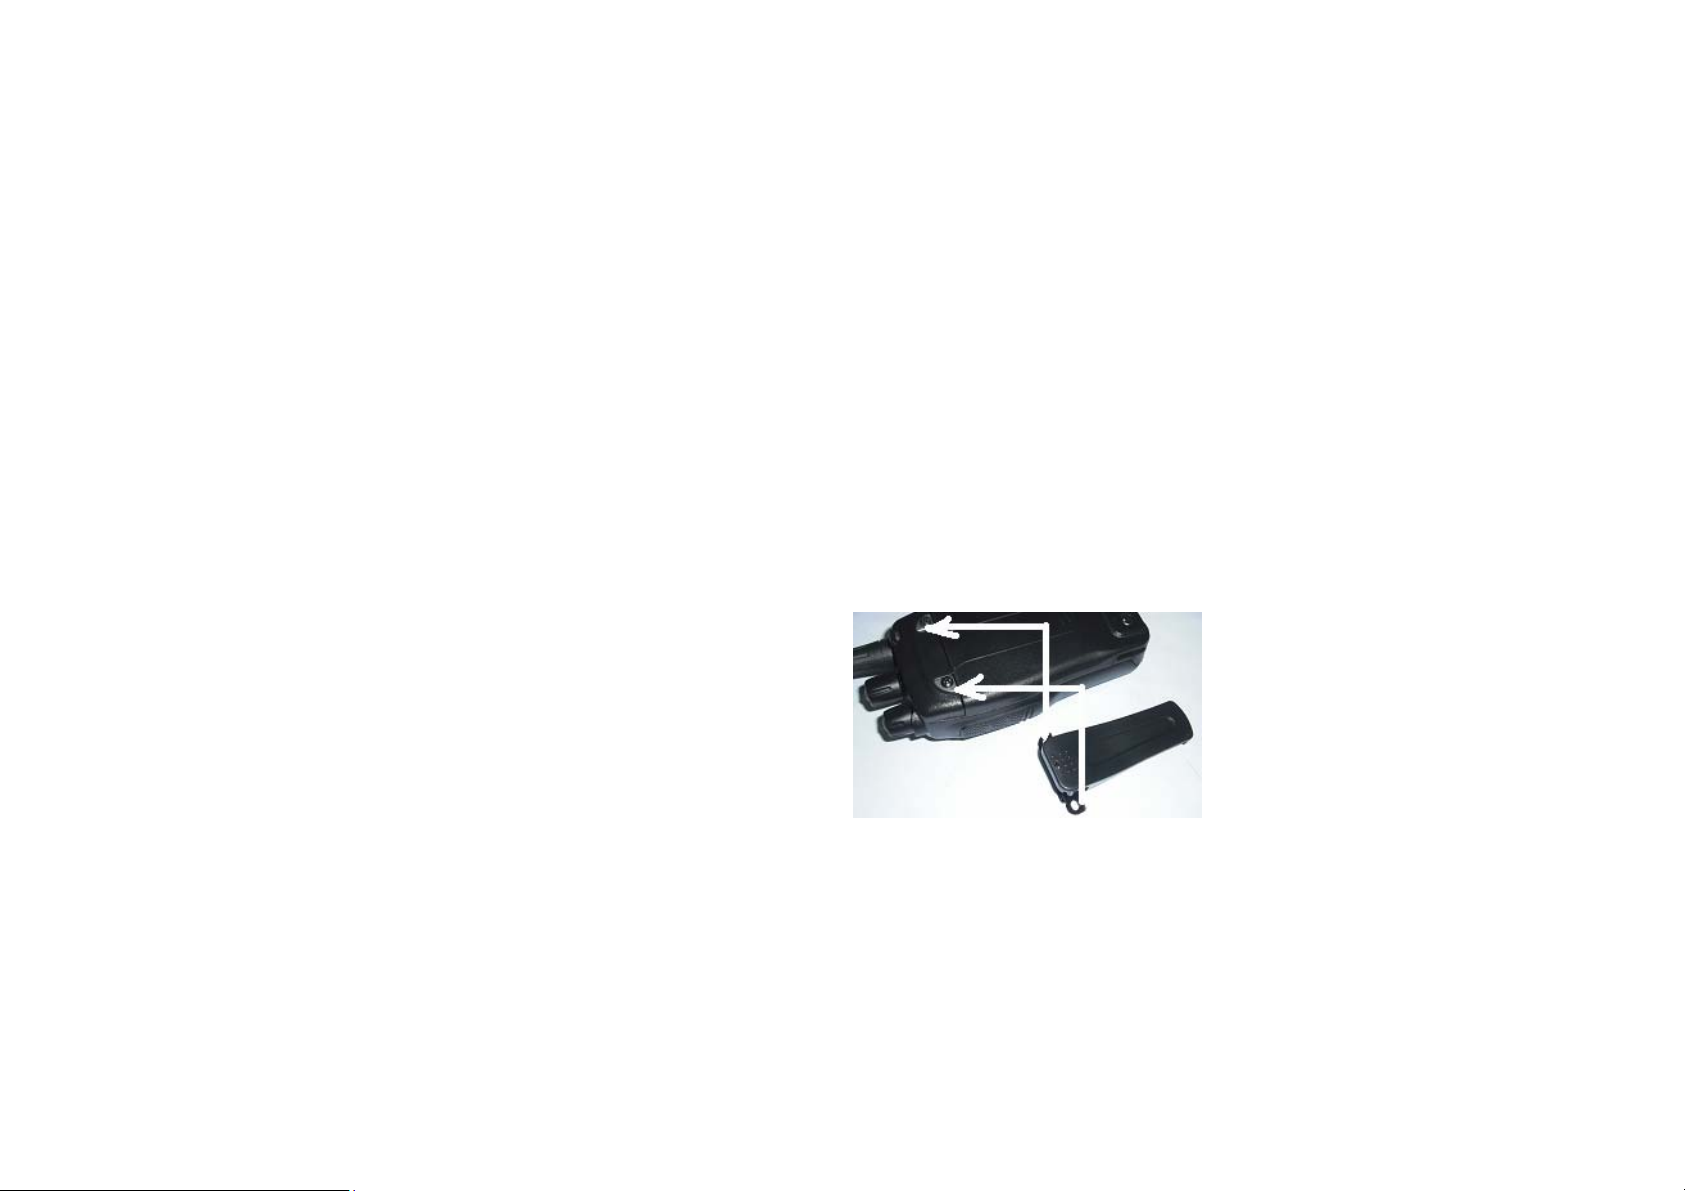
■ Installing the optional Speaker/Microphone
Firstly Pull up the jack cover on the right side of transceiver and
connect the Speaker/Microphone.
Please note that when connecting the Speaker/Microphone, the
performance of shower resistance may reduce its performance.
8

2. Basic Operation
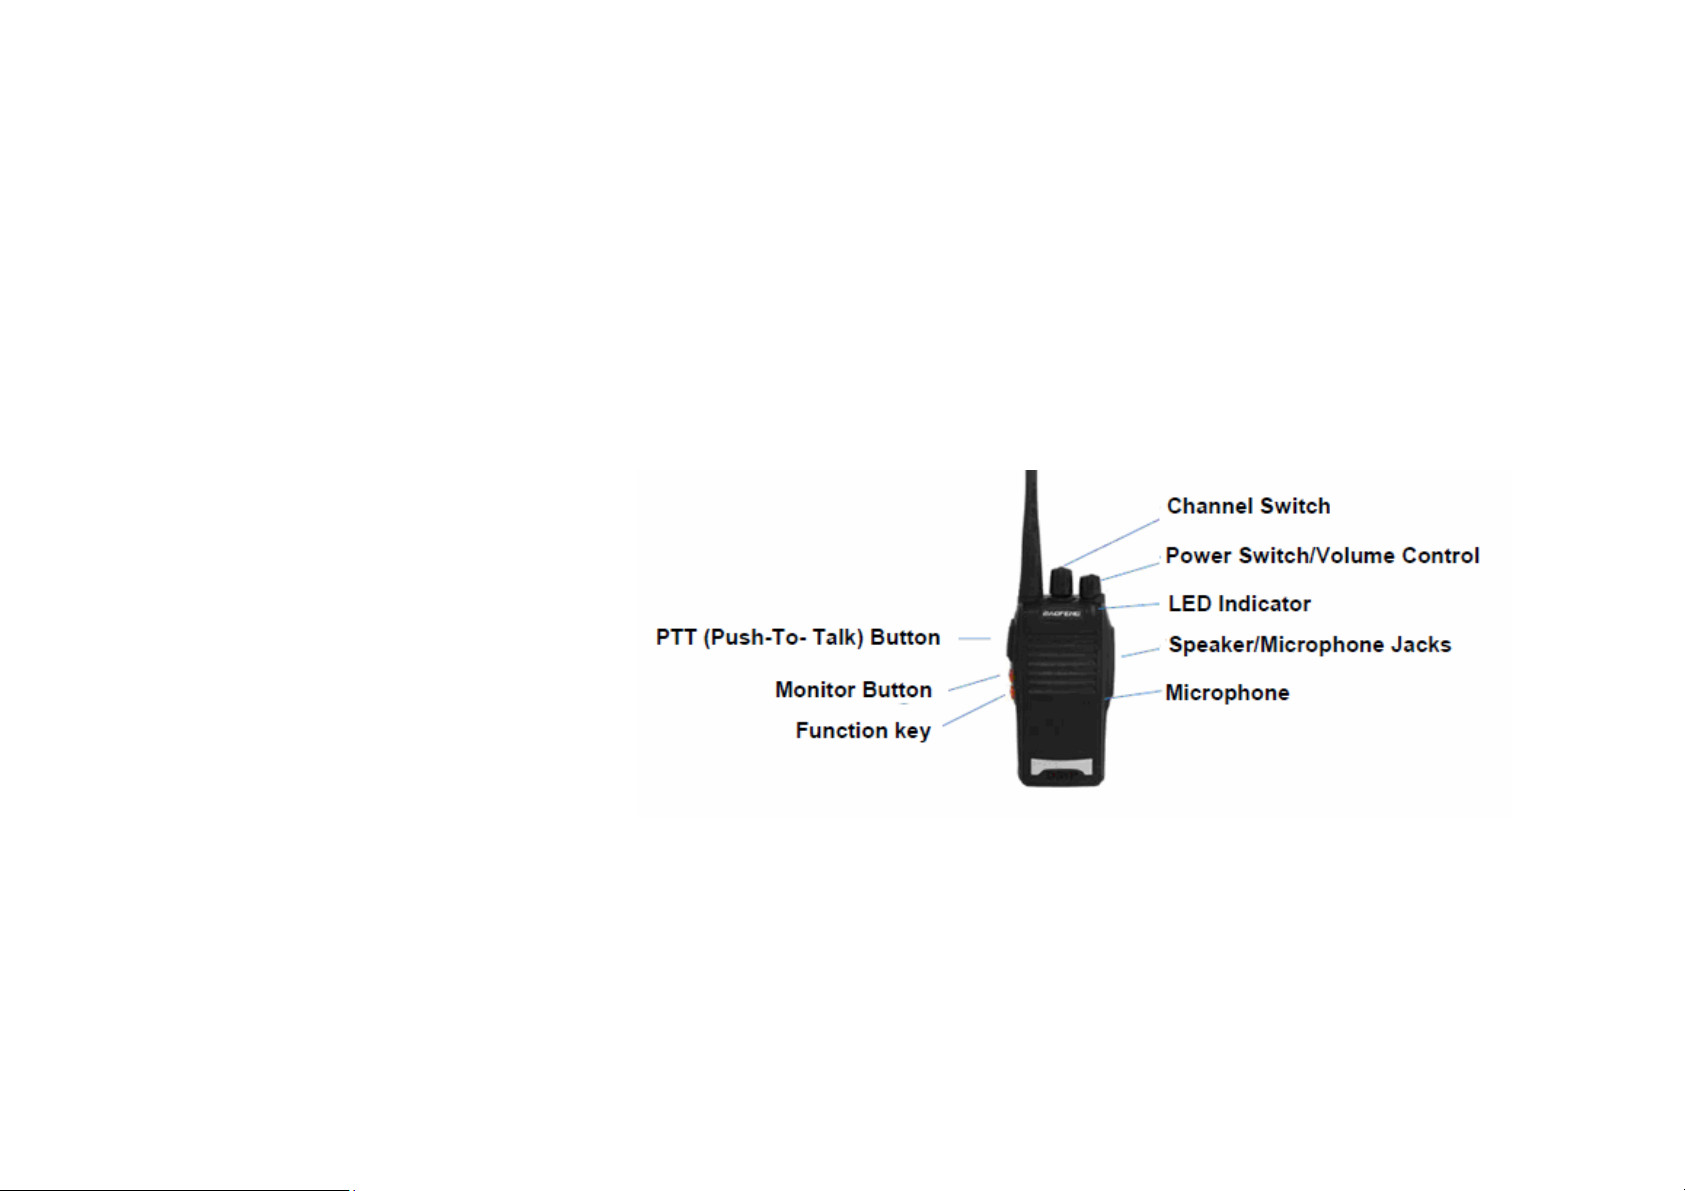
■ Turn transceiver ON.
When delivering the transceiver, transceiver should be powered off.
To power on the transceiver, turning clockwise the Power
switch/Volume control knob. You can hear the turn on message
automatically to indicate that transceiver is power on condition.
■ Control Volume
Press and hold the Monitor button to listen the audio noise. Then adjust
the Power- switch/Volume control knob to set the proper sound level.
Turn clockwise to increase the volu me and turn counterclockwise to
decrease the volume.
9

■ Select the channel.
To select channel, turn the Channel Switch to set the desired channel.
No. 16 channel is the scanning channel.
■ Receiving operation.
The LED indicator lights green to indicate the transceiver is under
reception mode. Transceiver equipped with the Squelch function. If
field strength is very weak, transceiver can not generate the audio to
keep communication smooth. But if you want to listen the voice even
in the weak field strength, press Monitor button and hold to listen the
noisy voice.
To press the Function button LED torch will light up. If press one time,
Touch will continuously light on and press 2 times to flash Torch.LED.
10

■ Transmit operation
To transmit the transceiver, press and hold the Press to Talk ( PTT )
button. Holding the PTT button, you can speak to microphone.
To keep the better condition to transmit the voice, mouth should be
away from the microphone around 2-3 inches.
When transceiver is under transmission LED will light RED color.
■ Battery low alert
If battery is very low level, Battery low alert will be generated to indicate
that you need to charge the battery.
11

3. Battery Charging
12

To charge the Transceiver, following are the instructions,
1. Plug the AC power to the Charger unit.
2. Check the Charger LED turns green to standby the charger.
3. Insert the Transceiver into the Charger pocket.
4. Check the Charger LED turns red to indicate that charging is
operating.
5. After 3 hours from the charging start, LED turns green to indicate
the charging has been successfully done.
6. Remove the Transceiver unit from the charger pocket
13

4. Additional function
■ Time out timer ( TOT )
TOT is the optional function set by programmer. If TOT is available,
transmission time ( hold the PTT button ) will be limited on certain
period of time. TOT is useful for preventing from the thermal damage
when Transceiver is under long time transmission.
■ Scan
Scan is the optional function set by programmer. If scan function is
available, transceiver can stop the any of channel which are busy.
This scan function can be set only for No.16 channel, so you can
monitor maximum of 15 channelw with scanning mode.
14

When channel is stop at certain channel, you can press the PTT button
to transmit. Also press and hold the Monitor button to stop scan
operation.
■ Voice message ( Prompt )
Voice prompt function can be valid or invalid by programmer.
If Voice prompt is valid, you can listen the voice when changing the
channel or power switch on.
To activate the Voice prompt function on, keep holding Monitor button
and PTT button together and turn the Transceiver power on.
15

■ Voice Operated Transmission ( VOX )
VOX is the optional microphone set. If you have VOX function, you
do not need to PTT mode by manual, VOX circuit automatically switch
on the transmission mode
VOX sensing level is bit critical to set. You need to adjust the sensor
level at actual environment and voice level.
To activate the VOX function, press and hold monitor button and PTT
button together and turn Transceiver power on at channel 1 to 5.
■ Battery Saving
This is a standard function. To increase the battery life ( decrease
battery consumption ) , Transceiver has battery saving mode Battery
saving mode will start after 10 seconds from the busy condition off.
16

■ Busy channel Lockout ( BCL )
BCL function is the optional function that can be set by programmer.
If BCL is on, Transceiver can not transmit when Transceiver is under
busy condition. If press PTT button, generate the short beep to indicate
that Transceiver can not transmit due to busy condition.
■ CTCSS / DCS
CTCSS can be set by programmer.
If equipped with CTCSS or DCS, your group can not listen other group
conversation. This function is useful to listen the voice within the group
even other group are using same channel.
17

5. Important Precaution
□ This Transceiver contains precious electronic components.
Avoid temperature extremes during use storage, and do not
subject it to strong impact.
□ Avoid using it in area where it might come into direct contact with
liquids and avoid very high humidity.
□ Never try to open Transceiver or take it apart. Doing so can lead
to serious damage and malfunctions.
□ Clean the Transceiver by wiping it with a soft dry cloth. You can
also use a soft cloth moistened with a weak solution of a mild
neutral detergent and water. Wiping as much liquid as possible
18

from the cloth before wiping the pager. Never use thinner,
benzene, or other volatile agents, or alcohol to clean the body.
□ Do not use allow the Transceiver to be exposed to direct sunlight,
heat from the heaters, or other source from heat ( greater than 60
degree C ).
□ Never expose batteries to direct heat or incinerate them. Doing so
may cause the battery to explode.
19

This radio has been tested and complies with the FCC RF exposure limits for
“
Occupational/Controlled Exposure.” In addition, your SANCON radio complies with the following
Standards and Guidelines with regard to RF energy and electromagnetic energy levels
and evaluation of such levels for exposure to humans:
KDB 865664 D01 SAR Measurement 100 MHz to 6 GHz v01r03, Evaluating Compliance with FCC
Guidelines for Human Exposure to Radio Frequency Electromagnetic Fields.
• American National Standards Institute (C95.1–1992), IEEE Standard for Safety Levels
with Respect to Human Exposure to Radio Frequency Electromagnetic Fields, 3 kHz to
300 GHz.
• American National Standards Institute (C95.3–1992), IEEE Recommended Practice for
the Measurement of Potential y Hazardous Electromagnetic Fields— RF and Microwave.
To ensure that your exposure to RF electromagnetic energy is
within the FCC allowable limits for general population use, always adhere
to the following
CAUTION guidelines:
• DO NOT operate the radio without a proper antenna attached, as
this may damage the radio and may also cause you to exceed FCC
RF exposure limits. A proper antenna is the antenna supplied with

this radio by the manufacturer or an antenna specifically authorized by the manufacturer
for use with this radio.
• DO NOT transmit for more than 50% of total radio use time (“50% duty cycle”).
Transmitting more than 50% of the time can cause FCC RF exposure compliance
requirements to be exceeded. The radio is transmitting when the “TX indicator” lights red.
You can cause the radio to transmit by pressing the “PTT” switch.
• ALWAYS use SANCON authorized accessories (antennas, batteries, belt clips,
speaker/mics, etc). Use of unauthorized accessories can cause the FCC RF exposure
compliance requirements to be exceeded. Body-worn operations are restricted to
belt-clips, holsters or similar accessories that have no metallic component in the assembly
and that provide at least 1.5 cm separation between the device, including its antenna, and
the user's body. T o provide the recipients of your transmission the best sound quality, hold
the antenna at least 5 cm (2 inches) from mouth, and slightly off to one side. The
information listed above provides the user with the information needed to make him or her
aware of RF exposure, and what to do to assure that this radio operates within the FCC
RF exposure limits of this radio.
Electromagnetic Interference/Compatibility
During transmissions, your SANCON radio generates RF energy that can possibly cause
interference with other devices or systems. To avoid such interference, turn off the radio in
areas where signs are posted to do so. DO NOT operate the transmitter in areas that are
sensitive to electromagnetic radiation such as hospitals, aircraft, and blasting sites.
This device complies with Part 90 of the FCC rules. Operation is subject to the following two
conditions: (1) This device may not cause harmful interference, and
(2) this device must except any interference received, including interference that may cause
undesired operation.
Changesormodificationsnotexpresslyapprovedbythepartyresponsiblefor
compliancecouldvoidtheuser’sauthoritytooperatetheequipment.
Important: Do not hold down CALL for more than 10 seconds. The FCC does not allow you to
send a continuous tone for more than 10 seconds at a time.
 Loading...