

y
y
p
y
(
)
y
g
Test Model:FPEN10A
User Manual
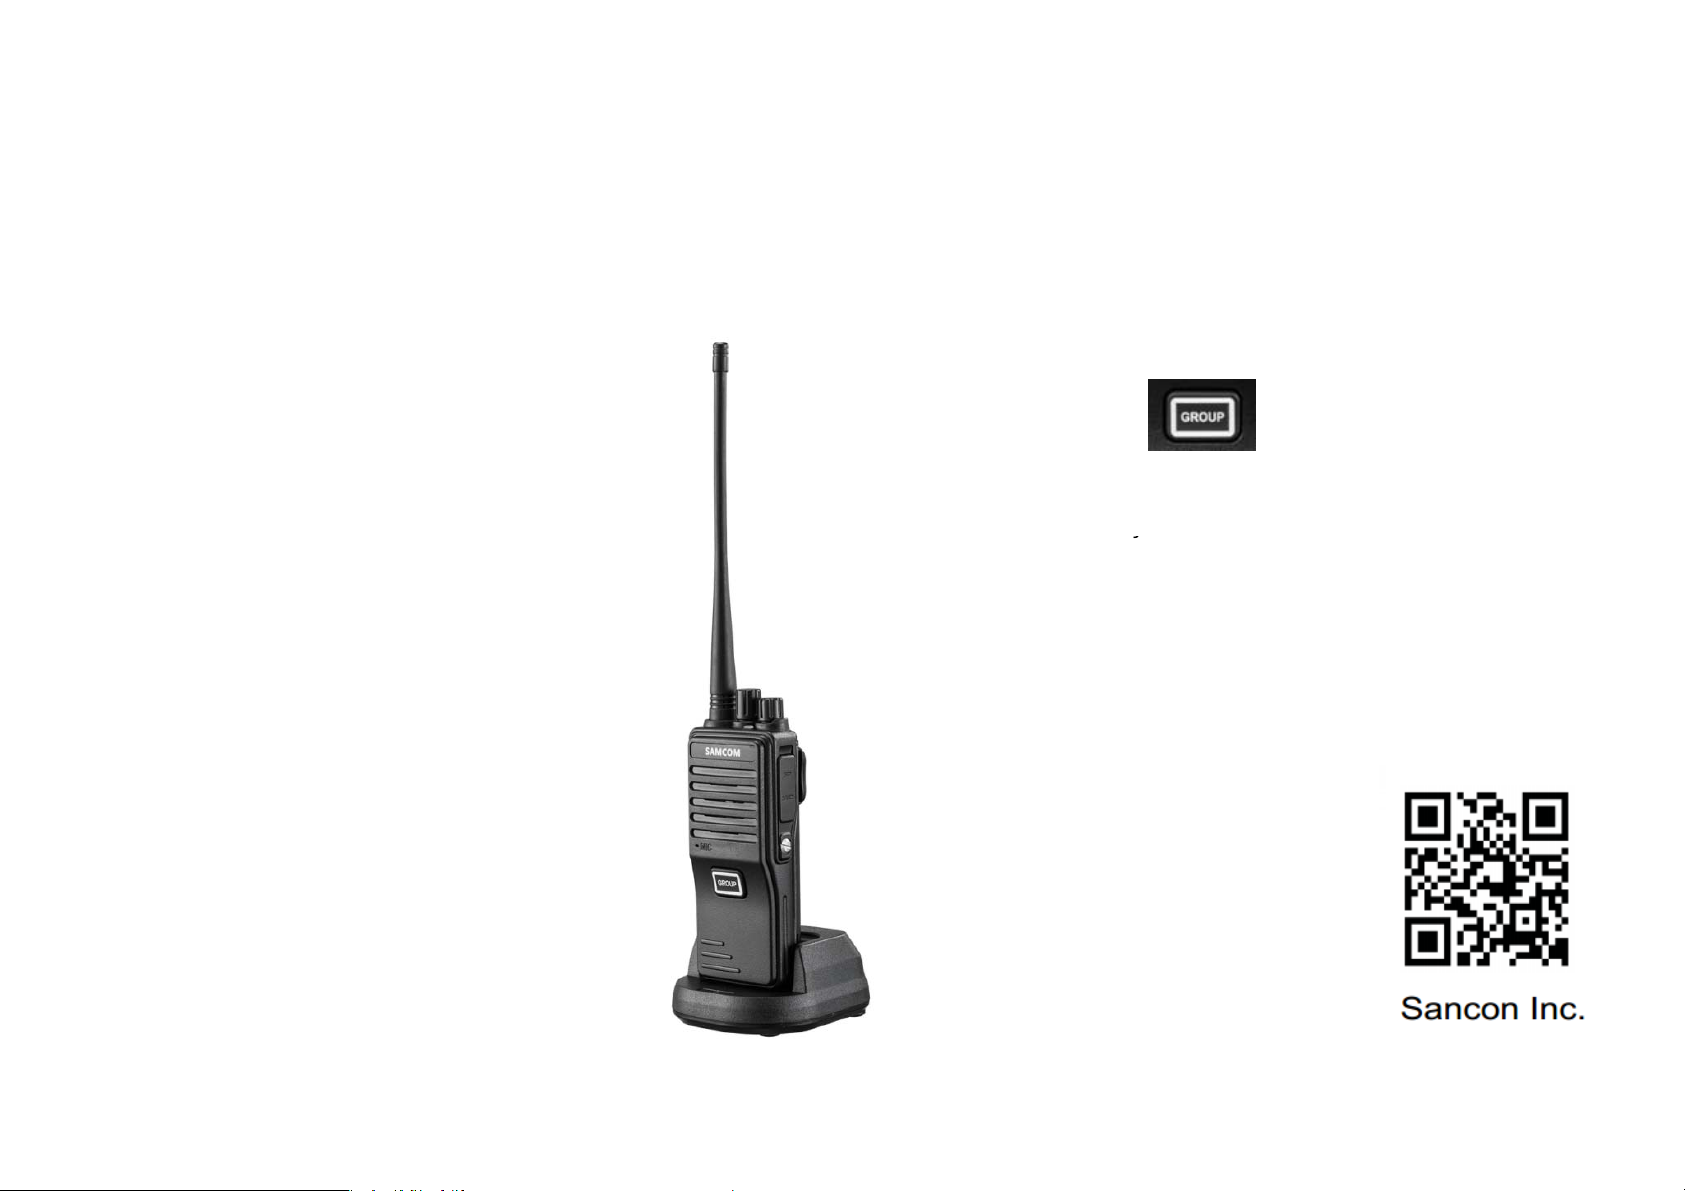
SAMCOM FPEN10A
Features
■ With GROUP button
■
Batter
■
Voice Prom
■
20 Memor
Vox Function
■
■ Low Battery Alarm
Noise Reduction Circuit
■
■ Batter
Hi
■
Monitor Function
■
■ Scan Function
■ CTCSS/CDCSS
Capacity 3000mAh
t
Channel
internaland external
Save Function
h/ Low Power Selectable
1) Keep Press Talk
you can talk to all
of person, even they
are in different channel
2) The color change to blue
that is the voice is from
someone press the GROUP
button speaking.
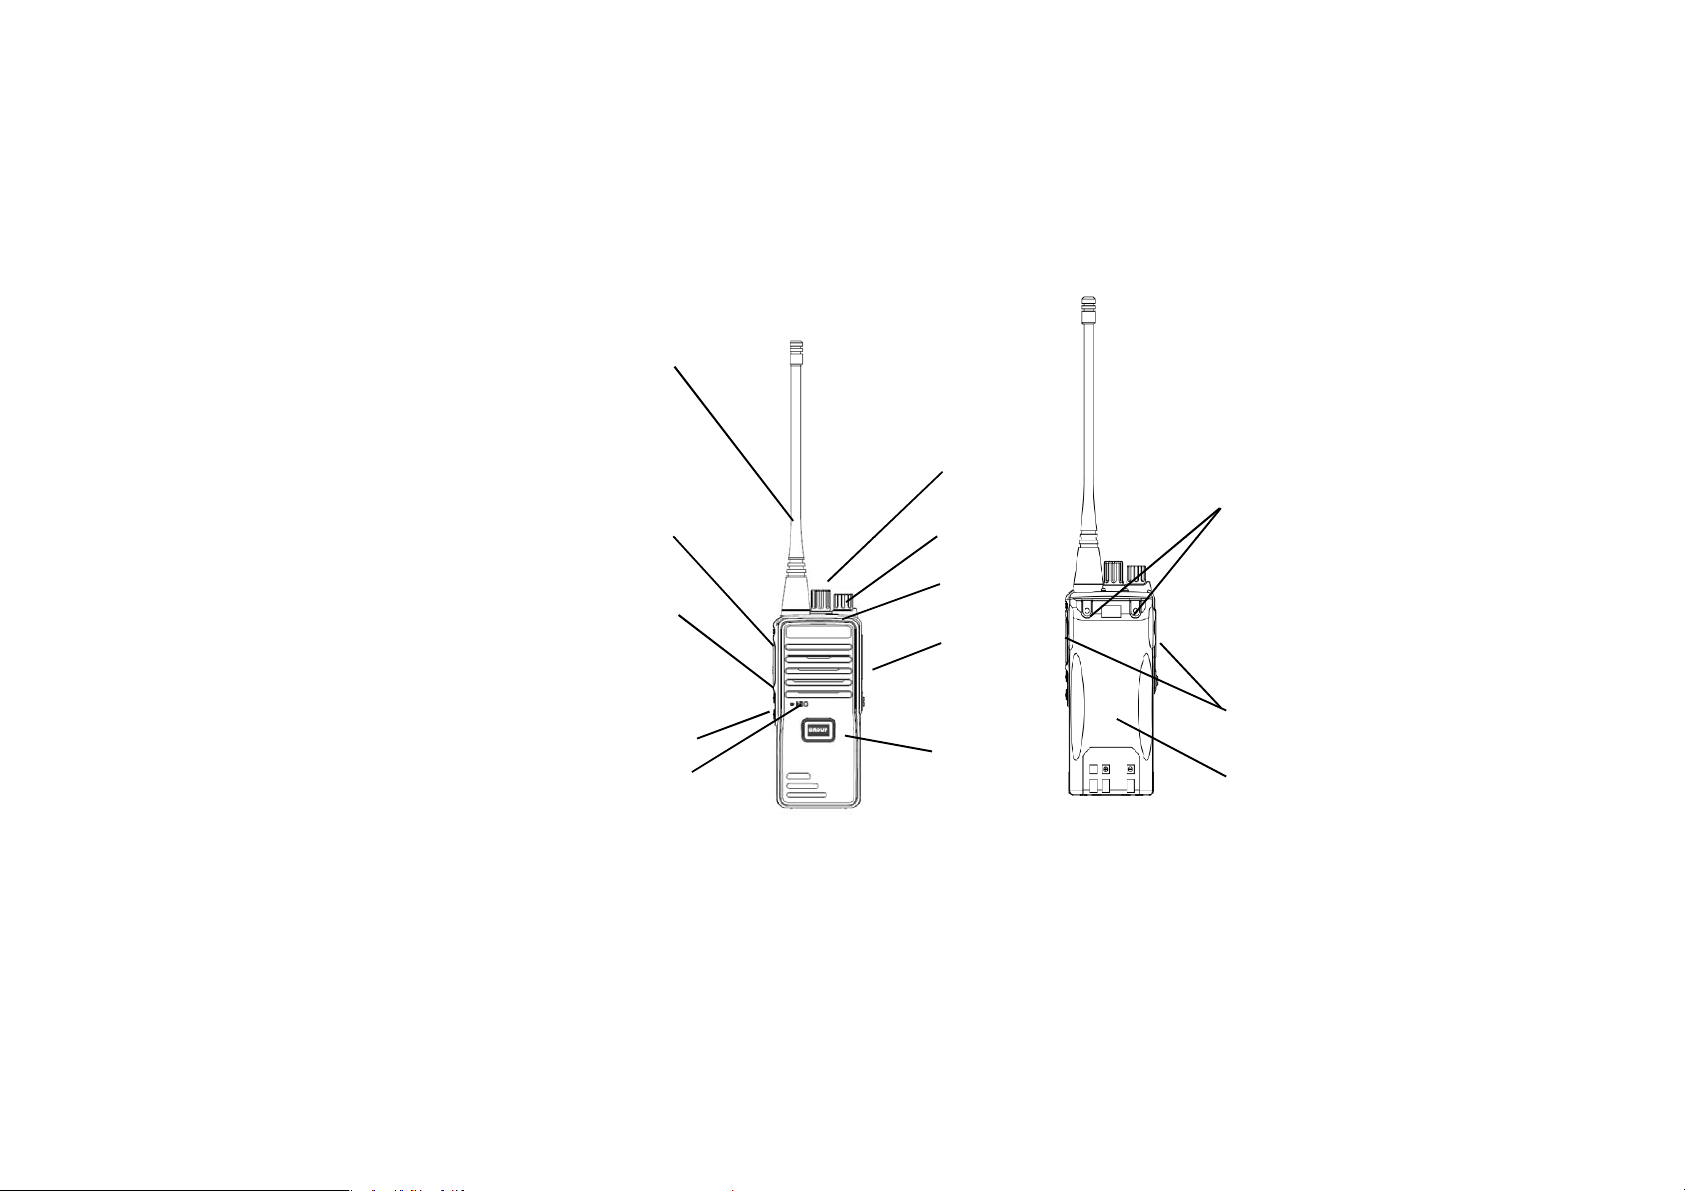
Get Familiar with the transceiver
(1) PTT Transmitting
(2) MONI (monitor) button 4
VOX Function (keep press)
(3) Scan/call button
High/Low Power (keep press)
(4) Antenna 55
(5) Channel selection knob 13
(6) Power/volume switch 16
(7) Microphone
(8) Status indicator 8
(9) Battery release button 2
(10) Earphone cap 10
(11) GROUP button
(12) Battery 9
(13) Belt screw
311
712
Charging Operation
Please use SAMCOM-specified charger to charge the battery; the indicator light of the charger shows the completion of charging
operation.
Indicator Light State
Red light
Green light
Please do the following steps to charge:
1. Insert the AC plug of the power adapter into the AC power outlet.
2. Insert the DC plug of the power adapter into the DC jack on the
back of the charger,
3. Place the battery or the transceiver with battery on the charger.
4. Confirm that the battery contacts are well connected with the charger contacts, and the charge indicator light turns red, which
represent the beginning of the charging operation.
5. After a period of time, when the indicator light turns green, it shows the completion of the charging operation.
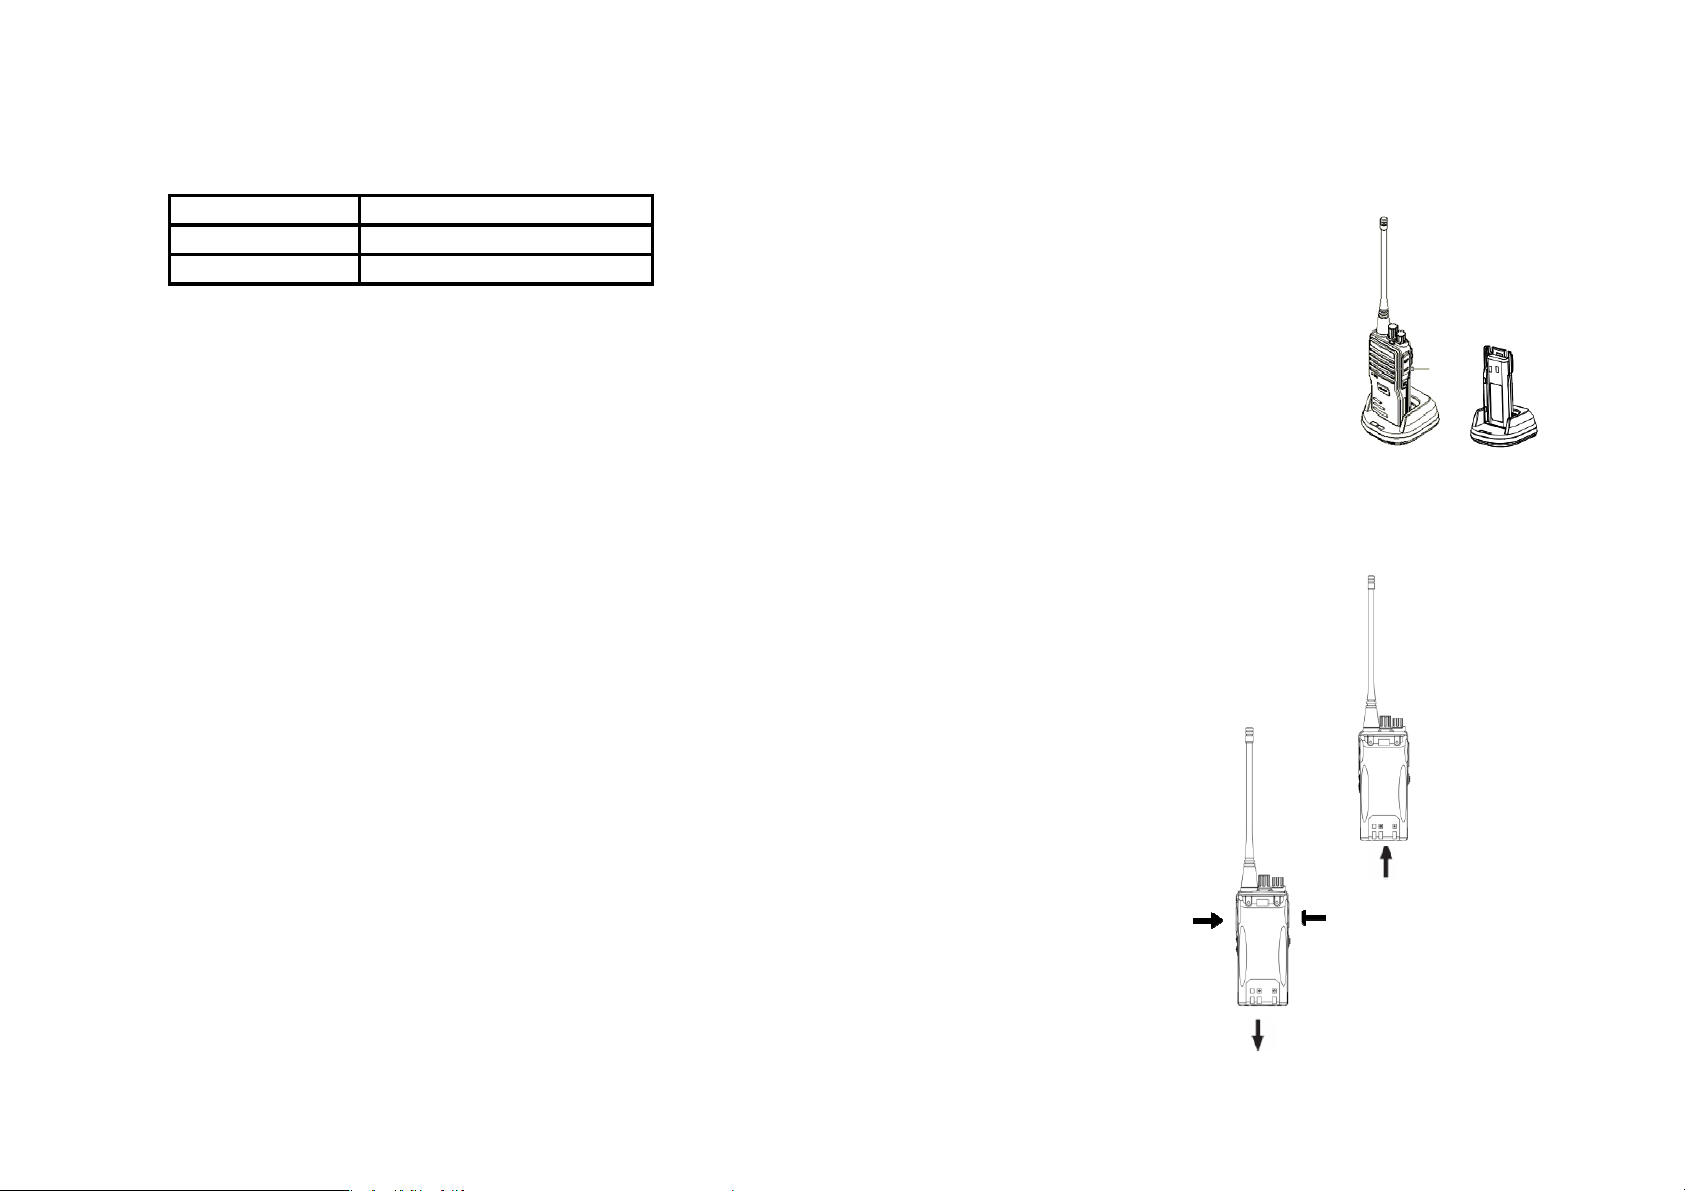
Installation/Removal of the Battery
1. Installation of the Battery
Please make sure the transceiver is powered off, and then hold down the belt clip to open it ,
Hold down the two side keys and insert the two bumps on the top of the bat tery into
the aluminum grooves of the transceiver in the direction of the arrow, and to finish the installation,
press the bottom of the battery in the direction of the arrow until the “ka-ta” sound is heard.
Note: If the battery is not fixed well, please remove it and reinstall.
Be charging
Charging completed
2. Removal of the battery
To remove the battery, please make sure the transceiver is powered off,
and then press and hold to open the belt clip so that the open the belt clip so t hat the
open the belt clip so that the
battery can get out when the
button has been turned upward.
Pull the battery out according to the
arrow after the battery hook is detached.

Installation /Removal of Antenna
g
g
p
1. Installation of the antenna
⑴ Plu
⑵ Rotate the antenna clockwise until ti
2. Removal of the antenna
Rotate the antenna counterclockwise to remove it.
Installation /Removal of Belt clip
1.Installation of the belt clip
First remove the battery, and then place the clip on the rear top of the
machine, and fix it with two screws by a cross-screw.
Note: Do not install the belt clip unless the battery is off.
2. Removal of the belt clip
As for the removal of the belt clip, please refer to the installation
steps and loose the screws in counterclockwise.
Installation/Removal of External Earphone or
Microphone
1. Installation of the external earphone or microphone
the screw-thread end of the antenna into the socket at the top of the transceiver.
htening up , as shown.
(1) Unclose the earphone cap (without removing) in the direction of
the arrow
(2) Insert the earphone or microphone
2. Removal of the external earphone or microphone
You can pull out the external earphone or microphone to remove it.
Note: The use of an external earphone or microphone will affect the
waterproof performance of the transceiver.

Operation Guide
yygy
Power On/Off
Rotate the Power knob clockwise until a “ka-ta” sound is heard to turn on the
power. Counter clockwise to turn off.
Volume Adjustment
Volume knob clockwise to increase the volume, or counter clockwise to decrease it.
Channel Adjustment
Channel knob clockwise to decrease the channel number, or counterclockwise to increase it.
Monitoring
Press monitor button it can directly monitor the channel you are without having to wait for their call you.
press monitor button once again it can directly return back to stand by status.
Voice Operated Transmission ( VOX )
VOX is the optional microphone set. Hold press monitor button the voice tell you VOX
funtion is ON or OFF, VOX ON is VOX circuit automatically switch on the transmission mode
Scanning
Press scan button the LED indicator flashes green, it will scan all the channels in the
scan queue one by one in order. When a channel receives a signal, the LED indicator will turn green for long.
When the function is activated, the transceiver will check whether
there are calls on the channels that are set to be scanned. If a channel is tested to have signals on it, it will switch to
this channel in order to receive voices (which channels can be scanned is programmed and set by Users).
High/ Low Power Selectable
Hold press scan button the voice tell you the radio is high power or Low power
High power is 2 watt. Low power is 0.5 watt.

Transmitting
()
while holding down the PTT button. The transmission indicator turns red when the PTT button is pressed.
If you speaks too loud or with your mouth getting too close with the microphone, it may distort the sound
and reduce the signal clarity on the receiving side. Release the PTT button to listen to the partner's voices.
Receiving
Release PTT key, transceiver enter the receiving mode, the status indicator lights green. Please adjust the volume
appropriately to achieve the best listening effect.
Low Battery Warning
Low battery warning happens at the time when the battery needs charging or replacement.
Additional function
■ Time out timer ( TOT )
TOT is the optional function set by programmer. If TOT is available, transmission time ( hold the PTT button ) will be
limited on certain period of time.
TOT is useful for preventing from the thermal damage when Transceiver is under long time transmission.
■ Scan
Scan is the optional function set by programmer. If scan function is available, transceiver can stop the any of channel which are busy.
This scan function can be set only for No.20 channel, so you can monitor maximum of 20 channel with scanning mode.
When channel is stop at certain channel, you can press the PTT button to transmit. Also press and hold the Monitor button
to stop scan operation.
■ Battery Saving
This is a standard function. To increase the battery life ( decrease battery consumption ) , Transceiver has battery saving mode
Battery saving mode will start after 10 seconds from the busy condition off.
■ CTCSS / CDCSS
CTCSS can be set by programmer.
If equipped with CTCSS or DCS, your group can not listen other group conversation. This function is useful to listen the voice within
the group even other group are using same channel.

■ VOX (Voice Operated Transmission)
/sub-audio digital settings” as other members of the group. Confirm
There are 9 levels sensitive for choise through by programmer.
Troubleshooting Guide
SolutionsProblems
Battery may have been exhausted. Please update or recharging the
No Power
Battery lasts no long after charging
It can not reach others of a group
There are voices from other people rather Please change the sub-audio frequency/sub-audio digital settings. At
than group members in the channel. this time, be sure to change all the walkie-talkies of the group at the
When transmitting voices, only a small Confirm whether the rotary volume knob is to the appropriate volume.
or even no sound can be heard on the Send the machine to Users to check the microphone.
other side.
Consistent noises Other members of the group may be too far away and can not receive the
battery.
Battery may not be installed correctly. Please remove the battery and
reload it.
Battery’s lifetime is due. Please update the battery.
Battery is not charged fully, so please ensure that the battery indicator is
green when removing it.
Make sure you are using the same frequency and “sub-audio frequency
”
whether you are in the valid range of transceiver since other members of
the group may be too far away.
same time. (Need Users to recharge.)
voices you send, please get close and try again.
Maintenance and Cleaning
1. Do not lift the transceiver directly by its antenna or external microphone.
2. Dust the transceiver with an anti-pilling cloth to prevent bad contact.
3. When the transceiver is off work, please cover the microphone cap.
4. The buttons, control knob and the casing of transceiver are easy to become dirty after long usage, you can use a neutral detergent
(do not use strong corrosive chemicals) and wrung damp cloth to clean it.

* The company reserves the right to change product design and specifications, and takes no responsibility for printing errors and
(
t
omissions that may occur at the public division.
* Since technologies are developing continuously, the corresponding changes of product design and specifications will go without
notice.
* The reproduction of this manual in part or entirety without permission is strictly prohibited.
* Our company reserves the right of final explanation to these commitments above.
FCC requirement
This radio has been tested and complies with the FCC RF exposure limits for "General population". In addition,
Your SANCON radio complies with the following Standards and Guidelines with regard to RF energy and
electromagnetic energy levels and evaluation of such levels for exposure to humans:
KDB 865664 D01 SAR measurement 100MHz to 6 GHz v01ro3, Evaluating Compliance with FCC
Guidelines for Human Exposure to Radio Frequency Electromagnetic Fields.
● American National Standards Institute
to Human Exposure to Radio Frequency Electromagetic Fields, 3KHz to 300GHz.
● American National Standards Institute ( C95.1-1992), IEEE recommended practice for
the Measurement of potential Y hazardous Electromagnetic Fields- RF and Microwave
C95.1-1992), IEEE standard for safety Levels with Respec
To ensure that your exposure to RF electromagnetic energy is
within the FCC allowable limits for general population use,
always adhere to the following CAUTION guidelines:
CAUTION
● DO NOT operate the radio without a proper antenna attached, as this
may damage the radio and may also cause you to exceed FCC RF
RF exposure limits. A porper antenna is the antenna supplied with this radio by the manufacture or
an antenna specifically authorized by the manufacturer for use with this radio.
● DO NOT transmit for more than 50% of total radio use time " 50% duty cycle'
Transmitting more than 50% of the time can cause FCC RF exposure compliance
reqirements to be exceeded. The radio is transmitting when the " TX indicator" lights red.
you can cause the radio to transmit by pressing the "PTT" switch or " Group" button.

● ALWAYS use SANCON authoried accessories ( antennas, batteries, belt clips, speaker/mics, etc).
g
During transmissions, your SANCON radio generates RF energy that can possibly cause interference
Use of unauthoried accessories can cause the FCC RF exposure compliance reqirements to be
exceeded. Body-worn operations are restriced to belt-clips, holsters or similar accessories that
have no metallic component in the assembly and that provide at least 1.5 cm separation between the
device , including its antenna, and the user's body. To provide the recipients of your transmission the
best sound quality, hold the antenna at least 5 cm ( 2 incches) from mouth, and slightly off to one side.
the information listed above provides the user with the information needed to make him or her aware
of RF exposure, and what to do to assure that this radio operates within the FCC RF exposure limits
of this radio.
Electromagnetic Interference/Compatibility
Durin
with other devices or systems. To avoid such interference, turn off the radio in areas whtere signs are
posted to do so, DO NOT operate the transmitter in areas that are sensitive to electromagnetic radiation
such as hospitals, aircraft, and blasting sites.
This device complies with Part 90 of the FCC rules, Operation is subject to the following two conditions:
(1) This device may not cause harmful interference, and
(2) This device must except any interference received, including interference that may cause
undesired operation.
Charges or modifications not expressly approved by the party responsible for compliance
could voide the user's authority to operate the equipment.
Important: Do not hold down CALL for more than 10 seconds. The FCC does not allow you
to send a continuous tone for more than 10 seconds at a time.
transmissions, your SANCON radio generates RF energy that can possibly cause interference

this radio by the manufacturer or an antenna specifically authorized by the manufacturer
for use with this radio.
DO NOT transmit for more than 50% of total radio use time (“50% duty cycle”).
Transmitting more than 50% of the time can cause FCC RF exposure compliance
requirements to be exceeded. The radio is transmitting when the “TX indicator” lights red.
You can cause the radio to transmit by pressing the “PTT” switch.
ALWAYS use SAMCOM authorized accessories (antennas, batteries, belt clips,
speaker/mics, etc). Use of unauthorized accessories can cause the FCC RF exposure
compliance requirements to be exceeded. Body-worn operations are restricted to
belt-clips, holsters or similar accessories that have no metallic component in the assembly
and that provide at least 1.5 cm separation between the device, including its antenna, and
the user's body. To provide the recipients of your transmission the best sound quality,
hold the antenna at least 25 cm (10 inches) from mouth, and slightly off to one side. The
information listed above provides the user with the information needed to make him or
her aware of RF exposure, and what to do to assure that this radio operates within the FCC
RF exposure limits of this radio.
Electromagnetic Interference/Compatibility
During transmissions, your Amcrest radio generates RF energy that can possibly cause
interference with other devices or systems. To avoid such interference, turn off the radio in
areas where signs are posted to do so. DO NOT operate the transmitter in areas that are
sensitive to electromagnetic radiation such as hospitals, aircraft, and blasting sites.
This device complies with Part 15 of the FCC rules. Operation is subject to the following
two conditions: (1) This device may not cause harmful interference, and
must except any interference received, including interference that may cause undesired
operation.
Changes or modifications not expressly approved by the party responsible for compliance
could void the user’s authority to operate the equipment.
Note:This EUT has one voice channel per 12.5 kHz of channel bandwidth
(2) this device
changes or modifications not expressly approved by the party responsible for
compliance could void the user's authority to operate the equipment.
NOTE: This equipment has been tested and found to comply with the limits for a
Class B digital device, pursuant to Part 15 of the FCC Rules. These limits are
designed to provide reasonable protection against harmful interference in a
residential installation. This equipment generates, uses and can radiate radio
frequency energy and, if not installed and used in accordance with the instructions,
may cause harmful interference to radio communications. However, there is no
guarantee that interference will not occur in a particular installation. If this
equipment does cause harmful interference to radio or television reception, which
can be determined by turning the equipment off and on, the user is encouraged to
try to correct the interference by one or more of the following measures:
-Reorient or relocate the receiving antenna.
-Increase the separation between the equipment and receiver.
--Connect the equipment into an outlet on a circuit different from that to which the
receiver is connected.
-Consult the dealer or an experienced radio/TV technician for help.
NOTE: This device and its antenna(s) must not be co-located or operation in
conjunction with any other antenna or transmitter
 Loading...