

Samsung YP-K3JQ, YP-K3JZ, YP-K3JA, YP-K3JAB, YP-K3JZB User Manual
...
YP-K3J
For Your Safety
Read this manual carefully to ensure proper use of the player and
to avoid any danger or physical damage.
2
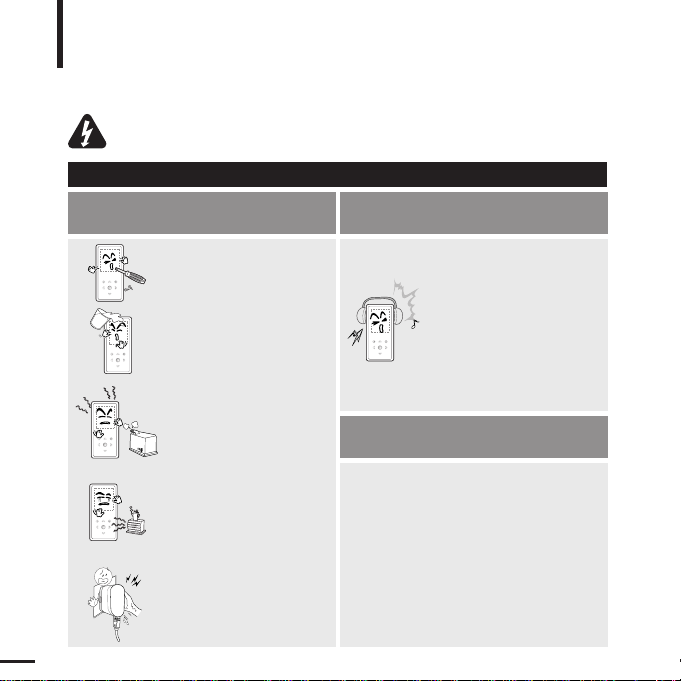
Product Use
Improper use can result in explosion,
fire or electric shock.
To avoid your hearing damage
Do not disassemble, repair
or modify this player on
your own.
Do not get the player wet
or drop it in water.
If the player gets wet, do not
switch it on. Contact a Service
Center.
Do not place the player in
damp, dusty or sooty areas,
as it could result in fire or
electric shock.
Do not touch the charger
with wet hands.
Avoid using your player at
high volume levels, as it may
result in permanent hearing
damage.
If you experience ringing in
your ears while using the
earphone, remove the
earphone immediately and
lower the volume.
To avoid a risk of traffic accident
Do not use the earphones while you are
driving a bicycle, automobile or motorcycle.
It can cause a serious accident and furthermore,
is prohibited by law in some areas.
Using the earphones while walking, in particular,
on a crosswalk, can lead to a serious accident.
Take care not to tangle the earphone cable
around your arms or neighboring objects
while driving, working out or walking, as it
could result in a car accident or other
injuries.
Do not leave the player in
areas above 35°C(95°F)
(such as a sauna or inside
a parked car).
During hot weather, the
temperature inside a car may
rise up to 80°C(176°F).
Failing to heed the player instructions may cause serious injury.
WARNING
3
ENG
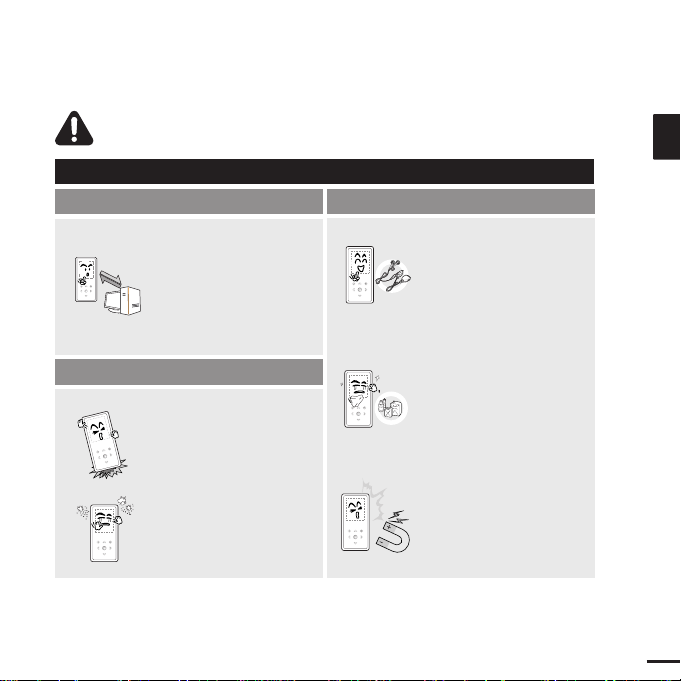
CAUTION
Product Use
Management of Important Data
Avoid malfunction
Be sure to back up
important data.
Please be aware that we
claim no responsibility for
damage from data loss due
to breakdown, repair or other
causes.
Avoid malfunction
Failure to follow all instructions lead to physical injuries or damage to the player.
Do not cause excessive
impact on the player by
dropping it. Do not place
heavy objects on top of the
player.
Prevent any foreign
particles or dust from
entering into the player.
Always use the accessories
provided by or approved by
Samsung.
Do not spray water on the
player. Never clean the
player with chemical
substances such as
benzene or thinner, as it may
cause fire, electric shock or
deteriorate the surface.
Do not place the player near
magnetic objects, as it may
cause a malfunction.
Basic Information .......................................6
Components...............................................6
Screen Display Information........................9
Button Functions......................................10
Battery Charger Safety ............................12
Charging the battery ................................13
Basic Use.................................................14
Contents
4
Chapter 1. Preparation
Chapter 2.
Loading Your Desired File
Loading Your Desired File ......................17
Installing Samsung Media Studio ............17
Connecting to your PC.............................18
Adding Files/Folders in
Samsung Media Studio............................20
Transferring Files to the Player with
Samsung Media Studio............................22
Chapter 3. Multimedia function
Listening to Music ....................................24
Listening to Music....................................24
Creating a Playlist Using
Samsung Media Studio............................28
To Play a Playlist......................................30
Using the Music Option Menu..................31
Photo Viewing ...........................................34
Photo Viewing..........................................34
Using the Photo Option Menu..................35
Listening to FM Radio .............................37
Listening to FM Radio..............................37
Setting FM Presets ..................................40
To Delete Presets.....................................42
Setting FM Radio.....................................43
For Your Safety ..........................................2
Contents .......................................................4
5
ENG
Chapter 4. Setting
Settings.......................................................44
Setting Display.........................................44
Setting Time ............................................46
Setting Language.....................................48
Setting the System ..................................49
Chapter 5. Troubleshooting
Troubleshooting........................................51
Chapter 6. Appendix
Menu Tree...................................................53
Product Specifications............................54

Components
Basic Information
6
Checking the Accessories
Player Earphones Charger
USB Cable
Installation CD Neckstrape / Carrying case
■ Design of accessories is subject to change for the purpose of improvement, without notice.
7
ENG
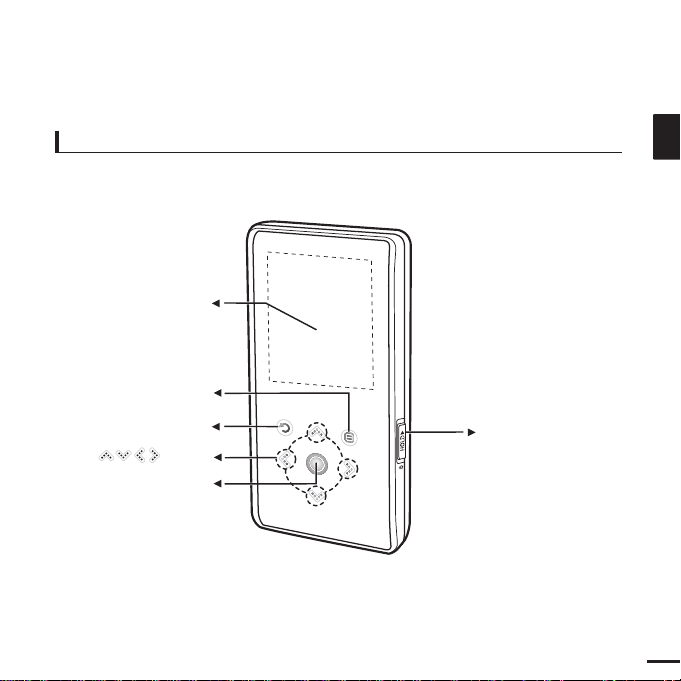
Front, Right Side
Power &
Hold Switch
Screen Display
Back Button
Play/Pause &
Select Button
Menu Button
Button
All buttons are 'Light-touch' buttons.
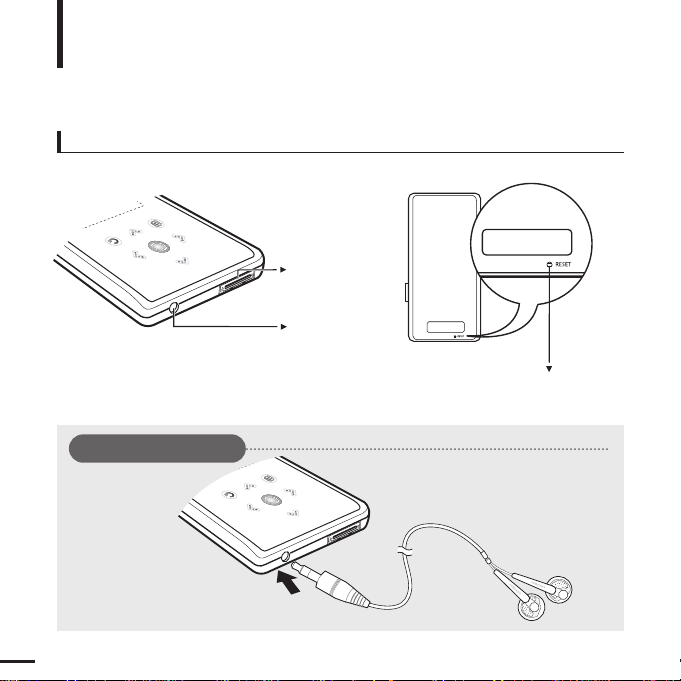
8
Bottom/Rear
USB
Connection
Port
Earphone
Jack
Reset Hole
Components (Continued)
Basic Information
[Rear]
[Bottom]
Earphone Connection
√ Bottom
Earphones
9
ENG
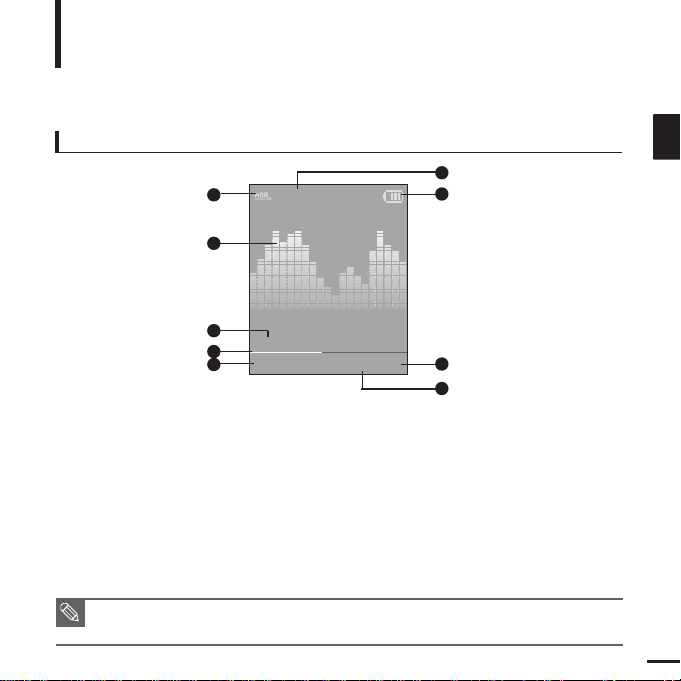
Screen Display Information
Basic Information
NOTE
■ The screen pictures are for illustration purposes only. The actual screen may differ.
Music
Normal
1.Life is cool
002/020
√√
00:02:20
1
2
3
4
5
6
7
8
9
1 Play Mode Display
2 Graphic Equalizer
3 Music Information
4 Play Status Bar
5 Current Music Number/
Total Number Display
6 Sound Effect Display
7 Battery Status Display
8 Play Time Display
9 Play/Pause Display
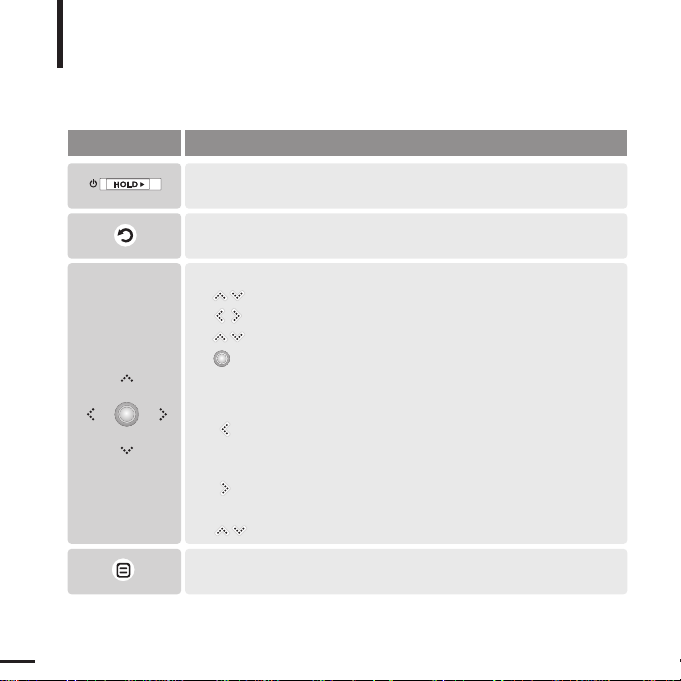
10
Button Functions
Basic Information
■
Slide and hold in the opposite direction of the arrow to turn the power on/off.
■ Slide in the arrow direction to lock the buttons.
■ Moving up, down, left and right and Function Selection.
Tap to move up or down by one selection.
Tap to move left or right by one selection.
Press and hold to move up or down continuously.
Short tap to select the play/pause and function, move to the
next screen.
■ Search for a track and control volume while listening to music.
Press and hold to scan to a point on the current track.
Tap to move to the previous track or to play the current track
from the start.
Press and hold to scan to a point on the current track.
Tap to move to the next track.
Tap to reduce/increase the volume.
■ Long tap to move to the main menu.
■
Short tap to move to the previous screen.
Buttons Functions and Use
■
Tap to display the option menu.
11
ENG
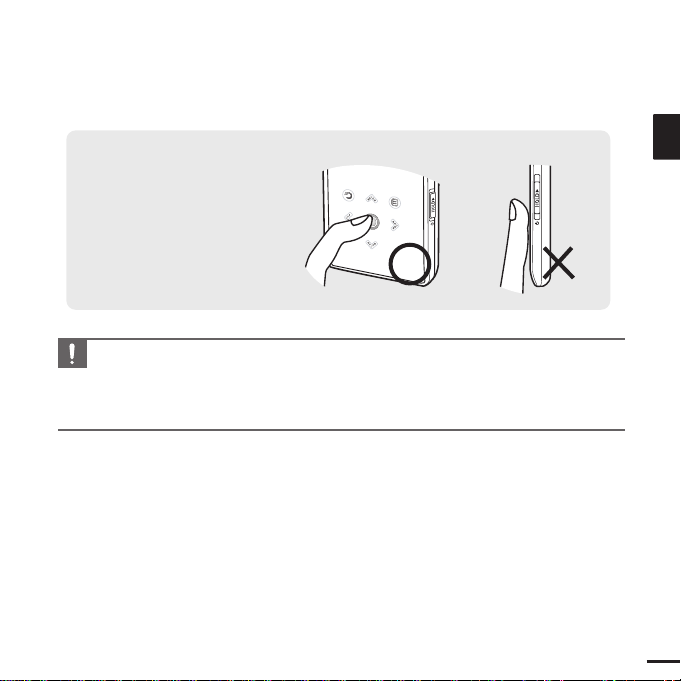
CAUTION
■ Do not use any sharp object other than your fingers to operate the touch screen.
Otherwise, touch screen may be damaged.
■ Do not tap on the touch screen if your fingers are not clean.
■ Do not tap on the touch screen with your gloves on. Otherwise, the button does not operate in any way.
✽
Tap on touch screen with your
fingertip.
12
WARNING
■ Use the charger away from water sources to avoid fire or electric shock.
CAUTION
■ To avoid electric shock, use the charger only with a power outlet that matches the shape of the
converter's plug.
■ Make sure that the charger's plug is inserted all the way into the outlet.
Battery Charger Safety
Basic Information
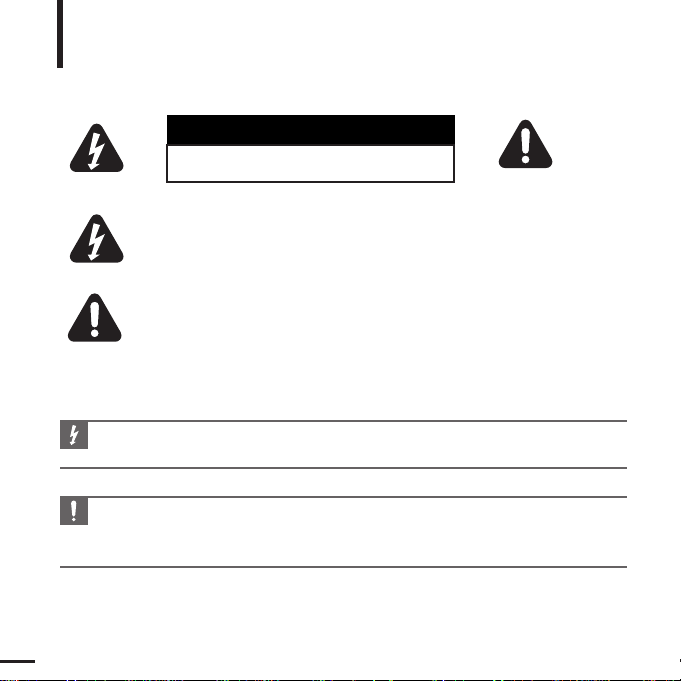
CAUTION
RISK OF ELECTRIC SHOCK. DO NOT OPEN
The uninsulated parts inside the charger could
cause electric shock.
For your safety, do not open the case of the
charger.
Read this User Manual to prevent any problems
that may occur while using the charger.
13
ENG
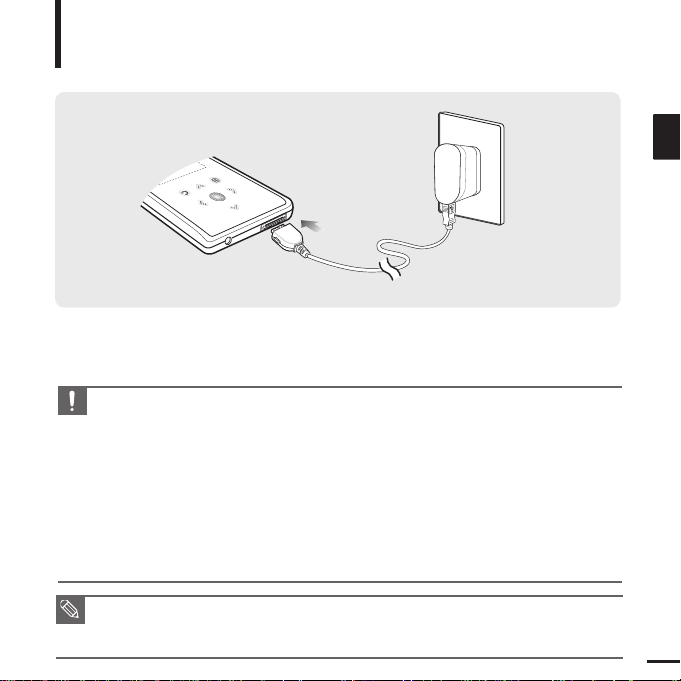
Charging the battery
Fully charge the rechargeable battery before using the
player for the first time or when it has not been used for a while.
Basic Information
A charger is supplied with your player.
Plug the charger into a wall outlet.
■
Charging time : approx. 4 hr.
■ When connected with the USB cable, it takes about 4 hours for the player to fully charge although
this may vary depending on your PC environment.
■ Battery life naturally shortens slowly over time.
NOTE
CAUTION
■
To avoid the risk of fire, do not charge longer than 12 hours.
■
Do not plug several devices into the same outlet.
■
Do not use a charger that is defective.
■
When using the rechargeable battery for the first time or after several months of non-use, fully
charge it first.
■
Overcharging will reduce the battery life.
■
The rechargeable battery is a consumable item and its capacity will decrease gradually.
■
To prolong the life of your battery, use the fully charged battery until it is completely discharged,
and then fully charge it again before use.
■
Please be aware that we disclaim all responsibility for damage from loss of saved or recorded data
due to breakdown, repair or other causes. Afire or electric shock may result.
■
Do not touch the charger with wet hands.

14
Basic Use
Basic Information
Turning the Power On & Off
Turning the Power On
Slide and hold the [HOLD√]
switch in the opposite direction
of the arrow.
■
Power is turned on.
Turning the Power Off
Slide and hold the [HOLD√]
switch in the opposite direction
of the arrow again.
■
Power is turned off.
■ Power is automatically turned off when none of the buttons have been tapped for a preset
period of time
(Default: 1 minute)
in the pause mode.
√ Page 46
NOTE
NOTE
■ Tap [
]
to move to the previous screen.
■ Press and hold
[]
to move to the main menu screen.
Playing Music
1
Press and hold [ ] to move to the main menu.
2
Tap [ ] to select <Music> and then tap [ ].
■ The Music Menu will appear.
3
Use [
]
and [ ] t o select a music file of your choice.
4
Tap [ ].
■ The music file will begin playing.
Normal
1.Life is cool
002/020
√√
00:02:20
Normal
1.Life is cool
002/020
√√
00:02:20
15
ENG
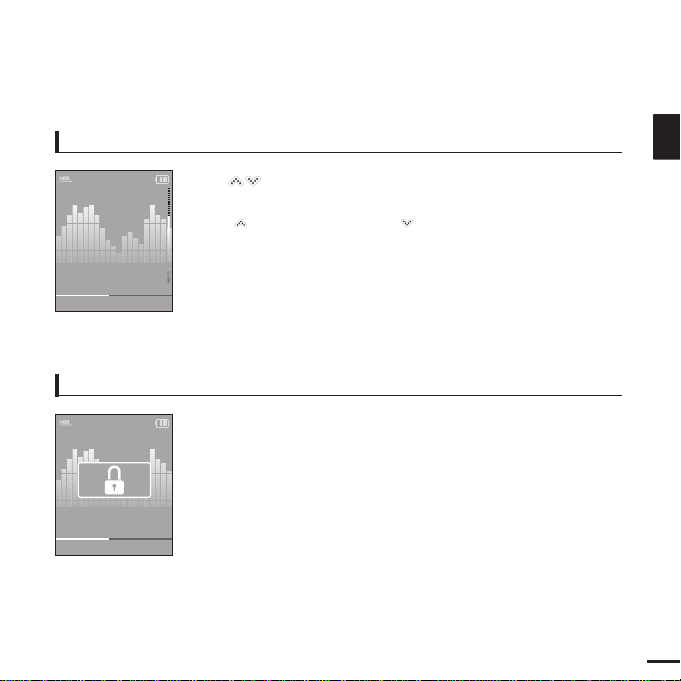
Volume Control
Lock Function
Tap [ ].
■ You will see a volume control icon.
■ Tap [
]
to increase the volume or []to decrease it.
In Hold mode, all buttons are disabled. This function is useful
when you are walking or jogging.
1
Slide the [
HOLD√]
switch
in the direction of the arrow.
2
Slide the [
HOLD√]
switch
in the opposite direction of the
arrow to release the Lock function.
Normal
1.Life is cool
002/020 √√00:02:20
Normal
1.Life is cool
002/020
√√
00:02:20
16
Basic Use (Continued)
Basic Information
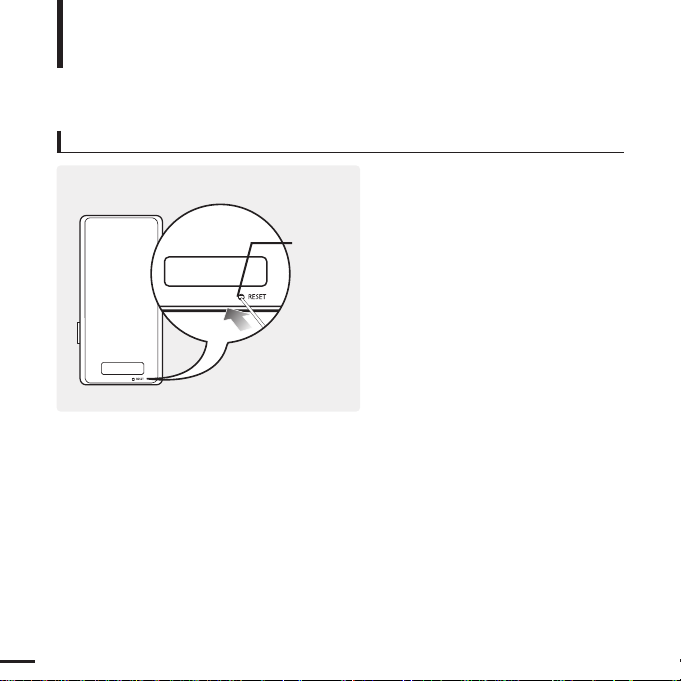
If a player malfunction occurs, you can
re-initialize the system by pressing the
Reset hole.
Press the Reset hole at the rear of the
player with a pointed object such as a
safety clip.
■
The system will be initialized.
■
Your settings and files will not be affected.
Reset Function
Reset hole

17
ENG
Before you start!
Insert the installation CD provided with the player into the CD-ROM drive.
2
Click <NEXT>.
■ Media Studio installation starts.
■ An icon is created on the desktop
after installation is complete and Media
Studio starts.
1
Click <Install now>.
Installing Samsung Media Studio
Use Media Studio to transfer music
files from your PC to the player.
Loading Your Desired File
■ Install the program on PCs running Windows XP after logging on with the Administrator account.
Please refer to the PC user manual on how to log on with the Administrator account.
CAUTION

18
Connecting to your PC
Loading Your Desired File
Before you start!
Use the USB Cable provided when connecting the player to your PC.
1
1
Connect the USB cable to the USB port ( ) on your PC.
2
2
Connect the other end of the USB cable to the
USB Connection Port
on the
bottom of the player.
 Loading...