

Page 1
ii
LCD MONITOR
quick start guide
SyncMaster XL30
Page 2
Model
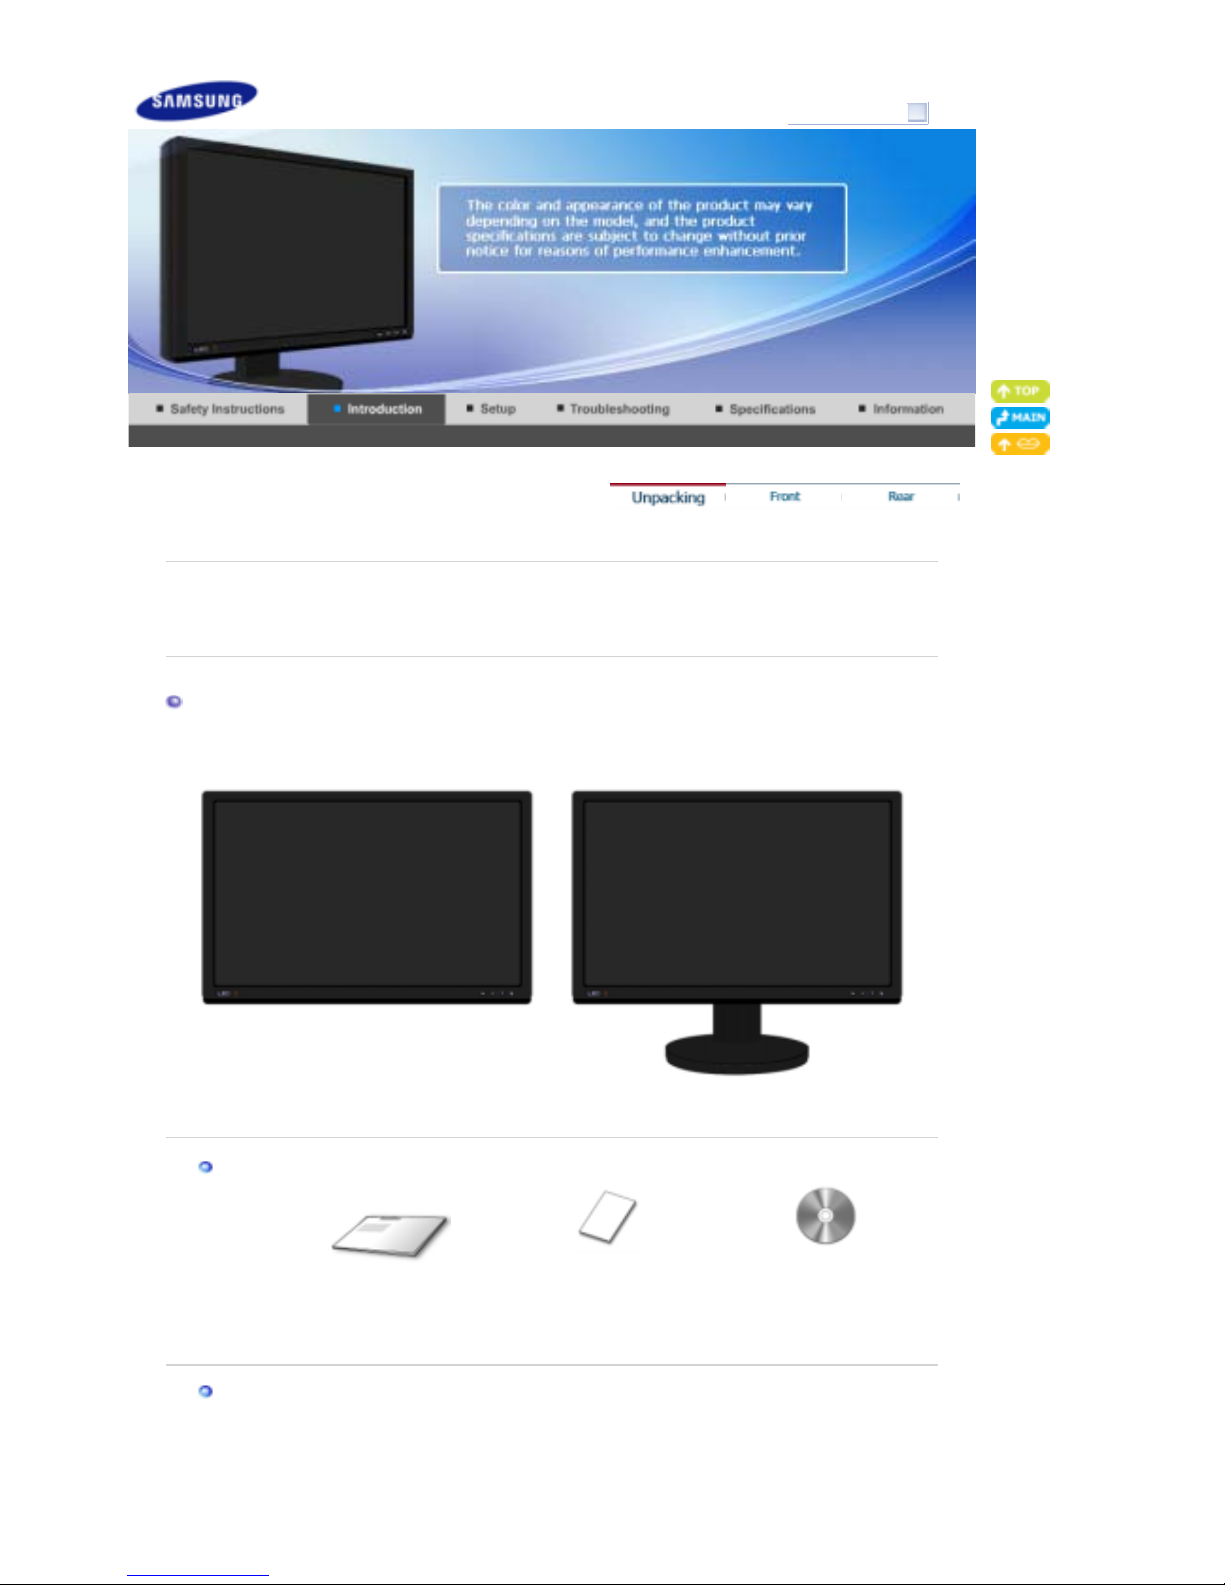
Please make sure the following items are included with your monitor.
If any items are missing, contact your dealer.
Contact a local deale
r
to buy optional items.
Unpacking
Without Stand
With Stand
(
Monitor & Sliding Stand
)
Manual
Quick Setup Guide
Warranty Card
(Not available in all
locations)
User's Guide,
Monitor Driver
Cable
SyncMaster XL30
Page 3
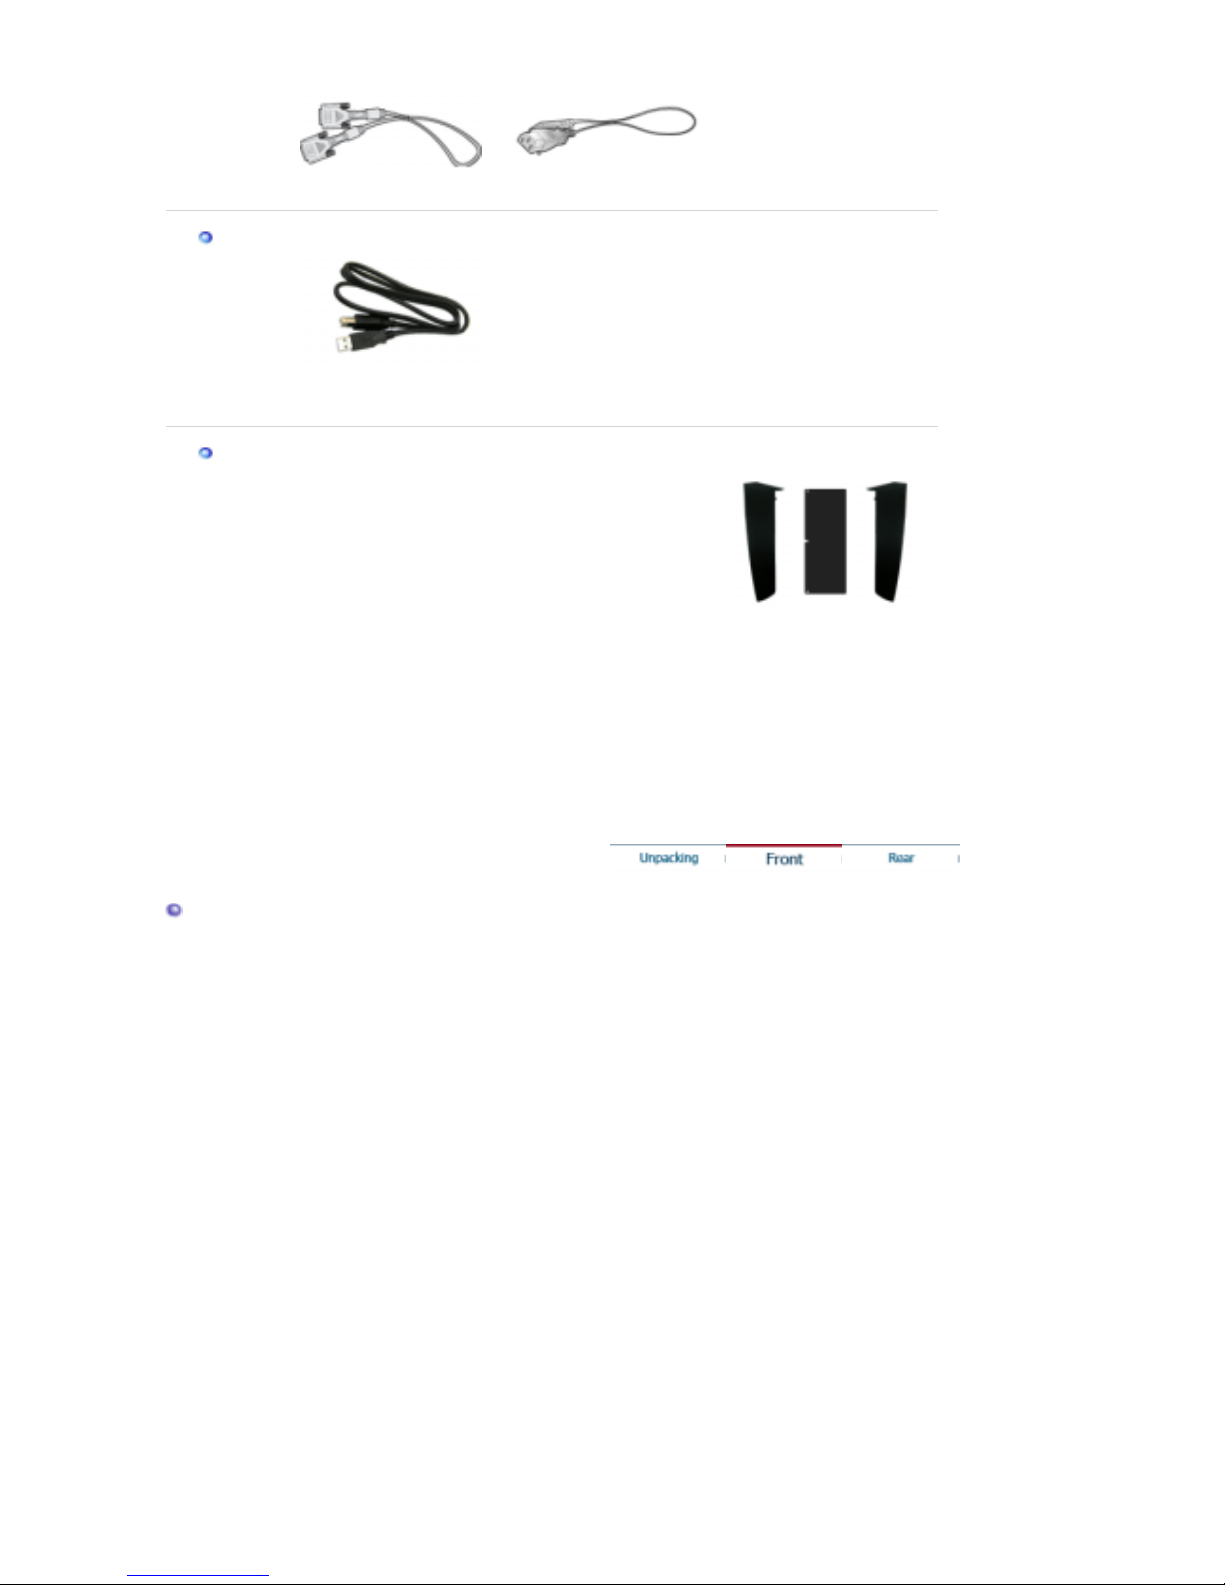
DVI-D (Dual link) Cable
Power Cord
Sold separatel
y
USB Cable
(
A-B Type cable
)
Others
Calibrater
For more information on the use of the
calibrater, see Natural Color Expert Help.
Hood
Front
Page 4
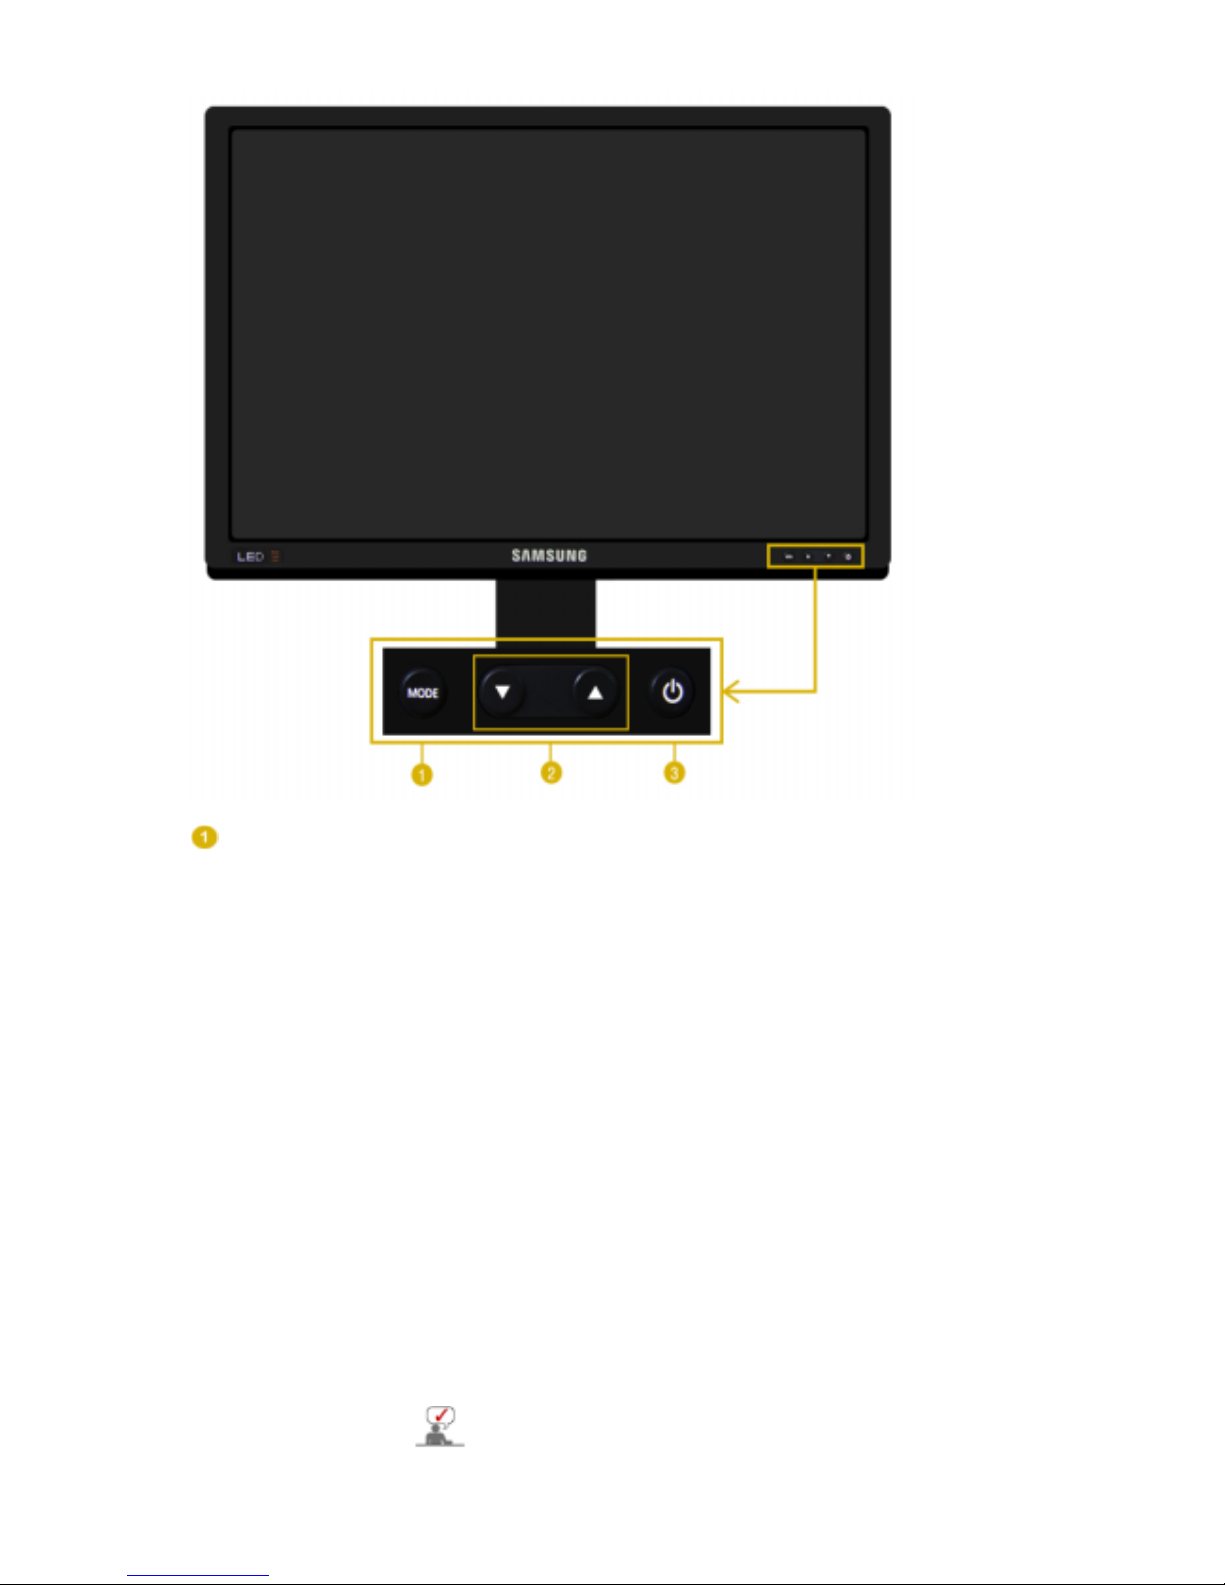
MODE button
(= Color Mode)
Press this button to select a Color Mode. Continuing to press the
button, will repeatedly display the setting modes. With the control
buttons at the front of the monitor, you can easily implement
different color information matching your environment.
1) Custom
- Although the values are carefully chosen by our
engineers, the pre-configured values may not be comfortable to
your eyes depending on your taste. If this is the case, adjust the
brightness and contrast by using the OSD menu.
2) sRGB
- Displays the sRGB color information on the screen.
3) AdobeRGB
- Displays the Adobe RGB color information on the
screen.
4) Emulation
- With Natural Color Expert, you can change the
system profile or a previously created color information and display
it on the screen.
Caution: The Emulation information presented when pressing the
Emulation button at the front of your monitor is saved as the
Emulation information of the Color Mode for your product. Once
saved, your monitor will be presented with this saved information
whenever Emulation is selected.
5) Calibration
- The Calibration functionality analyzes the color
characteristics of your monitor and allows you to save its color
information as an icc profile. This will tell your monitor what color
space it should use and how it should accept and present colors.
Displays your custom color information obtained by using Natural
Color Expert and the Calibrator.
Caution: The Calibration information is presented when pressing
the Calibration button at the front of your monitor. Note that only
one piece of Calibration information, i.e. the one saved last, is kept
on your monitor.
The Contrast and Brightness functions only operate in
Custom mode.
Page 5
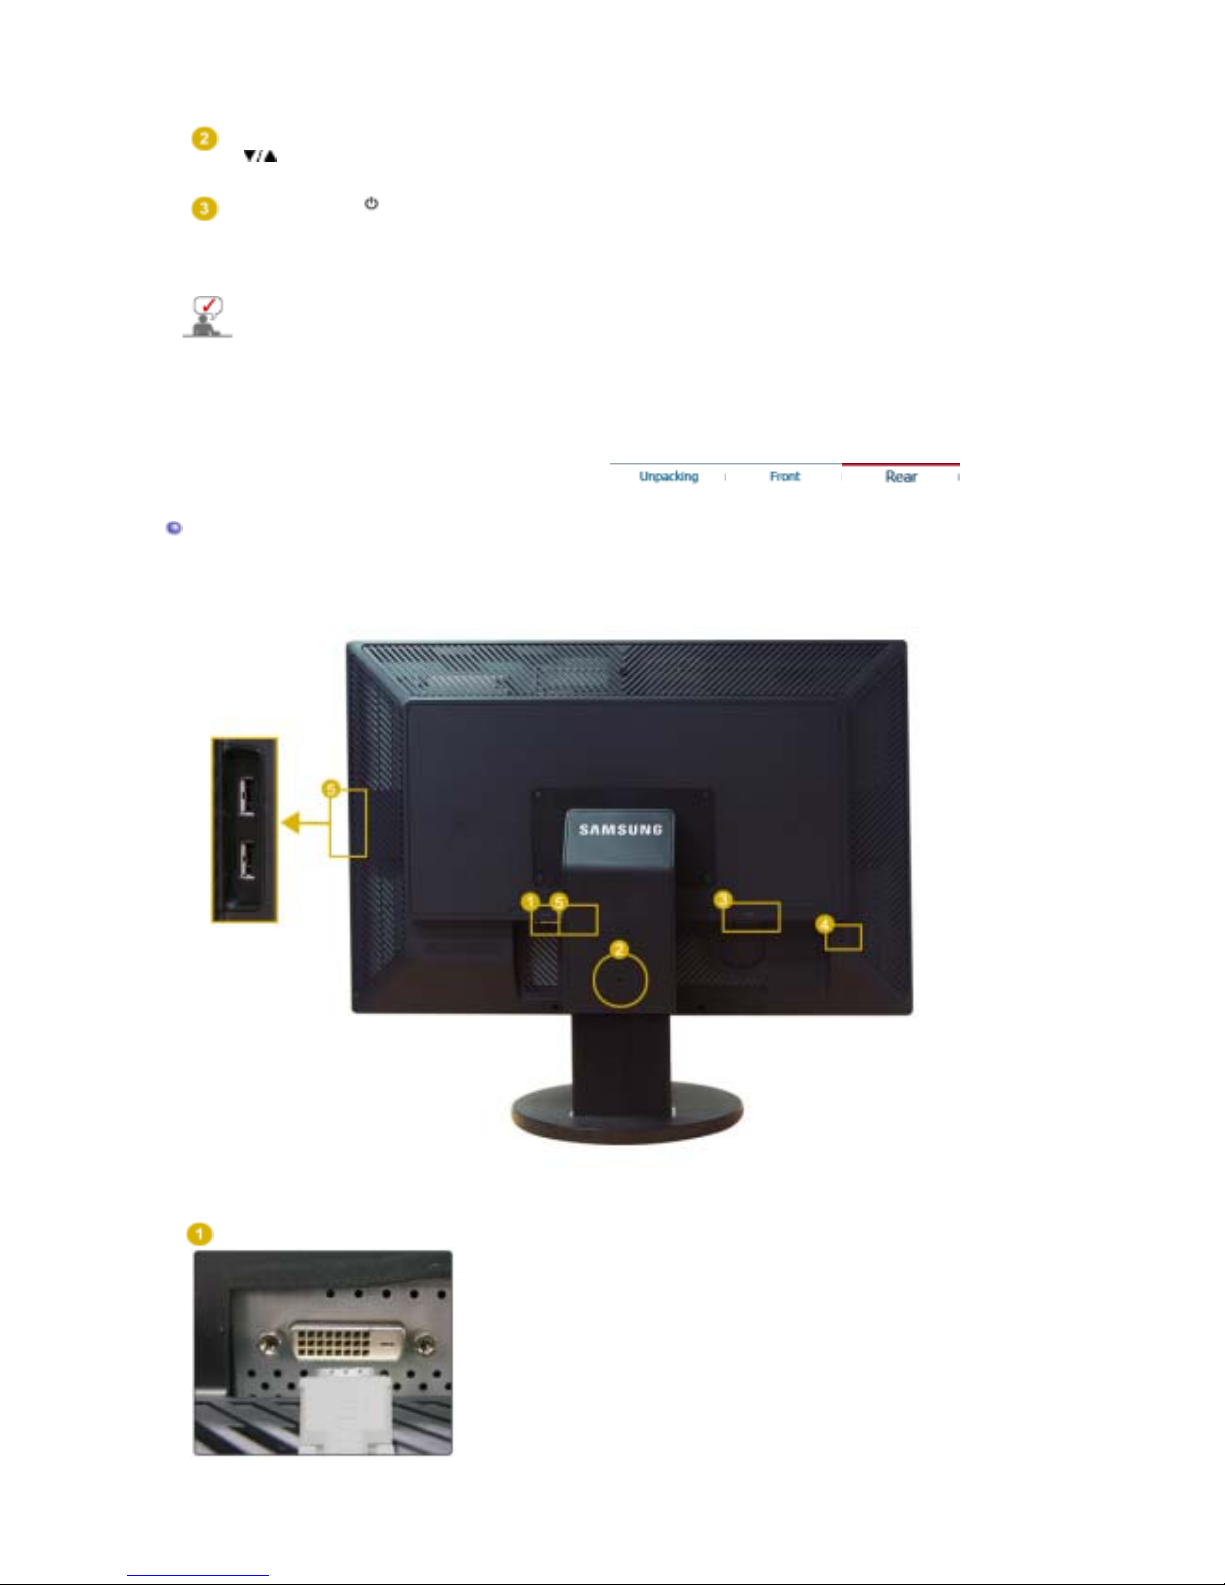
Adjust buttons [
]
Push the button to adjust brightness.
▼
: The screen is getting dark.
▲
: The screen is getting bright.
Power button [ ] /
Power indicator
Use this button for turning the monitor on and off. /
This light glows blue during normal operation, and blinks blue once
as the monitor saves your adjustments.
See PowerSaver described in the manual for further information regarding power saving
functions. For energy conservation, turn your monitor OFF when it is not needed, or when
leaving it unattended for long periods.
Rear
(The configuration at the back of the monitor may vary from product to product.)
DVI-D
Only digital signals can be input to this terminal. Therefore,
only connect the DVI terminal of your PC to this terminal.
Page 6
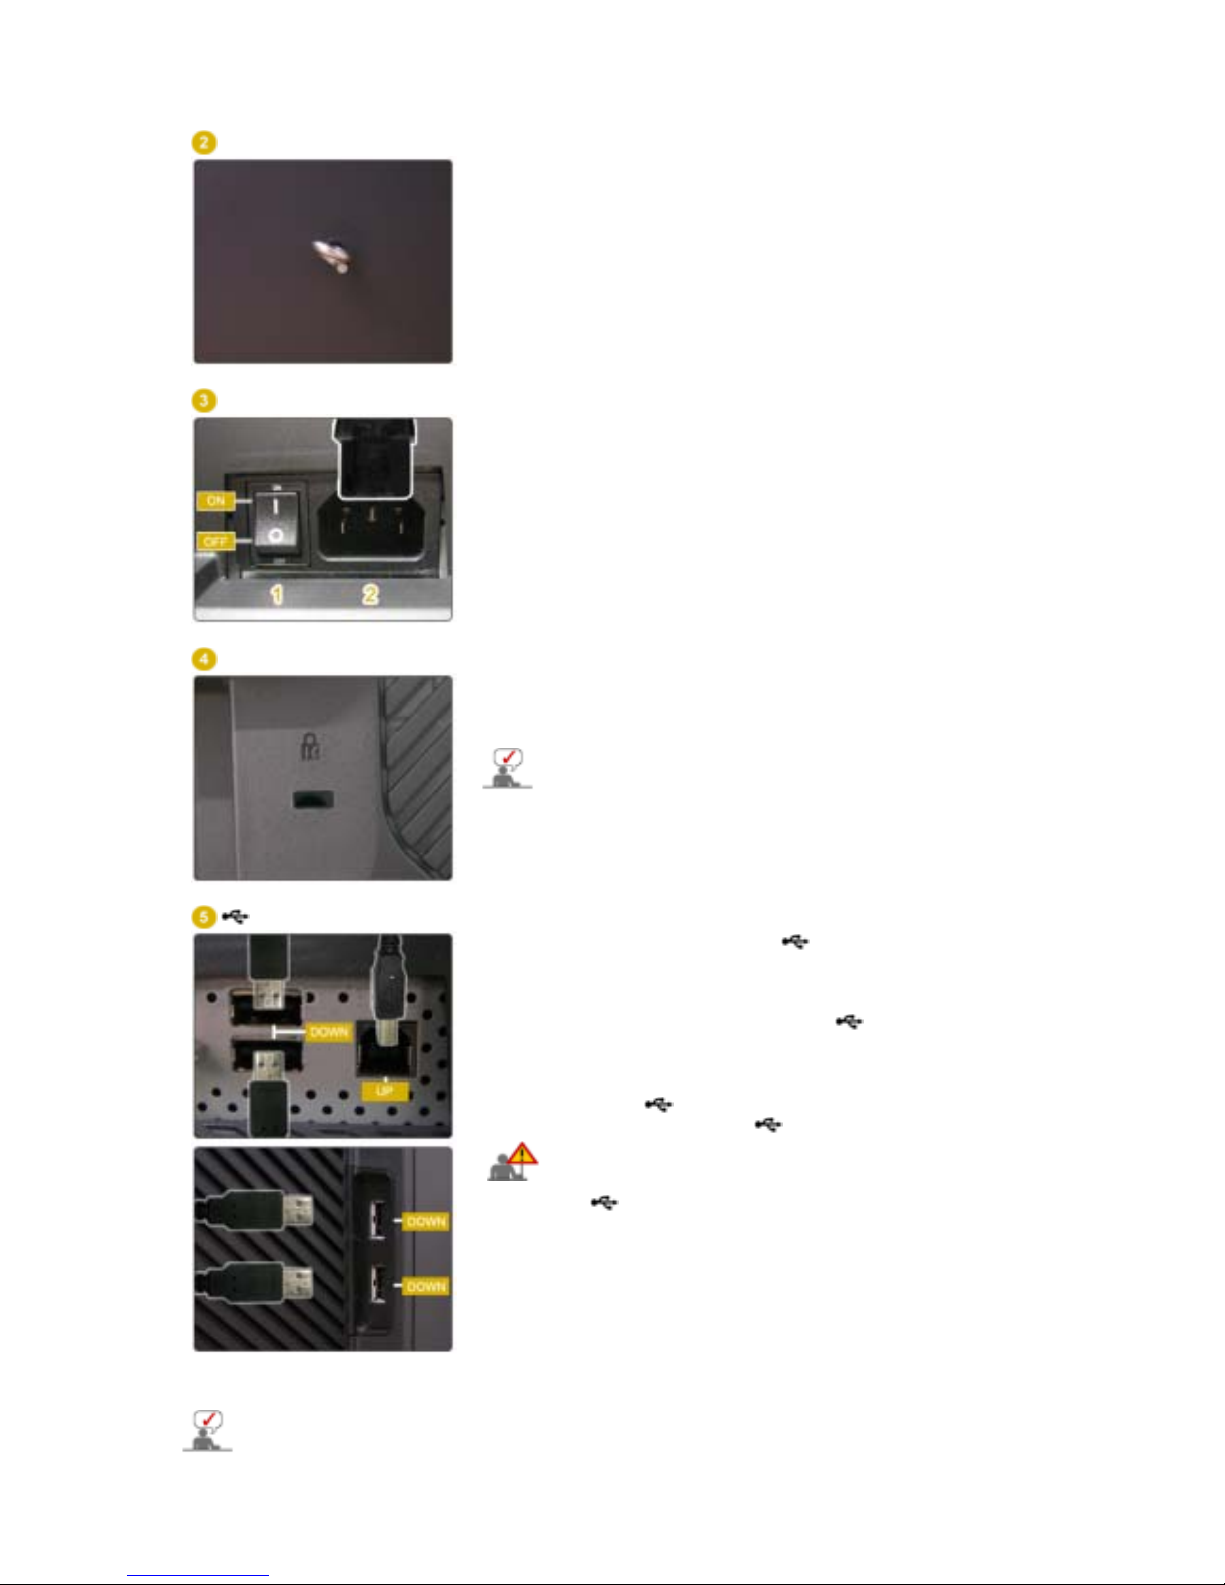
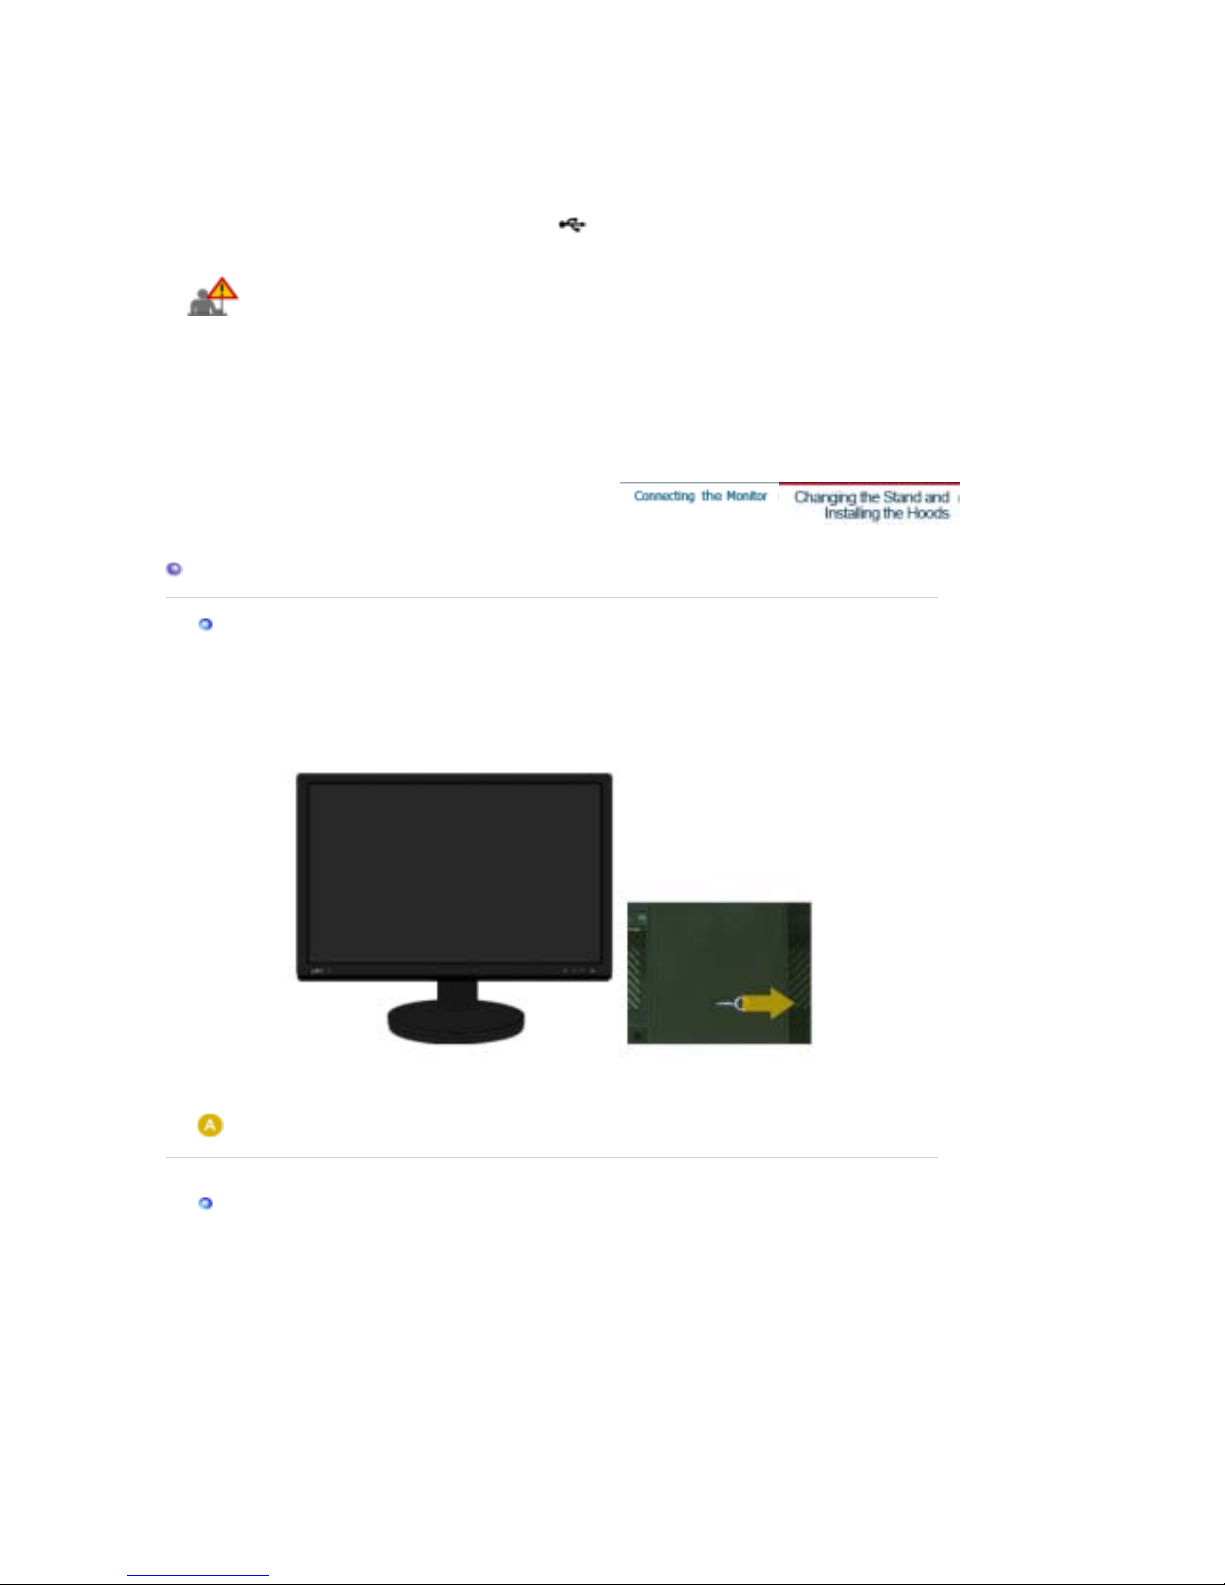
Stand Stopper
Remove the fixing pin on the stand to lift the monitor up and
down.
POWER
1. POWER S/W
: Switches the monitor On/Off.
2. POWER
: Connect the power cord for your monitor to the
POWER
on
the back of the monitor.
Kensington Lock
The Kensington lock is a device used to physically fix the
system when using dit in a public place.
(The locking device has to be purchased separately.)
For using a locking device, contact where you
purchased it.
USB connection terminal
UP (USB upstream port):
Connect the
UP
port of the
monitor and the USB port of the computer with the USB
cable.
DOWN (USB downstream port):
Connect the
DOWN
port of the USB monitor and a USB device with the USB
cable.
z
To use DOWN (Downstream Port), you
have to connect the UP (Upstream
Cable ) to the PC.
z
Make sure to use the USB cable supplied
with this monitor to connect the monitor's
UP port and your computer's USB
port.
See Connecting the Monitor for further information regarding cable connections.
Page 7
Model
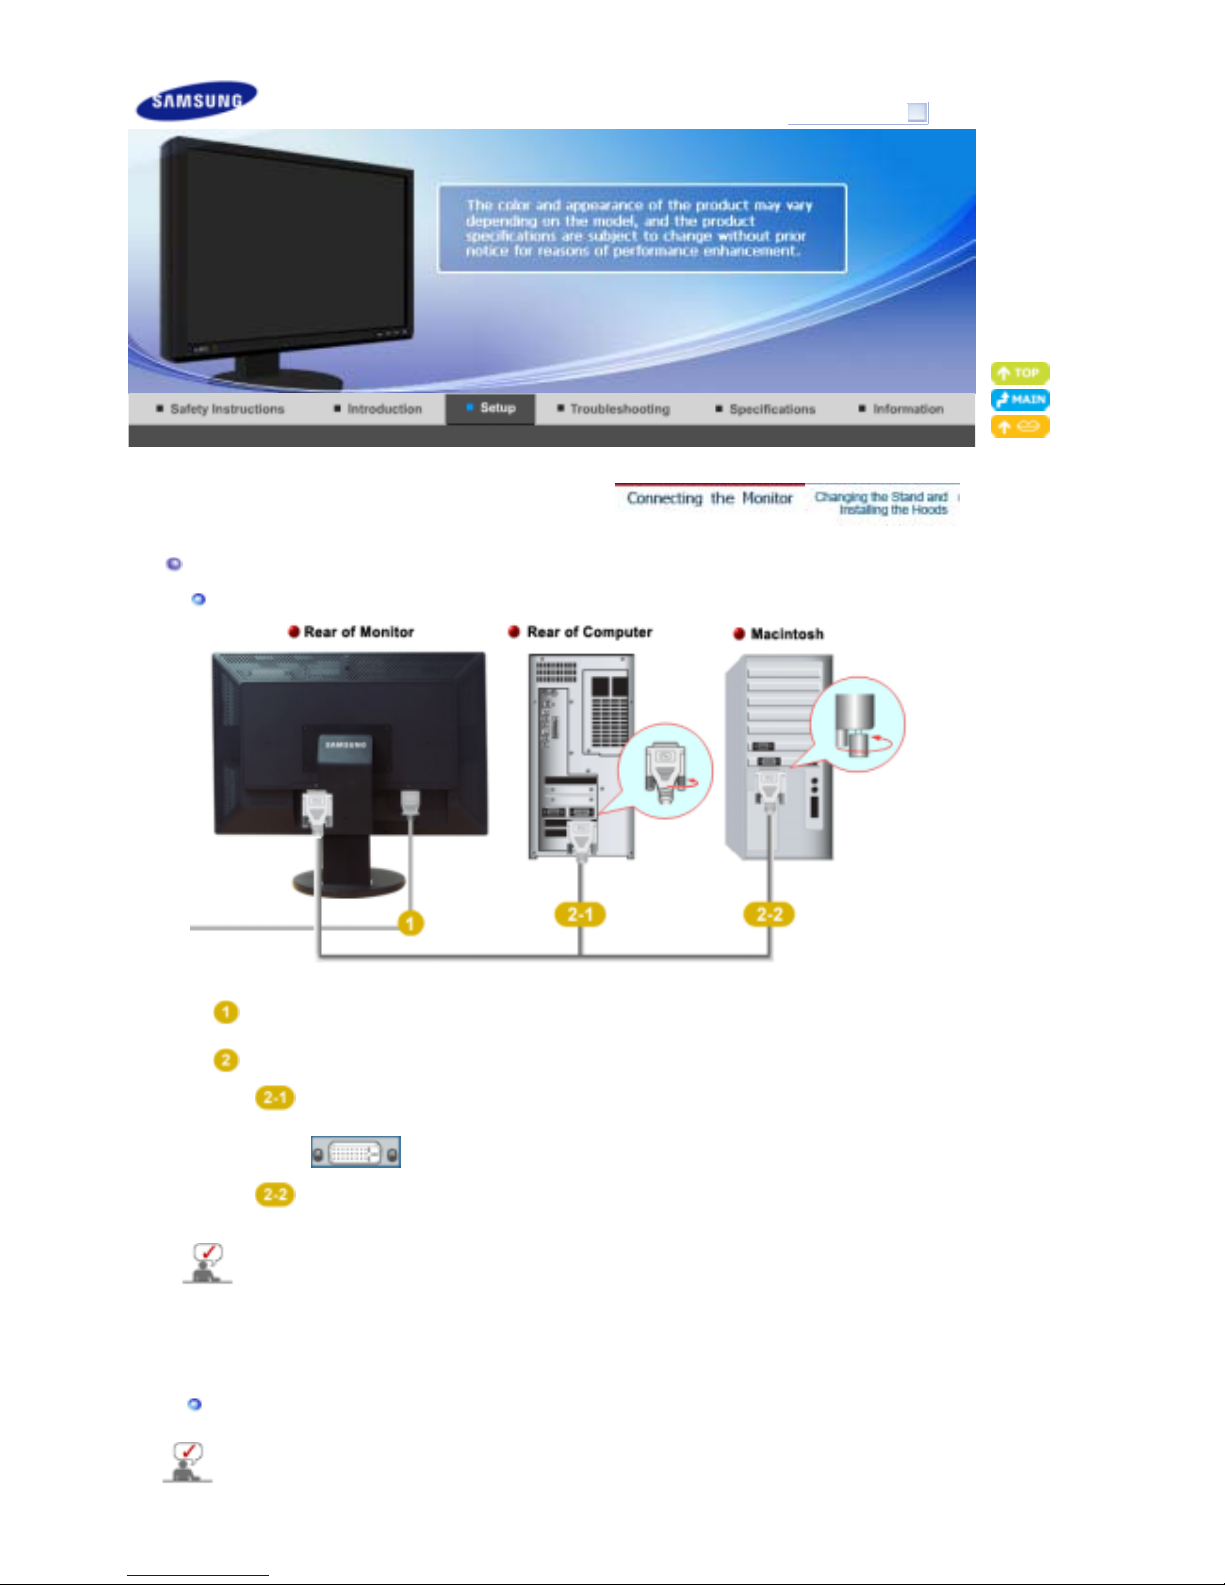
Connecting the Monitor
Connecting the Monitor
Connect the power cord for your monitor to the power port on the back of the monitor.
Plug the power cord for the monitor into a nearby outlet.
Use a connection appropriate for your computer.
Using the DVI (Digital) connector on the video card.
Connect the DVI Cable to the DVI-D Port on the back of your Monitor.
[ DVI-D ]
Connected to a Macintosh.
Connect the monitor to the Macintosh computer using the DVI connection cable.
Turn on your computer and monitor. If your monitor displays an image, installation is
completed.
Connecting USB
You can use a USB device such as a mouse, keyboard, Memory Stick, or external hard
SyncMaster XL30
Page 8
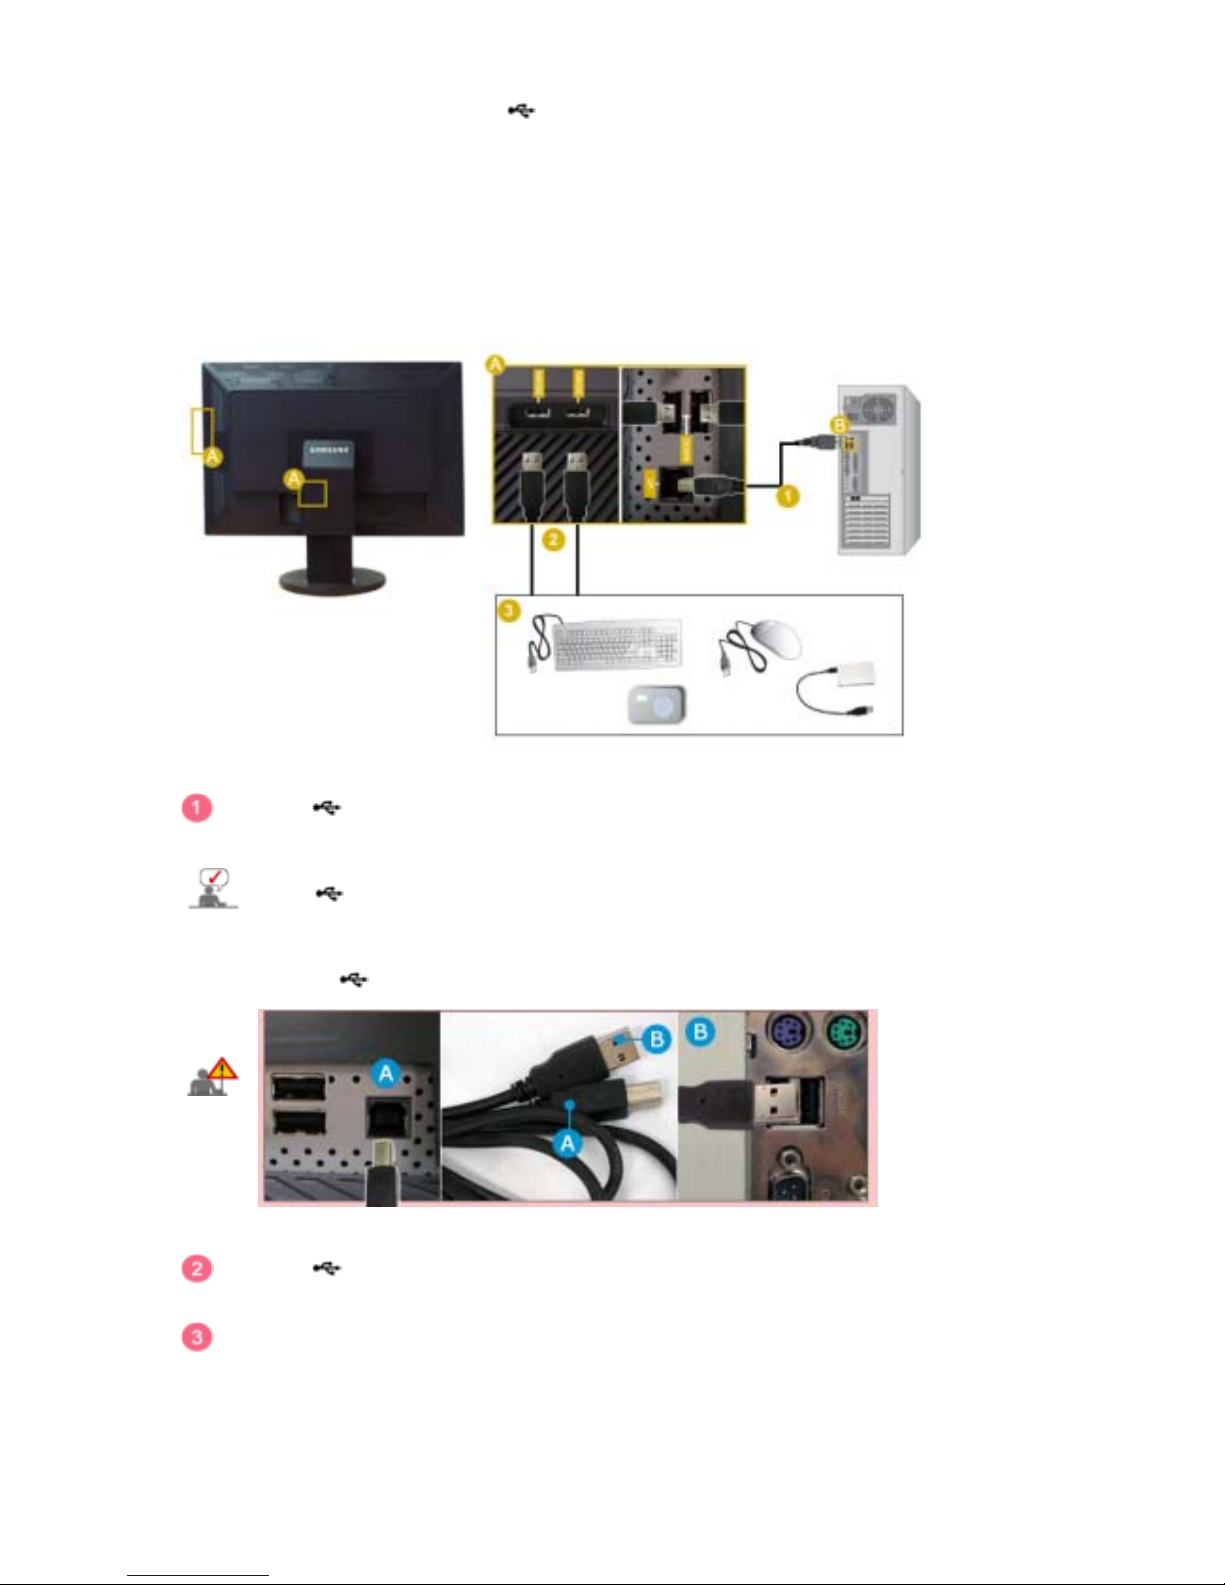
disk drive by connecting them to the
DOWN
port of the monitor without connecting
them to the PC.
The USB port of the monitor supports High-Speed Certified USB 2.0.
High speed Full speed Low speed
Data Rate 480 Mbps 12 Mbps 1.5 Mbps
Power Consumption
2.5W
(Max., each port)
2.5W
(Max., each port)
2.5W
(Max., each port)
Connect the
UP
port of the monitor and the USB port of the computer with the USB cable.
Connect the
DOWN
port of the USB monitor and a USB device with the USB cable.
The use procedures are as the same as those for using an external device connecting to the
PC.
z You can connect and use a keyboard and mouse.
z You can play a file from a media device.
(Examples of media devices: MP3, digital camera, etc.)
z You can run, move, copy or delete the files on the storage device.
(Examples of storage devices: external memory, memory card, memory reader, HDD-type
To use
DOWN
port, you have to connect the UP (Upstream Cable) to the PC.
Make sure to use the USB cable supplied with this monitor to connect the
monitor's UP port and your computer's USB port.
Page 9
MP3 player, etc.)
z
You can use other USB devices that can be connected to a computer.
z
When connecting a device to the DOWN port of the monitor, connect the
device using a cable appropriate to the device.
(For the purchase of the cable and external devices, ask the service center of
the corresponding product.)
z
The company is not liable for problems or damages to an external device
caused by using an unauthorized cable for the connection.
z
Some products do not follow the USB standard, and it may cause a
malfunction of the device.
z
If the device malfunctions even if it is connected to the computer, contact the
service center of the device/computer.
Changing the Stand and Installing the Hoods
Sliding
Stand Stopper
Swivel
Page 10
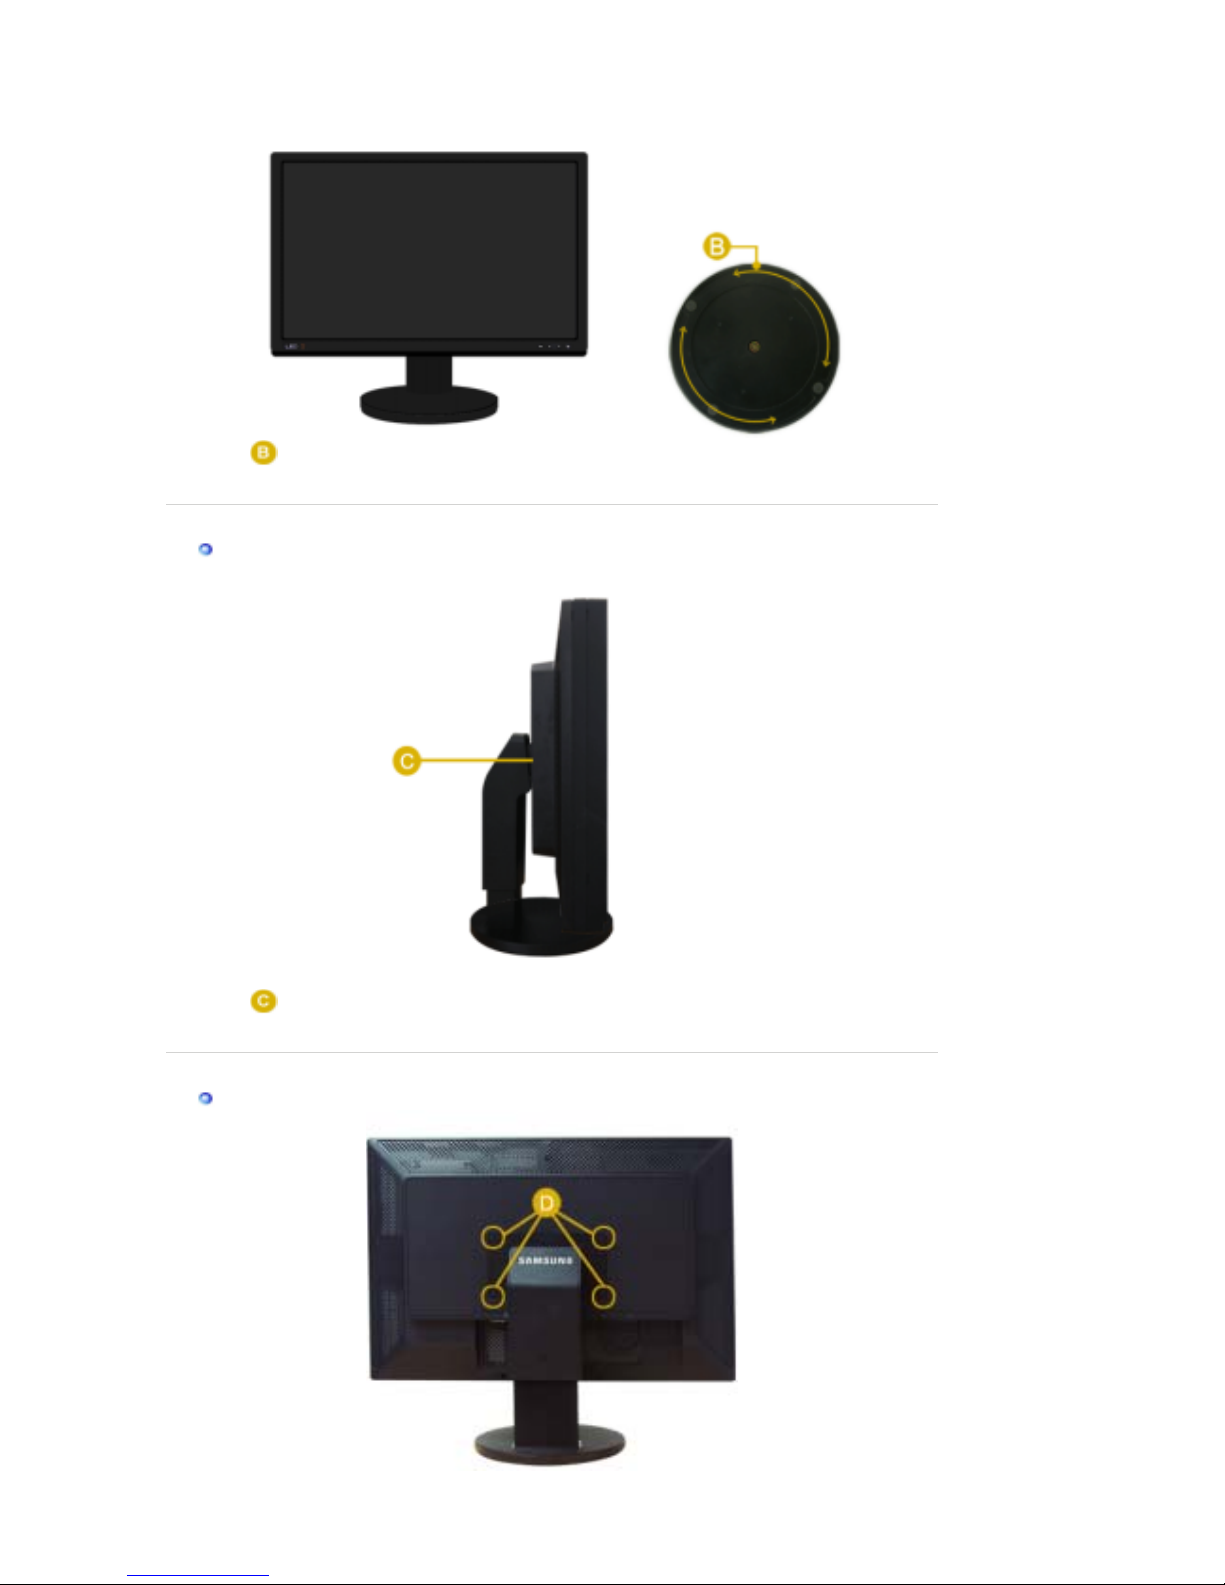
Using ( ),You can swivel the monitor left and right at an angle of 330 ° to set the monitor
lengthwise. The rubber under the stand is to avoid the monitor slide.
Tilt angle
Using ( ), You can adjust the tilt angle forward and backward for the most comfortable viewing
angle.
Removing the base
Page 11
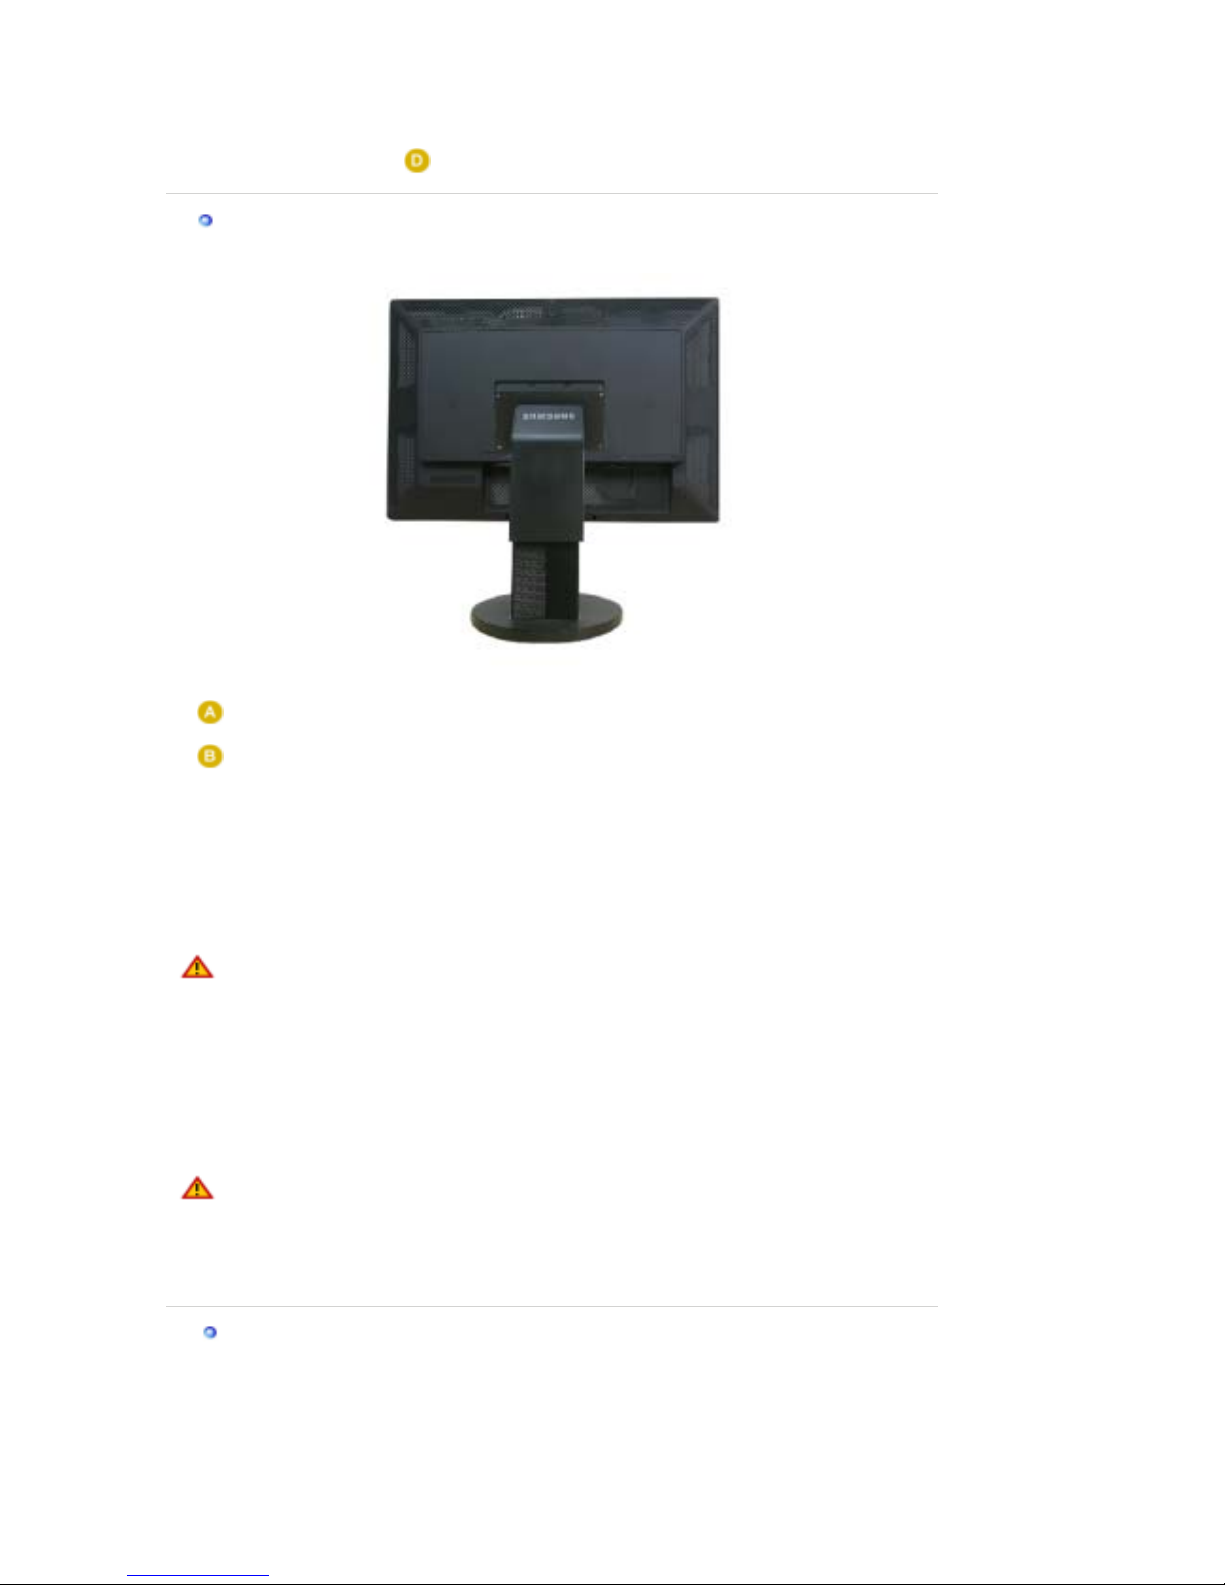
1. Turn off your monitor and unplug its power cord.
2. Lay the LCD monitor face-down on a flat surface with a cushion beneath it to protect the
screen.
3. Remove four screws ( ) and then remove the Stand from the LCD monitor.
Attaching a Base
This monitor accepts a 200 mm x 100 mm VESA-compliant mounting interface pad.
Monitor
Mounting interface pad (Sold separately)
1. Turn off your monitor and unplug its power cord.
2. Lay the LCD monitor face-down on a flat surface with a cushion beneath it to protect the
screen.
3. Remove four screws and then remove the stand from the LCD monitor.
4. Align the mounting interface pad with the holes in the rear cover mounting pad and secure it
with four screws that came with the arm-type base, wall mount hanger or other base.
z Do not use screws longer than the standard dimension, as they may damage the inside
of the Monitor.
z For wall mounts that do not comply with VESA standard screw specifications, the length
of the screws may differ depending on their specifications.
z
Do not use screws that do not comply with the VESA standard screw specifications.
Do not fasten the screws too tightly, as this may damage the product or cause the
product to fall, leading to personal injury.
Samsung is not liable for these kinds of accidents.
z Samsung is not liable for product damage or personal injury when a non-VESA or non-
specified wall mount is used or the consumer fails to follow the product installation
instructions.
z To mount the monitor on a wall, you should purchase the wall mounting kit that allows
you to mount the monitor at least 10cm away from the wall surface.
z Contact the nearest Samsung Service Center for more information. Samsung
Electronics will not be responsible for damages caused by using a base other than
those specified.
z
Please use Wall Mount according to the International standards.
Installation Using the Hood
What is the Hood?
It is a device that can be attached to the top, right and left of the monitor to screen sunlight,
preventing any color distortion. You can change the colors of the entire screen according to your
preferences.
Page 12
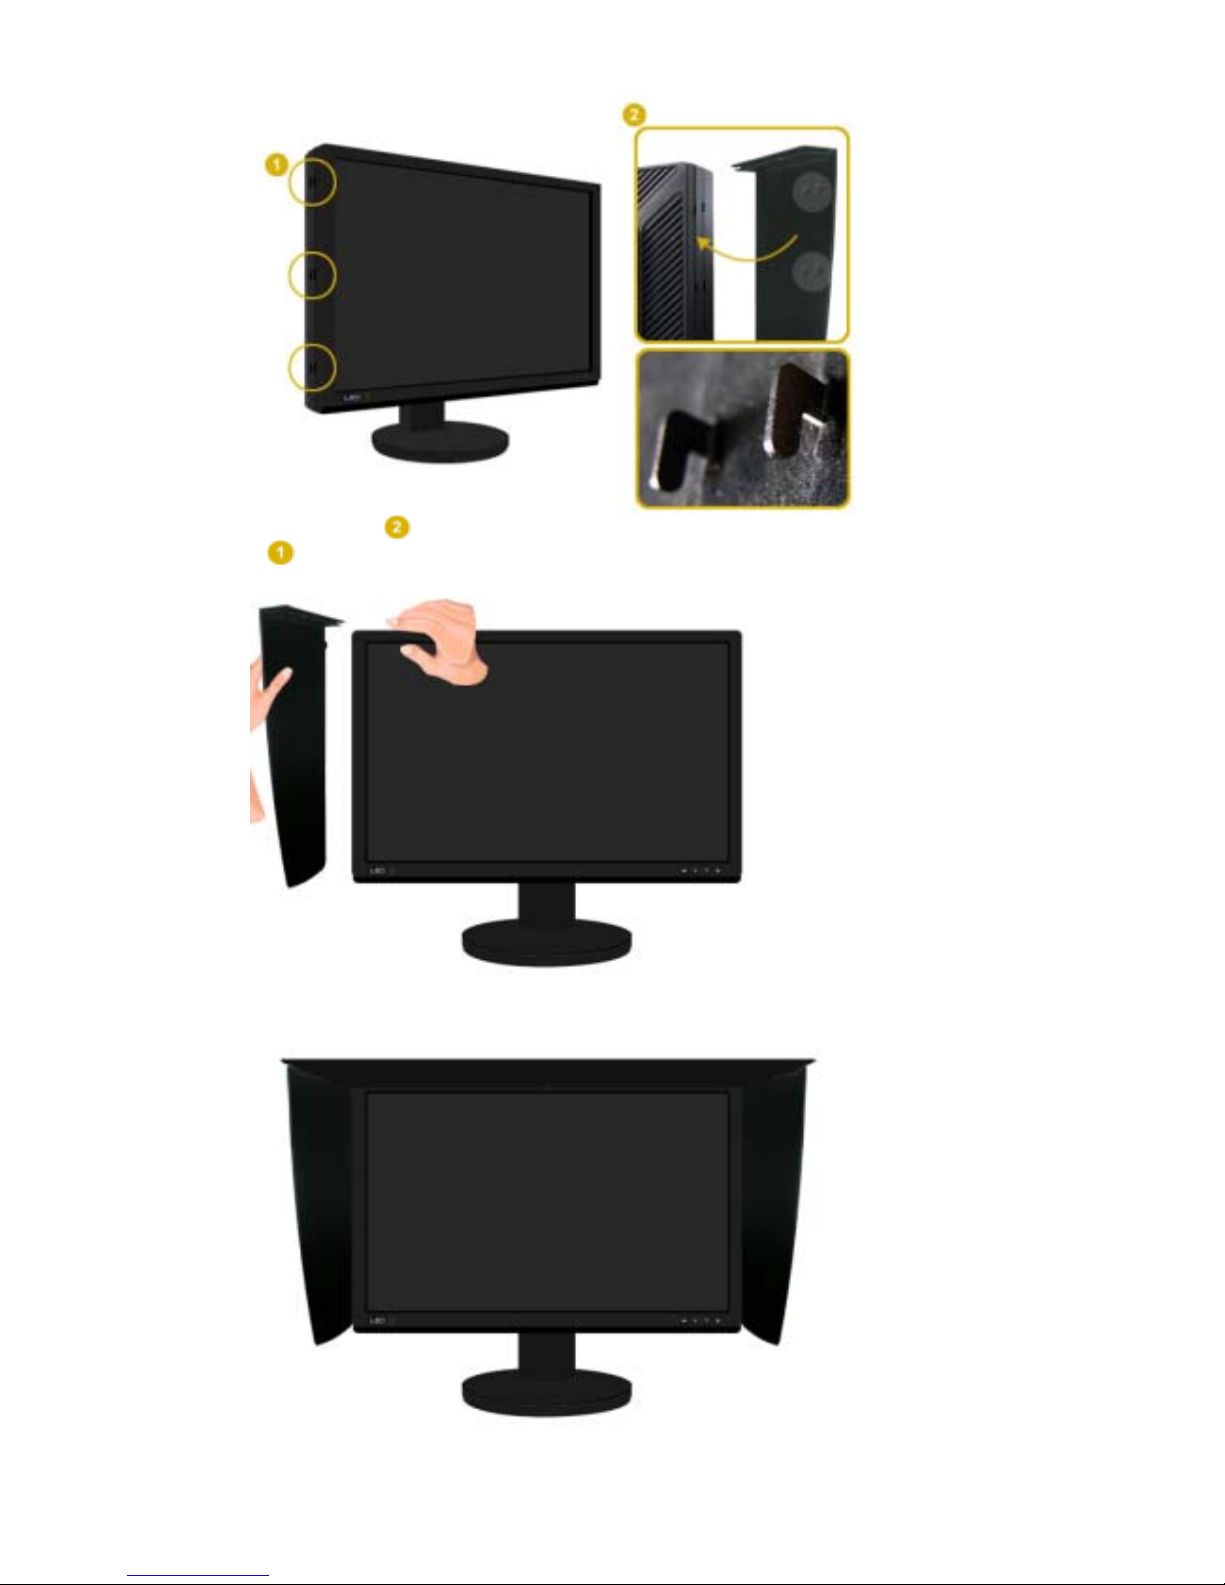
Insert the hooking parts ( ) of both hoods starting from the top and moving downwards into the
grooves ( ) near the left and right edges at the back of the monitor.
Fit the top part of the monitor into the top of the grooves of both hoods.
Page 13
Model
Check List
Before calling for service, check the information in this section to see if you can remedy any
problems yourself. If you do need assistance, please call the phone number on the
Information section or contact your dealer.
Symptom Check List Solutions
No images on the
screen. I cannot turn
on the monitor.
Is the power cord connected
properly?
Check the power cord connection
and supply.
If the power is on, reboot the
computer to see the initial
screen(the login screen),
which can be seen.
If the initial screen (the login screen)
appears, boot the computer in the
applicable mode (the safe mode for
Windows ME/XP/2000) and then
change the frequency of the video
card.
(Refer to Preset Timing Modes)
Note : If the initial screen (the login
screen) does not appear, contact
the Service Center or your dealer.
There is no image on the
screen.
Is the power indicator on the
monitor blinking at 1 second
intervals?
The monitor is in PowerSaver mode.
Press any key on the keyboard to
activate the monitor and restore the
image on the screen.
The screen shows
strange colors or just
black and white.
Is the screen displaying only
one color as if looking at the
screen through a cellophane
paper?
Check the signal cable connection.
Make sure the video card is fully
inserted in it's slot.
Have the screen colors
become strange after
running a program or due to
a crash between
applications?
Reboot the computer.
Has the video card been set
properly?
Set the video card by referring to the
video card manual.
The screen suddenly
has become
unbalanced.
Have you adjusted the
resolution or frequency to the
monitor?
Adjust the resolution and frequency
at the video card.
(Refer to Preset Timing Modes).
SyncMaster XL30
Page 14
LED is blinking but no
images on the screen.
Is the frequency properly
adjusted when checking the
Display Timing on the menu?
Adjust the frequency properly by
referring to the video card manual
and Preset Timing Modes.
(The maximum frequency per
resolution may differ from product to
product.)
There are only 16
colors shown on the
screen.
The screen colors
have changed after
changing the video
card.
Have the Windows colors
been set properly?
Windows ME/2000/XP :
Set the colors properly at the
Control Panel → Display →
Settings
.
Has the video card been set
properly?
Set the video card by referring to the
video card manual.
I cannot use the
2560x1600 resolution
with the monitor.
Does the graphics card on
your computer support the
2560x1600 resolution?
If your graphics card does not support the
2560x1600 resolution, then you can only
use the 1280x800 resolution with your
monitor.
To use the 2560x1600 resolution, replace
your graphics card with one that supports
that resolution.
Check the following items if there is trouble with the monitor.
1. Check if the power cord and the video cables are properly connected to the computer.
2. Check if the computer beeps more than 3 times when booting.
(If it does, ask the service center to check the main board of the computer.)
3. If you installed a new video card or if you assembled the PC, check if the installed the adapter
(video) driver.
4. Check if the scanning ratio of the video screen is set at 60 Hz +/- 2 Hz.
(Do not exceed 60 Hz when using the maximum resolution.)
5. If you have problems in installing the adapter (video) driver, boot the computer in Safe Mode,
remove the Display Adapter at the "
Control Panel→System→Device Administrator
" and then
reboot the computer to reinstall the adapter (video) driver.
If problems repeatedly occur, contact an authorized Service Center.
Q & A
Question
Answer
How can I change the
frequency?
The frequency can be changed by reconfiguring the video card.
Note that video card support can vary, depending on the version
of the driver used. (Refer to the computer or the video card
manual for details.)
How can I adjust the resolution? Windows ME/XP/2000 : Set the resolution at the Control
Panel→Display→Settings.
* Contact the video card manufacturer for details.
How can I set the Power Saving
function?
Windows ME/XP/2000 : Set the function at BIOS-SETUP of the
computer or the screen saver. (Refer to Windows/Computer
Manual).
How can I clean the outer
case/LCD Panel?
Disconnect the power cord and then clean the monitor with a soft
cloth, using either a cleaning solution or plain water.
Do not leave any detergent or scratches on the case. Do not let
any water enter the monitor.
 Loading...