


Getting Started
This chapter provides
basic information
for using this computer.
System overview and
methods for general
use are provided.
Chapter 1
Chapter 1
SAMSUNG X10 plus / X15 plus / X30
BA68-02535A10 040430

1-2
SAMSUNG X10 Plus / X15 Plus / X30 Manual
Introducing The Computer
X10 Plus Model
■
Front View
Power Button
Status Indicators (LED)
LCD Panel
Keyboard
Scroll Wheel/Fingerprint
Sensor(Optional)
LCD Latch
Memory Stick Slot
(Optional)
Status Indicators
(LED)
Speaker (L)
Speaker (R)
Hot Keys
Touchpad
Touchpad Button
CCCCaaaauuuuttttiiiioooonn
nn
About fingerprint sensor
Fingerprint sensor is an option. Models with fingerprint sensor
are provided without scroll wheels. For detailed instruction on using
fingerprint sensor, refer to the separate fingerprint sensor manual.

1-3
Chapter 1. Getting Started
■
Right View
■
Left View
CD-RW/DVD-ROM
Combo Drive
USB Port(2.0)Microphone Jack
Headphone Jack
Fan Vents
Modem Port
LAN Port
Monitor Port
USB Port(2.0) PCMCIA Card Slot
1394 Port (4Pin)

1-4
SAMSUNG X10 Plus / X15 Plus / X30 Manual
■
Rear View
■
Bottom View
TV Output Port
(S-Video)
S/PDIF Port
Battery Latch
Fan Vents
Mini PCI Compartment HDD Compartment
Memory
Compartment
DC-In Port Security Lock PortBattery
CCCCaaaauuuuttttiiiioooonn
nn
The removal of the HDD is not allowed. To replace the HDD, please contact your service center. The Mini PCI compartment is used for the installation of the optional wireless LAN module.

1-5
Chapter 1. Getting Started
X15 Plus Model
■
Front View
LCD Panel
Scroll Wheel
LCD Latch
Memory Stick Slot
Status Indicators
Speaker (L)
Speaker (R)
Touchpad
Touchpad Button
Power Button
Status Indicators
Keyboard
Hot Keys

1-6
SAMSUNG X10 Plus / X15 Plus / X30 Manual
■
Right View
■
Left View
CD Drive
(Optional, refer to P. 3-2.)
USB Port(2.0) S/PDIF Jack
Microphone Jack
Headphone Jack
Fan Vents
Modem Port
LAN Port
Monitor Port
USB Port (2.0) PCMCIA Card Slot
1394 Port (4Pin)

1-7
Chapter 1. Getting Started
■
Rear View
■
Bottom View
TV Output Port
(S-Video)
DC-
In Port
Security Lock Port
Battery
Battery Latch
Fan Vents
Mini PCI Compartment HDD Compartment
Memory
Compartment
The removal of the HDD is not allowed. To replace the HDD, please contact your
service center.
The Mini PCI compartment is used for the installation of the optional wireless LAN
module.
NNNNooootttteeee

1-8
SAMSUNG X10 Plus / X15 Plus / X30 Manual
X30 Model
■
Front View
LCD Latch
LCD Panel
Speaker (L) Memory Stick Slot Scroll Wheel/
Fingerprint Sensor
(Optional)
Status Indicators
Touchpad
Button
Power Button
Keyboard
Speakers
Hot Keys
Touchpad
CCCCaaaauuuuttttiiiioooonn
nn
About fingerprint sensor
Fingerprint sensor is an option. Models with fingerprint sensor are
provided without scroll wheels. For detailed instruction on using
fingerprint sensor, refer to the separate fingerprint sensor manual.

1-9
Chapter 1. Getting Started
O
Right View
O
Left View
CD-RW/DVD-ROM
Combo Drive
USB Ports (2.0)
Headphone Jack
Microphone Jack
Modem Port
Fan Vent LAN Port
Monitor Port USB Port (2.0)
PCMCIA Card Slot 1394 Port (4 Pin)

1-10
SAMSUNG X10 Plus / X15 Plus / X30 Manual
■
Rear View
■
Bottom View
Hard Disk Compartment Mini-PCI Compartment
Battery Latch
Memory
Compartment
TV-Out Port
(S-Video)
S/PDIF Port DC Jack Battery
Security Lock Port
The removal of the HDD is not allowed. To replace the HDD, please contact your
service center. Wireless LAN/Bluetooth module(optional) is installed in the mini
PCI compartment. After doing so, when you turn the system on, the system examination program is executed automatically.
NNNNooootttteeee

1-11
Chapter 1. Getting Started
Turning the Computer On and Off
Turning On
1. Insert the battery and connect the power according to the supplied Installation
Guide.
2. Lift up the LCD panel and open it to a comfortable angle.
3. Press and then release the power button to turn the system on.
Turning Off
1. Click the Start button on the Taskbar.
2. Select Turn Off Computer.
3. Click Turn Off from the [Turn Off Computer] window.
Power Button
CCCCaaaauuuuttttiiiioooonn
nn
After doing so, when you turn the system on, the system examination program is
executed automatically. After doing so, when you turn the system on, the system
examination program is executed automatically.

1-12
SAMSUNG X10 Plus / X15 Plus / X30 Manual
Creating and Changing User Accounts
Multiple users can be registered in a single system so that each user may
use their own customized working environment. Procedures to register
and change user accounts are provided below.
■
Registering a new user
1. Click Start > Control Panel.
2. Click User Accounts > Create a new account.
3. Type a name for the new account, and click Next.
4. Select the account type and click Create Account.
The new user account has been created.
■
Changing users
1. Click Start > Log Off.
2. Click Switch User.
3. In the [Windows Log On] window, select the desired user name.

1-13
Chapter 1. Getting Started
Touchpad
Movement of the pointer (arrow) on the screen will correspond to
movement made with a finger on the touchpad.
■
Click (Select Function)
Place a finger on the touchpad, move the pointer on the screen to the icon or
item to select, and tap the touchpad once. The click operation is also used to
move the ‘cursor’ during document operations.
■
Double-click (Run Function)
Place a finger on the touchpad, move the pointer on the screen to the item to
run, and quickly tap your finger on the touchpad twice.
Or double-click the left touchpad button.
Touchpad Buttons
Two buttons below the touchpad provide identical functions to buttons of a mouse.
Scrool Wheel
Do Scroll Functions In
Windows

1-14
SAMSUNG X10 Plus / X15 Plus / X30 Manual
■
Drag (Move / Select)
Click and hold the left touchpad
button over the point you wish to
drag, and drag your finger to the
desired location while holding
down the touchpad button.
■
Scroll Function
You can move up and down a window using the scroll wheel.
■
Using the Touchpad Scroll Function
You can use the scroll function in the touchpad.
Place your finger on the right edge or bottom edge of the touchpad and move
up/down or right/left, then the screen move up/down or right/left.
Place the touchpad pointer on
the title bar of the window.
This button is held down
If the scroll function does not appear to work, insert and run the system software
CD, click ‘Install Driver’ in the Menu, select Touchpad Driver, and click Install.
NNNNooootttteeee
To utilize the touchpad buttons for other more diverse functions, please refer to the
Mouse icon in the Control Panel.
NNNNooootttteeee
CCCCaaaauuuuttttiiiioooonn
nn
Use only fingers for the touchpad.

1-15
Chapter 1. Getting Started
Using the Keyboard
O
Special Function Keys :
The <Fn> key activates special functions
when pressed in combination with other keys.
Key Combinations
Key
Name
Function
Rest
Gauge
LCD/CRT
Mute
S/PDIF
Powers the computer down into suspended mode. To escape suspended mode, press power button.
Used to check the power supply and the battery charge.
1. Power Supply Status
When operating on battery power
When operating on AC power
2. Remaining Battery Charge Level
Used to type the Euro currency symbol.
Switches the display between the LCD and an external display
device when an external display device is connected. (P. 6-8)
Turns the audio output on and off.
Turns the S/PDIF function on and off.
Function Keys
<Fn> Key
<Fn> Key
Numeric Keypad
Cursor / Screen Control Keys

1-16
SAMSUNG X10 Plus / X15 Plus / X30 Manual
Num Lock
Scroll Lock
Volume Up
Volume
Down
Brightness
Up
Brightness
Down
Application
Key
Screen
Control Key
Enables the numeric keypad.
Scrolls the screen up and down while the cursor position
remains fixed in some applications.
Increases the audio volume.
Decreases the audio volume.
Turns the LCD screen brighter.
Turns the LCD screen dimmer.
Same function as the right button of the touchpad.
Moves to the screen above or below, or moves the cursor to the
beginning or end of the sentence.
Key
Key
Name
Function
Key Combinations
Key
Name
Function

1-17
Chapter 1. Getting Started
■ Changing the Hot Key Settings
The following example shows how to change the setting of User 1 button
1. Double click the SENS Keyboard icon ( ) on the taskbar.
2. Click Browse in the User 1 item.
3. Select the desired program in [Open], and click Open. (Example, Windows Paint)
4. Click OK in [Key Settings] to save the changes.
Internet key : Runs Internet Explorer.
E-mail key : Runs the Internet e-mail client program (Example: Outlook Express).
User 1 button
: Used to specify frequently used programs. To specify a program as
a frequently used program, follow these steps:
WLAN/Bluetooth or User 2 Button : Turns on and off the wireless
LAN/Bluetooth function for the models with wireless LAN/Bluetooth
function. Launches a user defined program for the models without
wireless LAN/Bluetooth function.
Hot Keys
Using Wireless LAN/Bluetooth Button
Loading or unloading wireless LAN/Bluetooth driver takes about 5 seconds.
Therefore, if you turn wireless LAN/Bluetooth on/off using the wireless
LAN/Bluetooth button, the button does not work for 5 seconds. (For wireless
LAN/Bluetooth installed models)
NNNNooootttteeee
What is Bluetooth?
Bluetooth is a worldwide standard for the wireless exchange of data between two
devices.
NNNNooootttteeee
In the models with wireless LAN/Bluetooth installed, you cannot change the configuration of the User 2 button.
NNNNooootttteeee

1-18
SAMSUNG X10 Plus / X15 Plus / X30 Manual
Icon Name Functions
Num Lock Turns on when the numeric keypad is activated.
Caps Lock This light is on when the user has set the option for
typing letters in upper case.
Scroll Lock This light is on when it is set to scroll the screen up and
down while the cursor position does not change in some
applications.
HDD Blinks when the hard disk drive is operating.
Battery Turns green - when the battery is fully charged, or when
the battery is not installed.
Turns amber - when the battery is being charged.
Blinks - when the battery is not properly installed
Power Turns on - when the computer is turned on.
Blinks - when the computer is in Standby mode.
Status Indicators (LED : Light Emitting Diode)
Location of status indicators may differ depending on the model.
NNNNooootttteeee

1-19
Chapter 1. Getting Started
Whenever you turn the system on or change the power source, the brightness level
changes according to the settings.
When operating on AC power: Brightness Level 8
When operating on battery power: Brightness Level1
Adjusting the LCD Brightness
There are 8 levels of LCD brightness (1:Dimmest ~ 8:Brightest).
Press <Fn>+< > or <Fn>+< > keys from the keyboard to adjust LCD brightness. When changed, the current LCD brightness is displayed on the top left corner of
the LCD screen for a few seconds.
(LCD brightness icon)
Maintaining your LCD brightness settings after turning the system
off and on
1. Turn on the system, and enter Setup.
2. In the Boot menu, change the Brightness Control Mode option to User
Control.
3. Save the settings and exit Setup.
Saving the battery charge
When your computer is operating on battery power, adjusting the LCD brightness
level to a dimmer level decreases the battery power consumption.
Bad pixels on the LCD
The limits of the LCD manufacturing technology allow a maximum of 10 abnormal
or bad pixels, which do not affect system performance. This system may have the
same level of abnormal or bad pixels as any other company’s products.
NNNNooootttteeee
CCCCaaaauuuuttttiiiioooonn
nn
Maintenance Instructions
When cleaning the LCD panel, use only computer specific cleaners on a soft
cloth, and lightly wipe in one direction.

Adjusting the Volume
Using the Keyboard
Press <Fn>+< > or <Fn>+< > keys on the keyboard to adjust the
audio volume.
Using the Volume Control Program
On the taskbar, click the Volume ( ) icon, and adjust the slide bars.
For advanced volume control options, double-click the Volume ()
icon, and adjust the settings in the [Master Volume] dialog box.
1-20
SAMSUNG X10 Plus / X15 Plus / X30 Manual

1-21
Chapter 1. Getting Started
Proper Seating Posture During Computer Use
The proper seating posture during computer use is provided here.
Maintaining proper posture during computer use enhances performance
and prevents physical bodily harm.
Seating Posture
- Position the chair so that the eyes are slightly higher than the display
panel.
- Straighten the neck and back.
- Place the legs naturally.
- If necessary, use a cushion to provide extra back support.
- Avoid working postures that require twisting the body or neck.
Lighting
- Soft, indirect lighting is recommended.
- Position the display panel so that external light does not reflect off the
screen. Use curtains, if necessary.
Work Habits
- Take periodic breaks and stretch out stiff muscles regularly.
- Look outside the window or at distant objects frequently to relieve strain
on the eyes.
If necessary, use a footrest to raise the level of your knees
and ease the pressure on the thighs.

1-22
SAMSUNG X10 Plus / X15 Plus / X30 Manual

Introducing Windows
This chapter provides basic
information on using
the computer’s main
operating system
Windows.
Chapter 2
Chapter 2

SAMSUNG P10
2-2
SAMSUNG X10 Plus / X15 Plus / X30 Manual
Windows XP Basics
Windows is the computer’s main operating system, which needs to be
familiarized with in order for efficiently computer use.
Windows XP Tour
A tour of the elementary functions provided by Windows XP.
Click Start > Tour Windows XP.
Or click Start > All Programs > Accessories > Tour Windows XP.
Click on the topics to find out about important functions of Windows XP.
Click the Title.
An explanation will appear
on the lower part of the screen.

Understanding the Desktop
The Desktop is the working area on the computer. It consists of the large workspace,
which is more or less the entire the screen and a Taskbar at the bottom.
Start Button Opens the Start Menu.
Taskbar
Displays programs that are currently running.
Frequently used icons can be placed here.
Recycle Bin Deleted files or folders end up here.
Language Bar
Enables switching between English/other languages
text inputs and provides other text input services.
2-3
Chapter 2. Introducing Windows
Start Menu
Start Button
Taskbar
System Tray with Clock
Language Bar
Recycle Bin
Desktop Icons
You can directly
launch a program.

2-4
SAMSUNG X10 Plus / X15 Plus / X30 Manual
Understanding the Start Menu
The Start Menu includes everything that is required to start Windows.
From the Start Menu it is possible to run a program, open a file, assign system users
with the Control Panel, receive support by clicking Help and Support, and search
desired items from computer or Internet by clicking Search.
Displays the contents of the hard disk, the CD-ROM
drive, the network drive, and floppy disks. It can
also be used to search and open files and folders.
Enables users to configure settings on the
computer.
Provides on-line help, information on Windows
and troubleshooting.
Enables users to search for information in files
or the Internet.
Runs programs or documents.
My Computer
Control Panel
Help and Support
Search
Run
Fixed Items
Internet Browser
Electronic Mail Program
This Folder Stores
Personal Documents
My Computer
Control Panel
Help and Support
Includes All Programs
List of Programs Last Used
The program item and location
may be changed.
Click This Button
to View the Start Menu

Understanding a Window
A window is the basic component in working with the computer. The My Computer
window, which is a window for the computer’s hard drive, will be used as an example here to show the basic composition of a window.
Click Start > My Computer.
Double-click the hard drive (local disk) to view internal folders and files stored in it. If
the contents do not appear, click Show Contents.
2-5
Chapter 2. Introducing Windows
Title Bar
Menu Bar
Quick Task Window
Folder Icon
Close Window Button
Maximize Button
Minimize Button
Click Shared Files or the
Local Disk to view the
folders and files in it.
Folders
Files
What is a Drive? A storage device in which files and folders are saved
in, and read from.
What is a Folder? A folder is used to group and manage files
systematically, and may include files in sub-folders.
It is similar to a bookshelf.
What is a File? A file is a document or various kinds of material that is
generated as a result of program operation. It is also
called data.
To view the entire structure of the drive
Click the Folder Icon in the Toolbar to view the entire structure. Click again to
return to the Quick Task Window.
NNNNooootttteeee

2-6
SAMSUNG X10 Plus / X15 Plus / X30 Manual
Help and Support Center
Help and Support Center provides references and troubleshooting information
regarding computer use.
Click Start > Help and Support.
Related help information
appears when a search
keyword is entered.
Displays Help Index
Help Topics
Troubleshooting Information
Connect to Support Center.
The computer has to be
connected to the Internet
Computer information
can be viewed and
the problem can be
diagnosed.

2-7
Chapter 2. Introducing Windows
Document Operations
To create documents, WordPad or NotePad, which is included in
Windows, or a separate specialized word processor program can be
used, such as MS Word.
Instructions for creating documents using WordPad is provided here.
O
Creating a New Document
1. Click Start > All Programs > Accessories> WordPad
2. Create and edit your document. For more information about WordPad,
refer to on-line Help.
O
Saving a Document
1. Select File from the Menu, and click Save.
2. Click on the Save in field to specify a folder to save the file in, enter the name
of the file in the File Name field, and click Save.
Save Location
Enter File Name

2-8
SAMSUNG X10 Plus / X15 Plus / X30 Manual
O
Opening a Document
1. Click Start > All programs > Accessories > WordPad.
2. Select File From the Menu, and click Open.
3. Click on the Look in field and specify the folder in which the file is saved.
4. Select the file to open and click Open.
O
Printing a Document
To print a document, connect a printer to the computer.
For more information about connecting and configuring a printer, please refer to the
printer manual.
To print a WordPad document
1. Turn on the printer, and insert paper.
2. Open the WordPad file to print.
3. Select File from the Menu and select Print.
4. Click Properties, adjust the printer options accordingly, and click OK.
5. In Print window, click OK to print the document.

Using The Computer
This chapter investigates various
different functions of the computer
and provides information
on using the related application
programs for them.
Chapter 3
Chapter 3

3-2
SAMSUNG X10 Plus / X15 Plus / X30 Manual
Using the CD-ROM Drive
This computer has one of the following CD drives.
- CD-ROM Drive Reads a CD.
- CD-RW Drive Reads and writes data on a CD.
- DVD-ROM Drive Reads a CD/DVD.
- CD-RW/DVD-ROM Read a CD/DVD, and writes data onto a CD.
Combo Drive
- DVD-Multi Drive Reads CD/DVD, and writes data to
CD/DVD. Supports DVD-R, DVD-RW, and
DVD-RAM only for the DVD recording format.
To Run a CD
1. Press the eject button on right side of the CD drive.
2. When the tray slides out, place a CD onto it and push down until it clicks.
3. Push the CD tray in gently. The CD will run automatically.
Emergency Eject Hole
Eject Button
Status Indicator
To eject a CD when the CD drive is out of order or the system is turned off, unfold
a paper clip, and insert the unfolded end of the clip into the hole ( ) and
press until the CD tray opens.
NNNNooootttteeee
Only CD-RW/DVD-ROM Combo drive is provided in X10 Plus and X30 models.
NNNNooootttteeee
CCCCaaaauuuuttttiiiioooonn
nn
To clean a CD or DVD title, clean the disc with a soft clean cloth by wiping from the
center outwards.
Do not eject the CD while the Status Indicator is on.

3-3
Chapter 3.Using The Computer
Using the Windows Media Player
The Windows Media Player enables the user to configure and play video and audio
files from the computer or the Internet.
Click Start > Windows Media Player.
Or click Start > All Programs > Accessories > Entertainment > Windows
Media Player.
Features
Playlist pane
Playback Control area
CCCCaaaauuuuttttiiiioooonn
nn
If you maximize or restore down the window while playing a media such as an
audio CD on Media Player, the screen may not displayed properly for a moment.

3-4
SAMSUNG X10 Plus / X15 Plus / X30 Manual
To Play an Audio CD
1. Insert an audio CD into the CD drive, and a list of all available players is
displayed automatically.
2. Select Windows Media Player, and click OK to play the audio CD.
To Play a Video CD
1. Insert a video CD into the CD drive.
2. When a video window appears, double-click the MPEGAV folder.
3. Double-click the DAT file.
4. When a warning window appears, click the Open with button.
5. In the new window, click Select Program from List and click OK.
6. Select the Windows Media Player, and click OK.
The video will start playing.

3-5
Chapter 3.Using The Computer
To Write Data in CD
You can copy data to a blank CD or create an audio CD.
1. Insert a blank CD into the CD-RW drive.
2. Click Open Writable CD Folder and click OK. The CD-ROM drive window
appears automatically.
3. Click Start > My Computer.
4. Select, drag and drop folders or files to copy onto the CD-ROM drive window.
Click Write Files to CD in the CD-ROM drive window.
CD-ROM drive window
2. Click Write Files to CD
1. Drag and drop folders or files to copy
My Computer window

3-6
SAMSUNG X10 Plus / X15 Plus / X30 Manual
5. When the CD Write Wizard appears, enter the CD label, and click Next.
The data will begin copying.
6. When copying is completed, a message ‘completed’ will appear and the
CD-ROM drive will open automatically.
For more information on copying CDs
Click Start > Help and Support. Enter [CD copy] in the search field, and click the
Search button.
To create an audio CD
Run the Windows Media Player, click the Help menu, and select [Using Windows
Media Player > Using CDs > Creating your own CDs > To create your own CD].
NNNNooootttteeee

3-7
Chapter 3.Using The Computer
Following devices are required to enjoy a home theater system.
·
5.1 channel speaker system (amplifier, speakers, round-type optical connection
cables that can connect to computer`s S/PDIF jack) (Purchased sepearately)
·
DVD drive and DVD program (Optional)
·
DVD titles that support the 5.1 channel (Purchased sepearately)
To Enjoy Home Theater
(S/PDIF Port)
Your computer supports 5.1 channel output, which is a basic function
for home theater systems, and DVD drive. It provides 3D surround
sound and vivid screen.
O
Step 1. Connect 5.1 channel speaker system to
your computer
1. Connect an amplifier to the S/PDIF port on your computer.
2.
Connect the speakers to the amplifier. (Refer to the speaker system`s manual.)
3. To watch through a TV, connect the TV, and change the display device to
the TV in the Display Properties.(P. 6-8)
Digital amp
Surround L speaker
Computer
Center speaker
TV
Front R speaker
Surround R speaker
Subwoofer
Front L speaker
Home theater system usually consists of a TV, DVD, 5.1 channel speaker, and
digital amp and provides a high-resolution screen (MPEG2) and 3D surrounding sound (Dolby 5.1 or DTS). With a home theater system, you can
enjoy a vivid screen and sound in your home as if you are in a movie theater.
NNNNooootttteeee

3-8
SAMSUNG X10 Plus / X15 Plus / X30 Manual
O
Step 2. Configuring the digital sound output on the computer
Press <Fn>+< > to output the audio signal through the S/PDIF port.
O
Step 3. Enable S/PDIF in the DVD program
When using 5.1 channel speakers, you need to install the Power DVD
program from the DVD Installation CD separately supplied and then
change the settings as directed in these steps:
1. Run Power DVD and click the Settings button.
2. On the Audio tab, set the Output setting to ‘Use SPDIF Output’.
Now, you can enjoy home theater using DVD titles.
The S/PDIF setting also can be changed in the Sound and Audio Device
properties. (Click Start > Control Panel > Sounds, speech, and Audio Devices
> Sounds and Audio Devices.) However, <Fn>+< > keys have priority.
NNNNooootttteeee
CCCCaaaauuuuttttiiiioooonn
nn
To control volumes for your 5.1 channel speaker, use the control on the
digital amp. (Please, refer to the speaker manual.)

3-9
Chapter 3.Using The Computer
Working with PCMCIA Cards
Various different functions can be added by inserting PCMCIA cards into
the system. This system supports 16 / 32 bit, type I or II PCMCIA card
types.
1. Insert a card into the PCMCIA card slot on the side of the system.
2. When a card is inserted, Windows automatically installs the necessary driver for
the card. If no available driver can be found by Windows, the driver has to be
installed using the disk supplied with the card.
Eject Button
CCCCaaaauuuuttttiiiioooonn
nn
Before using the PCMCIA slot, remove the slot protector.
Push the eject button of the PCMCIA card slot once to pop it out. Push the button again
to eject the slot protector.
To remove PCMCIA card
a. Double-click Safely Removes Hardware icon ( ) in Taskbar.
b. Select the appropriate PCMCIA card and click Stop button.
c. When ‘Safe to remove Hardware’ window appears, click OK.
d. Press Eject button at PCMCIA card slot once, then the button pops out.
e. Press the projected button to eject the PCMCIA card.
NNNNooootttteeee
CCCCaaaauuuuttttiiiioooonn
nn
You cannot use a ZV card and a PCMCIA III card through the PCMCIA card slot of the
system.

3-10
SAMSUNG X10 Plus / X15 Plus / X30 Manual
Using the Memory Stick (Optional)
In recent, Memory Stick is popular as a removable storage device like
floppy diskette. It is widely used for many digital products like digital
camera, PDA, etc. Users can easily install Memory Stick to save and
remove data in it.
1. Slightly slide Memory Stick into the slot.
2. Double-click My Computer to represent Memory Stick.
3. To remove Memory Stick, slightly push the end of the Memory Stick. When the
Memory Stick is ejected, pull it out.
CCCCaaaauuuuttttiiiioooonn
nn
Restrictions on using the memory stick
This computer does not support copyright protection function, so you can use the
memory stick only as a storage device.
To use memory stick in other digital devices
If you want to use a memory stick with other digital devices, such as a digital
camera, you are recommended to format the memory stick in the digital device. If
you have formatted the memory stick in the computer, you may have to reformat it
in the digital device.
To format Memory Stick on Windows XP,
1. My Computer > Right-Click Touchpad button on the Memory Stick drive.
2. Select 'Format' in Menu to display Format screen. Click Start to begin the
process.
To format a memory stick in Windows 98SE/Me/2000
Install the Memory Stick Formatter included in the System Software CD.
To format Memory Stick Pro
You cannot format Memory Stick Pro using Windows XP or Memory Stick
Formatter. Format it in other digital devices.
Format/Write/Erase is unavailable if Write-Protection Tab of Memory Stick is in
the Lock status.
To remove a memory stick after an operation such as format,
copy, and delete in the Windows 2000 operating system.
Due to a problem in Windows, you have to wait for more than 20 seconds before
removing the memory stick for proper operation.
NNNNooootttteeee

3-11
Chapter 3.Using The Computer
Using Samsung Smart Screen
Use Samsung Smart Screen program to arrange desktop icons as
desired and manage them effectively.
1. Click Start > All Programs > Samsung > Samsung Smart Screen.
2. Samsung Smart Screen appears. When you run the program for the first time,
water drop image is displayed.
3. To move an icon, click a water drop to open it, then drag an icon to another water
drop.
Click a water drop to
open and close the
group.
When you launch Samsung Smart Screen for the first time, a dialog box asking
whether to register the program as a start program or not appears. If you select
OK, the program is automatically launched when you start your computer.
NNNNooootttteeee
To return to Windows desktop
Right-click on Samsung Smart Screen and click Windows desktop. Windows desktop is displayed.
To return to Samsung Smart Screen, double-click ( ) icon on the taskbar.
To change background or skin
Right-click on Samsung Smart Screen and select desired item.
NNNNooootttteeee

3-12
SAMSUNG X10 Plus / X15 Plus / X30 Manual

Connecting to the
Internet
This chapter provides
instructions on connecting
to the Internet.
Chapter 4
Chapter 4
4-2
SAMSUNG X10 Plus / X15 Plus / X30 Manual
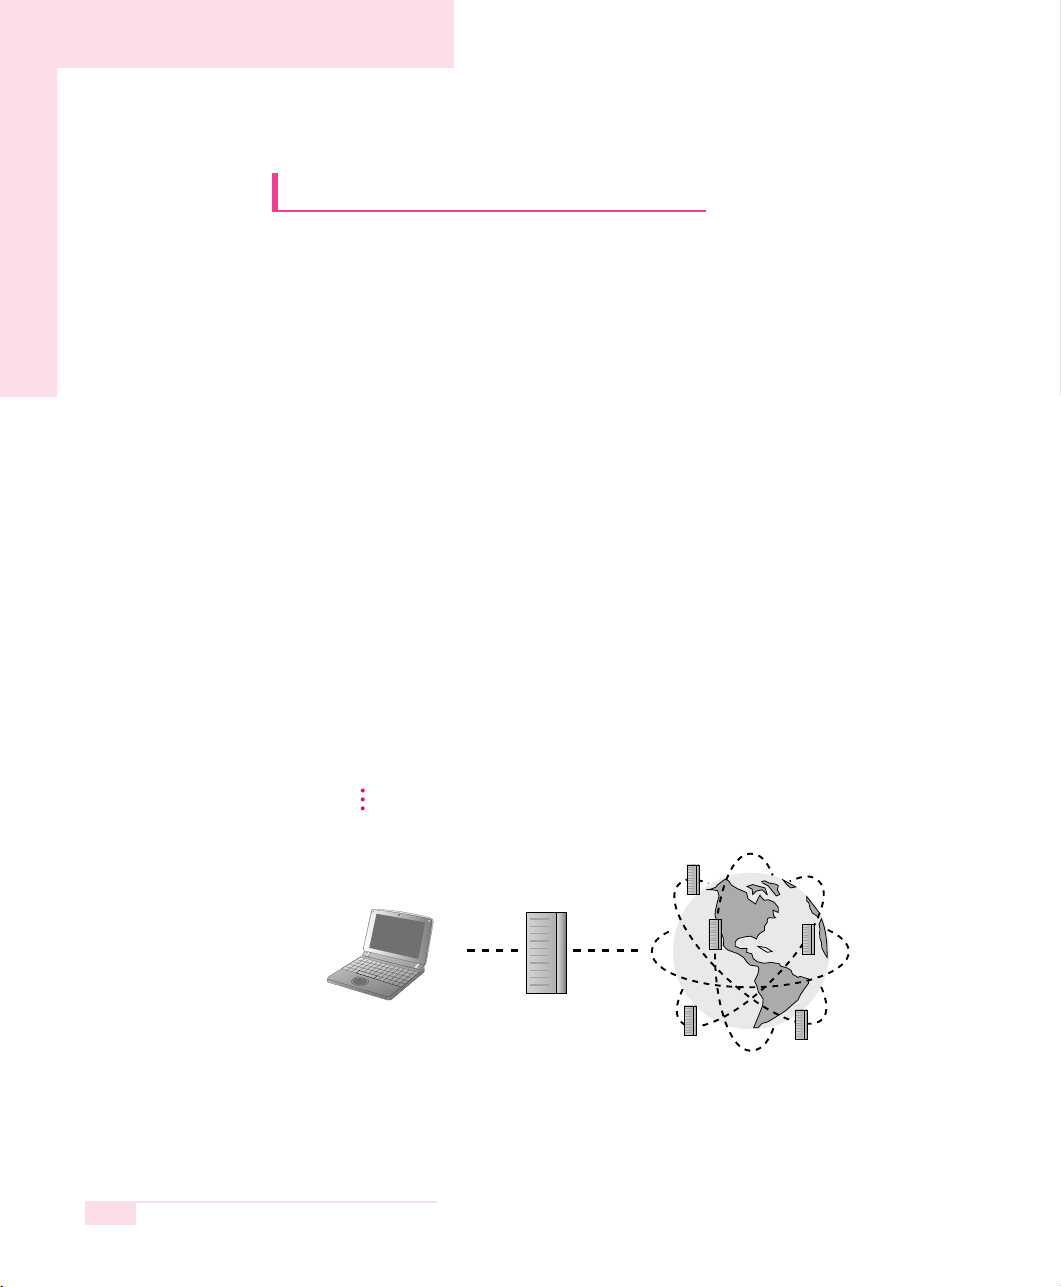
Connecting to the Internet
The following options show many ways to connect to the Internet.
An appropriate option should be selected depending on the user’s working environment and the user’s system specifications.
Option 1 Connecting using a modem and a telephone line.
Service has to be applied for and received from an Internet
Service Provider (ISP) through an Internet service account.
Option 2 Connecting using a High-speed communication
network service, such as ADSL and VDSL.
Service has to be applied for and received from a High-speed
communication network service provider. Receiving Internet
service may require support from specific devices.
Contact the service provider for details.
Option 3 Connecting using a wired LAN
Use a LAN cable that is already installed in your office or
building,
Option 4 Connecting using a wireless LAN
The Internet can be accessed without a telephone line or a LAN
cable if there is a Wireless LAN AP (Access Point) nearby.
My computer Internet Service
Provider
The Internet Provider
The Wireless LAN function is optional.
NNNNooootttteeee

4-3
Chapter 4. Connecting to the Internet
Connecting to the Internet Using a Modem
1. Connect the telephone line to the modem port. Do not use a digital
telephone line.
2. To connect the modem to the Internet, and use e-mail, you have to apply to an
Internet Service Provider (ISP) for an Internet service.
For more account information, please contact your ISP.
Ask your ISP about Internet fees and the disconnection procedure. If the Internet
connection is not disconnected properly, additional telephone charges may incur.
NNNNooootttteeee

4-4
SAMSUNG X10 Plus / X15 Plus / X30 Manual
Configuring the Network Environment Settings for Wired LAN Connections
A wired LAN environment is an environment where you can connect to the
Internet using the company’s LAN or with a broadband modem.
1. Connect the network (LAN) cable to the LAN port of the system.
2. Click Start > Control Panel.
3. Select Network and Internet Connections in the [Control Panel] window.
4. Click Network Connections in the [Network and Internet Connections]
window.
5. In the [Network Connections] window, point the mouse pointer to Local Area
Network and click the right touchpad button. Select Properties from the popup
menu that appears.
6. In the General tab of the [Local Area Connection Properties] window, check that
the connecting device field includes the Broadcom 440x 10/100 Integrated
driver.

7. In the “This connection uses the following items” field, select Internet Protocol
(TCP/IP), and click Properties.
8. Enter the system’s IP and DNS server addresses on the General tab of the
[Internet Protocol (TCP/IP) Properties] window. If DHCP is used, click “Obtain an
IP address automatically” and “Obtain DNS server address automatically” on the
General tab.
9. Once all of the information is entered in the [Internet Protocol (TCP/IP) Properties]
window, click OK to finish.
4-5
Chapter 4. Connecting to the Internet
①
Check the driver
②
Select “Internet Protocol (TCP/IP)”
③
Click Properties
In the above screen, necessary network components can be added by clicking the
Install button.
NNNNooootttteeee
IP addresses and other information necessary for configuration can be obtained
from the network administrator.
NNNNooootttteeee

4-6
SAMSUNG X10 Plus / X15 Plus / X30 Manual
Using Samsung Network Manager
Use Samsung Network Manager to configure network setting.
Using the program, you can do the following.
You can save network settings (including IP address) according to network places
such as office and home. When you change places, simply select a network place
and the network settings will be automatically changed accordingly.
You can easily find out your current IP.
O
To configure network setting
1. Connect LAN cable to the computer’s LAN port.
2. Double-click Samsung Network Manager icon on the desktop.
Or click Start > All Programs > Samsung Network Manager >
Samsung Network Manager.
3. When you are using DHCP, available IP’s are displayed in the status dialog box.
Click Change.
4. Click Add, click Choose Icon and select an icon. Enter a place name in New
Name field and click Ok.

4-7
Chapter 4. Connecting to the Internet
5. New place icon is displayed and full dialog box appears. Check your IP and click
Close. Network setting is saved.
O
To change network places
You can change network places as below.
1. Connect LAN cable to the computer’s LAN port, and double-click Samsung
Network Manager icon on the desktop.
2. Click Change, select a place icon then click Change.
3. On “Do you want to change the location setting?” dialog box, click Ok.
4. When the network place is changed, corresponding place icon is displayed in
color and full dialog box appears. In the right area of full dialog box, network
setting is displayed.
5. Click Close to close the dialog box.
To configure network setting of some place other than current place, click the
place icon and configure each network device. If you are using DHCP, select
‘DHCP’ check box and click Save.
If you are using a static IP, clear ‘DHCP’ check box, enter appropriate network setting and click Save.
Ask ISP or network administrator for IP address.
NNNNooootttteeee
If you used static IP in previous place, previous static IP is displayed in the status
dialog box.
NNNNooootttteeee
Example) changing to Office

4-8
SAMSUNG X10 Plus / X15 Plus / X30 Manual
Using Both DHCP and Static IP Simultaneously.
When you are alternatively using networks with either DHCP or static IP addressing, you can use alternative settings that enable simultaneous configurations of
DHCP and static IP to use both of the network connections without reconfiguring.
1. Click Start > Control Panel > Network and Internet Connections >
Network Connections > Local Area Connection, press the right button
of the touchpad, and then select Properties.
2. Select the Internet Protocol (TCP/IP) item, and then click Properties.
3. In the Alternate Configuration tab, click User configured, and then enter
the appropriate values for the following:
(IP address, Subnet mask, Default gateway, Preferred and alternate DNS server,
Preferred and alternate WINS server)
4. When the configuration has been completed, click OK.
Now you can connect to both networks using DHCP and static IP respectively.
This function is provided only when your operating system is Windows XP.
NNNNooootttteeee

4-9
Chapter 4. Connecting to the Internet
Configuring the Network Environment Settings for Wireless LAN Network
(WLAN)
A wireless network (Wireless LAN) environment is a network environment
that enables communication between multiple computers at home or a
small-size office through wireless LAN devices.
When a computer-to-computer network has been constructed, a computer
that is not connected to the Internet can share the Internet by accessing
another computer connected to the Internet. (See Page 4-18. Using
Network Services)
Wireless network connections can be classified into two categories.
1) Access Point
You can connect to an AP to use the network. This is possible only in an environment equipped with an AP. (See Page 4-10, ‘Connecting to an Access Point (AP)’)
2) Computer–to-computer (ad hoc)
This is also called a peer-to-peer or ad hoc network.
In computer-to-computer wireless networks, you can wirelessly connect 2 or more
computers that have wireless LAN modules. (See Page 4-11, ‘Connecting to computer-to-computer networks (peer-to-peer or ad hoc)’).
The description in this section concerns the Intel(R) PRO/Wireless LAN 2100 3B
Mini PCI Adapter (hereafter referred to as a 2100 11b card) and the Intel(R)
PRO/Wireless 2200BG Network Connection device (hereafter referred to as a
2200 11g card).
A wireless LAN interface is an optional device that you can select when you purchase this product. You can connect to the Internet over a wireless connection
when your computer has a wireless LAN (WLAN) device.
To view the installed wireless LAN card, click Start > Control Panel > System >
Hardware tab > Device Manager.
The actually displayed images may differ from the figures shown in this section
according to the installed device and the connection state.
NNNNooootttteeee
What is an Access Point (AP)?
An AP is a network device that bridges wired and wireless LANs, and corresponds to a wireless hub in a wired network. You can connect multiple wireless
LAN installed computers to an AP.
NNNNooootttteeee

4-10
SAMSUNG X10 Plus / X15 Plus / X30 Manual
Connecting to an Access Point (AP)
This section describes how to connect to an AP. You can use the network when you
are connected to an AP.
1. Right-click on the Wireless Network Connection ( ) icon on the taskbar,
and select View Available Wireless Networks.
2. Select your desired AP (e.g. Test) to connect, and enter the encryption key for the
AP in the Network key field, and click Connect.
Now you are connected to the AP, and you can access the network.
The connection setup is described for a computer running on Windows XP Service
Pack 1. If you are using the Windows 2000 system, refer to P. 4-15 ‘Wireless
Network Setup Using the Wireless LAN Setup Program’. For more detailed information such as the network key (encryption key), ask your network administrator.
NNNNooootttteeee
Checking the connection status.
Move the mouse pointer over the Wireless
Network Connection ( ) icon on
the taskbar, and the connection status is displayed.
NNNNooootttteeee
NNNNooootttteeee
If the network key is not configured for
the desired AP, select ‘Allow me to
connect to the selected wireless network, even though it is not secure’.

4-11
Chapter 4. Connecting to the Internet
Connecting to computer-to-computer networks
(peer-to-peer or ad hoc)
In computer-to-computer wireless networks, you can wirelessly connect 2 or more
computers that have wireless LAN modules.
Using this method, a computer that is not connected to the Internet can share the
Internet by accessing another computer connected to the Internet. (Refer to “Sharing
an Internet connection through a wireless network” (P.4-24).)
You can connect by completing the following steps:
▶
Step 1. Set up a computer-to-computer network on a computer.
▶
Step 2. Connect to the configured computer from other computers.
O Step 1. Setting up a computer-to-computer network
1. Right-click on the Wireless Network Connection ( ) icon on the taskbar,
and select View Available Wireless Networks.
2. Click Advanced.
The connection setup is described for computers running Windows XP Service
Pack 1. If you are using the Windows 2000 system, refer to P. 4-15 ‘Wireless
Network Setup Using the Wireless LAN Setup Program’.
NNNNooootttteeee

4-12
SAMSUNG X10 Plus / X15 Plus / X30 Manual
3. On the Wireless Networks tab, click Advanced.
4. Clear ‘Automatically connect to non-default network’ check box, if it
is selected.
Select ‘Computer-to-computer (ad hoc) networks only’, and click
Close.
5. In the Wireless Networks tab, click Add.
6. Enter the network name (e.g. samsung), and unselect ‘The key is provided
for me automatically’. Enter the encryption key in the Network key field,
and click OK.
To prevent a network connection from an unauthorized user, it would be better to
configure a network key (encryption key). A network key consists of 5 or 13
alphanumeric characters (e.g. magic), or of 10 or 26 hexadecimal numbers (a
hexadecimal number is represented by numbers ‘0’ to ‘9’ or letters ‘a’ to ‘f’).
NNNNooootttteeee

4-13
Chapter 4. Connecting to the Internet
7. Check that the configured network name (e.g. samsung) is in the ‘Preferred networks item’, and click OK.
Now your wireless network setup has been completed.

4-14
SAMSUNG X10 Plus / X15 Plus / X30 Manual
O
Step 2. Connecting to the configured computer
1. Right-click on the Wireless Network Connection ( ) icon on the taskbar,
and select View Available Wireless Networks.
2. Select the wireless network name (e.g. samsung) specified in ‘Setting up a computer-to-computer network’, enter the encryption key in the Network key field,
and then click Connect.
The two computers are connected and are able to communicate with each other.
When the computers are connected, the ‘Wireless Network Connection’ message is
displayed for a short time over the Wireless Network Connection ( ) icon of
the two computers.
If the network key is not configured in ‘Setting up a computer-to-computer network’, select ‘Allow me to connect to the selected wireless network, even though it
is not secure’.
NNNNooootttteeee
Checking the connection status.
Move the mouse pointer over the Wireless Network Connection ( ) icon
on the taskbar, and the connection status is displayed.
NNNNooootttteeee

4-15
Chapter 4. Connecting to the Internet
Wireless Network Setup Using the Wireless LAN Setup Program
When the operating system of your computer is not Windows XP, you should setup
the wireless network settings using an additional wireless LAN setup program
(PROSet).
To use wireless network connection, complete the following procedures.
▶
Step1. Install the wireless LAN configuration program (PROSet).
▶
Step2. Configure wireless network settings through the wireless LAN configura-
tion program.
O Step 1. Installing the wireless LAN configuration program (PROSet)
You can install the wireless LAN client administrator program following the
instruction displayed automatically when you insert the system software CD. Insert
the system software CD into the CD-ROM drive, and install the wireless LAN configuration program.
O Step 2. Using the wireless LAN configuration program (PROSet)
Double-click the wireless LAN program ( ) icon on the taskbar.
(Or, Click Start > All Programs > Intel Network Adapters > Intel
PROSet for Wireless.)
Configure wireless network settings in PROSet following the procedures below.
• To connect to an Access Point
To connect to an access point or existing computer-to-computer (Ad Hoc) network, refer to the following procedures. (To create a new computer-to-computer
network, refer to the following To create computer-to-computer (Ad Hoc)
network section.)
To not display ‘Intel Configuration Service’ window afterward
After installing the wireless LAN configuration program, select “Do not show this
again.” check box, then click Close.
NNNNooootttteeee
In some languages, some buttons on the window may not be displayed. Resize
the window to use the program.
NNNNooootttteeee

4-16
SAMSUNG X10 Plus / X15 Plus / X30 Manual
1. Click Scan in the Networks tab.
2. Select the name of desired access point or computer-to-computer network to connect from the searched available networks list, and click Connect.
3. Select “Yes, create a profile for this Network.”, and click OK.
4. Enter Profile Name and click Next.
5. Enter the network authentication, data encryption (WEP), key index, and password configured for the target access point or computer-to-computer network in
the Security Settings window, and click Finish.
When a wireless connection to an access point is established, connection icon
( ) appears in front of the name of connected profile.
If your desired network does not appear, click Refresh.
An access point is represented by ( ) icon, and a computer-to-computer network
is represented by ( ) icon. An ( ) icon is displayed in front of an access point
or a computer-to-computer network with configured security settings.
NNNNooootttteeee
The network authentication, data encryption (WEP), key index, and password of a
access point are configured in the access point management program. For the
information on the security information, check the security settings of the access
point or ask your wireless network administrator.
To connect to an existing computer-to-computer (Ad Hoc) network, enter the password configured when creating the computer-to-computer network for the first
time. You do not need to enter network authentication and key index.
Security Settings
Network Authentication : The network authentication option includes
Open System and Shared Key. When you select Open System, no
authentication is applied (however, encryption is supported). When you select
Shared Key, a WEP key is used for authentication. The default setting is
Open System.
Data Encryption (WEP) : The IEEE 802.11 WEP (Wired Equivalent Privacy)
standard defines two levels of encryption, a 64-bit key (this is sometimes represented by 40bits) and a 128-bit key.
Key index: Select the current encryption key index used by the access point
out of 1 to 4.
To use pass phrase: Click Use pass phrase to activate, and enter 5 (for 64bit) or 13 (for 128-bit) alphanumeric characters (represented by 0-9, a-z, or A-Z).
To use WEP key: Click Use WEP keys to activate, and enter a hexadecimal
number (represented by 0-9 and A-F) of 10 (for 64-bit) or 26 (for 128-bit) digits in the WEP key field.
NNNNooootttteeee

4-17
Chapter 4. Connecting to the Internet
• To create a computer-to-computer (Ad Hoc) network
To create a new computer-to-computer (Ad Hoc) network or to connect to a hidden access point (Stealth/Closed Mode), refer to the following procedures.
1. Click Add in the Networks tab.
2. Enter Profile Name and Network name (SSID), select Operating
Mode, then click Next.
3. Configure password setting to be used for computer-to-computer network connection in the Security Settings window.
To connect to an access point, enter the network authentication, data encryption
(WEP), key index, and password configured in the access point.
4. When a profile creation is completed, the new created profile appears in the
profiles list in the Networks tab. Select corresponding profile, and click
Connect to connect to the created profile.
When a wireless connection to the created profile is established, connection icon
( ) appears in front of the name of connected profile.
A hidden access point is an access point that exists, but is configured not to be
detected by the scan operation to prevent access attempts from unauthorized
users.
NNNNooootttteeee
What is a network name (SSID)?
Network name (SSID) is a name that a wireless adapter uses for identifying connection. Enter the name of a computer-to-computer network (e.g. samsung) or the
name of the access point to connect to. The network name identifies cases. (capital and lowercase) For the name of access point, check the settings of the access
point, or ask your wireless network administrator.
Operating Mode:
Infrastructure - Connect to an Access Point - Select to connect to an
access point.
Ad hoc - Connect directly to other computers - Select to create
a computer-to-computer (Ad Hoc) network.
NNNNooootttteeee
It is recommended to configure data encryption for security purposes when creating a computer-to-computer network connection profile. For more information on
security settings refer to the security settings in Connecting to AP or Help.
When you are creating a computer-to-computer network connection profile, the
network authentication setting is disabled.
NNNNooootttteeee

4-18
SAMSUNG X10 Plus / X15 Plus / X30 Manual
Using Network Services
While the computer is connected to the network, you can use network
services to share files, folders, and printers. Using computer-to-computer
wireless networks, you can access the Internet through a computer that is
connected to the Internet even if your computer is not directly connected
to the Internet.
Sharing files or folders
This section describes how to share files and folders between computers connected to
the network.
To share files, complete the following procedures:
▶
Step 1. Configuring the sharing of files and folders on a computer.
▶
Step 2. Accessing shared files and folders from another computer.
Network services are provided for the computers that are connected to the network through wired or wireless network connections. (See Pages 4-4, 4-9,
Configuring Network Environment Settings)
NNNNooootttteeee
CCCCaaaauuuuttttiiiioooonn
nn
When a file or folder is shared, anyone connected to the network can open and delete
the shared file or folder.
Configure a file sharing network only when the network is secure, and do not share
important data.

4-19
Chapter 4. Connecting to the Internet
O
Step 1. Configuring Sharing
1. Right-click the target file or folder to share in My Computer, and select
Sharing and Security.
2. Click ‘IF you understand the security risks but want to share files
without running the wizard, click here’.
3. Select ‘Just enable file sharing’, and click OK.
4. In the ‘Network sharing and security’ field, select ‘Share this folder on the
network’, enter the share name, and click OK.
The file and folder sharing configuration has been completed.
It has the same security effect as that of the ‘Network Setup Wizard’.
This screen does not appear if Internet Sharing Network Wizard has been
installed in the computer-to-computer wireless network environment.
NNNNooootttteeee
CCCCaaaauuuuttttiiiioooonn
nn
Be cautious when selecting ‘Allow network users to change my files’ since other network users can change the files in the shared folder.

4-20
SAMSUNG X10 Plus / X15 Plus / X30 Manual
O
Step 2. Using Shared Files or Folders
This section describes how to access shared files or folders if your computer is a
member of the same workgroup.
1. Click Start > My Computer. Under Other Places, click My Network
Places in your computer.
2. Click ‘View workgroup computers’, and click the desired computer to
access the shared file.
If your computer is a member of another workgroup:
1. Click Other Places > Microsoft Windows Network.
2. Click the desired workgroup.
3. Click the desired computer to display the shared files or folders.
NNNNooootttteeee

4-21
Chapter 4. Connecting to the Internet
Sharing Printers
This section describes how to share a printer between computers connected to a network.
To share a printer, complete the following procedures:
▶
Step 1. Configure printer sharing in the computer connected to the printer.
▶
Step 2. Add and use the shared printer in other computers on the network.
O
Step 1. Configuring Printer Sharing
1. From the computer connected to the printer, click Start > Printers and
Faxes.
2. Right-click the printer you want to share, and click Sharing.
3. Select ‘Share this printer’, enter a share name for the shared printer, and
click OK.
4-22
SAMSUNG X10 Plus / X15 Plus / X30 Manual
4. In the Printers and Faxes window, you will find the printer icon has been
changed to another icon on a hand.
O
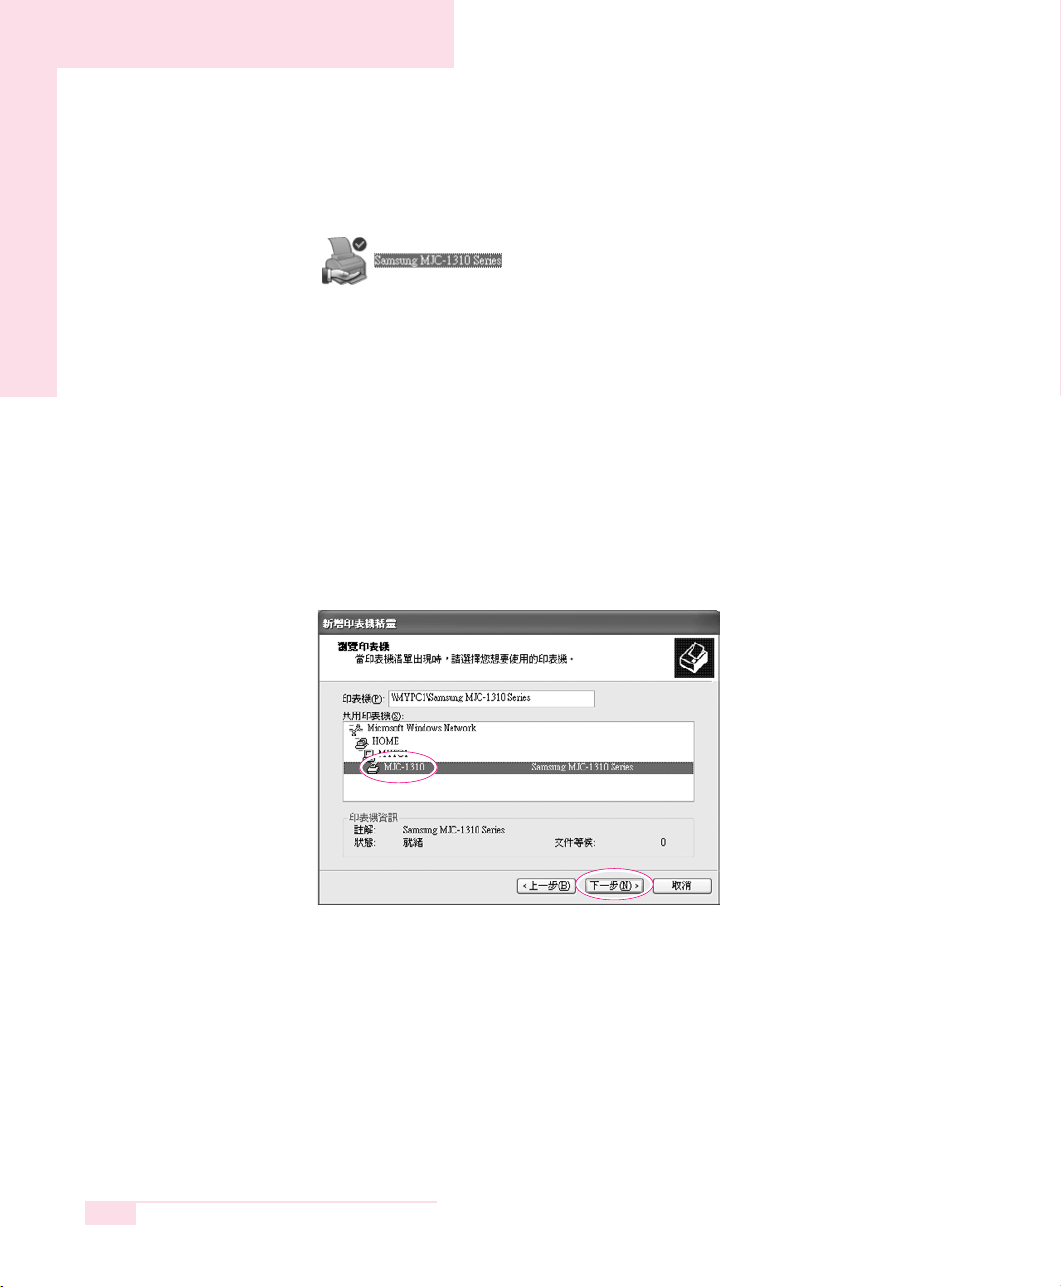
Step 2. Adding and Using a Shared Printer
1. From a different computer that wants to use the shared printer, click Start >
Printers and Faxes.
2. Click Add a printer.
3. In the Add Printer Wizard, click Next.
4. Select ‘A network printer, or a printer attached to another comput-
er’, and click Next.
5. Select ‘Browse for a printer’, and click Next.
6. Select the workgroup or computer, select the desired printer, and click Next.
If you cannot find the desired printer, try again after a while.

4-23
Chapter 4. Connecting to the Internet
7. Read the warning about a shared printer, and click Yes to install the shared
printer.
8. Select Yes for ‘Do you want to use this printer as a default printer?’, and click
Next.
9. Click Finish.
10. When the printer sharing configuration has been completed, the shared printer
appears in the Printers and Faxes window.
Now you can print using the shared printer even if your computer is not directly connected to a printer.

4-24
SAMSUNG X10 Plus / X15 Plus / X30 Manual
Sharing an Internet connection through a wireless network
By connecting your computer to another computer, which is connected to the Internet
over a wired connection, through a wireless network (Peer-to- Peer), you can access
the Internet from your computer.
To share an Internet connection, complete the following procedures:
▶
Step 1. Configuring a Internet connection sharing from the computer connected to
the Internet.
▶
Step 2. After completing the shared Internet connection configuration, check that
the other computers can access the Internet through the shared Internet
connection.
O
Step 1. Configuring Internet Sharing
Configuring a shared Internet connection on the computer connected to the
Internet.
1. Click Start > Control Panel > Network and Internet Connections >
Network Connections.
2. Right-click on the device connected to the Internet, the external network, and
select Properties.
To share an Internet connection, the computers should be connected to a computer-to-computer (peer-to-peer) wireless network.
(See Page 4-11, ‘Connecting to computer-to-computer networks’)
Also, one of the computers has to be connected to the Internet (external network).
The description for Sharing Internet access is for the operating system Windows
XP Service Pack 1.
NNNNooootttteeee
NNNNooootttteeee
If the computer is connected to the Internet through a wired LAN, select ‘Local Area
Connection’.

4-25
Chapter 4. Connecting to the Internet
3. In the Advanced tab, select ‘Allow other network users to connect
through this computer’s Internet connection’, and click OK.
O
Step 2. Checking the Shared Internet Connection
When the Internet connection sharing configuration has been completed, the network icon in the Network Connections window is displayed as follows:
Click Start > Control Panel > Network and Internet Connections >
Network Connections.
A computer connected to the Internet.
A computer sharing the remote Internet connection (other computer).
If the icon does not appear after a long time, restart the computer.
Computers on the network can access the Internet through the shared Internet connection only when the computer connected to the Internet is turned on.
NNNNooootttteeee

4-26
SAMSUNG X10 Plus / X15 Plus / X30 Manual
Using Bluetooth (Optional)
Bluetooth is an industry standard for local area wireless data exchange
between devices. To use Bluetooth, both of the two Bluetooth devices must
be accessible through a wireless connection.
Bluetooth enables you to do the following tasks.
▶
Transferring files and folders (p4-29)
▶
Connecting with a HID (p4-30)
▶
Synchronizing personal information (p4-31)
▶
Connecting to a network
▶
Exchanging electronic business card
▶
Connecting with a Bluetooth headset
This chapter describes “Transferring Files and Folders”, “Connecting with a HID (e.g.
keyboard and/or mouse), and “Synchronizing Personal Information”. For more information, refer to the separate Bluetooth Manual included on the system software CD.
Installing the Bluetooth Software
To use Bluetooth, you have to install the driver and the Bluetooth Manager program.
1. Insert the system software CD in the CD drive on the right side of the computer,
and select Install Bluetooth Software.
2. When the Install shield wizard appears, click Next to continue the installation.
When the installation is completed, the Bluetooth icon ( ) will appear on the
taskbar.
3. Press touchpad right button on the Bluetooth icon on the taskbar, and click
Start Using Bluetooth.
4. Click Next to continue the installation.
5. When the [Device Name and Type] dialog box appears, enter the desired name in
the Computer name field, and select “Laptop” in the Computer type field. Click
Next to proceed.

4-27
Chapter 4. Connecting to the Internet
6. When the [Initial Bluetooth Configuration Wizard] dialog box appears, click Skip
to finish the installation.
7. When the installation is completed, the menu of the Bluetooth icon on the
taskbar is changed as follows.
Computers on the network can access the Internet through the shared Internet
The name you enter is used to represent the device when connecting with another
device.
NNNNooootttteeee
While installing the drive, a warning message box may appear, telling you that
there is no Microsoft logo. Since this does not affect the operation, click
Continue Installation to continue the installation.
NNNNooootttteeee

4-28
SAMSUNG X10 Plus / X15 Plus / X30 Manual
Connecting with Other Devices
This section describes the common steps when using Bluetooth. Read this section first
before reading any other instructions.
A Bluetooth connection consists of a client requesting a connection, and a server
approving the connection. When you establish a Bluetooth connection, you need to
enter a PIN (Personal Identification Number) code in both the client and the server,
and the server has to approve the transmission for actual data transmission.
O
Step 1. Connecting
1. The client attempts to connect to the server. This happens when you are trying
to transfer a file to the server, or to connect to the network via the server.
2. When a notification window appears in the Bluetooth icon on the taskbar of
the server that requests a password, click the notification window.
3. Enter the desired password in the Bluetooth PIN Code field of the [Bluetooth
PIN Code Request] window, and click OK.
4. The same window appears on the client, enter the same password as on the
server, and click OK.
Now a connection between the client and the server has been established.

4-29
Chapter 4. Connecting to the Internet
O
Step 2. Approving a Transmission
1. When a notification window requesting access privilege appears in the
Bluetooth icon on the taskbar of the server, click the notification window.
2. In the [Approve Bluetooth File Transmission Access] dialog box, click OK.
Now you can transfer data over the network.
Transferring Files and Folders
You can exchange files and folders between two Bluetooth devices.
1. Press touchpad right button on the Bluetooth icon ( ) in the taskbar, and select
Quick Connect > File Transfer > Find Devices.
2. Select the device to receive files in the [Service : File Transfer] window, and click
Open. The shared folder window of the other party’s device appears.
3. Drag and drop the files or folders to transmit to the shared folder window of the
other party’s device.
4. When file transmission is approved as described in “Connecting with Other
Devices”(p4-28), the files are transmitted.
Always allow data transmissions
Select “Always allow this device to access to my computer’s File Transfer service”
to always allow automatic data transmission from the client without displaying a
notification window. This state is called Paring status.
NNNNooootttteeee

4-30
SAMSUNG X10 Plus / X15 Plus / X30 Manual
Connecting with a HID
You can connect and use an HID (Human Interface Device) with Bluetooth capability
such as a keyboard, a mouse, or a joystick on your computer.
1. Configure the HID to connect in search status. For more information refer to the
HID user manual.
2. Double-click the Bluetooth icon ( ) on the taskbar. The device (e.g. mouse) will
appear in the [My Bluetooth Places] window.
3. Double-click the HID icon to connect the device. Now you can use the HID as you
would use a wired interface device such as a keyboard, a mouse, or a joystick.
Connecting a keyboard
To connect a keyboard, you need to enter a PIN (Personal Identification Number)
code. For PIN information, refer to the keyboard user manual.
NNNNooootttteeee
Restriction
A Bluetooth HID works only when Windows is running, and will not work in DOS
mode (e.g. booting password screen) or in suspended mode. In this case use
other types of interface devices instead.
NNNNooootttteeee

4-31
Chapter 4. Connecting to the Internet
Synchronizing Personal Information
You can synchronize personal information saved in the PIMS of your computer such
as e-mail, a phonebook, a schedule, or memo with another Bluetooth device.
1. Double-click the Bluetooth icon ( ) on the taskbar, and click View My
Bluetooth Services in the [My Bluetooth Places] window.
2. Right-click on the My PIM Synchronization icon ( ), and click Properties.
3. In the [Bluetooth Properties] dialog box, select e-mail program, and click OK.
4. Right-click on the Bluetooth icon ( ) on the taskbar, and click Quick
Connect > PIM Synchronization > Find Devices.
5. In the [Service : PIM Synchronization] dialog box, select the other device to
synchronize information with, and click OK.
6. When the file synchronization is approved as described in “Connecting with Other
Devices”(p4-28), a personal information synchronization is performed.
What is PIMS?
PIMS (Personal Information Management System) is software that manages personal information such as e-mail, schedules, etc. Microsoft Outlook is an example
of PIMS.
NNNNooootttteeee
What is Synchronization?
Synchronization is a function that compares the data in two devices and updates
information with the latest one so that the data in the two devices are the same.
NNNNooootttteeee

4-32
SAMSUNG X10 Plus / X15 Plus / X30 Manual

System Management
This chapter provides
information on efficient
computer management.
Chapter 5
Chapter 5

5-2
SAMSUNG X10 Plus / X15 Plus / X30 Manual
Managing Power
Use Power Options to save power consumption. You can switch Standby
Mode while you are not using your computer or configure the system
components to shut it down on a specified time.
O
Specifying Power Save Time
You can specify Turn Off Monitor, Turn Off Hard Disk, System Standby Mode,
and Maximum Power Save Mode.
Select Start > Control Panel > Performance and Maintenance >
Power Options > Power Schemes tab. Then specify time in each item and
click OK.
Monitor Off
The LCD display goes into Power-Saving
mode after the specified period of time.
Hard Disk Off
The Hard Disk goes into Power-Saving
mode after the specified period of time.
Standby Mode
If the computer is not used for the specified
period of time, the monitor and hard disk
drives are turned off to reduce power
consumption.
Hibernation Mode
Saves the current working status onto the
hard disk and turns the computer off.
Pressing the Power button restores the
computer to the previous working status.
By default, the power scheme is configured to SAMSUNG mode. SAMSUNG
mode extends the battery life and optimizes the Intel Speedstep function. Since
SAMSUNG mode operates the CPU at half its original speed to reduce power
consumption, the operating speed of a program is slower than normal.
To use the SAMSUNG mode after reinstalling Windows, install the PowerCFG
program using the system software CD.
NNNNooootttteeee
Press Power button to use computer again in Standby Mode or Hibernate Mode.
NNNNooootttteeee

5-3
Chapter 5. System Management
O
Using the Power button
You can configure the function of the power button.
Click Start > Control Panel > Performance and Maintenance >
Power Options and select the Advanced tab.
Configure the Power button function.
Configure the <Fn>+< > function.
CCCCaaaauuuuttttiiiioooonn
nn
When the Power button is configured to put the system into Power-Saving Mode, manually shutting down the computer requires the Power button to be pressed and held for
more than 4 seconds.

5-4
SAMSUNG X10 Plus / X15 Plus / X30 Manual
Using the Battery
Please refer to the following instructions when running the computer on
battery power without connecting the AC power.
This computer uses smart rechargeable Lithium-Ion (Li-Ion) battery.
Ejecting and Attaching Battery
1. Shutdown system and close LCD.
2. Put the computer upside down.
3. Pull the two battery latches outward( ), then remove the battery.
4. To install the battery again, slide the battery into the system as below. The battery
latch moves inward, and fixes the battery automatically.
battery latch
CCCCaaaauuuuttttiiiioooonn
nn
Please read the instructions on the battery before use.
Please refer to the system operation environment (Page A-2) of this manual and oper-
ate and store the battery at room temperature.
CCCCaaaauuuuttttiiiioooonn
nn
In X10 plus model, slide left battery latch outward( ), then remove the battery
while holding the right battery latch outward( ).
CCCCaaaauuuuttttiiiioooonn
nn
Using the bridge battery
Your computer has a bridge battery, which supplies power for a short time even when
there is no battery installed. Thus you can exchange a battery in standby mode, without turning the computer completely off. When you are exchanging the battery in
standby mode, exchange in 3 minutes.(Only for X30 model)

Checking the Battery Charge Status
You can check the battery charge status using one of the following two methods:
Method 1 : Pressing the <Fn>+< > key combination displays the remaining
battery charge.
●
Power supply status (Power Source)
When operating on battery power
When operating on AC power
●
Remaining Battery Charge Level (Battery Level, %)
Method 2 : Remove the battery from the computer, and press the PUSH button on the
battery to view the approximate remaining battery charge (%).
5-5
Chapter 5. System Management
Slightly press PUSH button.
To configure the computer to emit alarm beeps when the remaining battery
charge is low, click Start > Control Panel > Performance and Maintenance >
Power Options Properties and configure accordingly in the ‘Alarms’ tab.
NNNNooootttteeee
Battery Warning
You will hear an alarm when the remaining battery charge is under 10%.
Connect the power cable or turn off the computer and install a fully charged
battery.
When the remaining battery charge is under 3%, the computer automatically
saves current work and turns off. This may be different according to the
settings in Control Panel > Performance and Maintenance > Power
Options > Alarms tab.
NNNNooootttteeee

5-6
SAMSUNG X10 Plus / X15 Plus / X30 Manual
Increasing Battery Life
O
Adjust LCD Brightness
<Fn> + < > : Dim the LCD display brightness.
O
Use Power Saving Mode
This function reduces power consumption when the system is not being used for
a prolonged period of time.
O
Use Battery Calibration
When the battery is in continuous use without being completely charged or discharged, there may be a difference between the displayed battery charge and
the actual battery charge, owing to the inherent characteristics of the battery.
Completely discharging the battery and fully charging it can correct this problem.
Completely discharging the battery for this reason is called battery calibration.
The procedure to calibrate the battery is described below.
1. Turn off the computer and disconnect the AC power.
2. Turn on the computer and press <F2> to enter into System Setup.
3. Select Smart Battery Calibration in the Boot Menu, and press <Enter> to
start. The calibration process usually takes 3 to 5 hours depending on the
remaining battery charge.
4. When the calibration process is complete and the battery is completely discharged, connect the AC power adaptor to fully recharge the battery.
Select system boot
options
Boot Device Priority
NumLock [Off]
Enable Keypad [By NumLock]
Summary screen [Disabled]
Boot-time Diagnostic Screen [Disabled]
PXE Oprom [Always]
Screen Expansion [Enabled]
Active Display [LCD/CRT]
Brightness Control Mode [Auto Dim]
Easy Hangul [Enabled]
Smart Battery Calibration
▶

5-7
Chapter 5. System Management
Upgrading Memory
This computer has a 128 MB or 256 MB memory module. There is a
socket in which one additional memory module can be installed.
1. Using a screwdriver, open the memory-module compartment cover on the bottom
of the system.
2. Push the memory module tabs outward to pop the memory module outward.
Pull the module out at an angle of about 30°.
Screws
Before replacing the memory module, turn the system off completely. Do not
replace the memory module when the system is in Rest Mode.
NNNNooootttteeee

5-8
SAMSUNG X10 Plus / X15 Plus / X30 Manual
3. Align the new memory module connectors accordingly and slide it into the slot at
a 30˚ angle.
4. Push the memory module in until the module clicks into place. If the memory
module is not fixed completely, push the module while pressing the memory module tabs outward.
5. Close and fix the memory-module compartment cover using a screwdriver.

5-9
Chapter 5. System Management
Using the Security Lock
The security lock is a device used to physically ‘fix’ the system when using it in a public place. The locking device needs to be purchased separately. The shape and methods of use may differ depending on the manufacturer. Please refer to the manual
provided with the security lock for proper use.
Connect a security lock cable to a fixed object, and to the security lock port on the
back of the computer.
①
②

5-10
SAMSUNG X10 Plus / X15 Plus / X30 Manual
Traveling with the Computer
- When traveling, keep the system and the AC adapter disconnected. Otherwise,
it may affect the functions of the system.
- Make sure that the system is not pressed by a book or heavy objects. The LCD
may get damaged.
- When traveling by plane, use a bag designed for notebook PCs and hand-carry
the computer.
- Allow the computer and disks to pass through security X-rays but do not pass the
computer and disks through metal detectors.
- Do not use the computer during take off and landing.
- Make sure the eject button of PCMCIA card slot is locked.

Customizing your
computer
This chapter provides information
how to use the system setup,
customizinig screen settings.
Chapter 6
Chapter 6

Using System Setup
System Setup is a utility that enables the computer environment to be
changed to suit the user. System Setup is used when changing the system
password, booting priority, or when adding new devices.
Please use extra care when configuring System Setup, as it may cause
serious system error.
To enter System Setup
1. Turn on the computer.
2. When the booting screen appears, press <F2>.
3. The initial System Setup screen will appear in a moment.
<Tab>, <Shift-Tab>, or
<Enter> selects field.
System Time [10:21:53]
System Date [04/26/2003]
Primary Master [30006MB]
Secondary Master [CD-ROM]
CPU Type XXXXXXXX
CPU Speed XXXX GHz
Sysem Memory 640KB
Extended Menory XXXXXXKB
BIOS Version XXXXXXXX
Micom Version XXXXXXXX
▶
▶
6-2
SAMSUNG X10 Plus / X15 Plus / X30 Manual
Setup Menu
Help
Displays help information on
the current selected item.
Navigation Keys
Use these navigation keys to
view and change the System
Setup settings.
Sub-Menu
Press<enter> to display sub-menu.
Setup Item

6-3
Chapter 6. Customizing your computer
System Setup Menus
System Setup Navigation Keys
Menu Items Description
Main Configures the basic system environment
Advanced Configures OS and major chipset options of the system
Security Configures system security options
Boot Configures booting options
Exit Exits System Setup
Displays the
Help window.
Exits the current
sub menu or
opens the Exit
menu.
Moves between
menus.
Selects a field
or opens a sub
menu.
Saves changes
and exits
System Setup.
Moves up and
down between
fields.
Changes the
value of the
current field.
Restores
default values.
For more information on System Setup menus or options, please refer to Help on the
right side of the screen.
NNNNooootttteeee
Contents of System Setup may be changed due to functional improvement or
other reasons.
NNNNooootttteeee

6-4
SAMSUNG X10 Plus / X15 Plus / X30 Manual
Configuring the Password
O
Setting the Supervisor Password
By configuring a supervisor password, you can restrict system access to authorized users only.
1. Select the Security menu in the System Setup. (To enter into System Setup, see
Page 6-2.)
2. On the ‘Set Supervisor Password’ item, press <Enter>.
3. Enter a password, press <Enter>, re-enter the password for confirmation, and
press <Enter> again.
4. When a message confirming the password configuration appears in the [Setup
Notice] window, press <Enter>.
Supervisor Password
controls access to the
setup utility.
Supervisor Password Is: Clear
User Password Is : Cle ar
HDD 0 Password Clear
Set Supervisor Password [Enter]
Set User Password [Enter]
Set HDD 0 Password [ Enter]
Password on Boot [Disabled]
Fixed Disk Boot S ector [Normal]
Do not lose or forget your password. If you have forgotten your password,
contact the Samsung service center.
NNNNooootttteeee

6-5
Chapter 6. Customizing your computer
O
Setting the User Password
You can configure user passwords so that other users can use the system.
On the ‘Set User Password’ item, press <Enter>, and complete step 3-4 of
Configuring the Supervisor Password.
O
Activating the Booting Password
Set the ‘Password on boot’ option to [Enabled].
From now on, you must enter the password to boot the system.
O
Activating the Hard Disk Drive Password
Activating the hard disk drive password prevents the currently installed hard disk
drive from being used in other systems.
In the ‘Set HDD 0 Password’ item, press <Enter>, and complete step 3-4 of
Configuring the Supervisor Password.
O
Deactivating the Password
1. On the password to delete, press <Enter>. (e.g. supervisor password)
2. Enter the current configured password, and press <Enter>.
3. Leave the ‘New Password’ and ‘Confirm New Password’ field empty, and press
<Enter> to deactivate the password.
Before activating a user password, a supervisor password must have been configured.
Users can start the system with their user password, but cannot enter into the
System Setup.
Deactivating the supervisor password also deactivates the user password.
NNNNooootttteeee
Before activating the booting password, the supervisor password must have been
configured.
NNNNooootttteeee
Before activating the hard disk drive password, the supervisor password must
have been configured.
NNNNooootttteeee

6-6
SAMSUNG X10 Plus / X15 Plus / X30 Manual
Changing Booting Priority
You can select the booting priority among the devices such as the hard
drive, CD-ROM drive, etc. The following example describes how to configure the hard drive as the first booting device when the CD-ROM drive
is configured as the first booting device by default.
1. Select the Boot Menu in System Setup.
2. Press <Enter> on Boot Device Priority item.
3. Use the <↓> key to move to the Hard Drive item, and press <F6> key until it
is at the very top.
4. Press <F10> to save the changed configuration, and exit System Setup.
Now you can boot the system with the hard disk drive as the first booting device.
Select system boot
options
Boot Device Priority
NumLock [Off]
Enable Keypad [By NumLock]
Summary screen [Disabled]
Boot-time Diagnostic Screen [Disabled]
PXE Oprom [Always]
Screen Expansion [Enabled]
Active Display [LCD/CRT]
Brightness Control Mode [Auto Dim]
Easy Hangul [Enabled]
Smart Battery Calibration
▶
Boot Options
CD-ROM Drive
Removable Devices
+ Hard Drive
Network Boot

6-7
Chapter 6. Customizing your computer
Configuring Resolution and Color Depth
Screen resolution is the number of pixels displayed on the screen. High
resolution makes the overall screen area large, although individual items
appear small. Color quality is determined by the number of bits used to
represent a pixel on the screen. High color quality displays more number
of colors on your screen.
1. Press touchpad right button on the desktop, and click Properties.
2. Make changes on the Settings tab of the [Display Properties] dialog.
3. When you have completed configuration, click Apply.
To change the number of colors displayed on a
monitor, select an appropriate color quality.
To change your screen resolution, move the slider
to select an appropriate resolution.
XGA models, configuring the Screen resolution to 1024x768, and the Color
quality to Highest (32 bit) is recommended.
SXGA+ models, configuring the Screen resolution to 1400x1050, and the
Color quality to Highest (32 bit) is recommended.
UXGA models, configuring the Screen resolution to 1600x1200, and the
Color quality to Highest (32 bit) is recommended.
WXGA(15.4") models, configuring the Screen resolution to 1280x800, and
the Color quality to Highest (32 bit) is recommended.
WSXGA+(15.4") models, configuring the Screen resolution to 1680x1050,
and the Color quality to Highest (32 bit) is recommended.
NNNNooootttteeee

6-8
SAMSUNG X10 Plus / X15 Plus / X30 Manual
Using External Display Devices
Using external display devices such as a monitor, projector, TV, etc
allows you to view screen images alternatively or simultaneously on each
device. Additionally, you can extend the screen onto two display devices
to use a larger workspace.Using external display devices is especially
useful when you are giving a presentation or watching a movie through
your TV.
O Switching Display Devices Using the Shortcut Key
You can watch the screen through either the LCD or an external display device,
or you can even watch the screen through both the LCD and an external display
device simultaneously.
1. Connect the external display device (e.g. a monitor or a projector) to the corresponding port of the system.
To connect a TV, connect the TV to the TV output port of the system.
2. Press the <Fn> + < > key. Provided that an external display device is connected, the display option changes in LCD > CRT > LCD+CRT order whenever the
key is pressed.
O Using Dual View to View an Extended Screen
You can expand the screen into two display devices and work conveniently in
separate workspaces.
In Dual View mode, you can select the screen resolution and color quality for
each display device, as if there were two separate graphics cards.
1. Connect the external display device (e.g. a monitor or a projector) to the corresponding port of the system.
To connect a TV, connect the TV to the TV output port of the system.
2. Press touchpad right button on the desktop, click Properties, and then click the
Settings tab.
Provided that multiple external display devices are connected, the display order is
LCD > CRT > LCD+CRT > TV > LCD+TV > CRT+TV whenever the <Fn>+< >
keys are pressed. You cannot view the screen via the LCD, CRT, and TV
simultaneously.
NNNNooootttteeee

6-9
Chapter 6. Customizing your computer
3. Click the monitor ‘2’ icon, select the ‘Extend my Windows desktop
onto this monitor’ check box, and then click Apply.
4. When you have completed this, click OK on the left of the Troubleshoot button.
The primary display device (the LCD) is indicated as ‘1’, and the secondary display device is indicated as ‘2’. Now you can use each of the two display devices
as independent display devices.
1: Primary 2: Secondary
When using Dual View, only the LCD is configured as the primary display device.
NNNNooootttteeee
CCCCaaaauuuuttttiiiioooonn
nn
If the screen of the secondary display device is displayed at 640x480 pixels, with 256
colors, change the settings to the desired screen resolution and color quality in the
[Display Properties] window.
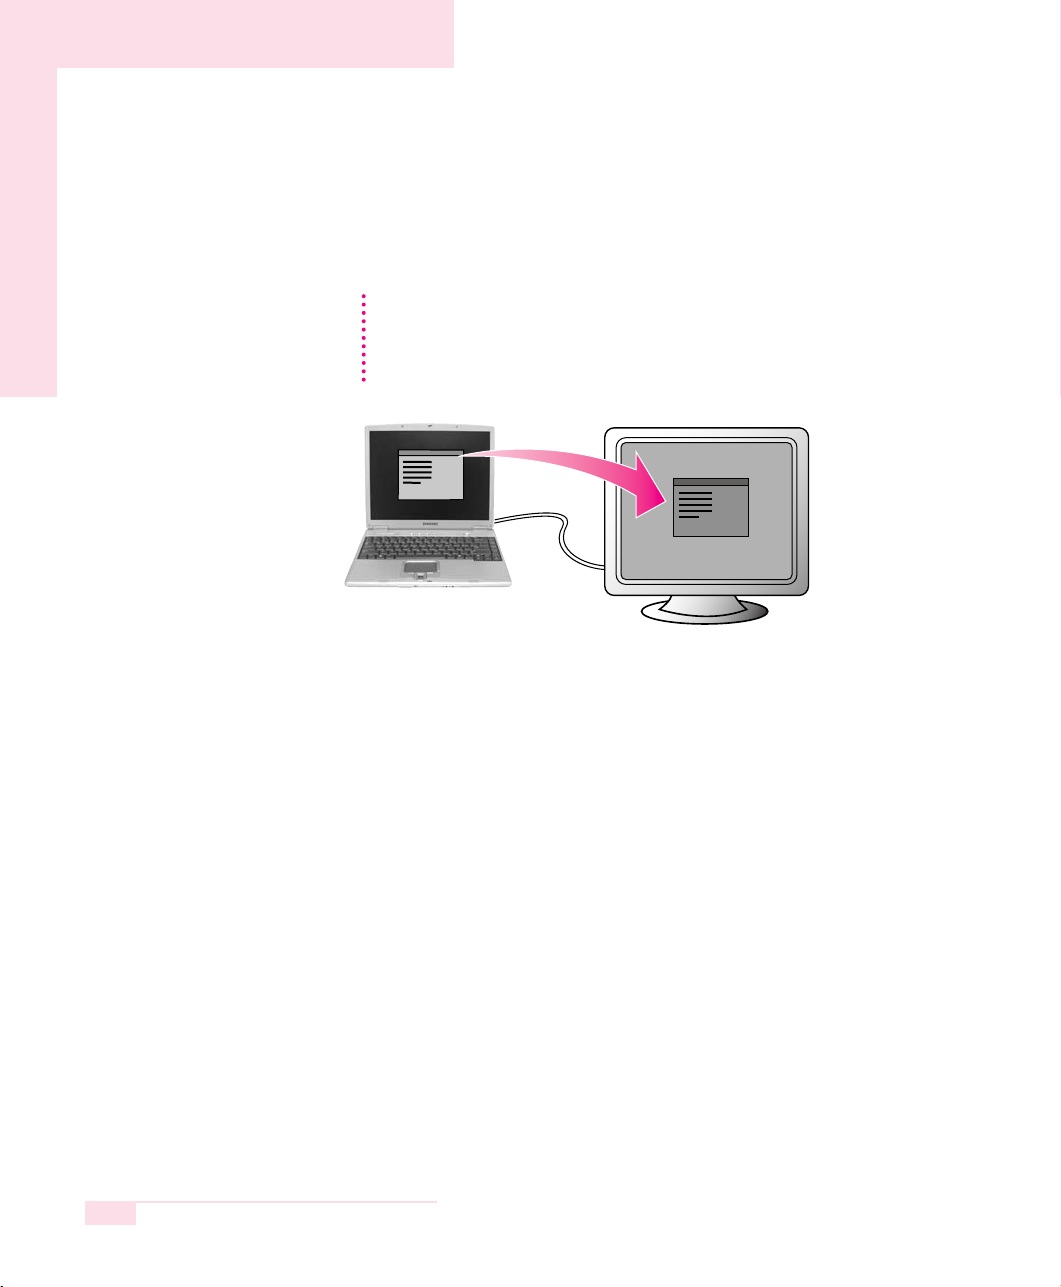
6-10
SAMSUNG X10 Plus / X15 Plus / X30 Manual
O Deactivating Dual View Mode
Click the monitor ‘2’ icon, clear the ‘Extend my Windows desktop
onto this monitor’ check box, and then click Apply.
To move a window between display devices in Dual View mode
Click the title bar of the window in the primary display device (1, the LCD), and
drag it to the secondary display device (2). The window moves to the secondary
display device.
NNNNooootttteeee
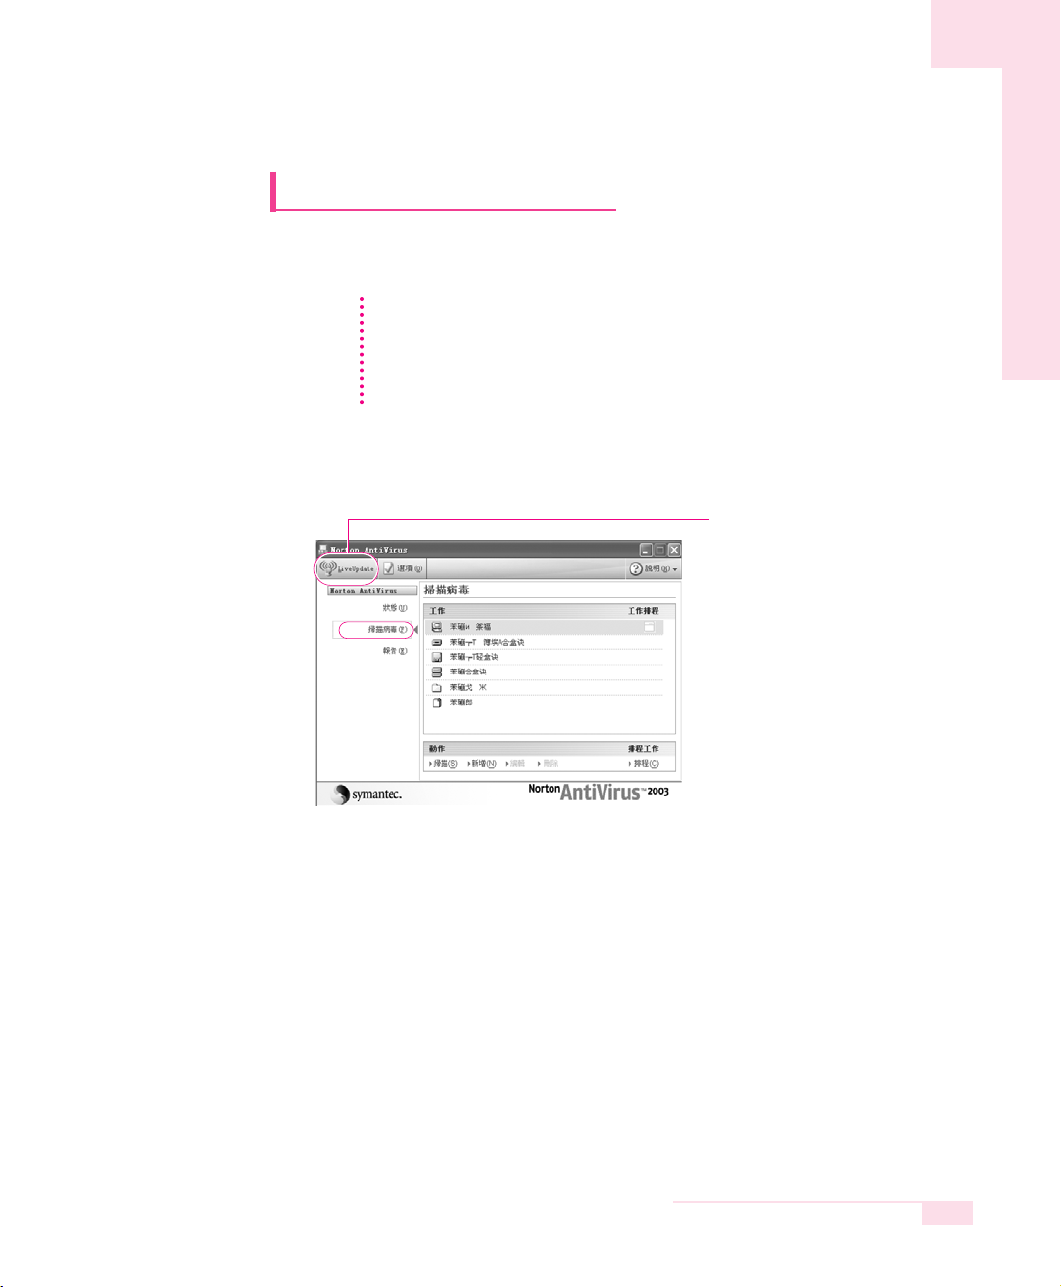
6-11
Chapter 6. Customizing your computer
Checking for Viruses
The Norton AntiVirus software is provided as the virus inspection
program.
1. Select Start > All Programs > Norton AntiVirus >
Norton AntiVirus 2003.
2. Click Scan Virus, select drive to inspect, and click Scan.
3. If a virus is detected, select Automatic in Norton AntiVirus, and click Next to
delete the virus.
Vaccines for the latest viruses
can be downloaded by
connecting to Symantec’s
homepage.
When Norton AntiVirus is launched for the first time, the Norton AntiVirus configuration window will be displayed. Read the instruction carefully and proceed with each
step. Live Update downloads the latest version of the program through networks. Once
this is completed, the first virus examination will start.
These steps must be completed in order for Norton AntiVirus to run properly.
NNNNooootttteeee

6-12
SAMSUNG X10 Plus / X15 Plus / X30 Manual

Recovering the
Computer
This chapter provides recovery
procedures using
the System Recovery CD
when the computer is not
operating properly.
Chapter 7
Chapter 7

7-2
SAMSUNG X10 Plus / X15 Plus / X30 Manual
Restoring the System
The System Restore function allows you to restore your computer to an earlier copy (called restore point), and restores the settings if a problem occurs.
The System Restore function is provided by Windows XP to enable the resolution of various problems without reinstalling Windows XP completely.
You can use System Restore in the following cases.
·
The system files are deleted or damaged by mistake.
·
The system is unstable or a problem occurs in a device driver.
·
A problem occurs after changing system files such as the registry.
·
A problem occurs after installing a new program.
O
Creating a Restore Point
Restore points are created at predetermined times and at times of significant system
events such as when a program or a driver is installed. You can also decide when to
create your own restore points.
The procedures to create your own restore point are described below.
1. Click Start > All Programs > Accessories > System Tools > System
Restore.
2. Select ‘Create a restore point’, and than click.
3. In the Restore point description box, type.
This description is only for models running Window XP.
NNNNooootttteeee
There has to be more than 200MB of free space on the hard disk drive. If the disk
space is insufficient, a saved restore point might be deleted.
You are recommended to create a restore point when you have purchased a new
computer and before installing new programs or device drivers. Before creating a
restore point, check that the computer is operating properly.
NNNNooootttteeee

7-3
Chapter 7. Recovering the Computer
O
Returning your computer to an earlier restore point
The procedures to return your computer to an earlier restore point when a problem
has occurred are described below.
1.
Start > All Programs > Accessories
> System Tools > System Restore.
2. Select ‘Restore my computer to an
earlier time’, and click Next.
3. Select the desired restore date (①) from
the calendar restoration and select the
desired restore point from the list (②),
and then click Next.
4. Confirm the selected restore point and click Next. System Restore shuts down
Windows, and starts the restoration processes.
5. After the restoration is complete, Windows restarts. In the [System Restore completed]
dialog box, click OK. Your computer has been restored to the selected restore point.
O
Undoing the last restoration
The procedures to undo a restoration are described below.
1.
Click Start > All Programs > Accessories > System Tools > System
Restore.
2. Select ‘Undo my last restoration’, and click Next.
3. Confirm the restoration information to undo, and click Next. System Restore
shuts down Windows and starts undoing the restoration.
4. After the undo restoration is complete, Windows restarts. On the [Undo the last
restoration completed] dialog box, click OK. Your computer has been restored to
the point prior to the last restoration.
②
①
The date of the restore point
is displayed in bold font.
NNNNooootttteeee

7-4
SAMSUNG X10 Plus / X15 Plus / X30 Manual
Reinstalling Software
If you have reinstalled the Windows operating system, or the system and
program do not operate properly, you can re-install the driver and program using the system software CD.
O
Running the system software CD
Insert the system software CD into the CD-ROM drive. The initial screen appears
automatically.
O
Installing drivers
1. In the initial screen, click Driver Installation.
2. Select the driver you want to install from the device installation screen, and click
Install Now.
Installs device drivers.
Installs programs.
The drivers and programs included in the system software CD are listed in the
D:\ReadMe.htm file.(Provided that the name of CD-ROM drive is “D”.)
This computer is optimized for Microsoft Windows XP. Therefore, Windows drivers
other than the ones included in the System Software CD are not provided.
NNNNooootttteeee
 Loading...