

Samsung Wingo S-P2450, Wingo S-2450, Wingo MY-MP200 Instruction Manual
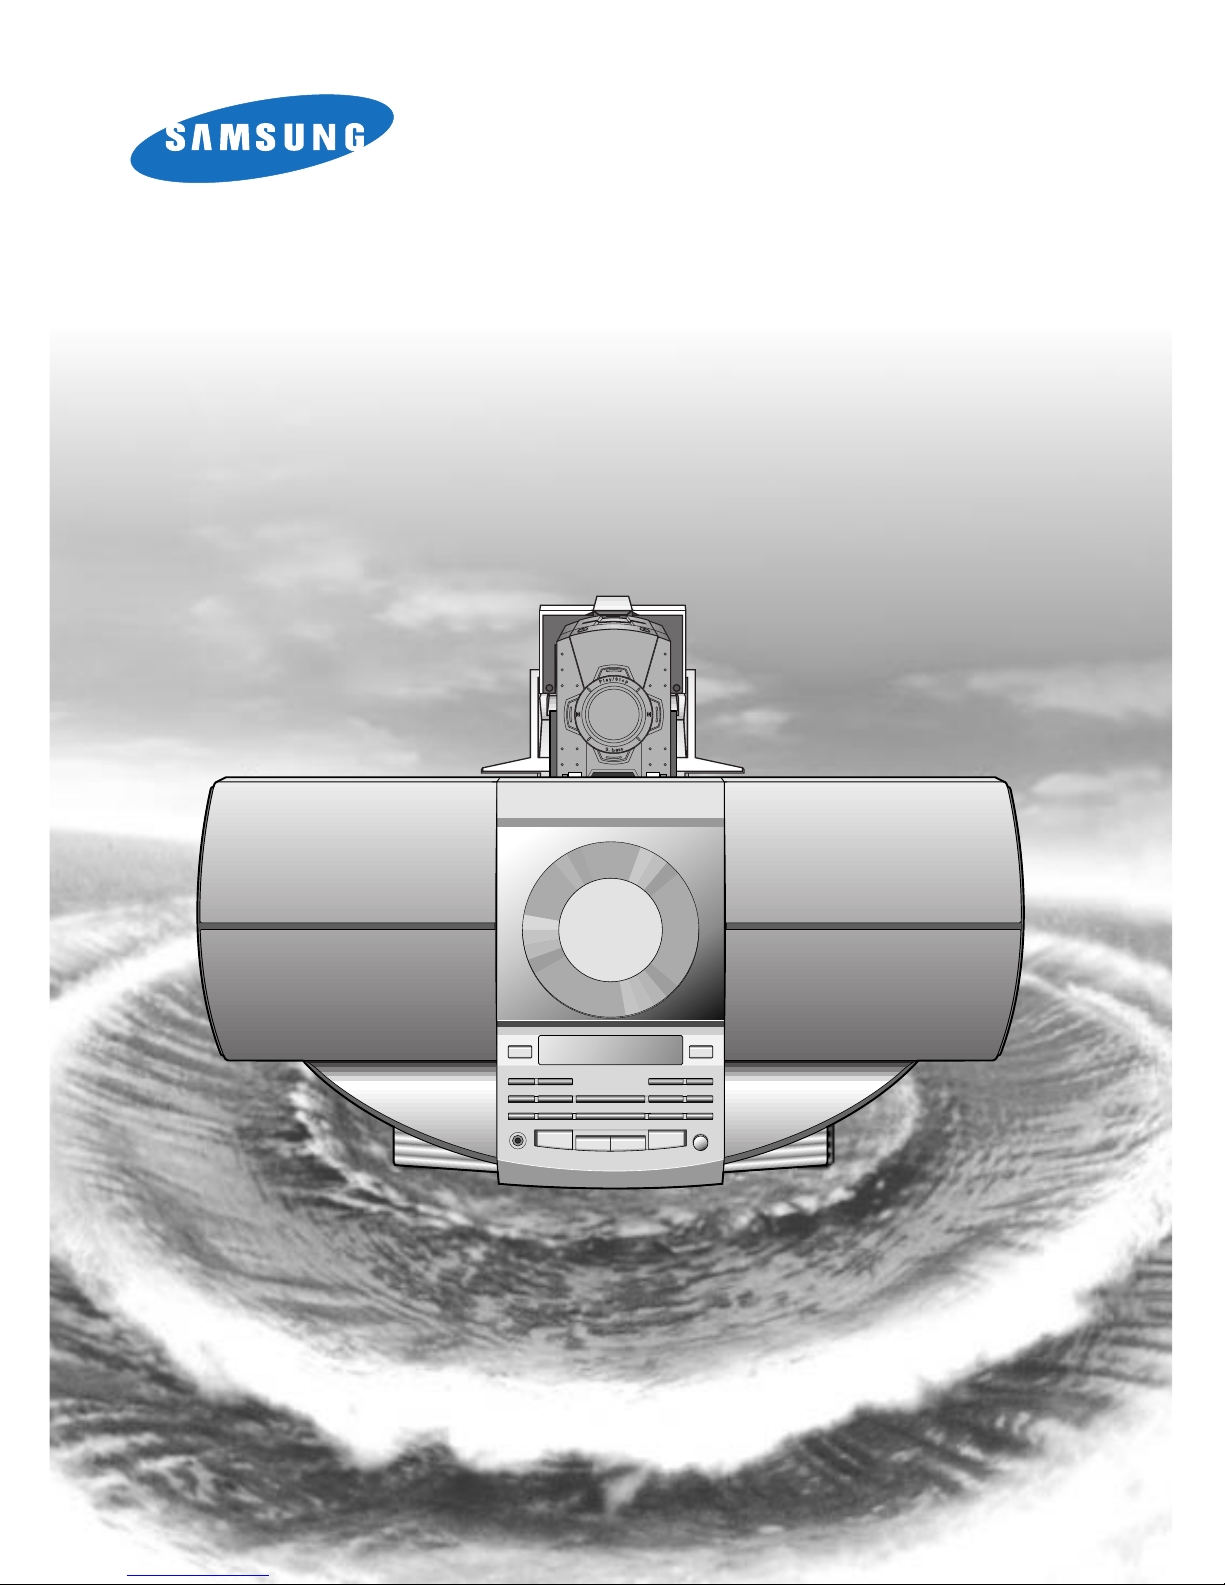
SAMSUNG Wingo
MP3 PLAYER
CD RADIO PLAYER
S-P2450 (S-2450/MY-MP200)
Instruction Manual
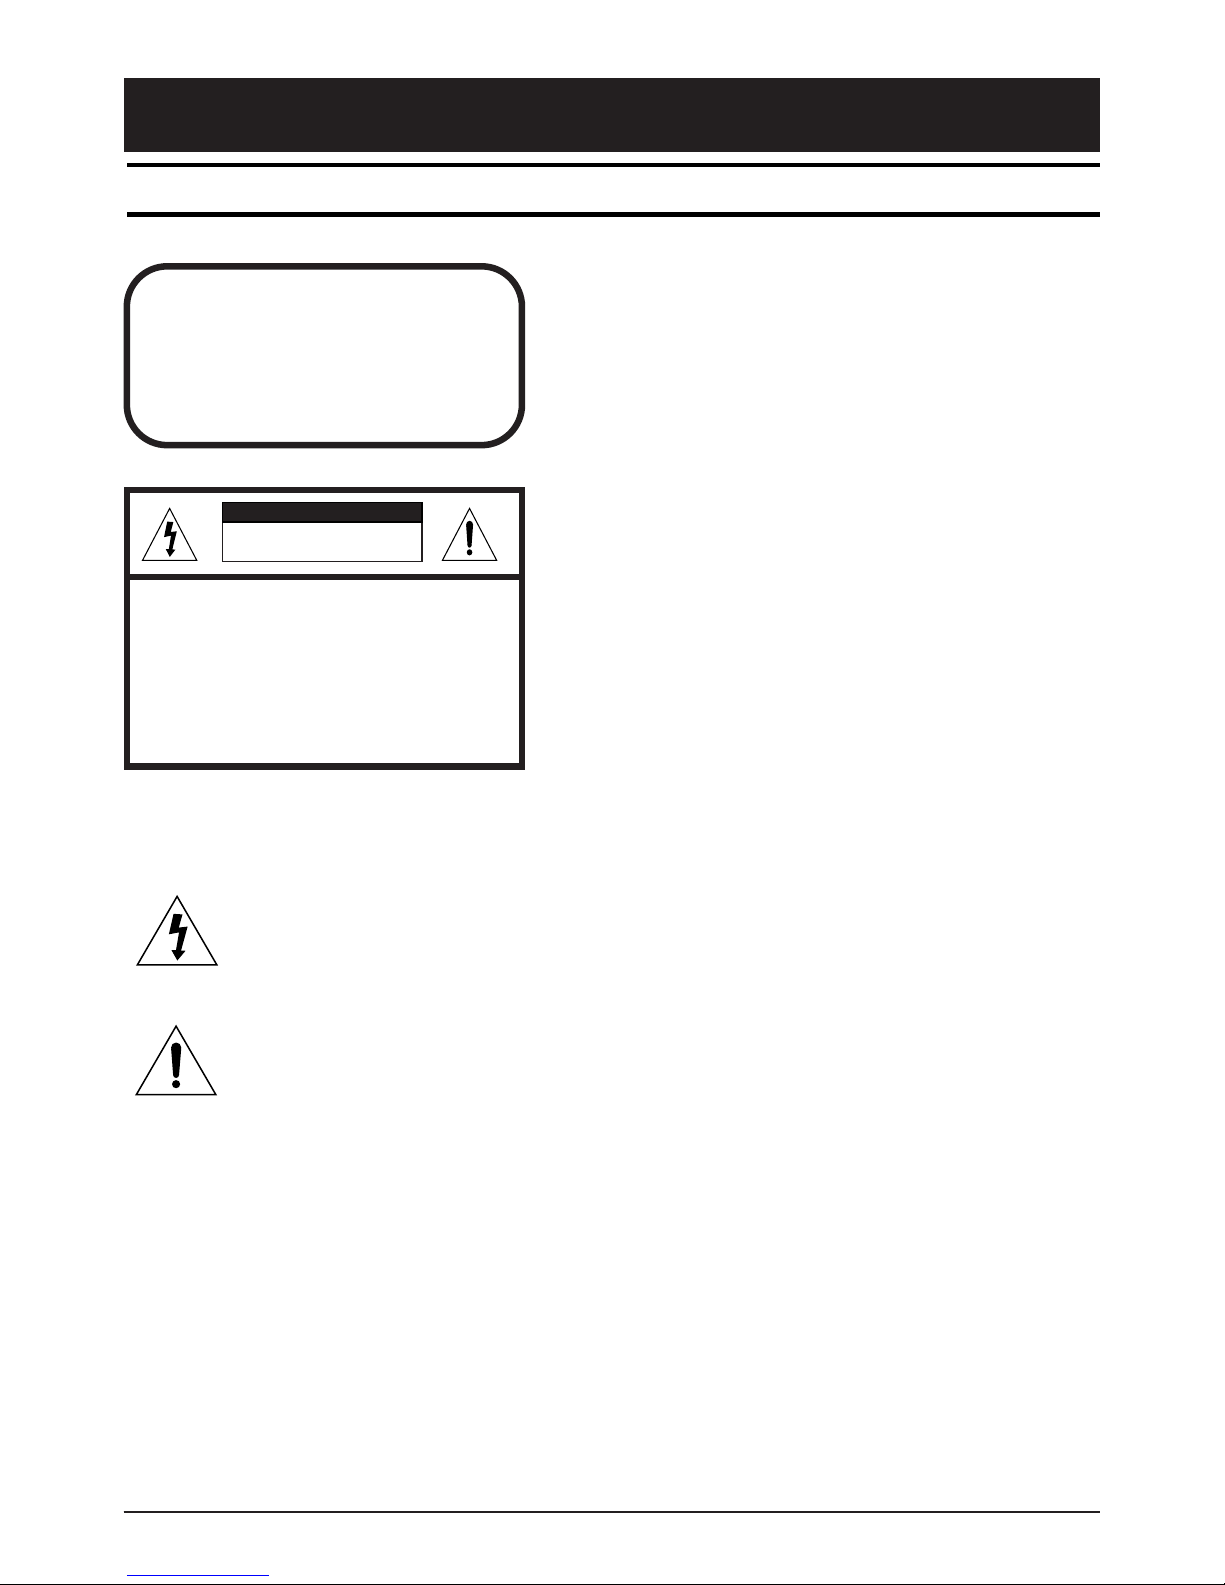
CLASS 1 LASER PRODUCT
This Compact Disc player is classified as a CLASS 1
LASER product.
Use of controls, adjustments or performance of procedures other than those specified herein may result in
hazardous radiation exposure.
CAUTION-Invisible laser radiation when open
and interlocks defeated, avoid exposure to beam
This symbol indicates that dangerous voltage which can cause electric shock is present inside this unit.
This symbol alerts you to impor tant operating and maintenance instructions accompanying the unit.
WARNING: To reduce the risk of fire or electric shock, do not expose this appliance to rain or
moisture.
CAUTION: To prevent electric shock, match wide blade of plug to wide slot, fully insert.
Attention: FCC Regulations state that unauthor ized changes or modifications to this equipment
may void the user’s authority to operate it.
CLASS 1 LASER PRODUCT
KLASSE 1 LASER PRODUKT
LUOKAN 1 LASER LAITE
KLASS 1 LASER APPARAT
PRODUCTO LASER CLASE 1
RISK OF ELECTRIC SHOCK.
DO NOT OPEN
CAUTION:
TO REDUCE THE RISK OF ELECTRIC
SHOCK, DO NOT REMOVE REAR COVER.
NO USER SERVICEABLE PARTS INSIDE.
REFER SERVICING TO QUALIFIED
SERVICE PERSONNEL.
CAUTION
2
SAMSUNG AUDIO
Safety Warnings
SAFETY WARNINGS

SAMSUNG AUDIO
3
Table of Contents
◆Safety Warnings.............................................................................................................................................. 2
◆Features and Accessories............................................................................................................................... 4
◆Locations of Controls
•Wingo (CD Radio Player)............................................................................................................................ 5
•Remote Control.............................................................................................................................................. 6
•MP3 Player .................................................................................................................................................... 7
◆Getting Started
•Recharging Batteries Using WINGO.......................................................................................................... 8
•Recharging Batteries in MP3 Player Charge Compartment ................................................................... 9
•Setting the SmartMedia Card.................................................................................................................... 10
•SmartMedia Card Erase Protection Feature............................................................................................ 10
•Connecting Your System to the Power Supply....................................................................................... 11
•Connecting the AM Antenna..................................................................................................................... 12
•Connecting the FM Antenna..................................................................................................................... 13
◆WINGO Player
•Setting the Clock ......................................................................................................................................... 15
•Listening to a Compact Disc...................................................................................................................... 16
•Selecting a Track.......................................................................................................................................... 17
•Searching for a Specific Music Passage on a CD.................................................................................... 17
•Repeat Function........................................................................................................................................... 18
•Programming the Order of Playback ....................................................................................................... 19
•Checking or Changing Programmed Tracks........................................................................................... 20
•Recording CD tracks to MP3 Player......................................................................................................... 21
◆Tuner
•Searching for and Storing the Radio Stations ........................................................................................ 22
•Selecting a Stored Station........................................................................................................................... 23
•Improving Radio Reception ...................................................................................................................... 23
◆Other Functions
•Timer Function............................................................................................................................................. 24
•Cancelling the Timer................................................................................................................................... 25
•Power Sound Function............................................................................................................................... 25
•Snooze Function.......................................................................................................................................... 26
•Setting the System to Switch Off Automatically .................................................................................... 27
•Selecting an Equalizer Preset..................................................................................................................... 27
•Connecting Headphones............................................................................................................................ 28
•Precautions When Using Compact Discs................................................................................................ 28
◆MP3 Player
•Connecting to PC ........................................................................................................................................ 30
•To install the MP3 programs on your PC................................................................................................ 31
•Using MP3 program ................................................................................................................................... 32
•MP3 playback .............................................................................................................................................. 34
•Special features............................................................................................................................................ 35
◆Recommendations for Use
•Safety Precautions....................................................................................................................................... 37
•Troubleshooting Guide............................................................................................................................... 38
•Specifications ............................................................................................................................................... 39
•Warranty Card............................................................................................................................................. 40
Press Push Important Note
Symbols

4
SAMSUNG AUDIO
Features and Accessories
Hi-power SLIM-audio at home,
Portable MP3 Player for use outdoors,
You can enjoy various convenient functions!
•Provides excellent sound quality.
10W Hi-Power SLIM Audio
•Allows playback and storage of MP3 files.
MP3 File Player Function
PUSH
Rechargeable
Batteries
(Ni-MH, AAA)
FM AntennaAM Antenna
Conversion Jack
Remote Control
Earphone
Smart Card
Recording
Protect Sticker
Owner's Manual
(Including Warranty)
CD-ROM DISC Parallel Cable
Smart Card Case
•The programs stored in the supplied CD-R are as follows:
– MP3 Player Explorer : software for downloading/uploading files
– CD Audiocatalyst : software for converting CD music into MP3
– Music drive : software which enables your PC to play MP3 files
– MS EXPLORER 4.01 : Internet trip s/w.
ACCESSORIES SUPPLIED
SAMSUNG AUDIO
5
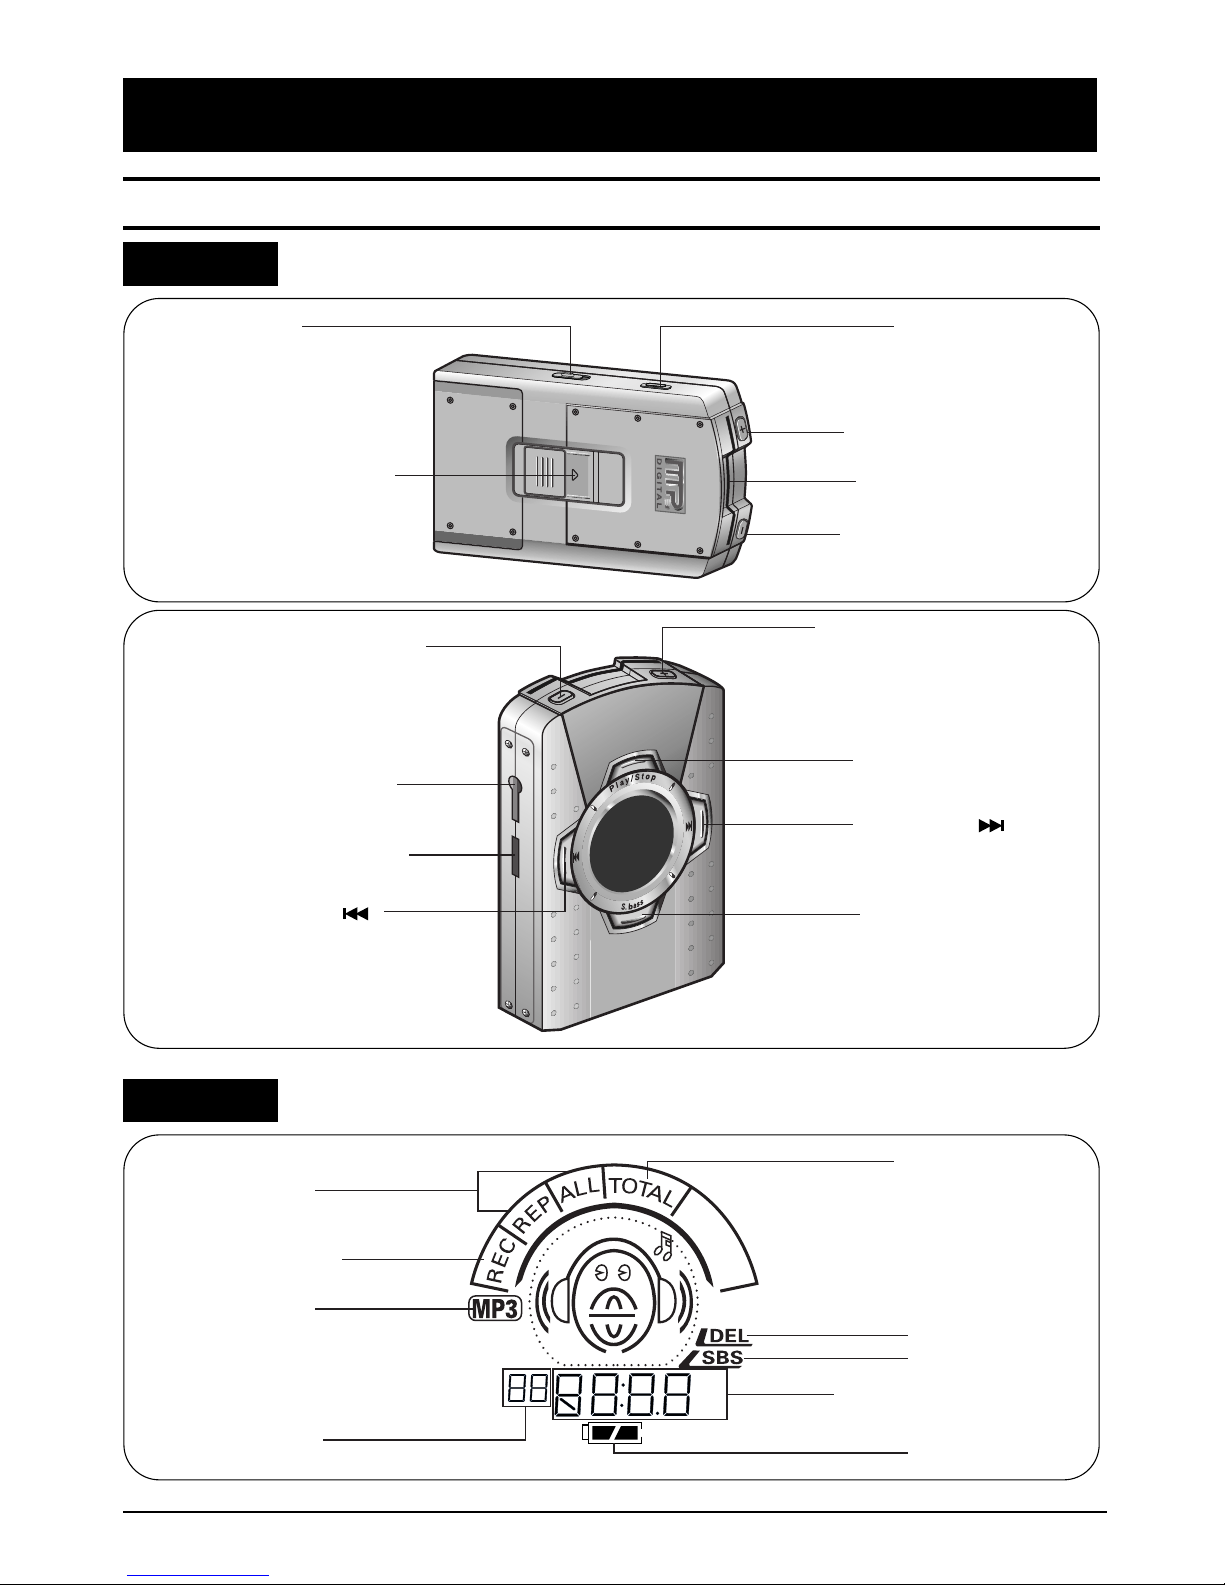
Location of controls
On/Standby
Timer
On/Off-Check
Mono/ST
Timer/Clock
Sleep
Phones
SNOOZE PRESET EQ
Repeat
P.Sound
Band Function
Tuning UpDown
Volume
/Tuning Mode PROG./Set
CD Synchro
MP3
Delete
Open/Close
IN
LINE
FM
(75Ω)
AM
ANTENNA
Function Button
Mono/ST. Button
On/Standby Button
Timer On/Off-Check
Button
Band Button
Timer/Clock Button
Play/Pause Button
Sleep Button
Headphones Jack
Snooze Button
CD/MP3 Track or Radio Station Search
FM Antenna Connector Terminal
Insert MP3 Player
CD Synchro (MP3) Button
Open/Close Button
Delete (MP3) Button
Stop/Tuning Mode Button
PROG./Set Button
Repeat(CD/MP3 repeat) Button
P.Sound Button
Preset EQ Button
Volume Button
AM Antenna Connector Terminal
WINGO (CD RADIO PLAYER)
FRONT
REAR
6
SAMSUNG AUDIO
Location of controls
CD
MP3
CD Synchro
On/Standby
CD / MP3
Snooze
Snooze
On/Off
Power
Sound
EQ
Preset
Band Function
Repeat
PROG./
Set
Timer
On/Off-Check
Timer/
Clock
Mute
VOL.
VOL.
Tuning
Mode
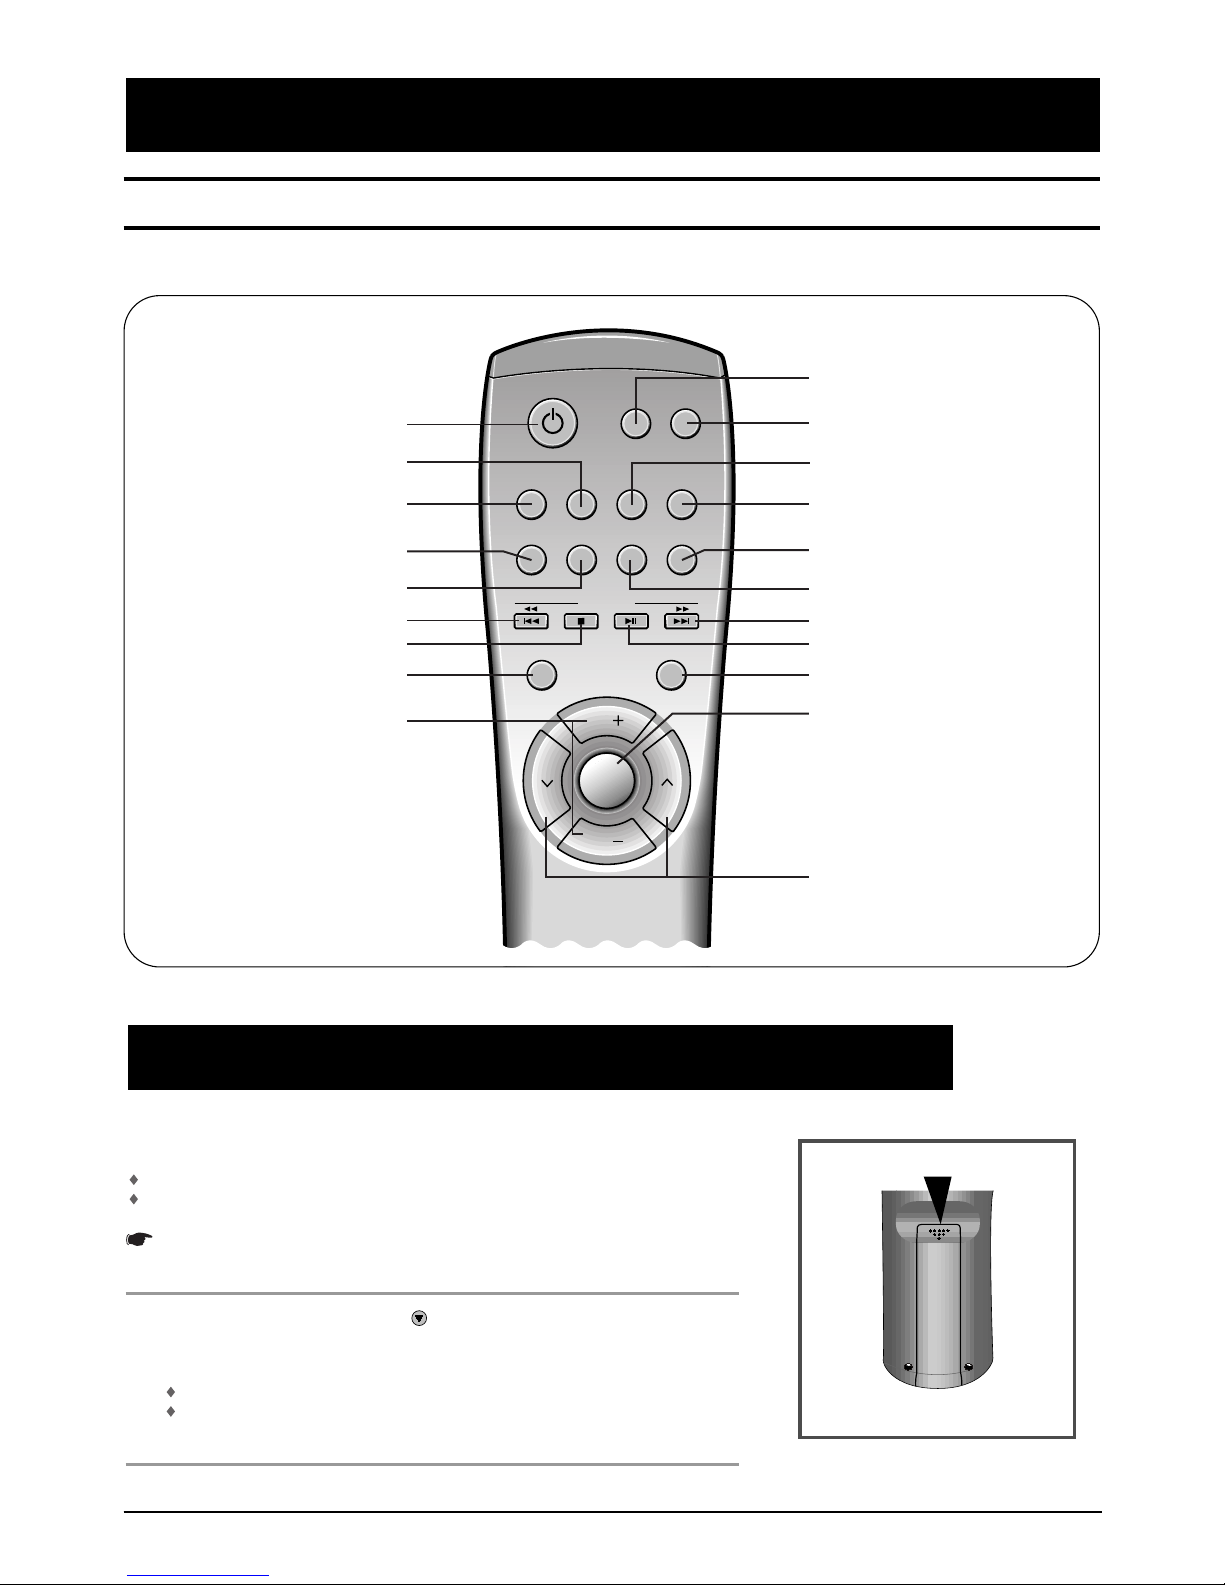
On/Standby Button
Snooze On/Off Button
EQ Preset Button
Rewind Button
Stop Button
Band Button
Volume Button
Snooze Button
P. Sound Button
Mute Button
MP3 CD Synchro Button
Timer Clock Button
Timer On/Off-Check Button
Program Set Button
Repeat Button
Tuning Mode Button
Function Button
Play/Pause Button
Fast-Forward Button
Radio Station Search
Insert or replace remote control batteries when you:
Purchase the Wingo.
Find that the remote control is no longer operating correctly
When replacing the batteries, use a new set of batteries and never mix alkaline and
manganese batteries.
Place your thumb on the position marked on the battery compartment cover (rear of the
remote control) and push the cover in the direction of the arrow.
Insert two AAA, LR03 or equivalent batteries, taking care to respect the polarities:
+ on the battery against + in the battery compar tment.
– on the battery against – in the battery compar tment.
Replace the cover by sliding it back until it clicks into position.
1
2
3
Inserting Remote Control Batteries
Remote Control
SAMSUNG AUDIO
7
Repeat Button
Volume Increase Button
Volume Decrease Button
SmartMedia Card Slot
Hold Switch
SmartMedia Card Eject Switch
MP3 Player
DISPLAY
UNIT
Volume Decrease Button
Headphone Terminal
Skip/Search( )
Data I/O Connector
Repeat
Recording
MP3
Channel
Volume Increase Button
Play/Stop Button
Skip/Search( )
S. bass Button
Total File
Delete Files
S. bass
Display Digits
Battery
Location of controls

8
SAMSUNG AUDIO
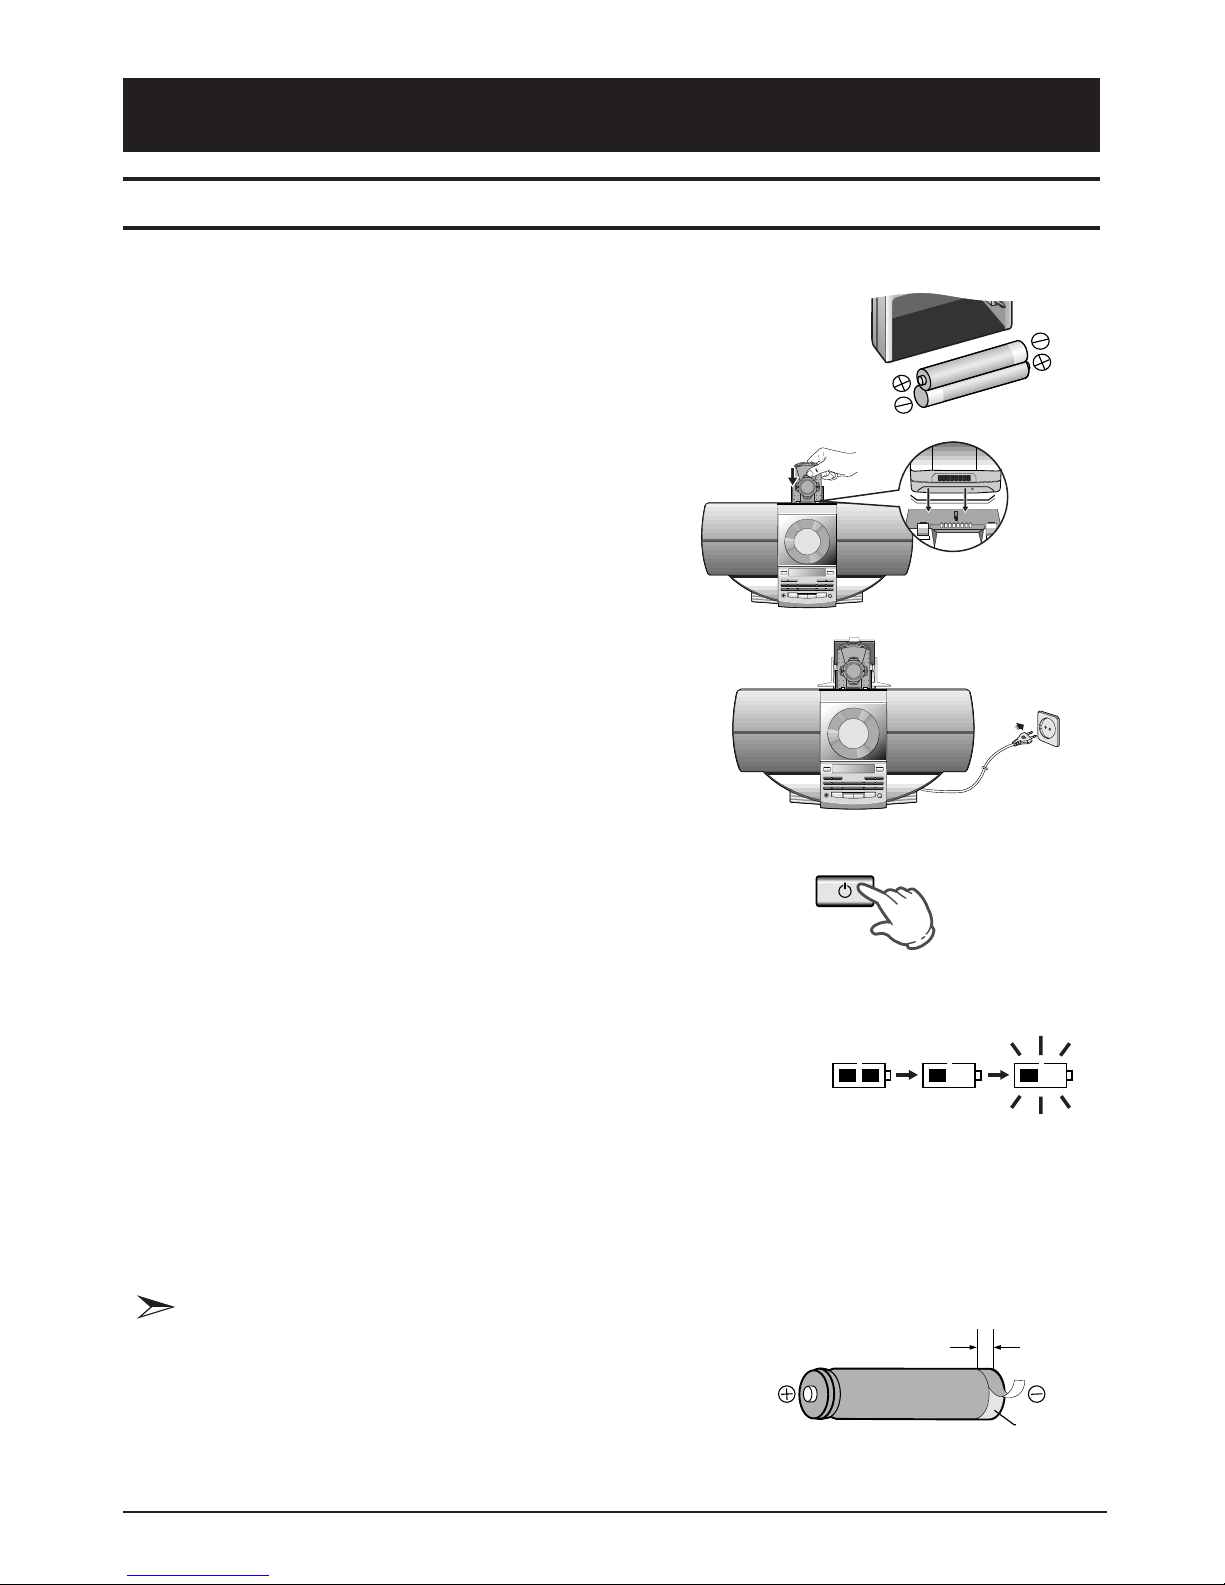
Getting Started
RECHARGING BATTERIES USING WINGO
1
Insert the rechargeable battery.
• Open the battery compartment lid.
• Insert batteries with correct polarity
and close the lid as illustrated.
2
Plug the power cord into a wall outlet.
3
Press the On/Standby Button.
• Charge Indication Lamp will light up.
• Charging time is about 100 minutes when the batteries are
completely discharged.
• When charging is completed, the Charge Indication Lamp
turns off. (After recharging, the green light disappears. In
about 30 minutes, you may take out the batteries.)
On/Standby
• While enjoying a CD or radio broadcast through the speakers, rechargeable batteries in the
Charger or MP3 Player(if inserted into Wingo) are charged.
• To prevent electric shock, do not disassemble the battery recharger.
• When you require service for the battery charger, contact the nearest SAMSUNG Electronics
dealer or Service Center.
☛
SAMSUNG AUDIO
9
(Charging time is subject to change depending on MP3 Player specifications.)
1
Insert the rechargeable batteries (Ni-MH 1.2V) into
the Battery Compartment of the MP3 Player.
• The (+) Polarity of the batteries must be followed as illustrated.
2
Insert the MP3 Player into the charger of WINGO.
• When inserting, make sure the front of
MP3 Player faces front.
3
Plug the power cord into a wall outlet.
4
Press the On/Standby Button.
• Though the Charge Indication Lamp will not light up,
recharging will start.
• Recharging Time is eight hours.
On/Standby
(Be sure you insert MP3
Player in correct position.)
Recharging Batteries in MP3 Player Charge Compartment
☛
• When batteries are discharged, the unit does not operate
properly. When the battery replacement indicator lamp on the
LCD flashes, replace the batteries with new ones.(For
rechargeable batteries, be sure to charge them.)
• If discharged batteries are left inside the unit for a long period
of time, battery service life becomes shorter; therefore recharge
them or replace them with new ones.
If you use store purchased batteries, strip off the sheath
from the new batteries.
•
Peel off the sheath on the negative pole side from the new
batteries by 5 mm using a knife before charging them.
Time to replace
batteries
☛
5mm
Battery SIZE: AAA
Ni-MH 1.2V
Peel off the
sheath.
Getting Started

10
SAMSUNG AUDIO
Getting Started
1
Insert a SmartMedia Card into the Unit
2
Downloading MP3 file.
• Refer to pages 29~36.
3
To remove the SmartMedia Card.
• Push the SmartMedia Eject Switch.
Setting the SmartMedia Card
SmartMedia Card Erase Protection Feature
SmartMedia Card Eject Switch
(Front) (Back)
(Recording protect sticker)
• To prevent an MP3 file from being erased, attach the memory erasing protection sticker to the
memory protection tab.
• Be sure to protect SmartMedia Card from magnet, humidity, shock, etc.
• Be sure to power off before inserting or removing the SmartMedia Card. Otherwise, the MP3 files stored in the
player may be damaged.
• Only 16MB and 32MB SmartMedia Cards can be used with this product.
☛
SAMSUNG AUDIO
11
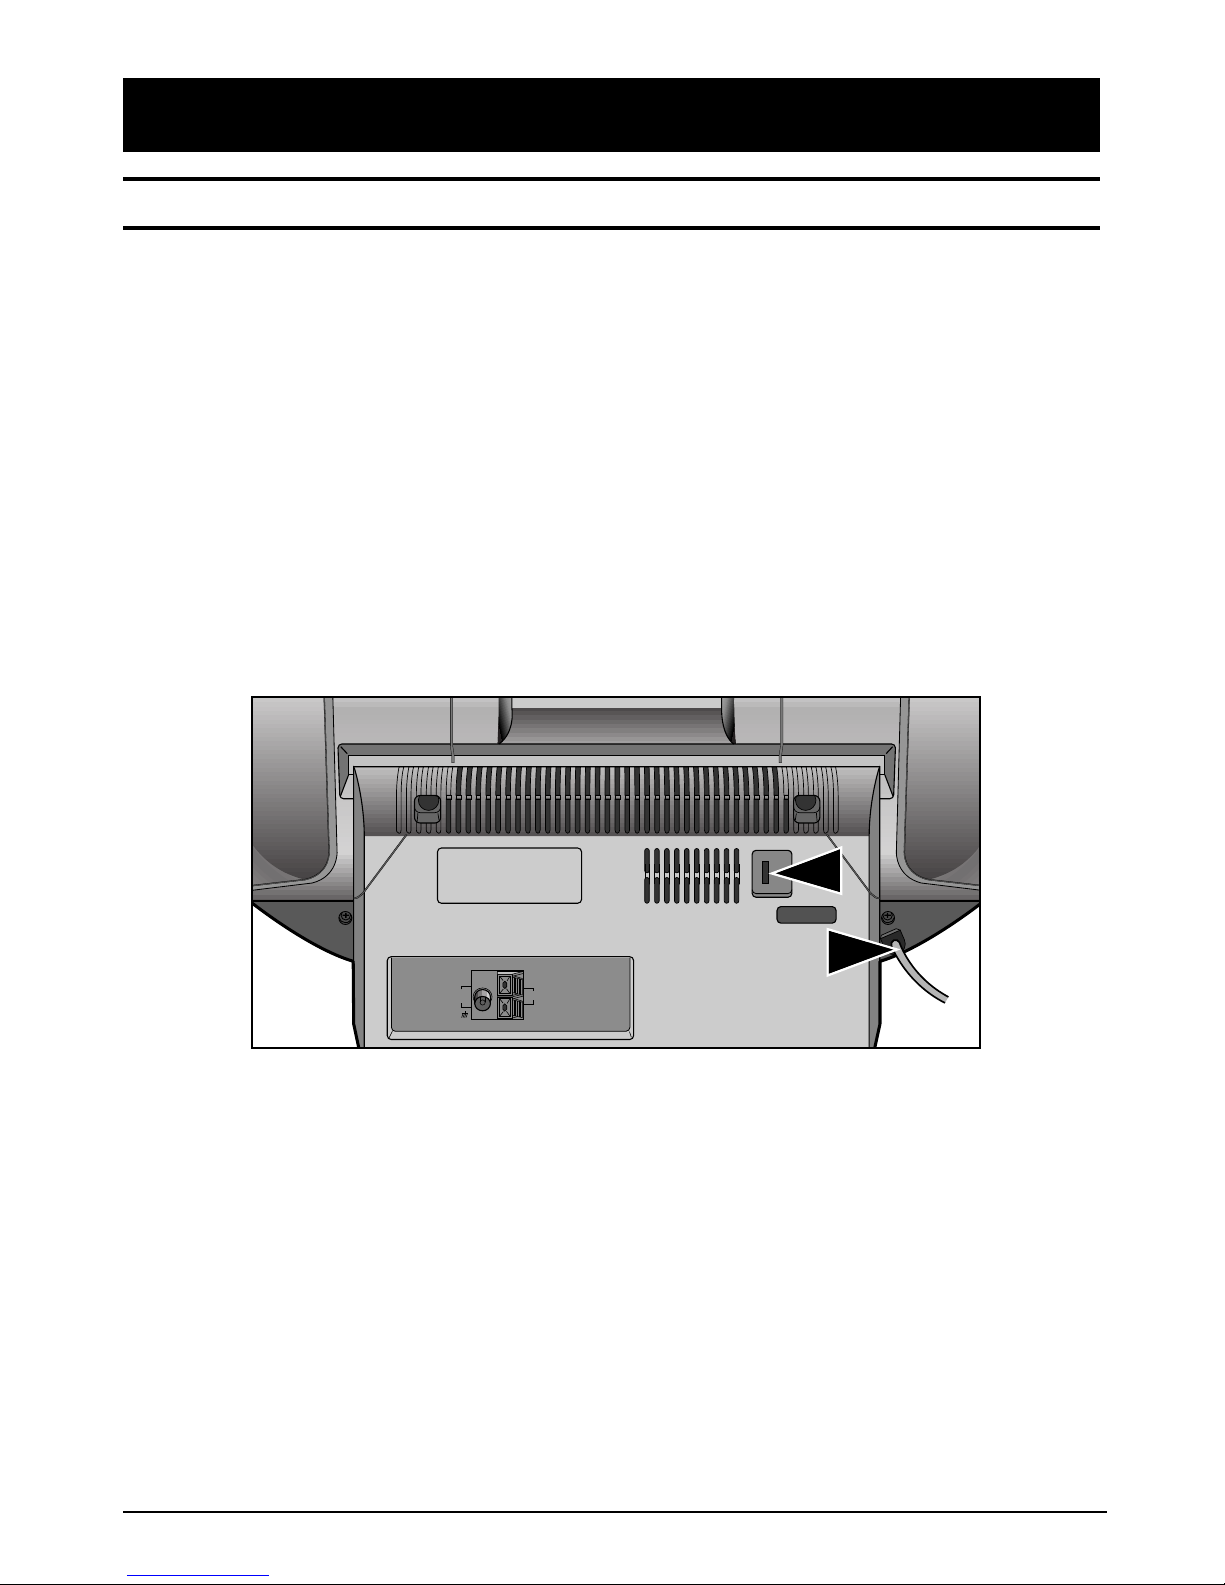
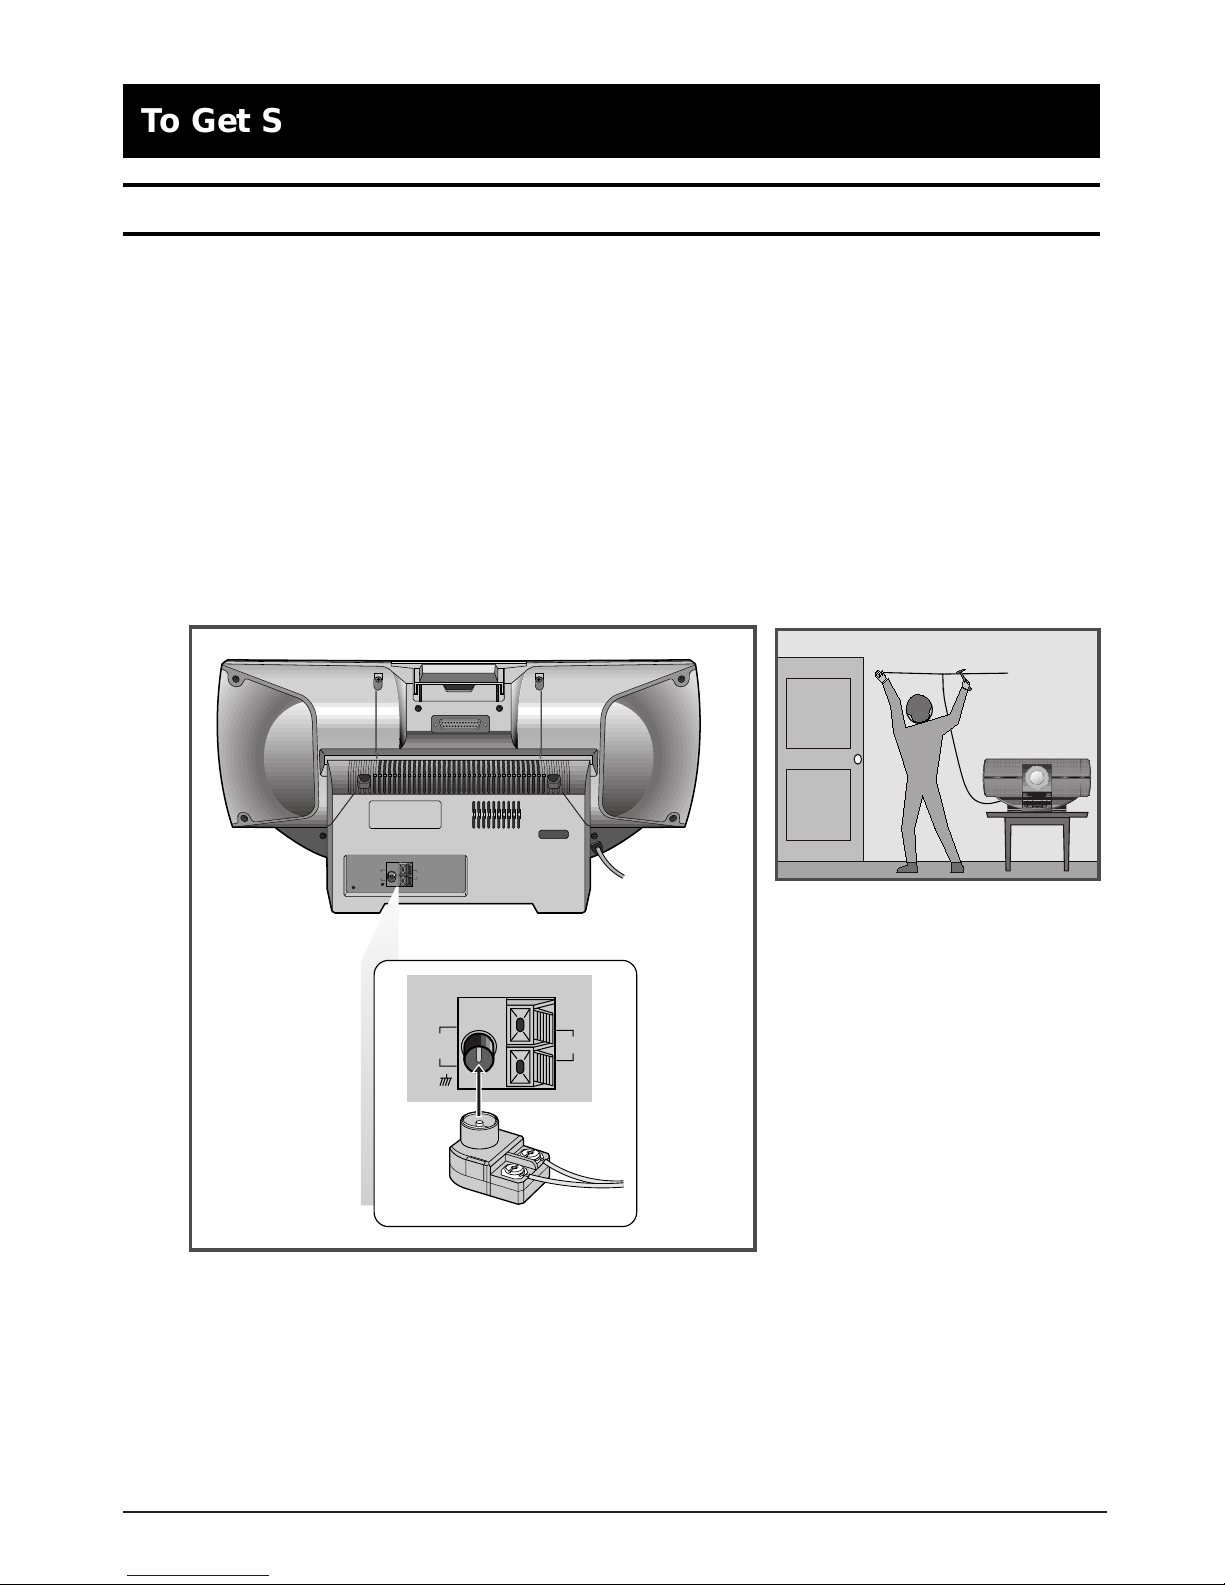
To Get Started
2
Press the On/Standby button to switch your mini-component system on.
1
Plug the AC cord into an 120V outlet.
Connecting Your System to the Power Supply
The AC cord must be plugged into an 120V outlet.
IN
LINE
FM
(75Ω)
AM
ANTENNA
12
SAMSUNG AUDIO
To Get Started
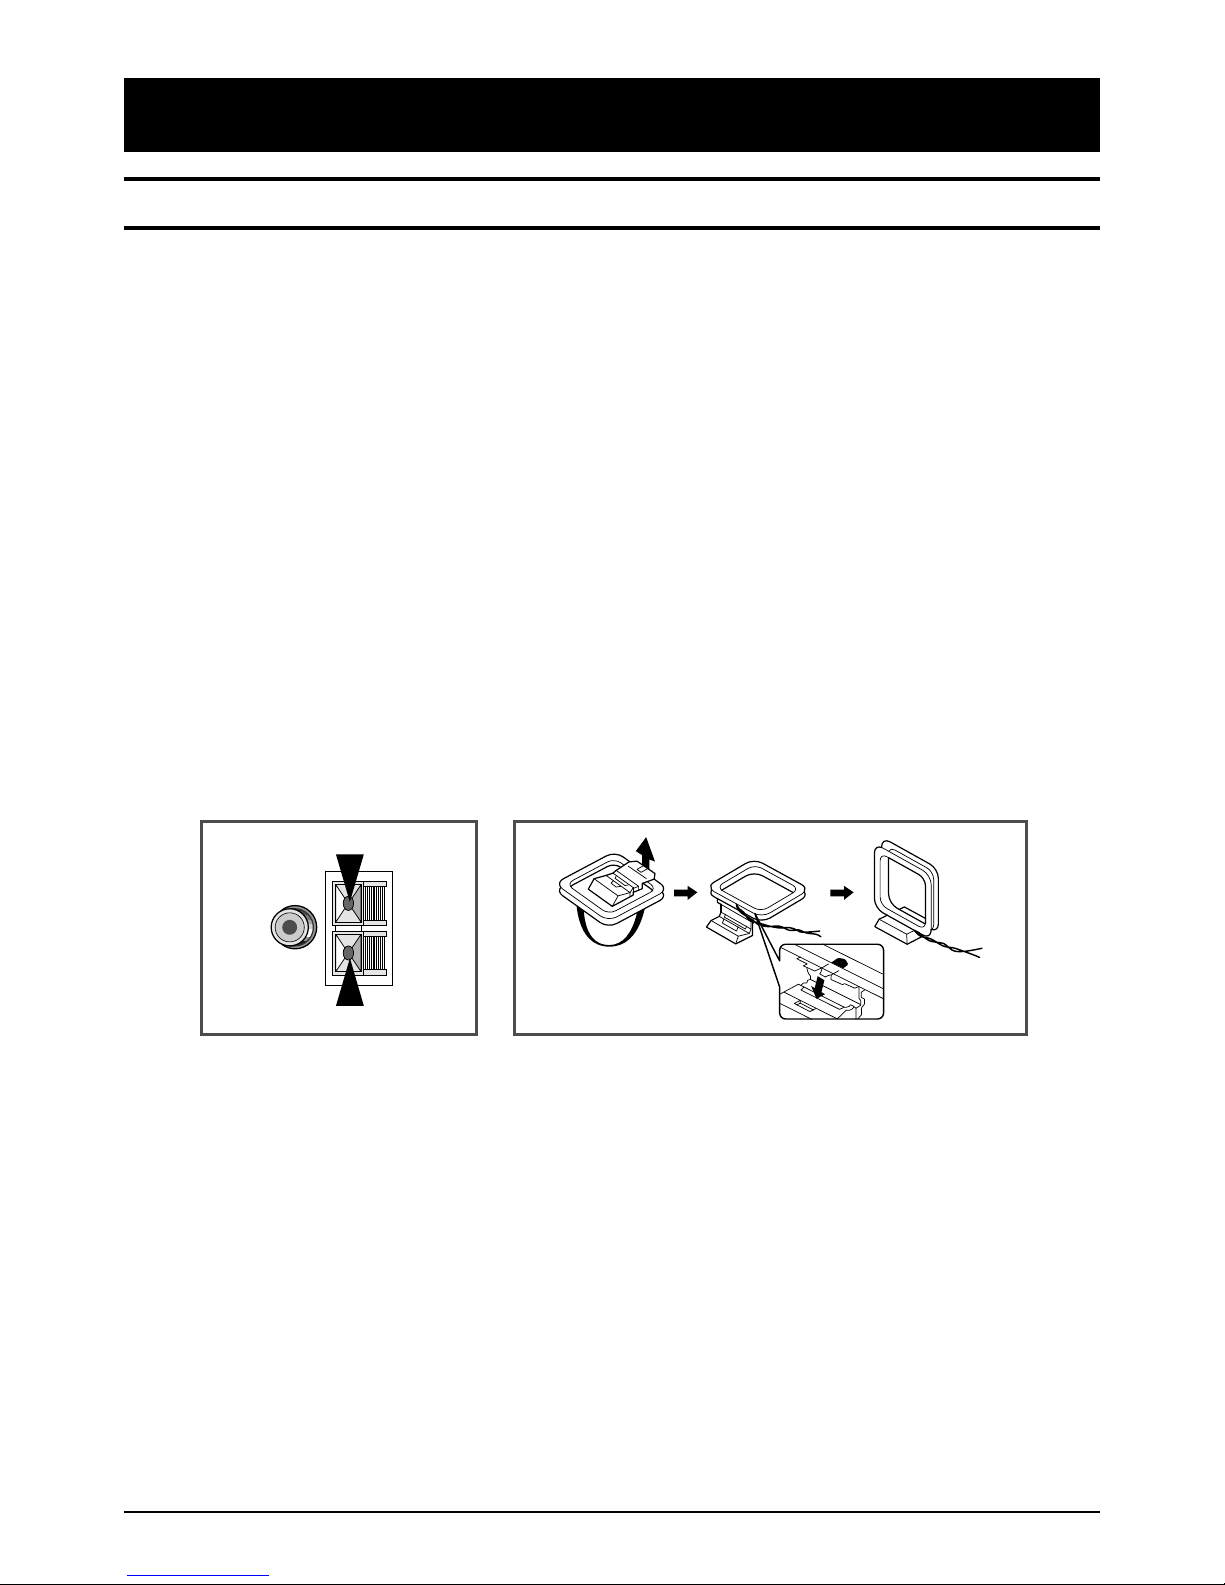
Connecting the AM Antenna
2
Insert the antenna wire, up to the plastic sheathing, in the hole.
3
Release the tab.
1
To connect the antenna wire, push the terminal tab downwards and hold it in
position.
The AM antenna can be:
•
Placed on a stable surface
•
Fixed to the wall (you must first remove the base)
AMFM
SAMSUNG AUDIO
13
Connector the FM antenna to the conversion Jack.
IN
LINE
FM
(75Ω)
AM
ANTENNA
FM
(75Ω)
AM
ANTENNA
LINE
OUT
To Get Started
Connecting the FM Antenna
2
Extend the FM antenna.
3
Fasten it up in the position which gives you the best reception, then fix it on the
wall, etc.
1
Connector the Conversion Jack to the FM 75Ω COAXIAL terminal.
(supplied)
 Loading...