How it Works
Log In / Sign Up
Buy Points
How it Works
FAQ
Contact Us
Questions and Suggestions
Users
Samsung
Loading...
W
WA50R5200AW
2
WA50R5400A
WA50R5400AV
WA50R5400AW
2
WA50T5300AC
2
WA50U1
WA50U1E
WA50U1P
WA50U6
WA50U6E
WA50U6P
WA51A5505AC
WA52A5500AV
WA52J8060A
WA52J8060A Series
WA52J8060AW
WA52J8060AW-A2
4
WA52J8700A
2
WA52J8700AP-A2
3
WA52J8700A Series
WA52J8700AW/A2
2
WA52M7750A*
WA52M7750A series
WA52M7750AV
5
WA52M7750AV/A4-00
WA52M7750AW
WA52M7750AW/A4-00
WA52M7755A*
WA52M7755A series
WA52M8650A
WA52M8650A Series
WA52M8650AV
3
WA52M8650AV/A4-00
WA52M8650AW/A4-00
WA5451
WA5451A
WA5451AB Series
WA5451ANP
2
WA5451ANP/XAA-01
WA5451ANP/XAA-02
WA5451AN Series
6
WA5451ANW
WA5451ANW/XAA
3
WA5451ANW/XAA-01
WA5451ANW/XAA-02
WA5451ANW/XAA-03
WA5451 Series
WA5471
WA5471ABP
6
WA5471ABP/XAA
3
WA5471ABP/XAA-00
WA5471ABP/XAA-01
WA5471ABP/XAA-02
WA5471AB Series
6
WA5471ABW
4
WA5471ABW/XAA
2
WA5471ABW/XAA-00
WA5471ABW/XAA-01
WA5471ABW/XAA-02
WA5471AN Series
WA5471 Series
WA54M8750A SERIES
WA54M8750AV
3
WA54M8750AV/A4-00
WA54M8750AV/A4-01
WA54M8750AW
3
WA54M8750AW/A4-00
WA54R5200A Series
WA54R7200A Series
WA54R7200AV
3
WA54R7200AW
WA54R7600AC
WA54R7600AV
WA54R7600AW
3
WA5500A2
2
WA5500A5
2
WA5550B9
2
WA55A7300AE
WA55A7700AV
WA55H4000SW
WA56H9000A
WA56H9000AP
WA56H9000AP-A2
2
WA56H9000AP/A2-00
WA56H9000AP/A2-01
WA56H9000A Series
WA56H9000AW/A2
WA56H9000AW/A2-00
WA56H9000AW/A2-01
WA600
WA6000A1
WA6000B1
WA60B5
2
WA60B7
WA60B9
WA60H4100H
WA60H4300H
WA60N2
WA60U1
WA6*M4 Series
Loading...
Loading...
Nothing found
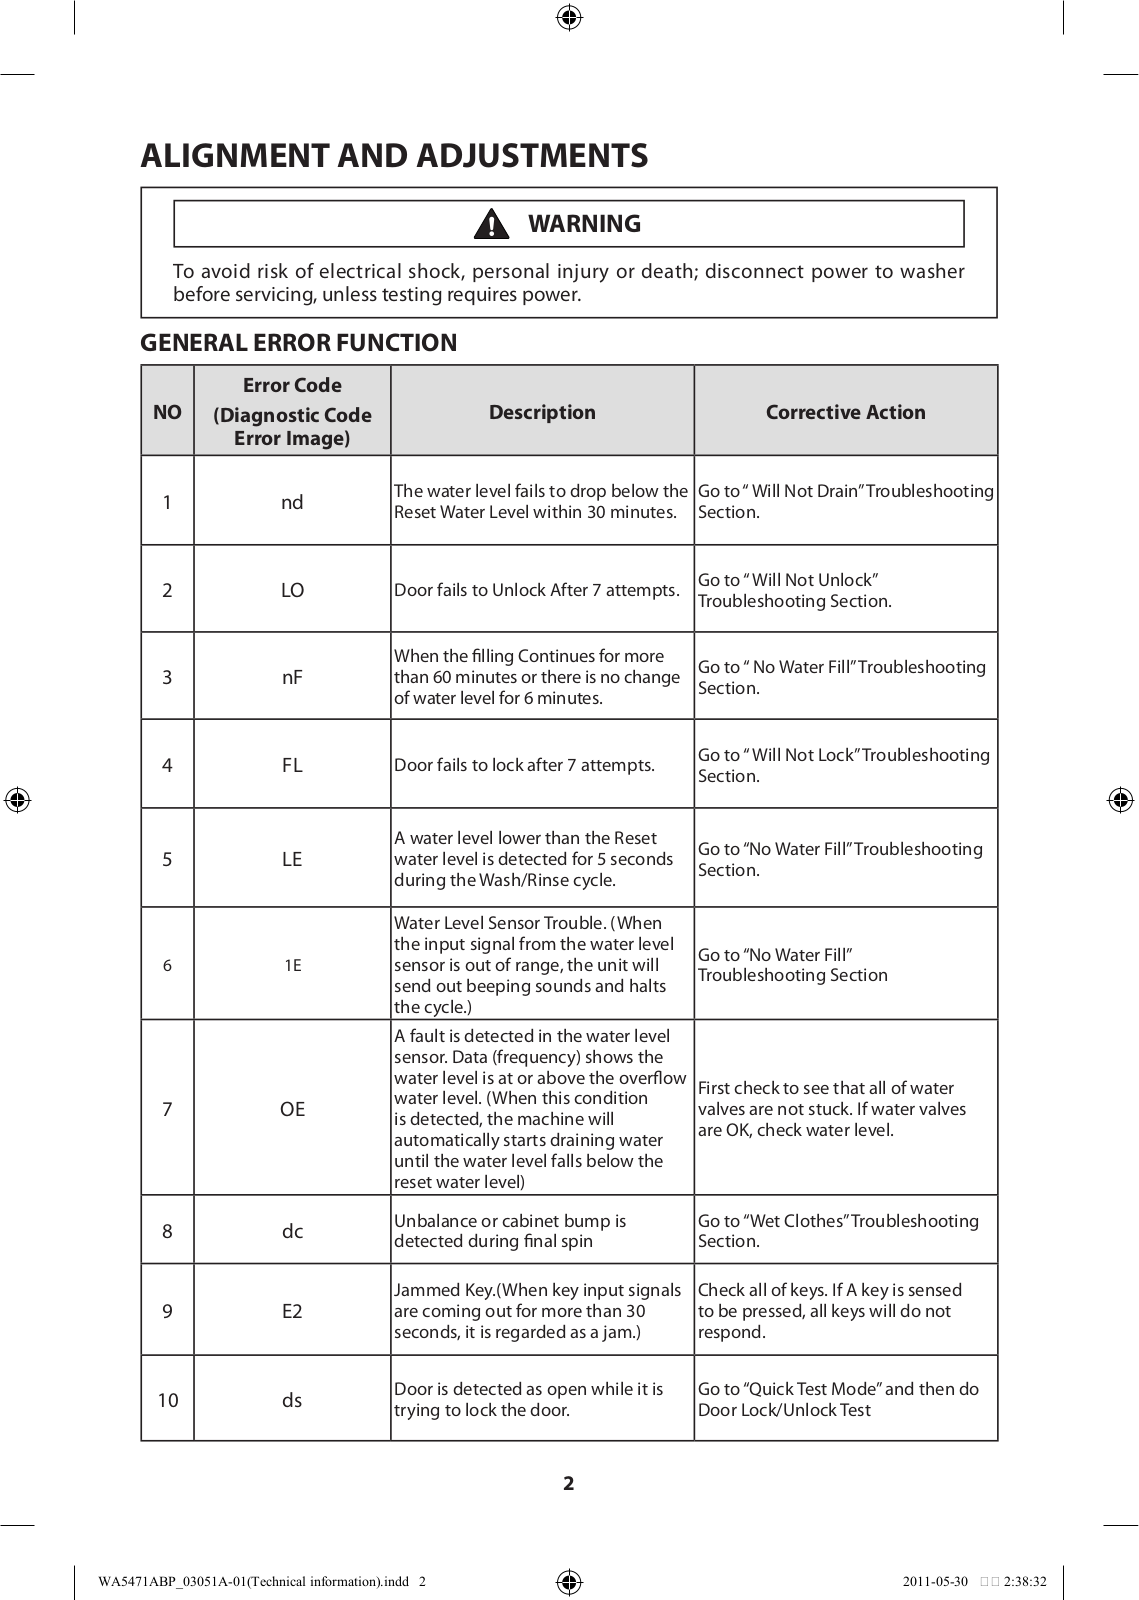
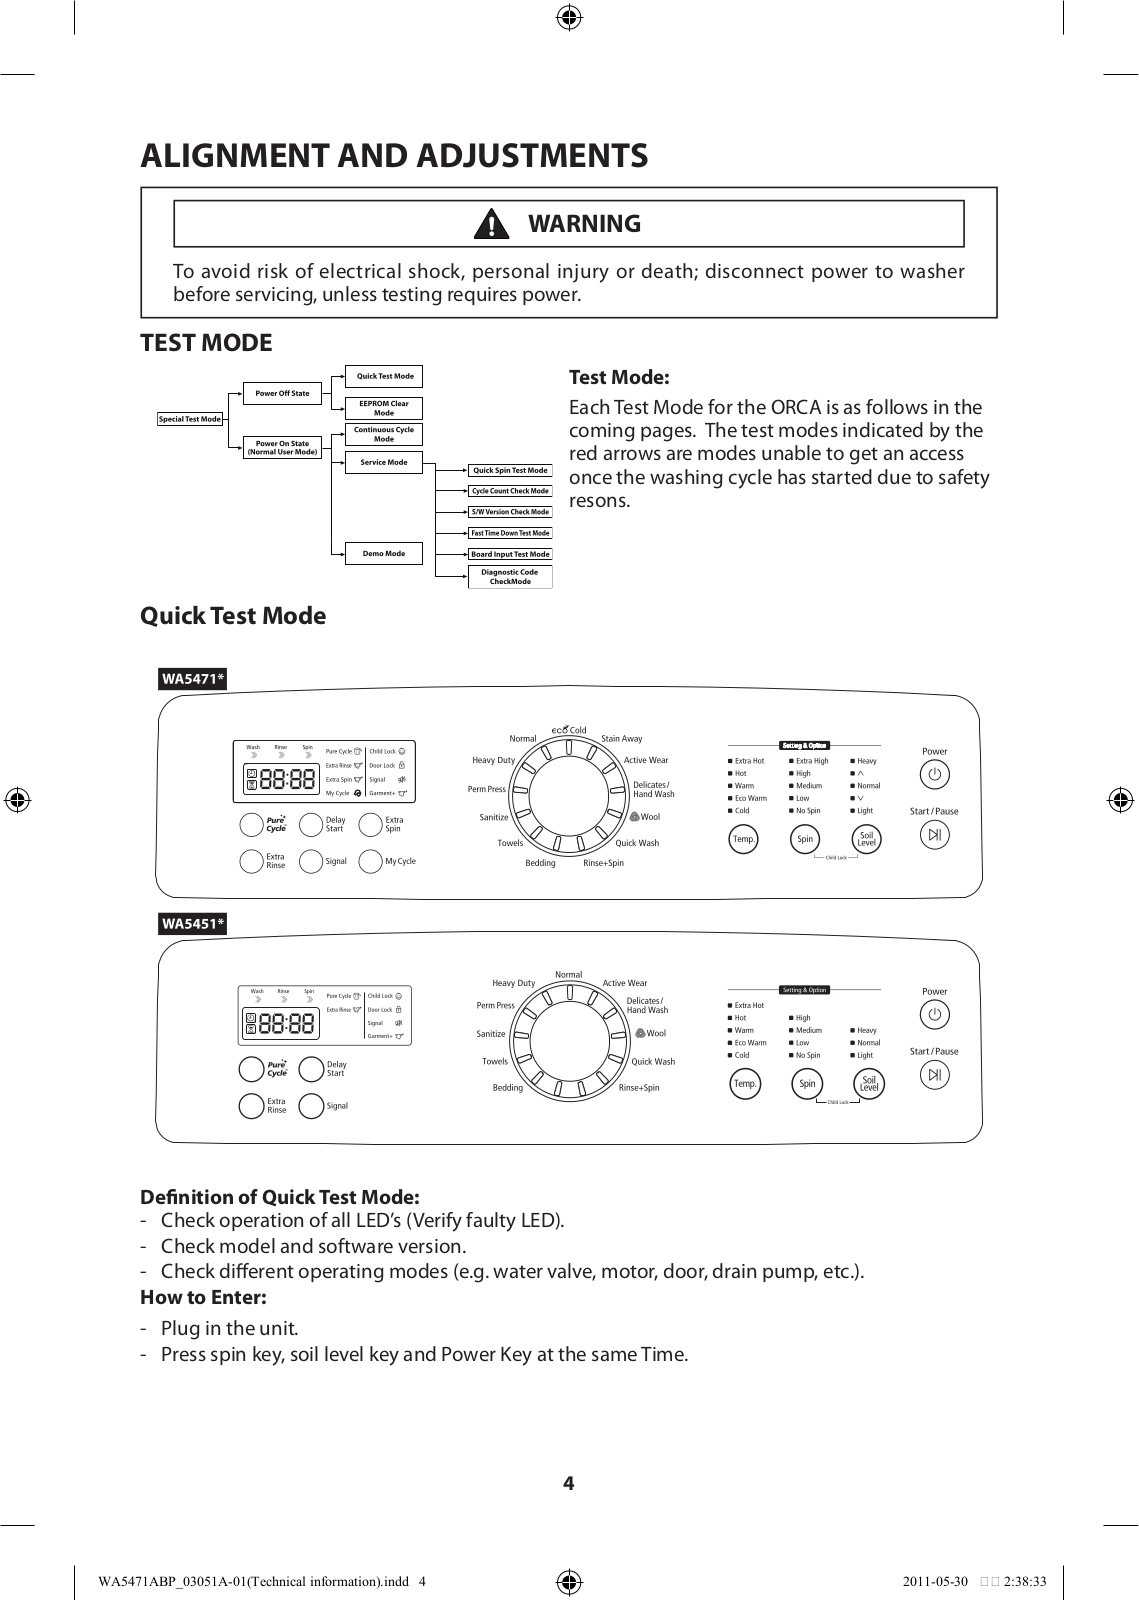
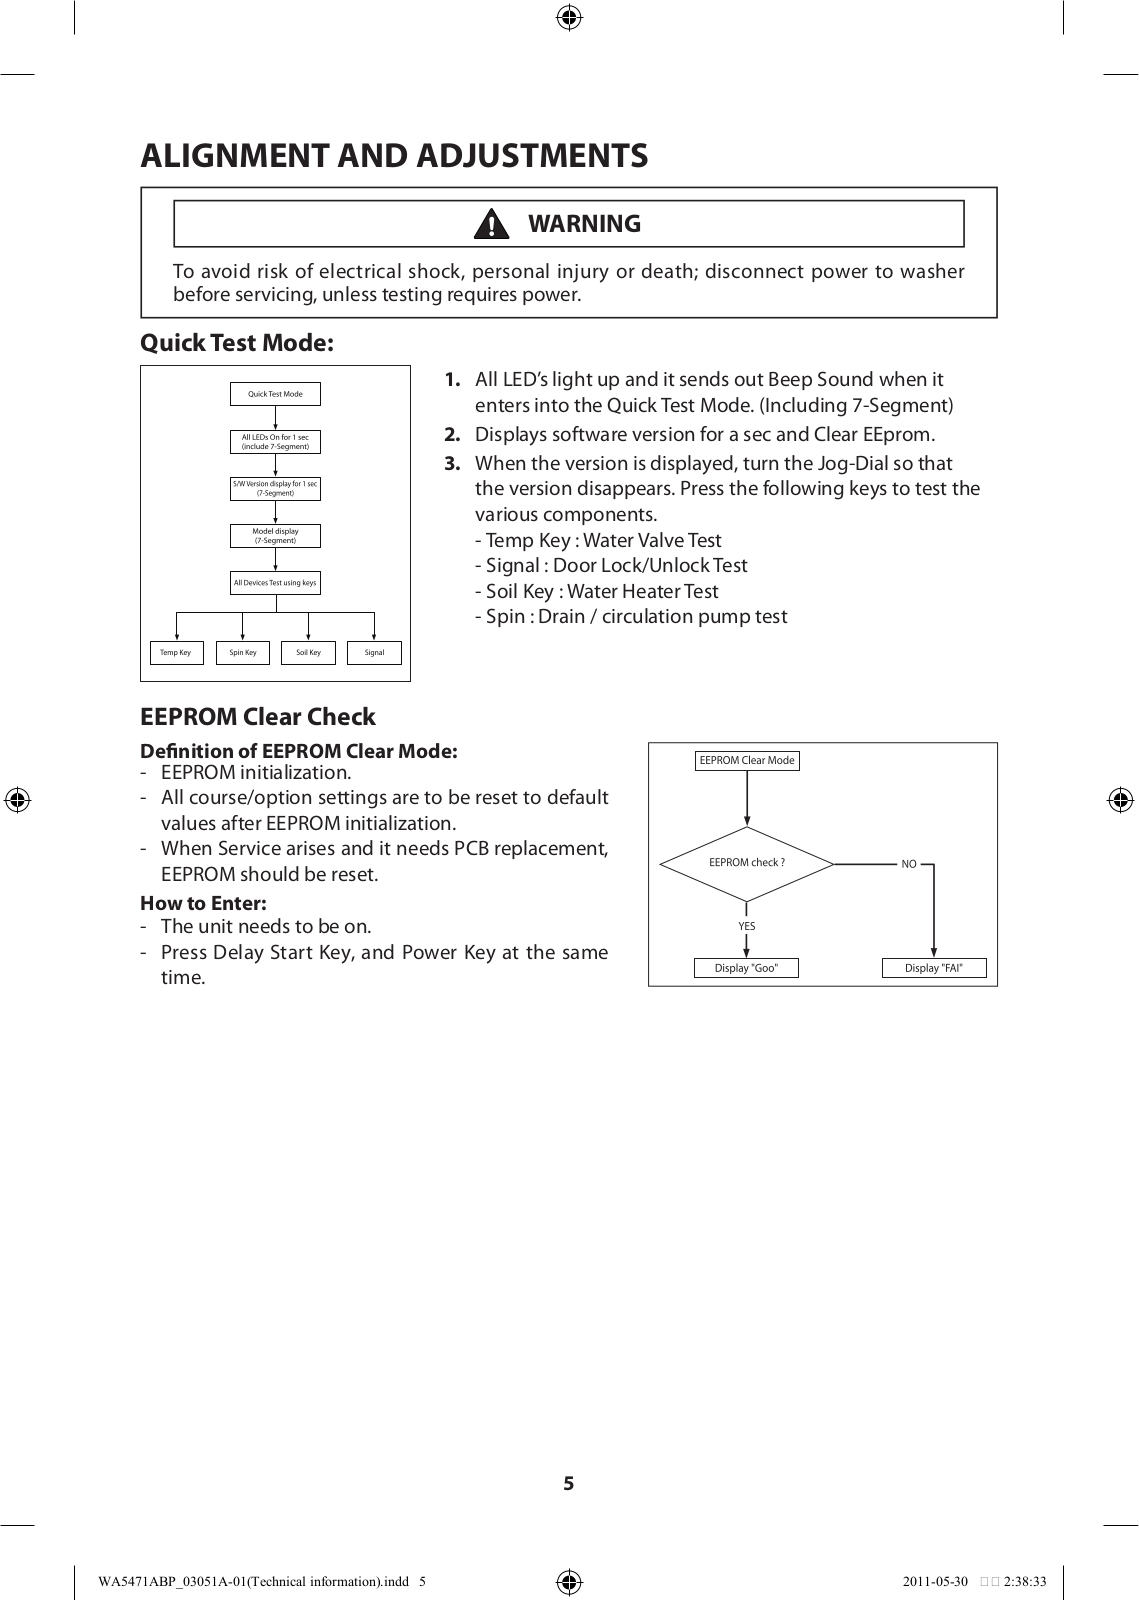
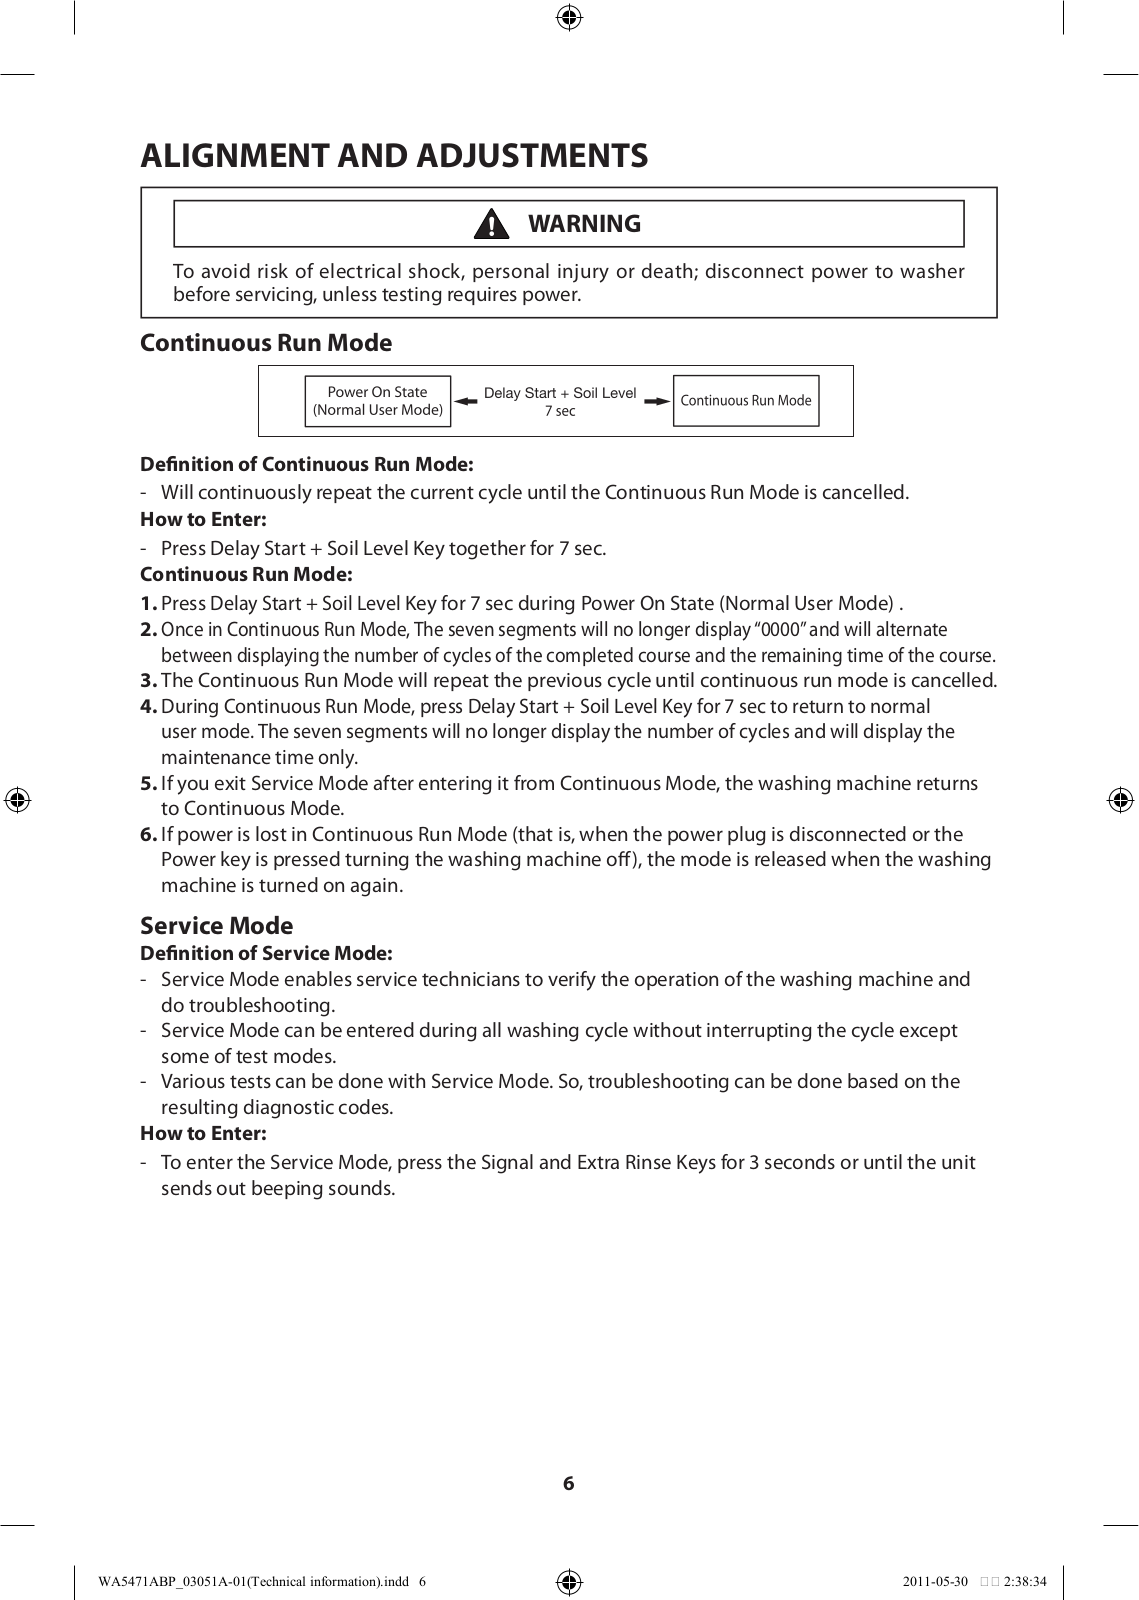
WA5471ABP
Operating Instructions
36 pgs
2.12 Mb
0
User Manual
132 pgs
9.01 Mb
0
User Manual
20 pgs
2.57 Mb
0
User Manual
40 pgs
4.28 Mb
0
User Manual
80 pgs
4.1 Mb
0
User Manual
80 pgs
4.24 Mb
0
Table of contents
Loading...
Samsung WA5471ABP User Manual
...
Samsung User Manual
Download
Specifications and Main Features
Frequently Asked Questions
User Manual
Download
Loading...
+
14
hidden pages
Unhide
You need points to download manuals.
1 point = 1 manual.
You can buy points or you can get point for every manual you upload.
Buy points
Upload your manuals
 Loading...