

Page 1
3
SAMSUNG ELECTRONICS CO., LTD
3-1. Disassembly of COVER-MID ASSY
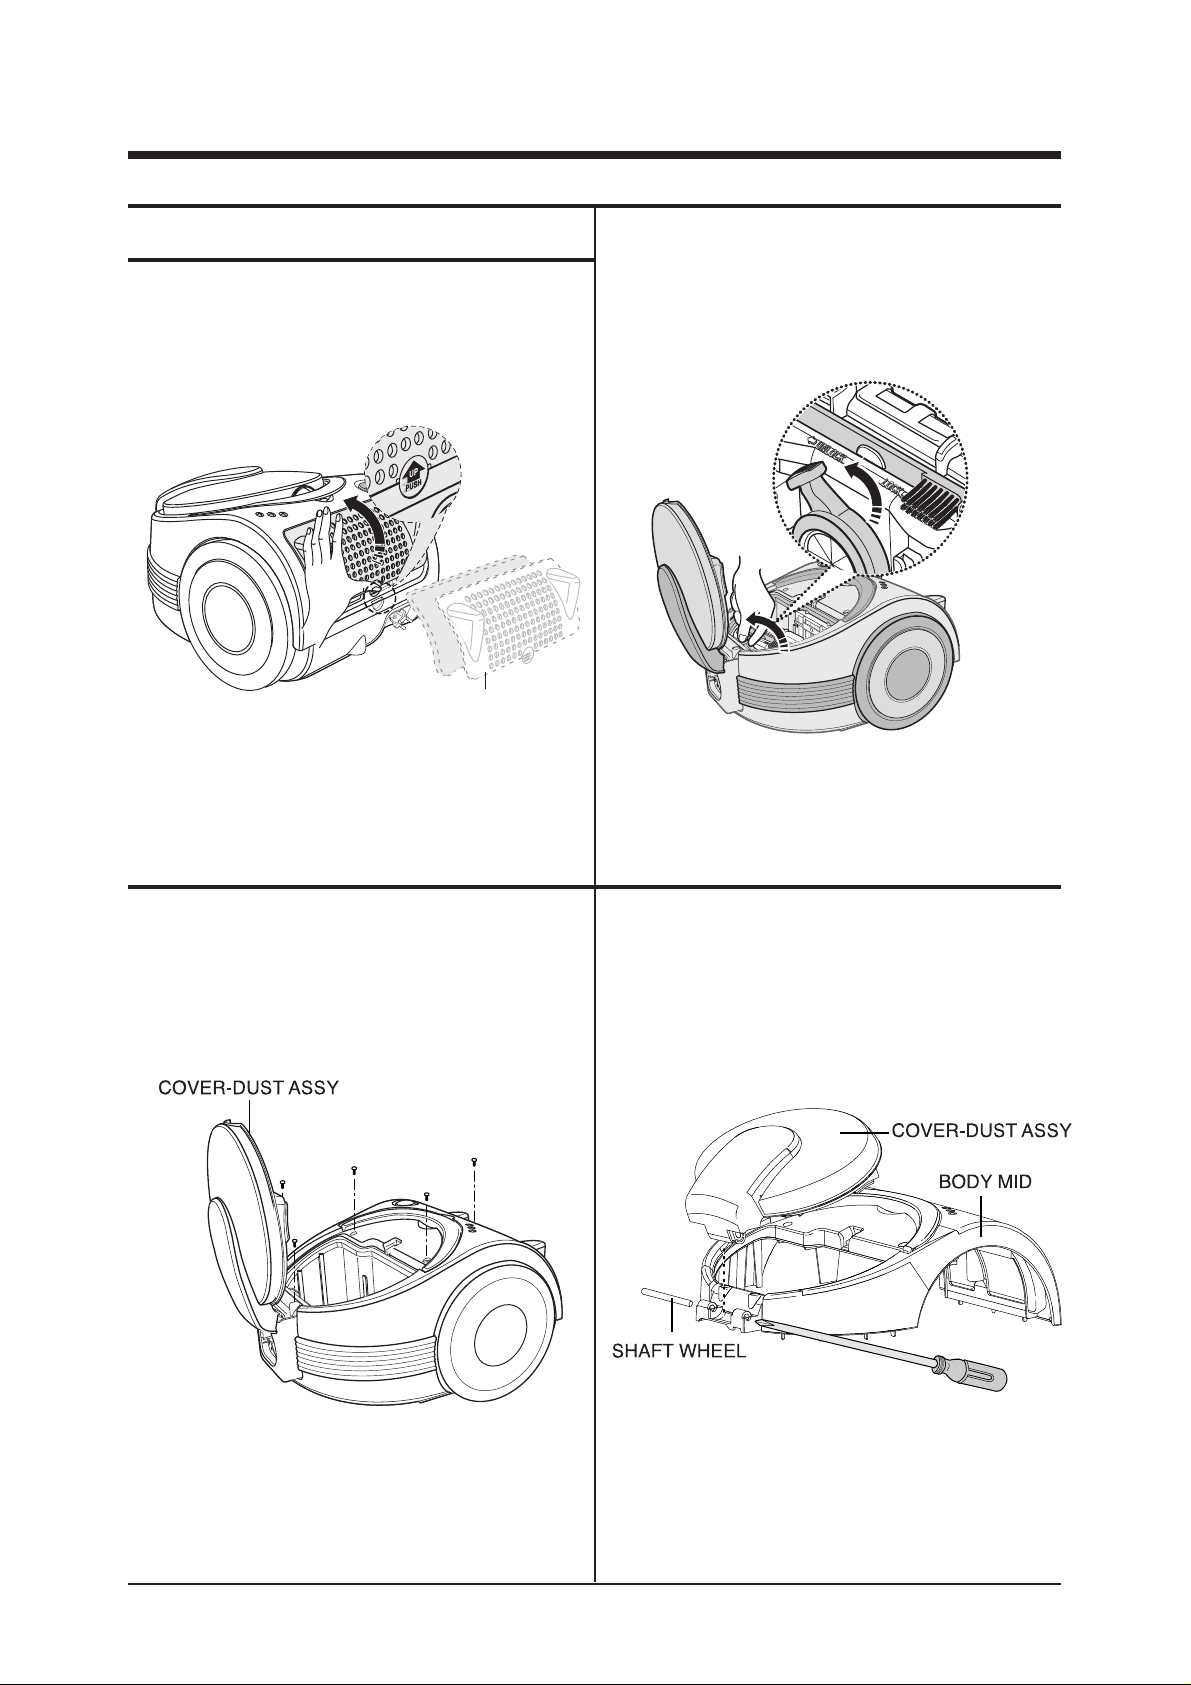
1)
Detach GRILLE-BACK by pushing the hook.
3) Separate the COVER-MID ASSY by loosening
five screws.
2) Open the COVER-DUST ASSY and after turning
the LEVER-CASE and pull out CASE BASKET ASSY
from the body of VACCUM CLEANER.
4) Separate the COVER-DUST ASSY and BODY MID
by pushing out SHAFT WHEEL with a screw
driver(+)
3. Disassembly and Reassembly
GRILLE-BACK
Page 2
SAMSUNG ELECTRONICS CO., LTD
4
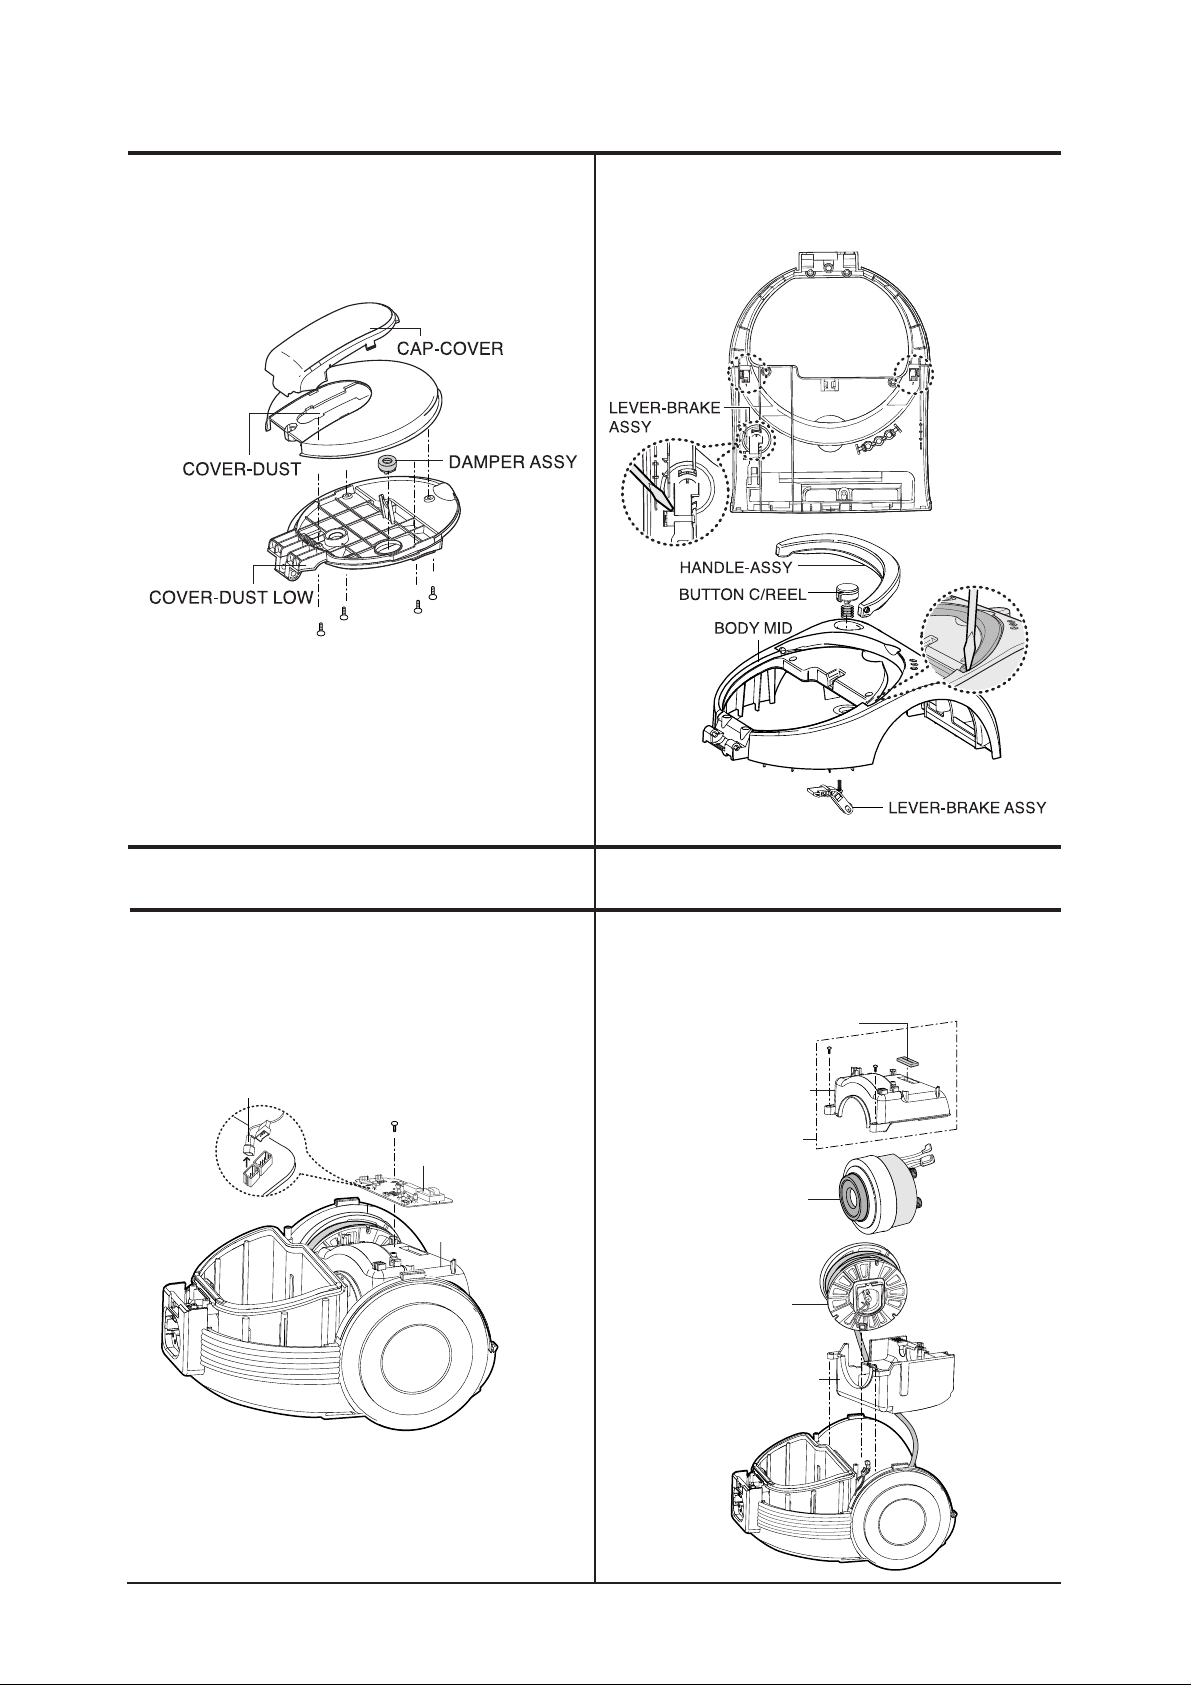
5) Release four screws and separate COVER DUST,
COVER DUST LOW, DAMPER ASSY.
3-2. Disassembly of PBA MAIN
1) Detach the CONNECTOR-HOUSING and
separate the PBA-MAIN by loosening a screw.
6) Turn up a BODY MID ASSY and detach the
HANDLE ASSY, LEVER-BRAKE ASSY, BUTTON
C/REEL with a flat head screw driver.
3-3. Disassembly of BODY-BASE ASSY
1)
Loosen two screws from the CASE-UP ASSY
and detach the CASE-UP ASSY, MOTOR FAN-AC,
CASE-LOW ASSY after lift up the CORD-REEL ASSY.
PBA-MAIN
CONNECTOR-HOUSING
CASE-UP ASSY
3. Disassembly and Reassmbly
MOTOR FAN-AC
CORD-REEL
CASE-UP ASSY
SPONGE-H/SINK
CASE-UP
CASE-LOW ASSY
Page 3

5
SAMSUNG ELECTRONICS CO., LTD
2) After separate the BAND-BODY L/R and
PACKING DUST, detach the COVER-FRONT ASSY,
SWITCH-PRESSURE and DAMPER SUCTION.
3-5. Assembly of CORD-REEL ASSY
1) Hold COVER-REEL and wind the power cord
4~5times.
2) When winding is completed, reassemble
CORD-REEL ASSY immedlaterly into the body.
3-4. Disassembly of CORD REEL ASSY
1) After lift up the CORD-REEL ASSY,
detach GUARD-CORD with a flat head screw driver.
2) Separate the CORD-REEL ASSY from BODY-BASE.
3-6. Replacement of MOTOR ASSY
1) Separate the CUSHION-MOTOR F, SPONGE
MOTOR and CUSHION RING from MOTOR-FAN AC.
2) Replace the MOTOR-FAN AC.
BODY-BASE
GUARD-CORD
CORD-REEL ASSY
COVER-FRONT
CAP-FRONT
DAMPER SUCTION
PACKING DUST
BAND-BODY L
BAND-BODY R
COVER-FRONT ASSY
WIRE HARNESS-FRONT
SWITCH PRESSURE
3. Disassembly and Reassmbly
 Loading...