

Samsung AQ18P0GE, AQT18P0GE, AQT24P6GE, UQT24P6GB, AQ24P6GB Service Manual
...
ROOM AIR CONDITIONER
INDOOR UNIT
SH24TP6(A)
AQT24P6GB
AQT24P6GE
AQ24P6GB
SH18ZP0(A)
AQT18P0GB
AQT18P0GE
AQ18P0GB
AQ18P0GE
SERVICE
OUTDOOR UNIT
SH24TP6(A)X
UQT24P6GB
UQT24P6GE
UQ24P6GB
SH18ZP0(A)X
UQT18P0GB
UQT18P0GE
UQ18P0GB
UQ18P0GE
Manual
CONTENTSAIR CONDITIONER
1. Product Specifications
2. Operating Instructions
3. Disassembly and Reassembly
4. Exploded Views and Parts List
5. Block Diagrams
6. PCB Diagrams
7. Wiring Diagrams
8. Schematic Diagrams

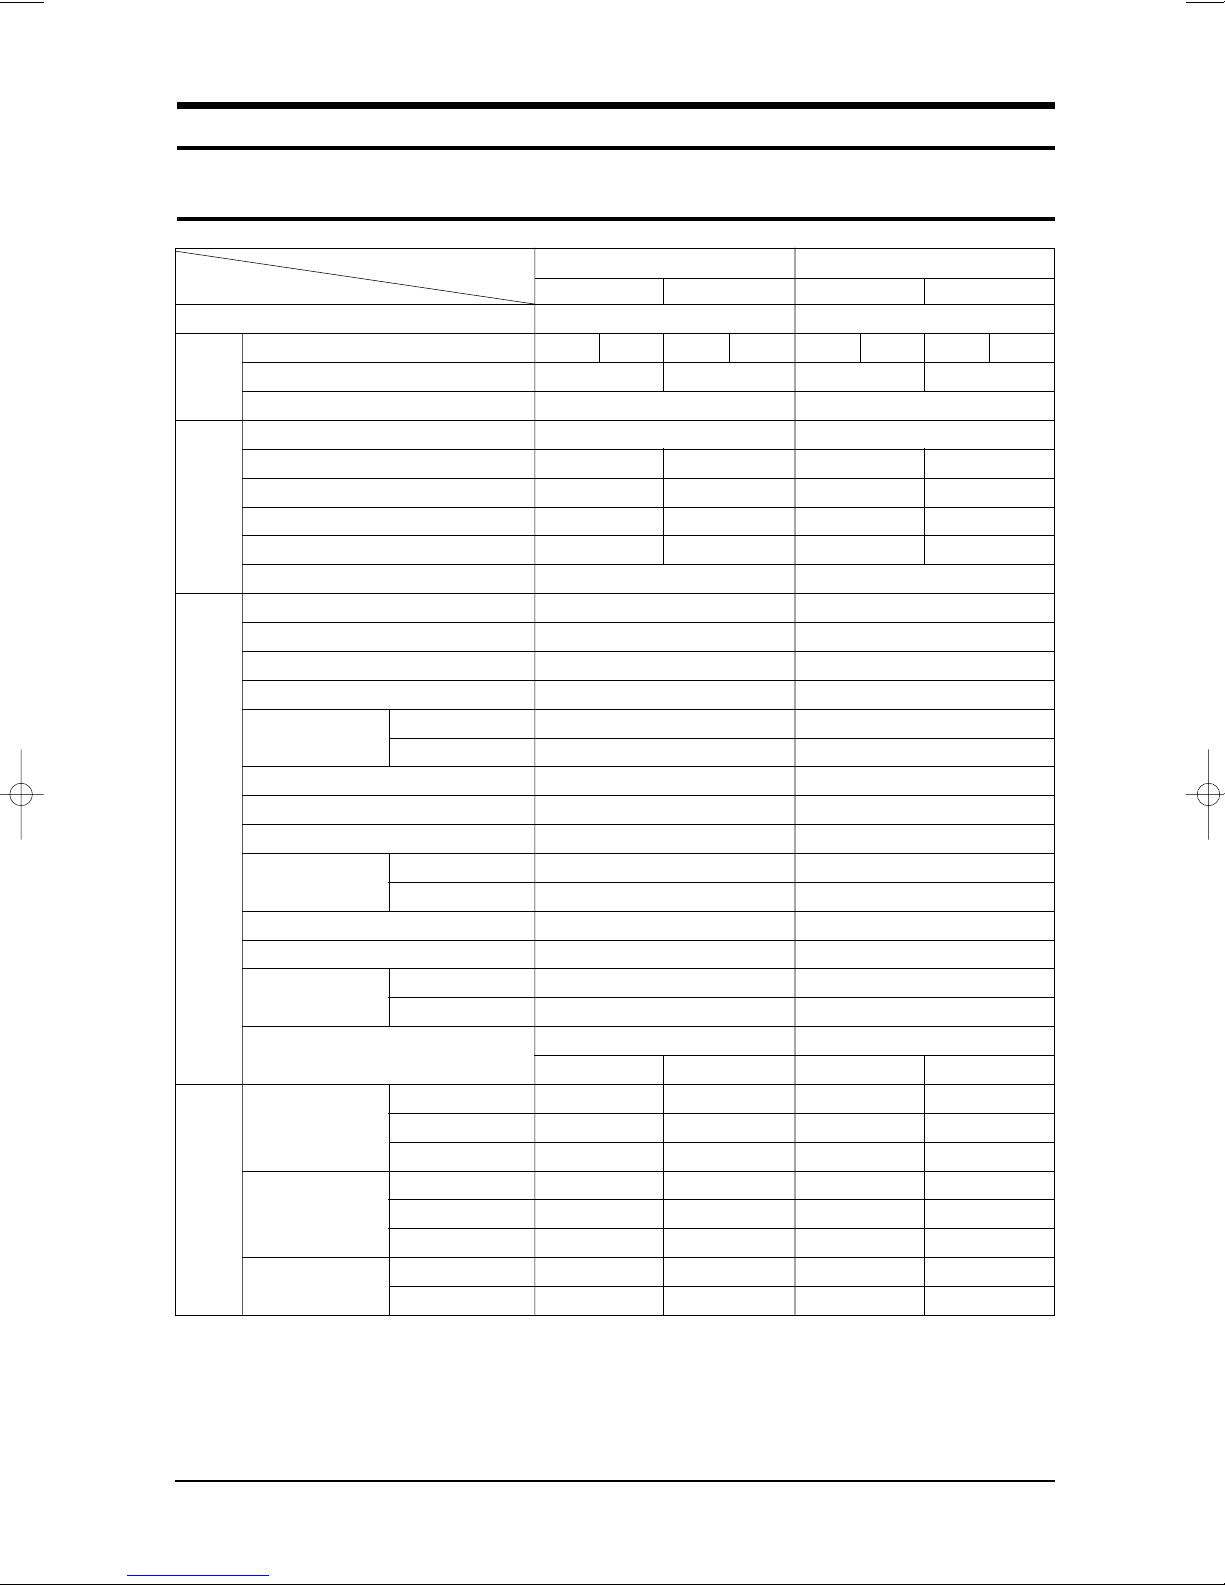
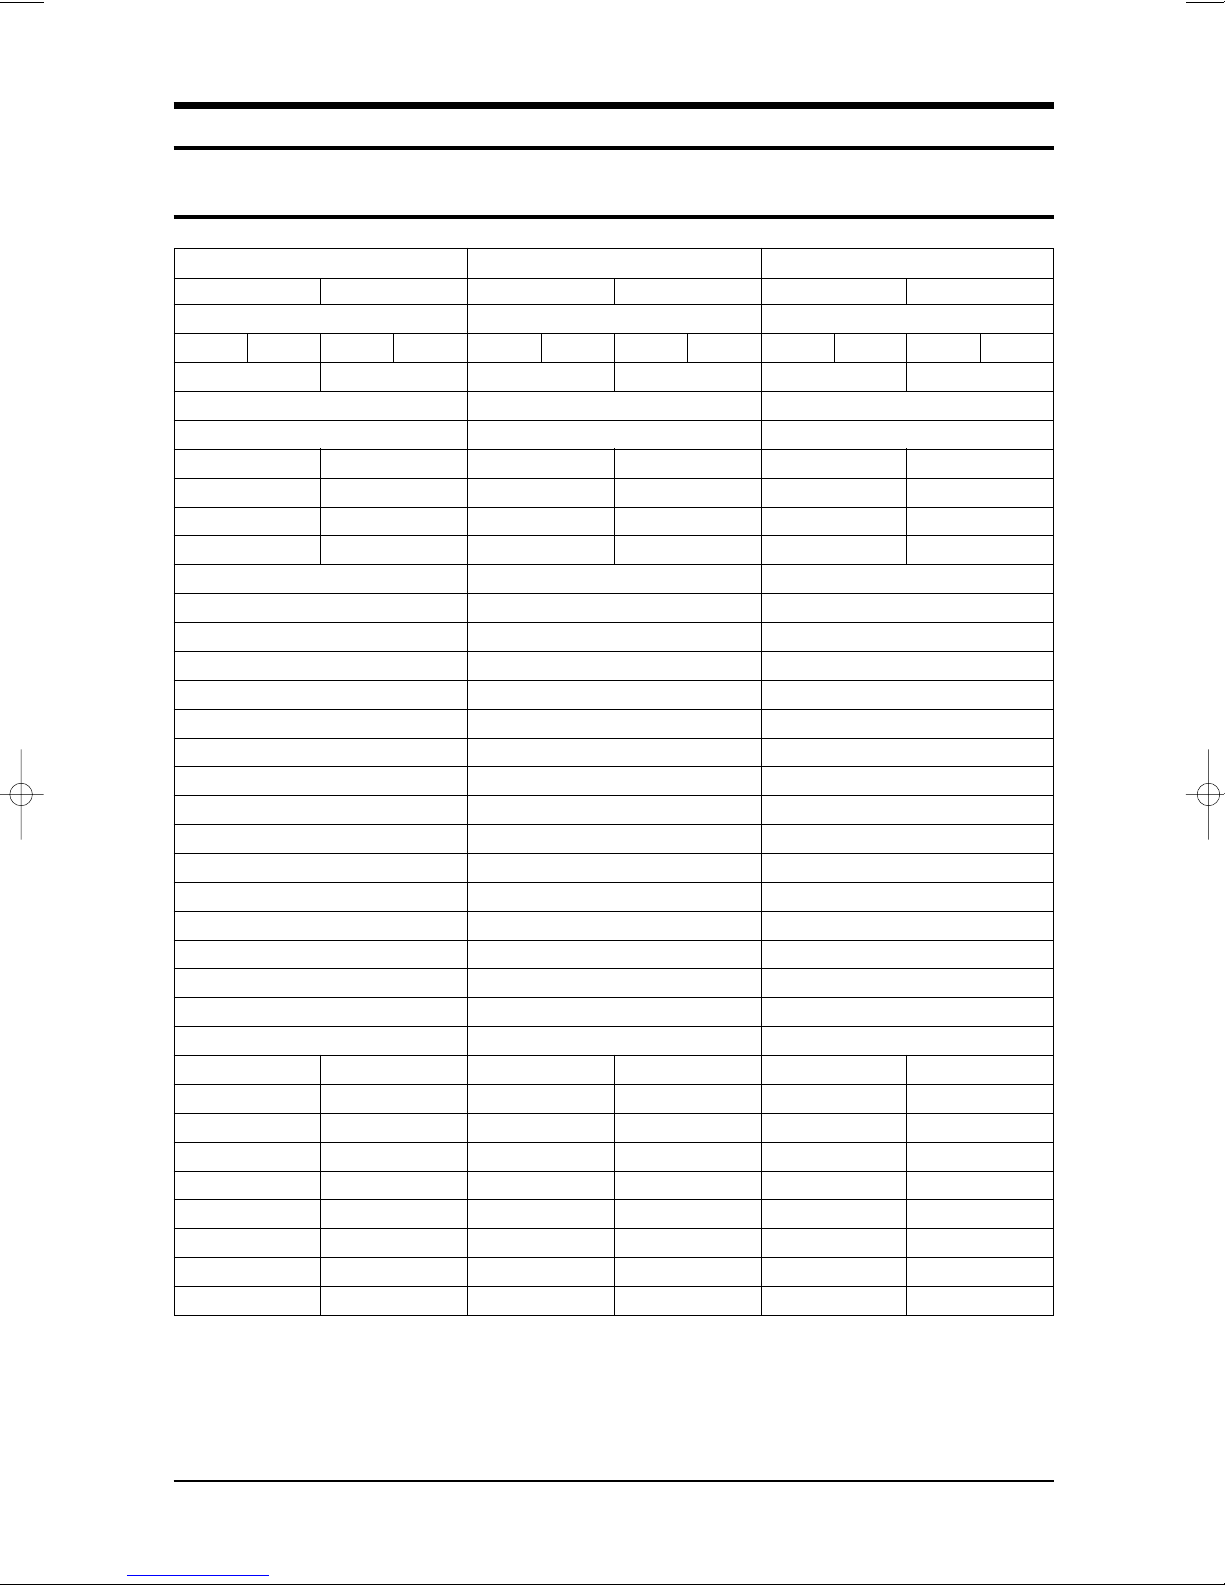
1. Product Specifications
1-1 Table
Item
Power Source
Performance
Electrical
Rating
Features
Dimensions
&
Weight
Model
Capacity (ISO/SASO)
Air circulation (High) m
Moisture removal (High) Liters/h
Available voltage range V
Running amperes A
Power input kw
Power factor %
Energy efficiency ratio BTU/wh
Compressor locked rotor amperes A
Controls/Temperature control
Control unit
Timer
Fan speed
Airflow direction (indoor)
Compressor
Refrigerant/Amount charged at rating g
Refrigerant control
Operation sound
Refrigerant tubing connections
Max. allowable tubing length at shippint m
Refrigerant tube diameter
Refrigerant tube kit/Accessories
Unit dimensions Width mm
Package dimensions Width mm
Weight
Horizontal
Vertical
Indoor Hi/Mi/Low dB-A
Outdoor-Hi dB-A
Narrow tube (in.)
Wide tube (in.)
Height mm
Depth mm
Height mm
Depth mm
Net kg
Shipping kg
2
/min
SH24TP6(A)/AQT24P6GE
Cool Heat
220-240V~,50Hz
6.8 kW - 6.9 kW -
14.0 14.5
3.0
198~264
11.5 11.5
2.78 2.82
92.6 92.6
9.4 9.6
82
Microprocessor / Thermistor
Wireless remote control
24-Hour ON or OFF
3 Steps and Turbo / 2 Step
Manual
Auto
Reciprocation(Bristol)
R22 / 1,300g
Capillary tube
48 / 46 / 44
61
Flare type
15
6.35(1/4")
15.88(5/8")
Optional / Hanger-plate
Indoor unit Outdoor unit
215 638
1080 880
205 310
286 704
1151 1023
397 413
13 64.5
16 68.5
AQT24P6GB
Cool Heat
220V~,60Hz
24,000 BTU/h 5,040 kcal/h 24,000 BTU/h 6,048 kcal/h
14.0 14.5
3.0
187~253
13 13.5
2.6 2.8
90.9 94.3
9.2 8.6
73
Microprocessor / Thermistor
Wireless remote control
24-Hour ON or OFF
3 Steps and Turbo / 2 Step
Manual
Auto
Reciprocation(Tecumseh)
R22 / 1,600g
Capillary tube
48 / 46 / 44
61
Flare type
15
6.35(1/5")
15.88(5/9")
Optional / Hanger-plate
Indoor unit Outdoor unit
215 638
1080 880
205 310
286 704
1151 1023
397 413
13 64.5
16 68.5
1-1Samsung Electronics
Table(Cont.)
Item
Power Source
Performance
Electrical
Rating
Features
Dimensions
&
Weight
Model
Capacity (ISO/SASO)
Air circulation (High) m
Moisture removal (High) Liters/h
Available voltage range V
Running amperes A
Power input kw
Power factor %
Energy efficiency ratio BTU/wh
Compressor locked rotor amperes A
Controls/Temperature control
Control unit
Timer
Fan speed
Airflow direction (indoor)
Compressor
Refrigerant/Amount charged at rating g
Refrigerant control
Operation sound
Refrigerant tubing connections
Max. allowable tubing length at shippint m
Refrigerant tube diameter
Refrigerant tube kit/Accessories
Unit dimensions Width mm
Package dimensions Width mm
Weight
Horizontal
Vertical
Indoor Hi/Mi/Low dB-A
Outdoor-Hi dB-A
Narrow tube (in.)
Wide tube (in.)
Height mm
Depth mm
Height mm
Depth mm
Net kg
Shipping kg
2
/min
AQ24P6GB
Cool Heat
220V~,60Hz
24,000 BTU/h - 25,000 BTU/h -
14.0 14.5
3.0
187~253
10.5 11.5
2.30 2.55
99.6 96.6
10.4 9.4
51
Microprocessor / Thermistor
Wireless remote control
24-Hour ON or OFF
3 Steps and Turbo / 2 Step
Manual
Auto
Rotary(Samsung)
R22 / 1,350g
Capillary tube
50 / 48 / 46
62
Flare type
15
6.35(1/6")
15.88(5/10")
Optional / Hanger-plate
Indoor unit Outdoor unit
216 638
680 480
415 520
1122 1540
895 767
429 445
13 64
16 68
SH18ZP0(A) / AQ18P0GE
Cool Heat
220-240V~,50Hz
18,000 BTU/h - 20,000 BTU/h -
13.5 14.0
2.5
198~264
7.8 7.8
1.75 1.74
98.1 97.0
10.23 11.49
35
Microprocessor / Thermistor
Wireless remote control
24-Hour ON or OFF
3 Steps and Turbo / 2 Step
Manual
Auto
Rotary(Samsung)
R22 / 1,150g
Capillary tube
46 / 44 / 42
57
Flare type
15
6.35(1/4")
12.70(1/2")
Optional / Hanger-plate
Indoor unit Outdoor unit
215 620
1080 787
205 320
286 692
1151 909
397 444
13 45
16 49
Samsung Electronics1-2
AQT18P0GB
Cool Heat
220V~,60Hz
18,000 BTU/h 4,000 kcal/h 20,000 BTU/h 5,040 kcal/h
13.5 14.0
2.5
187~253
8.5 9.5
1.87 2.10
99.0 99.0
9.63 9.52
35
Microprocessor / Thermistor
Wireless remote control
24-Hour ON or OFF
3 Steps and Turbo / 2 Step
Manual
Auto
Rotary(Samsung)
R22 / 1,570g
Capillary tube
48 / 46 / 44
58
Flare type
15
6.35(1/4")
12.70(1/2")
Optional / Hanger-plate
Indoor unit Outdoor unit
215 620
1080 787
205 320
286 692
1151 909
397 444
13 54
16 58
AQT18P0GE
Cool Heat
220-240V~,50Hz
18,000 BTU/h 4,000 kcal/h 20,000 BTU/h 5,040 kcal/h
13.5 14.0
2.5
198~264
8.0 8.8
1.85 2.00
97.9 98.8
9.73 10.00
35
Microprocessor / Thermistor
Wireless remote control
24-Hour ON or OFF
3 Steps and Turbo / 2 Step
Manual
Auto
Rotary(Samsung)
R22 / 1,650g
Capillary tube
48 / 46 / 44
58
Flare type
15
6.35(1/4")
12.70(1/2")
Optional / Hanger-plate
Indoor unit Outdoor unit
215 620
1080 787
205 320
286 692
1151 909
397 444
13 54
16 58
AQ18P0GB
Cool Heat
220V~,60Hz
18,000 BTU/h - 19,000 BTU/h -
13.5 14.0
2.5
187~253
8.3 9.0
1.77 2.00
96.9 98.6
10.16 9.5
35
Microprocessor / Thermistor
Wireless remote control
24-Hour ON or OFF
3 Steps and Turbo / 2 Step
Manual
Auto
Rotary(Samsung)
R22 / 1,210g
Capillary tube
46 / 44 / 42
58
Flare type
15
6.35(1/4")
12.70(1/2")
Optional / Hanger-plate
Indoor unit Outdoor unit
215 620
1080 787
205 320
286 692
1151 909
397 444
13 45
16 49
1-3Samsung Electronics
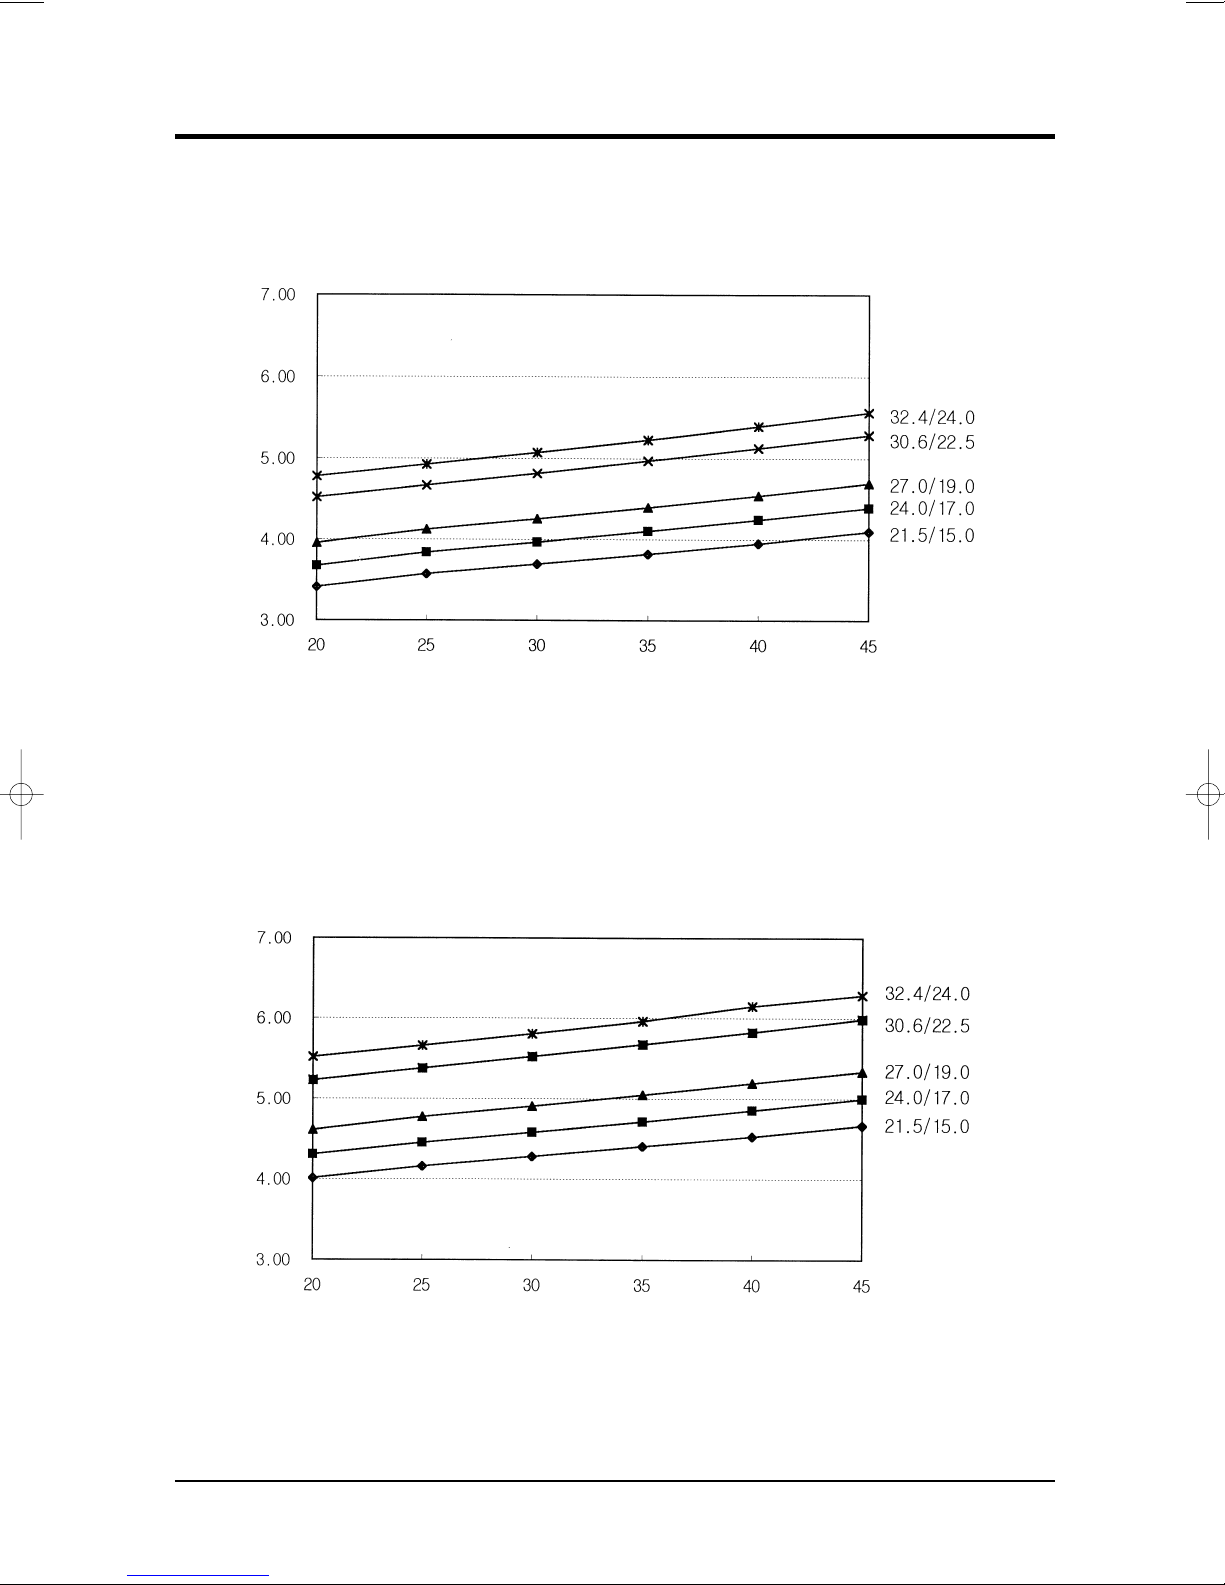
1-2 Pressure Graph
■
24K BTU
G)
2
■
18K BTU
Low pressure(kg/cm
G)
2
Indoor inlet air D.B. temp(˚C)
Outdoor inlet air D.B. temp(˚C)
Low pressure(kg/cm
Indoor inlet air D.B. temp(˚C)
Outdoor inlet air D.B. temp(˚C)
Samsung Electronics1-4

2. Operating Instructions
Low Medium High
Automatic(rotated : )
2-1 The Feature of Key in remote control
NAMED OF KEYNO
1
2
3
4
(On/Off)
(UP)
(DOWN)
On/Off button.
Press the button to stop or run the air conditioner.
Temperature adjustment button(UP).
To increase the temperature by the pressing the temperature button.
Temperature adjustment button(DOWN).
To decrease the temperature by the pressing the temperature button.
Mode selection button.
Each time you press this button
Mode is changed in the following order
Fan speed adjustment button.
Each time you press this button, FAN SPEED is changed in the following order.
FUNCTION OF KEY
: Auto Mode : Fan Only
: Cool Mode : Heat Mode
: Dry Mode
5
6
7
8
Swing button.
It adjusts the airflow to upward and downward.
Turbo button.
The air conditioner cools or heats the room as quickly as possible.
After 30minutes, the air conditioner is reset automatically to the previous mode.
Energy saving button.
If you wish to save energy when using your air conditioner, select the Energy saving
mode with the button.
Sleep button.
The sleep timer can be used when you are cooling or heating your room to switch the
air conditioner off automatically after a period of six hours.
2-1Samsung Electronics
Operating Instructions
NO
9
10
11
12
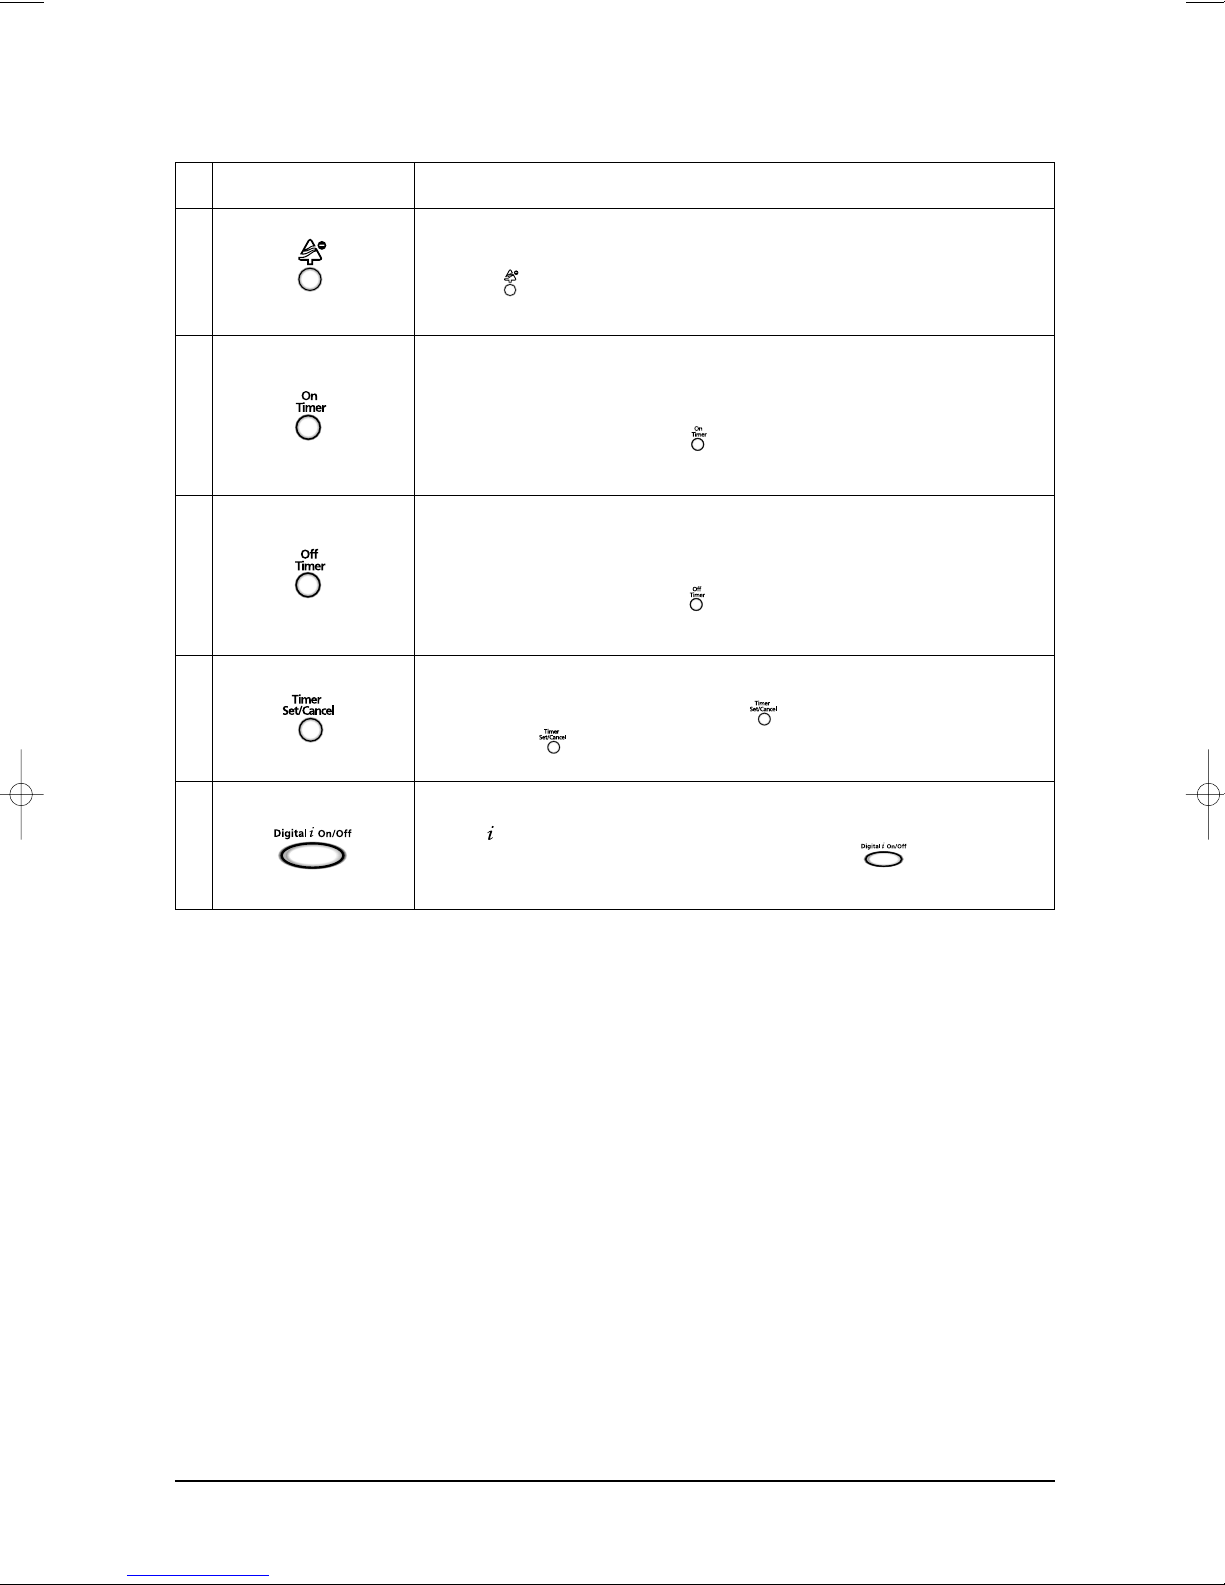
NAMED OF KEY
FUNCTION OF KEY
Anion button.
Press the button to generate ion from the air conditioner.
On Timer button.
The On Timer enables you to switch onthe air conditioner automatically after
a given period of time that is from 30 minutes to 24 hours.
To set the operating time, press the button one or more times until the required
time display.
Off Timer button.
The Off Timer enables you to switch off the air conditioner automatically after
a given period of time that is from 30 minutes to 24 hours.
To set the operating time, press the button one or more times until the required
time display.
Timer Set/Cancel button.
After setting On Timer or Off Timer, press the button to set it completely.
And
press the button again to cancel On Timer or Off Timer set.
13
Digital On/Off button.
If you want to turn off the display during operation press the button.
Samsung Electronics2-2
2-1-1 Name & Function of Key in remote control
Operating Instructions
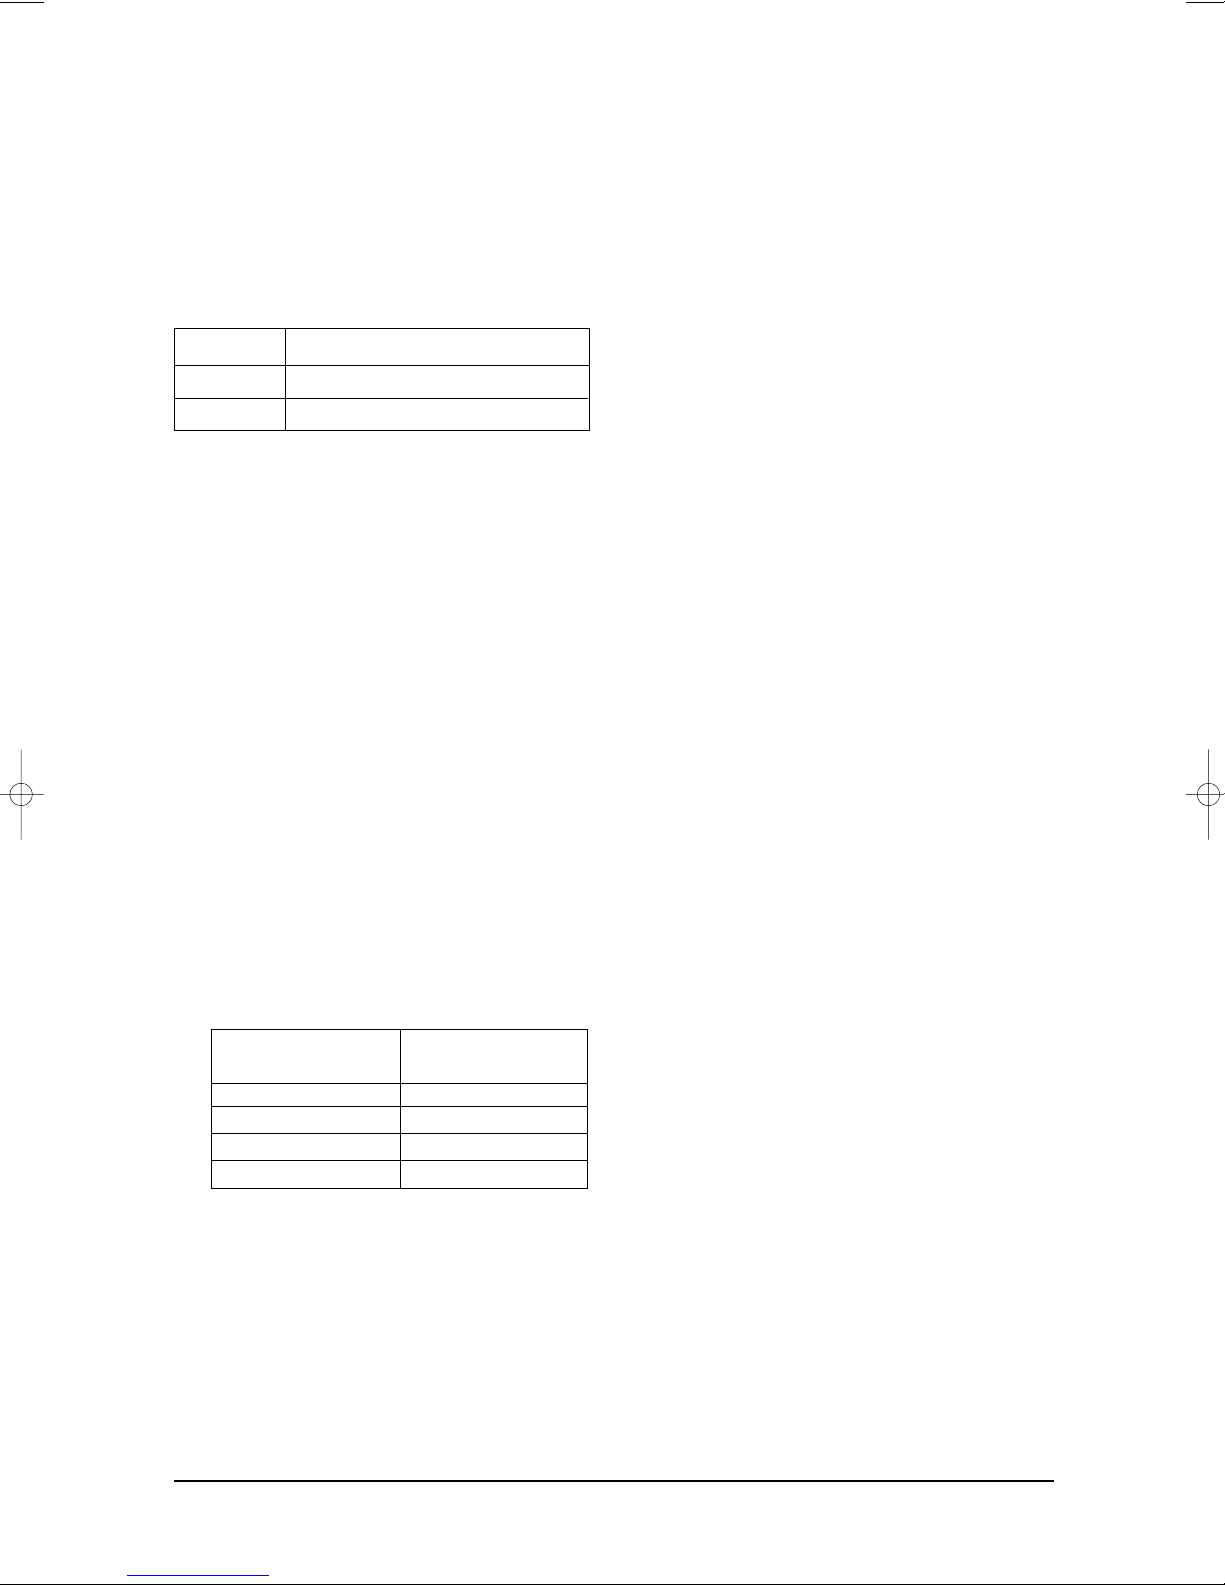
1. AUTO MODE : In this mode, operation
mode(COOL, HEAT) is selected automatically by the room temperature of initial
operation.
Room Temp
Tr ≥ 21°C+∆T
21°C +∆T>Tr
∆T= -1°C, -2°C, 0°C, +1°C, +2°C
∆T is controlled by setting temperature
up/down key of remote control
2. COOL MODE : The unit operates according to the difference between the setting
and room temperature. (18°C~30°C)
3. HEAT MODE : The unit operates according to the difference between the setting
and room temperature.(16°C~30°C)
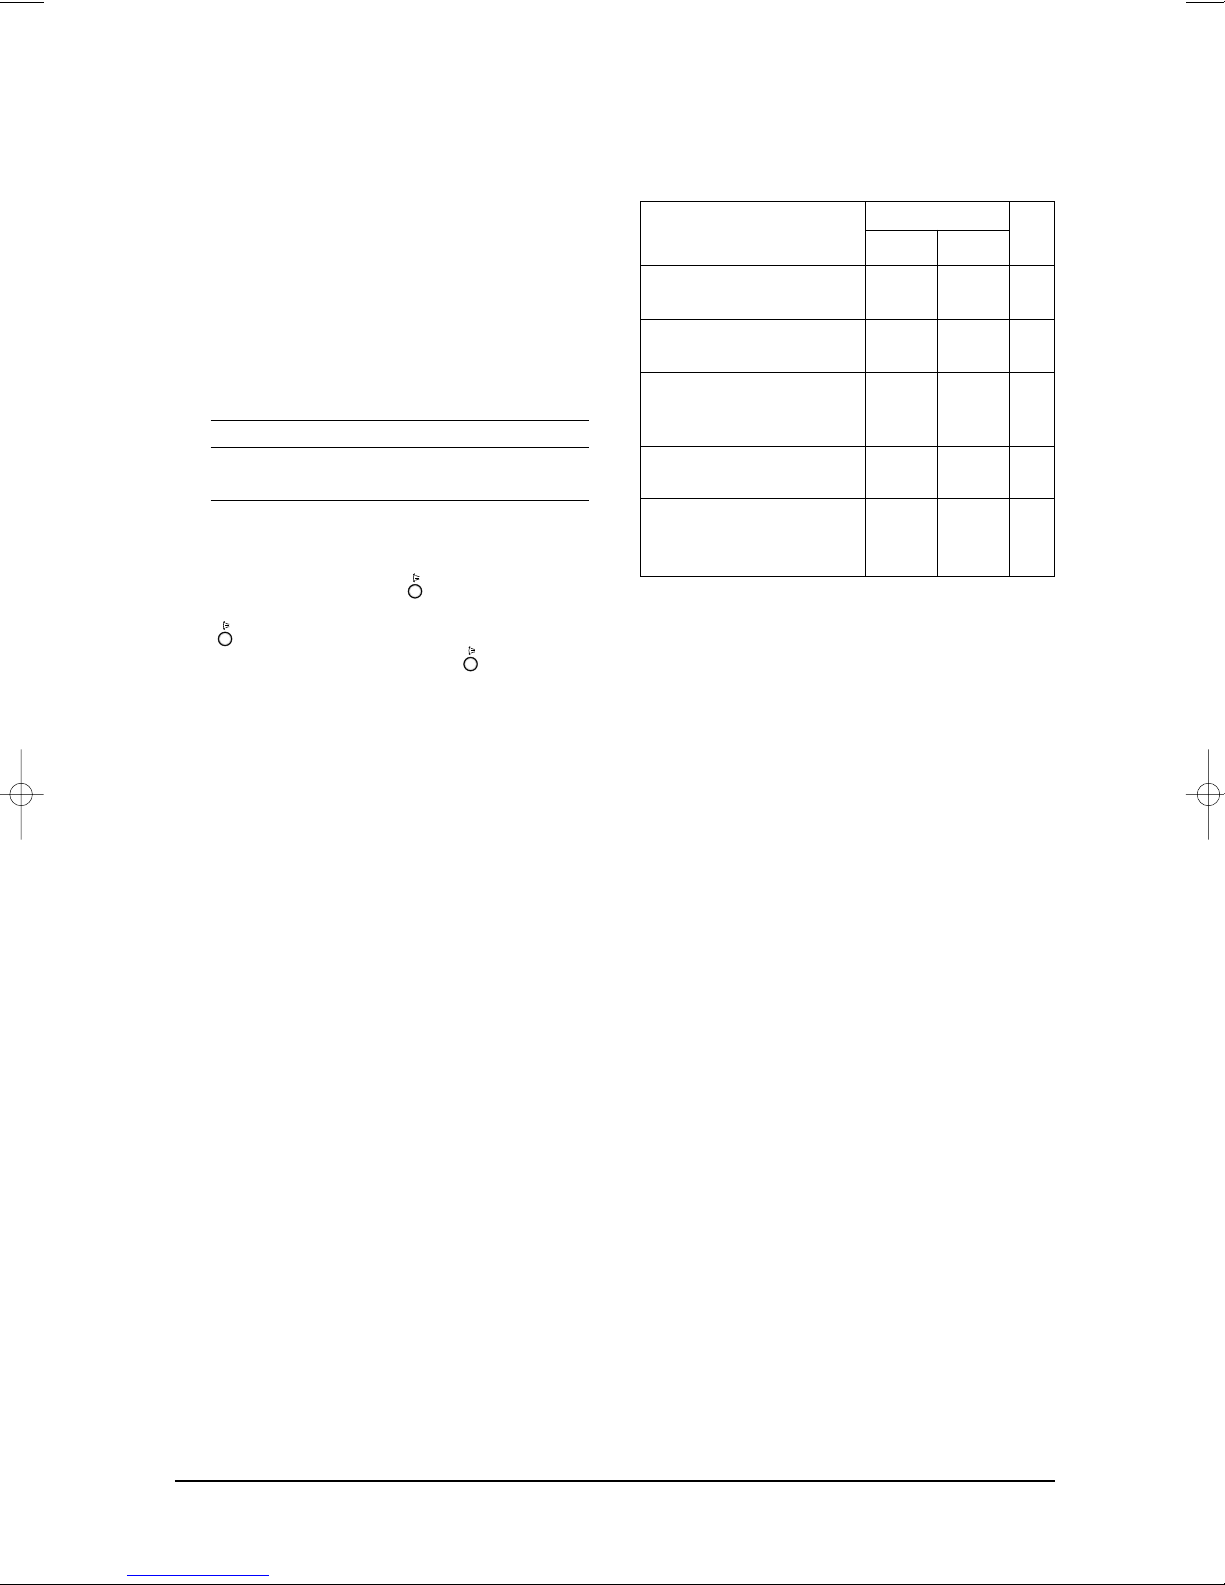
*Prevention against cold wind : In order to
prevent the cool air from flowing out at
the heat mode, the indoor fan does not
operate or operates very slowly in the
following cases. At this time, the indoor
heat exchanger will be preheating.
- For 3~5 minutes after the initial
operation
- For deicing operation
- The operation of an indoor fan in
accordance with the temperature of an
indoor heat exchanger
The temperature of
indoor heat exchanger
28˚C~below 34˚C
34˚C~below 40˚C
*High temperature release function : It is a
function to detect an outdoor overload by
the sensor of an indoor heat exchanger
and to turn the outdoor fan or the
compressor ON/OFF for safety.
Cool Operation (Set Temp:24˚C+∆T)
Heat Operation (Set Temp:22˚C+∆T)
below 28˚C
above 40˚C
Operation Type
Indoor fan speed
off
LL Speed
L Speed
Setting Speed
*Deice : Deicing operation is controlled
by indoor unit's heat exchanger temperature and accumulating time of compressor's operation.
Deice ends by sensing of the processing
time by deice condition.
4. DRY MODE : Has 3 states, each determined by room temperature.
The unit operates in DRY mode.
*Compressor ON/OFF Time is controlled
compulsorily(can not set up the fan
speed, always breeze).
*Protective function : Low temperature
release. (Prevention against freeze)
5. TURBO MODE : This mode is available in
AUTO, COOL, HEAT, DRY, FAN MODE.
When this button is pressed at first, the
air conditioner is operated “powerful”
state for 30 minutes regardless of the set
temperature, room temperature.
When this button is pressed again, or
when the operating time is 30 minutes,
turbo operation mode is canceled and
returned to the previous mode.
*But, if you press the TURBO button in
DRY or FAN mode that is changed with
AUTO mode automatically.
6. SLEEP MODE : Sleep mode is available
only in COOL or HEAT mode.
The operation will stop after 6 hours.
*In COOL mode : The setting temperature
is automatically raised by 1°C each 1hour
When the temperature has been raised by
total of 2°C, that temperature is maintained.
*In HEAT mode : The setting temperature
is automatically dropped by 1°C each
1hour.
When the temperature has been dropped
by total of 2°C, that temperature is maintained.
2-3Samsung Electronics
Operating Instructions
7. FAN SPEED : Manual (3 step), Auto (4 step)
Fan speed automatically varies depending
on both the difference between setting and
the room temperature.
8. COMPULSORY OPERATION :
For operating the air conditioner without
the remote control.
*The air conditioner starts up in the most
suitable mode for the room temperature:
Room Temperature
Less than 21˚C
21˚C or above
Operating Mode
Heat
Cool
Temperature Setting
22˚C approx.
24˚C approx.
9. SWING : BLADE-H is rotated vertically by
the stepping motor.
*Swing Set : Press the button under the
remote control is displayed on LCD the
and the blades move up and down. If
the one more time press the button,
blades location is stop.
10. SETTING THE ON/OFF TIMER. :
*ON TIMER : The On Timer enables you
to switch on the air conditioner automatically after a given period of time. You can
set the period of time from 30 minutes to
24 hours.
*OFF TIMER : The Off Timer enables you
to switch off the air conditioner automatically after a given period of time. You can
set the period of time from 30 minutes to
24 hours.
12. SELF DIAGNOSIS
Error Mode
Indoor unit room temperature sensor
error (open or short)
Indoor unit heat exchanger temperature
sensor error(open or short)
Indoor FAN MOTOR error :
Keep the RPM value 450 below for 15
seconds
EEPROM error
Error in option
In case of No option set-up
In case of option data error
DISPLAY 7-SEGMENT
Operation Off Operation On
All lamp
blinking
OFF E1
OFF E2
OFF E3
OFF E6
All lamp
blinking
Remark
13. BUZZER SOUND : Whenever the On/Off
button is pressed or whenever change
occurs to the condition which is set up or
select, the compulsory operation mode,
buzzer is sounded "beep".
11. GENERATING ANION :
The air conditioner can generate anion
with an ionizer in the indoor unit.
Samsung Electronics2-4
2-2 Installation
2-2-1 Selecting Area for Installation
Select an area for installation that is
suitable to the customer's needs.
2-2-1(a) Indoor Unit
1. Make sure that you install the indoor unit
in an area providing good ventilation. It
must not be blocked by an obstacle affecting the airflow near the air inlet and the
air outlet.
2. Make sure that you install the indoor unit
in an area allowing good air handling and
endurance of vibration of the indoor unit.
3. Make sure that you install the indoor unit
in an area where there is no source of heat
or vapor nearby.
4. Make sure that you install the indoor unit
in an area from which hot or cool air is
spread evenly in a room.
5. Make sure that you install the indoor unit
in an area away from TVs, audio units,
cordless phones, fluorescent lighting
fixtures and other electrical appliances
(at least 1 meter).
(Fix the unit firmly if it is mounted in a
high place.)
3. Make sure that you install the outdoor
unit in area providing good ventilation
and which is not dusty. It must not be
blocked by any obstacle affecting the airflow near the air inlet and the air outlet.
4. Make sure that you install the outdoor
unit in area free from animals or plants.
5. Make sure that you install the outdoor
unit in area not blocking the traffic.
6. Make sure that you install the outdoor
unit in area easy to drain condensed water
from the indoor unit.
7.
Make sure that you install the outdoor unit
in area which provides easy connection
within the maximum allowable length of a
coolant pipe(18✳✳:15meters, 24✳✳:20meters).
Note
1. Add (18✳✳:30g, 24✳✳:40g) of refrigerant
(R-22) for every 1 meter if the pipe length
exceeds the standard pipe length of 5 meters.
2. Maintain a height between the indoor and outdoor units of less than 8 meters.
6. Make sure that you install the indoor unit
in an area which provides easy pipe connection with the outdoor unit, and easy
drainage for condensed water.
7. Make sure that you install the indoor unit
in an area which is large enough to
accommodate the measurements shown in
figure on the next page.
2-2-1(b) Outdoor Unit
1. Make sure that you install the outdoor
unit in area not exposed to the rain or
direct sun light.
(Install a separate sunblind if exposed to
direct sun light.)
2. Make sure that you install the outdoor
unit in area allowing good air moment,
not amplifying noise or vibration, especially to avoid disturbing neighbors.
Caution :
It is harmful to the air conditioner if it is used in the following environments: greasy areas (including areas near
machines), salty areas such as coast areas, areas where sulfuric gas is present such as hot spring areas. Contact your
dealer for advice.
8. Make sure that you install the outdoor
unit in an area which is large enough to
accommodate the measurements
2-2-1(c) Remote Control Unit
1. Make sure that you install the remote control unit in an area free from obstacles
such as curtains etc, which may block
signals from the remote control unit.
2. Make sure that you install the remote control unit in an area not exposed to
direct sunlight, and where there is no
source of heat.
3. Make sure that you install the remote
control unit in an area away from TVs,
audio units, cordless phones, fluorescent
lighting fixtures and other electrical
appliances (at least 1 meter).
2-5Samsung Electronics
2-3 Set up the Model option
The Method for Setting up the model option with remocon
• It is necessary to set up option code after replacing the main-PCB as a service parts.
Make sure that you can set up the option of code the remote controller after you replace the main
PBA otherwise, the unit won’t be working properly and all LED lamps on display will be flickering.
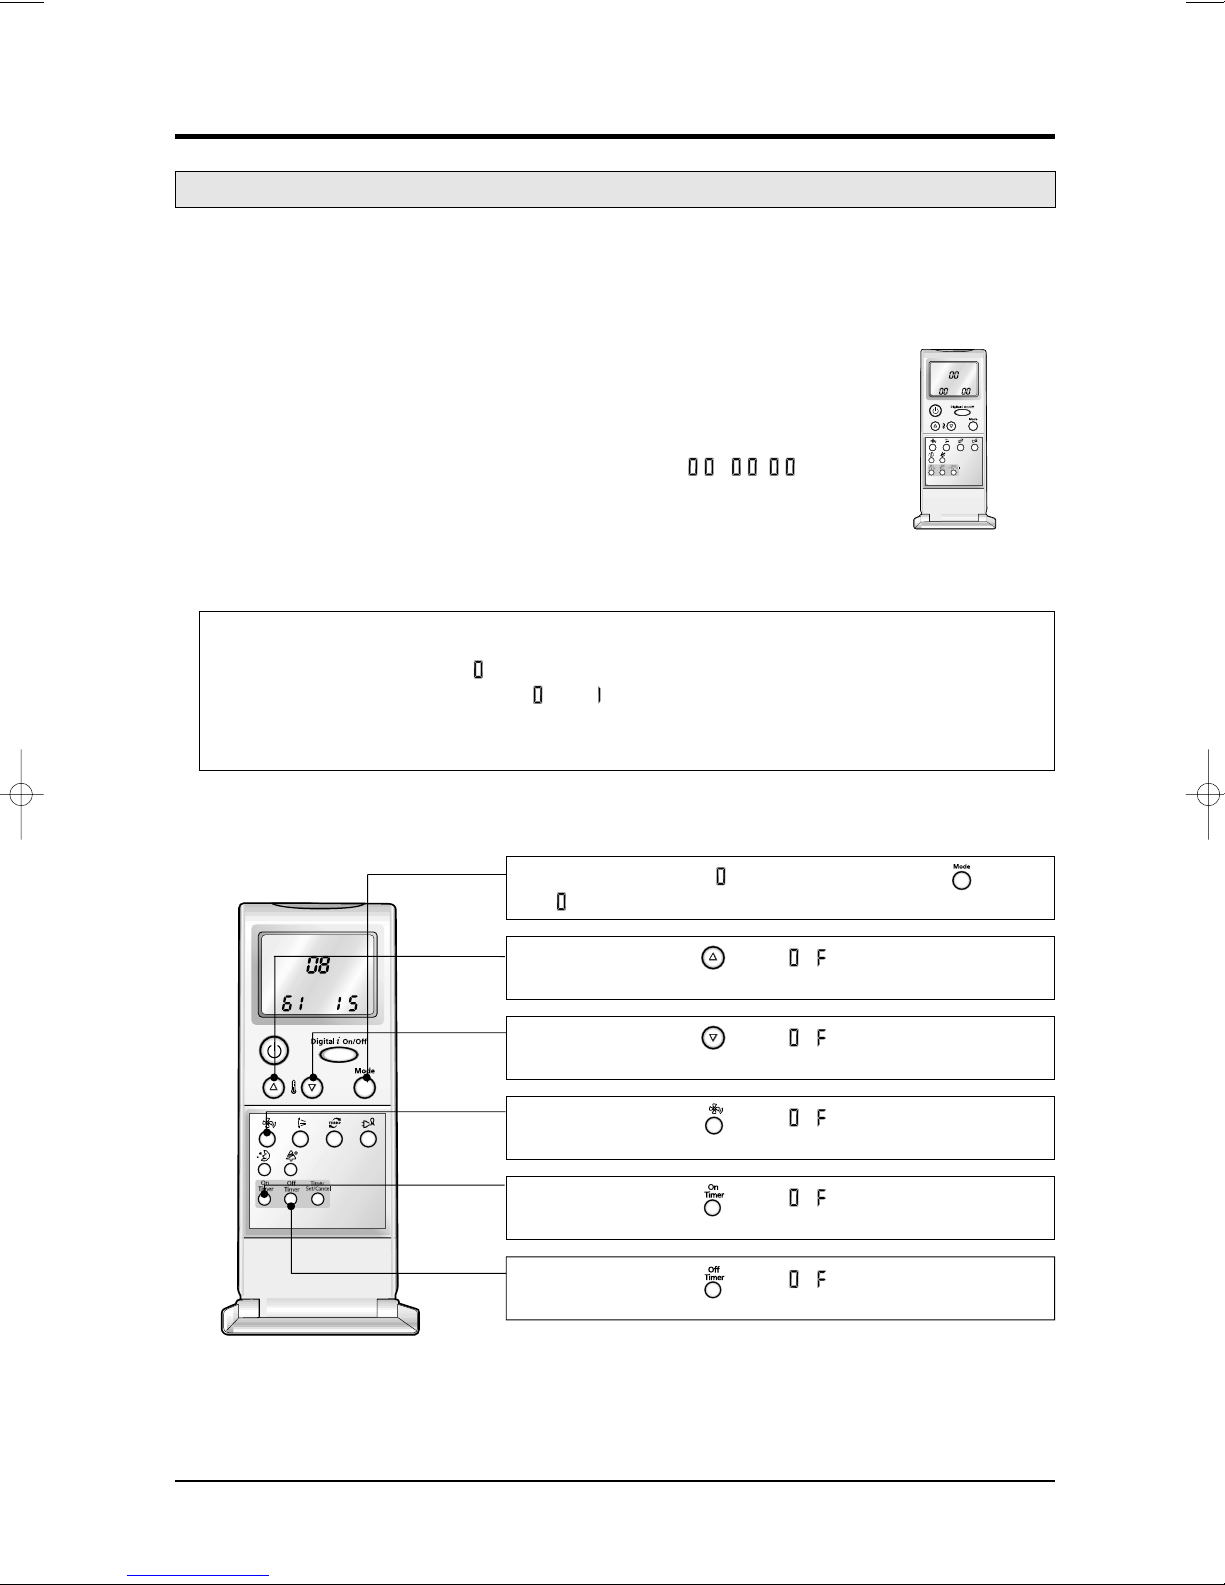
Step 1 : Preparing the remocon to main PCB option set
1stRemove the battery from the remocon.
2ndPress the temperature raise/down button simultaneously
and insert the battery again.
3rdMake sure the remocon display shown as .
Step 2 : Second stage preparation of the remocon option set.
❈ Note ; In case the wrong letter has been selected, continue to press the button until the correct letter appears.
1stIf the first stage number “ ” appears on the display, proceed to the second stage.
2ndEvery time the ! and & button, “ ” and “ ” each continue to appear.
3rdWhenever pressing the @, #, $, %, ^, *, (, ), 1, 2 button, the number increase from
0~9(0123456789) and A, b, C, d, E, F each time.
! If the first number is , it is correct otherwise press until
appear.
@ When pressing the button ~ appear on the display,
select one of them.
# When pressing the button ~ appear on the display,
select one of them.
$ When pressing the button ~ appear on the display,
select one of them.
% When pressing the button ~ appear on the display,
select one of them.
^ When pressing the button ~ appear on the display,
select one of them.
Samsung Electronics2-6
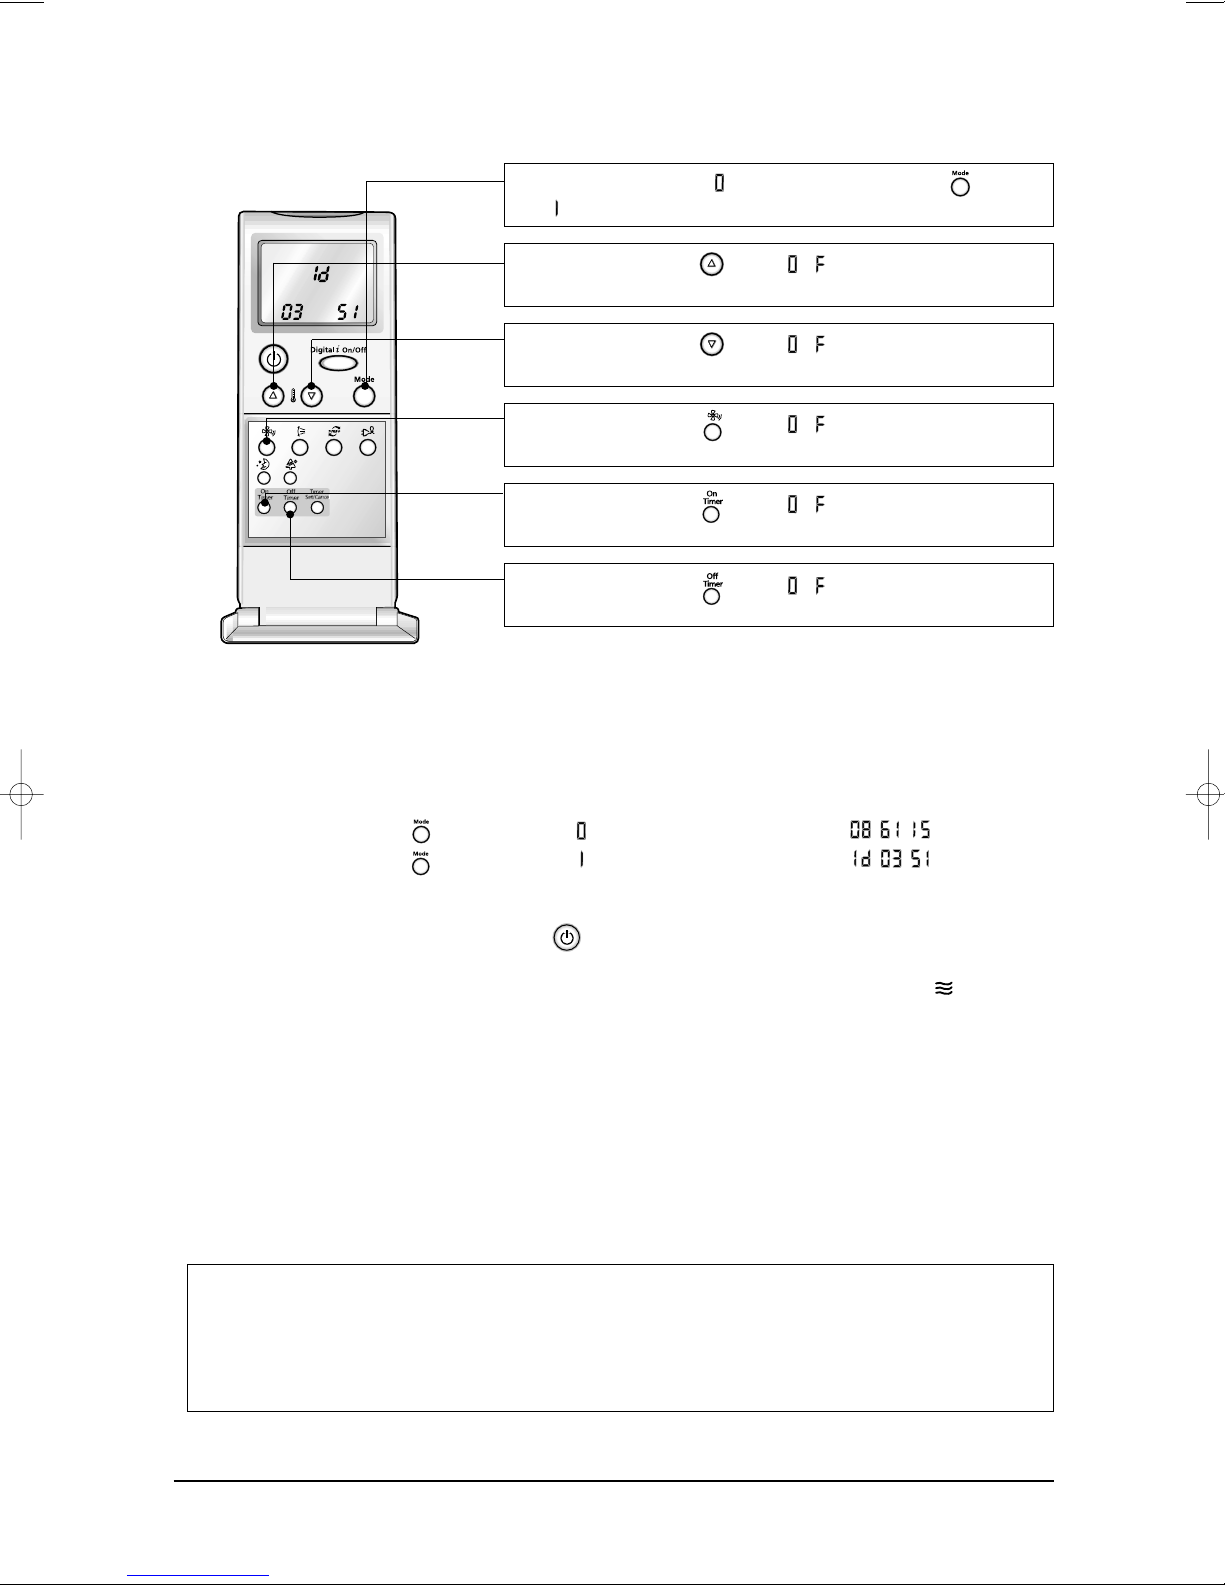
Operating Instructions
! If the first number is , it is correct otherwise press until
appear.
@ When pressing the button ~ appear on the display,
select one of them.
# When pressing the button ~ appear on the display,
select one of them.
$ When pressing the button ~ appear on the display,
select one of them.
% When pressing the button ~ appear on the display,
select one of them.
^ When pressing the button ~ appear on the display,
select one of them.
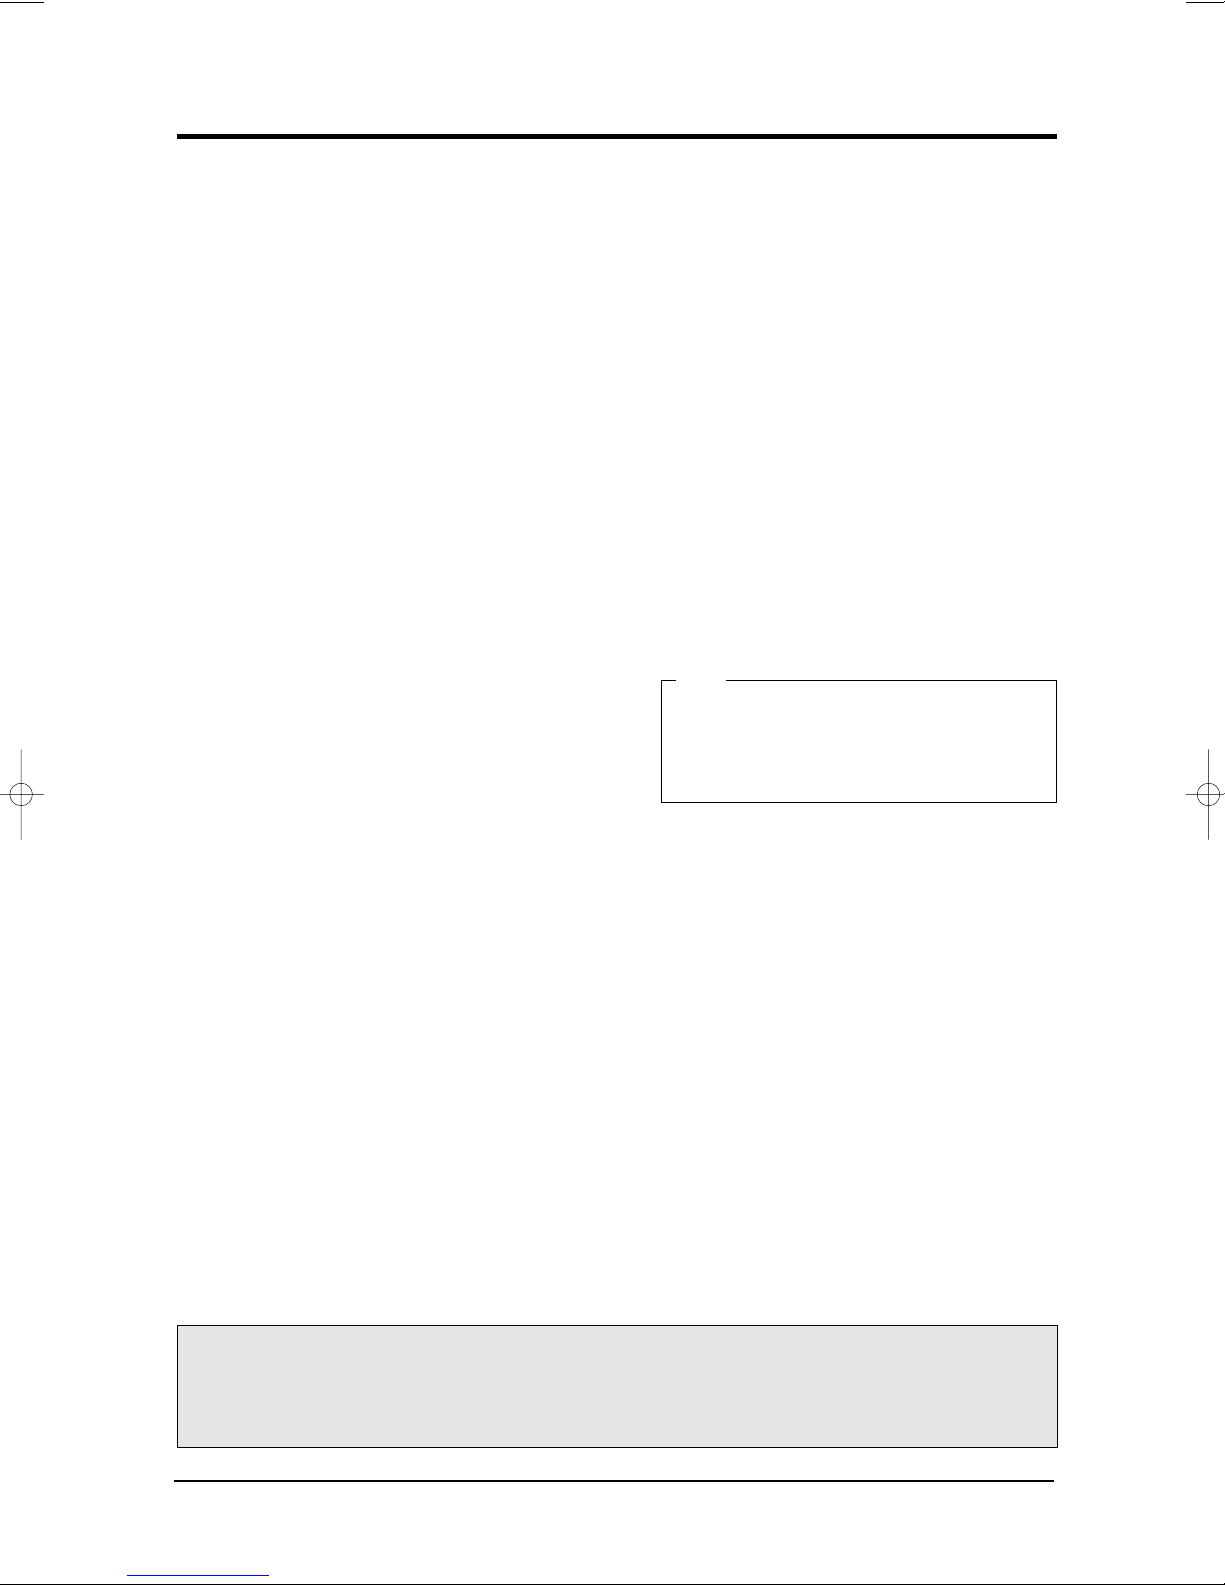
Step 3 : Reconfirming option set after completion
(in case of ex. 086115-1d0351)
After pressing selector for the mode, the display shown as .
After pressing selector for the mode, the display shown as .
Step 4 : Pressing the ON/OFF button ( )
When pressing the operation ON/OFF key with the direction of remote controller for
unit, the sound “Ding” or “Diriring” is heard and the OPERATION ICON( ) lamp of
the display is flickering at the same time, then the input of option is completed. (If the
diriring sound isn’t heard, try again pressing the ON/OFF button.)
Step 5 : Unit operation test-run
First, Remove the battery from the remote controller.
Second, Re-insert the battery into the remote controller.
Third, Press ON/OFF key with the direction of remote controller for set.
• Error Mode
st
1
If all lamps of indoor unit are flickering, Plug out and plug in again and pressing ON/OFF key to retry.
nd
If the unit is not working properly or all lamps are continuously flickering after setting the option code, see
2
if the correct option code is set up for it’s model.
2-7Samsung Electronics
Operating Instructions
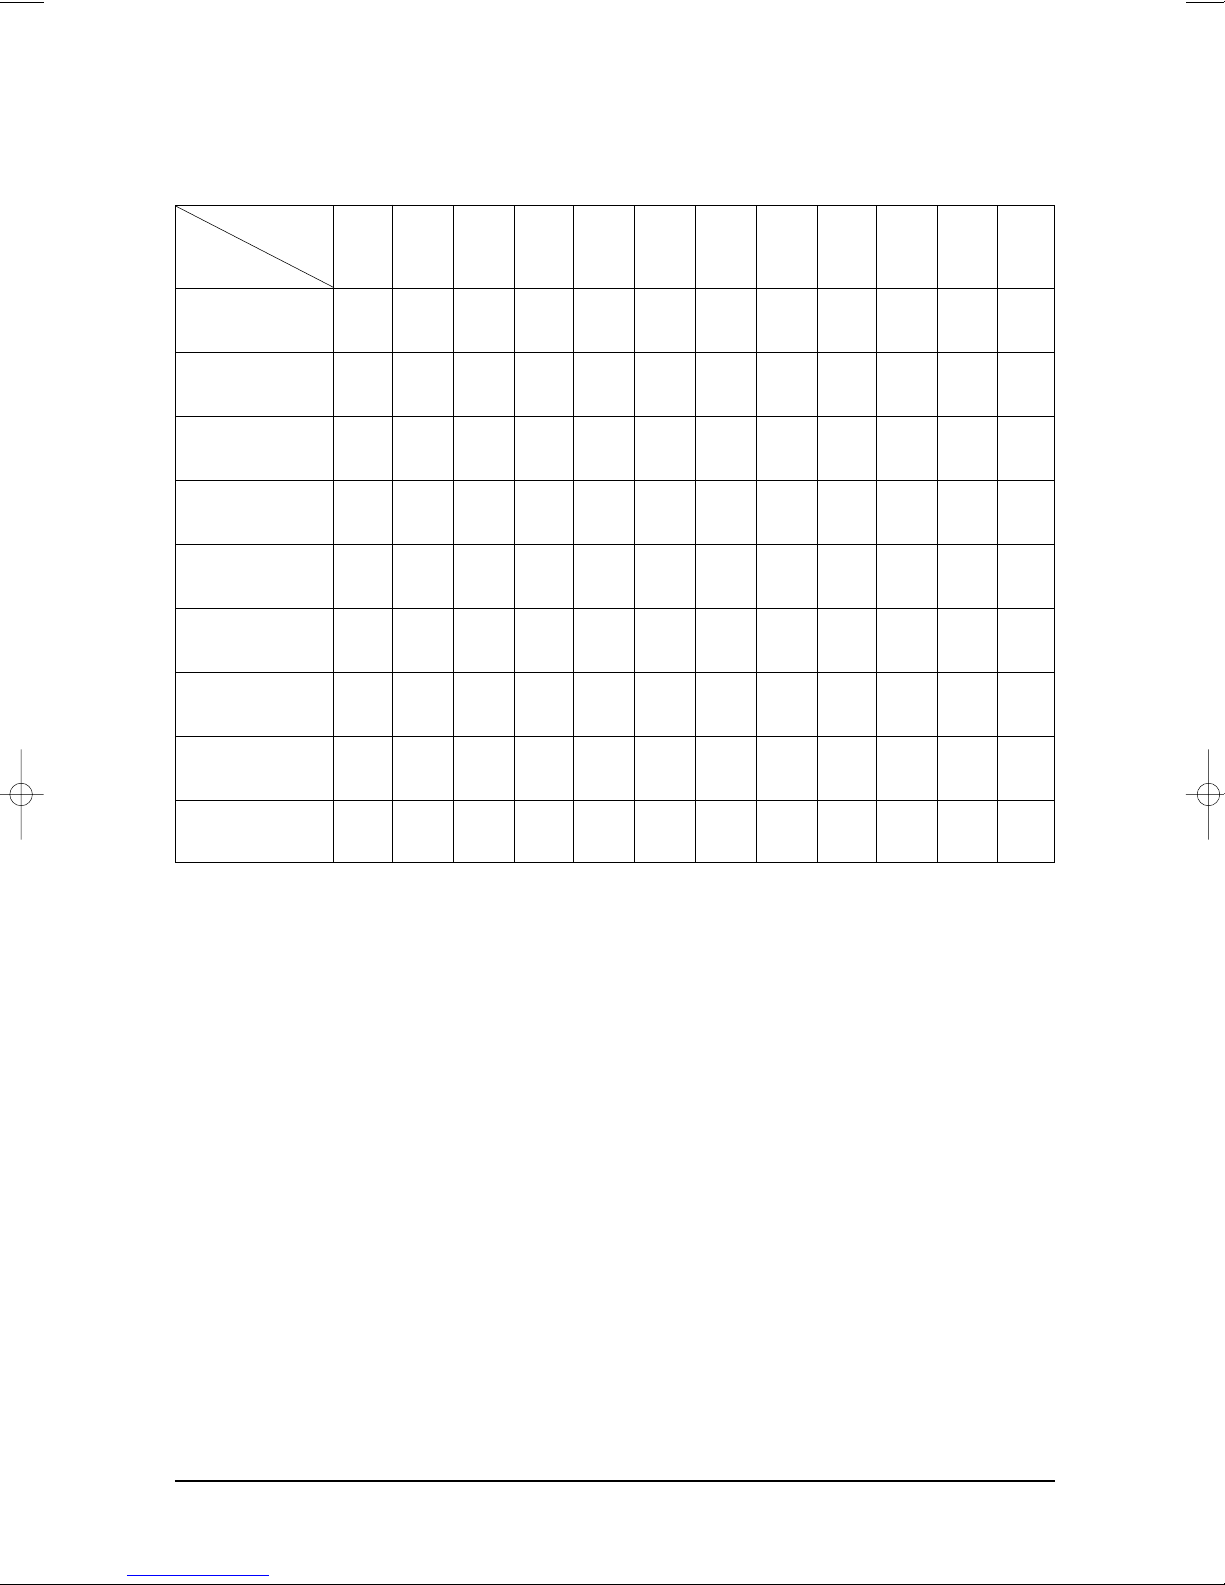
■ OPTION ITEMS
MODEL
SH24TP6(A)
AQT24P6GB
AQT24P6GE
AQ24P6GB
SH18ZP0(A)
AQT18P0GB
AQT18P0GE
AQ18P0GB
REMOCON
SEG1 SEG2 SEG3 SEG4 SEG5 SEG6 SEG7 SEG8 SEG9 SEG10 SEG11 SEG12
0854161d0384
0854171d0384
0854161d0384
0852d51d0395
0861151d0351
0854171d0351
0854171d0362
0851151d0351
AQ18P0GE
0861151d0351
Samsung Electronics2-8
 Loading...