

Samsung UN55EH6070F, UN55EH6030F, UN46FH6030F, UN55FH6030F, UN40FH6030F E-manual
E-MANUAL
imagine the possibilities
Thank you for purchasing this Samsung
product. To receive more complete service,
please register your product at
www.samsung.com/register
Model __________ Serial No. ____________

Contents
Channel Setting
• UsingtheChannelmenu
• Memorizingchannels
• OtherFeatures
1
14
18
Basic Features
• ChangingthePresetPictureMode
• AdjustingPictureSettings
• ChangingthePictureOptions
• ChangingthePresetSoundModes
• SoundSettings
• AdjustingSoundSettings
20
21
27
36
37
39
Preference Features
• ConnectingtotheNetwork
• SettingtheWiredNetwork
• SettingtheWirelessNetwork
• ManagingtheNetworkConnectedDevices
• SettingtheSetup
• SettingtheTime
• UsingtheSleepTimer
• SettingtheOn/OffTimer
• BlockingPrograms
• EconomicalSolutions
• OtherFeatures
• SupportMenu
45
61
67
79
81
82
84
85
90
102
104
113
Advanced Features
• Usingthe3Dfunction
• UsingtheExplore3D
• UsingtheAllSharePlay
• ConnectingaUSBDevice
• ConnectingtothePCthroughnetwork
• ScreenDisplay
• Videos
• Photos
• Music
• AllSharePlay-AdditionalFunctions
• UsingtheDLNAFunctions
127
138
139
140
146
149
150
155
157
160
165
Other Information
• Troubleshooting
• Anti-theftKensingtonLock
• License
171
187
189
▶
English
❑Using the Channel menu
Press the CONTENT button, and then select the desired menu item. Choose
from Channel List and Schedule Manager.
■ Channel List
O
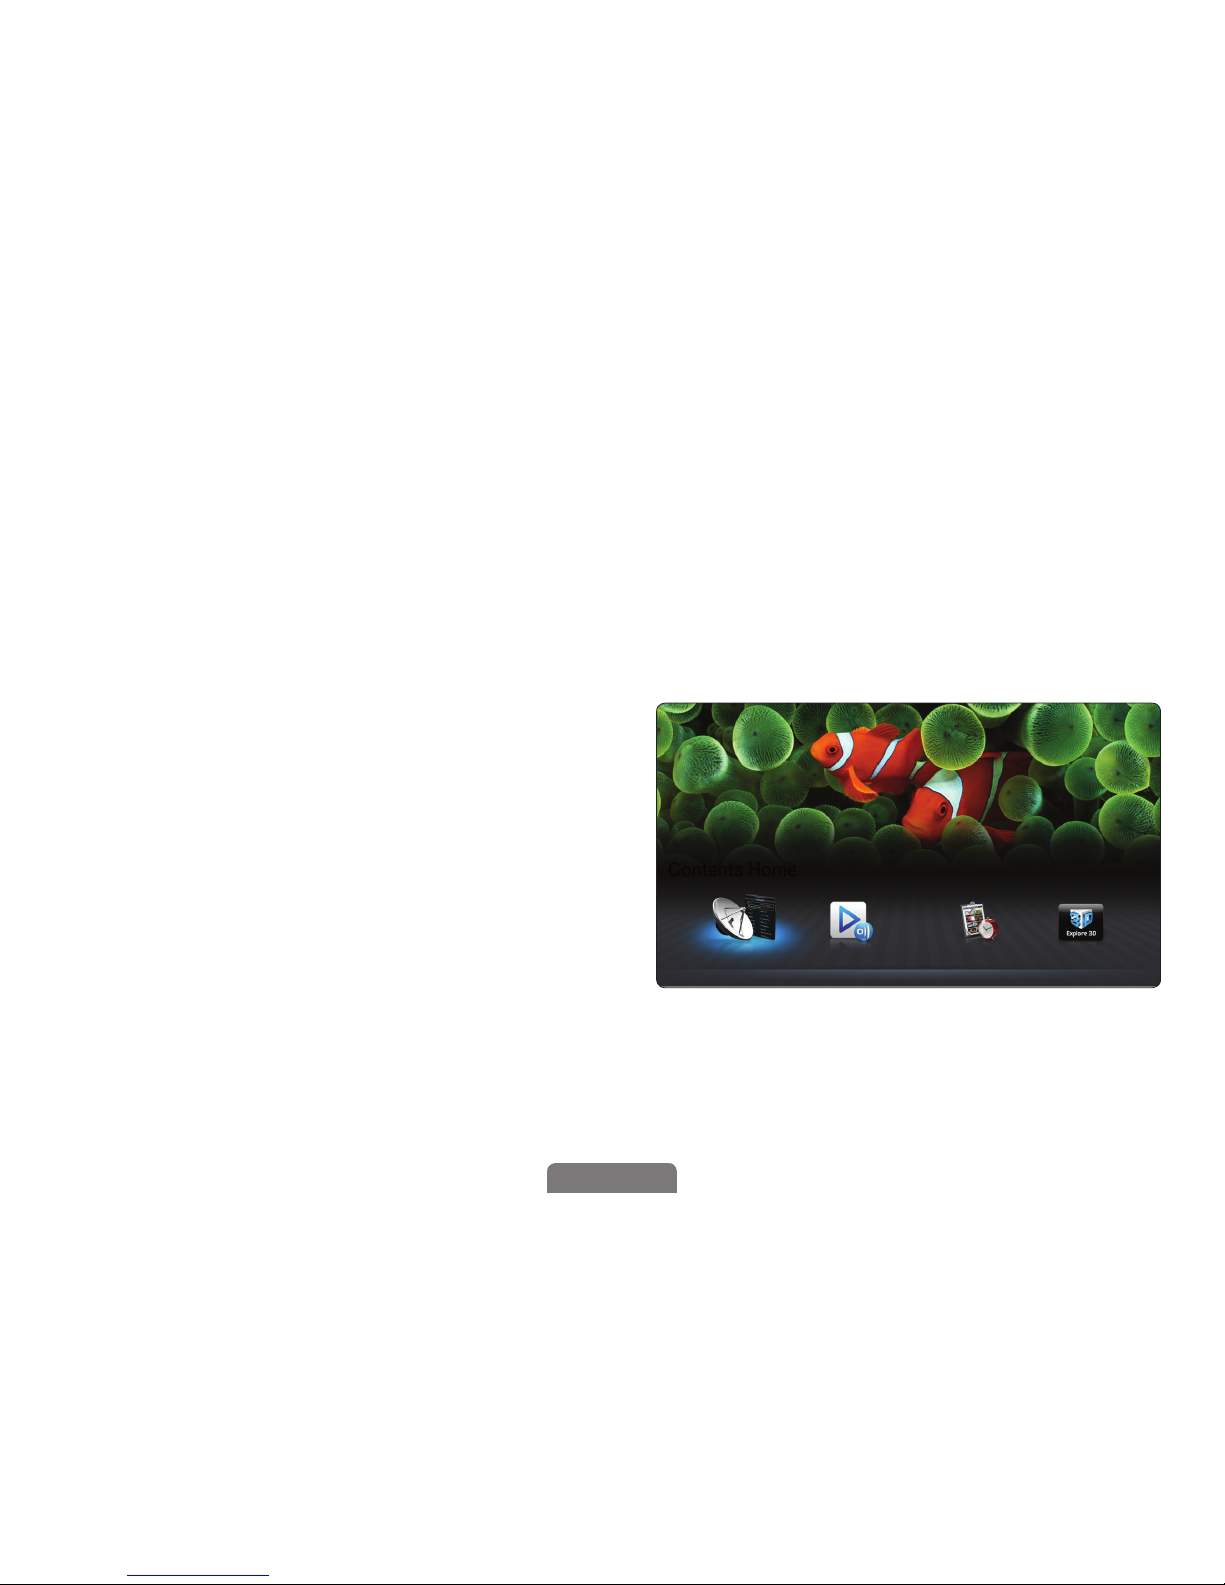
MENU → Support → Contents Home → Channel List → ENTER
E
The Channel List contains the
channels your TV displays (added
channels) when you press the CH LIST
button. On the Channel List, you can
view channel information, Added Ch.,
Favorites 1-5 and manage channels.
Contents Home
Channel List AllShare Play Schedule Manager Explore 3D
R
Return

◀ ▶
English
●
Added Ch.: Shows all added channels.
●
Favorites 1-5: Shows all favorite channels, arranged in up to five groups.
Each group has a separate screen.
N
The TV displays Favorites 1-5 only if you have added favorites using Edit
Favorites.
N
If you want to view the list of favorite channels quickly, press the CH LIST
button, and then press the ► (CH Mode) to display Favorites 1-5. If you
have favorites in more than one favorite group, press the ► (CH Mode)
to view the other groups. Press the ◄ (CH Mode) to return to the Added
Ch..

◀ ▶
English
N
Using the function buttons with the Channel List.
●
T
(Tools): Displays the option menu.
●
L
(CH Mode / Channel): Moves to the Favorites list (if you have added
favorites using Edit Favorites) / Moves to other channels when you
select the Program View in T (Tools) menu.
●
E
(Watch / Information): Press to watch the channel you selected. /
Displays details of the selected program.
●
k
(Page): Scrolls the Channel List to the next or previous page.

◀ ▶
English
How to use Schedule Viewing in Channel List (digital channels only)
You can use Schedule Viewing in Channel List to schedule a digital channel
program for viewing. The TV will turn on and display the digital channel program
when the program begins.
To schedule a digital program, follow these steps:
1. Press the CH LIST button, then select a desired digital channel.
2. Press TOOLS button, and then select the Program View. The program list
for that channel appears.
3. Press the
▲/▼
buttons to select the desired program, and then press the
ENTER
E
(Information) button.
4. Select Schedule Viewing, and then press the ENTER
E
button.
N
If you want to cancel Schedule Viewing, follow Steps 1 through 3, and then
select Cancel Schedule.

◀ ▶
English
Using Option Menu
t
Manage channels using the Channel List menu options (Program View, Edit
Favorites, Channel Name Edit, Delete, Information, Change Antenna, Edit
Mode).
1. Use the arrow buttons to select a channel, and then press the TOOLS button.
2. Select an option, and then press ENTER
E
to activate the option or change
its settings.
●
Program View (digital channels only): Displays the program when digital
channel is selected.

◀ ▶
English
●
Edit Favorites
t
: Set channels you watch frequently as favorites. Add
or delete the selected channel in Favorites 1-5.
1. Select Edit Favorites, and then press the ENTER
E
button. The Edit
Favorites screen appears.
2. The Edit Favorites screen has five groups, Favorites 1, Favorites 2,
etc. You can add a favorite channel to any one of the groups. Select a
group using the
▲/▼
buttons, and then press ENTER
E
.
3. Select OK, and then press ENTER
E
twice.
N
If you want to edit or delete the channel as being Favorites, change its
settings in Edit Favorites screen.

◀ ▶
English
●
Channel Name Edit (analog channels only): Assign a name of up to five
characters to a channel. For example, Food, Golf, etc. This makes it easier to
find and select the channel.
●
Delete: Delete a channel from the channel list. When you use the channel
button to change channels, your TV only displays the channels on the channel
list.
●
Information: Displays details of the selected program.
N
Press the Watch to switch the channel directly.
●
Change Antenna: Switches to Air or Cable.
●
Edit Mode: You can select desired channels and edit it. For detailed
information about using Edit Mode, refer to “Using Option Menu in Edit
Mode”.

◀ ▶
English
Using Option Menu in Edit Mode
t
Press the ◄ / ► button to select the channel mode (Added Ch. / All
Channels / Favorites 1-5).
●
Added Ch.: Shows all added channels.
●
All Channels: Shows all currently available channels.
●
Favorites 1-5: Shows all favorite channels. The TV displays Favorites
1-5 only if you have added favorites using Edit Favorites.
Set each channel using the menu options (Edit Favorites, Add / Delete,
Information, Deselect, Select All). The option menu items that appear may
differ depending on the channel status and type.

◀ ▶
English
1. Press the TOOLS button in Channel List screen, then select the Edit
Mode. A check box appears to the left of the channel.
2. Press the
▲/▼
buttons to select the desired channel, and then press
ENTER
E
button. The (c) mark indicates the channel you’ve selected.
N
You can select more than one channel.
N
Press ENTER
E
button again to deselect the channel.
3. Press the TOOLS button, then select a function and change its settings.
●
Edit Favorites: Set the selected channels you watch frequently as
favorites.
N
The Edit Favorites screen has five groups (Favorites 1, Favorites 2,
etc.). You can add a favorite channel to any one of the groups. Press
the
▲/▼
buttons to select a group.

◀ ▶
English
●
Add / Delete: Delete or add a channel to display the channels you want.
N
The Add menu is only available in All Channels.
N
The Add menu only appears for deleted channels.
N
A gray-colored channel indicates the channel has been deleted.
●
Information: Displays details of the selected program.
N
Press the Watch to switch the channel directly.
●
Deselect: Deselect the selected channels.
●
Select All: Select all the channels in the channel list.

◀ ▶
English
■Schedule Manager
O
MENU → Support → Contents Home → Schedule Manager →
ENTER
E
Select the schedule menu item to access the Schedule Viewing function.
Schedule Viewing lets you display the channel you want at the time of your
choice.
Using Option Menu
t
You can set the TV to display a desired channel automatically on a day and at a
time of your choice. Set each channel using the menu options (Cancel Schedule,
Edit Schedule, Manually Schedule)
N
You must set the current time first using the Time → Clock function in the
System menu to use this function.

◀ ▶
English
To use Schedule Viewing, follow these steps:
1. Press the TOOLS button on the Schedule Manager screen. Press the
Manually Schedule to add a scheduled viewing.
N
You can press the a (Manually Schedule) directly on the Schedule
Manager screen.
2. Press the
◄/►/▲/▼
buttons to set Antenna, Channel, Repeat, Date, and
Start Time.
●
Antenna: Select the desired broadcasting signal.
●
Channel: Select the desired channel.

◀ ▶
English
●
Repeat: Select Once, Manual, Sat~Sun, Mon~Fri or Everyday. If you
select Manual, you can set the day you want.
N
A check (c) mark indicates a day you selected.
●
Date: You can set a desired date.
N
Date is available only when you select Once in Repeat.
●
Start Time: You can set the start time you want.
N
If you want to edit or cancel a scheduled viewing, select the scheduled
viewing on the Booking List. Press the TOOLS button and select Edit
Schedule or Cancel Schedule.

◀ ▶
English
❑Memorizing channels
O
MENUm → Channel → ENTER
E
Your TV memorizes channels and adds the memorized channels to the Channel
List with the Auto Program function. Before your TV can memorize channels,
you must specify the signal source, either Air or Cable. If you select cable, when
you start Auto Program, you must also specify the cable system type, STD,
HRC, or IRC. If you don’t know your cable system type, contact your local cable
company for the information. Most cable companies use STD.

◀ ▶
English
■Antenna (Air / Cable)
t
To begin the memorizing procedure, follow these steps:
1. Push MENU
m
→ Channel → ENTER
E
.
2. Select Antenna, and then press ENTER
E
.
3. Select the source of your TV signal, Air or Cable. Go to the next section,
Auto Program.
N
Selecting Air or Cable also changes the actual signal input from Air to Cable
or Cable to Air.

◀ ▶
English
■Auto Program
Scans for channels automatically and stores them in the TV’s memory.
To start Auto Program, follow these steps:
1. Push MENU
m
→ Channel → ENTER
E
.
2. Select Auto Program, and then press ENTER
E
.
3. Select Start, and then press ENTER
E
.
4. Select Air or Cable or both by highlighting and then pressing ENTER
E
.
N
If you selected Air or Cable or both on the Antenna screen, your choice
will already be selected.
5. Select Next, and then press ENTER
E
.
6. If you selected Cable, the cable system screen appears. Select Digital Cable
System, and then press ENTER
E
.
N
If you selected Air only, Auto Program starts.

◀ ▶
English
7. Select STD, HRC, or IRC, and then press ENTER
E
.
8. Repeat for Analog Cable System.
9. Select Next, and then press ENTER
E
. Auto Program starts.
N
After all the available channels are stored, Auto Program removes scrambled
channels. When done, the Auto Program menu then reappears. This
process can take up to 30 minutes.
How to Stop Auto Programming
1. Press the ENTER
E
button to select Stop.
2. A message will ask Stop Auto Program? Select Yes by pressing the ▲ or ▼
button.
3. Press the ENTER
E
button.

◀ ▶
English
❑Other Features
O
MENUm → Channel → ENTER
E
■Clear Scrambled Channel
This function filters out scrambled channels after Auto Program is completed.
This process may take up to 20~30 minutes.
How to Stop the Clear Scrambled Channels Function
1. Press the ENTER
E
button to select Stop.
2. Press the ▲ button to select Yes.
3. Press the ENTER
E
button.
N
This function is only available in Cable mode.

◀ ▶
English
■Fine Tune
(analog channels only)
If the reception is clear, you do not have to fine tune the channel, as this is done
automatically during the search and store operation. If the signal is weak or
distorted, fine tune the channel manually.
●
Select Fine Tune in the Channel menu.
N
Fine tuned channels that have been saved are marked with an asterisk “*” on
the right-hand side of the channel number in the channel banner.
N
To reset the fine-tuning, select Reset.

◀ ▶
English
❑Changing the Preset Picture Mode
■Picture Mode
t
O
MENUm → Picture → Picture Mode → ENTER
E
Picture modes apply preset adjustments to the picture. Select a mode using the
▲/▼
buttons, and then press ENTER
E
.
N
When connecting a PC, you can only select Entertain and Standard.
●
Dynamic: Suitable for a bright room.
●
Standard: Suitable for a normal environment.
●
Natural: Suitable for an eye comfortable display.
●
Movie: Suitable for watching movies in a dark room.
●
Entertain: Suitable for watching movies and games.
N
It is only available when connecting a PC.
Basic Features

◀ ▶
English
❑Adjusting Picture Settings
■Backlight / Contrast / Brightness / Sharpness / Color / Tint (G/R)
O
MENUm → Picture → Backlight → ENTER
E
Your television has several options for adjusting picture quality. Select an option
using the
▲/▼/◄/►
buttons, and then press ENTER
E
.
N
NOTE
●
When you make changes to Backlight, Contrast, Brightness,
Sharpness, Color or Tint (G/R), the OSD will be adjusted accordingly.
●
When connecting a PC, you can only make changes to Backlight,
Contrast, Brightness, and Sharpness.
●
You can adjust and store settings for each external device connected to
the TV.
●
Lowering picture brightness reduces power consumption.

◀ ▶
English
■Screen Adjustment
O
MENUm → Picture → Screen Adjustment → ENTER
E
Screen Adjustment provides various picture size and aspect ratio options. Select
an option using the
▲/▼/◄/►
buttons, and then press ENTER
E
.
●
Picture Size: If you have a cable box or satellite receiver, it may have its own
set of screen sizes as well. However, we highly recommend you use your TV’s
16:9 mode most of the time.
16:9: Sets the picture to 16:9 wide screen mode.
Zoom1: Magnifies the picture moderately. Cuts off the top and sides.
Zoom2: Magnifies the picture more than Zoom1.
Wide Fit: Enlarges the aspect ratio of the picture so it fits the entire screen.

◀ ▶
English
4:3: Sets the picture to 4:3 mode. For analog TV programs.
N
Do not set your TV to 4:3 format for a long time. The borders displayed
on the left and right, or top and bottom of the screen may cause image
retention (screen burn) which is not covered by the warranty.
Screen Fit: When your TV inputs HDMI (720p / 1080i / 1080p) or Component
(1080i / 1080p) signals, displays the full image without any cut-off.
Smart View 1: Reduces original screen by 50%.
Smart View 2: Reduces original screen by 25%.
N
NOTE
●
Smart View 1 is enabled only in HDMI mode.
●
Smart View 2 is enabled only in DTV and HDMI modes.

◀ ▶
English
●
Position: Adjusts the picture position. Position is only available if Picture size
is set to Zoom1, Zoom2, Wide Fit, or Screen fit.
N
To use the Position function after selecting Zoom1, Zoom2 or Wide Fit,
follow these steps:
1. Select the Position, and then press the ENTER
E
button.
2. Select the Position button, and then press ENTER
E
.
3. Press the ▲ or ▼ button to move the picture up or down.
4. Press the ENTER
E
button.
N
If you want to reset the pictures to its original position, select Reset in the
Position screen, and then press ENTER
E
. The picture will be reset to
its default position.

◀ ▶
English
N
To use the Position function after selecting Screen Fit when connected
to an HDMI (1080i/1080p) or Component (1080i/1080p) source, follow
these steps:
1. Select the Position, and then press the ENTER
E
button.
2. Select the Position button, and then press ENTER
E
.
3. Press the
▲, ▼, ◄
or ► button to move the picture.
4. Press the ENTER
E
button.
N
If you want to reset the pictures to its original position, select Reset in the
Position screen, and then press ENTER
E
. The picture will be reset to
its default position.

◀ ▶
English
N
The picture size can vary depending on the input resolution when you
play content using Videos in AllShare Play.
N
HD (High Definition): 16:9 - 1080i/1080p (1920x1080), 720p (1280x720)
N
You can adjust and store settings for each external device you have
connected to an input on the TV.
N
Picture Sizes available by Input Source:
Input Source Picture Size
DTV (1080i, 1080p) 16:9, Wide Fit, 4:3, Screen Fit, Smart View 2
DTV (720p) 16:9, Wide Fit, 4:3, Smart View 2
DTV (480i, 480p) 16:9, Zoom1, Zoom2, 4:3, Smart View 2
ATV, AV 16:9, Zoom1, Zoom2, 4:3
Component (1080i, 1080p) 16:9, Wide Fit, 4:3, Screen Fit
Component (720p) 16:9, Wide Fit, 4:3
Component (480i, 480p) 16:9, Zoom1, Zoom2, 4:3
HDMI (720p, 1080i, 1080p) 16:9, Wide Fit, 4:3, Screen Fit, Smart View 1, Smart View 2

◀ ▶
English
❑Changing the Picture Options
■Advanced Settings
O
MENUm → Picture → Advanced Settings → ENTER
E
Advanced Settings are available in the Standard and Movie modes.
To use, select an option using the
▲/▼/◄/►
buttons, and then press
ENTER
E
.
N
When connecting a PC, you can only make changes to White Balance and
Gamma.
◀ ▶
English
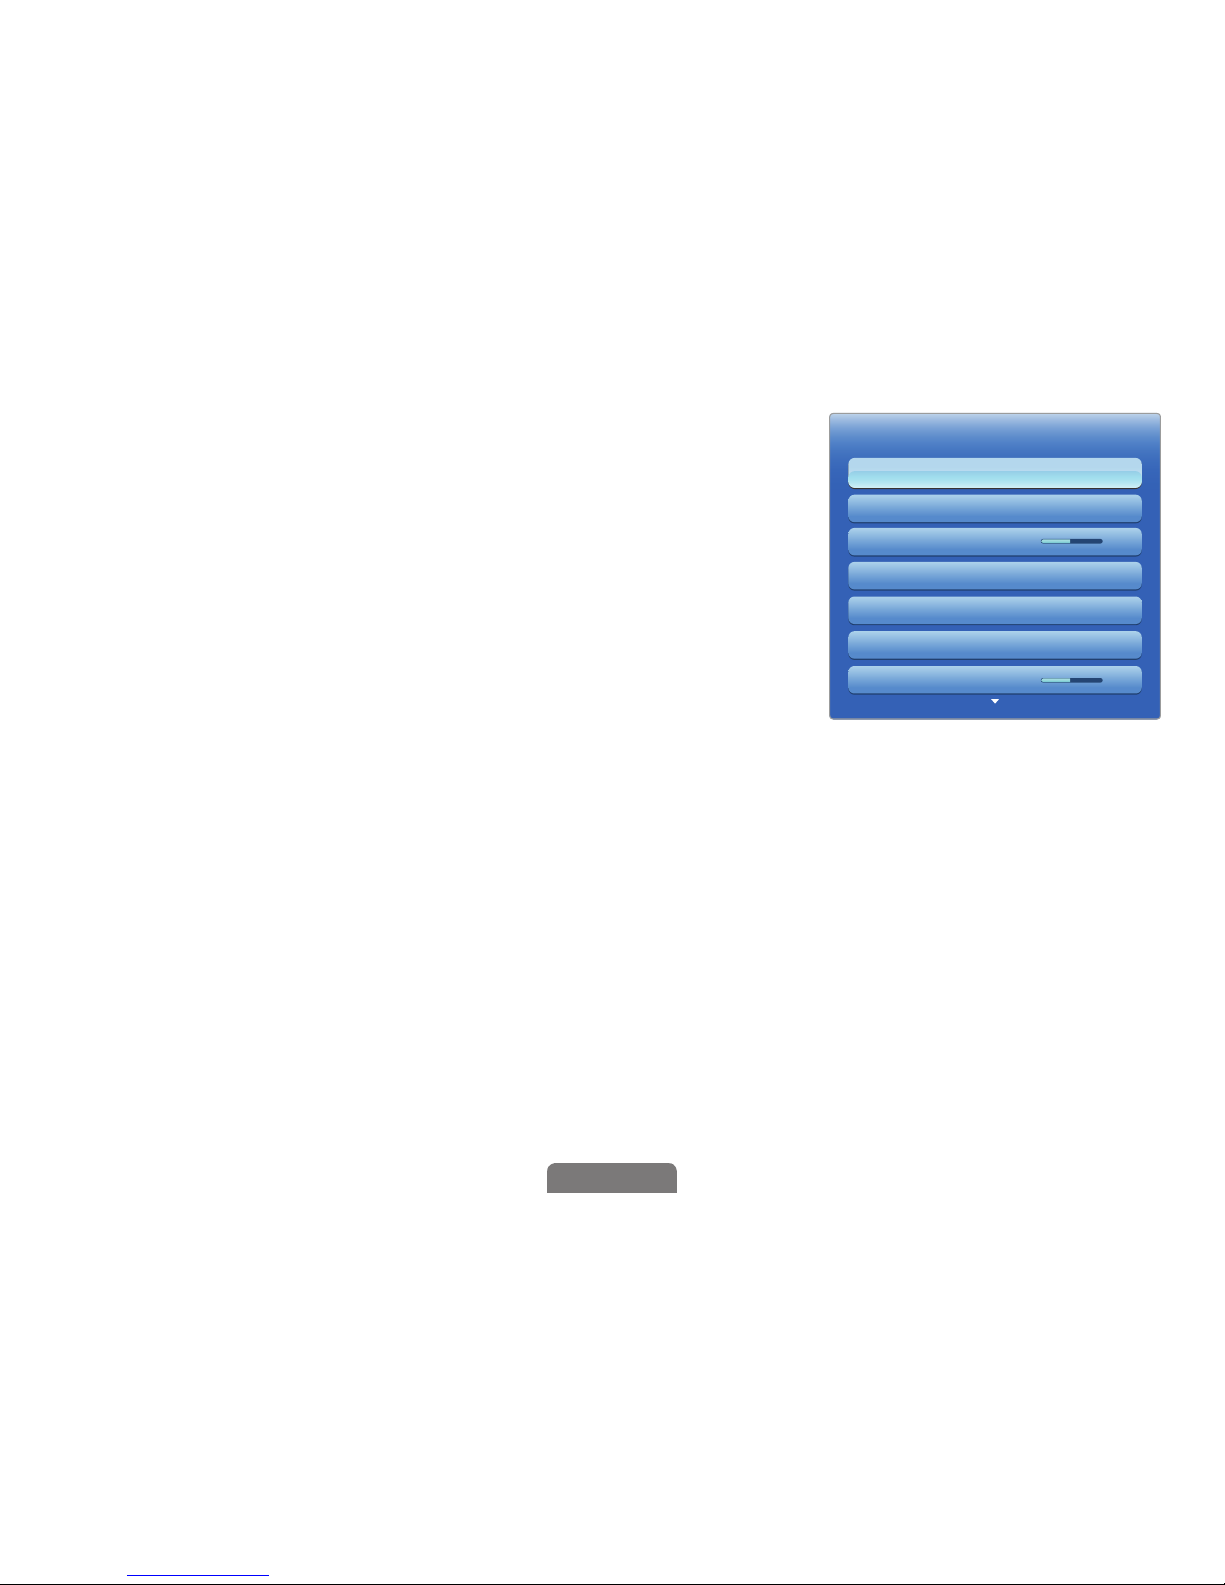
●
Dynamic Contrast (Off / Low / Medium / High):
Adjusts the screen contrast.
●
Black Tone (Off / Dark / Darker / Darkest):
Select the black level to adjust the screen depth.
●
Flesh Tone: Emphasizes pink “Flesh Tone.”
●
RGB Only Mode (Off / Red / Green / Blue):
Displays the Red, Green and Blue color for
making fine adjustments to hue and saturation.
●
Color Space (Auto / Native): Adjusts the range of colors (the color gamut)
available to create images.
Advanced Settings
RGB Only Mode Off
Color Space Native
White Balance
Gamma 0
Flesh Tone 0
Black Tone Off
Dynamic Contrast Medium
 Loading...