How it Works
Log In / Sign Up
Buy Points
How it Works
FAQ
Contact Us
Questions and Suggestions
Users
Samsung
Loading...
T
T32E310
T32E310EW
2
T32E310EX
6
T32E316
T32E316EX
T32E390SX
T32H390FEV
T336
T349
2
T359
T359 Series
T359 Smiley
T369
T369R
T377P
T377T
T400
T410
T429 - SGH Cell Phone
T456
T479B
2
T500
T500-1BD
T508
2
T5300
T539
T550
T555
T580
T589
T599
2
T6-12Sc
T669
2
T669B
2
T669Y
T679M-UG
t705
T729
T746
3
T749
T749 Series
T759
t805
T807A
t809
T85NB/US
T878U
T919
T939
T959
T978U
T999N
2
TA300
2
TA350
5
TA550
4
TA750
2
ta7680
TA950
2
TAB 3 LITE
Tab4
TAB A
TAB E
3
Tablet
2
Tab S
TAB S2
4
TAB S3
TAB S4
TAD-798
Tantus HCJ555W
Tantus HCJ655W
Tantus HPM5027
TB14A53X/RAD
TB14A53X-XSA
9
TB-14C52S
12
TB14C52S/XEC
2
TB14C5DT2S
TB14C5DT2S-XEC
9
TB14C5DT2S-XET
2
TB14C5S2S-XEG
2
TB14C5T2S-XEC
2
TB-14CDT2S
11
TB15X5
TB20A53X
8
TB20A53/XSA
TB-20C52S
12
TB20C52S-XET
2
TB-20C5DF2S
12
TB20C5DF2S-XEG
2
TB20C5DF2S-XET
2
TB20C5DT2S
TB20C5DT2S-XEC
12
TB-21B5DF2S
12
TB21B5DF2S-XEC
2
TB300
2
TB331VBZ1S-XEG
TB-331VDZ1S
13
TB-501VDZ1S
12
TB 550
TB-CH
TB-WH
2
Loading...
Loading...
Nothing found
T978U
User Manual
158 pgs
7.11 Mb
0
Table of contents
Loading...
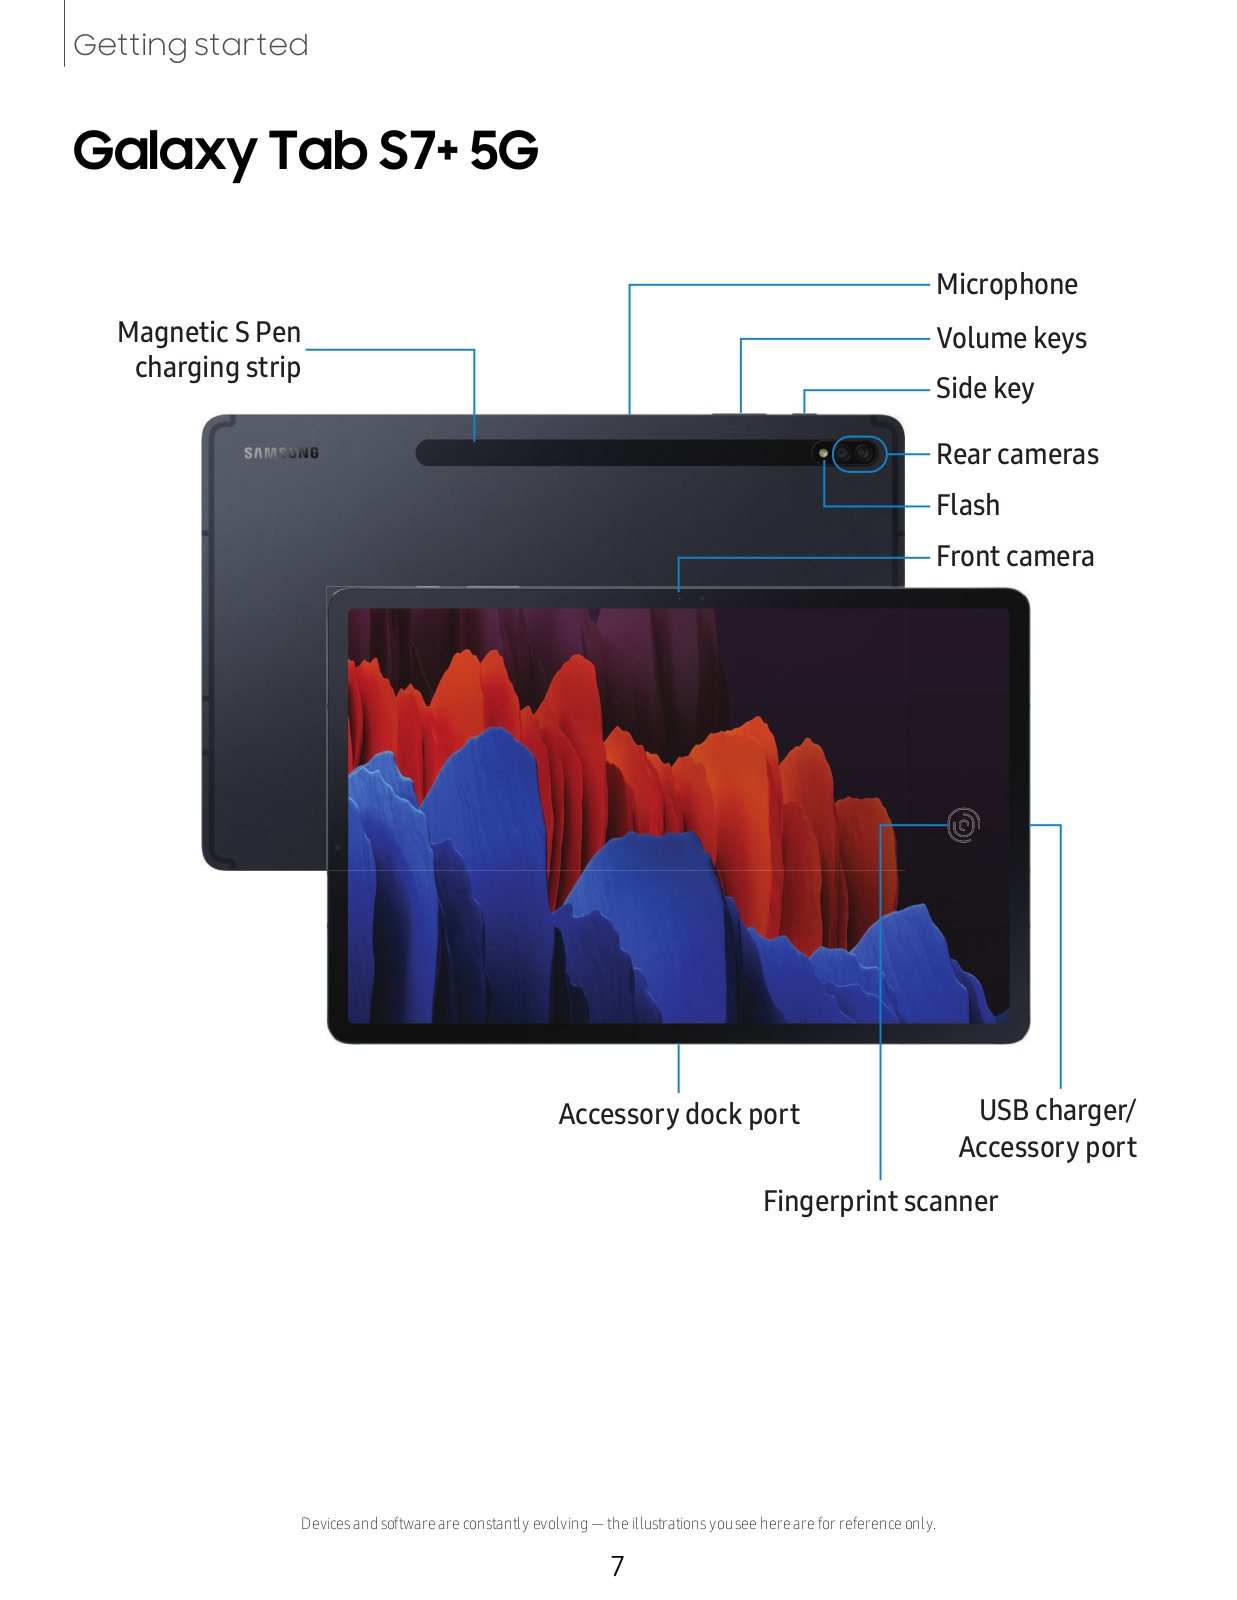
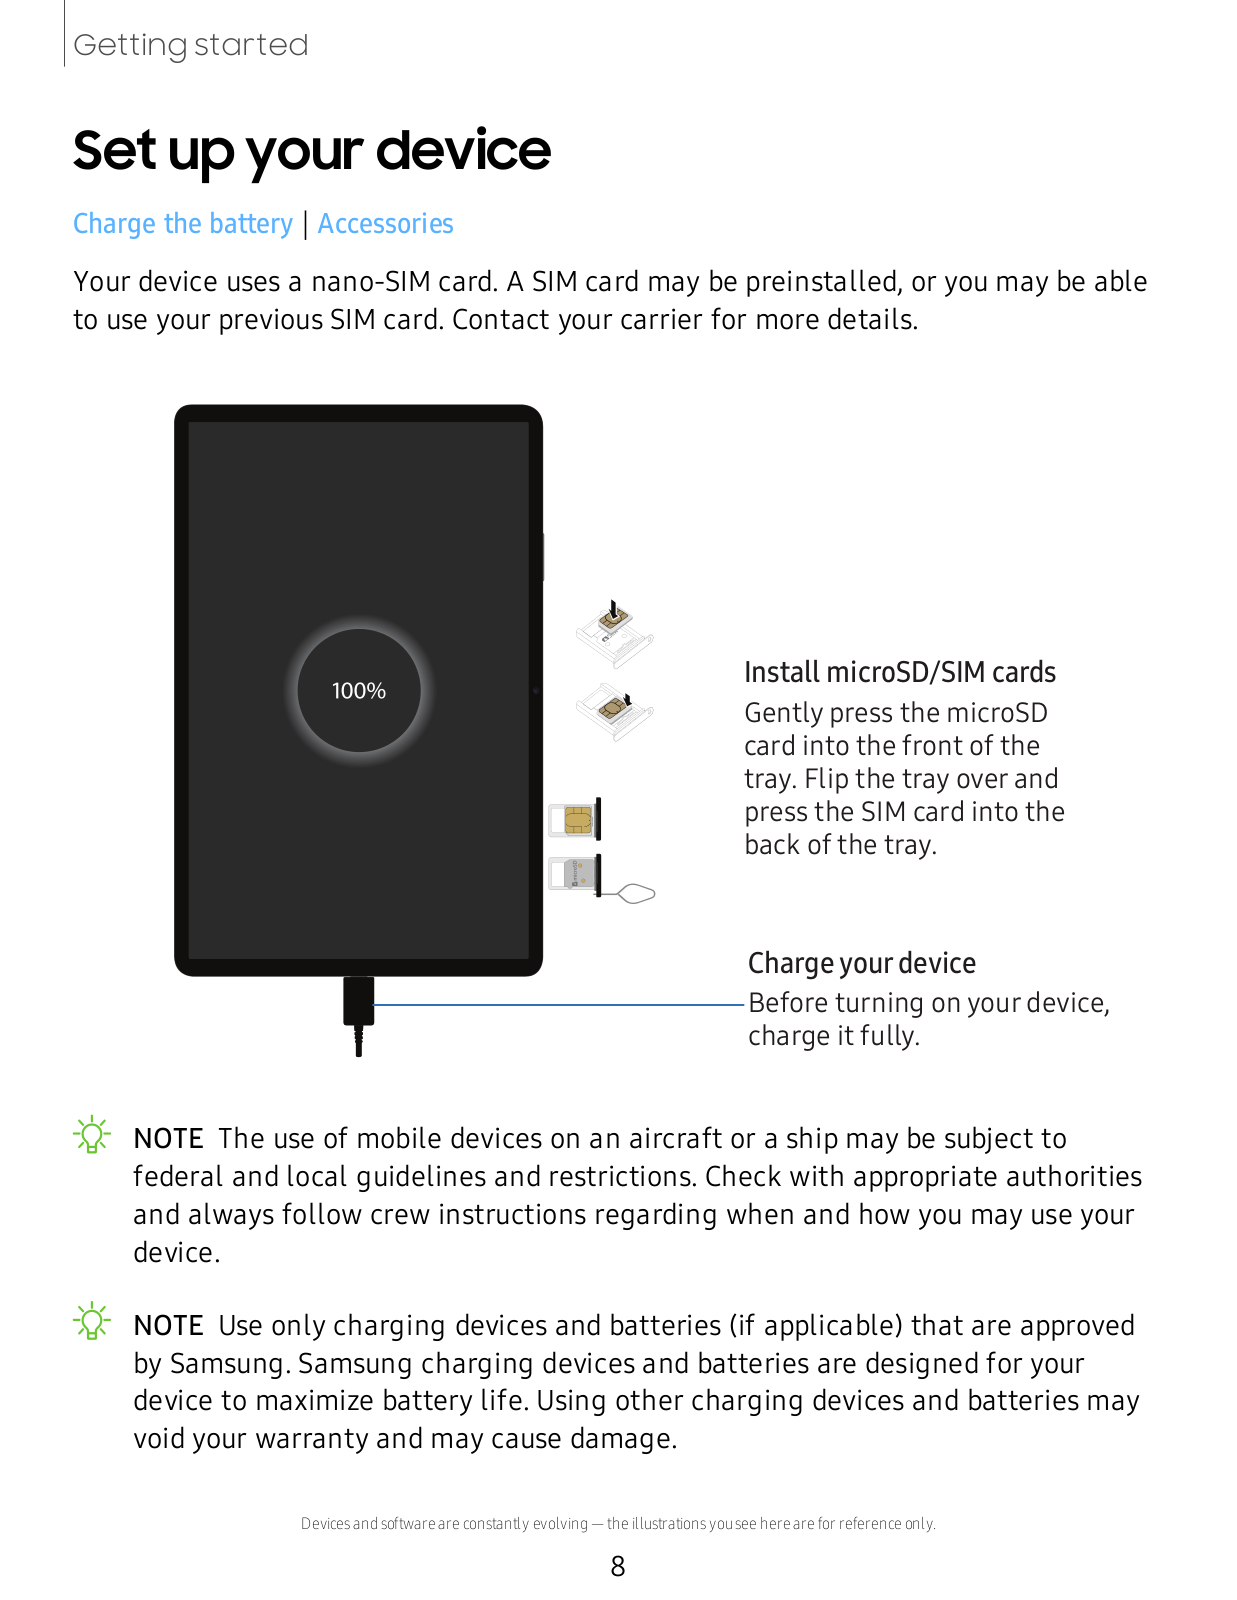
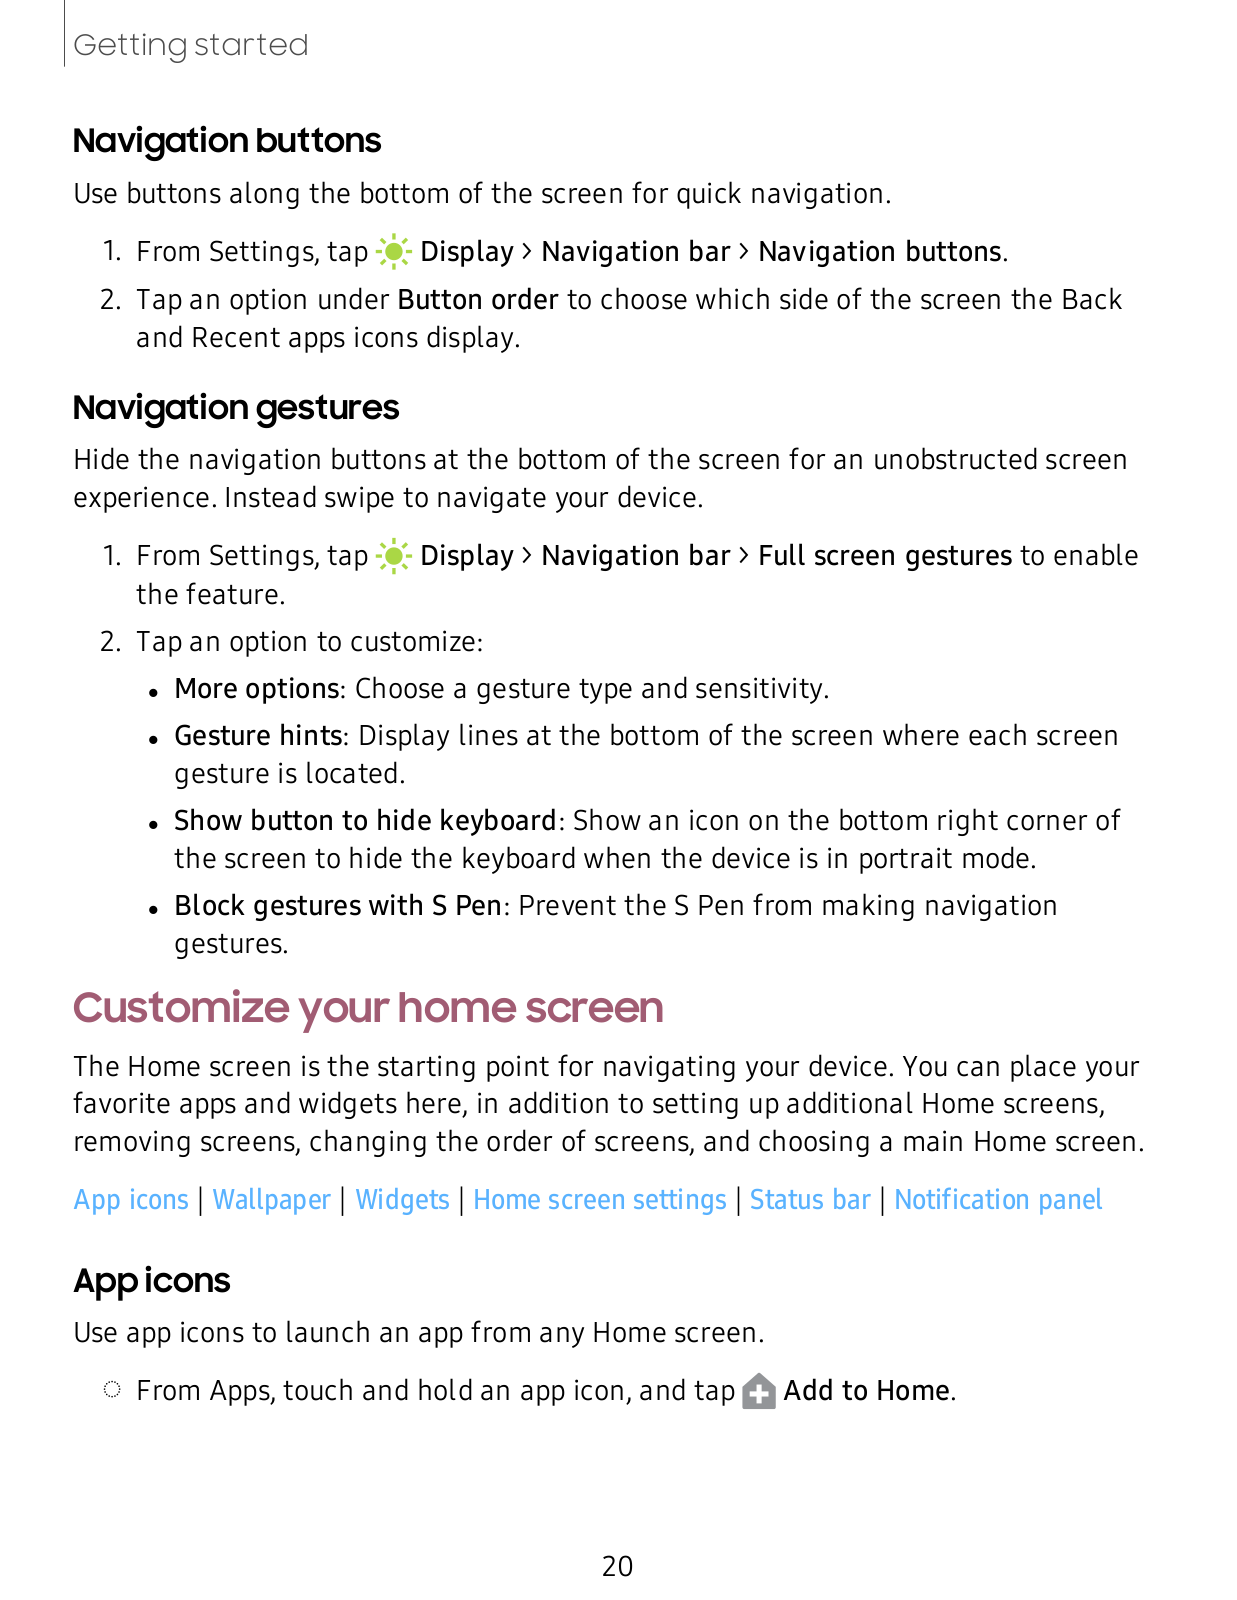
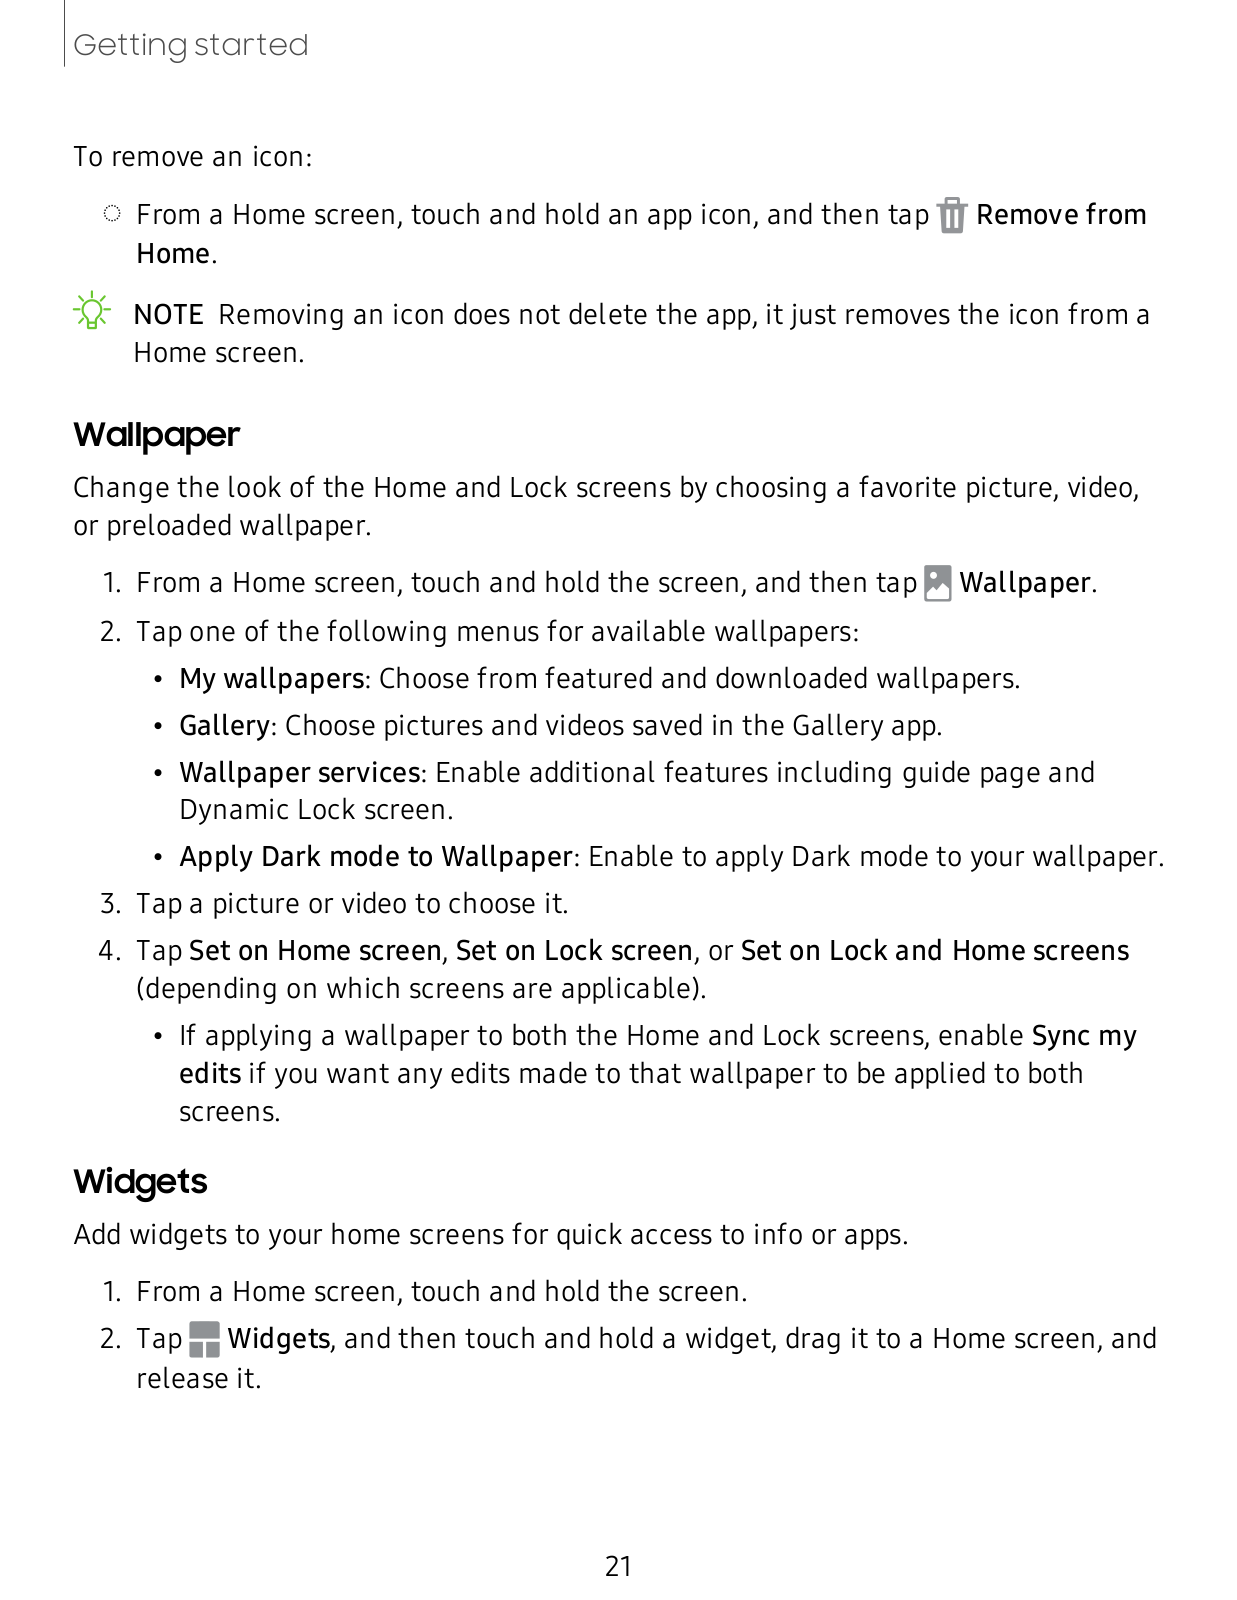
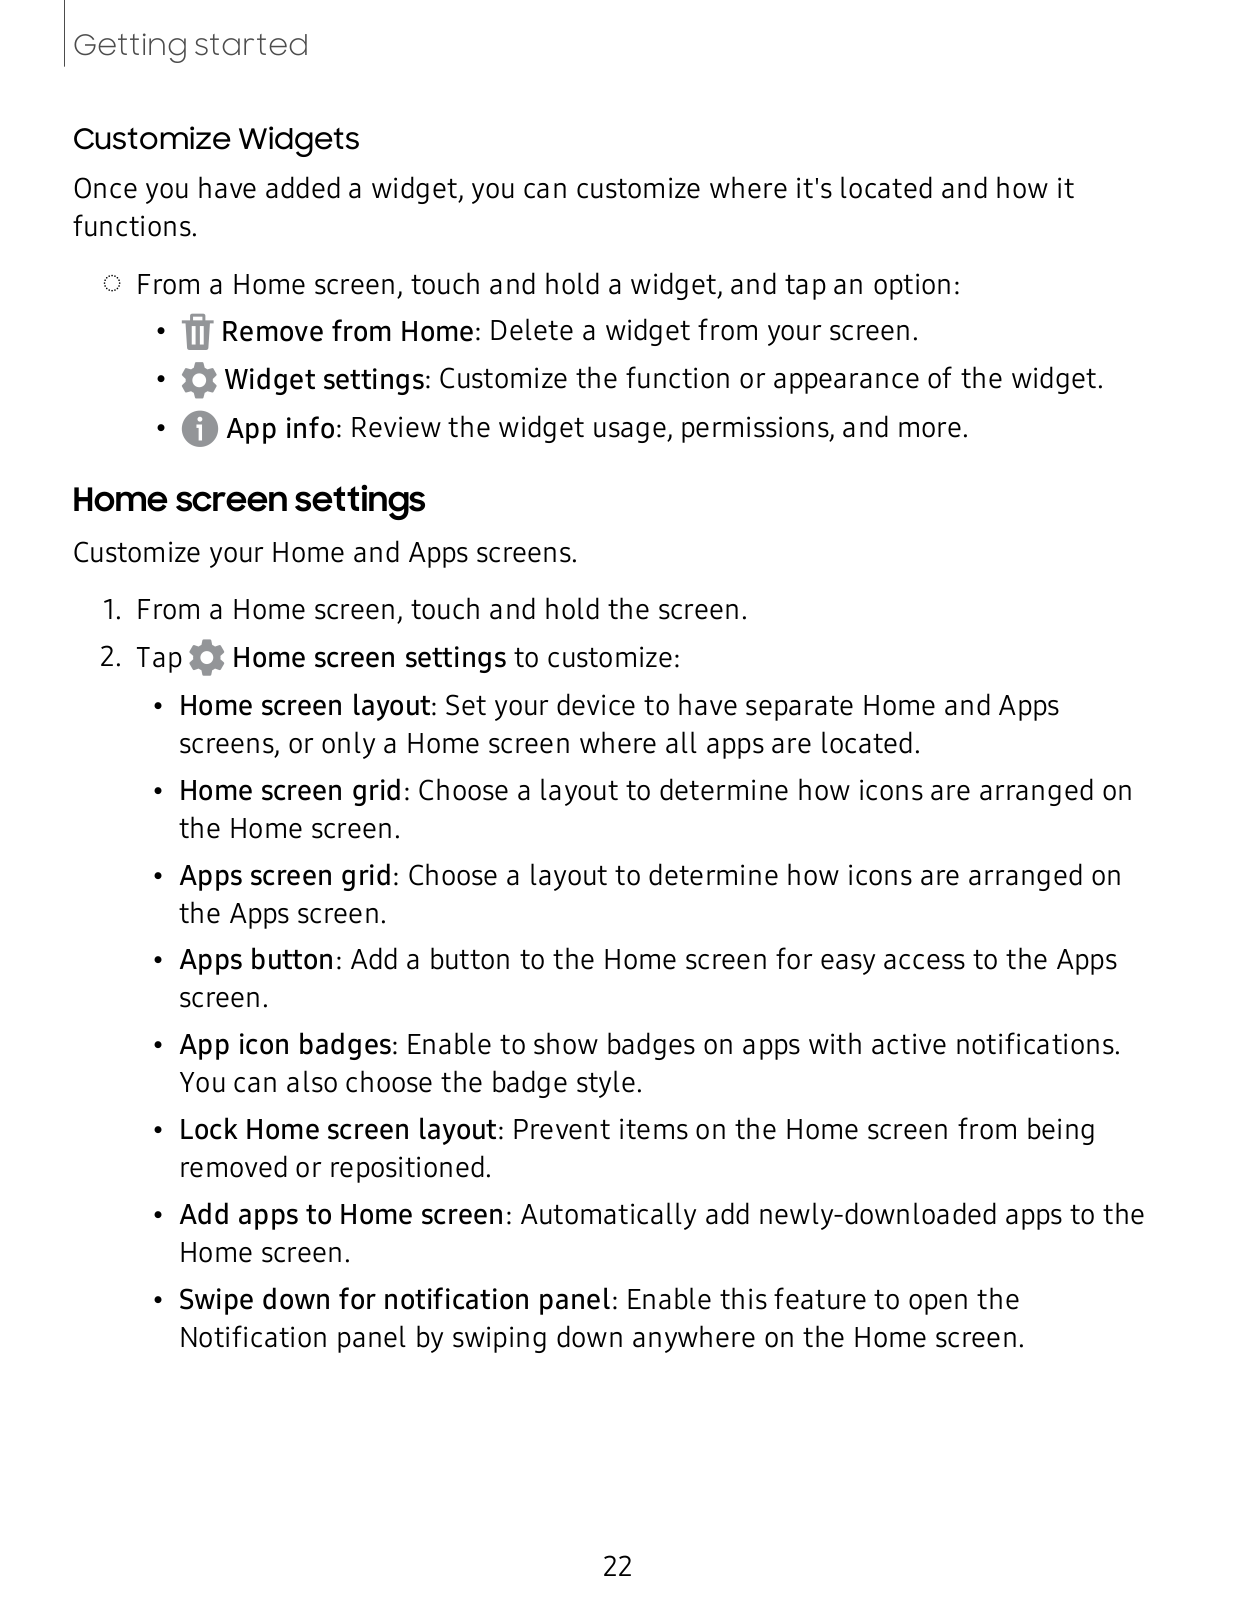
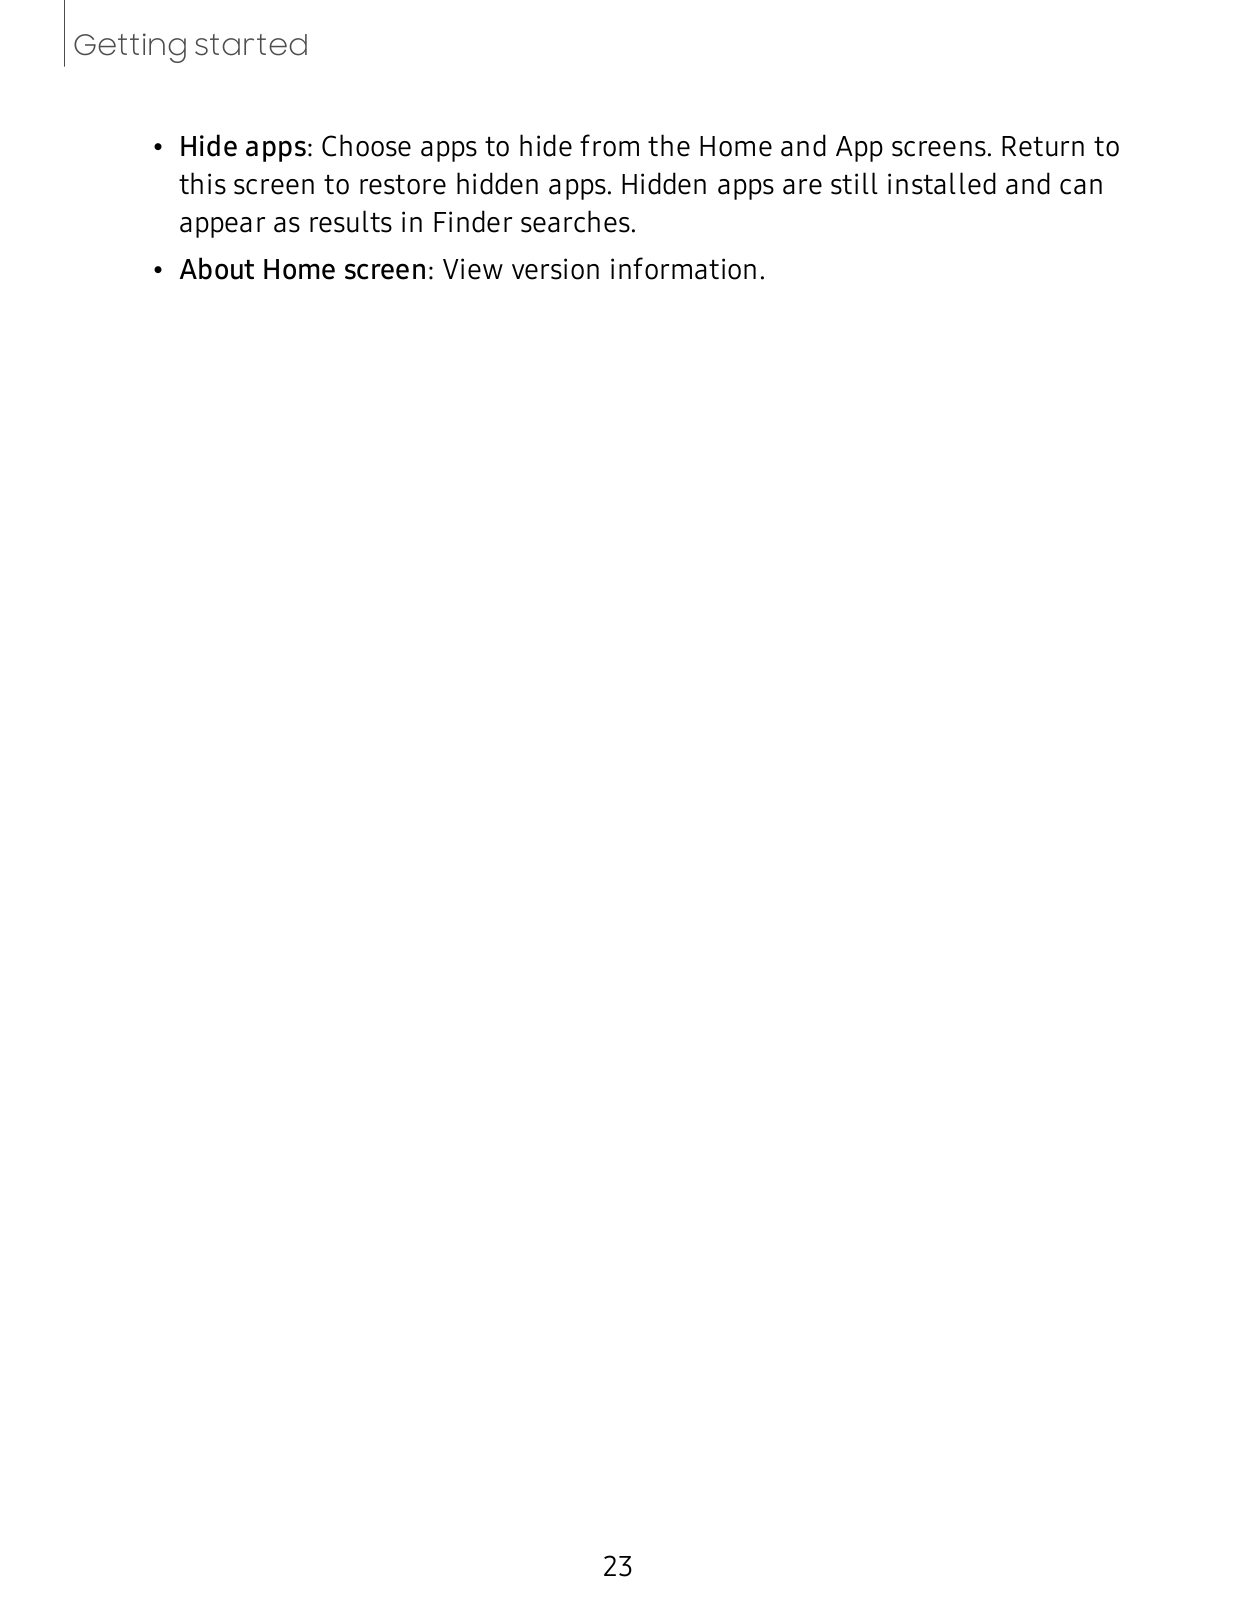
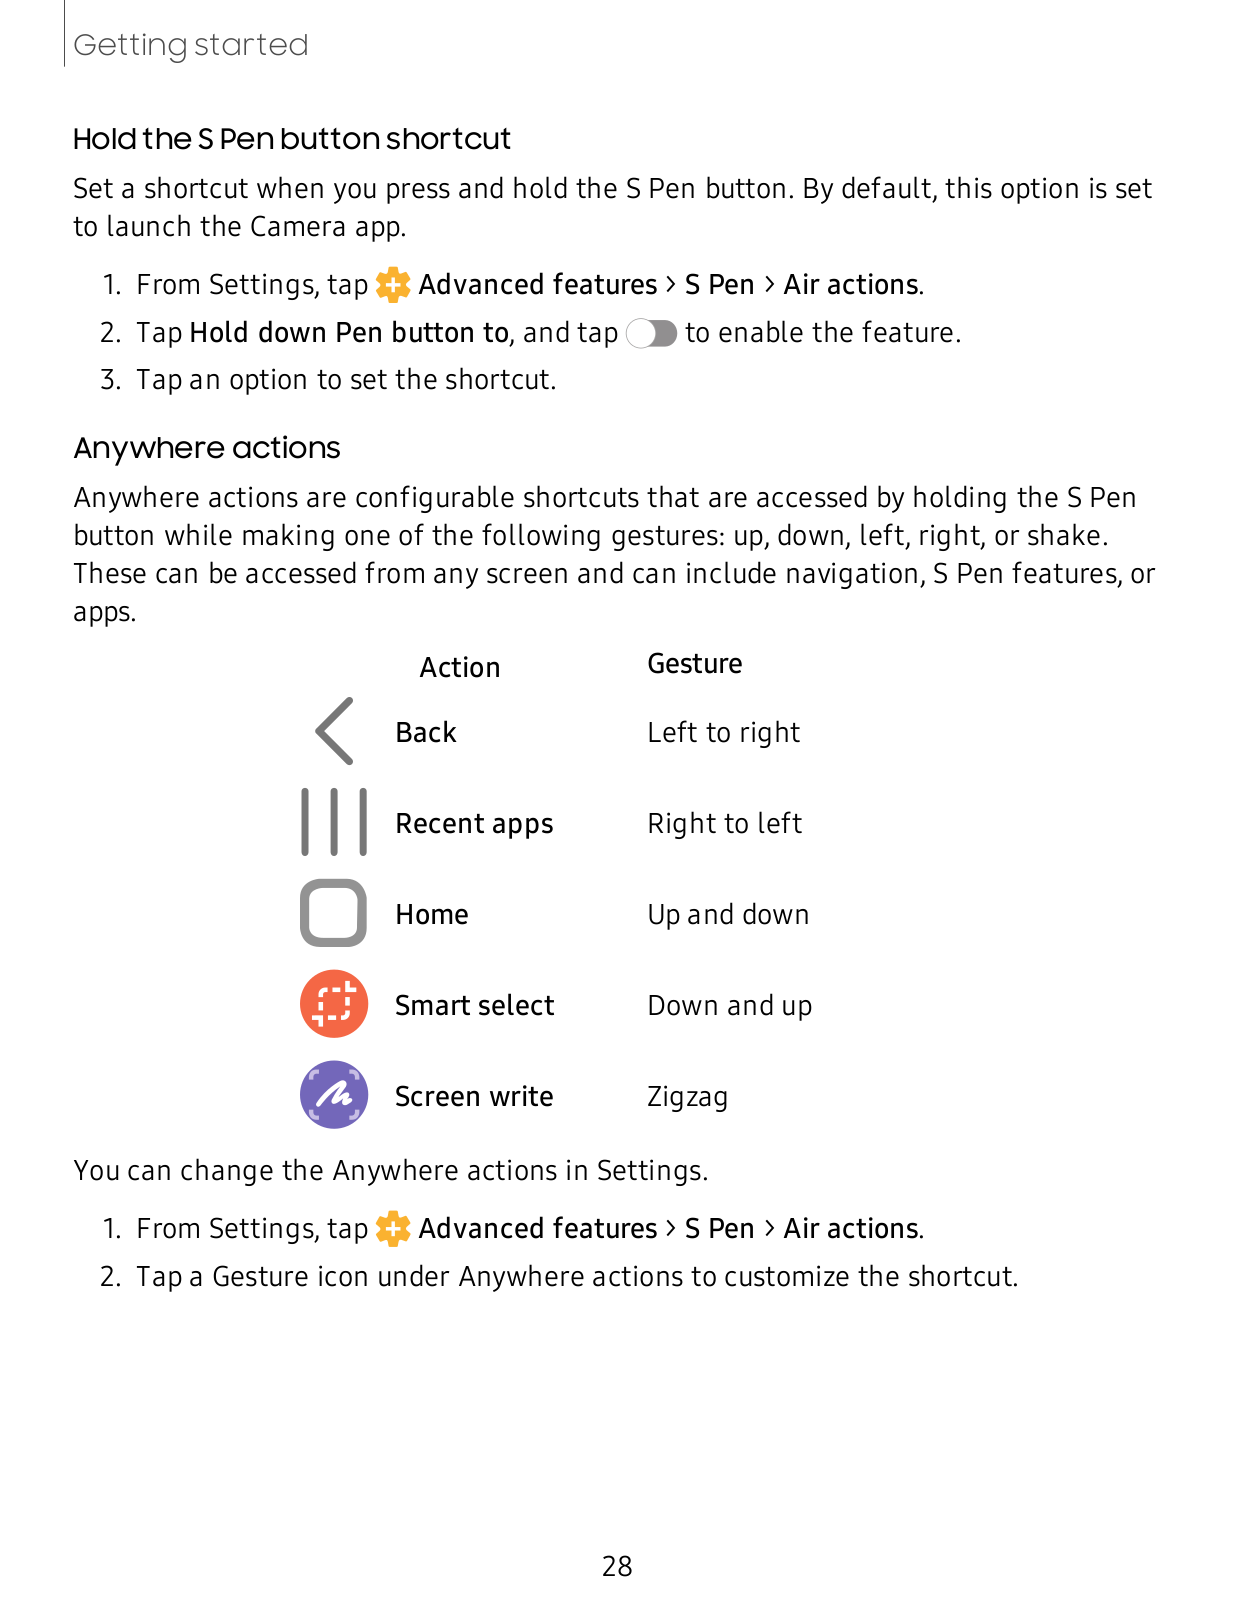
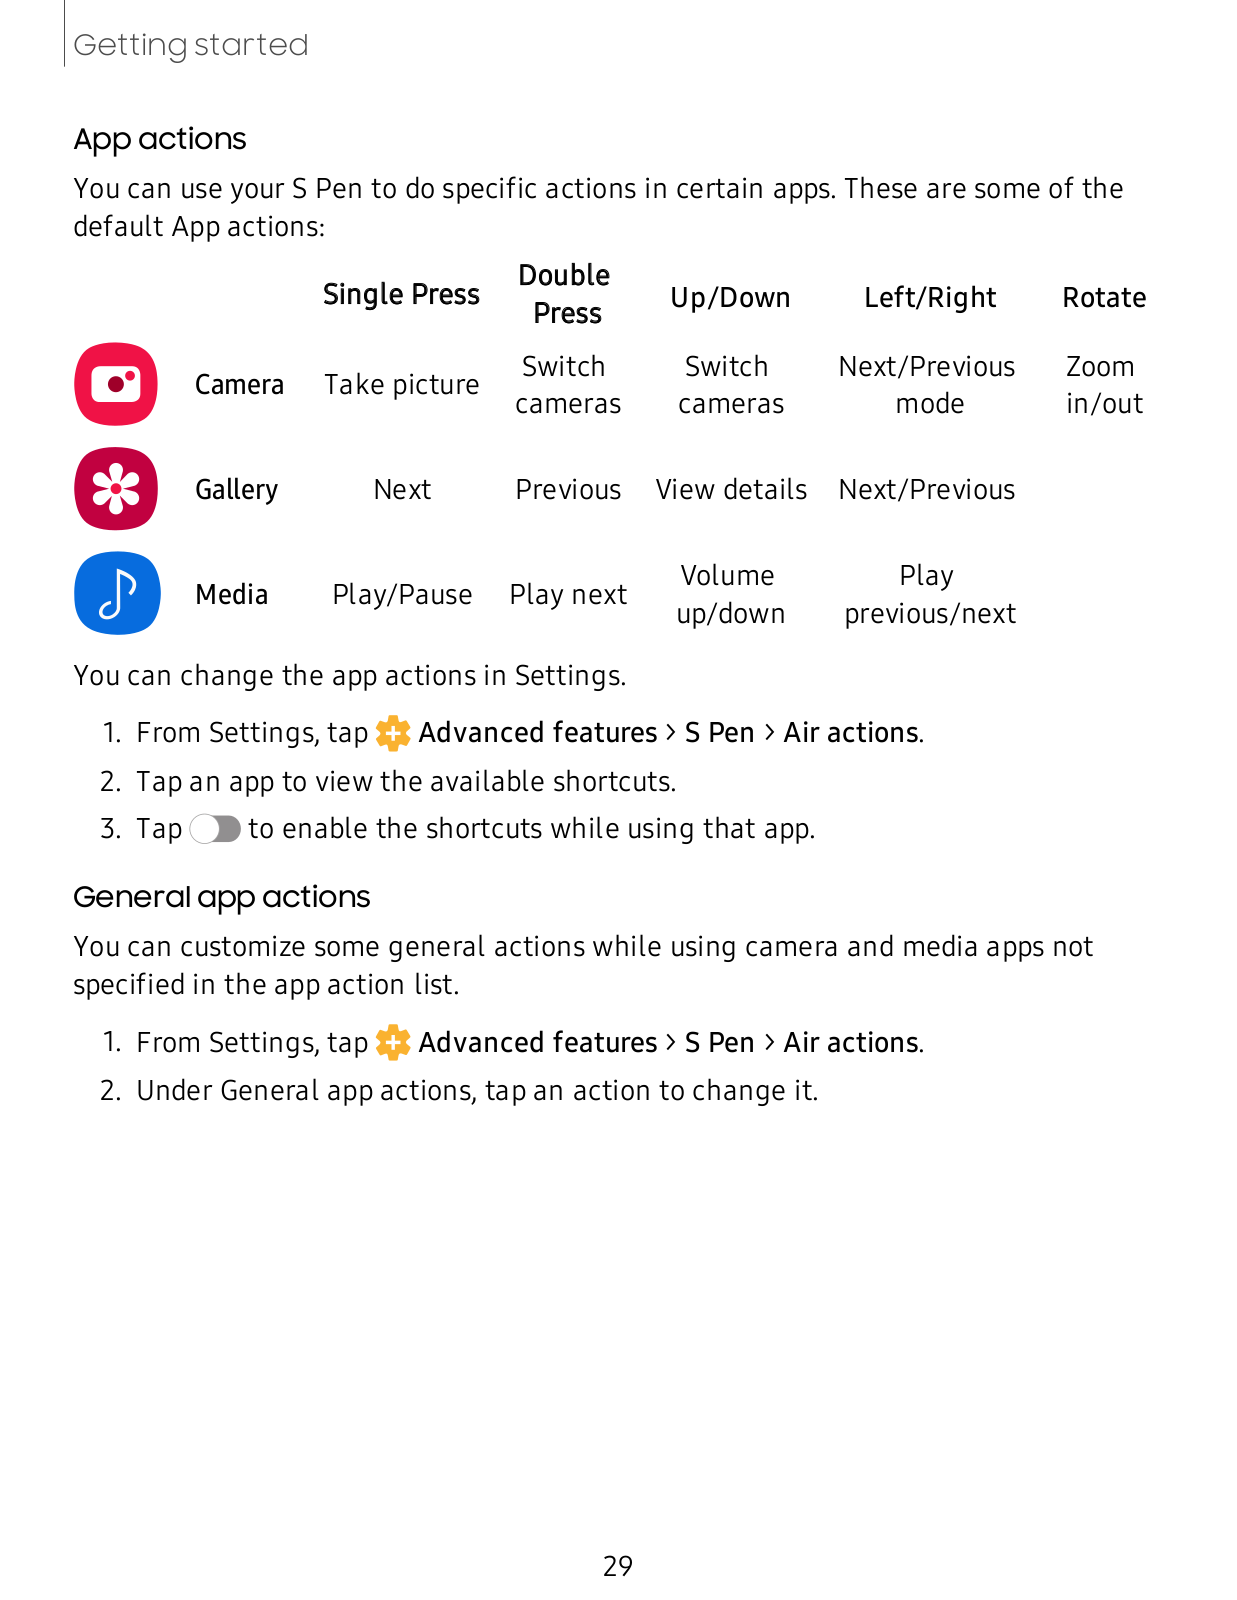
Samsung T878U, T978U User Manual
...
Samsung User Manual
Download
Specifications and Main Features
Frequently Asked Questions
User Manual
Download
Loading...
+
128
hidden pages
Unhide
You need points to download manuals.
1 point = 1 manual.
You can buy points or you can get point for every manual you upload.
Buy points
Upload your manuals
 Loading...