

Page 1
LCD TV
QUICK SETUP GUIDE
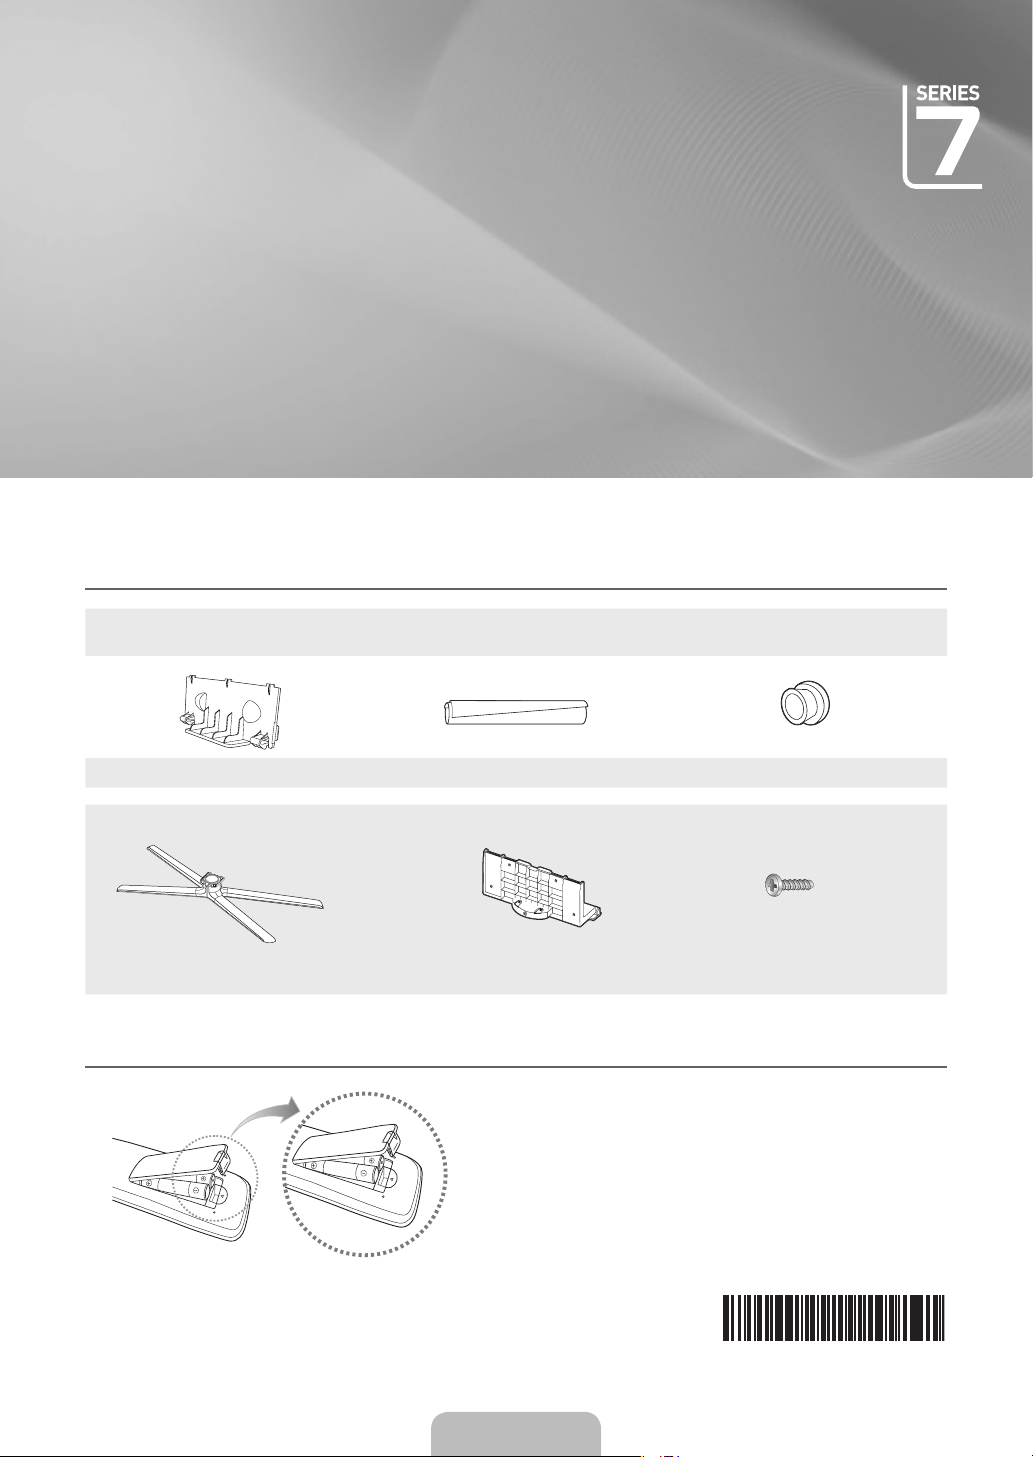
The Supplied Accessoris ¦
y
Remote Control & Batteries (AAA x 2)
y
Owner’s Instructions
y
Blanking Bracket
See separate guide for installing the stand.
y
Stand (1EA)
Installing Batteries in the Remote Control ¦
y
Cleaning Cloth
y
Power Cord
(46 ~ 55 inch TVs)
y
Cable tie
y
Guide Stand (1EA)
NOTE
✎
Use the remote control within 23 feet from the
x
T V.
Bright light may affect the performance of the
x
remote control. Avoid using nearby special
fluorescent light or neon signs.
The colour and shape may vary depending on
x
the model.
y
Holder-Ring (4ea)
(M4 X L12)
y
Screws (9EA)
(32 inch model only: 8EA)
English - 1
BN68-02814A -00
Page 2

Installing the Stand ¦
1
D
4EA
B
A
Top View
Front
Rear
2
Bottom View
Make sure to distinguish between the front and back of the Stand
✎
and Guide Stand when assembling them.
Make sure that at least two persons lif t and move the LCD T V.
✎
Stand the product up and fasten the screws. If you fasten the
✎
screws with the LCD TV placed down, it may lean to one side.
Assembling the Cables ¦
Enclose the cables in the Cable tie so that the cables are not visible through the stand.
Overly rigid or thick cables can damage input jacks over long term use.
3
4EA
C
Using the remote control buttons ¦
MENU Button
Displays the favourites channel list.
RETURN Button
Returns to the previous menu
Cable tie
ENTERE / Direction Button
Move the cursor and select an item.
Select the currently selected item.
Confirm the setting.
EXIT Button
Exit the on-screen menu
English - 2
Page 3
English - 3
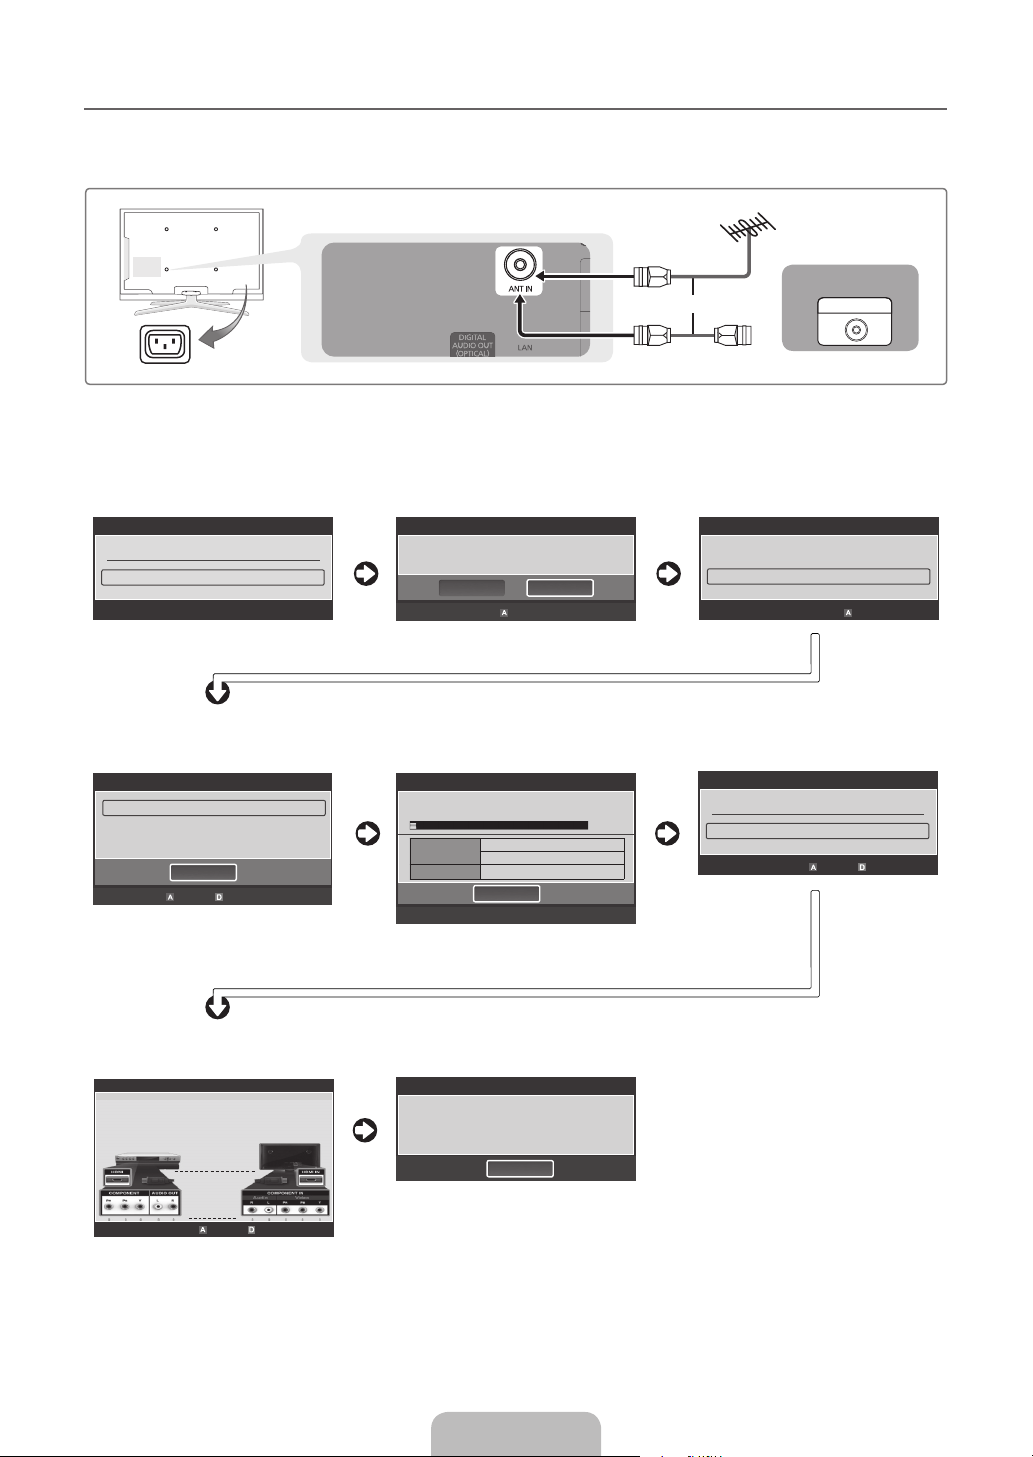
Plug & Play ¦
When the TV is initially powered on, basic settings proceed automatically and subsequently.
If you want to reset this feature, press the MENU button to display menu.
You can set the Plug & Play by selecting Setup → Plug & Play.
VHF/UHF Antenna
Power Input
On the screen, you can set as follows.
The each step may vary depending on the Antenna source.
✎
Step 1
Plug & Play
Select the OSD Language.
Menu Language
: English
Step 4
Plug & Play
Antenna Source
Channel Source
: Air
: Digital & Analogue
Serch
Previous Skip U Mov e E Enter
►
E
Enter
►
Select the usage mode.
Auto Store in progress.
Channels 7
Digital
Analogue 0
or
Step 2
Plug & Play
Select Country.
Store Demo Home USE
Previous L Mov e E Enter
Country
Step 5 Step 6
Plug & Play
3%
2
TV:2 Radio:0 Data/Other: 0
Stop
E
Enter
Set the Clock Mode.
Clock Mode
Cable
ANT OUT
Step 3
Plug & Play
: United Kingdom
Previous E Enter
Plug & Play
: Auto
►
Previous Skip E Enter
►
Step 7
cables.
HD Connection Guide
TV rear view
HDMI Cable
Component Cable
Previous Skip r Next Page
How to get the best performance from your new HDTV.
Step 1. Connect the HD Box to the TV using the HDMI or Component
HD box
Step 8
1/2
Plug & Play
Enjoy your TV.
OK
Page 4
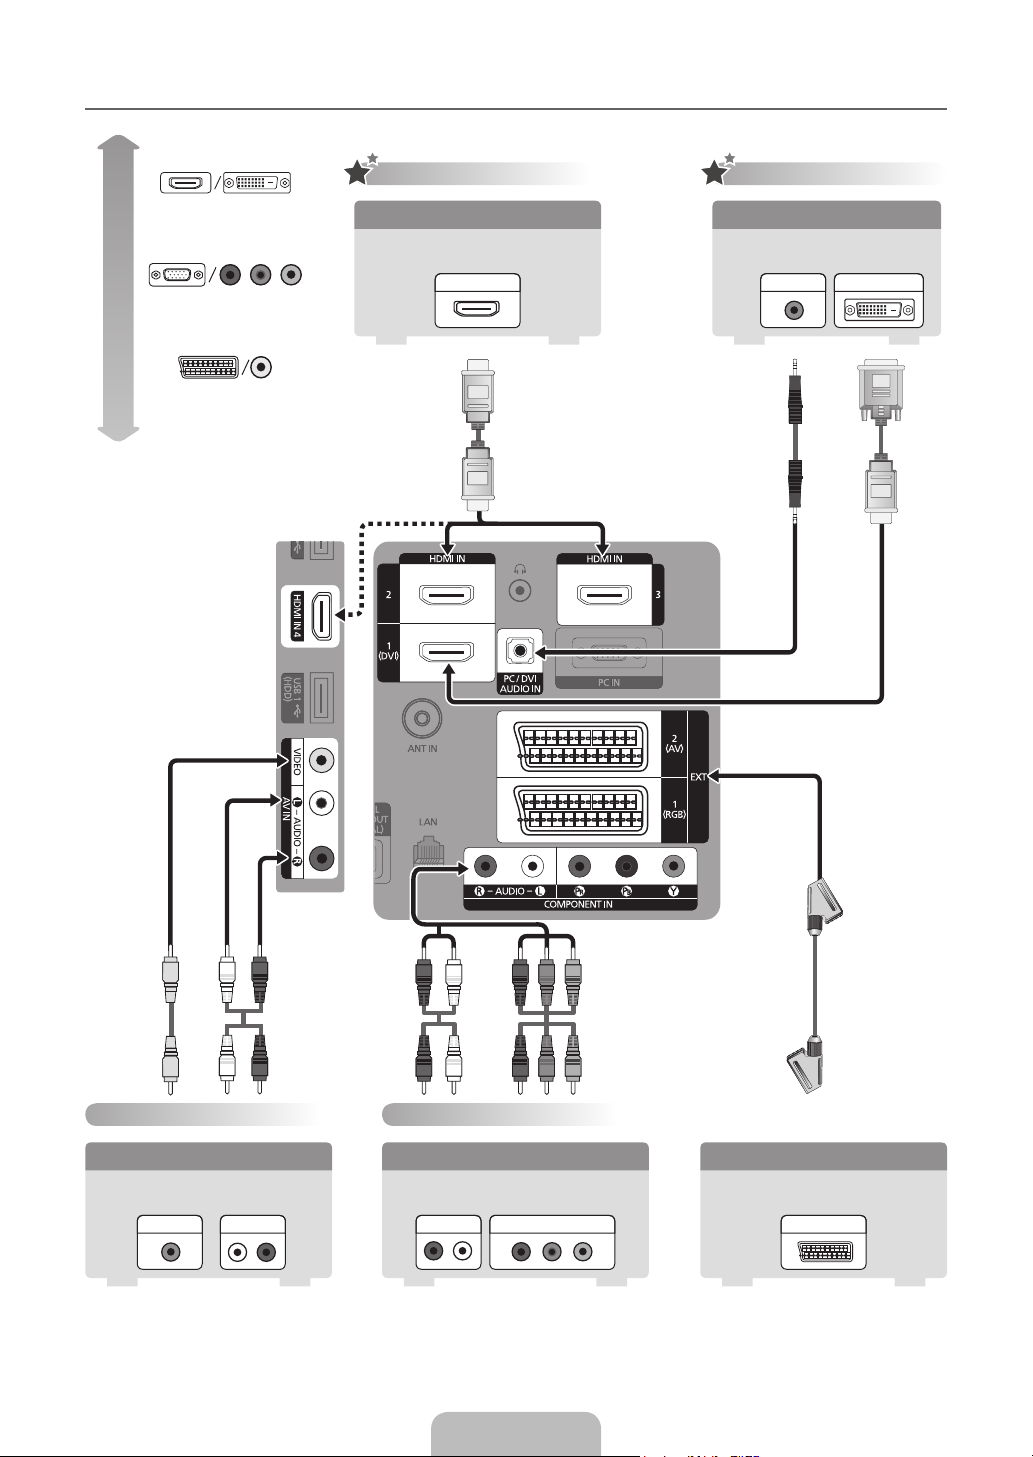
Connecting a AV device ¦
R
B
G
WR
W R
R
B
G
WY R
WYR
Best
Normal
HDMI/DVI
PC/COMPONENT
EXT/VIDEO
HD connection
Using an HDMI Cable
DVD / Blu-Ray player / HD Cable Box
/ HD Satellite receiver (STB)
HDMI OUT
HD connection
Using a DVI Cable
DVD / Blu-Ray player / Cable Box
/ Satellite receiver (STB)
AUDIO OUT DVI OUT
Audio/Video connection
Using an Audio/Video Cable
VCR
AUDIO OUTVIDEO OUT
Component connection
Using a Component Cable
DVD / Blu-Ray player / Cable
Box / Satellite receiver
AUDIO OUT COMPONENT OUT
Using a Scart Cable
VCR / DVD
EXT
English - 4
 Loading...