

Page 1
SyncMaster 723N
Install drivers
Page 2
Model
Notational
Otherwise, it may result in death or personal injury.
Otherwise, it may result in personal injury or property damage.
Prohibited Important to read and understand at all times
Do not disassemble Disconnect the plug from the outlet
Do not touch Ground to prevent an electric shock
Power
When not used for extended period of time, set your computer to DPM.
If using screen saver, set it to active screen mode.
The images here are for reference only, and are not applicable in all cases (or countries).
SyncMaster 723N
Page 3
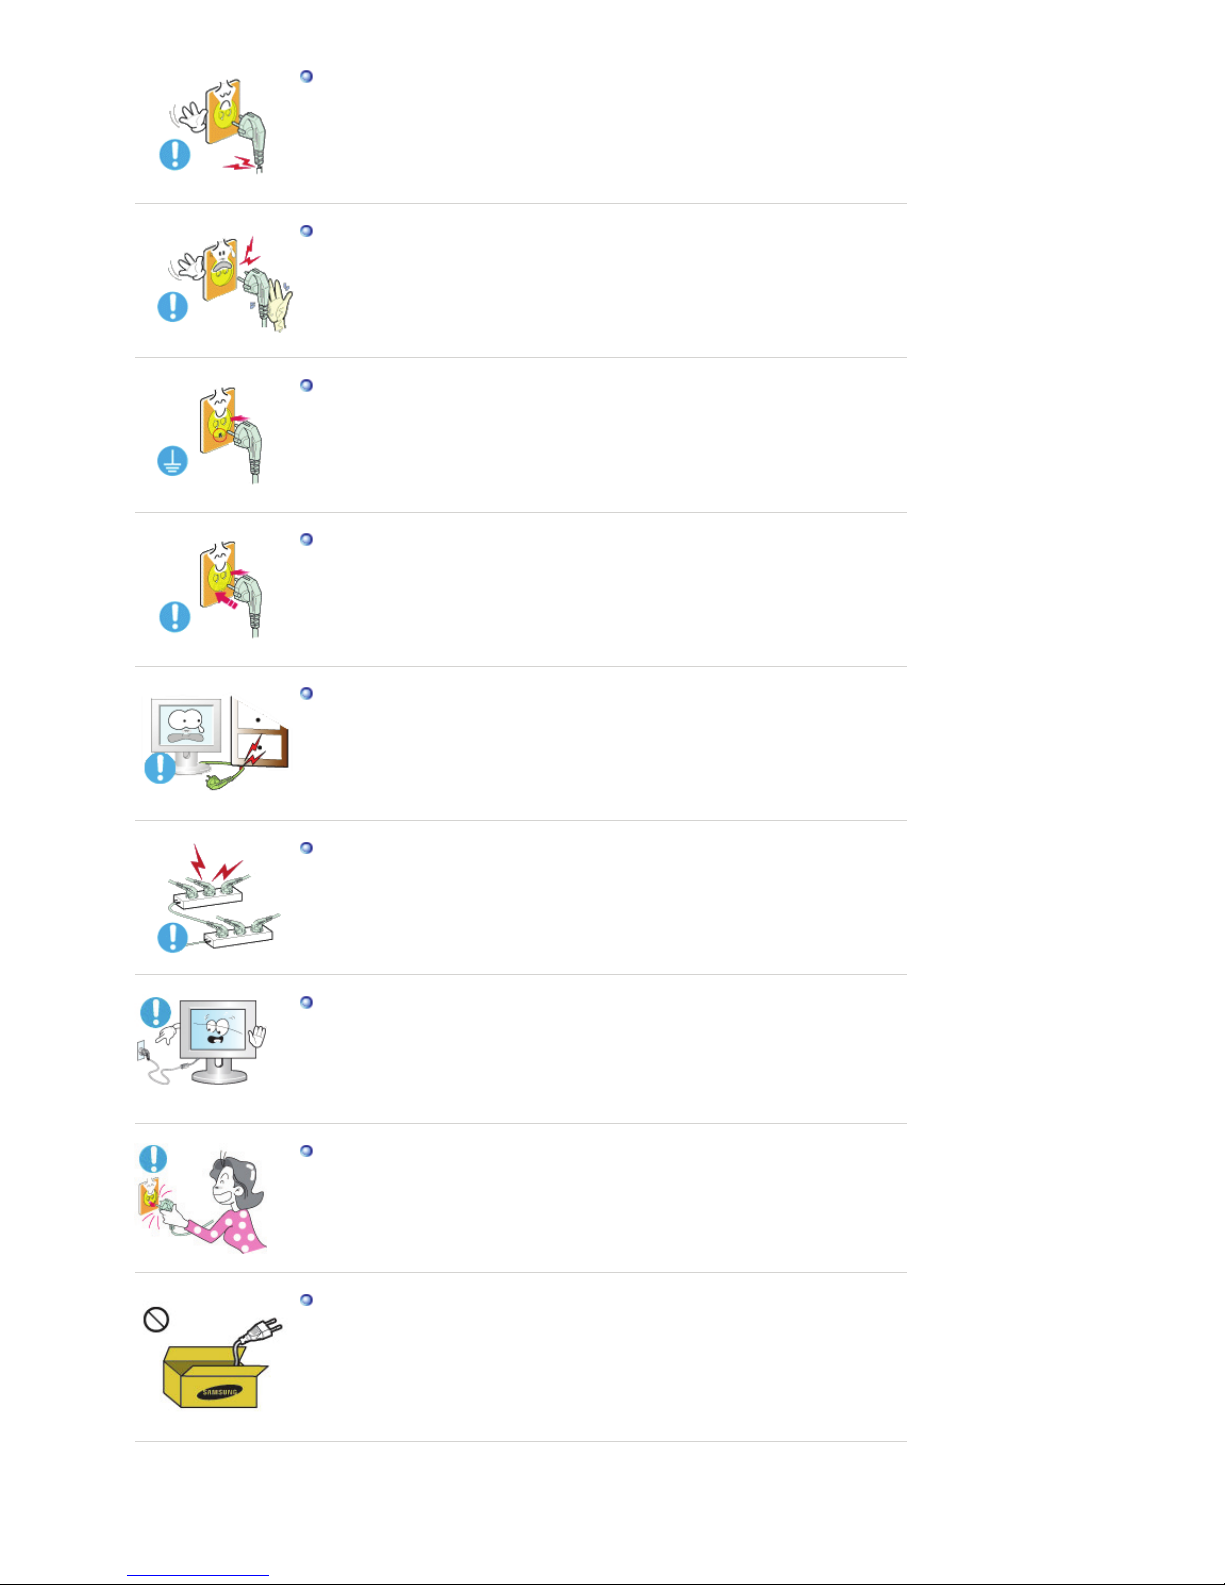
Do not use a damaged power cord or plug or a damaged or loose power
outlet.
z Otherwise, this may result in electric shock or fire.
Do not touch the power plug with wet hands when removing or plugging
the plug into the outlet.
z Otherwise, this may result in electric shock.
Make sure to connect the power cord to a grounded power outlet.
z Otherwise, it may result in electric shock or personal injury.
Ensure that the power plug is plugged into the power outlet firmly and
correctly.
z Otherwise, this may result in fire.
Do not forcefully bend or pull the power plug and do not place any heavy
material on it.
z Otherwise, this may result in fire.
Do not connect multiple appliances to the same power outlet.
z
Otherwise, this may cause fire due to overheating.
Do not disconnect the power cord while using the product.
z Otherwise, this may result in damage to the product due to electric
shock.
To disconnect the apparatus from the mains, the plug must be pulled out
from the mains socket, therefore the mains plug shall be readily
operable.
z This may cause electric shock or fire.
Use only the power cord provided by our company. Do not use the
provided power cord of another product.
z Otherwise, this may result in fire or electric shock.
Page 4
Installation
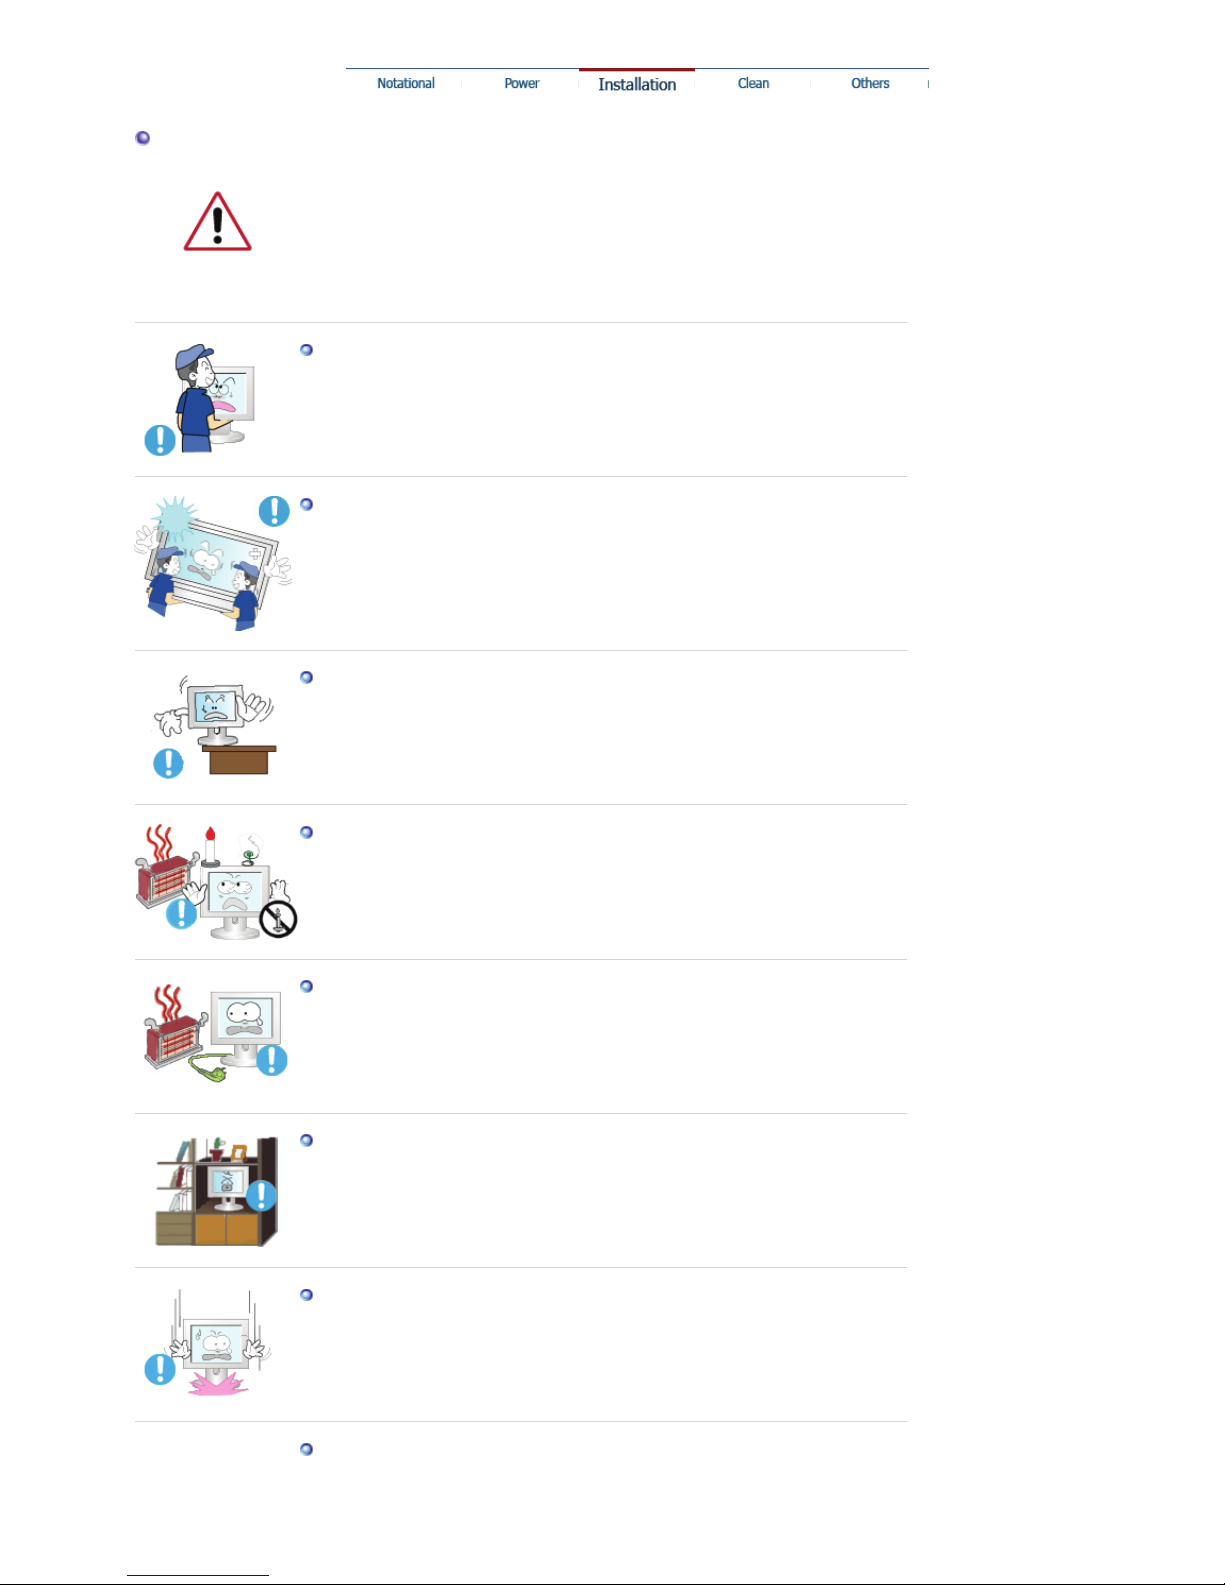
Be sure to contact an authorized Service Center when installing your monitor in a
location with heavy dust, high or low temperatures, high humidity, and exposed
to chemical substances and where it operates for 24 hours such as at airports,
train stations etc.
Failure to do so may cause serious damage to your monitor.
Do not drop the monitor when moving it.
z This may cause damage to the product or the person carrying it.
Ensure that at least two persons lift and move the product.
z Otherwise, it may be dropped and cause personal injury, and/or damage
the product.
When installing the product in a cabinet or rack, make sure that the front
end of the bottom of the product does not project out.
z
Otherwise, it may fall or cause personal injury.
z Use a cabinet or rack of a size appropriate to the product..
DO NOT PLACE CANDLES, MOSQUITO REPELLANT, CIGARETTES AND
ANY HEATING APPLIANCES NEAR THE PRODUCT.
z Otherwise, this may result in fire.
Keep heating appliances as far away from the power cord or the product
as possible.
z Otherwise, this may result in electric shock or fire.
Do not install it in a badly ventilated location such as a bookcase or
closet.
z Otherwise, this may result in fire due to an increase in the internal
temperature.
Put down the monitor carefully.
z Failing to do so may damage the monitor.
Do not place the front of the product on the floor.
z Otherwise, this may result in damage to the screen display.
Page 5
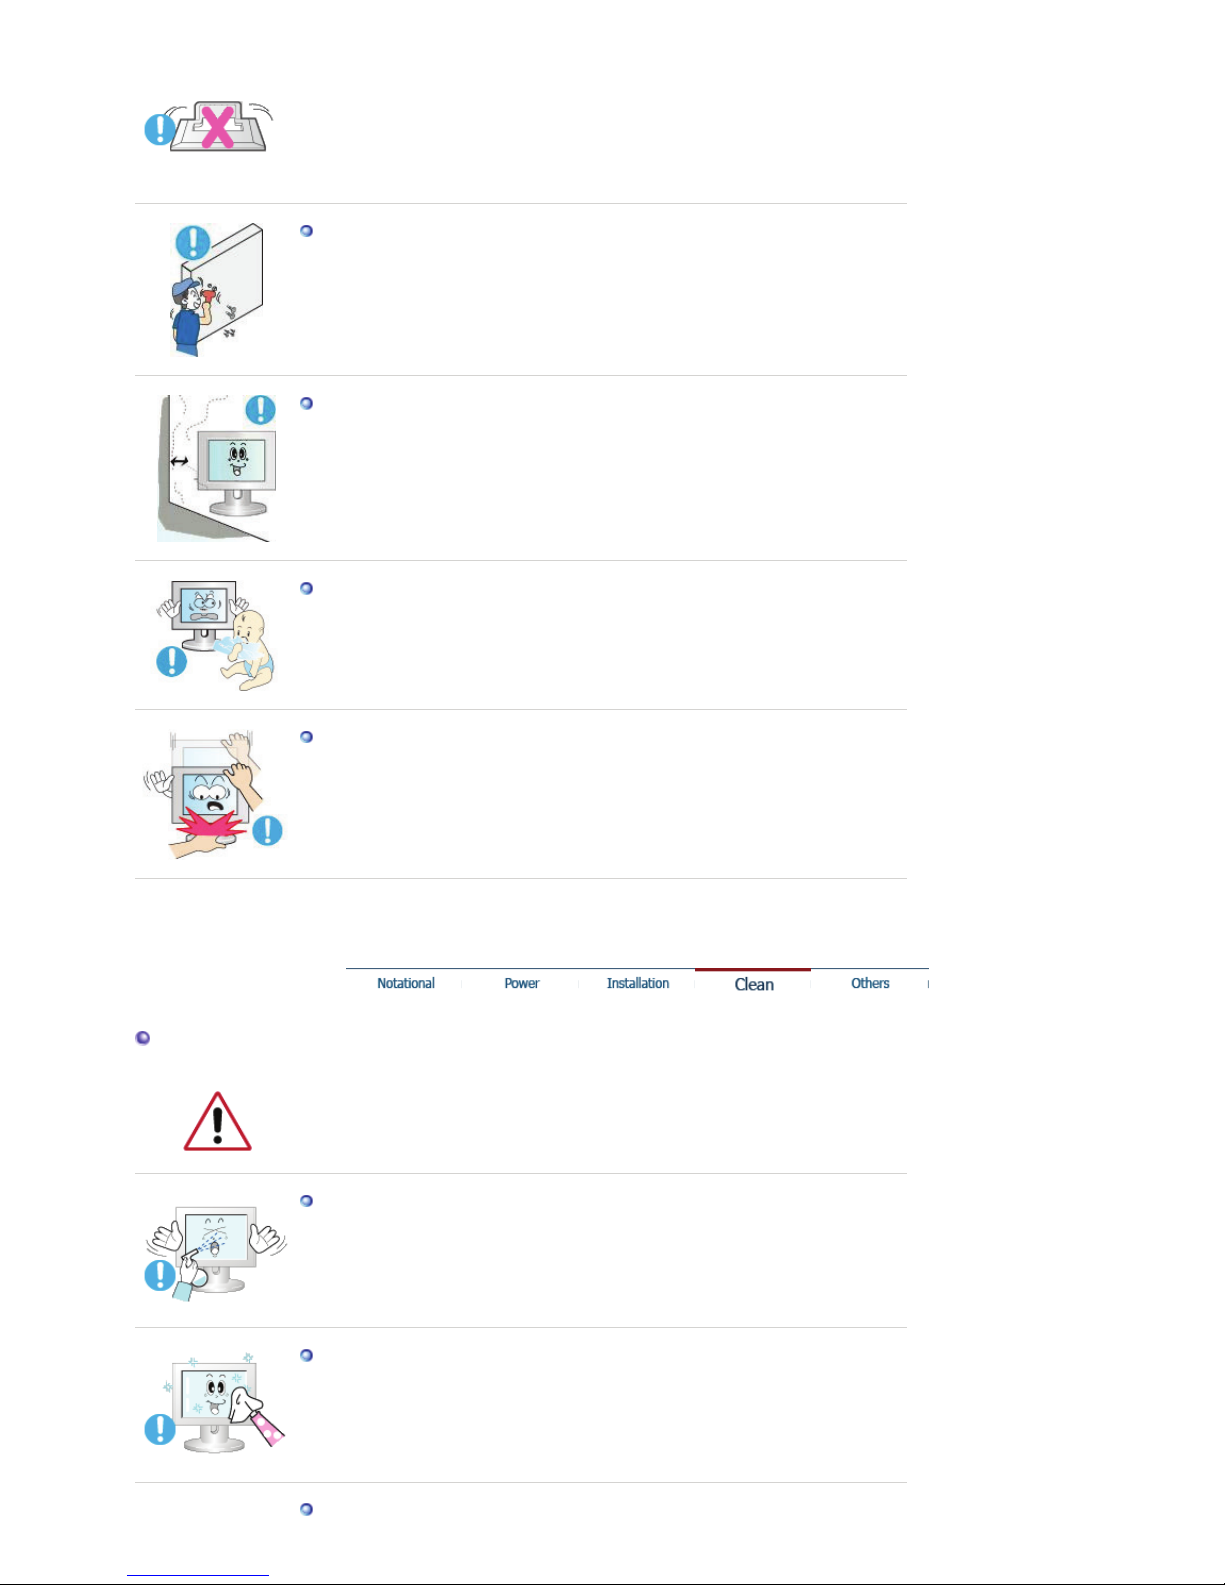
Ensure that an authorized installation company installs the wall mount.
z Otherwise, it may fall and cause personal injury.
z Make sure to install the specified wall mount.
Install your product in a well ventilated location. Ensure that there is a
clearance of more than 10 cm from the wall.
z Otherwise, it may result in fire due to an increase in the internal
temperature.
Ensure that the packaging vinyl is kept away from children.
z Otherwise, it may result in serious harm (suffocation) if children play with
it.
If the height of your monitor is adjustable, do not place any object or
part of your body on the stand when lowering it.
z This may cause damage to the product or the person carrying it.
Clean
When cleaning the monitor case or the surface of the TFT-LCD screen, wipe with
a slightly moistened and soft fabric.
Do not spray cleaner directly onto the surface of the product.
z Otherwise, this may result in the discoloration and distortion of the
structure and the screen surface may peel off.
Clean the product using a soft cloth with a monitor cleaner only. If you
must use a cleaner other than the monitor cleaner, dilute it with water at
a ratio of 1:10.
When cleaning the power plug pins or dusting the power outlet, clean it
with a dry cloth.
Page 6
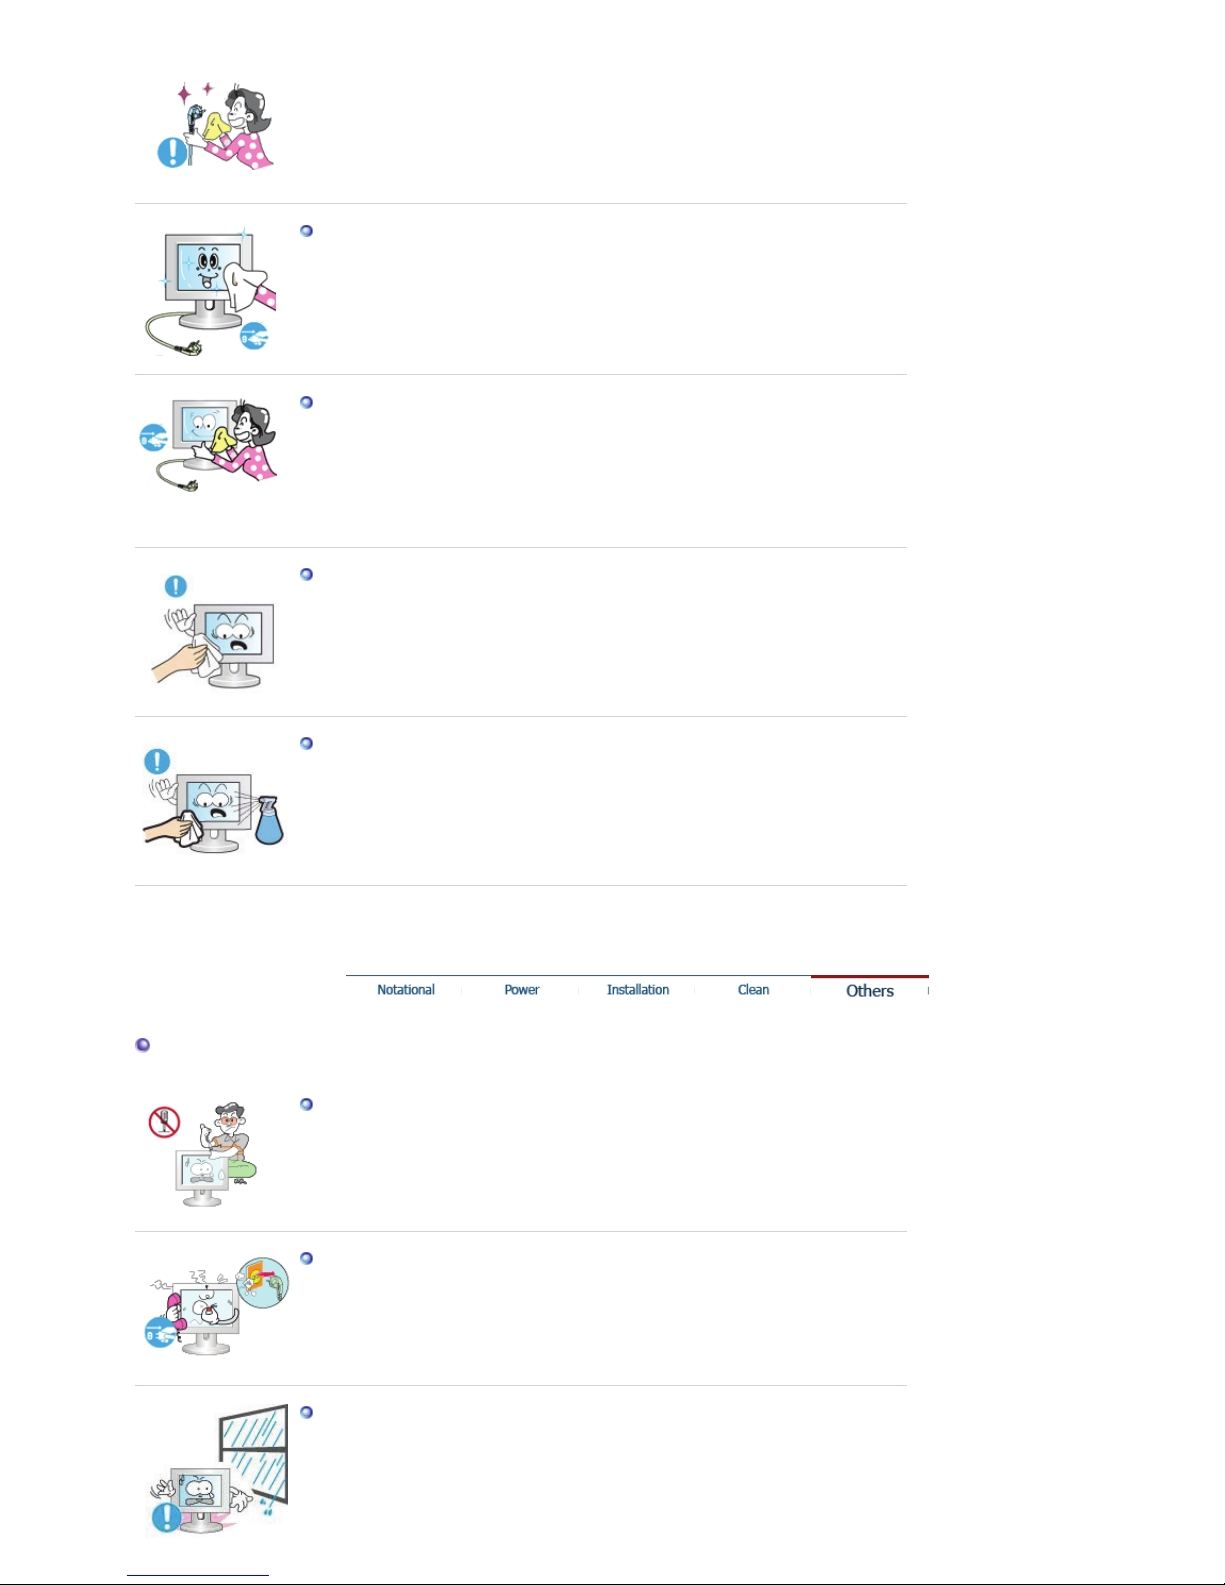
z Otherwise, it may result in fire.
When cleaning the product, make sure to disconnect the power cord.
z Otherwise, it may result in electric shock or fire.
When cleaning the product, disconnect the power cord and clean it
softly with a dry cloth.
z (Do not use chemicals such as wax, benzene, alcohol, thinner,
mosquito repellant, lubricant, or cleaner.) These may change the
appearance of the product surface and peel off the indication labels on
the product.
Since the product housing is easily scratched, make sure to use the
specified cloth only.
z Use the specified cloth adding only a little water. As the product may be
scratched if there is any foreign material on the cloth, make sure to
shake it thoroughly before using it.
When cleaning the product, do not spray water directly onto the main
body of the product.
z Ensure that water does not enter the product and that it is not wet.
z
Otherwise, this may result in electric shock, fire or a malfunction.
Others
The product is a high voltage product. Ensure that users do not
disassemble, repair or modify the product themselves.
z Otherwise, this may result in electric shock or fire. If the product needs
to be repaired, contact a Service Center.
If there is a strange smell or a strange sound or smoke is coming from
the product, disconnect the power plug immediately and contact a
Service Center.
z Otherwise, this may result in electric shock or fire.
Do not place this product in a location exposed to moisture, dust,
smoke, water, or in a car.
z Otherwise, this may result in electric shock or fire.
Page 7
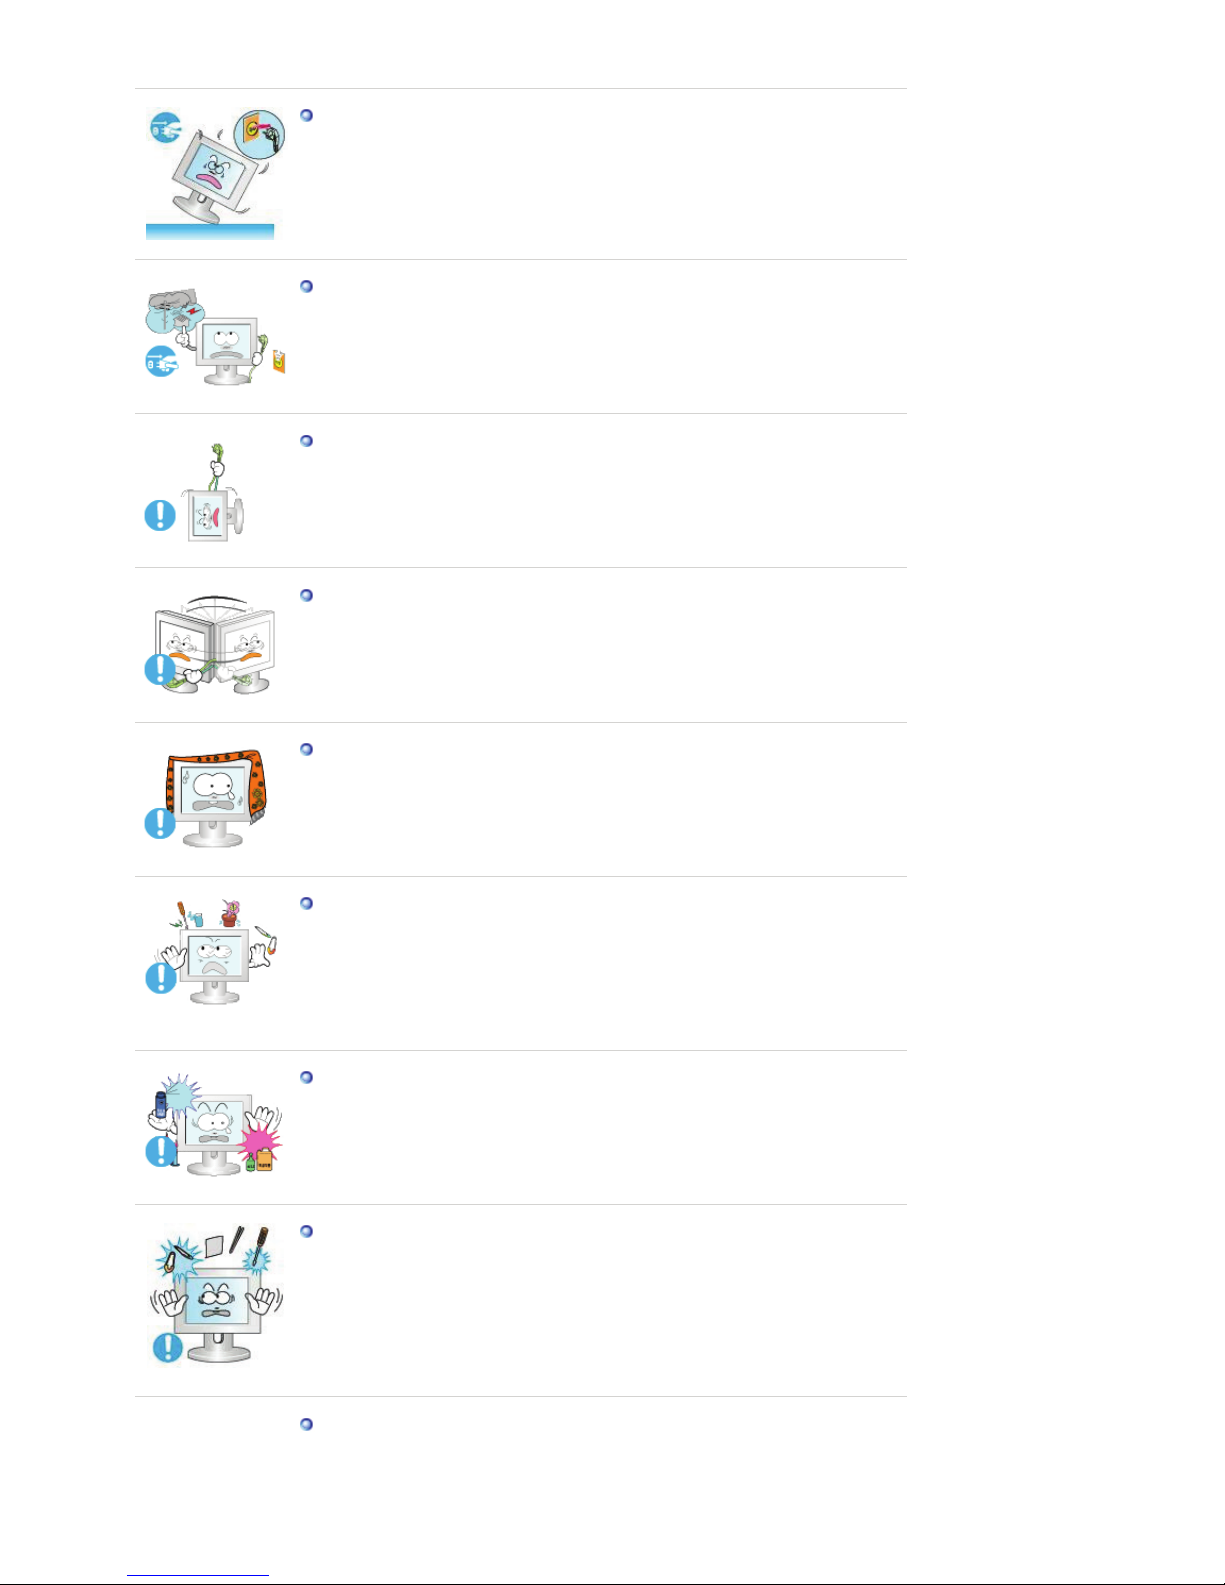
When you drop the product or the case is broken, turn the power off and
disconnect the power cord. Contact a Service Center.
z Otherwise, this may result in electric shock or fire.
If thunder or lightening is occurring, do not touch the power cord or
antenna cable.
z Otherwise, this may result in electric shock or fire.
Do not try to move the monitor by pulling only the wire or the signal
cable.
z Otherwise, it may fall and result in electric shock, damage to the product
or fire due to damage to the cable.
Do not lift or move the product back and forwards or right and left while
only holding the power cord or signal cables.
z Otherwise, it may fall and result in electric shock, damage to the product
or fire due to damage to the cable.
Make sure that the ventilating opening is not blocked by a table or
curtain.
z Otherwise, it may result in fire due to an increase in the internal
temperature.
Do not place any containers containing water, vases, flowerpots,
medicines as well as any metal on the product.
z If water or a foreign material enters the product, disconnect the power
cord and contact a Service Center.
z This may result in a product malfunction, electric shock, or fire.
Do not use or keep combustible spray or flammable material near the
product.
z
Otherwise, this may result in an explosion or fire.
Do not insert any metal, such as chopsticks, coins, pins and steels, or
inflammable objects, such as matches or paper, inside the product
(through the ventilating openings, input and output terminals, etc).
z If water or foreign material enters the product, disconnect the power
cord and contact a Service Center.
z Otherwise, this may result in electric shock or fire.
When using a fixed screen for a long time, an afterimage or stain may
occur.
z
If you are not using your product for a long period of time, put it into
sleep mode or use a moving screen saver.
Page 8
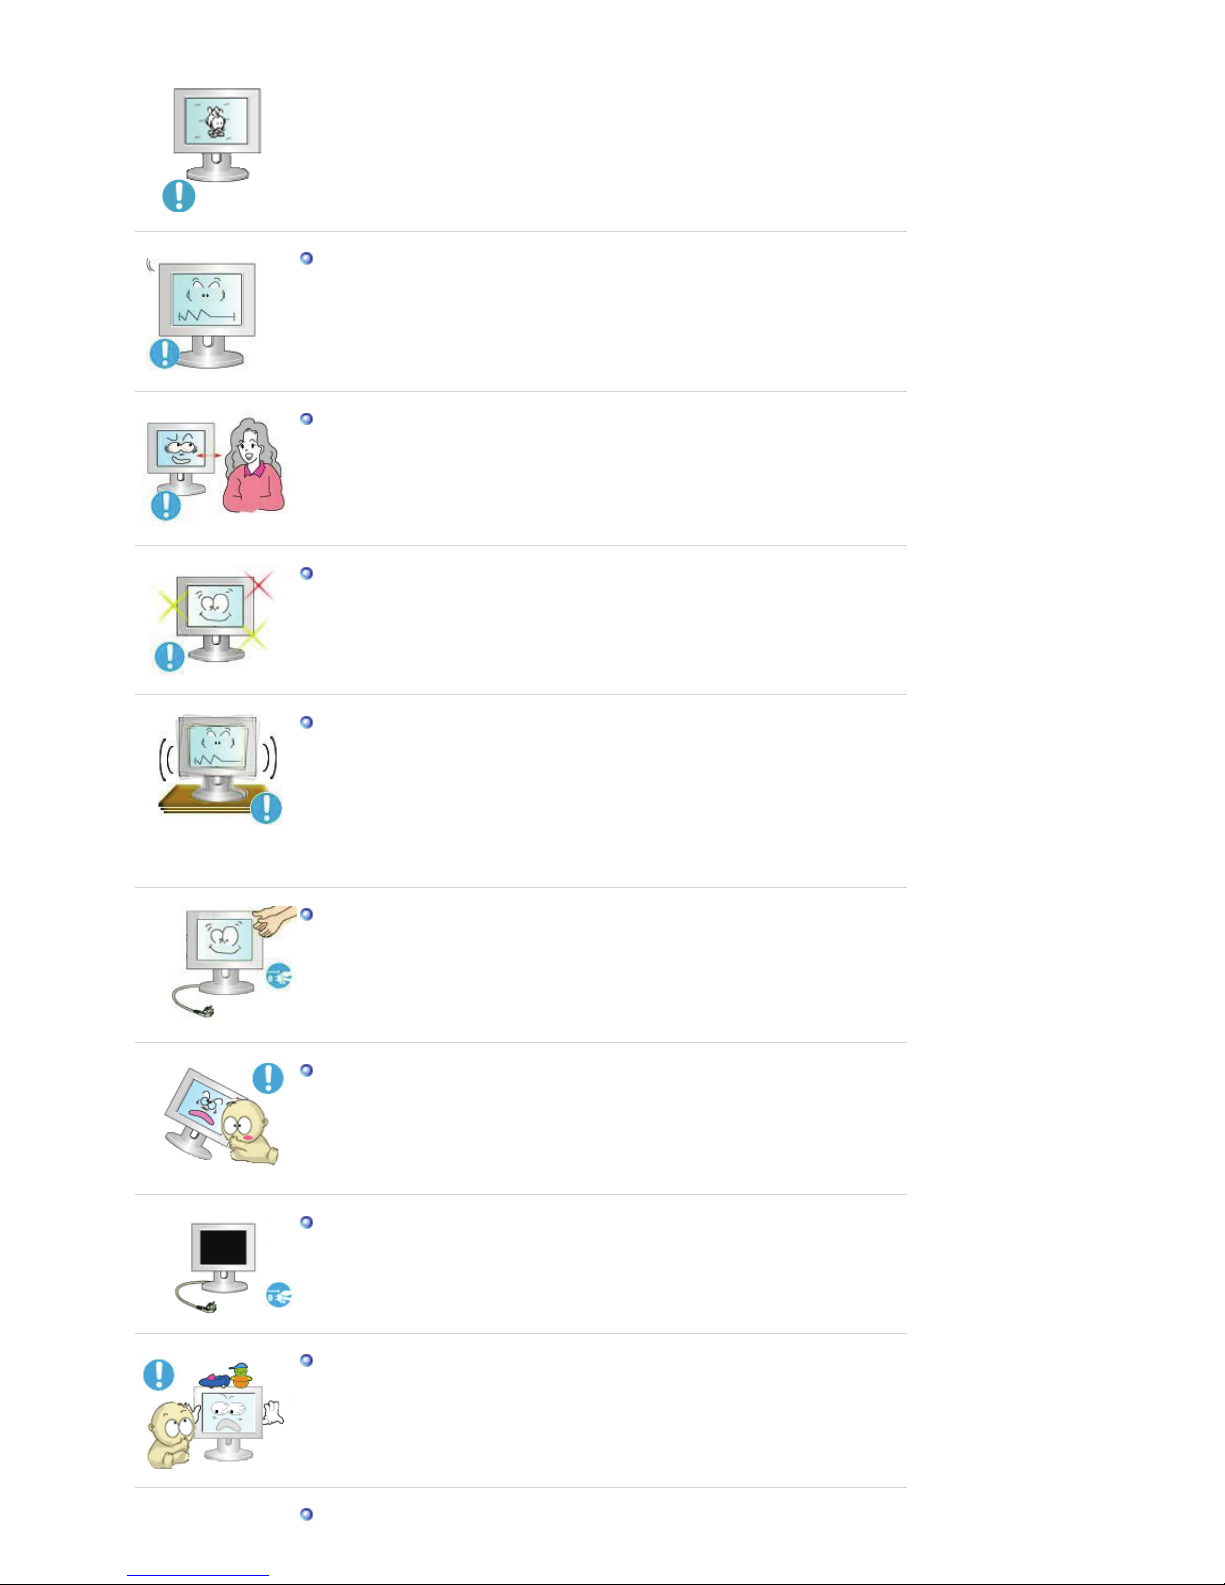
Set a resolution and frequency appropriate to the product.
z Otherwise, your eyesight may be damaged.
If you continually move closer to the product screen, your eyesight may
be failing.
To ease eye strain, take at least a five-minute break after every hour of
using the monitor.
Do not install it in an unstable location such as an unstable rack or
uneven surface or a location exposed to vibrations.
z Otherwise, it may fall and cause personal injury and/or damage the
product.
z If you use the product in a location exposed to vibrations, it may damage
the product and result in fire.
When moving the product, turn the power off and disconnect the power
plug, antenna cable, and all the cables connected to the product.
z Otherwise, it may result in electric shock or fire.
Ensure that children do not hang onto the product or climb up onto the
product.
z The product may fall and cause personal injury or death.
If you do not use the product for a long period of time, disconnect the
power cord from the power outlet.
z Otherwise, this may result in overheating or fire due to dust, and may
result in fire due to electric shock or leakage.
Do not place any heavy items or toys or confectionery, such as cookies
etc. that may attract the attentions of children onto the product.
z
Your children may hang onto the product causing it to fall and this may
result in personal injury or death.
Do not turn the product upside down or move it while holding only the
stand.
Page 9
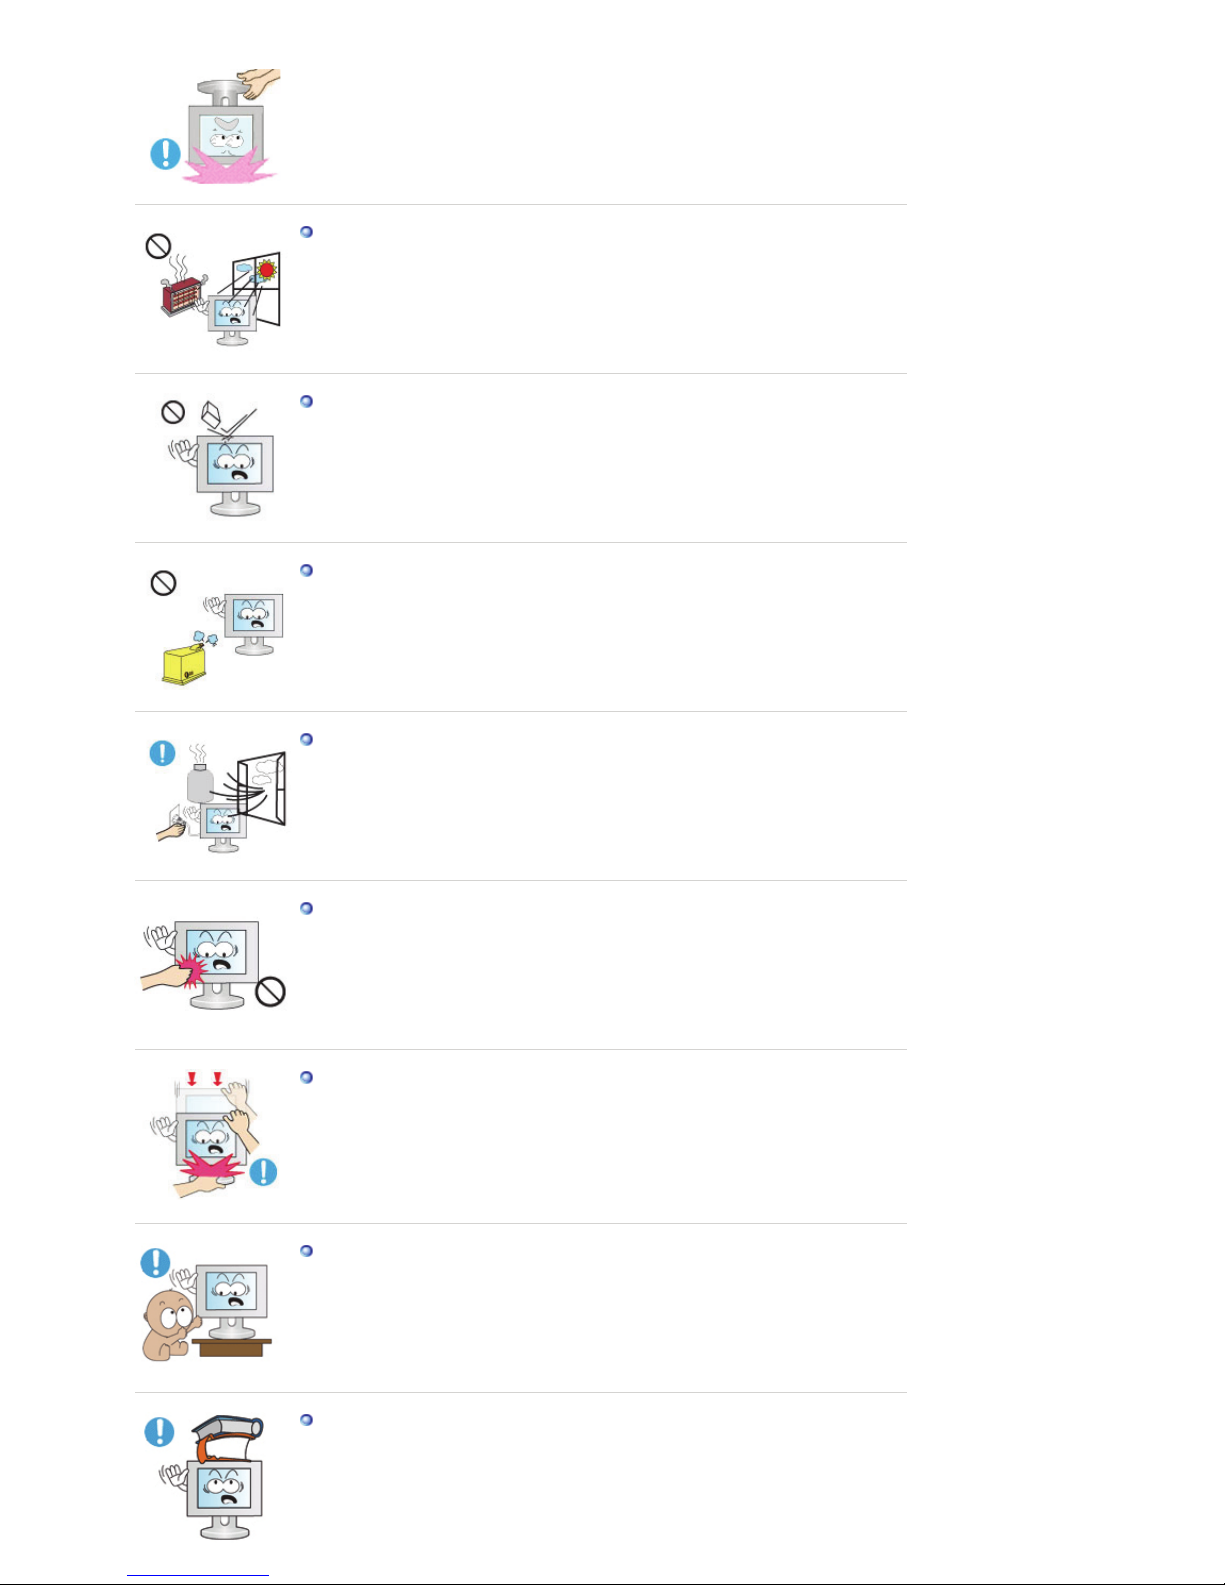
z Otherwise, it may fall and result in personal injury and/or damage to the
product.
Do not place the product in a location exposed to direct sunlight or near
any heat such as a fire or heater.
z This may reduce the lifetime of the product, and may result in fire.
Do not drop any objects onto the product or cause any impact to the
product.
z Otherwise, this may result in electric shock or fire.
Do not use a humidifier or kitchen table near the product.
z Otherwise, this may result in electric shock or fire.
When there is a gas leak, do not touch the product or the power plug but
ventilate immediately.
z If a spark occurs, it may cause an explosion or fire.
If the product has been turned on for a long time, the display panel
becomes hot. Do not touch it.
z Keep the small accessories in a location out of the reach of children.
Be careful when adjusting the angle of the product or the height of the
stand.
z This may result in personal injury as your hand or fingers may become
caught.
z
Also, if you tilt the product too far, it may fall and cause personal injury.
Do not install the product in a location low enough for children to reach.
z Otherwise, it may fall and result in personal injury.
z Since the front part of the product is heavy, install the product on a level
and stable surface.
Do not put any heavy objects on the product.
z This may result in personal injury and/or damage to the product.
.
Page 10
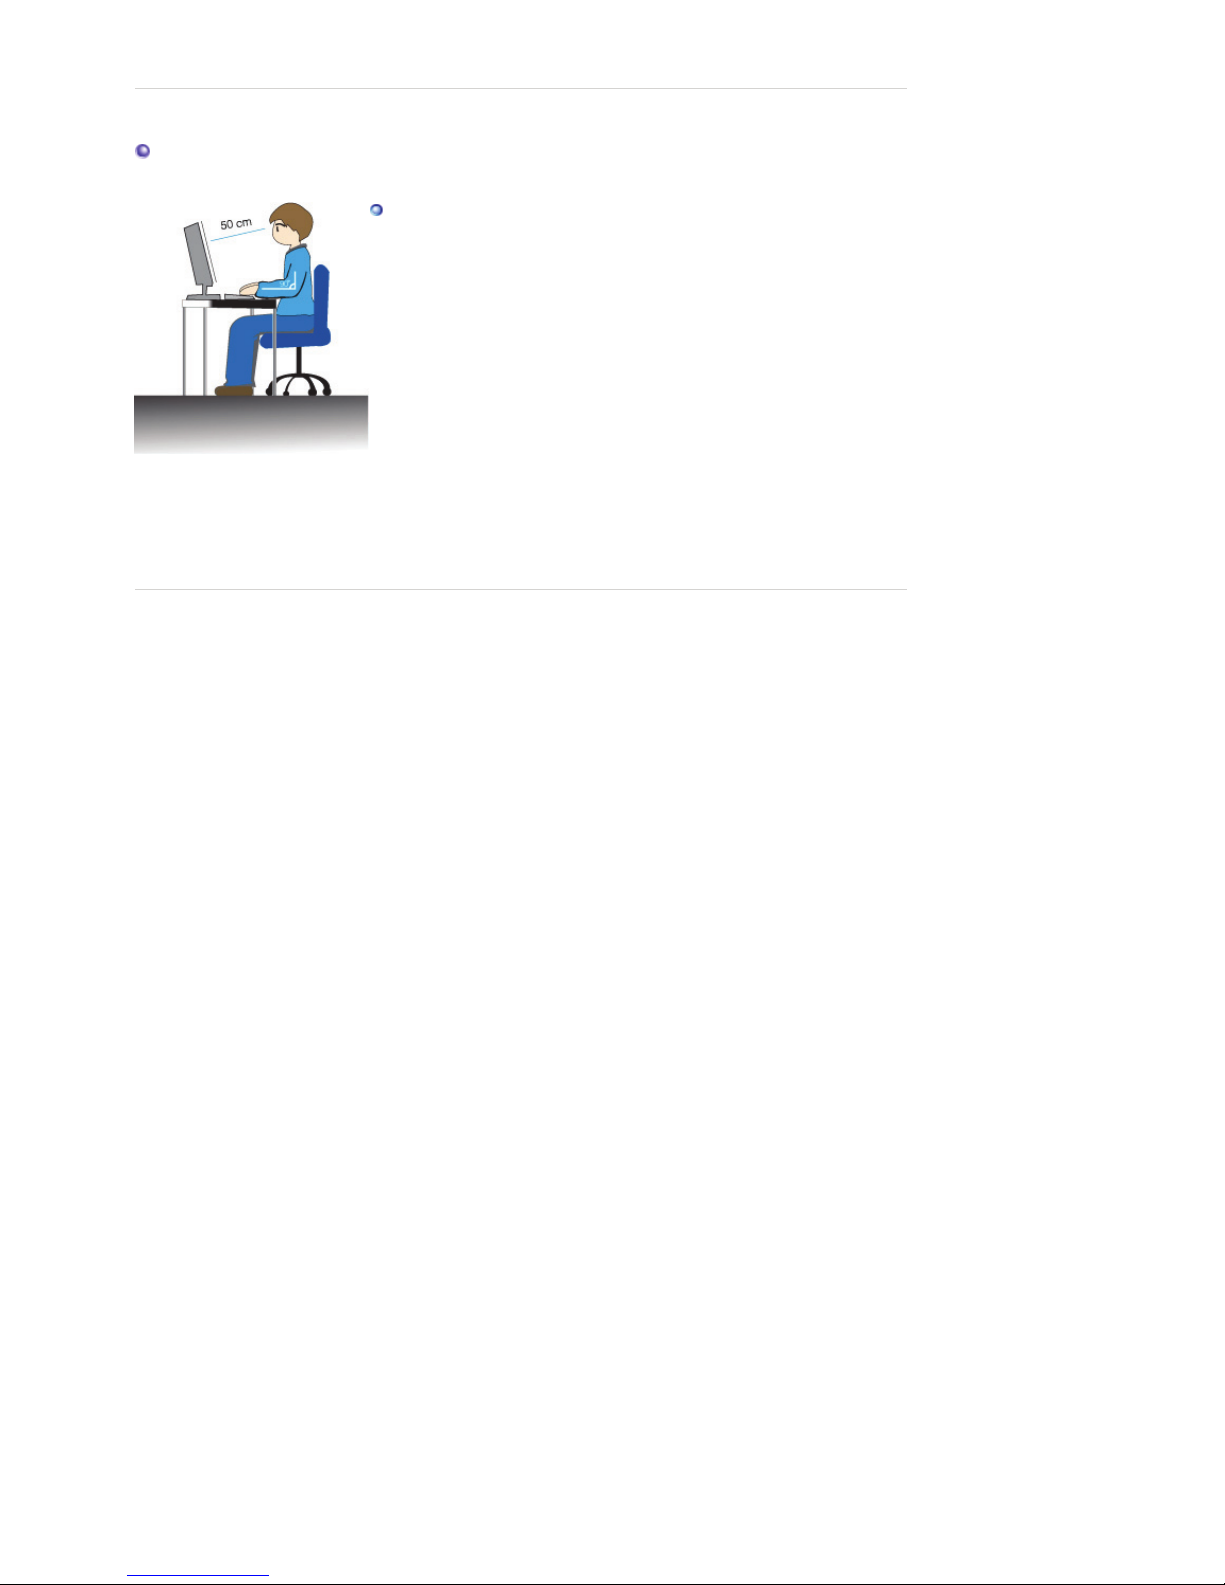
Good Postures When Using the Monitor
When using the product, use it in the correct position.
z Keep your back straight while looking at the product.
z The distance between your eyes and the screen should be
between 45 to 50 cm. Look at the screen from a slightly higher
location than the height of the screen.
z When using the product, use it in the correct position.
z Adjust the angle so that light is not reflected on the screen.
z Place your arms perpendicular to your sides and allow your
arms to be level with the back of the hand.
z Keep your elbow at 90 degrees.
z Keep your knees at greater than 90 degrees, and keep your
heels firmly on the floor. Keep your arms lower than your heart.
Page 11
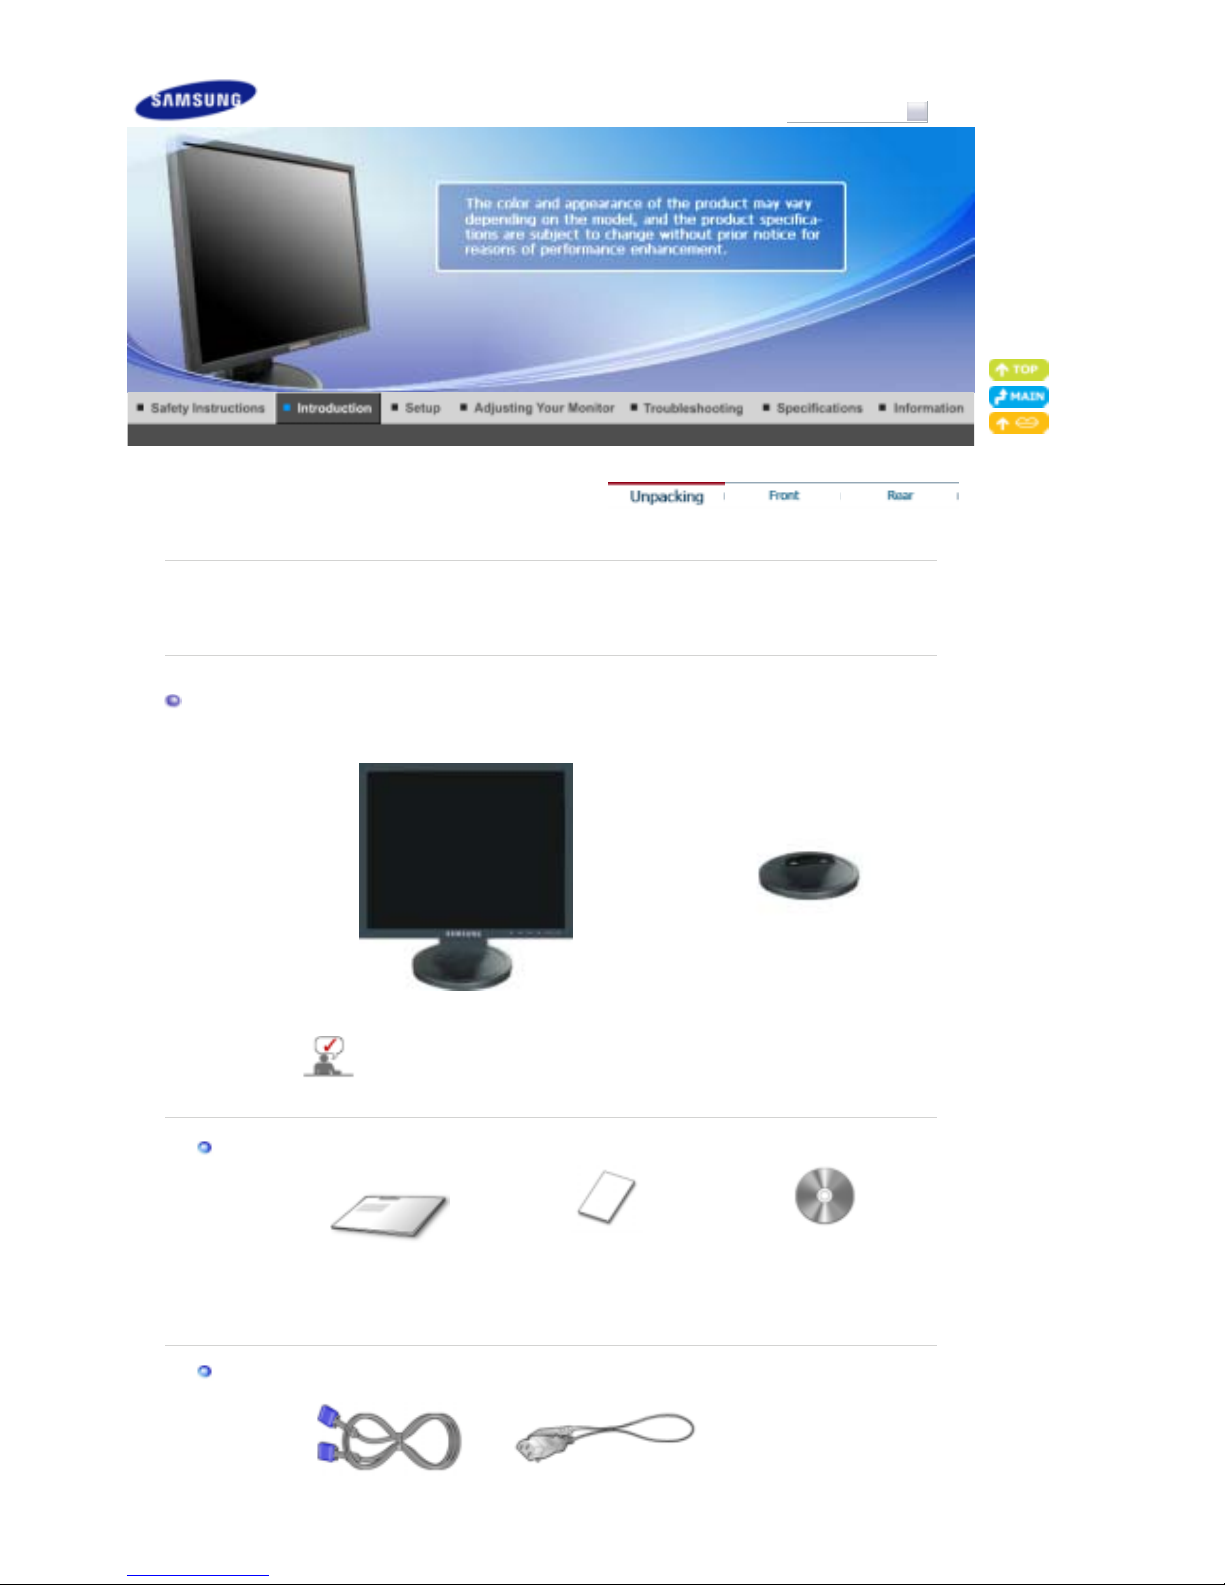
Model
Please make sure the following items are included with your monitor.
If any items are missing, contact your dealer.
Contact a local deale
r
to buy optional items.
Unpacking
Monitor & Sim
p
le stand Bottom
MagicRotation program can not be provided as Simple
Stand does not support Pivot function.
Manual
Quick Setup Guide
Warranty Card
(Not available in all
locations)
User's Guide,
Monitor Driver
Cable
SyncMaster 723N
Page 12
D-sub Cable Power Cord
Front
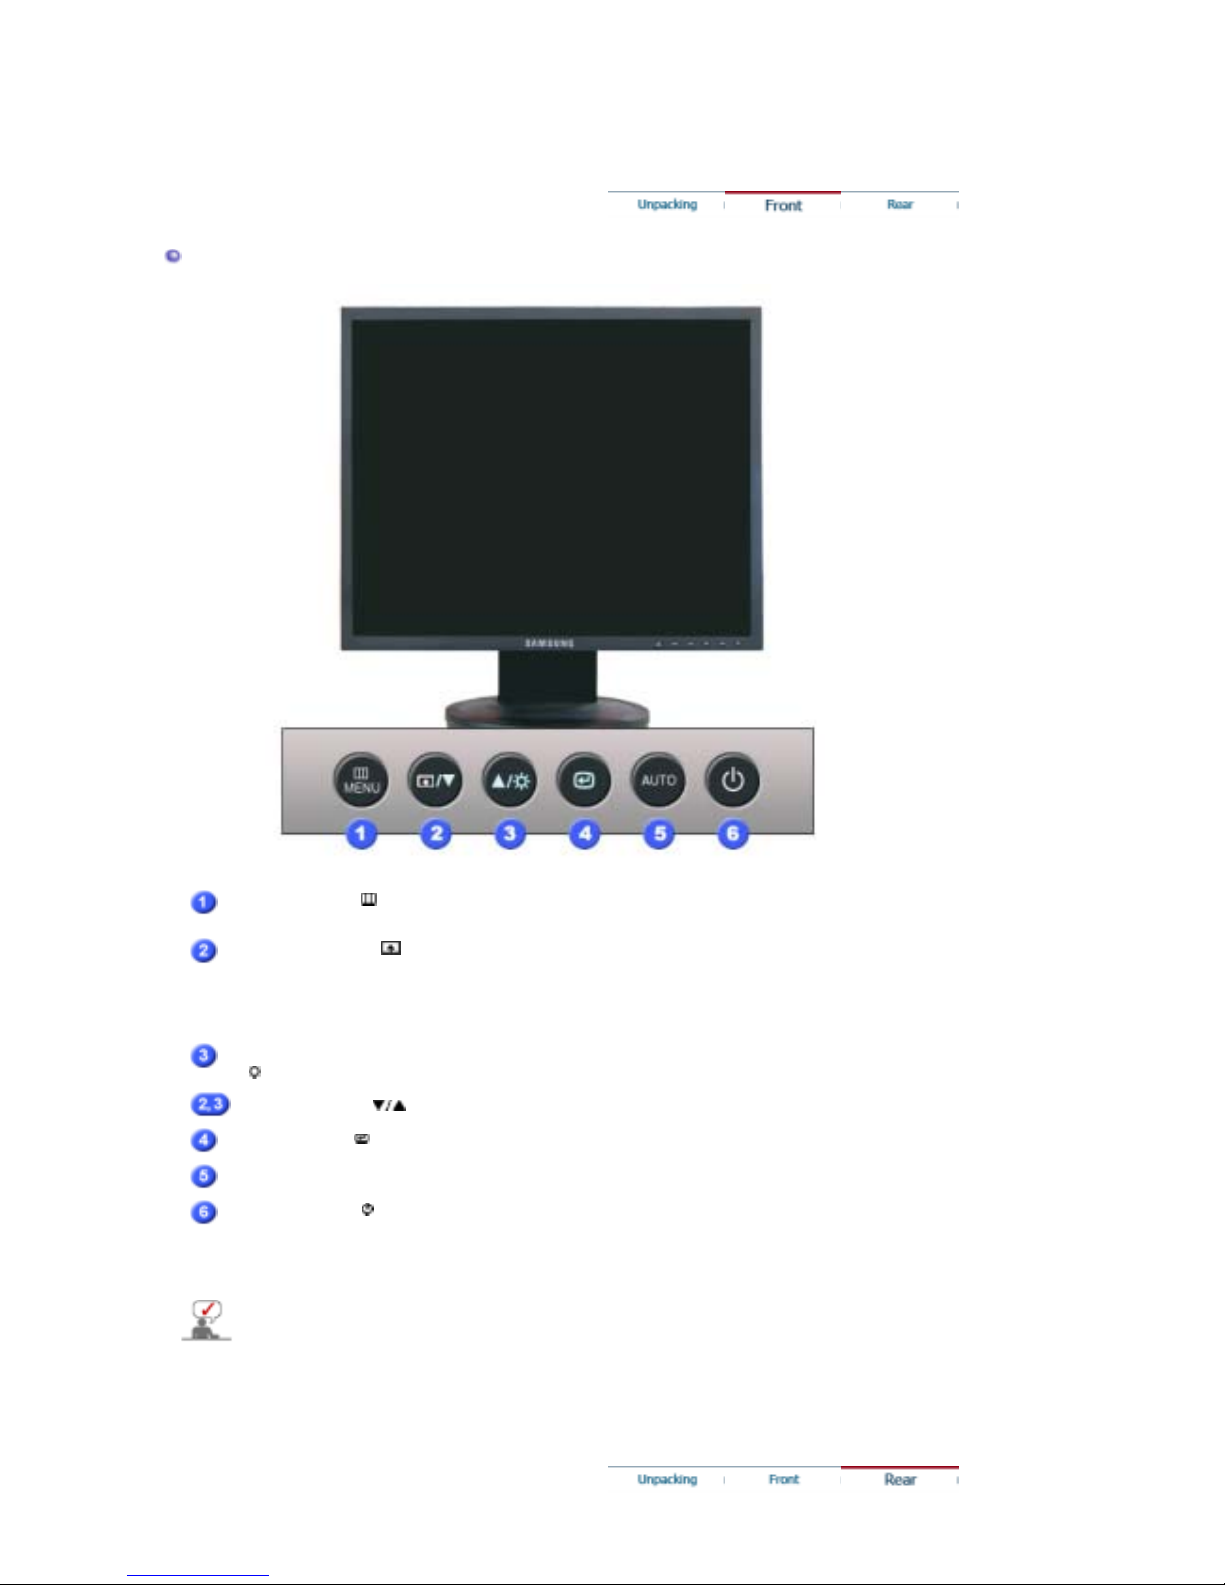
MENU button [ ]
Opens the OSD menu. Also use to exit the OSD menu or return to
the previous menu.
Customized Key[]
You can customize key assignment for the Custom button
according to your preferences.
Brightness button
[]
When OSD is not on the screen, push the button to adjust
brightness.
Adjust buttons [ ]
Adjust items in the menu.
Enter button [ ]
Activates a highlighted menu item.
AUTO button
Use this button for auto adjustment.
Power button [ ]/
Power indicator
Use this button for turn the monitor on and off.
This light glows blue during normal operation, and blinking blue
once as the monitor saves your adjustments.
See PowerSaver described in the manual for further information regarding power saving
functions. For energy conservation, turn your monitor OFF when it is not needed, or when
leaving it unattended for long periods.
Page 13
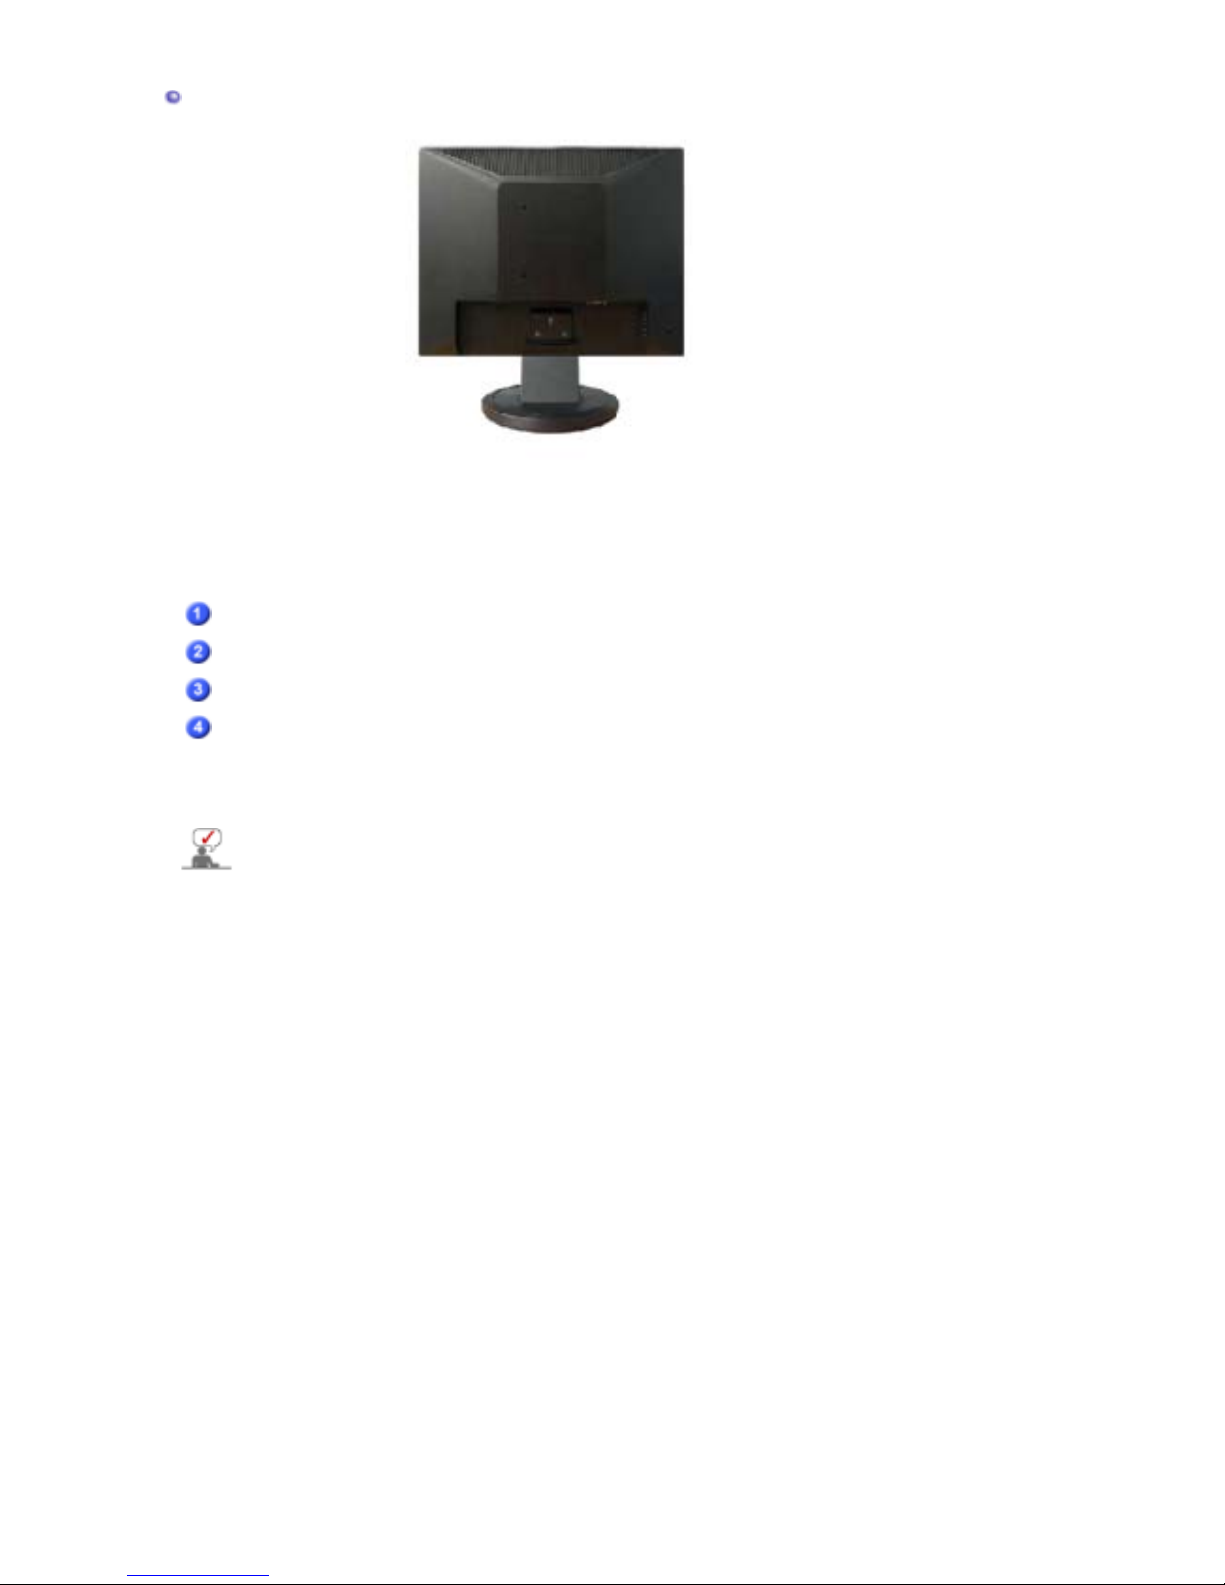
Rear
Simple stand
(The configuration at the back of the monitor may vary from product to product.)
POWER port
Connect the power cord for your monitor to the power port on the back
of the monitor.
RGB IN port
Connect the signal cable to the 15-pin, D-sub port on the back of your
monitor.
POWER on/off Switch
(op
tion
)
Use this button for turn the monitor on and off.
Kensington Lock
The Kensington lock is a device used to physically fix the system to
something when using it in a public place. (The locking device has to
be purchased separately.) For using a locking device, contact the
place of purchase.
See Connecting the Monitor for further information regarding cable connections.
Page 14
Model
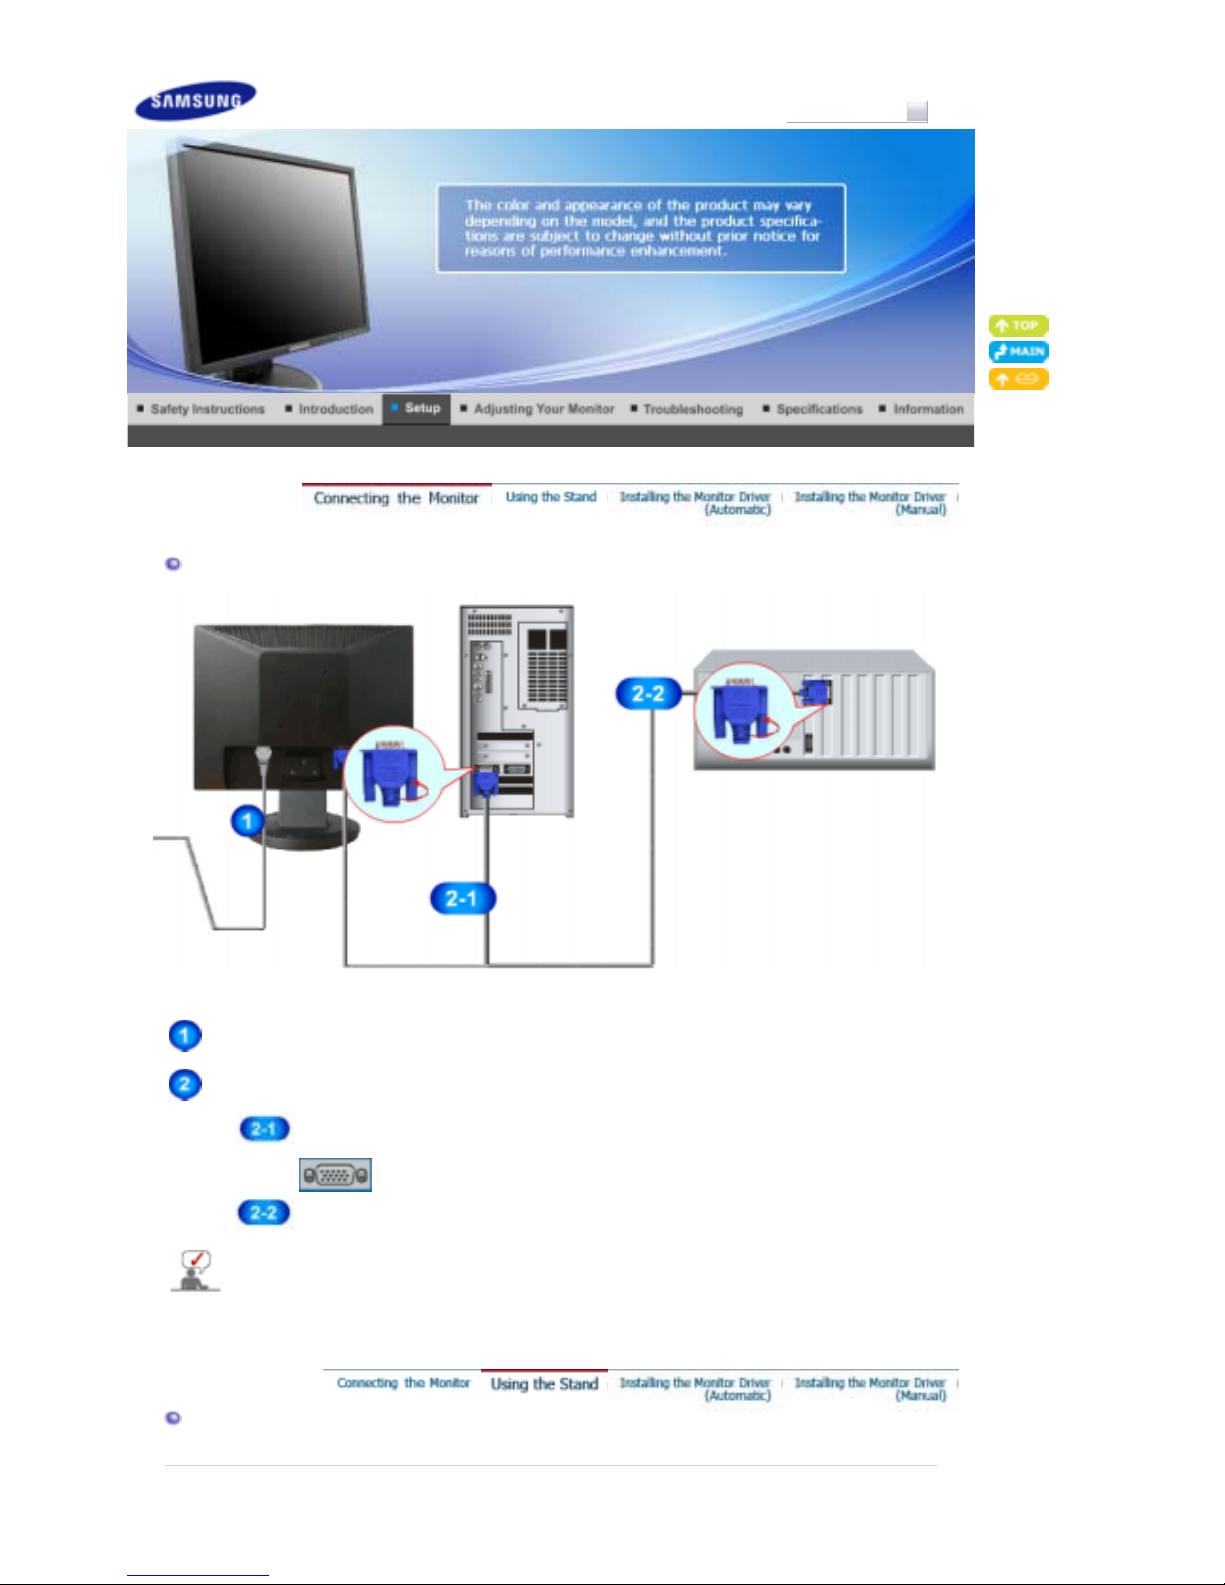
Connecting the Monitor
Connect the power cord for your monitor to the power port on the back of the monitor.
Plug the power cord for the monitor into a nearby outlet.
Use appropriate connection for your computer.
Using the D-sub (Analog) connector on the video card.
Connect the signal cable to the 15-pin, D-sub port on the back of your monitor.
[ RGB IN ]
Connected to a Macintosh.
Connect the monitor to the Macintosh computer using the D-sub connection cable.
If the monitor and the computer are connected, you can turn them on and use them.
Using the Stand
SyncMaster 723N
Page 15
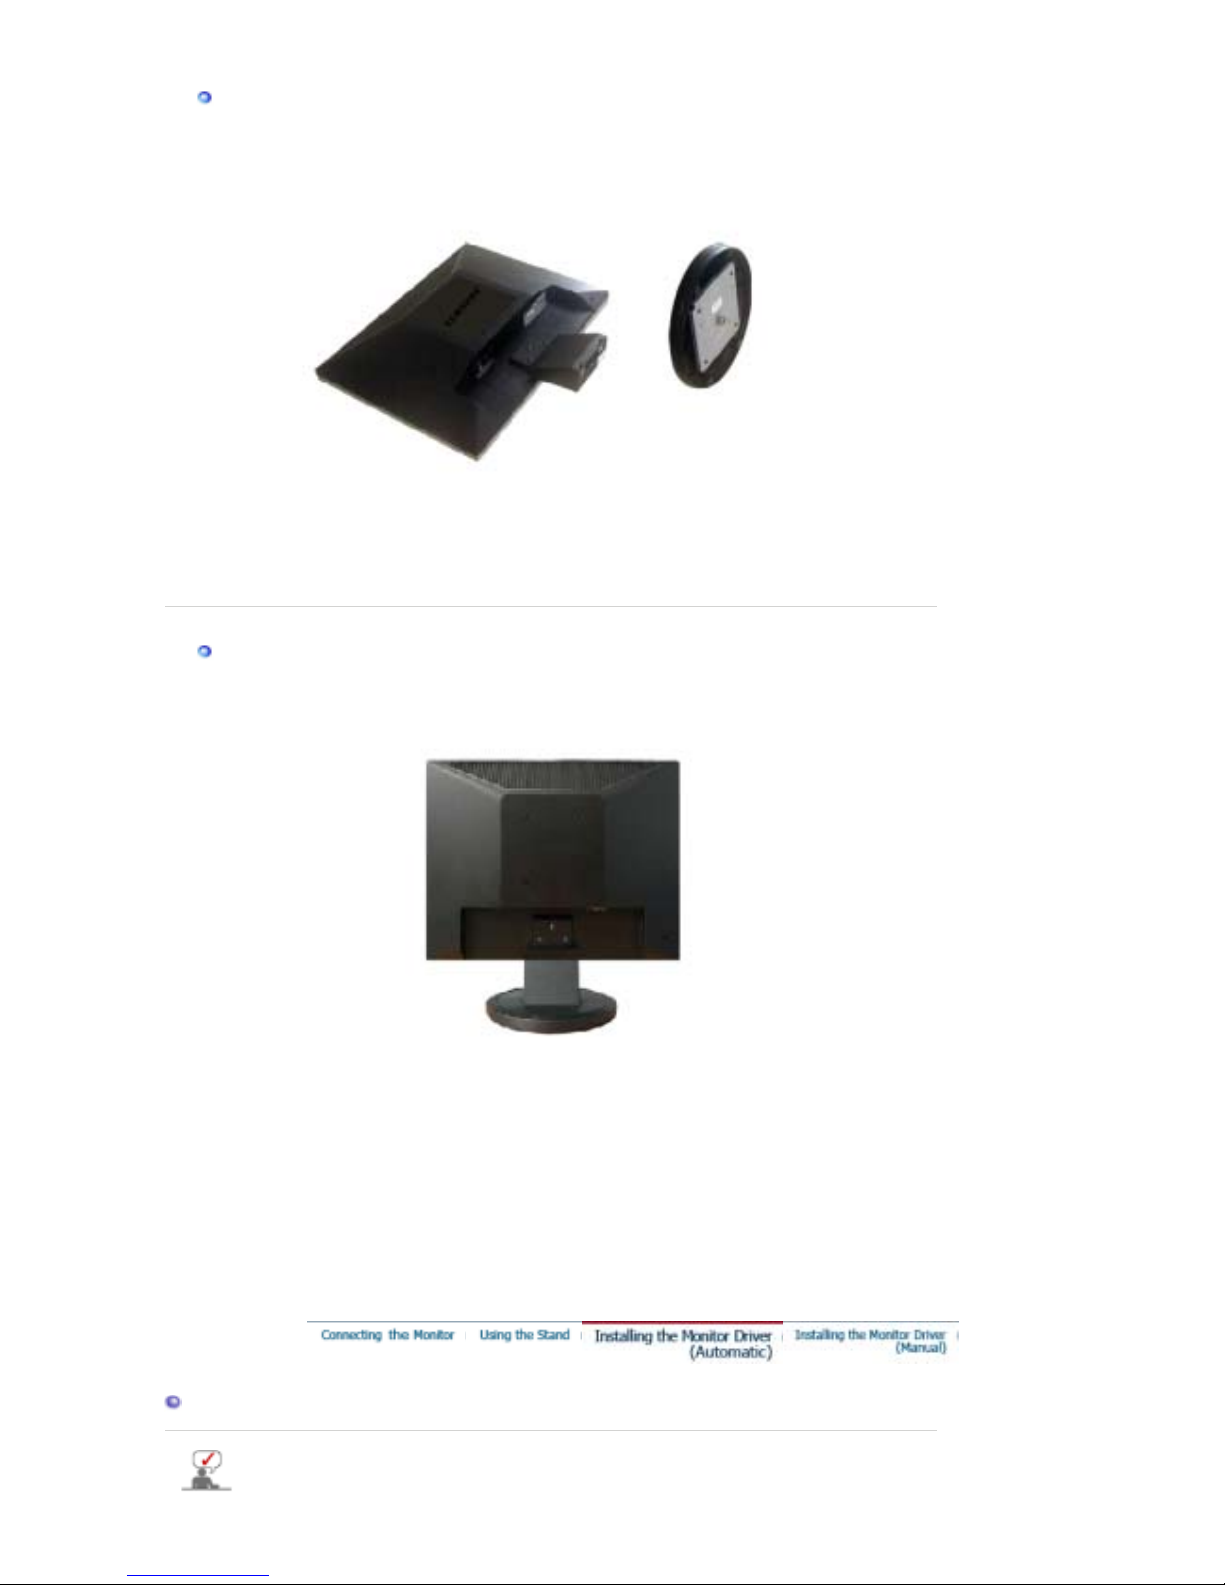
Monitor Assembly
Monitor and Bottom
Attaching a Base
This monitor accepts a 75 mm x 75 mm VESA-compliant mounting interface pad.
Simple stand
A.
Monitor
B.
Mounting interface pad (Sold separately)
1. Turn off your monitor and unplug its power cord.
2. Lay the LCD monitor face-down on a flat surface with a cushion beneath it to protect the
screen.
3. Remove four screws and then remove the stand from the LCD monitor.
4. Align the mounting interface pad with the holes in the rear cover mounting Pad and secure it
with four screws that came with the arm-type base, wall mount hanger or other base.
Installing the Monitor Driver (Automatic)
When prompted by the operating system for the monitor driver, insert the CD-ROM
included with this monitor. Driver installation is slightly different from one operating
Page 16
system to another. Follow the directions appropriate for the operating system you
have.
Prepare a blank disk and download the driver program file at the Internet web site shown
here.
z
Internet web site : http://www.samsung.com/ (Worldwide)
http://www.samsung.com/monitor (U.S.A)
http://www.sec.co.kr/monitor (Korea)
http://www.samsungmonitor.com.cn/ (China)
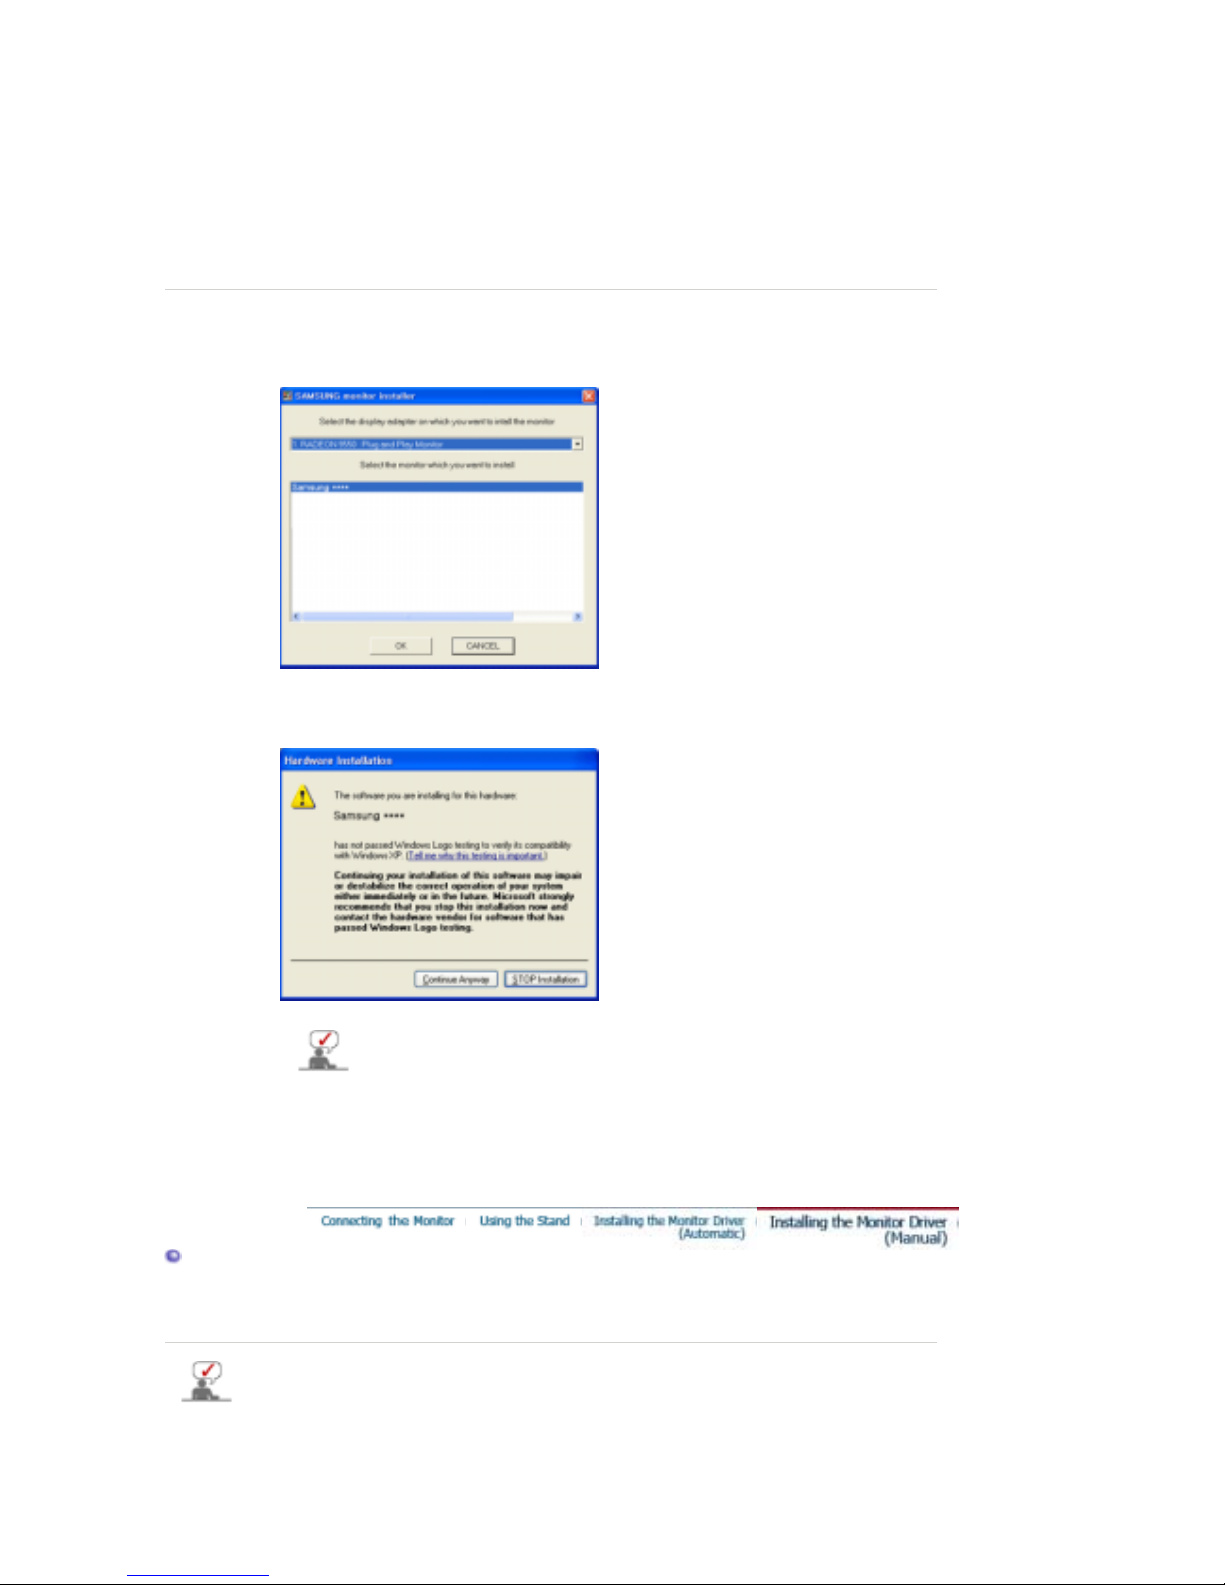
1. Insert CD into the CD-ROM drive.
2. Click
"Windows"
3. Choose your monitor model in the model list, then click the
"OK"
button.
4. If you can see following message window, then click the
"Continue Anyway"
button.
Then click
"OK"
button. (Microsoft
®
Windows® XP Operating System)
5. Monitor driver installation is completed.
This monitor driver is under certifying MS logo,and this installation don't
damage your system.The certified driver will be posted on Samsung
Monitor homepage
http://www.samsung.com/.
Installing the Monitor Driver (Manual)
Windows Vista | Windows XP | Windows 2000 | Windows ME | Windows NT | Linux
When prompted by the operating system for the monitor driver, insert the CD-ROM
included with this monitor. Driver installation is slightly different from one operating
system to another. Follow the directions appropriate for the operating system you
have.
Prepare a blank disk and download the driver program file at the Internet web site shown
Page 17
below.
z Internet web site : http://www.samsung.com/ (Worldwide)
http://www.samsung.com/monitor (U.S.A)
http://www.sec.co.kr/monitor (Korea)
http://www.samsungmonitor.com.cn/ (China)
Microsoft® Windows Vista™ Operating System
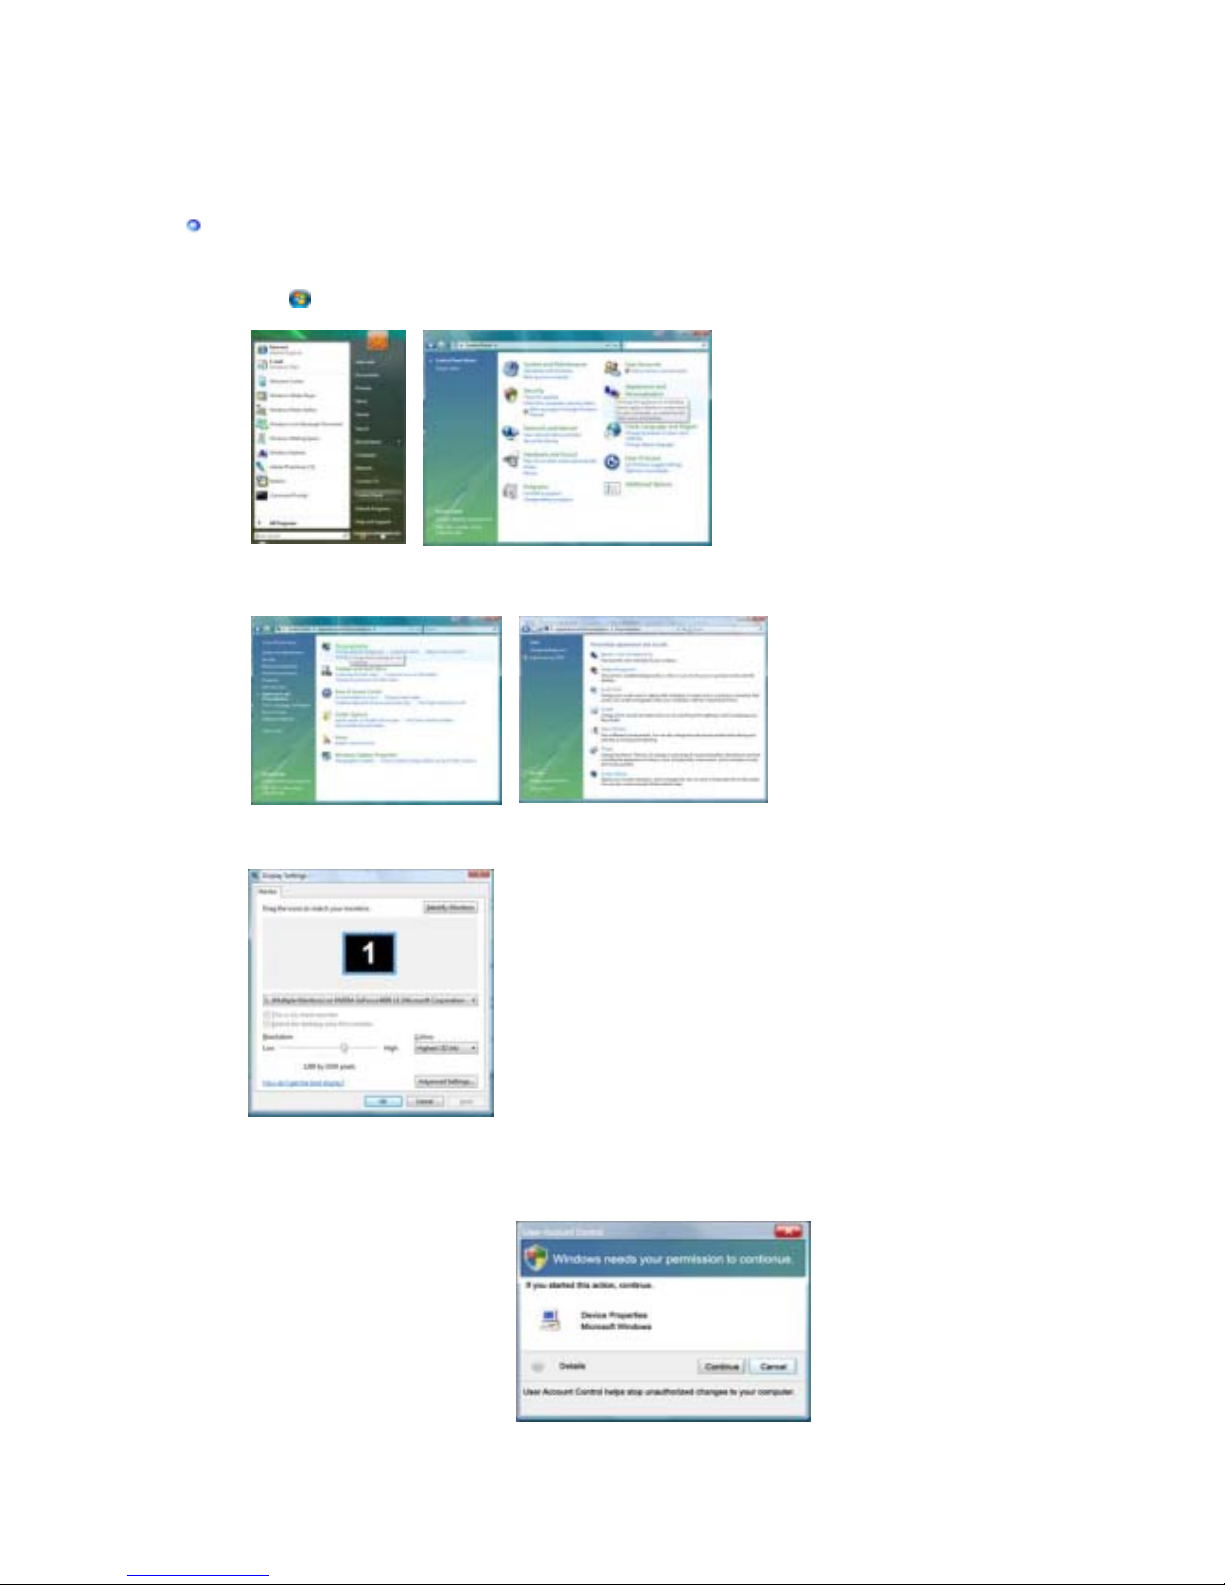
1. Insert your Manual CD into your CD-ROM drive.
2. Click (Start) and "
Control Panel
". Then, double-click on "
Appearance and
Personalization
".
3. Click "
Personalization
" and then "
Display Settings
".
4. Click "
Advanced Settings…
".
5. Click "
Properties
" in the "
Monitor
" tab. If the "
Properties
" button is deactivated, it
means the configuration for your monitor is completed. The monitor can be used as is.
If the message “
Windows needs…
” is displayed, as shown in the figure below,
click "
Continue
".
Page 18
This monitor driver is under certifying MS logo, and this installation doesn't
damage your system.
The certified driver will be posted on Samsung Monitor homepage
http://www.samsung.com/
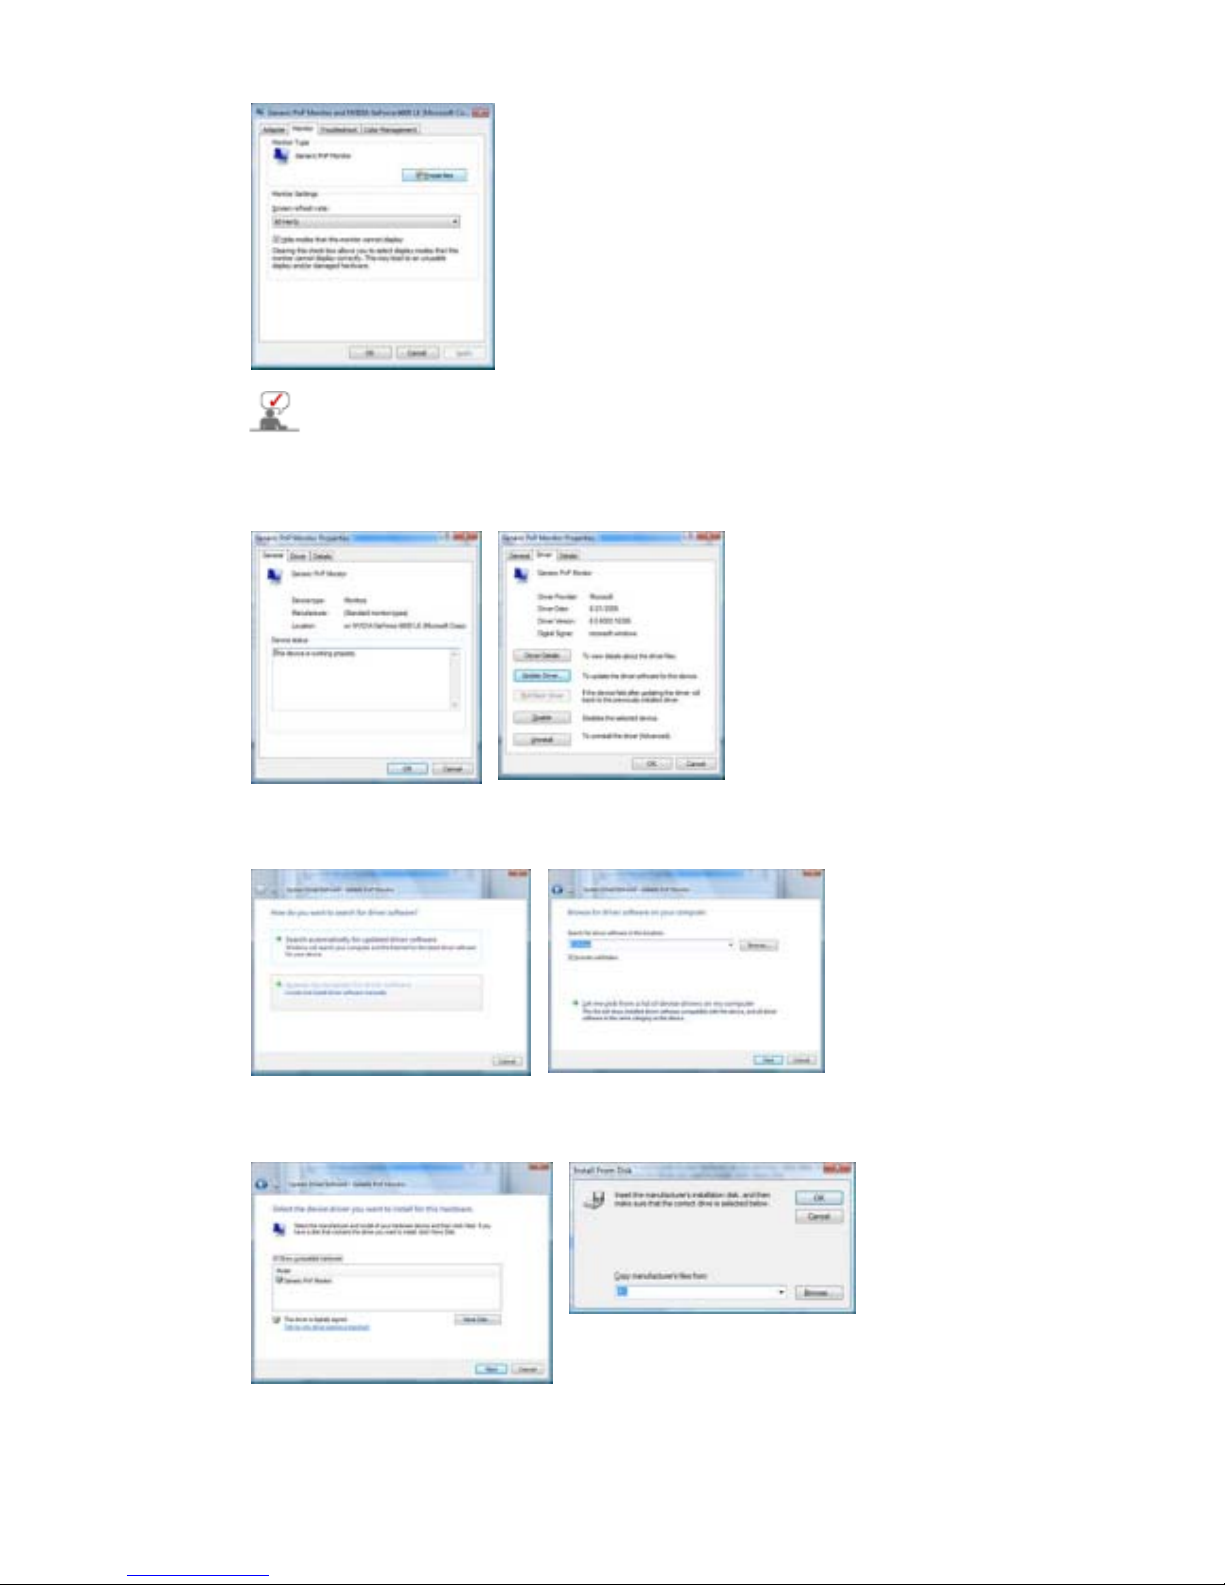
6. Click "
Update Driver…
" in the "
Driver
" tab.
7. Check the "
Browse my computer for driver software
" checkbox and click "
Let me
pick from a list of device drivers on my computer
".
8. Click "
Have Disk…
" and select the folder (for example, D:\Drive) where the driver setup
file is located, and click "OK".
9.
Select the model that matches your monitor from the list of monitor models on the
screen, and click "
Next
".
Page 19
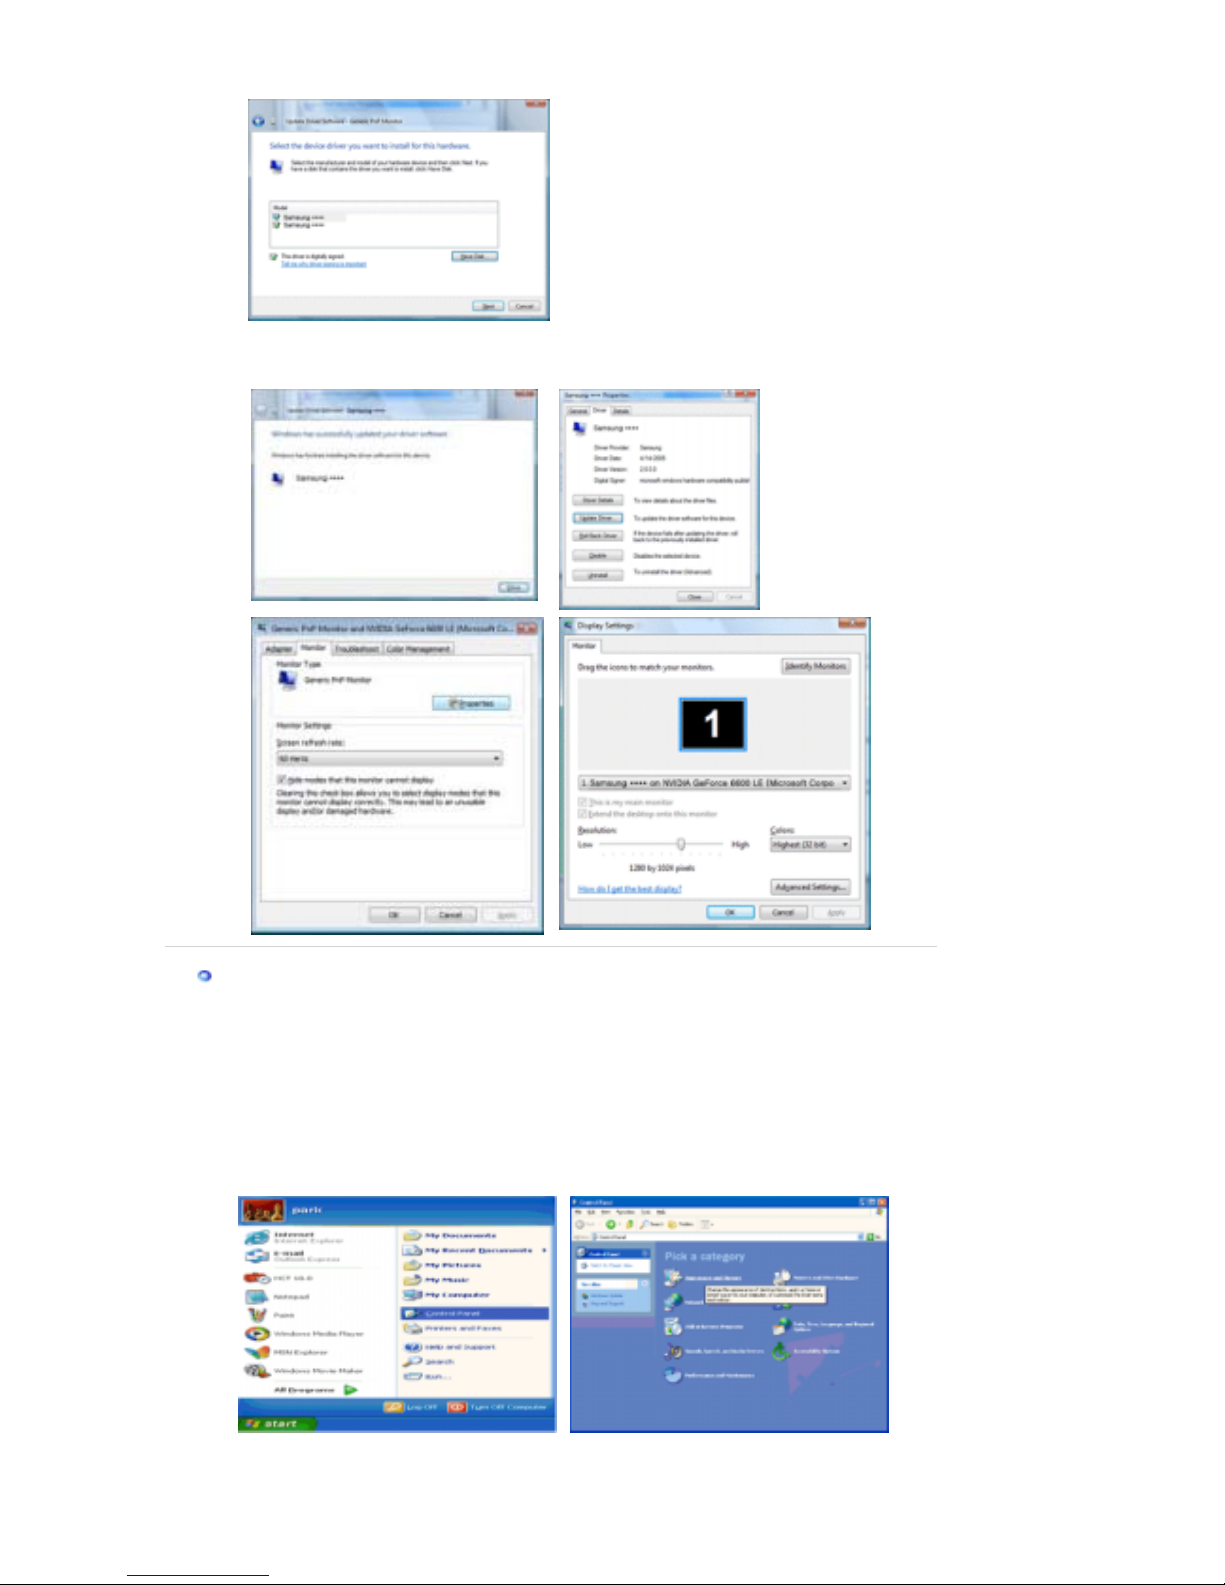
10. Click "
Close
"→ "
Close
" → "OK" → "OK" on the following screens displayed in
sequence.
Microsoft® Windows® XP Operating System
1. Insert CD into the CD-ROM driver.
2. Click "
Start
" —> "
Control Panel
" then click the "
Appearance and Themes
" Icon.
3. Click "
Display
" icon and choose the "
Settings
" tab then click "
Advanced..
".
Page 20
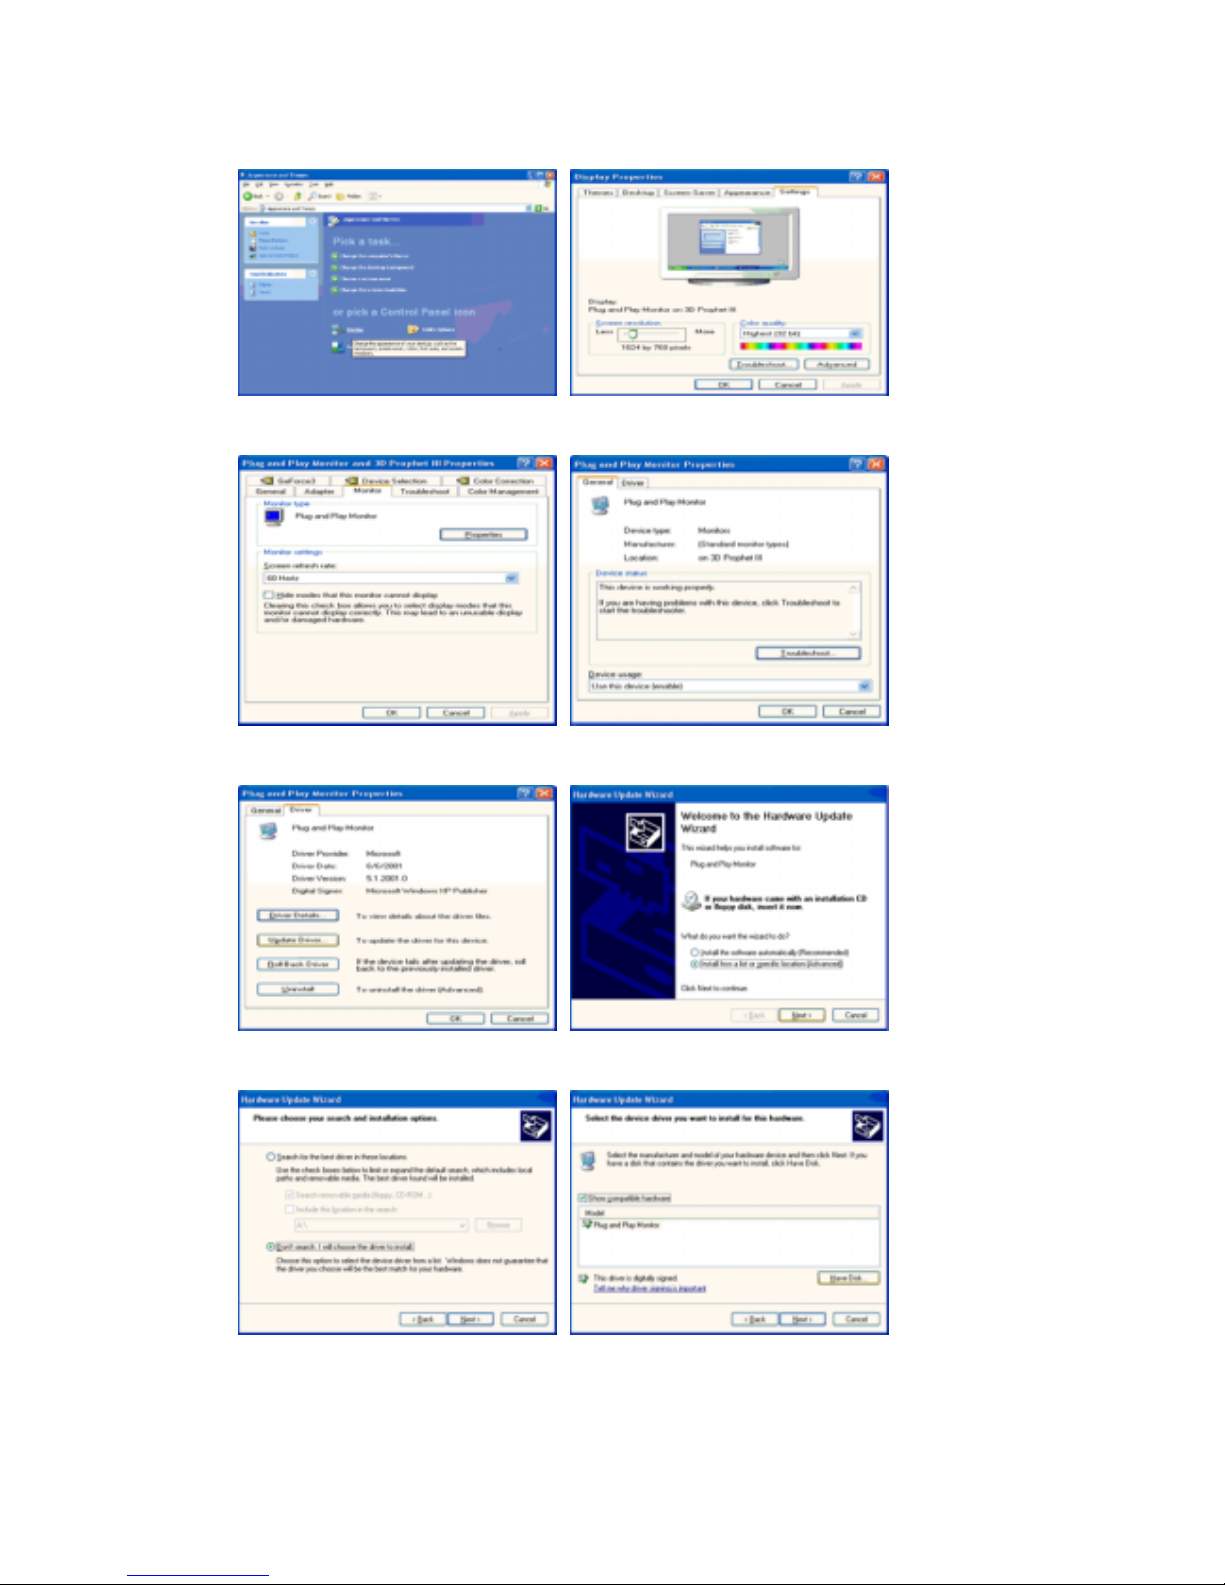
4. Click the "
Properties
" button on the "
Monitor
" tab and select "
Driver
" tab.
5. Click "
Update Driver..
" and select "
Install from a list or..
" then click "
Next
" button.
6. Select "
Don't search ,I will..
" then click "
Next
" and then click "
Have disk
".
7. Click the "
Browse
" button then choose A:(D:\Driver) and choose your monitor model in the
model list and click the "
Next
" button.
Page 21
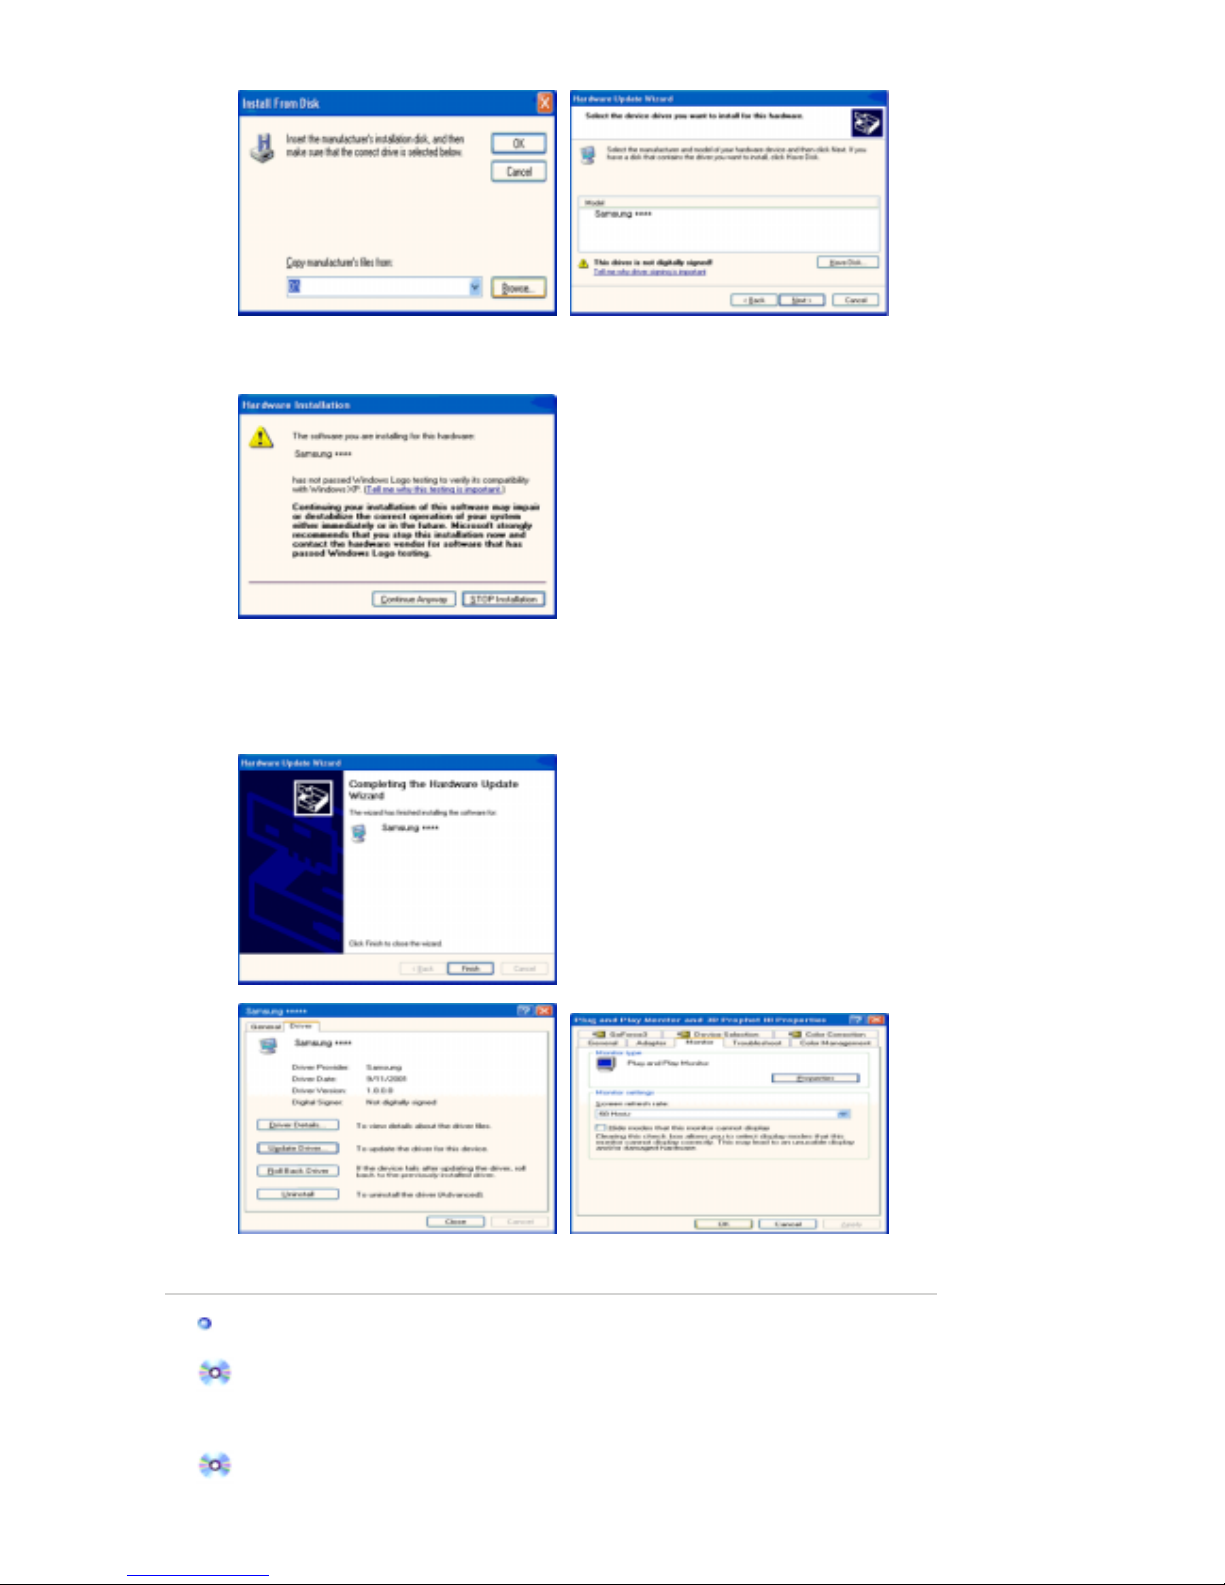
8. If you can see following "
Message
" window, then click the "
Continue Anyway
" button. Then
click "OK" button.
This monitor driver is under certified MS logo,and this installation doesn't damage your
system.The certified driver will be posted on Samsung Monitor homepage.
http://www.samsung.com/
9. Click the "
Close
" button then click "OK" button continually.
10. Monitor driver installation is completed.
Microsoft
®
Windows® 2000 Operating System
When you can see "Digital Signature Not Found" on your monitor, follow these steps.
1. Choose "OK" button on the "
Insert disk
" window.
2. Click the "
Browse
" button on the "
File Needed
" window.
3. Choose A:(D:\Driver) then click the "Open" button and then click "OK" button.
How to install
Page 22
1. Click "
Start
" , "
Setting
" , "
Control Panel
".
2. Double click the "
Display
" Icon.
3. Choose the "
Settings
" tab and then click "
Advanced..
".
4. Choose "
Monitor
".
5. Click "
Driver
" and then click on "
Update Driver..
" then click on the "Next" button.
6. Choose "
Display a list of the known drivers for this device so that I can choose a
specific driver
" then click "
Next
" and then click "
Have disk
".
7. Click the "
Browse
" button then choose A:(D:\Driver).
8. Click the "
Open
" button, then click "OK" button.
9. Choose your monitor model and click the "
Next
" button then click "
Next
" button.
10. Click the "
Finish
" button then the "
Close
" button.
If you can see the "
Digital Signature Not Found
" window then click the "
Yes
"button.
And click the "
Finish
" button then the "
Close
" button.
Case1: If the "Properties" button is inactive, it means your monitor is properly configured.
Please stop installation
Case2: If the "Properties" button is active, click the "Properties" button then follow next steps
continually.
Microsoft
®
Windows® Millennium Operating System
1. Click "
Start
" , "
Setting
" , "
Control Panel
".
2. Double click "
Display
" icon.
3. Select the "
Settings
" tab and click "
Advanced Properties
" button.
4. Select the "
Monitor
" tab.
5. Click the "
Change
" button in the "
Monitor Type
" area.
6. Choose "
Specify the location of the driver
".
7. Choose "
Display a list of all the driver in a specific location..
" then click "
Next
" button.
8. Click the "
Have Disk
" button
9. Specify A:\(D:\driver) then click "OK" button.
10. Select "
Show all devices
" and choose the monitor that corresponds to the one you
connected to your computer and click "OK".
11. Continue choosing "
Close
" button and "OK" button until you close the Display Properties
dialogue box.
Microsoft
®
Windows® NT Operating System
1. Click
Start, Settings, Control Panel
, and then double-click
Display
icon.
2. In Display Registration Information window, click Settings Tab and then click
All Display
Modes
.
3. Select a mode that you wish to use (Resolution, Number of colors and Vertical frequency)
and then click OK.
4. Click
Apply
button if you see the screen working normally after clicking
Test
. If the screen is
not normal, change to a different mode (lower mode of resolution, colors or frequency).
If there is no Mode at
All Display Modes
, select the level of resolution and vertical
frequency by referring to the Preset Timing Modes in the user guide.
Linux Operating System
To execute X-Window, you need to make the X86Config file, which is a type of system setting file.
1. Press Enter at the first and the second screen after executing the X86Config file.
2. The third screen is for
setting your mouse
.
3. Set a mouse for your computer.
4. The next screen is for
selecting a keyboard
.
5. Set a Keyboard for your computer.
6. The next screen is for
setting your monitor
.
7. First of all, set a
horizontal frequency
for your monitor. (You can enter the frequency
directly.)
8. Set a
vertical frequency
for your monitor. (You can enter the frequency directly.)
9. Enter the
model name of your monitor
. This information will not affect the actual execution
of X-Window.
10. You have
finished
setting up your monitor.
Execute
X-Window after setting other requested hardware.
Page 23
Model
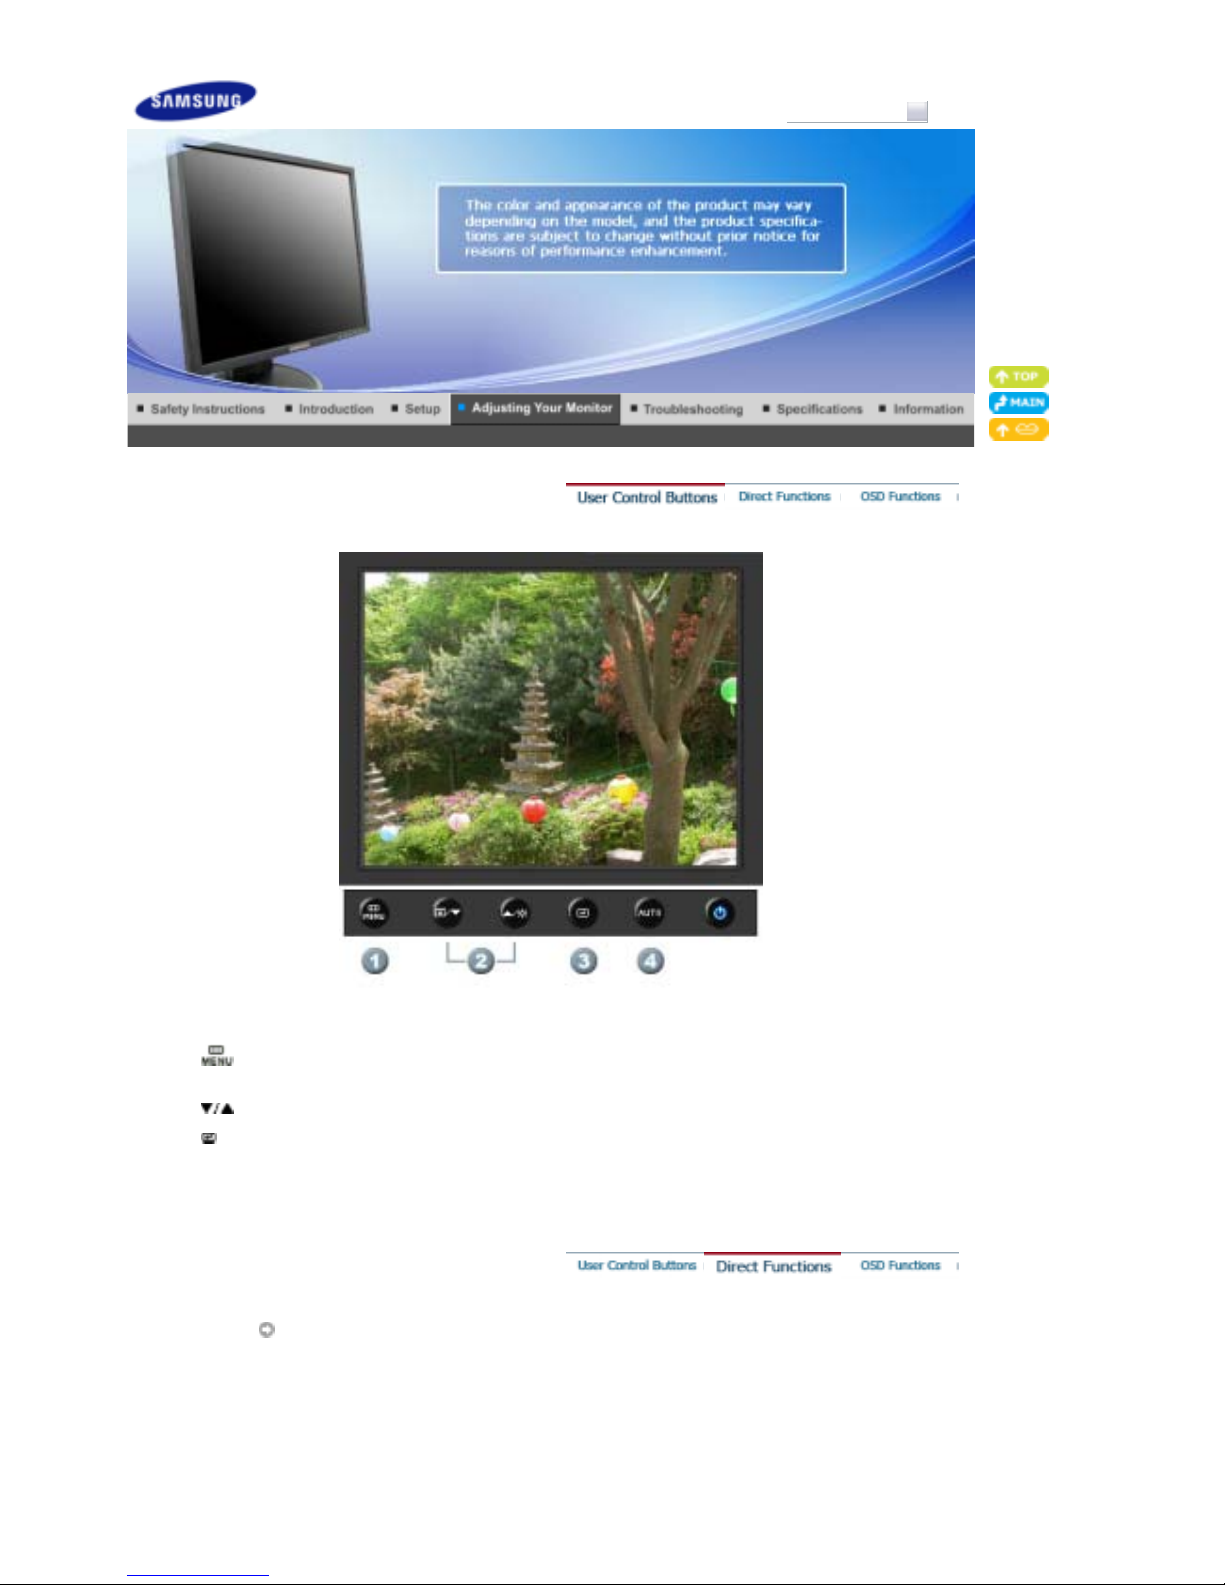
1.
[ ]Use this button to open the on-screen menu and exit from the menu screen or close screen
adjustment menu.
2.
[ ]This button allows you to adjust items in the menu.
3.
[ ]Press this button to activate a highlighted menu item.
4. [AUTO
]Press to self-adjust to the incoming PC signal. The values of fine,coarse and position are
adjusted automatically.
AUTO
SyncMaster 723N
Page 24
Menu Description
AUTO
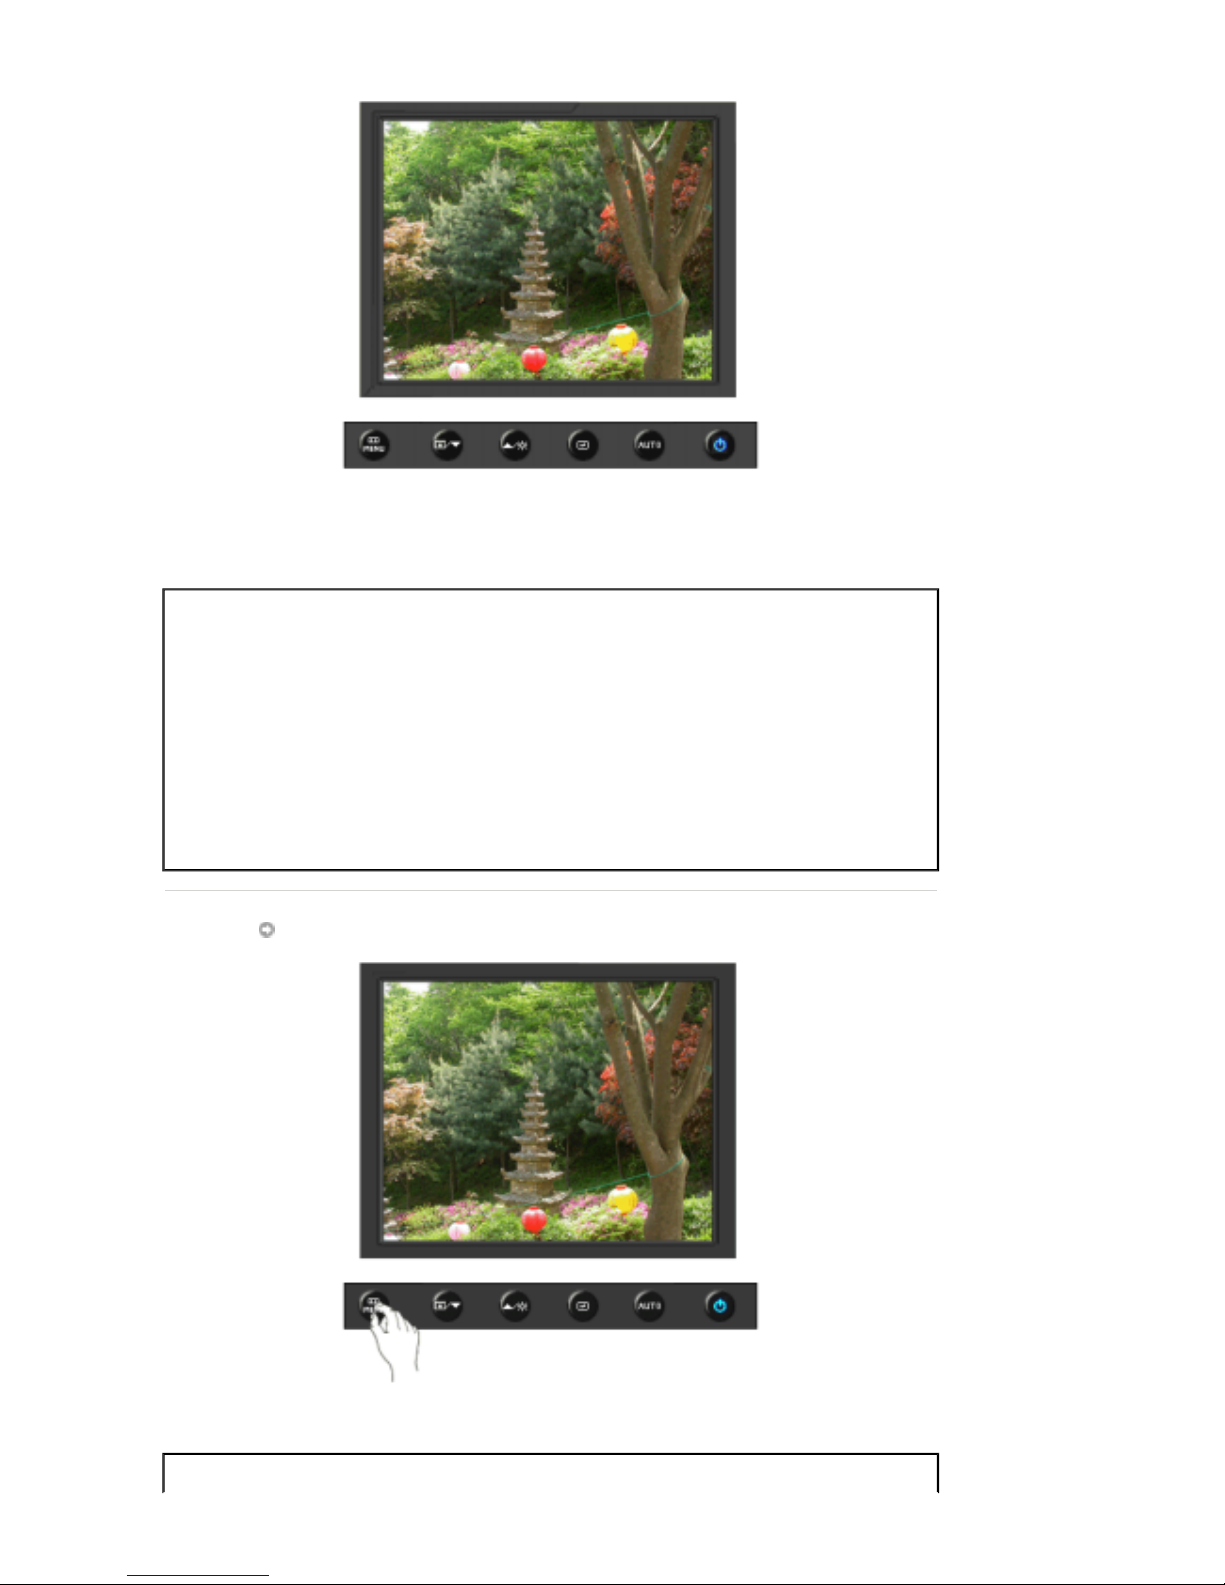
When the '
AUTO
' button is pressed, the Auto Adjustment screen appears
as shown in the animated screen on the center.
Auto adjustment allows the monitor to self-adjust to the incoming video
signal. The values of fine, coarse and position are adjusted automatically.
(Available in analog mode only)
- If auto adjustment does not work properly, press AUTO button again to
adjust picture with more accuracy.
- If you change resolution in the control panel, auto function will be
executed automatically.
Locked
Menu Description
Page 25
Locked
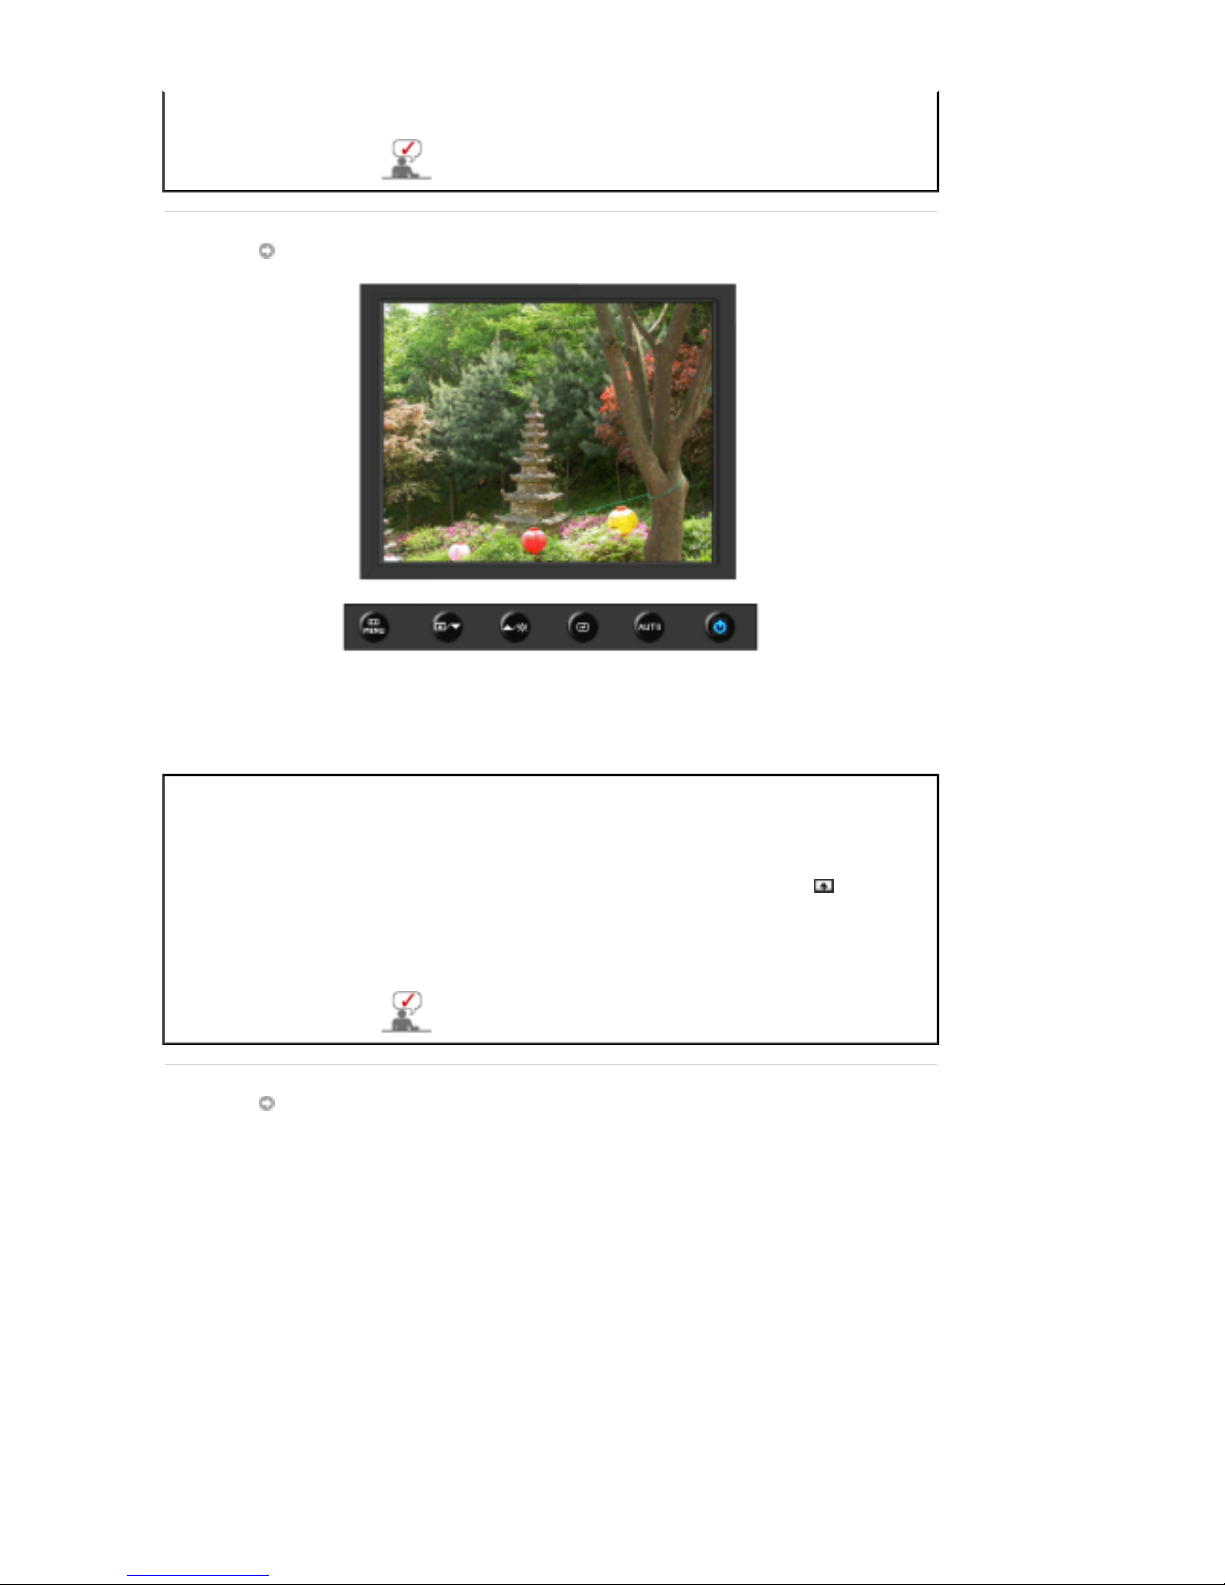
After pushing the "MENU" button more than 5 seconds, OSD function is
locked (unlocked).
You can adjust only the brightness and contrast of the
monitor with the OSD adjustment locking feature.
Customized key
Menu Description
Customized key
You can customize key assignment for the Custom button according to
your preferences.
To view the operating screen displayed when pressing the [ ] button
after configuring the customized key for a function, click the name of each
function.
( MagicBright - MagicColor - Color Effect )
You can configure the customized key for a required
function via
Setup
>Customized Key
Brightness
Page 26
Menu Description
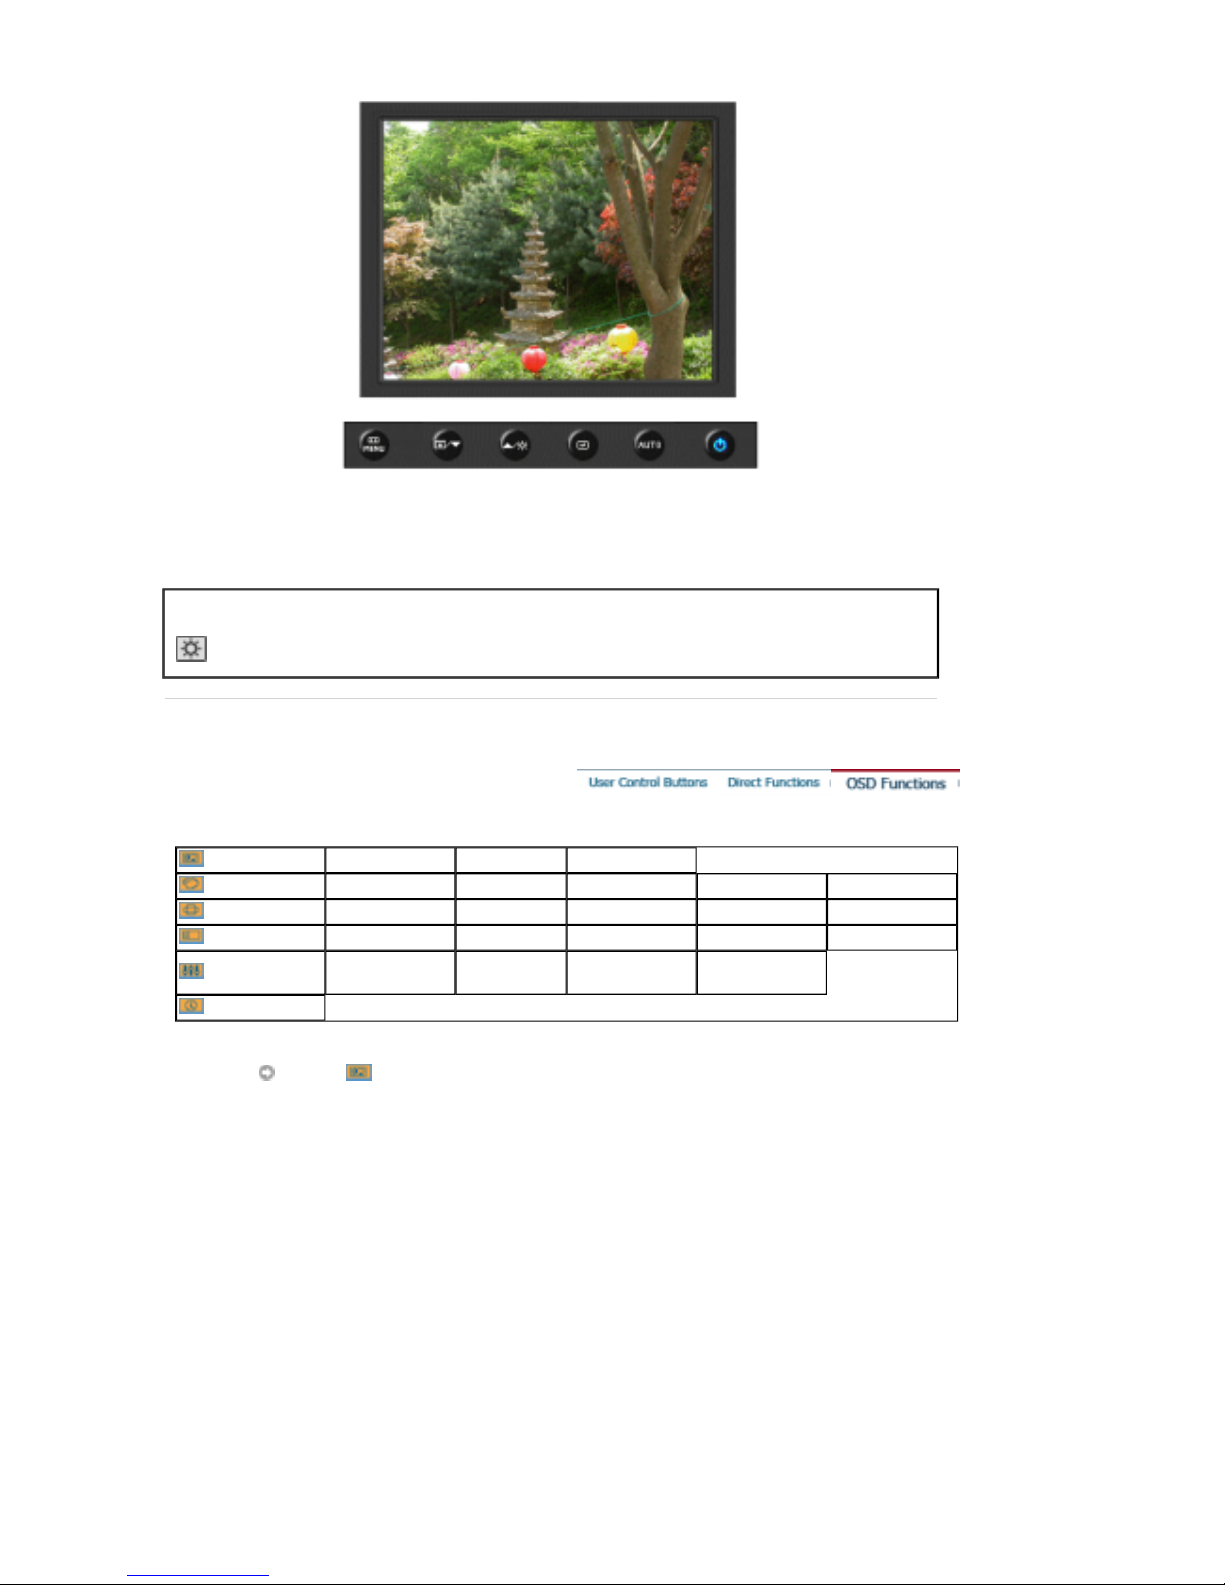
Brightness
When OSD is not on the screen, push the button to adjust brightness.
Picture
Brightness Contrast MagicBright
Color
MagicColor Color Tone Color Control Color Effect Gamma
Image
Coarse Fine Sharpness H-Position V-Position
OSD
Language H-Position V-Position Transparency Display Time
Setup
Reset
Customized
Key
Off Timer
Information
Picture
Page 27
Menu Description Play/Stop
Brightness
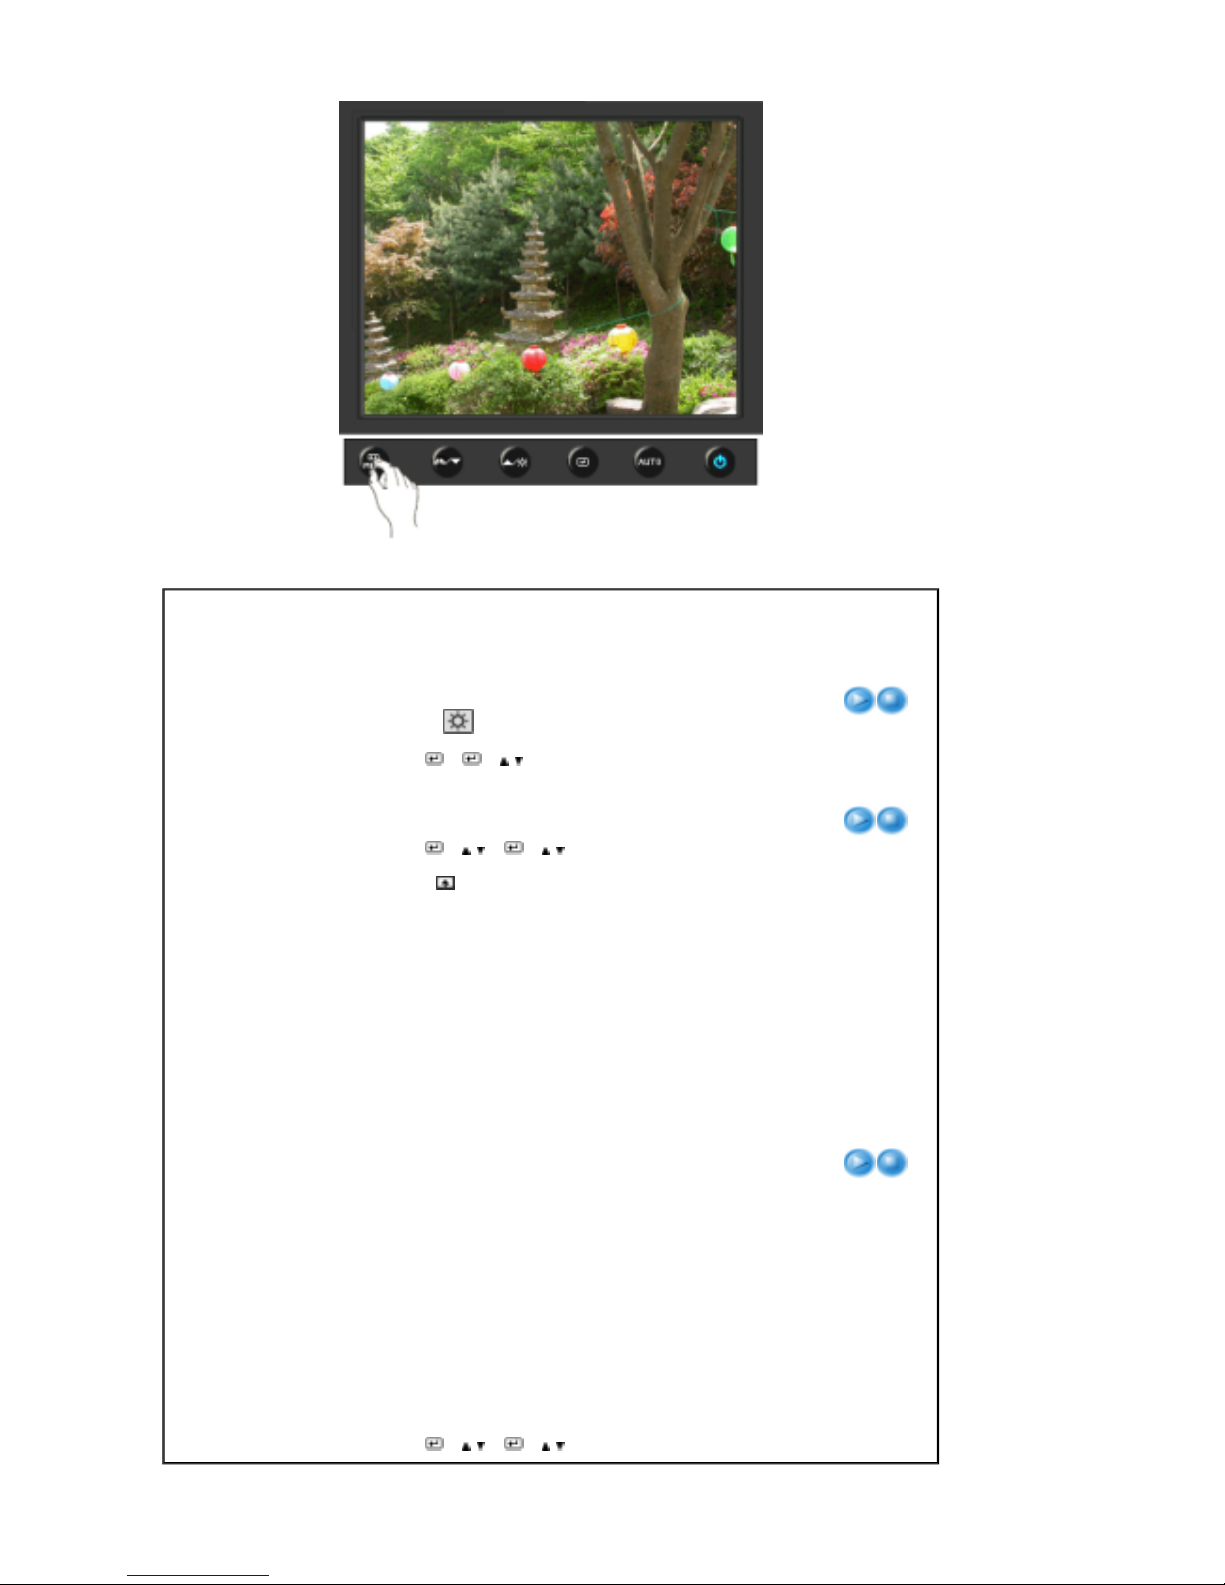
You can use the on-screen menus to change the
brightness according to personal preference.
Direct Access Feature
: When OSD is not on the screen,
push the [ ] button to adjust brightness.
[MENU → → → , → MENU]
Contrast
You can use the on-screen menus to change the contrast
according to personal preference.
[MENU → → , → → , → MENU]
MagicBright
Push the button to circle through available
preconfigured modes.
MagicBright is a new feature providing optimum viewing
environment depending on the contents of the image you
are watching. Currently seven different modes are
available: Custom, Text, Internet, Game, Sport, Movie and
Dynamic Contrast. Each mode has its own pre-configured
brightness value. You can easily select one of seven
settings by simply pressing Customized Key control
button.
[MENU → → , → → , → MENU]
1) Custom
- Although the values are carefully chosen by
our engineers, the pre-configured values may not be
comfortable to your eyes depending on your taste.
If this is the case, adjust the brightness and contrast by
using the OSD menu.
2) Text
- For documentations or works involving heavy
text.
3) Internet
- For working with a mixture of images such as
texts and graphics.
4) Game
- For watching motion pictures such as a game.
5) Sport
- For watching motion pictures such as a sport.
6) Movie
- For watching motion pictures such as a DVD
or Video CD.
Page 28
Color
Menu Description Play/Stop
MagicColor
[MENU → , → → → , → → MENU]
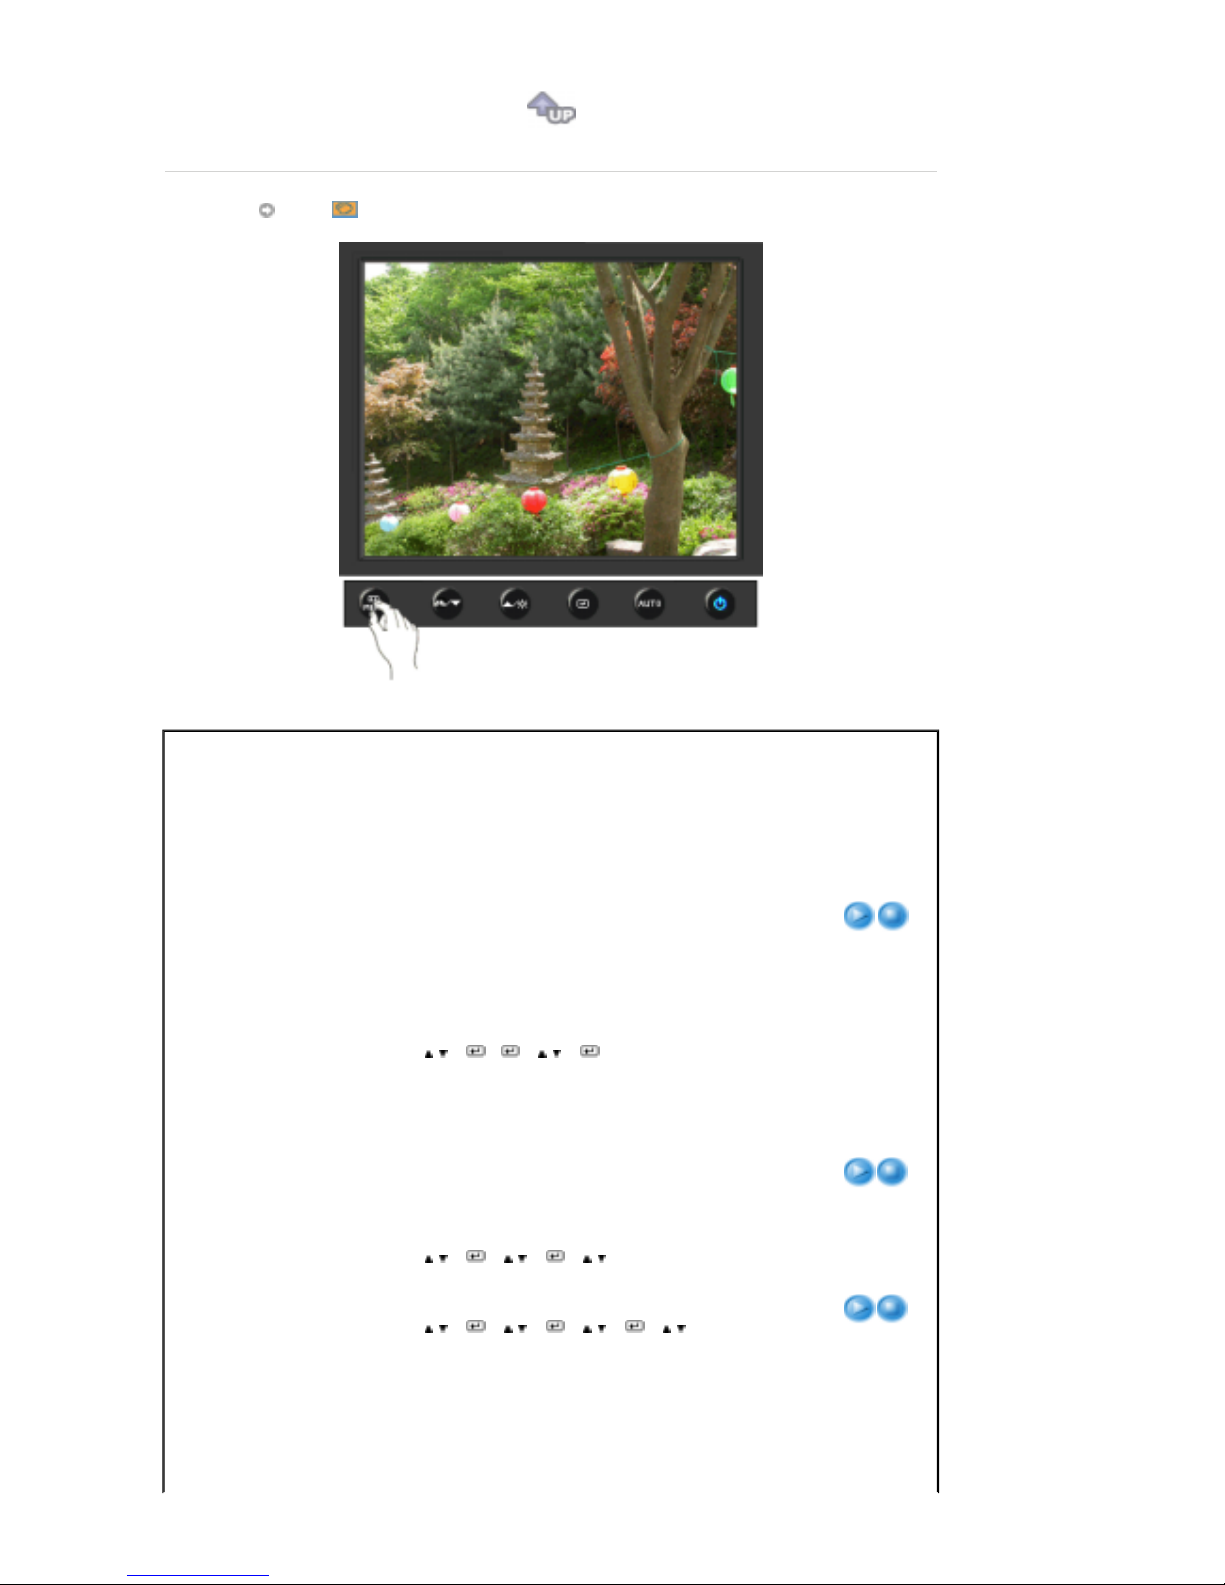
MagicColor is a new technology that Samsung has
exclusively developed to improve digital image and to
display natural color more clearly without disturbing image
quality.
1) Off
- Returns to the original mode.
2) Demo
- The screen before applying MagicColor
appears on the right and the screen after applying
MagicColor appears on the left.
3) Full
- Displays not only vivid natural color but also
more realistic natural skin color with clearness.
4) Intelligent
- Displays vivid natural color with clearness.
Color Tone
The tone of the color can be changed and one of four
modes can be selected - Cool, Normal, Warm and
Custom.
[MENU → , → → , → → , → MENU]
Cool
- Makes whites bluish.
Normal
- Keeps whites white.
Warm
- Makes whites reddish.
Custom
- Select this mode when you want to adjust
the image according to your preferences.
Color Control
Adjusts individual R,G,B color balance.
[MENU → , → → , → → , → → , → MENU]
You can change the overall mood by changing the screen
colors.
Off
-
This applies an achromatic color to the
screen to adjust the screen effects.
The default colors of black and white are
Page 29
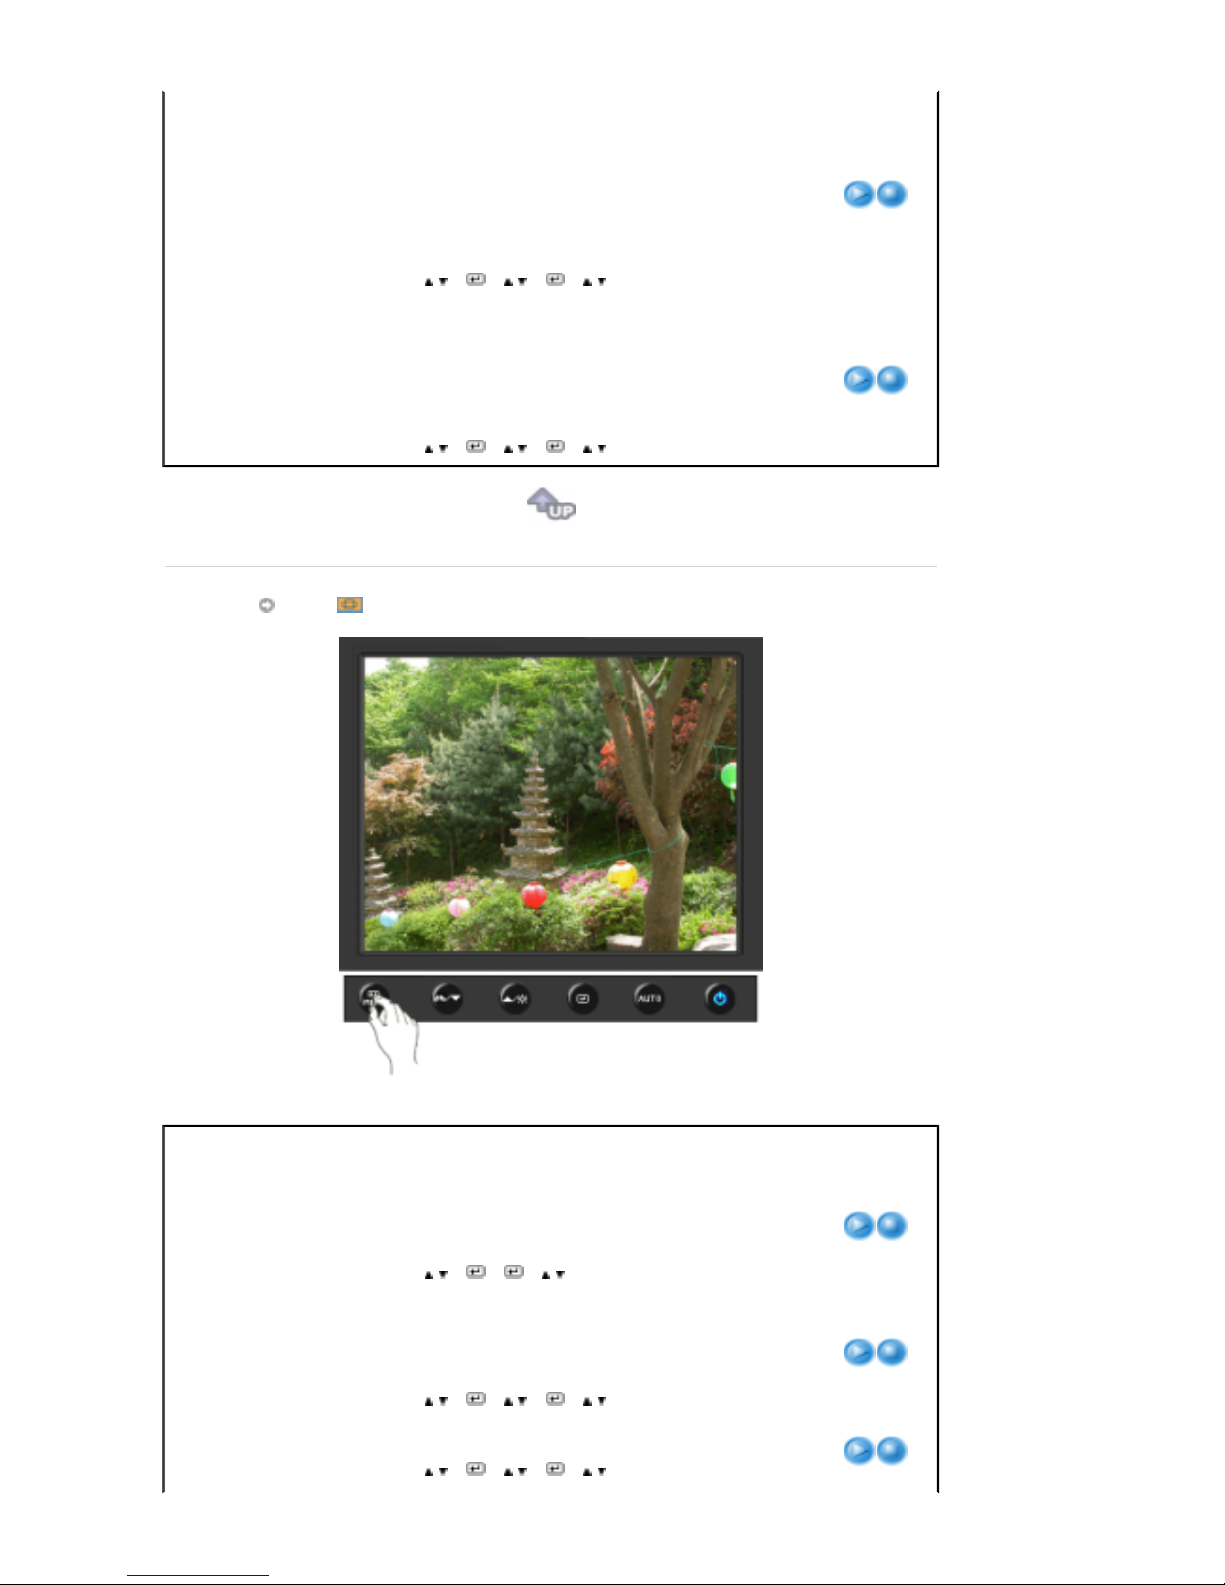
Color Effect
[MENU → , → → , → → , → MENU]
Grayscale
- displayed.
Green
-
This applies the green color effect to a
black and white screen.
Aqua
- Select this mode when you want to adjust
the image according to your preferences.
Sepia
- This applies the Sepia color effect to a
black and white screen.
Gamma
Gamma correction changes the luminance of the colors
with intermediate luminance.
z
Mode 1
z
Mode 2
z
Mode 3
[MENU → , → → , → → , → MENU]
Image
Menu Description Play/Stop
Coarse
Removes noise such as vertical stripes. Coarse
adjustment may move the screen image area. You may
relocate it to the center using the horizontal control menu.
(Available in analog mode only)
[MENU → , → → → , → MENU]
Fine
Removes noise such as horizontal stripes. If the noise
persists even after fine tuning, repeat it after adjusting the
frequency (clock speed).
(Available in analog mode only)
[MENU → , → → , → → , → MENU]
Sharpness
Changes the clearance of image.
[MENU → , → → , → → , → MENU]
Page 30
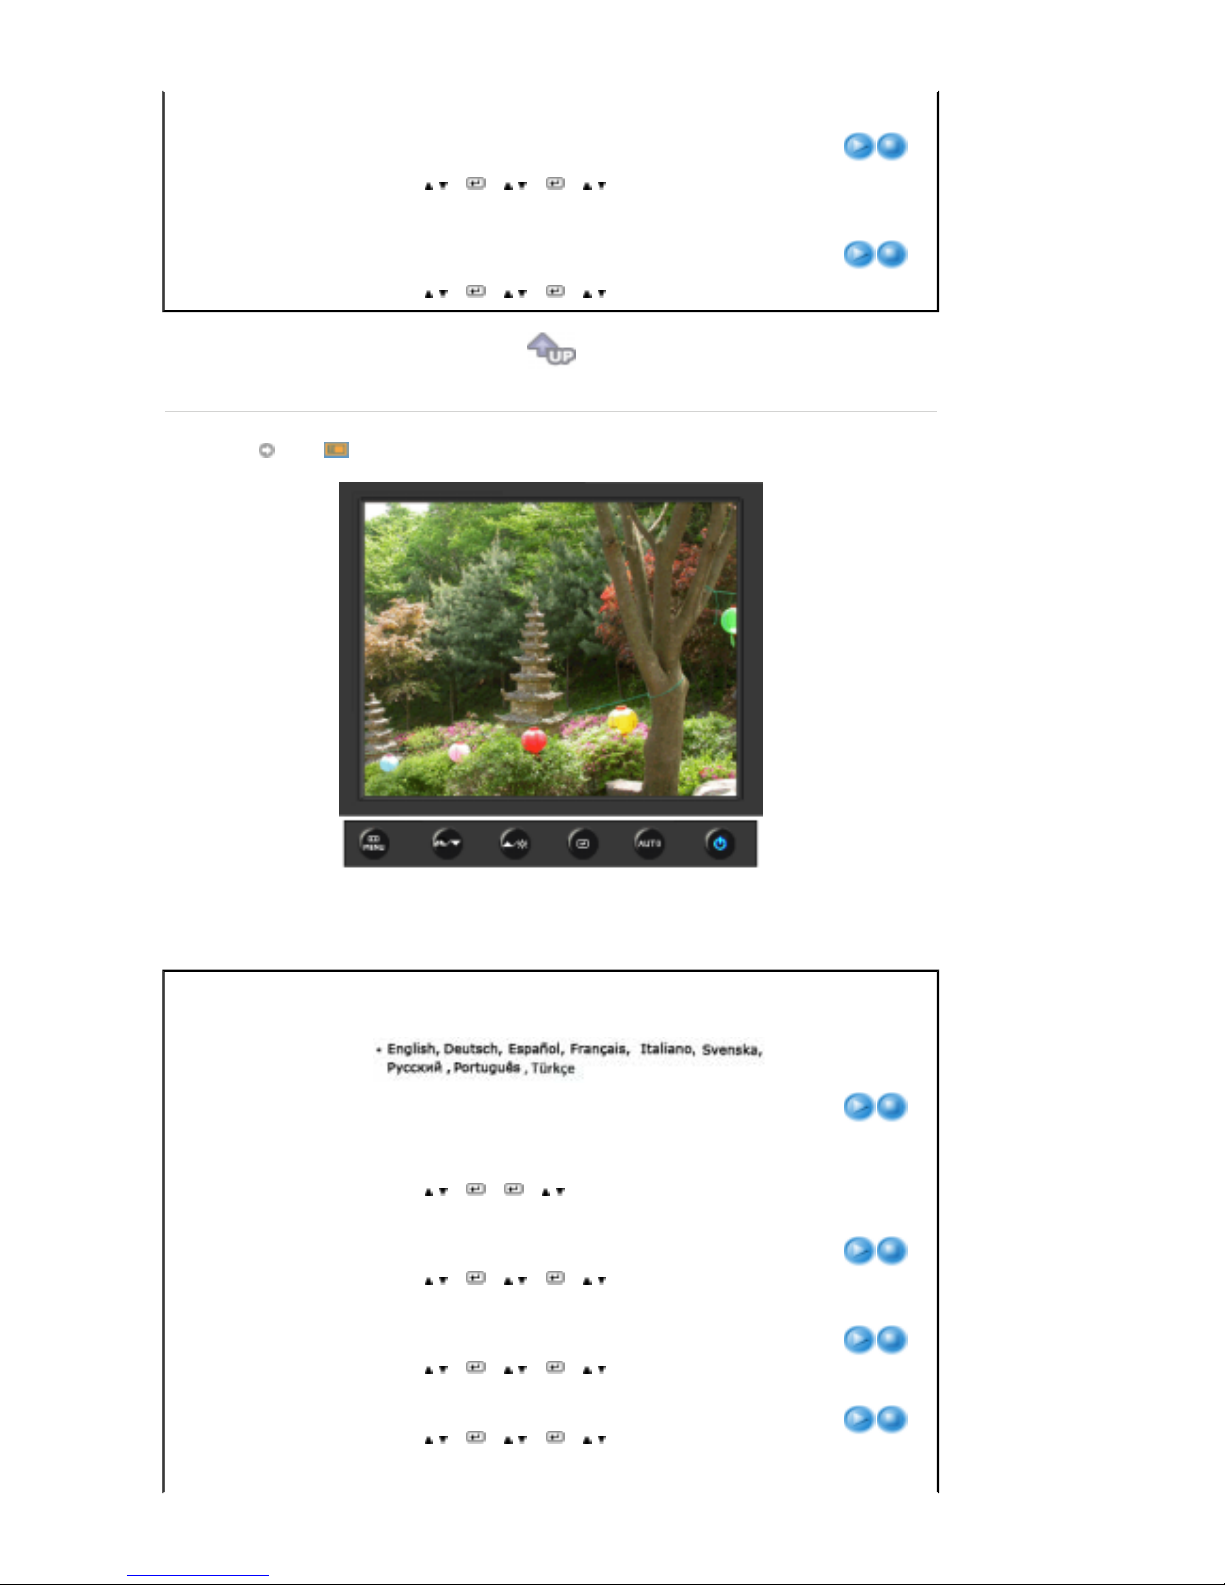
H-Position
Changes the horizontal position of the monitor's entire
display.
(Available in analog mode only)
[MENU → , → → , → → , → MENU]
V-Position
Changes the vertical position of the monitor's entire
display.
(Available in analog mode only)
[MENU → , → → , → → , → MENU]
OSD
Menu Description Play/Stop
Language
You can choose one of 9 languages.
Note
:The language chosen affects only the language of
the OSD. It has no effect on any software running on the
computer.
[MENU → , → → → , → MENU]
H-Position
You can change the horizontal position where the OSD
menu appears on your monitor.
[MENU → , → → , → → , → MENU]
V-Position
You can change the vertical position where the OSD menu
appears on your monitor.
[MENU → , → → , → → , → MENU]
Transparency
Change the transparency of the background of the OSD.
[MENU → , → → , → → , → MENU]
The menu will be automatically turned off if no adjustments
Page 31
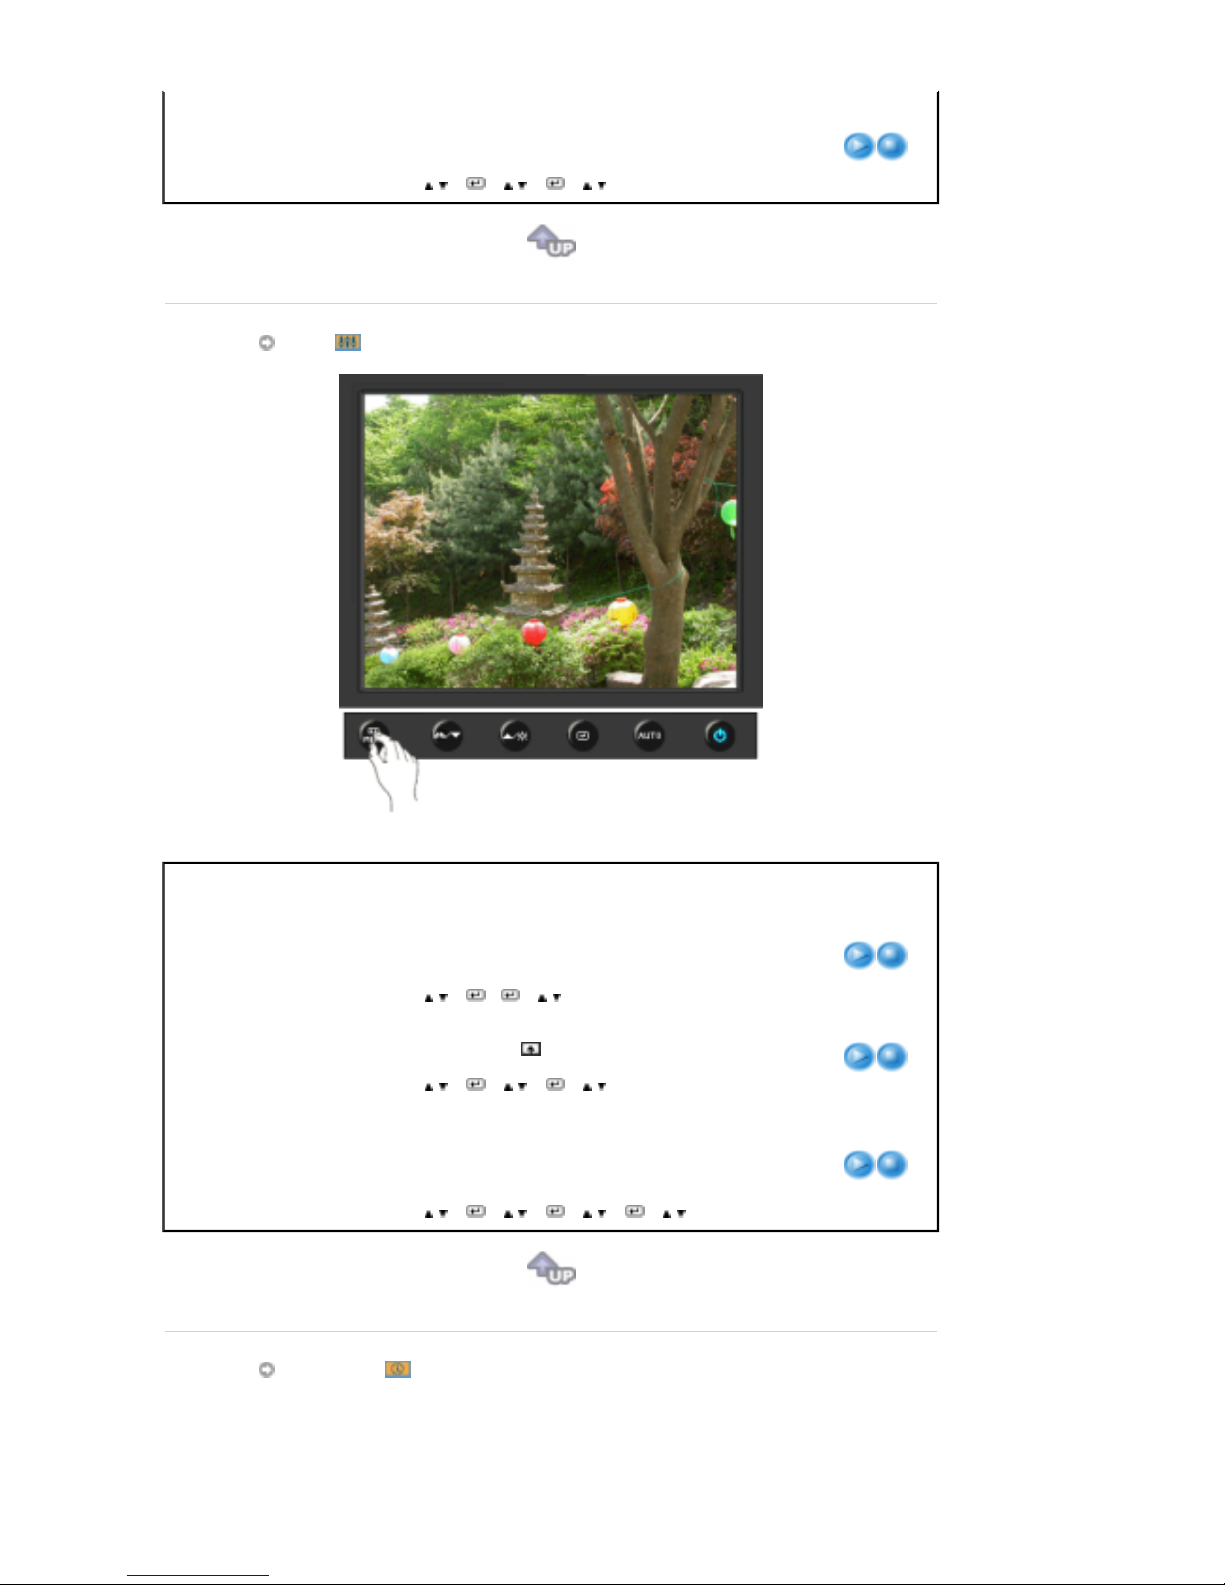
Display Time
are made for a certain time period.
You can set the amount of time the menu will wait before it
is turned off.
[MENU → , → → , → → , → MENU]
Setup
Menu Description Play/Stop
Reset
Reverts the product settings to factory defaults.
[MENU → , → → → , → MENU]
z
No
z
Yes
Customized Key
You can specify a function which will be activated when
the Customized Key( ) is pressed.
[MENU → , → → , → → , → MENU]
Off Timer
The monitors will turn off automatically at the specified
time.
[MENU → , → → , → → , → → , → MENU]
z
Of
f
z
On
Information
Page 32
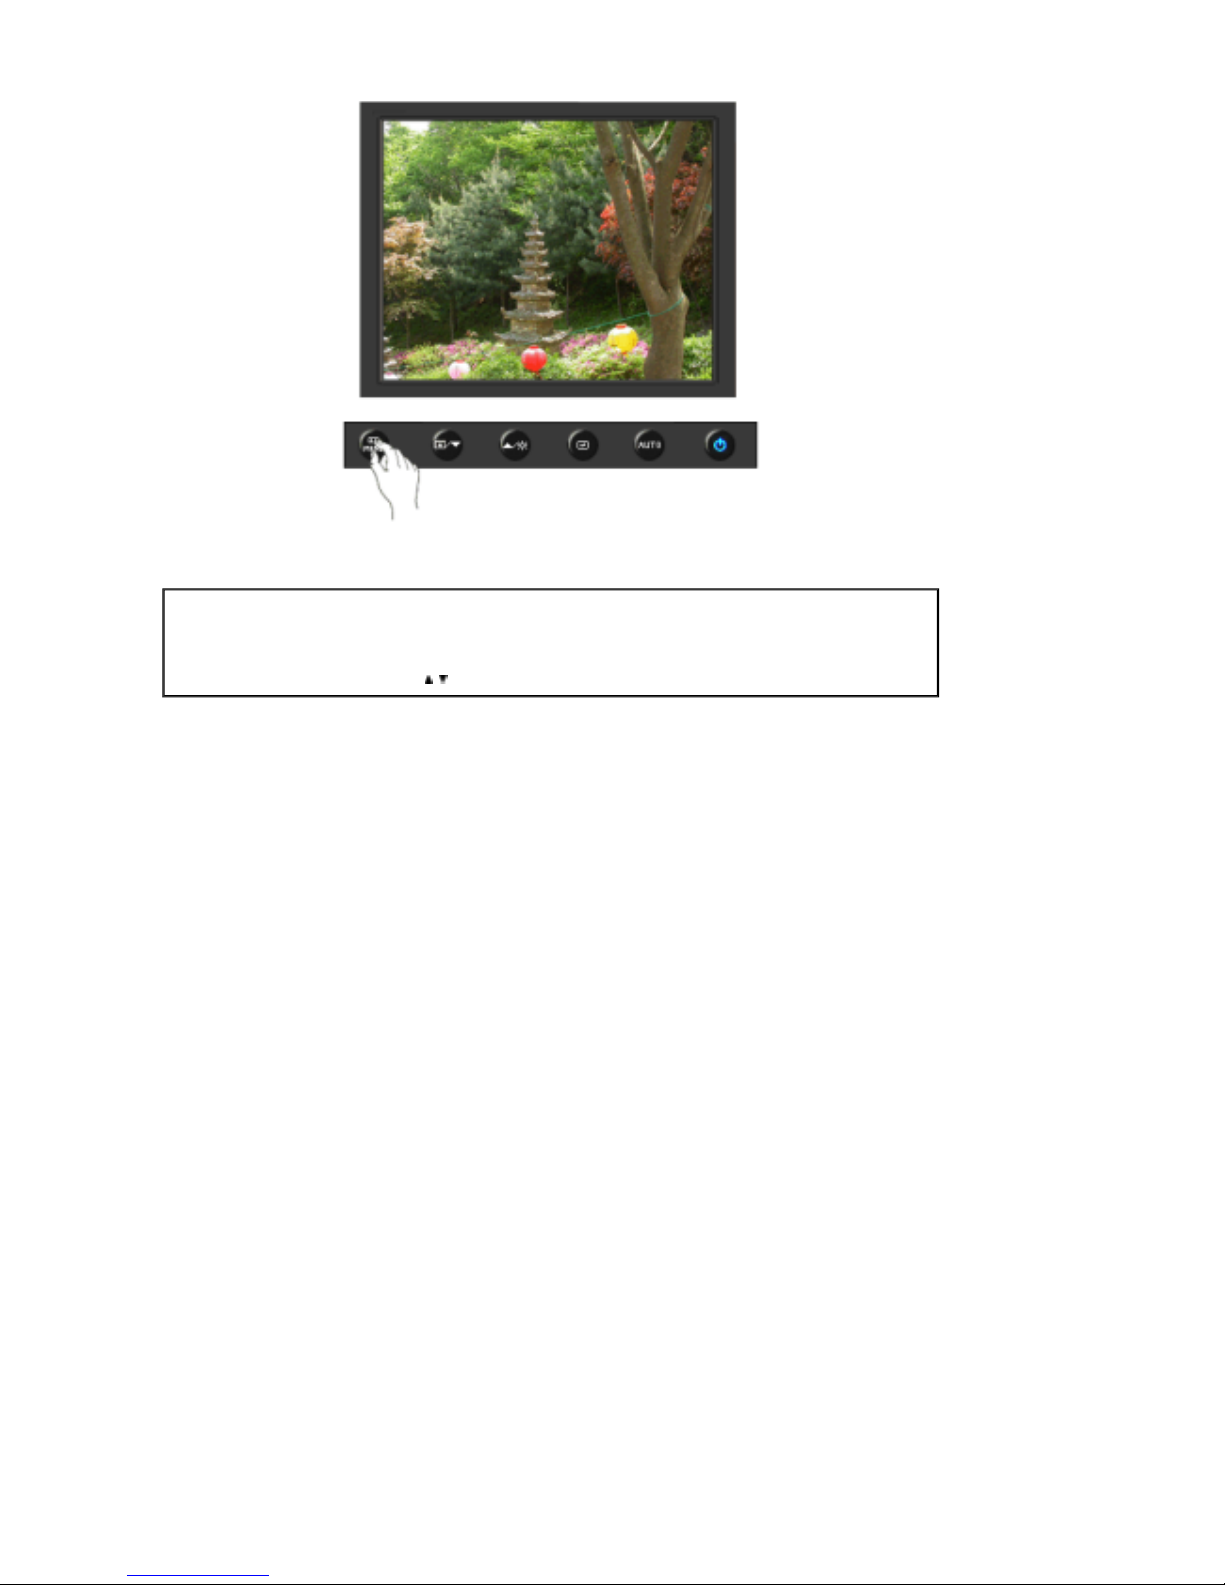
Menu Description
Information
Shows a video source, display mode on the OSD screen.
[MENU → , → MENU]
Page 33
Model
Check List
Before calling for assistance, check the information in this section to see if you can remedy
any problems yourself. If you do need assistance, please call the phone number on the
Information section or contact your dealer.
Symptom Check List Solutions
No images on the
screen. I cannot turn
on the monitor.
Is the power cord connected
properly?
Check the power cord connection
and supply.
Can you see
"Check Signal Cable"
on the screen?
(Connected using the D-sub
cable)
Check the signal cable connection.
(Connected using the DVI cable)
If you still see an (error) message
on the screen when the monitor is
connected properly, check to see if
the monitor status is set to analog.
Press button to have the monitor
double-check the input signal
source.
If the power is on, reboot the
computer to see the initial screen
(the login screen), which can be
seen.
If the initial screen (the login screen)
appears, boot the computer in the
applicable mode (the safe mode for
Windows ME/XP/2000) and then
change the frequency of the video
card.
(Refer to the Preset Timing Modes)
Note: If the initial screen (the login
screen) does not appear, contact
the Service Center or your dealer.
Can you see
"Not Optimum
Mode","Recommended mode
1280 x 1024 60 Hz"
on the screen?
You can see this message when the
signal from the video card exceeds
the maximum resolution and
frequency that the monitor can
handle properly.
Adjust the maximum resolution and
frequency that the monitor can
handle properly.
If the display exceeds SXGA or 75
Hz, a
"Not Optimum
SyncMaster 723N
Page 34
Mode","Recommended mode
1280 x 1024 60 Hz"
message is
displayed. If the display exceeds 85
Hz, the display will work properly but
the
"Not Optimum
Mode","Recommended Mode
1280 x 1024 60 Hz"
message
appears for one minute and then
disappears.
Please change to the recommended
mode during this one-minute period.
(The message is displayed again if
the system is rebooted.)
There is no image on the screen.
Is the power indicator on the monitor
blinking at 1 second intervals?
The monitor is in PowerSaver mode.
press a key on the keyboard to
activate the monitor and restore the
image on the screen.
If there is still no image,
press the ' ' button.
Then press any key on the keyboard
again to activate the monitor and
restore the image on the screen.
Connected using the DVI cable? You may get a blank screen if you
boot the system before you connect
the DVI cable, or disconnect and
then reconnect the DVI cable while
the system is running as certain
types of graphic cards do not send
out video signals.
Connect the DVI cable and then
reboot the system.
I cannot see the On
Screen Display.
Have you locked the On Screen
Display (OSD) Menu to prevent
changes?
Unlock the OSD by pressing the
MENU button for at least 5 seconds.
The screen shows
strange colors or just
black and white.
Is the screen displaying only one
color as if looking at the screen
through a cellophane paper?
Check the signal cable
connection.Make sure the video
card is fully inserted in it's slot.
Have the screen colors become
strange after running a program or
due to a crash between
applications?
Reboot the computer.
Has the video card been set
properly?
Set the video card by referring to the
video card manual.
The screen suddenly
has become
unbalanced.
Have you changed the video card or
the driver?
Adjust screen image position and
size using the OSD.
Have you adjusted the resolution or
frequency to the monitor?
Adjust the resolution and frequency
at the video card.
(Refer to the Preset Timing Modes).
The screen can be unbalanced due to the cycle of the video card signals.
Readjust Position by referring to the OSD.
The screen is out of
focus or OSD cannot
be adjusted.
Have you adjusted the resolution or
frequency on the monitor?
Adjust the resolution and frequency
of the video card.
(Refer to the Preset Timing Modes).
LED is blinking but no
images on the screen.
Is the frequency properly adjusted
when checking the Display Timing
on the menu?
Adjust the frequency properly by
referring to the video card manual
and the Preset Timing Modes.
(The maximum frequency per
resolution may differ from product to
product.)
Page 35
There are only 16
colors shown on the
screen.
The screen colors
have changed after
changing the video
card.
Have the Windows colors been set
properly?
Windows ME/2000/XP:
Set the colors properly at the
Control Panel → Display →
Settings
.
Has the video card been set
properly?
Set the video card by referring to the
video card manual.
There is a message
that reads
"Unrecognized
monitor, Plug & Play
(VESA DDC) monitor
found".
Have you installed the monitor
driver?
Install the monitor driver according
to the Driver Installation Instructions.
See the video card manual to see if
the Plug & Play (VESA DDC)
function can be supported.
Install the monitor driver according
to the Driver Installation Instructions.
Check the following items if there is trouble with the monitor.
1. Check if the power cord and the video cables are properly connected to the computer.
2. Check if the computer beeps more than 3 times when booting.
(If it does, request an a service for the main board of the computer.)
3. If you installed a new video card or if you assembled the PC, check if the installed the adapter
(video) driver and the monitor driver.
4. Check if the scanning ratio of the video screen is set at 56 Hz ~ 75 Hz.
(Do not exceed 75 Hz when using the maximum resolution.)
5. If you have problems in installing the adapter (video) driver, boot the computer in Safe Mode,
remove the Display Adapter at the "
Control Panel→System→Device Administrator
" and then
reboot the computer to reinstall the adapter (video) driver.
If problems repeatedly occur, contact an authorized service center.
Q & A
Question Answer
How can I change the
frequency?
The frequency can be changed by reconfiguring the video card.
Note that video card support can vary, depending on the version
of the driver used. (Refer to the computer or the video card
manual for details.)
How can I adjust the resolution? Windows ME/XP/2000 : Set the resolution at the Control
Panel→Display→Settings.
* Contact the video card manufacturer for details.
How can I set the Power Saving
function?
Windows ME/XP/2000 : Set the function at BIOS-SETUP of the
computer or the screen saver. (Refer to Windows/Computer
Manual).
How can I clean the outer
case/LCD Panel?
Disconnect the power cord and then clean the monitor with a soft
cloth, using either a cleaning solution or plain water.
Do not leave any detergent or scratches on the case. Do not let
any water enter the monitor.
Self-Test Feature Check
Self-Test Feature Check | Warning Messages | Environment | Useful Tips
Page 36
Y
our monitor provides a self test feature that allows you to check whether your monitor is
functioning properly.
Self-Test Feature Check
1. Turn off both your computer and the monitor.
2. Unplug the video cable from the back of the computer.
3. Turn on the monitor.
If the monitor is functioning properly, you will see a box in the illustration below.
This box appears during normal operation if the video cable becomes disconnected or
damaged.
4. Turn off your monitor and reconnect the video cable; then turn on both your computer and the
monitor.
If your monitor screen remains blank after using the previous procedure, check your video
controller and computer system; your monitor is functioning properly.
Warning Messages
If there is something wrong with the input signal, a message appears on the screen or the
screen goes blank although the power indicator LED is still on. The message may indicate
that the monitor is out of scan range or that you need to check the signal cable.
Environment
The location and the position of the monitor may influence the quality and other
features of the monitor.
1. if there are any sub woofer speakers near the monitor, unplug and relocate the woofer
to another room.
2. Remove all electronic devices such as radios, fans, clocks and telephones that are
within 3 feet (one meter) of the monitor.
Useful Tips
z
A monitor recreates visual signals received from the computer. Therefore, if there is trouble with
the computer or the video card, this can cause the monitor to become blank, have poor coloring,
noise, Video mode not supported, etc. In this case, first check the source of the problem, and
then contact the Service Center or your dealer.
z
Judging the monitor's working condition
If there is no image on the screen or a
"Not Optimum Mode","Recommended Mode 1280 x
1024 60 Hz"
message comes up, disconnect the cable from the computer while the monitor is
still powered on.
{
If there is a message coming up on the screen or if the screen goes white, this means the
monitor is in working condition.
{
In this case, check the computer for trouble.
Page 37
Model
General
General
Model Name SyncMaster 723N
LCD Panel
Size 17 inch (43 cm)
Display area 337.920 mm (H) x 270.336 mm (V)
Pixel Pitch 0.264 mm (H) x 0.264 mm (V)
Synchronization
Horizontal 30 ~ 81 k Hz
Vertical 56 ~ 75 Hz
Display Color
16.7M
Resolution
Optimum resolution 1280 x 1024@60 Hz
Maximum resolution 1280 x 1024@75 Hz
Input Signal, Terminated
RGB Analog
0.7 Vp-p ± 5 %
Separate H/V sync, Composite, SOG
TTL level (V high ≥ 2.0 V, V low ≤ 0.8 V)
Maximum Pixel Clock
135 MHz
Power Supply
AC 100 - 240 V~ (+/- 10 %), 50/60 Hz ± 3 Hz
Signal Cable
15pin - to - 15pin D-sub cable, Detachable
SyncMaster 723N
Page 38
Dimensions (WxHxD)/ Weight (Without Stand)
371.9 x 308.7 x 64.7 mm (with Basic Stand) / 3.2 kg
Dimensions (WxHxD)/ Weight (With Stand)
371.9 x 385.5 x 199.9 mm (with Basic Stand) / 3.5 kg
VESA Mounting Interface
75 mm x 75 mm
Environmental considerations
Operating Temperature: 50 °F ~ 104 °F (10 °C ~ 40 °C)
Humidity: 10% ~ 80%, non-condensing
Storage Temperature: -4 °F ~113 °F (-20 °C ~ 45 °C)
Humidity: 5% ~ 95%, non-condensing
Plug and Play Capability
This monitor can be installed on any Plug & Play compatible system. The interaction of the monitor
and the computer systems will provide the best operating conditions and monitor settings. In most
cases, the monitor installation will proceed automatically, unless the user wishes to select alternate
settings.
Dot Acceptable
TFT LCD panels manufactured by using advanced semiconductor technology with precision of 1ppm
(one millionth) above are used for this product. But the pixels of RED, GREEN, BLUE and WHITE
color appear to be bright sometimes or some black pixels may be seen. This is not from bad quality
and you can use it without any problelms.
z
For example, the number of TFT LCD sub pixels contained in this product are 3,932,160.
Note: Design and specifications are subject to change without prior notice.
Class B Equipment (Information Communication equipment for residential use)
This product complies with the Electromagnetic Compatibility Directives for residential use and can
be used in all areas including common residential areas.
(Class B equipment emits less electromagnetic waves than Class A equipment.)
PowerSaver
This monitor has a built-in power management system called PowerSaver. This system saves energy
by switching your monitor to low-power mode when it has not been used for a certain amount of time.
The monitor automatically returns to normal operation when you press a key on the keyboard. For
energy conservation, turn your monitor OFF when it is not needed, or when leaving it unattended for
long periods. The PowerSaver system operates with a VESA DPMS compliant video card installed in
your computer. Use the software utility installed on your computer to set up this feature.
State
Normal Operation
Power saving mode
Power off
EPA/ENERGY 2000
(Power button)
Power Indicator Blue Blue, Blinking Black
Power Consumption 31 W Less than 1 W Less than 1 W
This monitor is EPA ENERGY STAR® compliant and ENERGY2000
compliant when used with a computer equipped with VESA DPMS
functionality.
As an ENERGY STAR
®
Partner, SAMSUNG has determined that this
product meets the ENERGY STAR
®
guidelines for energy efficiency.
Page 39
Preset Timing Modes
If the signal transferred from the computer is the same as the following Preset Timing Modes, the
screen will be adjusted automatically. However, if the signal differs, the screen may go blank while
the power LED is on. Refer to the video card manual and adjust the screen as follows.
Table 1. Preset Timing Modes
Display Mode
Horizontal
Frequency
(kHz)
Vertical
Frequency
(Hz)
Pixel Clock
(MHz)
Sync Polarity
(H/V)
IBM, 640 x 350 31,469 70,086 25,175 +/-
IBM, 640 x 480 31,469 59,940 25,175 -/-
IBM, 720 x 400 31,469 70,087 28,322 -/+
MAC, 640 x 480 35,000 66,667 30,240 -/-
MAC, 832 x 624 49,726 74,551 57,284 -/-
MAC, 1152 x 870 68,681 75,062 100,00 -/-
VESA, 640 x 480 37,861 72,809 31,500 -/-
VESA, 640 x 480 37,500 75,000 31,500 -/-
VESA, 800 x 600 35,156 56,250 36,000 +/+
VESA, 800 x 600 37,879 60,317 40,000 +/+
VESA, 800 x 600 48,077 72,188 50,000 +/+
VESA, 800 x 600 46,875 75,000 49,500 +/+
VESA, 1024 x 768 48,363 60,004 65,000 -/-
VESA, 1024 x 768 56,476 70,069 75,000 -/-
VESA, 1024 x 768 60,023 75,029 78,750 +/+
VESA, 1152 x 864 67,500 75,000 108,000 +/+
VESA, 1280 x 960 60,000 60,000 108,000 +/+
VESA, 1280 x 1024 63,981 60,020 108,000 +/+
VESA, 1280 x 1024 79,976 75,025 135,000 +/+
Horizontal Frequency
The time to scan one line connecting the right edge to the left edge of
the screen horizontally is called the Horizontal Cycle and the inverse
number of the Horizontal Cycle is called the Horizontal Frequency.
Unit: kHz
Vertical Frequency
Like a fluorescent lamp, the screen has to repeat the same image
many times per second to display an image to the user. The
frequency of this repetition is called the Vertical Frequency or Refresh
Rate. Unit: Hz
Page 40

Like a fluorescent lamp, the screen has to repeat the same image
many times per second to display an image to the user. The
frequency of this repetition is called the Vertical Frequency or Refresh
Rate. Unit: Hz
Page 41
Model
Contact SAMSUNG WORLDWIDE
If you have any questions or comments relating to Samsung products, please
contact the SAMSUNG customer care center.
North America
U.S.A 1-800-SAMSUNG (726-7864) http://www.samsung.com
CANADA 1-800-SAMSUNG (726-7864) http://www.samsung.com/ca
MEXICO 01-800-SAMSUNG (726-7864) http://www.samsung.com
Latin America
ARGENTINE 0800-333-3733 http://www.samsung.com/ar
BRAZIL
0800-124-421
4004-0000
http://www.samsung.com
CHILE 800-SAMSUNG(726-7864) http://www.samsung.com/cl
COLOMBIA 01-8000112112 http://www.samsung.com/co
COSTA RICA 0-800-507-7267 http://www.samsung.com/latin
ECUADOR 1-800-10-7267 http://www.samsung.com/latin
EL SALVADOR 800-6225 http://www.samsung.com/latin
GUATEMALA 1-800-299-0013 http://www.samsung.com/latin
HONDURAS 800-7919267
JAMAICA 1-800-234-7267 http://www.samsung.com/latin
NICARAGUA 00-1800-5077267
PANAMA 800-7267 http://www.samsung.com/latin
PUERTO RICO 1-800-682-3180 http://www.samsung.com/latin
REP. DOMINICA 1-800-751-2676 http://www.samsung.com/latin
TRINIDAD & TOBAGO 1-800-SAMSUNG(726-7864) http://www.samsung.com/latin
SyncMaster 723N
Page 42
VENEZUELA 0-800-100-5303 http://www.samsung.com/latin
Europe
AUSTRIA 0800-SAMSUNG(726-7864) http://www.samsung.com/at
BELGIUM 0032 (0)2 201 24 18 http://www.samsung.com/be
CZECH REPUBLIC 844 000 844 http://www.samsung.com/cz
DENMARK 70 70 19 70 http://www.samsung.com/dk
EIRE 0818 717 100 http://www.samsung.com/ie
FINLAND 030-6227 515 http://www.samsung.com/fi
FRANCE
3260 SAMSUNG(€ 0,15/Min)
08 25 08 65 65 (€ 0,15/Min)
http://www.samsung.com
GERMANY
01805 - SAMSUNG(726-7864) (€
0,14/Min)
http://www.samsung.com
HUNGARY 06-80-SAMSUNG(726-7864) http://www.samsung.com
ITALIA 800-SAMSUNG(726-7864) http://www.samsung.com
LUXEMBURG 0035 (0)2 261 03 710 http://www.samsung.com/be
NETHERLANDS
0900 SAMSUNG(726-7864) (€
0,10/Min)
http://www.samsung.com/nl
NORWAY 815-56 480 http://www.samsung.com/no
POLAND
0 801 801 881
022-607-93-33
http://www.samsung.com/pl
PORTUGAL 80820-SAMSUNG(726-7864) http://www.samsung.com/pt
SLOVAKIA 0800-SAMSUNG (726-7864) http://www.samsung.com/sk
SPAIN 902 10 11 30 http://www.samsung.com
SWEDEN 0771-400 200 http://www.samsung.com/se
SWITZERLAND 0800-SAMSUNG(726-7864) http://www.samsung.com/ch
U.K 0845 SAMSUNG (7267864) http://www.samsung.com
CIS
ESTONIA 800-7267 http://www.samsung.ee
LATVIA 800-7267 http://www.samsung.com/lv
LITHUANIA 8-800-77777 http://www.samsung.lt
KAZAKHSTAN 8-10-800-500-55-500 http://www.samsung.kz
KYRGYZSTAN 00-800-500-55-500
RUSSIA 8-800-555-55-55 http://www.samsung.ru
TADJIKISTAN 8-10-800-500-55-500
UKRAINE 8-800-502-0000 http://www.samsung.com
UZBEKISTAN 8-10-800-500-55-500 http://www.samsung.uz
Page 43
Asia Pacific
AUSTRALIA 1300 362 603 http://www.samsung.com
CHINA
800-810-5858
010- 6475 1880
http://www.samsung.com
HONG KONG 3698-4698 http://www.samsung.com/hk
INDIA
3030 8282
1800 110011
http://www.samsung.com
INDONESIA 0800-112-8888 http://www.samsung.com
JAPAN 0120-327-527 http://www.samsung.com/jp
MALAYSIA 1800-88-9999 http://www.samsung.com/my
NEW ZEALAND 0800 SAMSUNG(726-7864) http://www.samsung.com/nz
PHILIPPINES 1800-10-SAMSUNG (726-7864) http://www.samsung.com/ph
SINGAPORE 1800-SAMSUNG (726-7864) http://www.samsung.com
THAILAND 1800-29-3232, 02-689-3232 http://www.samsung.com
TAIWAN 0800-329-999 http://www.samsung.com/tw
VIETNAM 1 800 588 889 http://www.samsung.com
Middle East & Africa
SOUTH AFRICA 0860-SAMSUNG(726-7864) http://www.samsung.com
TURKEY 444 77 11 http://www.samsung.com
U.A.E
800-SAMSUNG(726-7864)
8000-4726
http://www.samsung.com
Terms
Dot Pitch
The image on a monitor is composed of red, green and blue dots. The closer the dots, the
higher the resolution. The distance between two dots of the same color is called the 'Dot
Pitch'. Unit: mm
Vertical Frequency
The screen must be redrawn several times per second in order to create and display an image
for the user. The frequency of this repetition per second is called Vertical Frequency or
Refresh Rate. Unit: Hz
Example :If the same light repeats itself 60 times per second, this is regarded as 60 Hz.
Horizontal Frequency
The time to scan one line connecting the right edge to the left edge of the screen horizontally
is called Horizontal Cycle. The inverse number of the Horizontal Cycle is called Horizontal
Frequency. Unit: kHz
Interlace and Non-Interlace Methods
Showing the horizontal lines of the screen from the top to the bottom in order is called the
Non-Interlace method while showing odd lines and then even lines in turn is called the
Interlace method. The Non-Interlace method is used for the majority of monitors to ensure a
clear image. The Interlace method is the same as that used in TVs.
Page 44
Plug & Play
This is a function that provides the best quality screen for the user by allowing the computer
and the monitor to exchange information automatically. This monitor follows the international
standard VESA DDC for the Plug & Play function.
Resolution
The number of horizontal and vertical dots used to compose the screen image is called
'resolution'. This number shows the accuracy of the display. High resolution is good for
performing multiple tasks as more image information can be shown on the screen.
Example : If the resolution is 1280 x 1024 , this means the screen is composed of 1280
horizontal dots (horizontal resolution) and 1024 vertical lines (vertical resolution).
For Better Display
1. Adjust computer resolution and screen injection rate (refresh rate) oncomputer as described
below to enjoy the best quality of picture. You can have an uneven quality of picture in the
screen if the best quality of picture is not provided in TFT-LCD.
{
Resolution: 1280 x 1024
{ Vertical frequency (refresh rate): 60 Hz
2. TFT LCD panel manufactured by using advanced semiconductor technology with precision of
1ppm (one millionth) above is used for this product. But the pixels of RED, GREEN, BLUE
and WHITE color seem to be bright sometimes or some of black pixels could be seen.
This is not from bad quality and you can use it without uneasiness.
{
For example, the number of TFT LCD sub pixels that is contained in this product are
3,932,160.
3. When you clean the monitor and the panel outside, please apply the recommended small
amount of cleaner by using soft and dry cloth and polish it. Let LCD area not to be forced but
to be scrubbed out softly.
If excessive force is applied, you can have a stain on it.
4. If you are not satisfied with the quality of the picture, you can get better quality of the picture
by executing "auto adjustment function" in display screen that is appeared as window
termination button is pressed.
If there's still noise after automatic adjustment, use FINE/COARSE adjustment function.
5. If you view a fixed screen for an extended period of time, residual image or blurriness may
appear.
Change the mode to energy save or set a screensaver to move the picture when you need to
be away from the monitor for an extended period of time.
Authority
Information in this document is subject to change without notice.
© 2008 Samsung Electronics Co., Ltd. All rights reserved.
Reproduction in any manner whatsoever without the written permission of Samsung Electronics
Co., Ltd. is strictly forbidden.
Samsung Electronics Co., Ltd. shall not be liable for errors contained herein or for incidental or
consequential damages in connection with the furnishing, performance, or use of this material.
Samsung is the registered trademark of Samsung Electronics Co., Ltd.; Microsoft, Windows and
Windows NT are registered trademarks of Microsoft Corporation; VESA, DPMS and DDC are
registered trademarks of Video Electronics Standard Association; the ENERGY STAR® name and
logo are registered trademarks of the U.S. Environmental Protection Agency (EPA). As an
ENERGY STAR® Partner, Samsung Electronics Co., Ltd. has determined that this product meets
Page 45

the ENERGY STAR® guidelines for energy efficiency. All other product names mentioned herein
may be the trademarks or registered trademarks of their respective owners.
RoHS Verified:
The RoHS directive 2002/95/EC bans using the 6 substances listed below with electric and
electronic equipment.
- Lead(Pb), Cadmium(Cd), Mercury(Hg), Chromium VI(Cr VI), Polybrominated Biphenyls(PBB),
Polybrominated Diphenyl Ethers(PBDE)
This certification will contribute to the protection of health and the environmentally sound
recovery and disposal of electric and electronic waste equipment.
Page 46
PRODUCT INFORMATION (Image Retention Free)
LCD Monitors and TVs may have image retention when switching from one image to another
especially after displaying a stationary image for a long time.
This guide is to demonstrate correct usage of LCD products in order to protect them from Image
retention.
Warrant
y
Warranty does not cover any damage caused by image retention.
Burn-in is not covered by the warranty.
What is Image retention ?
During normal operation of a LCD panel, pixel image retention doesn't occur. However,
if the same image is displayed for a long time, a slight difference in electric charge
accumulates between the two electrodes which encase the liquid crystal. This may
cause the liquid crystal to build up in a certain areas of the display. Thus, the previous
image is retained when switching to a new video image. All display products, including
LCD,are subject to image retention. This is not a product defect.
Please follow the suggestions below to protect your LCD from image retention
Power Off, Screen Saver, or Power Save Mode
Ex)
z Turn the power off when using a stationary pattern.
z Use a Screen saver if possible
z Set the Monitor to power off with the PC Display Properties Power Scheme.
- Turn the power off for 4 hours after 20 hours in use
- Turn the power off for 2 hours after 12 hours in use
- Screen saver in one color or a moving image is recommended.
Suggestions for specific applications
Ex) Airports, Transit Stations, Stock Markets, Banks, and Controlling Systems
We recommend that you follow set up of your display system program as below:
Display Information together with Logo or Moving image cycle.
Ex) Cycle : Display Information for 1 hour followed by a
Display Logo or moving image for 1 minute.
Change the Color Information periodically(Use 2 different colors).
Ex) Rotate the Color Information with 2 colors every 30 minutes.
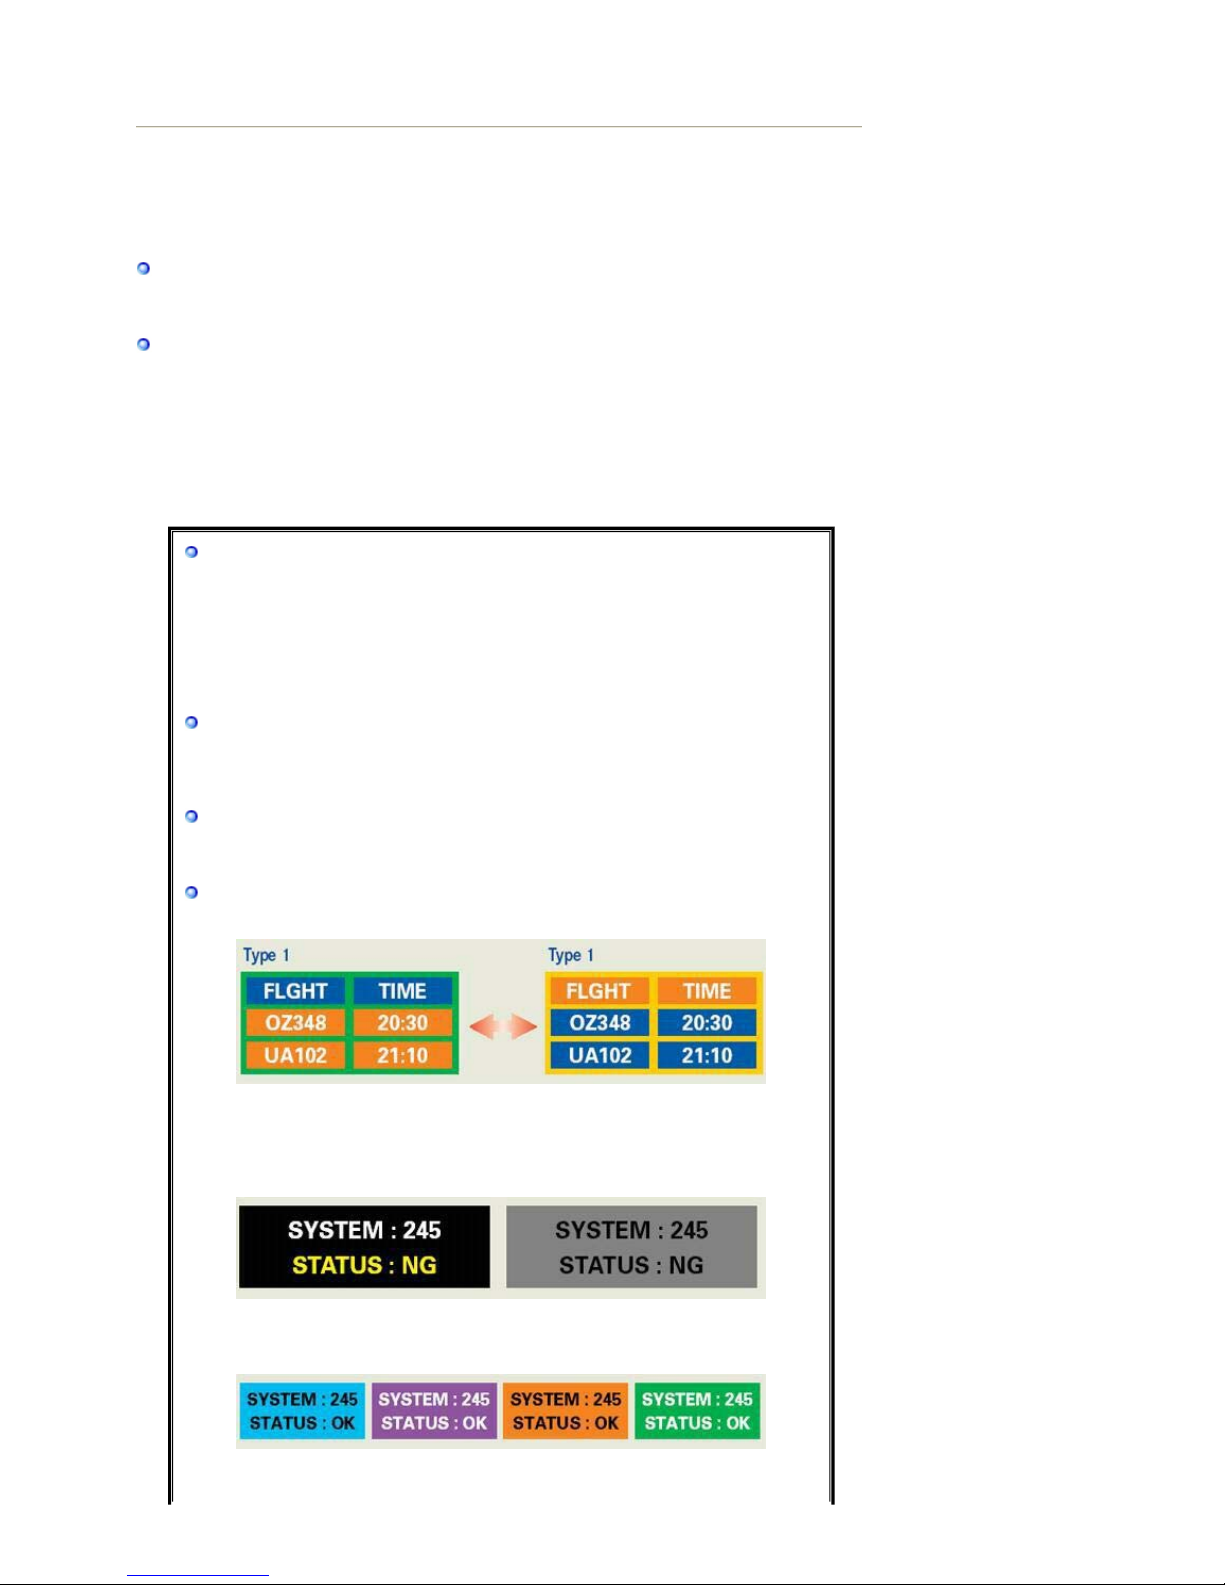
A
void using a combination of characters and background color with large
difference in luminance.
A
void using Grey colors, which can cause Image retention easily.
z Avoid: Colors with big difference in luminance (Black & White, Grey)
Ex)
z Recommended settings: Bright colors with little difference in luminance
- Change the characters color and background color every 30 minutes
Ex)
- Every 30 minutes, change the characters with movement.
Page 47
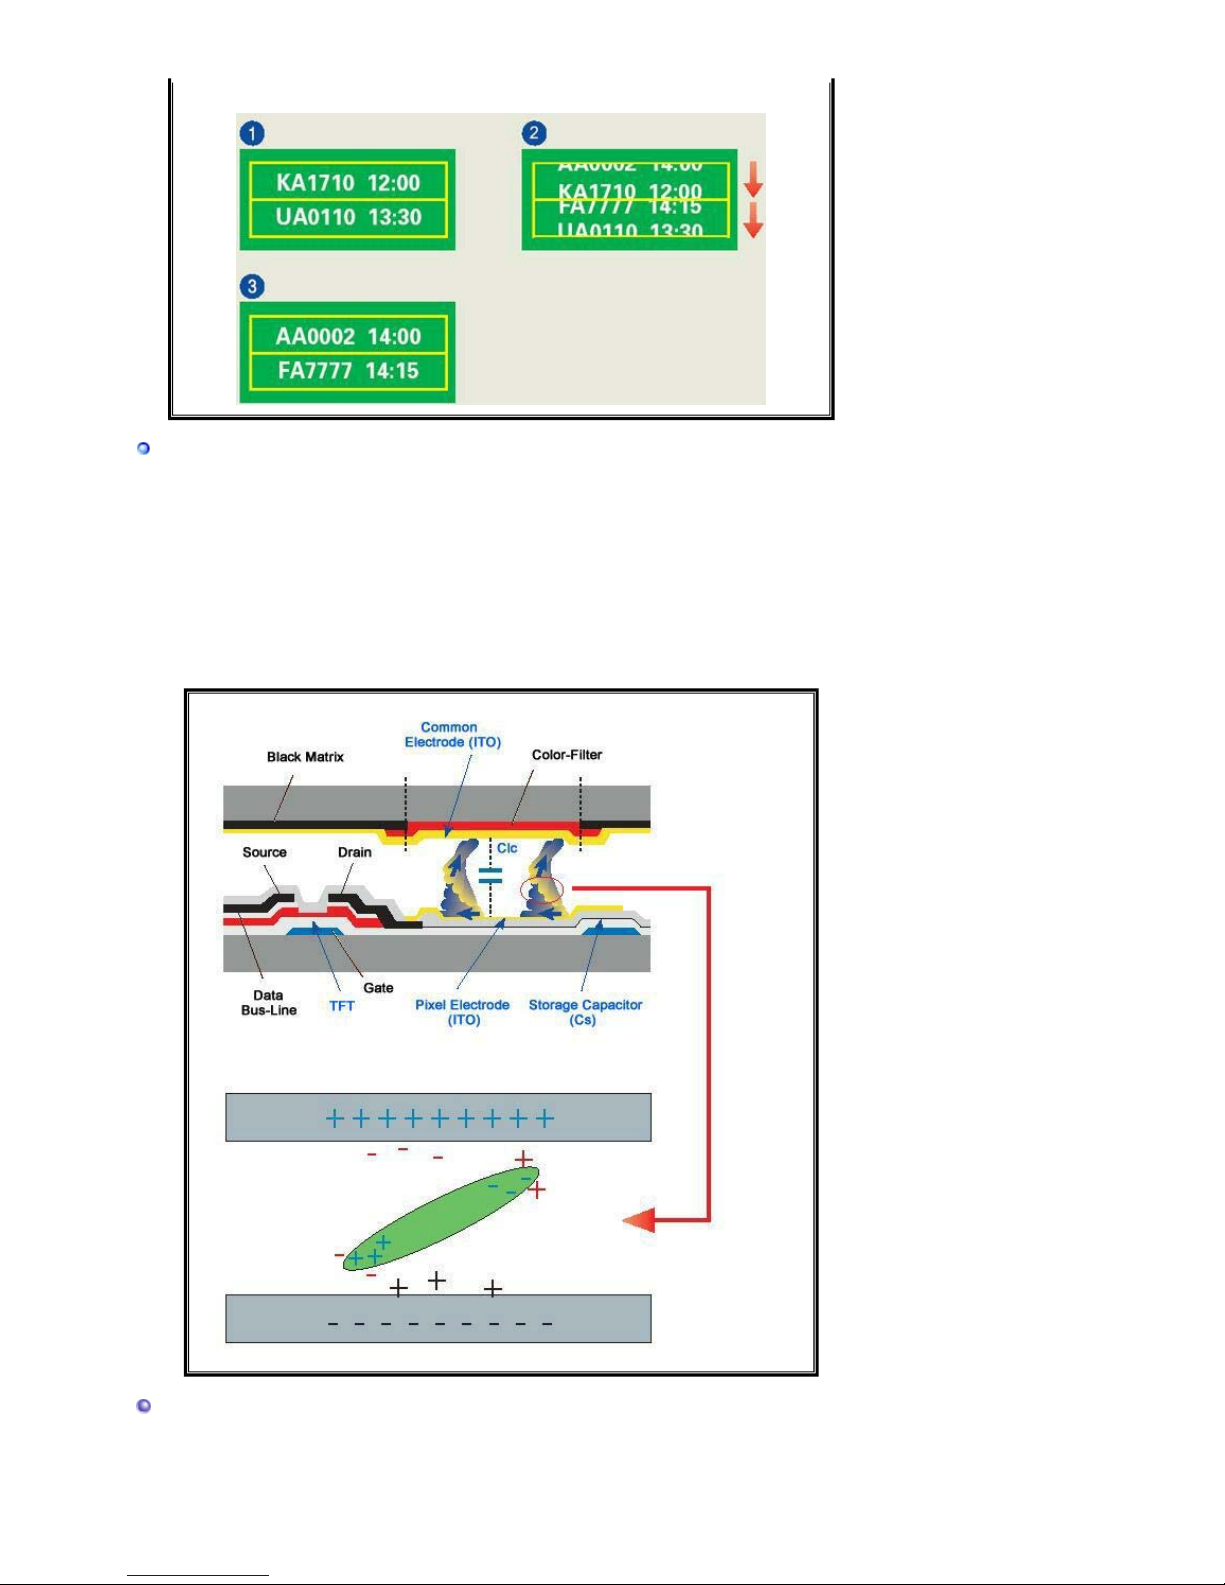
Ex)
The best way to protect your monitor from Image retention is to set your PC or
S
y
stem to operate a Screen Saver program when you are not using it.
Image retention may not occur when a LCD panel is operated under normal conditions.
Normal conditions are defined as continuously changing video patterns. When the LCD
panel is operated for a long time with a fixed pattern (-over 12 hours-), there may be
slight difference in voltage between electrodes that work the liquid crystal (LC) in a
pixel. The voltage difference between electrodes increases with time, forcing the liquid
crystal to lean. When this occurs, the previous image may be seen when the pattern is
changed.
To prevent this, the accumulated voltage difference must be decreased.
Our LCD Monitor satisfies ISO13406-2 Pixel fault Class II
Page 48
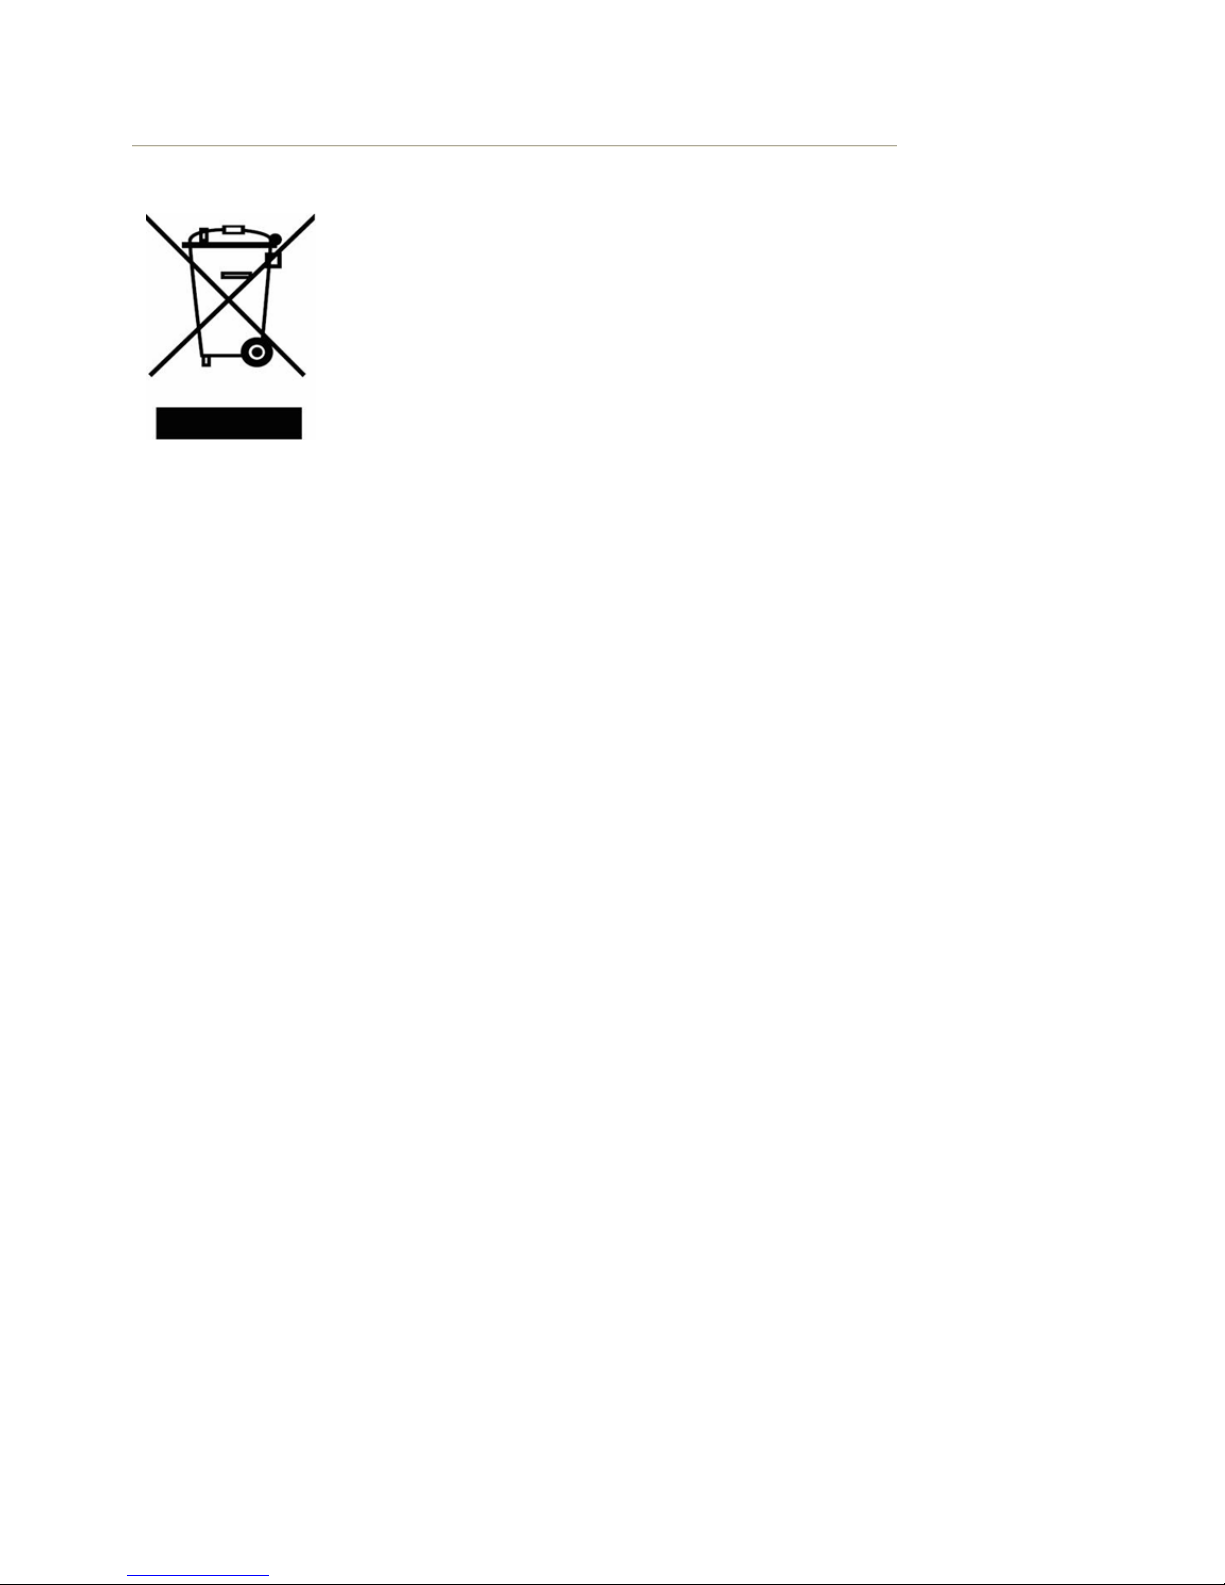
Correct Disposal of This Product
(Waste Electrical & Electronic Equipment) - Europe only
(Applicable in the European Union and other European countries with
separate collection systems)
This marking shown on the product or its literature, indicates that it should not
be disposed with other household wastes at the end of its working life. To
prevent possible harm to the environment or human health from uncontrolled
waste disposal, please separate this from other types of wastes and recycle it
responsibly to promote the sustainable reuse of material resources.
Household users should contact either the retailer where they purchased this
product, or their local government office, for details of where and how they
can take this item for environmentally safe recycling.
Business users should contact their supplier and check the terms and
conditions of the purchase contract. This product should not be mixed with
other commercial wastes for disposal.
 Loading...