How it Works
Log In / Sign Up
Buy Points
How it Works
FAQ
Contact Us
Questions and Suggestions
Users
SAMSUNG
Loading...
S
SR050AW
SR090AW
SR10F71UA
SR10F71UB
SR10F71UC
SR10F71UЕ
SR10J501FU
2
SR10J502FU
SR10J502FUD
2
SR10J503FU
SR10J503FUC
SR10J5050UD
SR10J50FUD
3
SR10M7010UB
SR10M7010UW
SR10M701PU5
SR10M7030WG
SR10M7030WW
3
SR10M703PW9
SR120AW
SR12BCSWHL/JUM
SR1AM70
SR20H9030U
4
SR20H9050U
6
SR20H9051U
2
SR20J902FU
SR20K9350W
SR20K9350WK
2
SR20M7070WD
SR20M7070WS
SR227MW
SR254MW
SR255MLS
2
SR269MW
SR28
13
SR294MIS
SR2AJ90
SR2AJ9250W
SR2AK9000UG
SR2AM70
SR2FM7070WD
SR30RMBW
SR318LSTC
2
SR32
13
SR320MLS
SR321FN
SR321IN
SR321IN(C)
SR321LC
SR335NME
7
SR340MW
SR341MLS
SR342WTC
2
SR34RMBW
SR361FN
SR361IN
SR-T768IVA
SR-T768IVAG
SR-T768IVI
SR-T768LSI
SR-T768MAI
SR-T768MBI
SR-T768MGI
SR-T768MGIS
SR-T768MHI
SR-T768MNI
SR-T768MPI
SR-T768MSI
SR-T768MVI
SR-T768MWI
SR-T768QDGR
SR-T768QDWR
SR-T768QPBR
SR-T768QPCR
SR-T768QPGR
SR-T768QWR
SR-T768SAW
SR-T768SGG
SR-T768SGP
SR-T768SY
SR-T768ULCE
SR-T768UTCE
SR-T768VFHW
2
SR-T768YWRW
2
SR-T785AD
SR-T785ADK
SR-T785AG
SR-T785AI
SR-T785AIK
SR-T785AM
SR-T785AMK
SR-T785AN
SR-T785ANK
SR-T785AR
SR-T785ARK
SR-T785AS
SR-T785ASK
SR-T785BD
SR-T785BS
SR-W04B
Loading...
Loading...
Nothing found
SR10J501FU
Product sheet
2 pgs
670.22 Kb
0
User Manual
168 pgs
111.78 Mb
0
Table of contents
Loading...
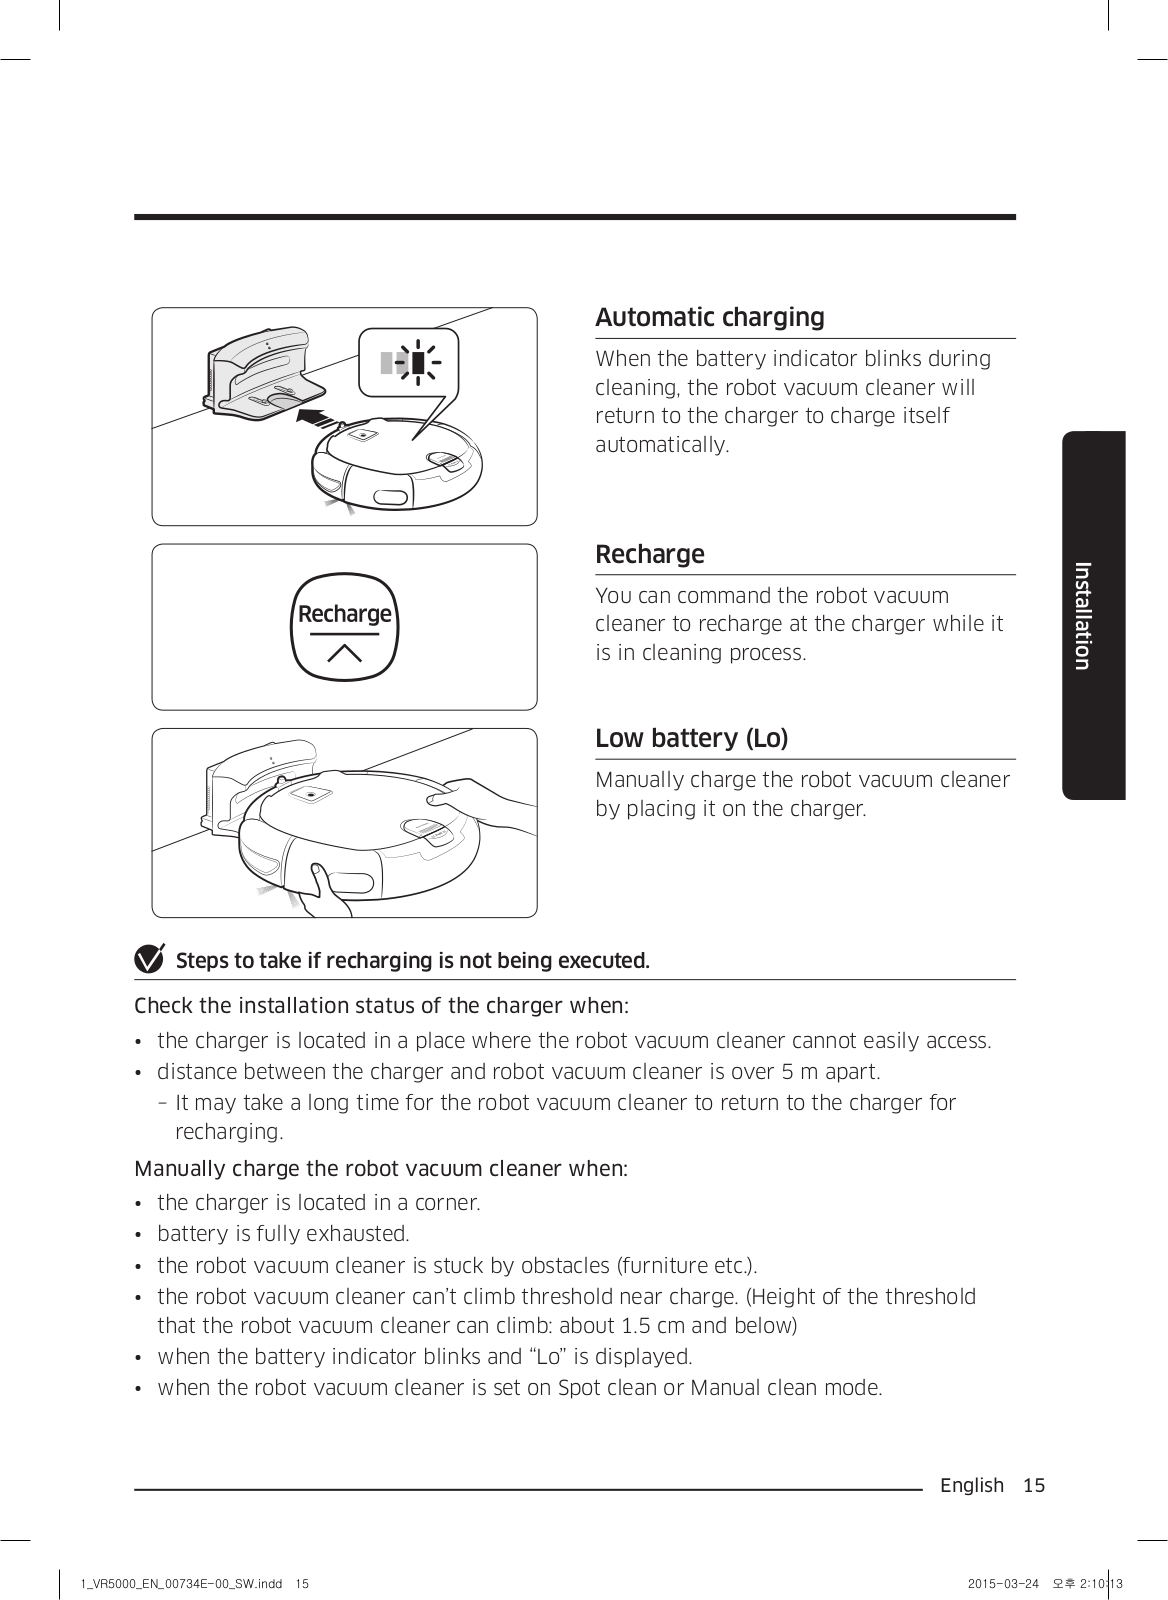
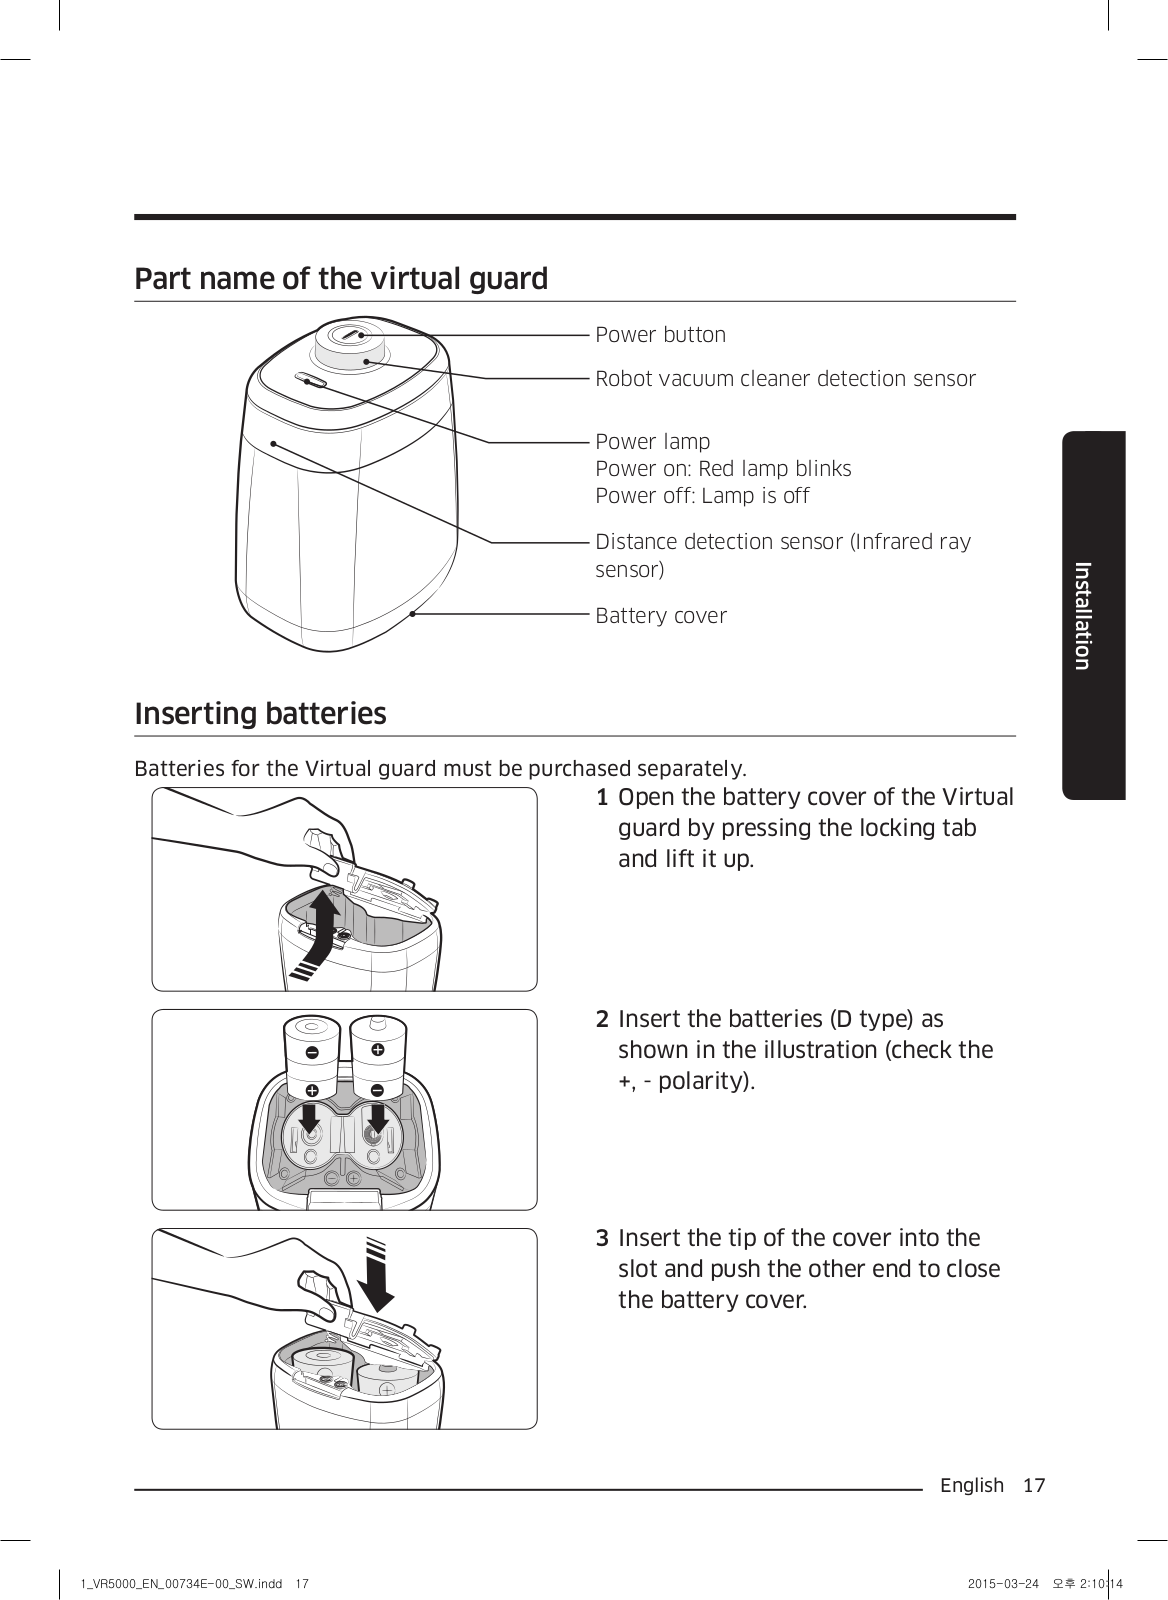
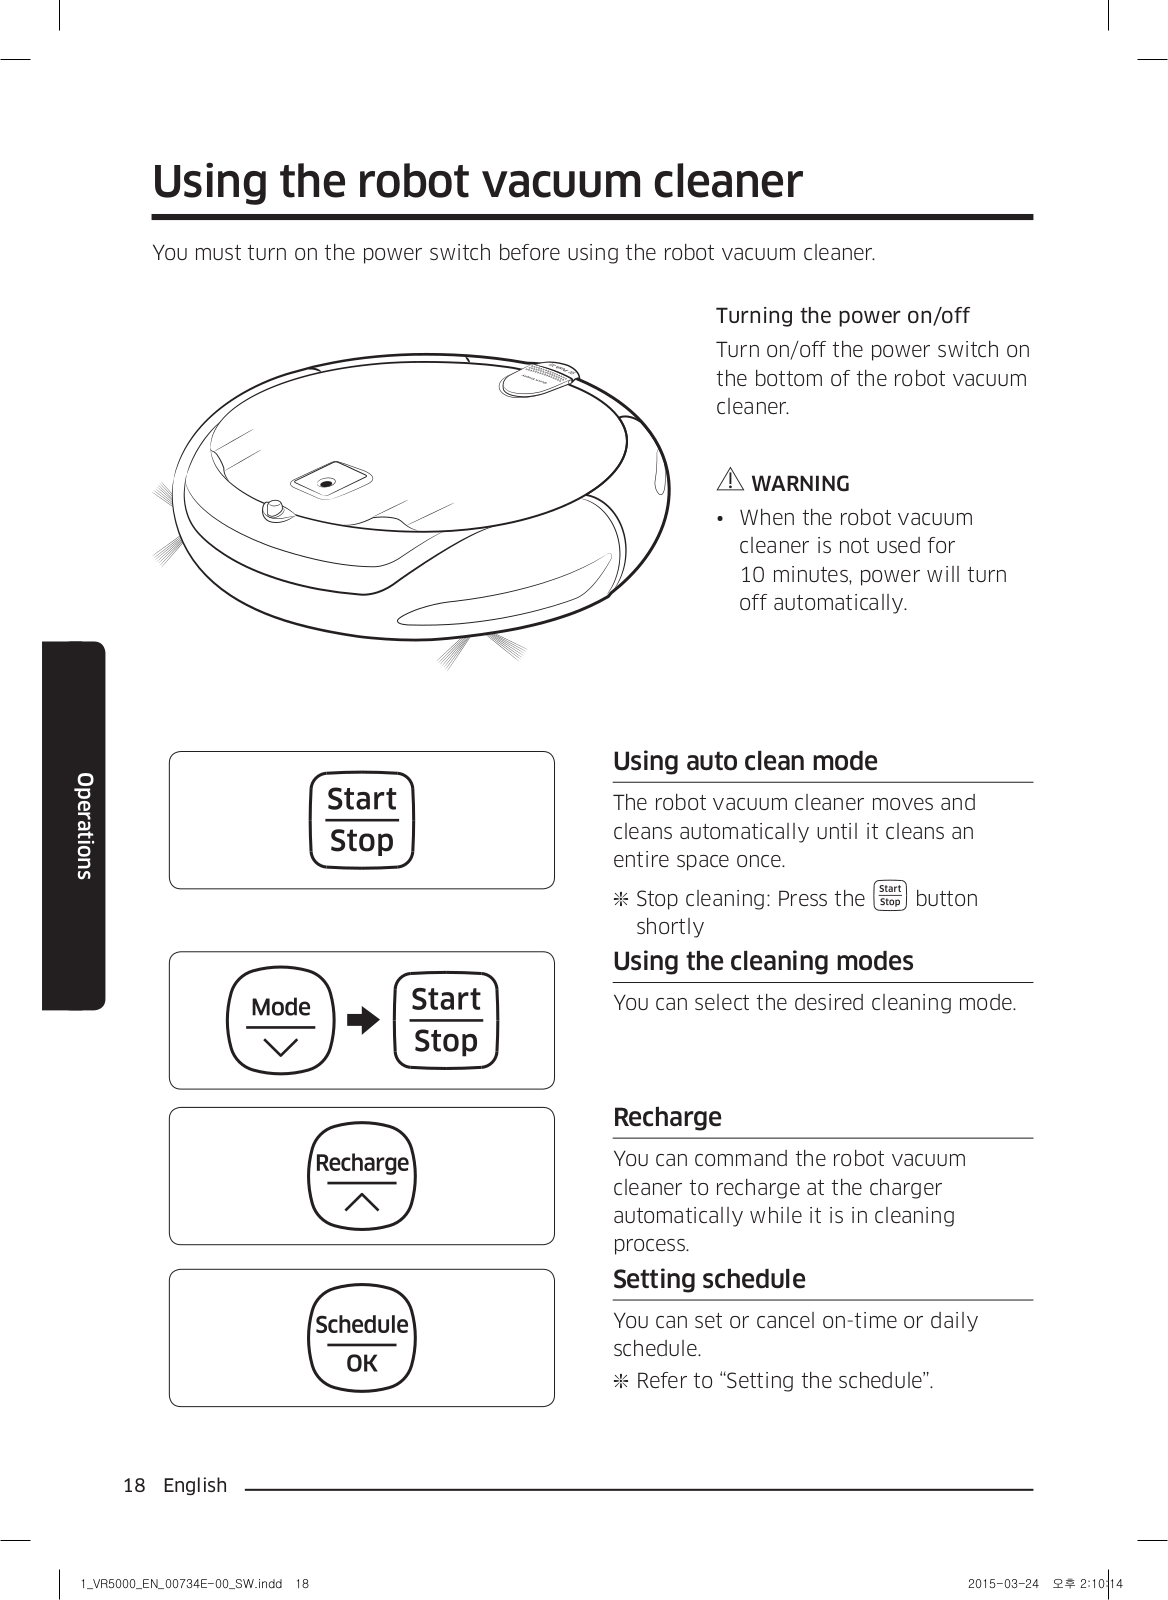
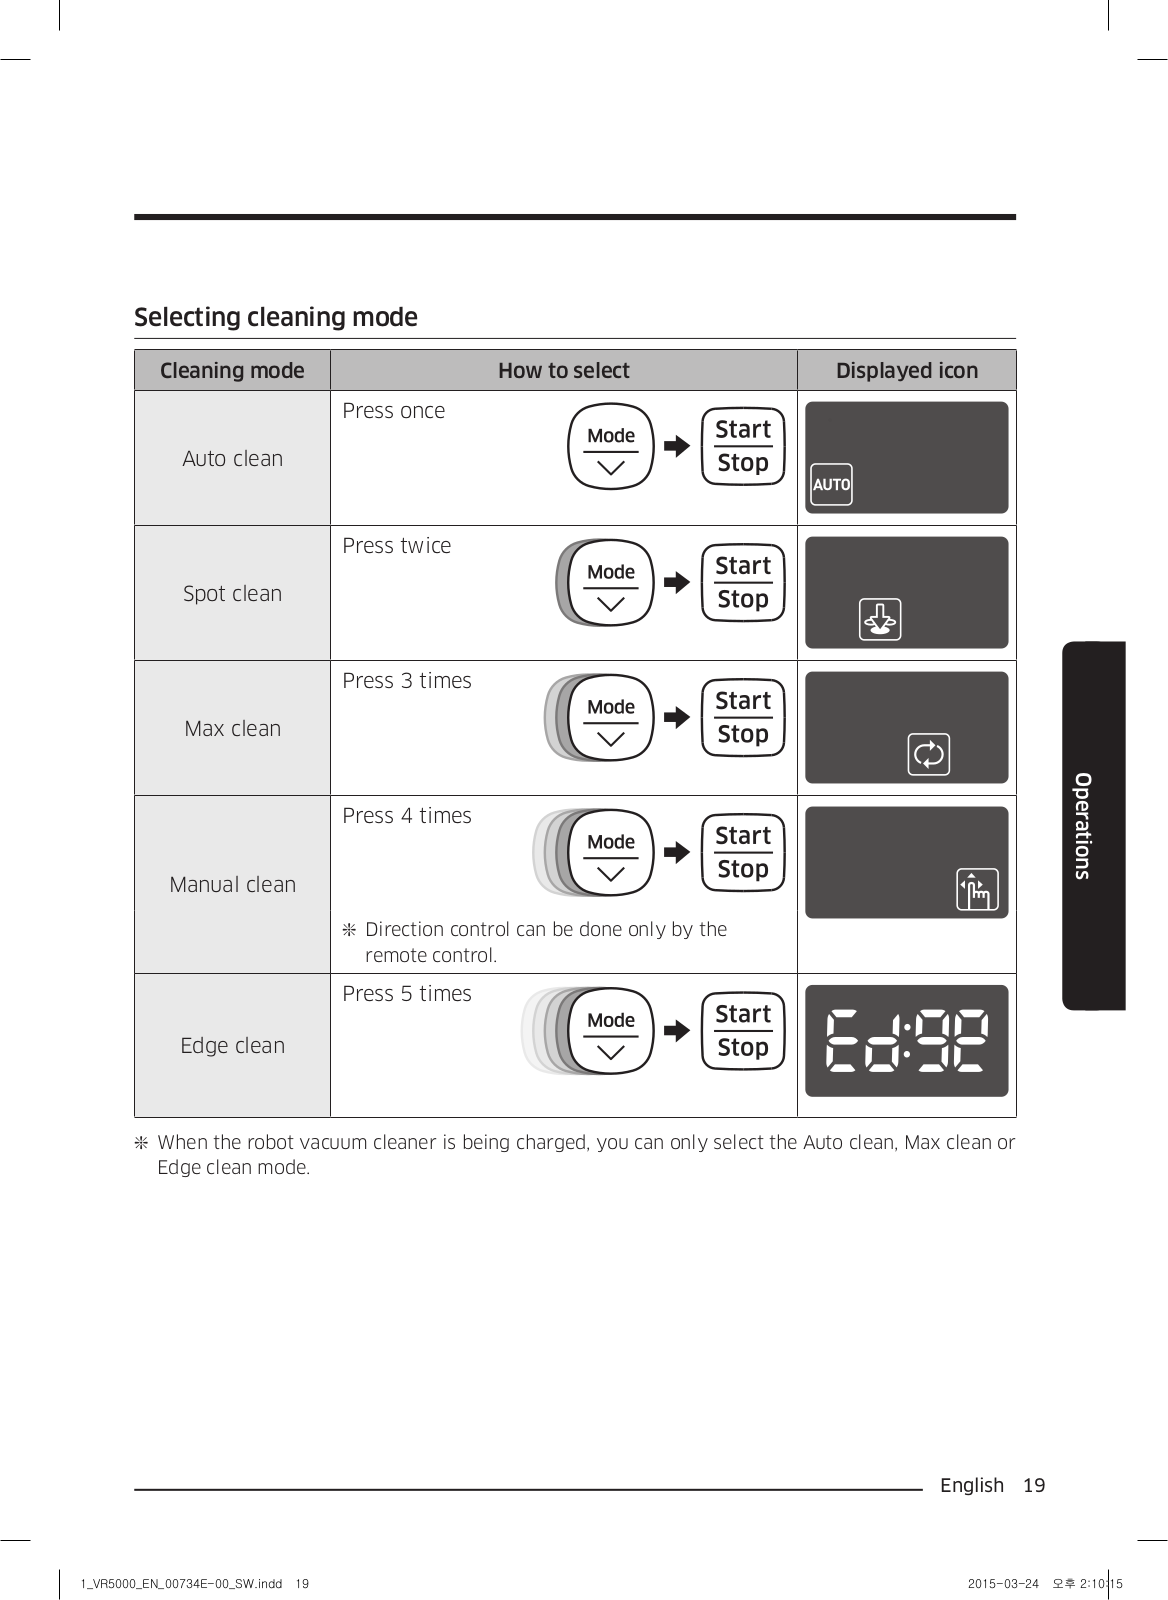
SAMSUNG SR10J501FU, SR10J502FU, SR10J502FUD, SR10J503FU, SR10J50FUD User Manual
...
SAMSUNG User Manual
Download
Specifications and Main Features
Frequently Asked Questions
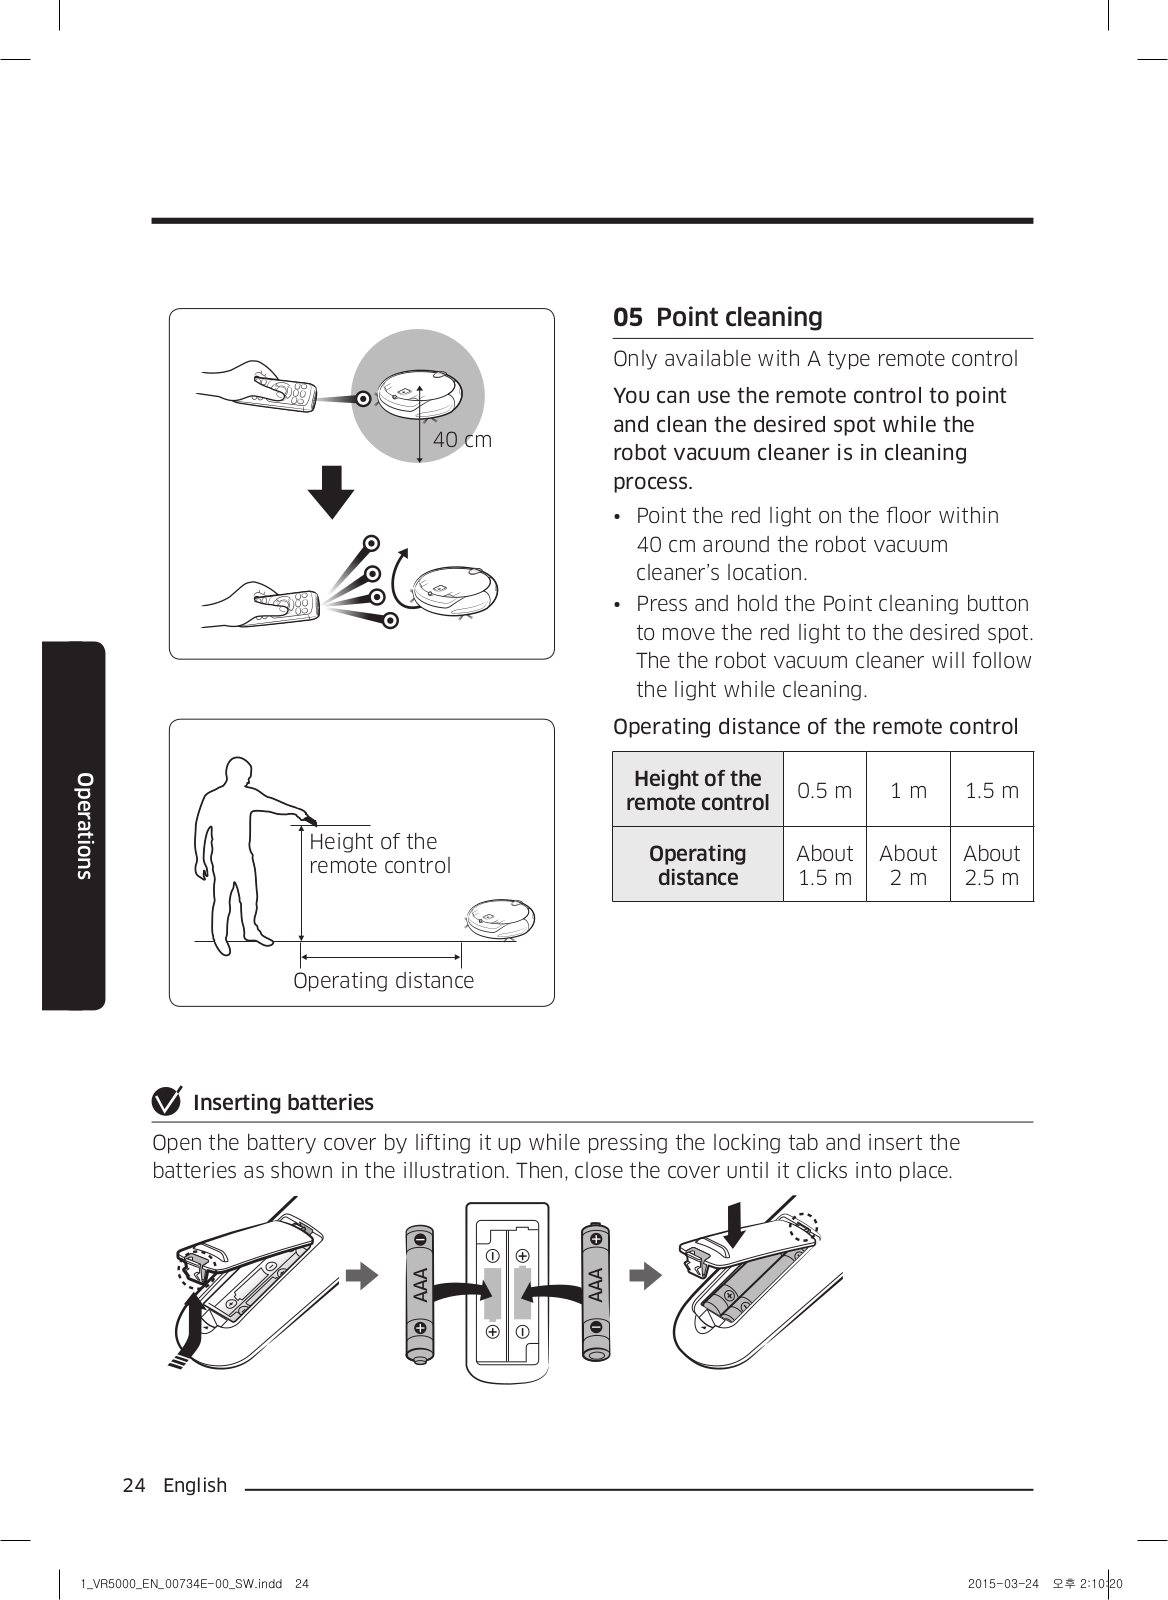
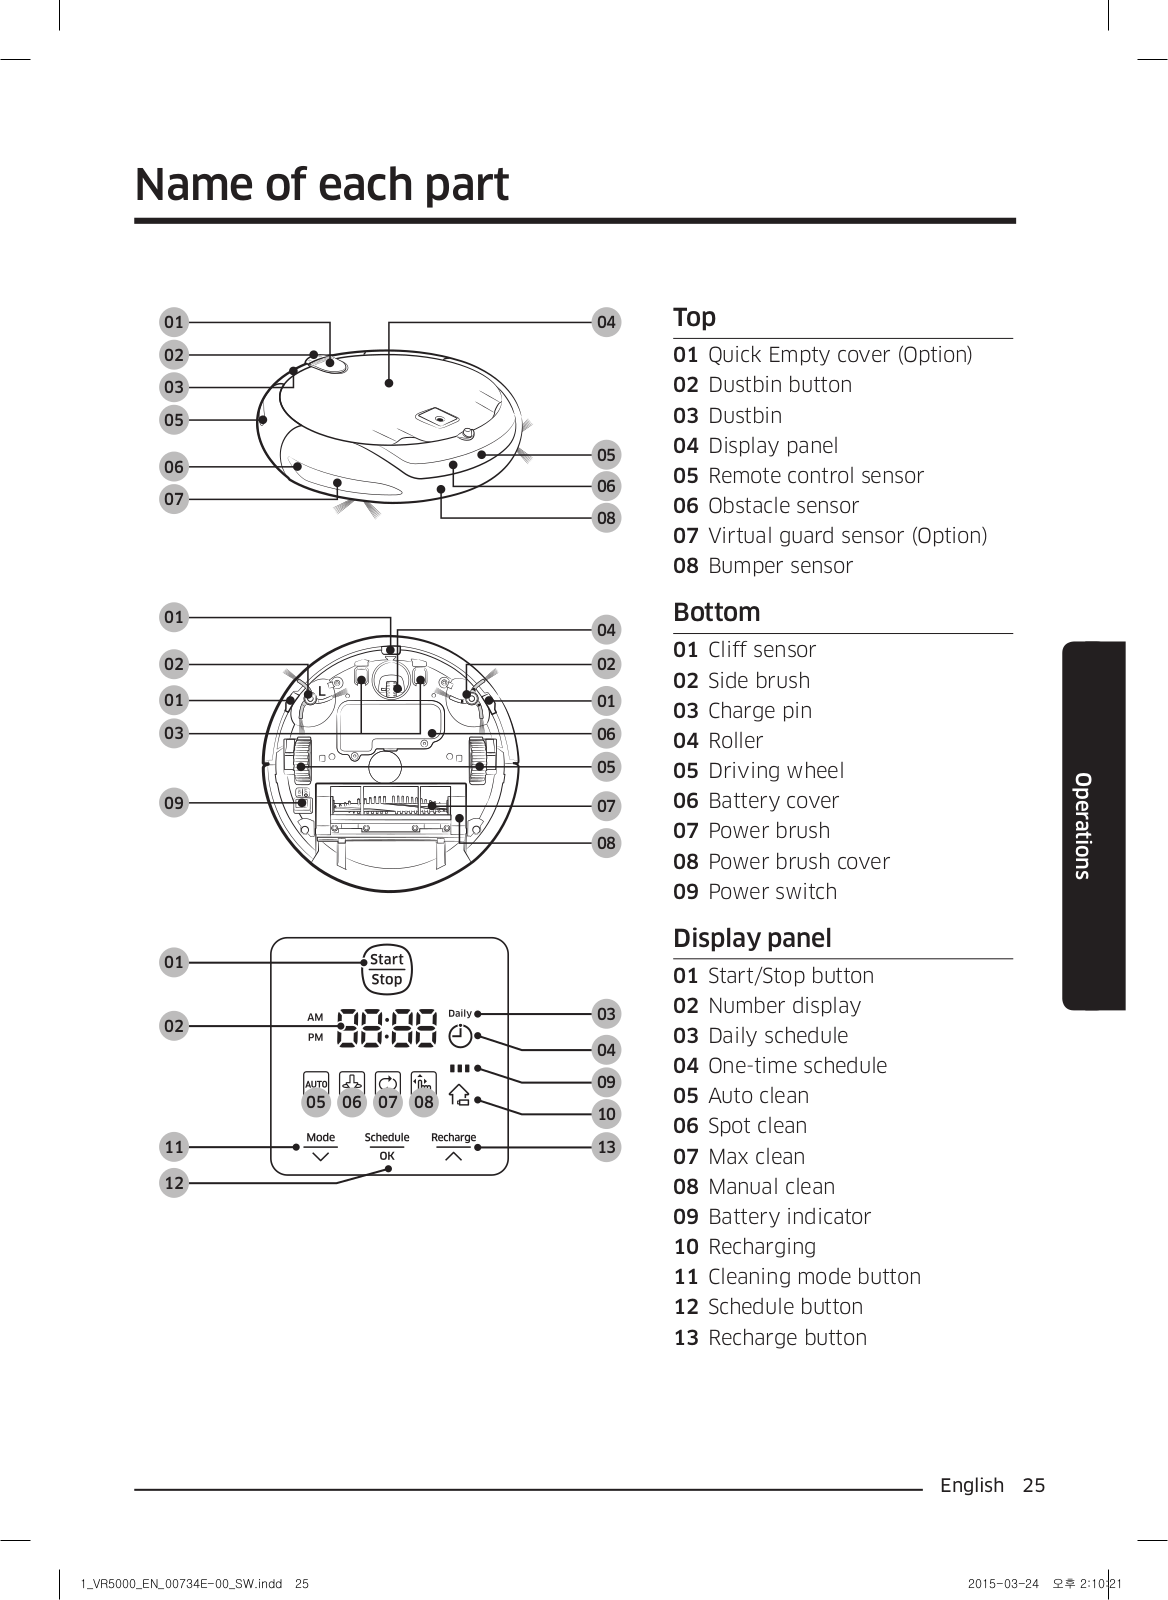
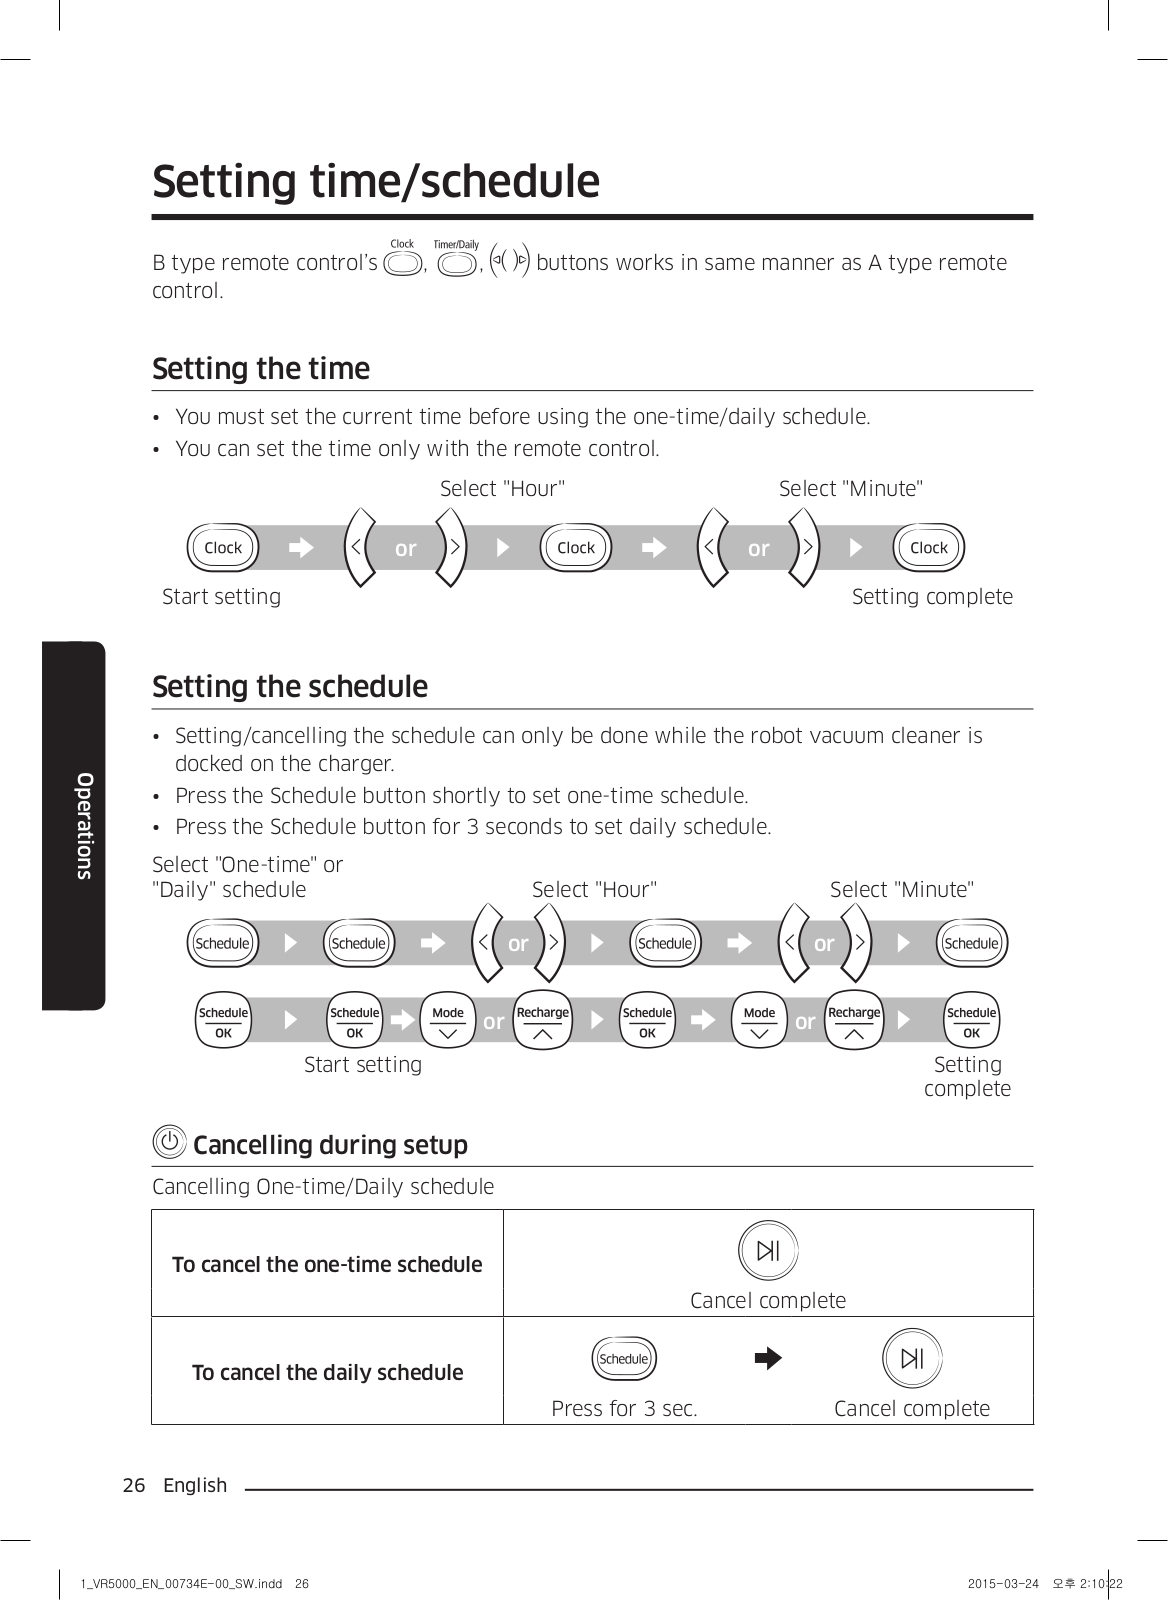
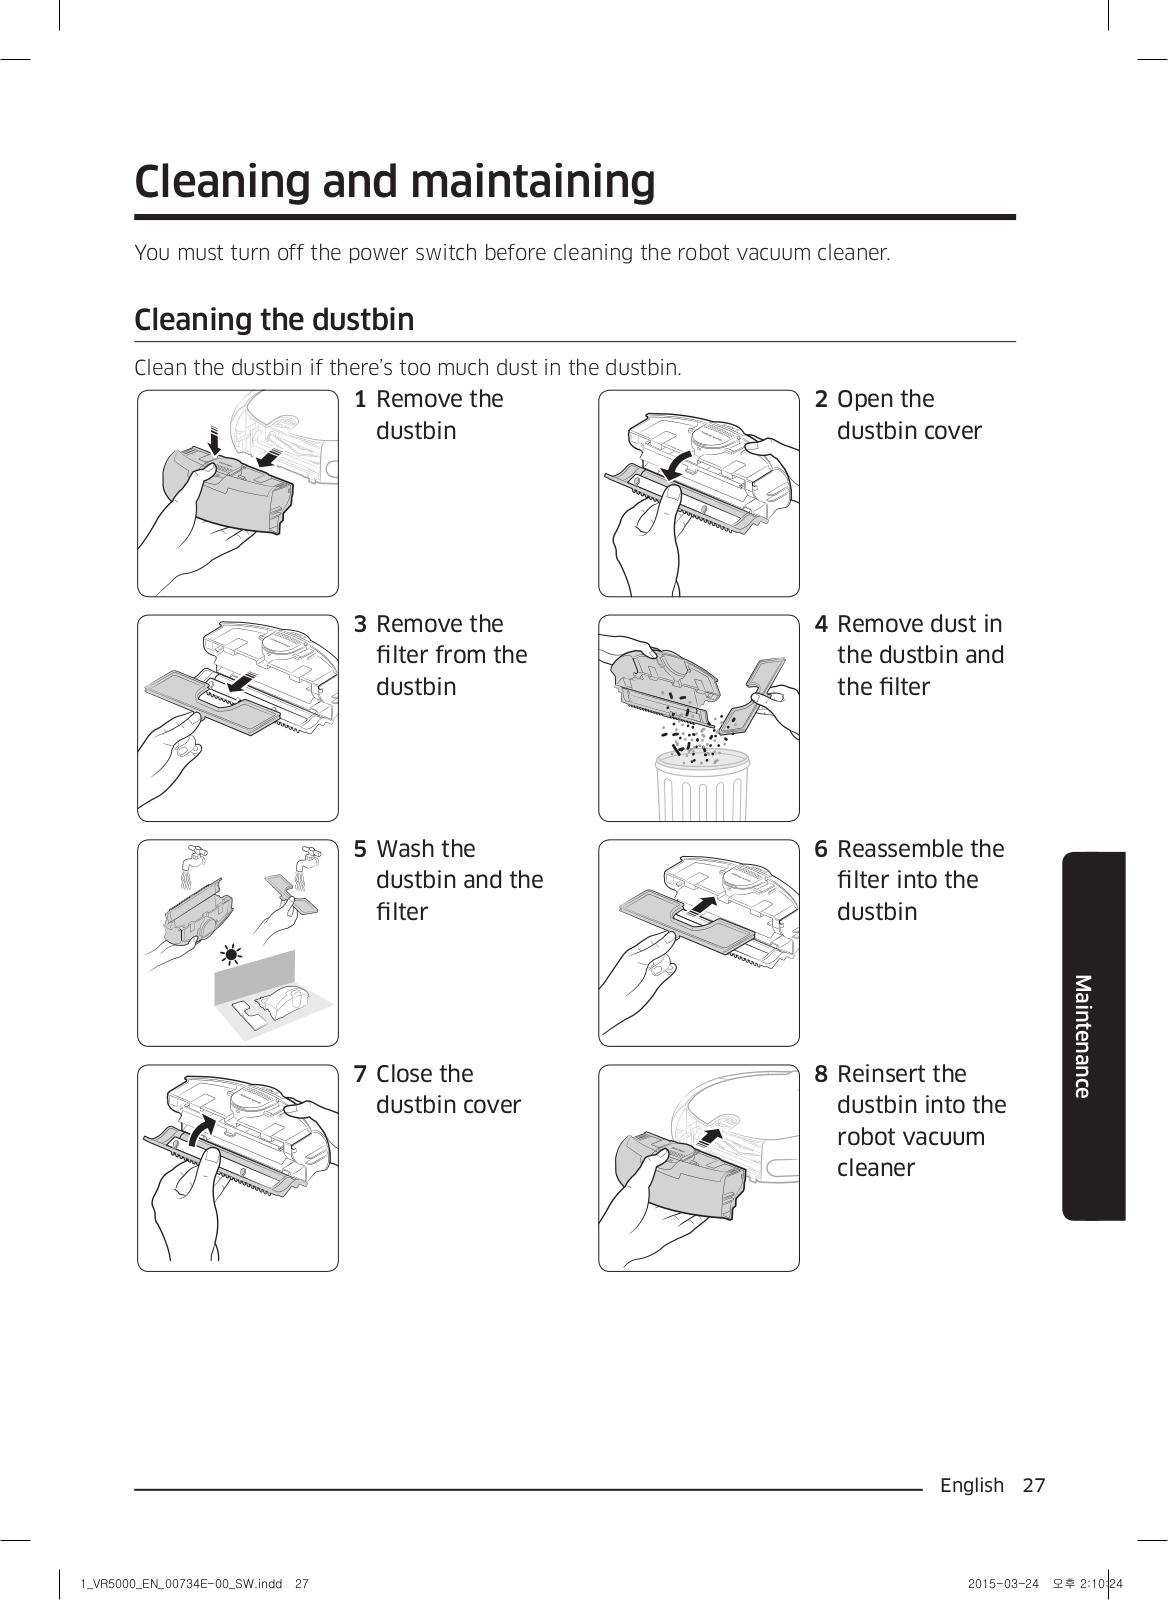
User Manual
Download
Loading...
+
138
hidden pages
Unhide
You need points to download manuals.
1 point = 1 manual.
You can buy points or you can get point for every manual you upload.
Buy points
Upload your manuals
 Loading...