

Page 1

PICO Projector
User Manual
SP-H03
The color and the appearance of the product may differ
from the illustrations in this manual. The specifications are
subject to change without prior notice to improve
performance.
Page 2

Table Of Contents
MAJOR SAFETY PRECAUTIONS
Before You Start . . . . . . . . . . . . . . . . . . . . . . . . . . . . . . . . . . . . . . . . . . . 1-1
Care and Maintenance . . . . . . . . . . . . . . . . . . . . . . . . . . . . . . . . . . . . . . 1-2
Safety Precautions . . . . . . . . . . . . . . . . . . . . . . . . . . . . . . . . . . . . . . . . . 1-3
INSTALLATION AND CONNECTION
Package Contents . . . . . . . . . . . . . . . . . . . . . . . . . . . . . . . . . . . . . . . . . 2-1
Connecting and Disconnecting the Battery . . . . . . . . . . . . . . . . . . . . . 2-2
Zoom and Focus Adjustment . . . . . . . . . . . . . . . . . . . . . . . . . . . . . . . . 2-3
Screen Size and Projection Distance . . . . . . . . . . . . . . . . . . . . . . . . . 2-4
Ventilation openings . . . . . . . . . . . . . . . . . . . . . . . . . . . . . . . . . . . . . . . 2-5
Supported Display Modes . . . . . . . . . . . . . . . . . . . . . . . . . . . . . . . . . . . 2-6
Ports . . . . . . . . . . . . . . . . . . . . . . . . . . . . . . . . . . . . . . . . . . . . . . . . . . . . 2-7
Connecting with a PC and Setting up the PC . . . . . . . . . . . . . . . . . . . 2-8
Connecting to an AV Device . . . . . . . . . . . . . . . . . . . . . . . . . . . . . . . . . 2-9
Connecting an External Speaker . . . . . . . . . . . . . . . . . . . . . . . . . . . . 2-10
Connecting the Power and Charging the battery . . . . . . . . . . . . . . . 2-11
Connecting to an External Memory Device and USB Cable . . . . . . . 2-12
USING
Product Features . . . . . . . . . . . . . . . . . . . . . . . . . . . . . . . . . . . . . . . . . . 3-1
Product Details . . . . . . . . . . . . . . . . . . . . . . . . . . . . . . . . . . . . . . . . . . . . 3-2
LED Indications . . . . . . . . . . . . . . . . . . . . . . . . . . . . . . . . . . . . . . . . . . . 3-3
Using the Screen Adjustment Menu (OSD: On Screen Display) . . . . 3-4
Supported File Formats . . . . . . . . . . . . . . . . . . . . . . . . . . . . . . . . . . . . . 3-5
Firmware Update . . . . . . . . . . . . . . . . . . . . . . . . . . . . . . . . . . . . . . . . . . 3-6
TROUBLESHOOTING
Before Requesting Service . . . . . . . . . . . . . . . . . . . . . . . . . . . . . . . . . . 4-1
MORE INFORMATION
Specifications . . . . . . . . . . . . . . . . . . . . . . . . . . . . . . . . . . . . . . . . . . . . . 5-1
ROHS . . . . . . . . . . . . . . . . . . . . . . . . . . . . . . . . . . . . . . . . . . . . . . . . . . . . 5-2
Contact SAMSUNG WORLDWIDE . . . . . . . . . . . . . . . . . . . . . . . . . . . . . 5-3
Correct Disposal - Europe only . . . . . . . . . . . . . . . . . . . . . . . . . . . . . . . 5-4
Page 3

1 Major Safety Precautions
1-1 Before You Start
Icons used in this manual
ICON NAME MEANING
Caution Indicates cases where the function may not work or the setting may be canceled.
Note Indicates a hint or tip to operate a function.
Using this Manual
The contents of this manual are subject to change without prior notice for performance improvement.
• Make yourself fully aware of the safety precautions before using this product.
• If a problem occurs, refer to the 'Troubleshooting' section.
Copyright Notice
Copyright © 2010 Samsung Electronics Co., Ltd. All rights reserved.
The copyright of this manual is reserved by Samsung Electronics, Co., Ltd.
The contents of this manual may not be partially or in whole reproduced, distributed or used in any form without the written
permission of Samsung Electronics, Co., Ltd.
Page 4
1-2 Care and Maintenance
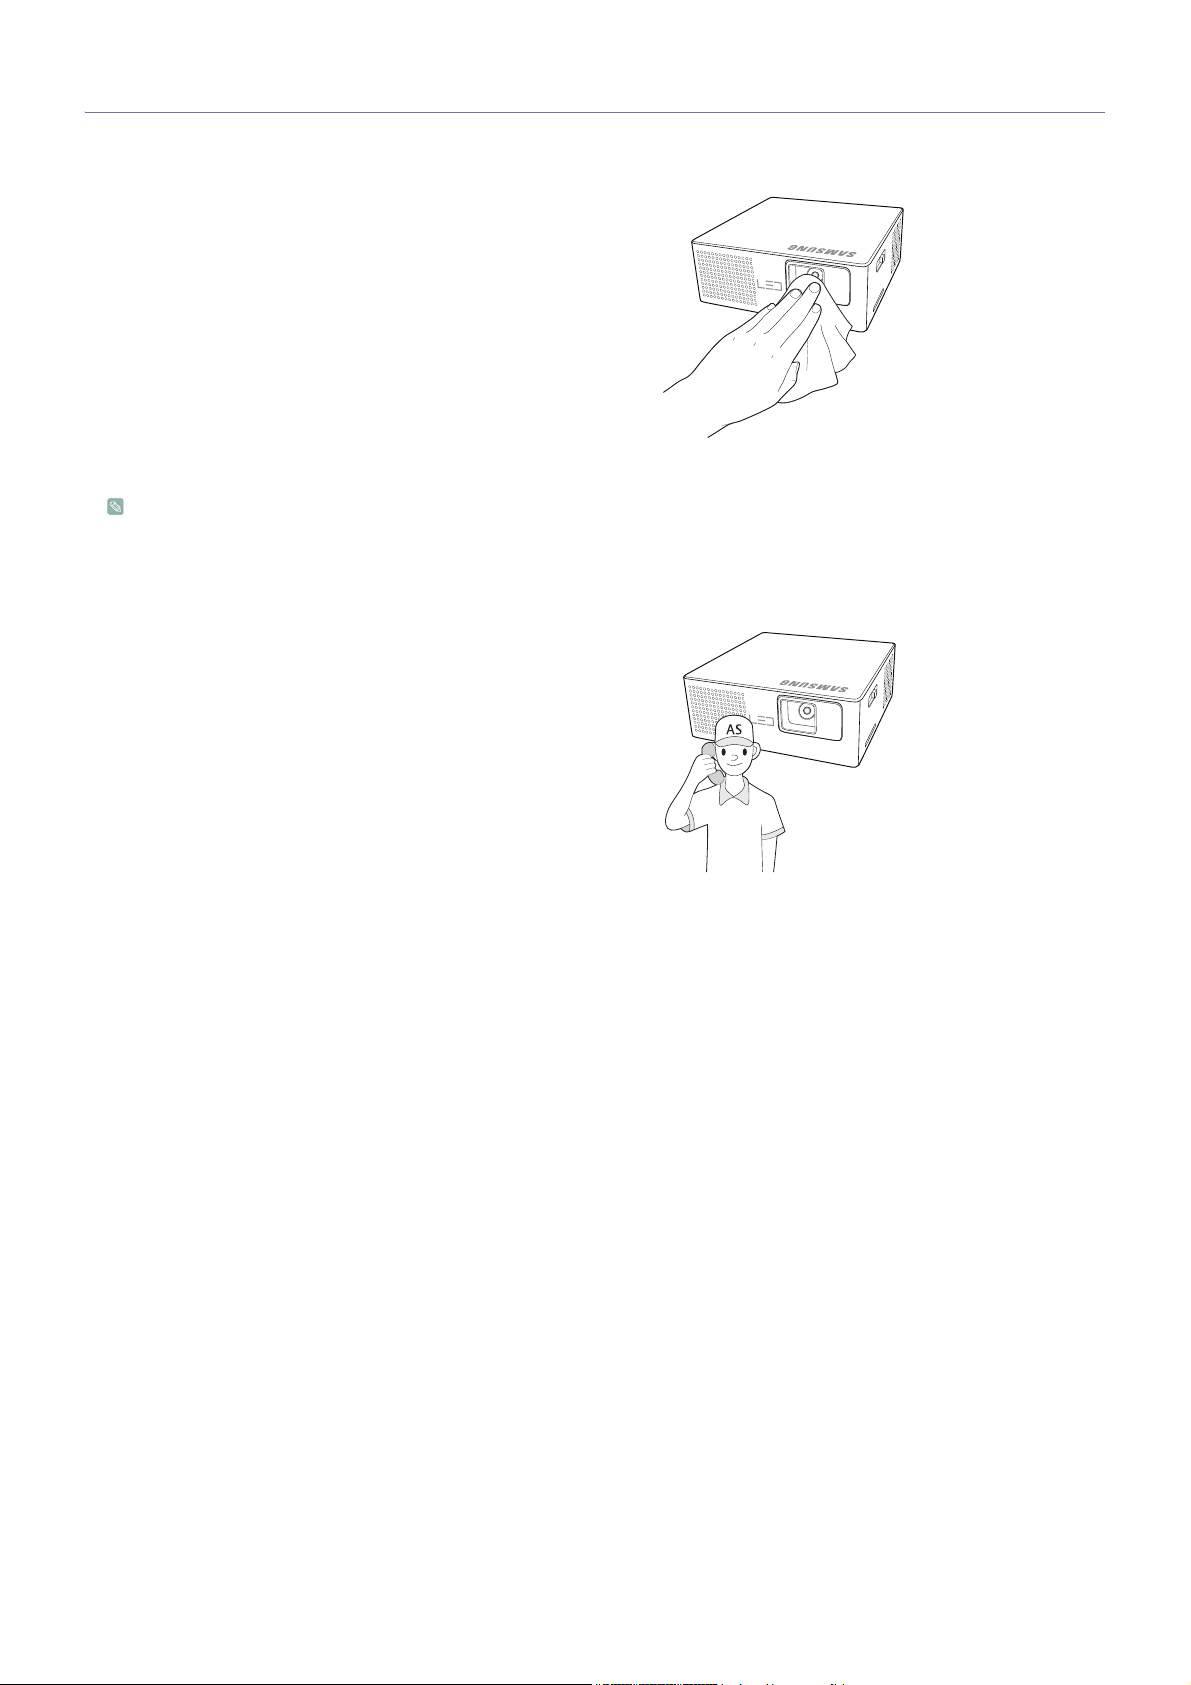
Cleaning the Surface and the Lens
Clean the projector using a soft dry cloth.
• Avoid cleaning the product with a flammable substance such as
benzene or thinner.
• Avoid scratching the lens with your fingernails or a sharp object.
This may result in scratches or damage to the product.
• Avoid cleaning the body of the product with a wet cloth or by
directly spraying water onto the product.
If water enters the product, it may result in fire, electric shock, or
a problem with the product.
• A white stain may appear on the surface of the projector if water
gets on it.
The appearance and the color may differ depending on
models.
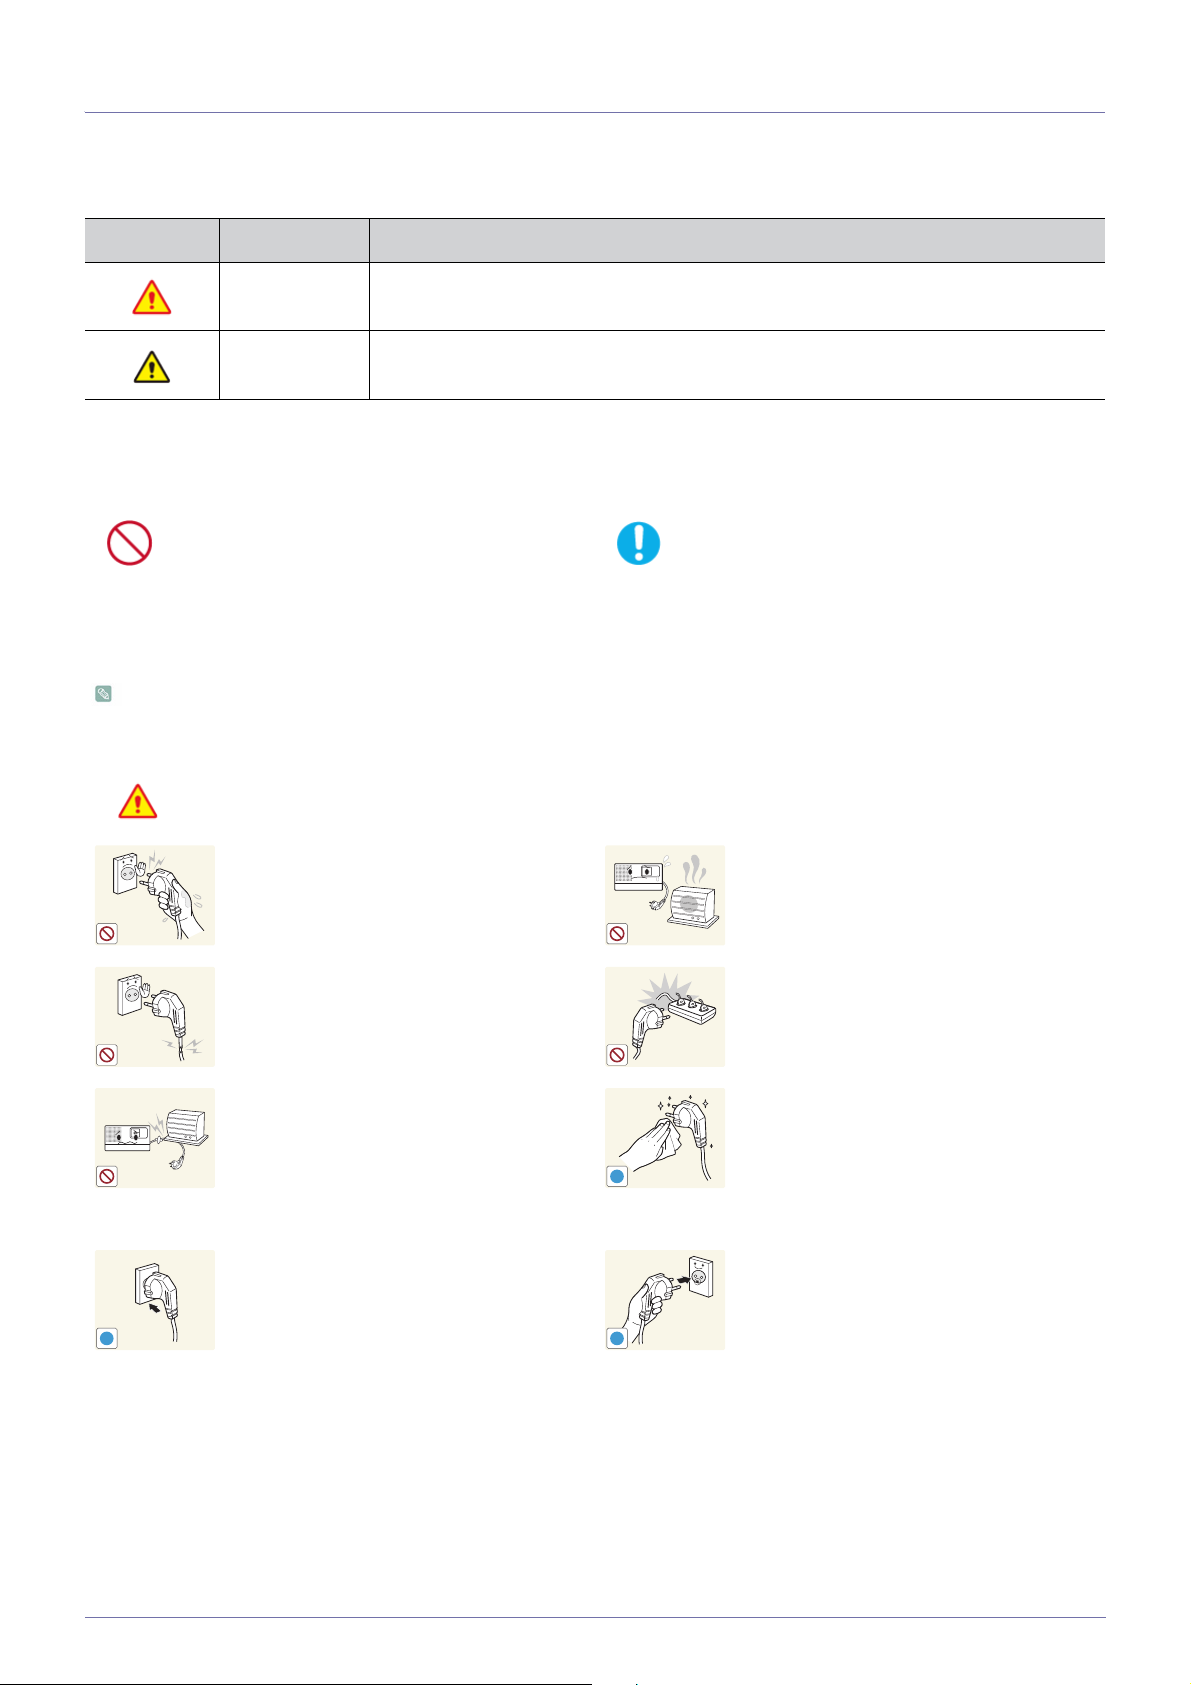
Cleaning Inside the Projector
For cleaning the interior of the projector, contact an authorized Samsung
Service Center.
• Contact a Service Center if dust or other substances are inside
the projector.
Page 5
1-3 Safety Precautions
30
LUMEN
30
LUMEN
!
!
!
Icons used for safety precautions
ICON NAME MEANING
Warning
Caution
Failing to follow the precautions marked with this sign may result in a serious injury or even a
fatality.
Failing to follow the precautions marked with this sign may result in a personal injury or property
damage.
Meaning of Signs
Do not perform. Must be followed.
Power Related
The following images are for your reference and may differ depending on models and countries.
The appearance and the color may differ depending on models.
Warning
Avoid plugging in or unplugging the power
supply with wet hands.
• Otherwise, it may result in electric
shock.
Keep the power cord and the product away
from heaters.
• Otherwise, it may result in electric
shock or fire.
Avoid using a damaged power cord or plug or
a loose power outlet.
• Otherwise, it may result in electric
shock or fire.
Avoid bending or twisting the power cord
excessively and avoid placing heavy objects
on the cord.
• Otherwise, it may result in electric
shock or fire due to a damaged power
cord.
Plug the power plug in firmly.
• Otherwise, it may result in fire.
Avoid connecting multiple electric appliances
to a single wall outlet.
• Otherwise, it may result in fire due to
overheating of the wall outlet.
If the power plug pin or jack is exposed to
dust, water or alien substances, clean it
thoroughly.
• There is a danger of electric shock or
fire.
Make sure to connect the power cord to a
grounded wall outlet (for insulation class 1
equipment only).
• Otherwise, it may result in electric
shock or injury.
Major Safety Precautions 1-3
Page 6

Caution
!
!
!
30
LUMEN
30
LUMEN
!
30
LUMEN
30
LUMEN
30
LUMEN
!
30
LUMEN
30
LUMEN
!
30
LUMEN
!
30
LUMEN
!
30
LUMEN
Precautions for handling the battery.
• Do not use an unapproved battery. It
may explode.
• Do not apply a strong force to the
battery or attempt to make a hole in the
battery.
• Neither heat the battery nor store it in a
place with a high temperature, such as
a car interior in the summer.
• Do not let the battery get wet.
• Do not let your child or pet suck or hold
the battery in his mouth.
• Do not let the charging terminal of the
battery contact any metal object.
Make sure to use only the power cord
supplied by our company. In addition, do not
use the power cord of another electric
appliance.
• Otherwise, it may result in electric
shock or fire.
When unplugging the power plug from the
wall outlet, make sure to pull the power plug
and not the cord.
• Failing to do so may result in electric
shock or fire.
Unplug the power plug before cleaning the
product.
• There is a danger of electric shock or
fire.
Installation Related
Warning
When installing the product on a console or
shelf, make sure that the front of the product
does not protrude out of the console or shelf.
• Otherwise, this may cause the product
to fall off and result in a malfunction or
injury.
If a problem occurs with the projector when
the battery is removed, be sure to remove the
power plug to cut off the power supply
completely. The power button alone will not
cut off the power supply completely.
When the battery is removed, do not attempt
to turn the projector on or off by connecting or
removing the power plug. (Do not use the
power plug as a power switch.)
Avoid installing the product in a location
exposed to direct sunlight and installing the
product near a heat source such as a fire or
heater.
• This may shorten the product life cycle
or cause fire.
Be sure to remove the power plug and cables
connected to other devices before you move
the projector.
Keep the power cord away from heaters.
• The coating of the power cord may
melt and cause electric shock or fire.
• Otherwise, it may result in electric
shock or fire due to the damaged
power cord.
Avoid installing the product in a location
exposed to dust, moisture (sauna), oil, smoke
Do not install the product in areas with heavy
dust.
or water (rain drops) and installing it within a
vehicle.
• This may result in electric shock or fire.
Do not install the product at a height where
children may reach it.
• If a child touches the product, the
product may fall and this may result in
Keep the plastic bags used to pack the
product away from children.
• If children place the plastic bags over
their heads, they may suffocate.
injury.
1-3 Major Safety Precautions
Page 7

SAMSUNG
!
30
LUMEN
!
30
LUMEN
30
LUMEN
!
30
LUMEN
100
30
LUMEN
30
LUMEN
30
LUMEN
30
LUMEN
!
30
LUMEN
30
LUMEN
Caution
If the product is installed in a location where
the operating conditions vary considerably, a
serious quality problem may occur due to the
surrounding environment. In this case, install
the product only after consulting our Call
Center.
• Places exposed to microscopic dust,
chemicals, too high or low temperature,
high humidity, such as airports or
stations where the product is
continuously used for a long time etc.
Do not install the projector in a small, poorly
ventilated area.
• Otherwise, a fire may result after a rise
in internal temperature.
Usage Related
Warning
When installing the product on a console or
shelf, make sure that the front of the product
does not protrude out of the console or shelf.
• Otherwise, this may cause the product
to fall off and result in a malfunction or
injury.
• Make sure to use a cabinet or shelf
suitable to the size of the product.
Avoid inserting metal objects such as a paper
clips, coins, or hairpins, or inflammable
objects into the product (the vents, ports, etc).
• If water or an alien substance enters
the product, turn the power off, unplug
the power cord and contact a service
center.
• Otherwise, it may result in a problem
with the product, electric shock or fire.
When putting the product down, handle it
gently.
• Otherwise, it may result in a problem
with the product or injury
Avoid placing objects such as toys and
cookies on top of the product.
• If a child hangs over the product to
grab an object, the object or the
product may fall and this may result in
injury or even death.
Since a high voltage runs through the product,
never disassemble, repair, or modify the
product yourself.
• Otherwise, it may result in fire or
Do not look into the lens while the projector is
on.
• This is dangerous, especially for
children.
electric shock.
• If the product needs to be fixed, contact
a service center.
Avoid using or placing inflammable spray or
objects near the product.
• This may result in an explosion or fire.
Do not attempt to insert a conductive object,
such as a steel paper clips, into the power
cord socket if the cord is connected to a power
outlet.
Do not touch the power plug right after it was
removed from the power outlet.
When thunder or lighting occurs, unplug the
power cord.
• Failing to do so may result in electric
shock or fire.
Major Safety Precautions 1-3
Take care not to block the vent with a table
cloth or curtain.
• Otherwise, it may result in fire due to
internal overheating.
Page 8

Do not let the product drop while moving it.
!
30
LUMEN
30
LUMEN
30
LUMEN
30
LUMEN
!
!
30
LUMEN
GAS
30
LUMEN
!
30
LUMEN
30
LUMEN
30
LUMEN
SAMSUNG
!
30
LUMEN
30
LUMEN
SAMSUNG
30
LUMEN
30
LUMEN
!
!
30
LUMEN
!
30
LUMEN
!
• This may result in a problem with the
product or injury.
Avoid using a humidifier or cooker near the
product.
• Otherwise, it may result in electric
shock or fire.
Avoid lifting up or moving the product by
holding only the power cord or signal cable.
• Otherwise, it may result in electric
shock, fire or a problem with the
product due to damage to the cable.
If a gas leak occurs, do not touch the product
or the power plug and ventilate the area
immediately.
• A spark may result in an explosion or
fire.
• During a thunder or lighting storm, do
not touch the power cord or antenna
cable.
Avoid placing a container with liquid such as a
vase, flowerpot, beverage can, cosmetics
bottle, etc., or a metal object on the product.
• If water or an alien substance enters
the product, turn the power off, unplug
the power cord and contact a service
center.
• Otherwise, it may result in a problem
with the product, electric shock or fire.
If the product generates a strange noise, a
burning smell, or smoke, unplug the power
plug immediately and contact a service
center.
• Failing to do so may result in electric
shock or fire.
Avoid dropping an object on the product or
causing the product to strike or be struck by
another object.
• Otherwise, it may result in electric
shock or fire.
Caution
Avoid placing a heavy object on the product.
• Otherwise, it may result in a problem
with the product or injury.
When not using the product for a long time for example, when you go on vacation -
unplug the power cord from the wall outlet.
• Otherwise, it may cause dust
accumulation and result in fire caused
by overheating or short circuit or result
in an electric shock.
Be sure to place the projector on a table.
• Otherwise, you may trip over the
projector and hurt yourself, or damage
the projector.
Keep small accessories away from the
children.
If water or any other foreign substance gets in
the projector, switch the projector off, remove
the power cable, and contact a service center.
Do not use the product when it indicates a
malfunction, such as no sound or no picture.
• Turn the product off immediately,G
unplug the power cord from a wall
outlet, and contact a Service Center.
Do not touch the lens on the product.
• This may cause damage to the lens.
Do not touch any outer part of the product with
tools such as a knife or a hammer.
If you drop the product or the case is
damaged, turn the power off and unplug the
Always keep the power adaptor in a wellventilated area.
power cord. Contact a service center.
• Otherwise, it may result in fire or
electric shock.
1-3 Major Safety Precautions
Page 9

Do not expose the adaptor to water. Do not let
30
LUMEN
30
LUMEN
30
LUMEN
30
LUMEN
30
LUMEN
30
LUMEN30LUMEN
30
LUMEN30LUMEN
30
LUMEN
30
LUMEN
!
30
LUMEN
!
SAMSUNG
the adaptor to get wet.
• Water can cause a malfunction, electric
shock or fire. Do not use adaptor by the
waterside or outside particularly when
it rains or snows. Do not let the adaptor
to get wet when you clean the floor with
water.
Do not place the adapter on top of another
adapter.
• It may result in fire.
Keep power adaptor away from any other
heat source.
• Otherwise, it may result in fire.
Do not open any cover on the product.
• This would prove hazardous because
Be particularly careful not to let any of your
body parts contact the exhaust vents when
the projector is operating.
Do not place objects vulnerable to heat near
the projector.
Cleaning Related
of high-voltage current inside the
product.
Remove the vinyl cover of the adapter before
using the adaptor.
• Otherwise, it may result in fire.
Avoid going near the exhaust vents or lens.
Both emit extreme heat when the projector is
operating and immediately after the projector
is turned off.
Note that the exhaust vents stay hot even
after the projector is powered off.
The lens may be hot. Be careful not to contact
it. (Children and people with sensitive skin
should be most cautious.)
Warning
Caution
Do not clean the product case or body using
water spray or a wet cloth. Avoid using any
chemicals such as detergents, industrial or
automotive polish, abrasive, wax, benzene,
alcohol on any plastic part of the product such
as projector case, since this may cause
damage.
When cleaning the product, disconnect the
power cord and clean the product with a soft
dry cloth.
• Avoid using chemicals such as wax,
benzene, alcohol, thinner, mosquitorepellent, fragrance, lubrication or
cleansing agent when cleaning the
product.
• This may result in the exterior being
deformed or the print being removed.
Using surfactant which contains a large
amount of alcohol, solvent, or other strong
chemicals may result in discoloration,
cracking, or damage to the product exterior.
Be sure to use the recommended cleansing
agent only.
You can purchase the recommended
cleansing agent from a service center.
To clean dirt or stains on the front projection
lens, dampen a clean cloth with a small
amount of lens cleaner or a neutral detergent
and water, and then rub gently.
Ask a Service Center to clean the interior of
the projector at least once per year.
!
Major Safety Precautions 1-3
Page 10

2 Installation and Connection
B
B
2-1 Package Contents
• Unpack the product and confirm that all of the items listed under Contents have been included.
• Store the packaging box in case you need to move the product at a later date.
• If any items are missing, contact your dealer.
• You can purchase items listed as Sold Separately from your local Samsung dealer.
PICO Projector
CONTENTS
Quick Setup Guide Warranty Card
User Manual Power Cord / Adaptor
(Not available in all locations)
Battery USB gender adaptor 3RCA gender adaptor D-Sub gender adaptor
PICO Projector case Ferrite Core for Power Cord
(1EA)
SOLD SEPARATELY
D-Sub Cable USB Cable Stereo Cable Audio Cable
Video Cable
2-1 Installation and Connection
Page 11

2-2 Connecting and Disconnecting the Battery
Connecting the Battery
Align and fasten the grooves on the bottom of the projector with the counterparts on the battery.
Push the top and back of the projector forward simultaneously until you hear a click.
Disconnecting the Battery
Press the lock, marked [PUSH], on the back of the battery.
With the lock held down, lift the back of the projector.
Installation and Connection 2-2
Page 12
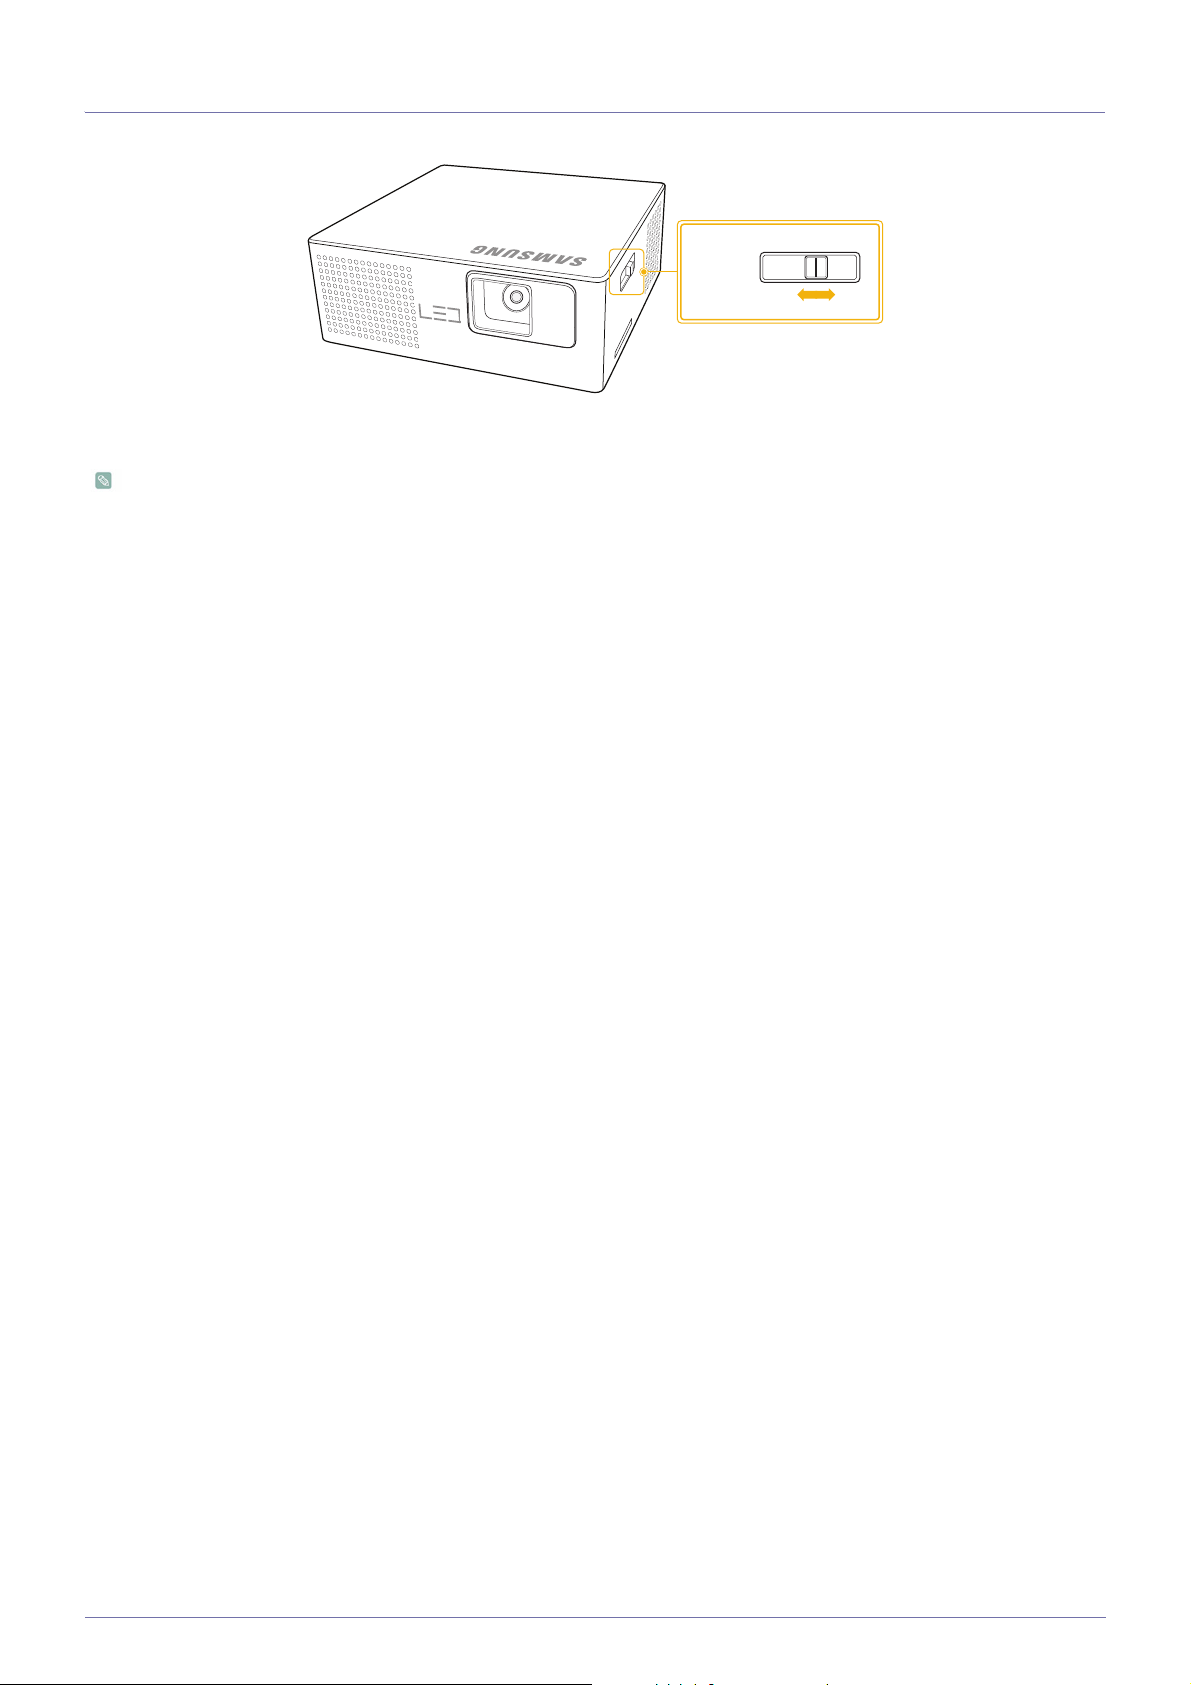
2-3 Zoom and Focus Adjustment
FOCUS
Move the [FOCUS] slide bar left or right until the picture is clear.
The size of your screen determines the distance you set your projector from the screen.
If you do not place your projector at the projection distance specified in the Screen Size and Projection Distance table in
Section 2-4, you will not be able to adjust the focus correctly.
2-3 Installation and Connection
Page 13

2-4 Screen Size and Projection Distance
Z: Throw Distance
Projector
Screen: Side view Screen: Front view
Y
M
Y
90°
X
Z
If the picture is not clear, adjust [FOCUS], or move the projector forward or backward.
SCREEN SIZE
Z (THROW DISTANCE)
M (DIAGONAL) X (HORIZONTAL) Y (VERTICAL)
INCHES CM INCHES CM INCHES CM INCHES CM
8.6 21.8 7.5 19.0 4.2 10.7 12.0 30.5
10 25.4 8.7 22.1 4.9 12.5 14.0 35.5
17.2 43.7 15.0 38.1 8.4 21.4 23.8 60.5
34.3 87.1 29.9 75.9 16.8 42.7 47.4 120.5
57.2 145.3 49.9 126.6 28.0 71.2 78.8 200.1
85.5 217.2 74.5 189.3 41.9 106.5 117.7 299
Installation and Connection 2-4
Page 14

2-5 Ventilation openings
Ventilation openings
For the location of the ventilation openings, see the picture below:
• Do not block the ventilation openings. Blocking the ventilation openings can cause your projector to overheat and may cause
it to fail.
NAME DESCRIPTION
,
, ,
Exhaust vents Air outtake vent
Intake vents Air intake vent
2-5 Installation and Connection
Page 15

2-6 Supported Display Modes
2-6-1. PC Timing (D-Sub)
FORMAT RESOLUTION
HORIZONTAL
FREQUENCY
(KHZ)
VERTICAL
FREQUENCY
(HZ)
FREQUENCY
IBM 640 x 480 60Hz 31.469 59.94 25.175
VESA 800 x 600 60Hz 37.879 60.317 40
VESA 1024 x 768 60Hz 48.363 60.004 65
VESA 720 x 576 60Hz 35.91 59.95 32.75
EIA-861B 720 x 480 60Hz 31.5 60 27.027
VESA 1280 x 800 60Hz 49.702 59.81 83.5
VESA 1280 x 768 60Hz 47.776 59.87 79.5
VESA 1280 x 720 60Hz 47.772 59.855 74.5
All resolutions higher or lower than 854 x 480 are converted to 854 x 480 by the scaler chip in the projector. To obtain an
optimal picture, the resolution from the PC should be similar to the projector (854 x 480).
2-6-2. AV Timing (VIDEO)
NTSC, NTSC 4.43, PAL, PAL60, PAL-N, PAL-M, SECAM
PIXEL
(MHZ)
Installation and Connection 2-6
Page 16

2-7 Ports
PC IN AV IN
2-7-1. Rear View
Open the cover on the back of the projector.
ICON
NAME
PC IN port
AV IN port
Power port
USB port
Audio output port
The maximum memory capacity supported for a USB memory device is 16 GB.
(The maximum capacity supported for external memory is based on our factory test. Your experience may differ depending
on the manufacturer of the memory device.)
2-7 Installation and Connection
Page 17

2-7-2. Side View
FOCUS
ICON
NAME
MicroSD(HC) card slot
The maximum memory capacity supported for a MicroSD(HC) card is 32 GB.
(The maximum capacity supported for external memory is based on our factory test. Your experience may differ depending
on the manufacturer of the memory device.)
Installation and Connection 2-7
Page 18

2-8 Connecting with a PC and Setting up the PC
1
2-8-1. Setting up the PC Environment
Check the following items before connecting your PC to your projector.
1. Click the right mouse button on the Windows desktop, and then click [Properties].
The <Display Properties> dialog appears.
2. Click the [Settings] tab, and then set the <Screen resolution>. The optimal resolution for the projector is 800 x 600. For other
resolutions supported by the projector, see the PC Timing Display Mode table in section 2-6.
You do not have to change the <Color quality> setup.
3. Press the [Advanced] button. Another property window appears.
2
3
4. Click the [Monitor] tab and set the <Screen refresh rate>. For the refresh rate that matches the resolution you’ve chosen, see
the refresh rate (60 Hz, 70 Hz, etc.) next to your selected resolution in the PC Timing Display Mode table in section 2-6.
Setting the refresh rate sets both the vertical and horizontal frequencies.
4
5. Click the [OK] button to close the window, and then click the [OK] button on the <Display Properties> window to close that
window.
6. Shut down the PC and connect it to the projector.
2-8 Installation and Connection
Page 19

RGB
PC IN AV IN
• The setup process might vary depending on your type of computer or version of Windows.
(For example, [Properties] appears instead of [Properties (R)] as shown in 1.)
• This projector supports 32 bit color quality (per pixel) when it is used as a PC monitor.
• Projected images may differ from the images on your monitor depending on the monitor manufacturer or Windows
version.
• When connecting the projector to a PC, make sure that the PC setup complies with the display settings supported by
this projector. If it does not, you may have signal problems.
2-8-2. Connecting with a PC
Make sure that your PC and projector are turned off.
1. Insert the D-Sub gender adaptor into the [PC IN] slot on the back of the projector.
2. Connect a D-Sub cable to the D-Sub gender adaptor.
3. Connect the D-Sub cable to the RGB port on the PC.
Refer to "PC Timing (D-Sub)" in the "Supported Display Modes" section for information on supported input signals.
4. Plug in the power cords of the projector and the PC.
D-Sub cables are sold separately.
Using the Projector
1. Turn on the projector and select <Input Source> ĺ <PC>.
If the <PC> mode cannot be selected, check that the D-Sub cable and gender adaptor are connected correctly.
2. Turn on the PC, and then set the PC Environment (screen resolution, etc.) if necessary.
3. Adjust the screen.
Installation and Connection 2-8
Page 20

2-9 Connecting to an AV Device
AUDIO OUTVIDEO OUT
PC IN AV IN
Make sure that the AV device and your projector are turned off.
1. Insert the 3RCA gender adaptor into the [AV IN] port on the back of the projector.
2. Connect a video cable and audio cable to the 3RCA gender adaptor.
Refer to "AV Timing (VIDEO)" in the "Supported Display Modes" section for information on supported input signals.
3. Connect the video cable to the VIDEO OUT port on the AV device.
Connect the audio cable to the AUDIO OUT port on the AV device.
Video and audio cables are sold separately.
2-9 Installation and Connection
Page 21

2-10 Connecting an External Speaker
AUDIO IN
PC IN AV IN
You can hear sound through an external speaker instead of the internal speakers built into the projector.
1. Connect an appropriate stereo cable to the external speaker and the [ ] port on the projector.
• The volume of the external speaker can be controlled by using the [ ] buttons on the projector.
• The [ ] port can output all of the audio input signals.
Stereo cables are sold separately.
Installation and Connection 2-10
Page 22

2-11 Connecting the Power and Charging the battery
PC IN AV IN
2-11-1. Connecting the Power
Be sure to connect the power supply after all other required connections are completed.
1. Connect the adaptor's power cable to the [ ] port on the back of the projector.
2. Plug one end of the adaptor's power cord to the adaptor and the other end into a wall socket.
• Ferrite Core for Power Cord
The ferrite cores are used to shield the cables from interference.
When connecting a cable, open the ferrite core and clip it around the cable near the plug as shown in the figure.
A
(Distance between the ferrite core and one end of the cord put into the Projector) : below 50mm
2-11-2. Charging the battery
2-11 Installation and Connection
Page 23

1. Connect the battery to the projector.
2. Make sure the projector is turned off.
3. Connect the adaptor's power cable to the [ ] port on the back of the projector.
4. Plug the adaptor's power cord into an electrical socket. The battery starts charging automatically.
• The battery is not used while the projector is connected to a wall outlet through the adaptor.
(If you connect the power supply, you can use the projector when the battery is not connected.)
We recommend that you keep the battery connected to the projector even when the projector is connected to a wall
outlet.
• The battery needs to be charged for about three hours if fully discharged. Do not turn on the projector when charging the
battery.
•Set <LED Mode> to <Eco> in <Settings> when the battery is fully charged. You can then play a video on <Internal
Memory> for about two hours. (The battery life may be shortened if you play a video from an external source.)
• The screen brightness may differ when the projector is operated only with the battery, depending on the remaining
power.
• The charging time and capacity of the battery differ depending on the battery status, operating condition, and duration of
use. The battery consumes power even when the device is not in use. Over time, the maximum operating time gradually
shortens. (If the maximum operating time decreases by more than half, it is time to buy a new battery.)
• The red LED ( ) indicates the battery is being charged. / The blue LED (
)
indicates the battery is fully charged.
Installation and Connection 2-11
Page 24

2-12 Connecting to an External Memory Device and USB Cable
FOCUS
B
PC IN AV IN
2-12-1. Connecting a MicroSD Card
1. Insert a microSD card into the microSD card slot on the side of the projector.
May not be compatible with some microSD cards.
2-12-2. Connecting USB Memory
1. Insert the USB gender adaptor into the [ ] slot on the back of the projector.
2. Connect a USB flash drive to the USB gender adaptor.
• This product does not support multi-card readers.
• This product does not work if the USB storage device is connected by a USB HUB.
• USB jack of this product does not support an external HDD (Hard Disk Drive).
• Some products which do not comply with standard USB specifications might not operate normally.
• A USB storage device with an automatic recognition application or its own driver might not operate normally.
• A USB storage device that uses only a designated driver might not be recognized.
• Recognition speed for USB storage device may vary by device.
2-12 Installation and Connection
Page 25

• Do not turn off the product or pull a connected USB storage device out while the USB storage device is in use. Doing so
USB
B
PC IN AV IN
may result in damage to the USB storage device or stored file.
• Use a USB storage device which contains normal files. Abnormal files can cause a malfunction or the files may not play.
• USB storage devices must be formatted with the FAT or FAT32 (recommended) file systems supported by Windows.
A memory device formatted by a program other than Windows may not work properly.
• Use the USB cable provided with the USB device when connecting it to the projector.
(For more information on purchasing cable and external devices, contact the respective manufacturer.)
• Samsung shall not be held liable for any failure of an external device caused by using a cable other than the ones(s)
specified for the device.
• As the data in the USB storage device can be damaged, please back up important data to avoid loss.
The user is responsible for data management. Samsung shall not be held liable for any data loss.
• When using a USB storage device with the projector, subfolders with a maximum depth of 4 from the top folder are
supported. Also, if the number of files (including folders) in the same folder exceeds 2,900, it will not be recognized. In
addition, if there are a large number of files on a USB device, individual files may take a long time to display.
• If an external memory device does not operate after you've connected it to the projector, try to connect it to a PC. If it still
does not operate normally, contact the memory device's manufacturer service center or related customer center.
2-12-3. Connecting to a PC Using a USB Cable
If you connect the projector to a PC, you can transfer files in the internal memory of the projector.
Connect the smaller end of the USB cable to the projector and the larger end to the USB port of a PC.
To transfer files from a PC.
1. Make sure the projector is turned off, and then connect the projector to a PC with the USB cable.
2. Turn the projector on. The start up Samsung logo appears, then the projector displays "Loading", and then displays
"Connected to PC USB port."
3. What you see next depends on your version of Windows. On many versions, the Removable Disk pop up appears on your
PC screen.
If this pop up appears, select "Open folder to view files". If not, use My Computer or Windows Explorer to access the
projector's files. The projector appears as a Removable Disk.
4. Transfer the files from your PC to the projector by dragging and dropping or copying and pasting.
Installation and Connection 2-12
Page 26

To disconnect the projector from a PC.
Make sure to end the connection properly to prevent damage to the projector or your data.
1. Click on the Windows Taskbar.
2. Click the pop-up message.
3. Disconnect the USB cable only when the message says that it is safe to remove the hardware.
• Do not disconnect the USB cable while the files are being copied, as this could result in loss of data or damage to
the projector.
• The connection will not end if you have projector files open on the PC. Close all projector files and try again.
• Other versions of Windows operate similarly. Follow the correct procedure for removing a USB device from your PC
safely for your version of Windows.
2-12 Installation and Connection
Page 27

3Using
3-1 Product Features
1. Advanced LED light source
• Non-mercuric and eco-friendly, these long lasting LEDs guarantee a longer life span than traditional lamps.
2. Minimized fan noise
• The fan noise from the projector has been minimized by optimizing the internal air circulation and fan structure.
3. Easy to carry
• The projector is small and light, making it useful for business trips and leisure activities.
• You can view documents, videos and photos anywhere.
4. Optical engine with DLP (data leak prevention) technologies
• You get WVGA resolution and a bright, 30-lumens picture.
5. Various useful features
• Multimedia player, document viewer, internal memory, microSD card slot, and a removable and rechargeable battery are
included.
6. Multiple input ports
• Multiple input ports, including PC, AV, USB, and MicroSD provide flexible connectivity with peripheral devices.
7. Audio output
• Equipped with a 1 W (mono) speaker and an audio output port.
8. Convenient menu items
• The same menu is used for all types of inputs, making the projector easy to use.
Using 3-1
Page 28

3-2 Product Details
3-2-1. Product Details
The battery is disconnected.
The battery is connected.
NAME
DESCRIPTION
Lens Forms an image of an object on screen.
FOCUS Adjusts the focus on screen.
Indicates the operational status of the projector.
Indicators
Refer to the “LED Indications”.
Speaker
Outputs sound.
Tripod hole Fasten a tripod here.
3-2 Using
Page 29

3-2-2. Control Buttons
The control buttons can be found on the top of the projector.
NAME DESCRIPTION
Power button
Direction buttons
Select button
Menu button
Back button
Turns the projector on or off.
Navigates displayed menu items and adjusts values.
Confirms a selected function when a menu is displayed.
Displays a menu.
Returns to the previous menu.
The [ ] buttons can be used to control the volume during video or audio playback.
Using 3-2
Page 30

3-3 LED Indications
3-3-1. LED Indications
: Light is Off / : Light is Blinking / : Light is On
LED STATUS
The battery is being charged.
The battery is completely charged.
The projector shut down automatically because it exceeded the maximum operating temperature.
(The LED blinks at one second intervals.)
Refer to Action 1 in Clearing Indicator Problems below.
The cooling system (including the cooling fan) inside the projector is not working normally.
(The LED blinks twice at one second intervals and then stays off for two seconds.)
Refer to Action 2 in Clearing Indicator Problems below.
The LED start-up board of the projector is not working normally.
Refer to Action 3 in Clearing Indicator Problems below.
The battery needs to be charged.
3-3-2. Clearing Indicator Problems
CLASSIFICATION STATE MEASURES
Action 1
Action 2
The internal temperature of the
projector increased abnormally.
The cooling system (including the
cooling fan) inside the projector is
not working normally.
• Restart the projector. If the same problem occurs continually,
contact your product distributor or service center.
• Move the projector to a cool place, let it cool sufficiently, and then
turn it on again. If the same problem occurs continually, contact
your product distributor or service center.
Action 3
The LED start-up board in the
projector is not working normally.
• Restart the projector. If the same problem occurs continually,
contact your product distributor or service center.
This Projector uses a cooling fan system to keep the unit from overheating. Operation of the cooling fan may produce noise,
This does not affect product performance and is part of normal operation.
3-3 Using
Page 31

3-4 Using the Screen Adjustment Menu (OSD: On Screen Display)
3&
$9
The Screen Adjustment Menu (OSD: On Screen Display) Structure
MENU SUB-MENU
Input Source
Internal Memory /
USB
/
MicroSD card
3-4-1. Input Source
PC
PC AV
Documents Videos Photos Music Settings
The projector displays the signal inputted from the PC.
PC Menu
To open the PC menu window, press [ ] when the projector is set to PC input.
MENU DESCRIPTION
Home
Auto Adjustment
Size
Brightness
Contrast
Returns to the main menu page.
Use to adjust the frequency and phase of the PC screen automatically.
Use to select a screen size.
• <Normal> - <4:3>
Use to adjust the brightness of the entire picture.
Adjust from
Use to adjust the contrast between the object and the background.
Adjust from 0 to 100.
0
to
100
.
Using 3-4
Page 32

AV
$9
3&
The projector displays the signal inputted from the AV device.
AV Menu
To open the AV menu window, press [ ] when the projector is set to AV input.
MENU DESCRIPTION
Home Returns to the main menu page.
Size Use to select a screen size.
• <Normal> - <4:3>
Brightness Use to adjust the brightness of the entire picture.
Adjust from 0 to 100.
Contrast Use to adjust the contrast between the object and the background.
Adjust from 0 to 100.
Sharpness Use to adjust the sharpness of the picture.
Adjust from 0 to 100.
Color Use to adjust color lighter or darker.
Adjust from 0 to 100.
Tint Use to obtain more natural color by enhancing the amount of green or red in images.
Adjust from -50 to +50.
It is activated when the signal is NTSC.
3-4 Using
Page 33

3-4-2. Internal Memory /
Home
Copy
File Size
Date
: 999 B
: 04.12.2010
Delete
Select Multiple Files
Select Storage Device
Documents
USB
/
MicroSD card
The projector displays the <USB> and <MicroSD card> menus only when you have connected an external memory device
(<USB>/<MicroSD card>).
Documents
Documents
Videos
Photos
Music
Settings
You can open document files of various formats saved in the <
Internal Memory
>, <
USB
> or <
MicroSD card
> without conversion.
Documents Menu
To open the Documents menu window, press [ ] when the projector is displaying the Document File List page.
Depending on the current language setting, folder names, file names, or text in a document may appear corrupted.
If this occurs, go to <Settings> ĺ <General> ĺ <Language> and change the language.
MENU DESCRIPTION
Home Returns to the main menu page.
Copy Copies a document from external memory to <
device (<
USB
>/<
MicroSD card
>) is connected.
Internal Memory
> or vice versa when an external memory
Using 3-4
Delete Deletes a document in <
Internal Memory
> or external memory (<
USB
>/<
MicroSD card
>).
Page 34

MENU DESCRIPTION
G
&QEWOGPVU
G
'HSHQGLQJRQWKHFXUUHQWODQJXDJHVHWWLQJIROGHUQDPHVILOHQDPHVRUWH[WLQDGRFXPHQWPD\DSSHDUFRUUXSWHG
pGGSGGGc
6HWWLQJV
eG Gc
*HQHUDO
eG Gc
/DQJXDJH
!DQGFKDQJHWKHODQJXDJH
G
/'07 &'5%4+26+ 10
+RPH
5HWXUQVWRWKHPDLQPHQXSDJH
Select Multiple Files Selects multiple document files and lets you <
Documents
Internal Memory½Document.ppt
)LOH1DPH
All
doc (0)
music (0)
photo (0)
video (0)
Document.ppt
View, Copy, Delete: Apply each action to selected
Reset : Cancel all selections
2 File(s) selected. Select 5HWXUQ Select All
Move to the document file you want to select using the [ ] buttons and tap [ ].
• A check( ) mark appears next to the selected document.
• Tapping the [ ] button selects or deselects a file.
• To select all documents in a folder, tap [ ].
• You can select multiple documents by repeating the process above.
• <View> : Opens the selected document file.
Enabled only when one file is selected.
• <Copy> : Copies multiple document files.
• <Delete> : Deletes multiple document files.
• <Reset> : Cancels all selections.
Copy
> or <
View
Copy
Delete
Reset
1/2
Delete
> them simultaneously.
Select Storage
Device
Moves directly to another memory device when an external memory device (<USB>/<MicroSD card>) is
connected.
Document Control Menu
NAME DESCRIPTION
View Info. Shows the Help bar, and information regarding pages and the battery.
Documents
Videos
Photos
Music
<RXFDQRSHQGRFXPHQWILOHVRIYDULRXVIRUPDWVVDYHGLQWKH
&QEWOGPVU/GPW
7RRSHQWKH'RFXPHQWVPHQXZLQGRZSUHVV> @ZKHQWKHSURMHFWRULVGLVSOD\LQJWKH'RFXPHQW)LOH/LVWSDJH
Settings
Documents
File Size
Date
Home
Copy
Delete
Select Multiple Files
Select Storage Device
,QWHUQDO0HPRU\
: 999 B
: 04.12.2010
!
86%
!RU
0LFUR6'FDUG
!ZLWKRXWFRQYHUVLRQ
3-4 Using
Page 35

NAME DESCRIPTION
, : Move to the previous page.
• Tapping [ ] while a page is zoomed in moves the display to the top of the
page.
• Clicking [ ] while a page is zoomed in moves the display to the left side of
the page.
Previous/Next
, : Move to the next page.
• Tapping [ ] while a page is zoomed in moves the display to the bottom of
the page.
• Clicking [ ] while a page is zoomed in moves the display to the right side
of the page.
Enables or disables the button lock.
Button Lock
• If the button lock is enabled, all the buttons, except for [ ], are disabled.
• Press and hold the [ ] button to power off the projector.
Document Display Settings Menu
Home
Zoom
Page Navigation
Page Map : On
Aspect Ratio
To open the document display settings menu window, tap [ ] when a document is opened.
MENU DESCRIPTION
Home Returns to the main menu page.
Zoom Enlarges or reduces a document.
• <Zoom In> : Enlarge a document (25% increments within the range of 100% ~ 500%).
• <Zoom Out> : Reduce a document.
• <Custom> : Enlarge or reduce the screen by a specific percentage.
• <100%> - <200%> - <300%> - <400%> - <500%>
Range of <Zoom In> and <Zoom Out>: <100%> to <500%>
Page Navigation Go directly to a specific page.
• Enter a page number using the [ ] buttons, check the page number in the preview window
on the upper right corner of the screen, and then select <Go> to move to that page.
Page Map Displays the zoom area.
• <Off> - <On>
• The displayed area of a zoomed-in page is indicated in the <Page Map> window in the top
right corner of the page.
• The projector displays the <Page Map> window only if you've zoomed in a page.
Using 3-4
Page 36

MENU DESCRIPTION
Aspect Ratio
• <Fit to Screen> : Displays a document so that it fits the screen size.
• <Original Fit> : Displays a document at its original size.
• <Fit to Width> : Displays a document so that it fits the screen width.
• <Fit to Height> : Displays a document so that it fits the screen height.
Rotate Rotate a document by a specified angle.
Select an angle using the [ ] buttons, and tap [ ].
• <0°> - <90°> - <180°> - <270°>
Supported in PDF format only.
Encoding To view a text (.TXT) file without any character corruption, you must select the original language that was
used to create the file.
• <Korean> - <Central Europe> - <Cyrillic> - <Baltic> - <Greek> - <Turkish> - <Hebrew> - <Arabic>
- <Latin> - <Vietnam> - <Germany> - <Français> - <Norway> - <Thai> - <Japanese> <Simplified Chinese GBK> - <Traditional Chinese Big5>
(e.g.: To view a text file created in German, select <Germany>)
• For some of the European countries whose languages are not found on the list, select
<Central Europe>.
• Files created in English do not require encoding.
Videoclip Play a video file linked to a PowerPoint file (.ppt or .pptx).
Enabled only when the linked video file is located in the same folder as the PowerPoint file (.ppt
or .pptx).
• Loading time may be longer for large files.
• This product may not work properly when a file does not comply with standards or it is damaged.
• This product may not work when a file contains too much data to display on a screen.
(For example, too much data on one sheet in a Excel file.)
• This product supports only one font. If a screen uses other fonts, the image Media Play displays may be different
than the original screen.
For example:
1. The position of line breaks in a sentence might be dissimilar.
2. The position of page breaks in a MS Word document might be changed. In this case, the document might be
shown incompletely according to the Layout properties for <Picture> or <Shapes> or <Object> in MS word . (Please
refer to the manual of MS Word for more information on the Layout properties.)
• Some functions supported on your PC are not supported by the projector, such as these PowerPoint functions:
Animation, 3D, Smart Art, Hyper Link, and Transparency and Gradation (color depth: 16 bits).
• This product does not support encrypted files (DRM).
3-4 Using
Page 37

Videos
Documents
Videos
Photos
Music
Settings
You can enjoy video files saved in the <
Internal Memory
>, <
USB
>, or <
MicroSD card
>.
Videos Menu
Video.avi
Play Time : 00:27:34
File Size
Date
Home
Copy
Delete
Select Multiple Files
Select Storage Device
To open the Videos menu window, tap [ ] when the projector is displaying the Video File List page.
Depending on the current language setting, folder or file names may appear corrupted.
If that is the case, go to <Settings> ĺ <General> ĺ <Language> and change the language.
MENU DESCRIPTION
Home Returns to the main menu page.
Copy Copies a video from external memory to <
(<
USB
>/<
MicroSD card
>) is connected.
: 351.4 MB
: 04.12.2010
Internal Memory
> or vice versa when an external memory device
Delete Deletes a video file in <
Internal Memory
> or external memory (<
USB
>/<
MicroSD card
>).
Using 3-4
Page 38

MENU DESCRIPTION
Select Multiple Files Selects multiple video files and lets you <
Videos
Internal Memory½Video.avi
Title
All
doc (0)
music (0)
photo (0)
video (0)
Video.AVI
Play, Copy, Delete: Apply each action to selected
Reset: Cancel all selections
2 File(s) selected. Select Return Select All
Move to the video file you want to select using the [ ] buttons, and then tap [ ] .
• A check( ) mark appears next to the selected video.
• Tapping the [ ] button selects or deselects a video.
• To select all video files in a folder, tap [ ].
• You can select multiple video files by repeating the process above.
• <Play> : Plays the selected multiple video files.
You can select the playback order in the Video Display Settings menu.
• <Copy> : Copies the selected multiple video files.
• <Delete> : Deletes the selected multiple video files.
• <Reset> : Cancels all selections.
Play
>, <
Copy
Play
Copy
Delete
Reset
>, or <
1/2
Delete
> them simultaneously.
Select Storage
Device
Video Control Menu
NAME
Play/Pause
/
Volume
Moves directly to another memory device when an external memory device (<USB>/<MicroSD card>) is
connected.
Video.avi
00:02:20 / 00:27:34
Pause Volume Prev/Next
&'5%4+26+10
Plays or pauses a video.
Controls the volume.
3-4 Using
Page 39

NAME
(QJOLVK!'HXWVFK!1HGHUODQGV!(VSDxRO!)UDQoDLV!,WDOLano!
6YHQVND!3RUWXJXrV!ƧNJLjLjǁƿǀ!7UNoH!ㅔԧЁ᭛!ଞ˲߭!
/
Prev/Next
Button Lock
Video Display Settings Menu
&'5%4+26+10
: Plays the previous video.
Press and hold [ ] to rewind the video (REW ).
: Plays the next video.
• Press and hold [ ] to fast forward the video (FF ).
• The rewind speed increases to x2, x4, x8 and x16 at 2-second intervals.
Enables or disables the button lock.
• If the button lock is enabled, all the buttons, except for [ ], are disabled.
• Press and hold the [ ] button to power off the projector.
Home
Play Mode
Play Order
Repeat : On
: All videos
: Normal
: OnSubtitle Setting
To open the video display settings menu, tap [ ] during video playback.
MENU
DESCRIPTION
Home Returns to the main menu page.
Play Mode
• <All videos> :Plays all video files in file name order.
• <Videos in folder> : Plays all video files from a folder in file name order.
• <One video> : Plays only one selected video.
Play Order Selects the playback order of videos.
• <Normal> : Plays videos in file name order.
• <Shuffle> : Plays videos in random order.
Repeat Lets you select whether to play a video repeatedly.
• <Off> - <On>
Subtitle Setting Lets you select whether to show subtitles with video playback.
• <Off> - <On>
Subtitle Language Selects the subtitle language.
•
Subtitle Background Lets you select whether the subtitles have a background.
• <Off> - <On>
Subtitle Sync Corrects the subtitles if they are out of synch with the video.
• <-0.5s> - <+0.5s>
Not supported for video files with internal subtitles.
Subtitle Position Selects the position of the subtitles.
• <Up> - <Down> - <Reset>
Using 3-4
Page 40

MENU
DESCRIPTION
Subtitle Font Size Selects the size of the subtitles.
• <Small> - <Middle> - <Large>
Subtitle Font Color Selects a font color for the subtitles.
• <White> - <Black> - <Red> - <Green> - <Blue> - <Yellow>
• The video must have external subtitles for you to view them using the Caption feature.
• See the table for supported subtitle file types. Refer to "Supported File Formats".
• Subtitle files must be in same directory as the video file.
Photos
Documents
Videos
Photos
Music
Settings
You can enjoy a slideshow of image files saved in the <
Internal Memory
>, <
USB
>, or <
MicroSD Card
>.
Photos Menu
Picture.jpg
Photo Size : 600 x 788
File Size
Date
Home
Copy
Delete
Select Multiple Files
Select Storage Device
To open the Photos menu window, tap [ ] when the projector is displaying the Photo File List screen.
Depending on the current language setting, folder or file names may appear corrupted.
If this occurs, go to <Settings> ĺ <General> ĺ <Language> and change the language.
MENU DESCRIPTION
Home Returns to the main menu page.
Copy Copies photos from external memory to <
(<
USB
>/<
MicroSD card
>) is connected.
: 121.4 KB
: 04.12.2010
Internal Memory
> or vice versa when an external memory device
Delete Deletes photos in <
Internal Memory
> or external memory (<
USB
>/<
MicroSD card
>).
3-4 Using
Page 41

MENU DESCRIPTION
Photos
Internal Memory½Picture.jpg
doc music photo video
Slideshow, Copy, Delete: Apply each action to selected
Reset: Cancel all selections
2 File(s) selected Select Return Select All
Reset
Delete
Copy
Slideshow
2/2
Select Multiple Files Selects multiple photo files and lets you play the files in a <
them simultaneously.
Move to the photo you want to select using the [ ] buttons and tap [ ].
• A check( ) mark appears in the selected photo.
• Tapping the [ ] button selects or deselects a picture.
• To select all the photos in a folder, tap [ ].
• You can select multiple photos by repeating the process above.
• <Slideshow> : Plays the selected photo files in a slideshow.
You can select the playback order in the Slideshow Display Settings menu.
• <Copy> : Copies the selected multiple photo files.
• <Delete> : Deletes the selected multiple photo files.
• <Reset> : Cancels all selections.
Slideshow
>, or lets you<
Copy
> or <
Delete
>
Select Storage
Device
To use the Photos menu in a presentation, save a general document file as an image file to an external memory device
Moves directly to another memory device when an external memory device (<
connected.
USB
>/<
MicroSD card
(USB memory device or microSD card).
For example, 1. Convert .ppt (Microsoft Powerpoint) files to ĺ .jpg /.bmp /.gif
2. Convert .pdf (Adobe Acrobat) files to ĺ .jpg
Caution: Be sure to save the image files in the order you want to present them.
Slideshow Control Menu
Picture.jpg
11.04.2010
NAME
DESCRIPTION
>) is
Using 3-4
Play/Pause
Plays or pauses a slideshow.
Page 42

NAME
DESCRIPTION
Previous/Next
: Shows the previous photo.
: Shows the next photo.
Enables or disables the button lock.
Button Lock
• If the button lock is enabled, all the buttons, except for [ ], are disabled.
• Press and hold the [ ] button to power off the projector.
Slideshow Display Settings Menu
Home
Rotate
Slideshow Transition
Slideshow Speed : Fast
To open the Slideshow Display Settings menu, tap [ ] during a slideshow. The slideshow pauses and the menu appears.
MENU
Home Returns to the main menu page.
: Mosaic
: All photosSlideshow Mode
DESCRIPTION
Rotate Rotate a photo by a specified angle.
Select an angle using the [ ] buttonsS and then tap [ ].
• <0°> - <90°> - <180°> - <270°>
Slideshow
Transition
Selects a photo transition effect to be inserted into a slideshow.
• <No Effect> - <Mosaic> - <Blind> - <Clock>
Slideshow Speed Selects the playback speed of a slideshow.
• <Fast> - <Normal> - <Slow>
Slideshow Mode
• <All photos> : Plays all image files in file name order.
• <Photos in folder> : Plays all image files from a folder in file name order.
• <One photo> : Plays only one selected photo.
Slideshow Order Selects the playback order of a slideshow.
• <Normal> : Plays photos in order of file name.
• <Shuffle> : Plays photos in random order.
Aspect Ratio
• <Original Fit> : Displays a photo smaller than the screen at its original size or reduces a photo
larger than the screen in direct proportion to the screen size.
• <Auto Fit> : Resizes a photo to fit the screen, maintaining the original aspect ratio of the photo
(The image may be cut off horizontally or vertically).
• <Fit To Width> : Resizes a photo to fit the screen width.
• <Fit To Screen> : Enlarges or reduces the size of a photo, regardless of the aspect ratio of the
photo, to fit the full screen.
Some functions may be limited according to the type of photo files.
3-4 Using
Page 43

Music
Documents
Videos
Photos
Music
Settings
You can enjoy music files saved in the <
Internal Memory
>, <
USB
> or <
MicroSD card
>.
Music Menu
Music.mp3
Play Time : 00:05:21
File Size
Date
Home
Copy
Delete
Select Multiple Files
Select Storage Device
To open the Music menu window, tap [ ] when the projector is displaying the Music List screen.
Depending on the current language setting, folder or file names may appear corrupted.
If this occurs, go to <Settings> ĺ <General> ĺ <Language> and change the language.
MENU DESCRIPTION
Home Returns to the main menu page.
Copy Copies music files from external memory to <
device (<
USB
>/<
MicroSD card
>) is connected.
: 9.8 MB
: 04.12.2010
Internal Memory
> or vice versa when an external memory
Delete Deletes music files in <
Internal Memory
> or external memory (<
USB
>/<
MicroSD card
>).
Using 3-4
Page 44

MENU DESCRIPTION
Select Multiple Files Selects multiple music files and lets you <
Music
Internal Memory½Music.mp3
Title
All
doc (0)
music (0)
photo (0)
video (0)
Music.mp3
Play, Copy, Delete: Apply each action to selected
Reset : Cancel all selections
2 File(s) selected. Select Retur n Select All
Move to the music file you want to select using the [ ] buttons and tap [ ].
• A check( ) mark appears next to the selected music.
• Tapping the [ ] button selects or deselects a music file.
• To select all the music files in a folder, tap [ ].
• You can select multiple music files by repeating the process above.
• <Play> : Plays the selected multiple music files.
You can select the playback order in the Music Display Settings menu.
• <Copy> : Copies the selected multiple music files.
• <Delete> : Deletes the selected multiple music files.
• <Reset> : Cancels all selections.
Play
>, <
Copy
Play
Copy
Delete
Reset
>, or <
1/2
Delete
> them simultaneously.
Select Storage
Device
Music Control Menu
NAME
Play/Pause Plays or pauses music.
/
Volume Controls the volume.
Moves directly to another memory device when an external memory device (<
connected.
1 / 2
Music_BG.mp3
Music.mp3
00:00:20 / 00:05:21
Pause Volume Prev/Next
&'5%4+26+10
USB
>/<
MicroSD card
>) is
3-4 Using
Page 45

NAME
/
Prev/Next
Button Lock
Music Display Settings Menu
&'5%4+26+10
: Plays the previous music file.
• Press and hold [ ] to rewind music at 20-second intervals as you are
listening. (REW )
• You cannot rewind past the current track, even if trying to rewind from the
start.
: Plays the next music file.
• Press and hold [ ] to fast forward music at 20-second intervals as you
are listening. (FF )
• If you fast forward to the end of the current track, the next track will start.
Enables or disables the button lock.
• If the button lock is enabled, all the buttons, except for [ ], are disabled.
• Press and hold the [ ] button to power off the projector.
Home
Play Mode
Play Order
Repeat : On
: All music
: Normal
To open the music display settings menu, tap [ ] during audio playback.
MENU DESCRIPTION
Home Returns to the main menu page.
Play Mode
• <All music> : Plays all music files in file name order.
• <Music in folder> : Plays all music files from a folder in file name order.
• <One music> : Plays only one selected music file.
Play Order Lets you select the playback order of music files.
• <Normal> : Plays music in file name order.
• <Shuffle> : Plays music in random order.
Repeat Lets you select whether to repeat music.
• <Off> - <On>
Using 3-4
Page 46

Settings
Settings
Category Option
Language
LED Mode
Test Pattern
Button Sound
Safe Remove
: English
: Normal
: Geometry
: Medium
: USB
General
Support
(QJOLVK!'HXWVFK!1HGHUODQGV!(VSDxRO!)UDQoDLV!,WDOLano!
6YHQVND!3RUWXJXrV!ƧNJLjLjǁƿǀ!7UNoH!ไทย!Ё䇁!ଞ˲߭!
Documents
Videos
Photos
Music
Settings
You can initialize or change the system settings.
General
MENU DESCRIPTION
Language Selects a system language.
•
LED Mode Set the picture brightness according to the ambient light intensity.
• <Normal> - <Eco>
Test Pattern A default test pattern built into the projector. You can use it as a reference picture to optimize the location of
the projector and to optimize images.
• <Geometry> - <Screen Size> - <RED> - <GREEN> - <BLUE> - <WHITE>
Button Sound Selects the volume for button effects.
• <Off> - <Low> - <Medium> - <High>
Safe Remove Lets you remove an external memory device (USB memory device or microSD card) safely.
• <MicroSD Card> : Remove the microSD card when you see a message that reads <You can
remove the MicroSD Card.>
• <USB> : Remove the USB device when you see a message that reads <You can remove the
USB.>
3-4 Using
Page 47

Support
Settings
Category Option
General
Support
Firmware Update
Open Source License
Reset Settings
Product Information
MENU
DESCRIPTION
Firmware Update Firmware update steps: Download the firmware update from the Samsung web site, save the firmware
update file to an external memory device (USB memory device), connect the device to the projector, select
<
Open Source
License
Firmware Update
View Open Source License information.
>, and then run the file. See 3-6.
Reset Settings Return the settings customized by the user to the factory defaults.
Product Information View <
Firmware Version
>, <
Internal Memory
>, <
Copyright
>, etc.
Using 3-4
Page 48

3-5 Supported File Formats
3-5-1. Document, Photo, Music
ITEM
Adobe PDF 1.2 ~ 1.7 (pdf)
MS PowerPoint 97 ~ 2007 (ppt, pptx)
Document
Photo
Music MP3, MP2, WAV, WMA, FLAC, APE, HE-AAC, RA
MS Excel (xls, xlsx)
MS Word (doc, docx)
Text (txt)
JPEG (A maximum of 4 mega pixels is supported for JPEG.), PNG, BMP,
GIF (GIF supports neither <
Rotate
> nor the transition effect in <
FILE EXTENSION
Slideshow Transition
3-5-2. Video, Subtitles
ITEM FILE EXTENSION CODEC DESCRIPTION
MPEG4
1280 x 720 @ 30f
VC-1
H.264 1280 x 720 @ 30f / Level 4.1
MPEG1/2
1280 x 720 @ 30f
RV
H.263
480 x 272 @ 30f
WMV7/8
Video
AVI
MP4
ASF
MPG
RM
FLV
WMV
M2TS/TS
>.)
Subtitles
.smi(SAMI) Microsoft SAMI (Synchronized Accessible Media Interchange)
.srt(SUBRIP) SubRip
.sub(SUBVIEWER) SubViewer 1.0 & 2.0
3-5 Using
Page 49

3-6 Firmware Update
Settings
Category Option
Firmware Update
Open Source License
Reset Settings
Product Information
General
Support
C
y
O
F
e
O
e
n
G
S
t
Download the latest firmware version from the Samsung Electronics website (http://www.samsung.com) and install.
ategor
eneral
uppor
ption
irmware Updat
Firmware Update
pen Source Licens
Reset Settings
Please, do not turn off the power.
The power will be off automatically
Product Informatio
after update is finished.
• As data saved in the internal memory can be deleted during an update, always back up your data.
• Only a USB memory device is supported for a firmware update.
• Do not remove an external (USB) memory device while an update is in progress.
• Do not operate any buttons during the update.
• Do not turn the projector off during the update.
• To confirm that the firmware has been successfully updated, go to <Settings> ĺ <Support> ĺ <Product Information>.
Before Firmware Update !
1. Prepare an external (USB) memory device.
2. Download the latest firmware for your projector model to your PC from the Samsung website.
3. Connect the USB memory device to the PC.
4. Copy the downloaded firmware to the USB memory device.
Updating the Firmware
1. Connect the USB memory device containing the latest firmware to the projector.
2. Select <Settings> ĺ <Support> ĺ <Firmware Update> in the main menu page.
3. You will see the current firmware version and the latest firmware version available.
4. Select <Update Now> to begin.
5. After the firmware is updated, the projector is automatically powered off.
6. Power on the projector and check the firmware version.
Using 3-6
Page 50

4 Troubleshooting
4-1 Before Requesting Service
Please check the following symptoms and solutions before requesting After-Sales service. If the problem continues, please
contact your nearest Samsung Electronics Service Center.
Symptoms Troubleshooting
Installation and
Connection
Screen and
External Source
No Power.
Cannot select External Source.
Cannot see picture images.
Images are not clear.
Strange noise.
An indicator blinks.
Lines appear on screen.
• Check the power cable connections.
• Check how much power remains in the battery.
• Check if the cable to the external device is connected to the
correct signal port. If not connected correctly, the projector
cannot select the device.
• Be sure that the power cord of the projector is connected.
• Check how much power remains in the battery.
• Be sure that the proper input source is selected.
• Check if the connectors are properly connected to the ports
at the back of the projector.
• Adjust the [FOCUS].
• Check if the projector is too far from or too near to the
screen.
• If a strange sound continues, contact your Service Center.
• Refer to the LED Indications section.
• On-screen noise may occur when using your PC. Adjust
the frequency (refresh rate) of the screen.
4-1 Troubleshooting
Page 51

5 More Information
5-1 Specifications
MODEL
Panel Size 0.3 inches
Resolution WVGA (854 x 480)
Aspect ratio 16 : 9
Power Power Consumption Max 12.0W (Operating & Charging at Adapter),
TYP. 8.5W (Operating at Battery)
Voltage 100 ~ 240 V AC, 50/60 Hz
LED Light Source Power Consumption 4 W
Life Time 30,000 Hours
Dimension (Width x Length x Height) 70 x 70 x 27.5 mm / 2.76 x 2.76 x 1.08 inches (without the battery)
70 x 70 x 37.5 mm / 2.76 x 2.76 x 1.48 inches (with the battery)
Weight Projector : 132 g / 0.29 lbs
Battery : 80 g / 0.18 lbs
Key Features Brightness TYP 27, MAX 30 Lumen
Contrast 1000 : 1
Projection Range 30.5 ~ 299 cm / 12.00 ~ 117.71 inches
SP-H03
Keystone < 1%
Focus Adjustment Manual
Screen Size (Diagonal) Diagonal 8.6 inches ~ 85.5 inches
Input signal D-Sub 15p Analog RGB, Analog Y PB P
Media Play USB, internal memory and MicroSD
RCA x 1 Composite video
Internal memory capacity 1 GB (System memory: 301 MB / User memory: 699 MB)
Speaker 1 W (Mono)
User Environment Temperature and Humidity Operating : Temperature 32 °F ~ 104 °F (0 °C ~ 40 °C),
Humidity 10 % ~ 80 % (Non-condensing)
Storage : Temperature
Humidity 5 % ~ 95 % (Non-condensing)
Noise 23 dB
Class B (Information Communication equipment for residential use)
This device is registered for EMC requirements for home use (Class B). It can be used in all areas. (Class B equipment
emits less electromagnetic waves than Class A equipment.)
R
-4 °F ~ 113 °F (-20 °C ~ 45 °C),
More Information 5-1
Page 52

The DMD panel used for the PICO projector consists of hundreds of thousands of tiny mirrors. Just like many other types of
image displays, the DMD panel may include bad pixels. The criteria for distinguishing bad pixels and the maximum quantity
of bad pixels allowed for the DMD panel are strictly controlled by our company and the manufacturer of the DMD panel
before shipment according to the predefined specifications. Though some pixels may not be visible in the screen, this
neither affects the picture quality significantly, nor the lifespan of the projector.
5-1 More Information
Page 53

5-2 Contact SAMSUNG WORLDWIDE
Distributor pro Českou republiku:
Samsung Zrt., česká organizační složka, Oasis Florenc, Sokolovská394/17, 180 00, Praha 8
If you have any questions or comments relating to Samsung products, please contact the SAMSUNG customer care center.
NORTH AMERICA
U.S.A 1-800-SAMSUNG(726-7864) http://www.samsung.com
CANADA 1-800-SAMSUNG(726-7864) http://www.samsung.com
MEXICO 01-800-SAMSUNG(726-7864) http://www.samsung.com
LATIN AMERICA
ARGENTINA 0800-333-3733 http://www.samsung.com
BRAZIL 0800-124-421
http://www.samsung.com
4004-0000
CHILE 800-SAMSUNG(726-7864) http://www.samsung.com
COLOMBIA 01-8000112112 http://www.samsung.com
COSTA RICA 0-800-507-7267 http://www.samsung.com
ECUADOR 1-800-10-7267 http://www.samsung.com
EL SALVADOR 800-6225 http://www.samsung.com
GUATEMALA 1-800-299-0013 http://www.samsung.com
HONDURAS 800-7919267 http://www.samsung.com
JAMAICA 1-800-234-7267 http://www.samsung.com
NICARAGUA 00-1800-5077267 http://www.samsung.com
PANAMA 800-7267 http://www.samsung.com
PUERTO RICO 1-800-682-3180 http://www.samsung.com
REP. DOMINICA 1-800-751-2676 http://www.samsung.com
TRINIDAD & TOBAGO 1-800-SAMSUNG(726-7864) http://www.samsung.com
VENEZUELA 0-800-100-5303 http://www.samsung.com
EUROPE
AUSTRIA 0810 - SAMSUNG(7267864,€ 0.07/min) http://www.samsung.com
BELGIUM 02-201-24-18 http://www.samsung.com/be (Dutch)
CZECH 800 - SAMSUNG (800-726786) http://www.samsung.com
DENMARK 70 70 19 70 http://www.samsung.com
EIRE 0818 717100 http://www.samsung.com
ESTONIA 800-7267 http://www.samsung.com
FINLAND 030 - 6227 515 http://www.samsung.com
FRANCE 01 48 63 00 00 http://www.samsung.com
GERMANY 01805 - SAMSUNG (726-7864,€ 0,14/Min) http://www.samsung.com
More Information 5-2
http://www.samsung.com/be_fr (French)
Page 54

EUROPE
HUNGARY 06-80-SAMSUNG(726-7864) http://www.samsung.com
ITALIA 800-SAMSUNG(726-7864) http://www.samsung.com
LATVIA 8000-7267 http://www.samsung.com
LITHUANIA 8-800-77777 http://www.samsung.com
LUXEMBURG 261 03 710 http://www.samsung.com
NETHERLANDS 0900 - SAMSUNG (0900-7267864) (€
0,10/Min)
NORWAY 815-56 480 http://www.samsung.com
POLAND 0 801 1SAMSUNG (172678)
022 - 607 - 93 - 33
PORTUGAL 80820 - SAMSUNG (726-7864) http://www.samsung.com
SLOVAKIA 0800-SAMSUNG(726-7864) http://www.samsung.com
SPAIN 902 - 1 - SAMSUNG (902 172 678) http://www.samsung.com
SWEDEN 0771 726 7864 (SAMSUNG) http://www.samsung.com
SWITZERLAND 0848-SAMSUNG(7267864, CHF 0.08/min) http://www.samsung.com/ch
U.K 0845 SAMSUNG (7267864) http://www.samsung.com
CIS
ARMENIA 0-800-05-555
AZERBAIJAN 088-55-55-555
BELARUS 810-800-500-55-500
http://www.samsung.com
http://www.samsung.com
http://www.samsung.com/ch_fr (French)
GEORGIA 8-800-555-555
KAZAKHSTAN 8-10-800-500-55-500
KYRGYZSTAN 00-800-500-55-500 http://www.samsung.com
MOLDOVA 00-800-500-55-500
RUSSIA 8-800-555-55-55 http://www.samsung.com
TADJIKISTAN 8-10-800-500-55-500 http://www.samsung.com
UKRAINE 0-800-502-000 http://www.samsung.com/ua
http://www.samsung.com/ua_ru
UZBEKISTAN 8-10-800-500-55-500 http://www.samsung.com
ASIA PACIFIC
AUSTRALIA 1300 362 603 http://www.samsung.com
CHINA 400-810-5858
010-6475 1880
HONG KONG
(852)
3698 - 4698
http://www.samsung.com
http://www.samsung.com/hk
http://www.samsung.com/hk_en/
5-2 More Information
Page 55

ASIA PACIFIC
INDIA 3030 8282
1800 110011
1800 3000 8282
1800 266 8282
INDONESIA 0800-112-8888
021-5699-7777
JAPAN 0120-327-527 http://www.samsung.com
MALAYSIA 1800-88-9999 http://www.samsung.com
NEW ZEALAND 0800 SAMSUNG (0800 726 786) http://www.samsung.com
PHILIPPINES 1-800-10-SAMSUNG(726-7864)
1-800-3-SAMSUNG(726-7864)
1-800-8-SAMSUNG(726-7864)
02-5805777
SINGAPORE 1800-SAMSUNG(726-7864) http://www.samsung.com
TAIWAN 0800-329-999 http://www.samsung.com
THAILAND 1800-29-3232
02-689-3232
http://www.samsung.com
http://www.samsung.com
http://www.samsung.com
http://www.samsung.com
VIETNAM 1 800 588 889 http://www.samsung.com
MIDDLE EAST & AFRICA
BAHRAIN 8000-4726
JORDAN 800-22273
SOUTH AFRICA 0860-SAMSUNG(726-7864) http://www.samsung.com
TURKEY 444 77 11 http://www.samsung.com
U.A.E 800-SAMSUNG(726-7864) http://www.samsung.com
More Information 5-2
Page 56

5-3 Correct Disposal - Europe only
Correct Disposal of This Product (Waste Electrical & Electronic Equipment) - Europe only
(Applicable in the European Union and other European countries with separate collection systems)
This marking on the product, accessories or literature indicates that the product and its electronic accessories (e.g.
charger, headset, USB cable) should not be disposed of with other household waste at the end of their working life. To
prevent possible harm to the environment or human health from uncontrolled waste disposal, please separate these
items from other types of waste and recycle them responsibly to promote the sustainable reuse of material resources.
Household users should contact either the retailer where they purchased this product, or their local government office,
for details of where and how they can take these items for environmentally safe recycling.
Business users should contact their supplier and check the terms and conditions of the purchase contract. This product
and its electronic accessories should not be mixed with other commercial wastes for disposal.
The rechargeable battery incorporated in this product is not user replaceable.
For information on its replacement, please contact your service provider.
5-3 More Information
 Loading...