

Samsung SP67L6HD, SP50L6HD User Manual
DLP TV
SP50L6HD
SP56K3HD
SP67L6HD
Owner’s Instructions
Before operating the unit,
please read this manual thoroughly,
and retain it for future reference.
Picture In Picture (PIP)
My Colour Control
TELETEXT
(Option)
SRS TruSurroundXT
Digital Natural Image engine
Digital Terrestrial Receiver
This device is a Class B digital apparatus.
Register your product at www.samsung.com/global/register


Contents
◆ CONNECTING AND PREPARING YOUR TELEVISION
■ Checking Parts .............................................................................................. 5
■ Control Panel................................................................................................. 6
■ Connection Panel .......................................................................................... 7
■ Infrared Remote Control ................................................................................ 9
■ Inserting the Batteries in the Remote Control................................................ 10
■ Connecting to an Aerial or Cable Television Network ................................... 11
■ Connecting a Satellite Receiver or Decoder.................................................. 11
■ Switching Your Television On and Off........................................................... 12
■ Placing Your Television in Standby Mode..................................................... 12
■ Becoming Familiar with the Remote Control ................................................. 13
■ Plug & Play Feature....................................................................................... 14
■ Choosing Your Language.............................................................................. 16
◆ SETTING THE CHANNELS (ANALOG TV)
■ Storing Channels Automatically..................................................................... 17
■ Storing Channels Manually............................................................................ 18
■ Adding / Locking Channels............................................................................ 20
■ Sorting the Stored Channels ......................................................................... 21
■ Assigning Names to Channels ...................................................................... 22
■ Using the LNA (Low Noise Amplifier) Feature............................................... 23
■ Fine Tuning Channel Reception.................................................................... 24
◆ USING YOUR DISPLAY
■ Displaying Information ................................................................................... 24
■ Changing the Picture Standard ..................................................................... 25
■ Customizing the Picture Settings................................................................... 26
■ Setting the Picture (PC Mode)....................................................................... 27
■ Selecting the Picture Size.............................................................................. 29
■ Viewing the DNIe Demonstration .................................................................. 30
■ Freezing the Current Picture ......................................................................... 30
■ Setting the My Colour Control (Easy Control) ............................................... 31
■ Setting the My Colour Control (Detail Control) .............................................. 32
■ Setting the Blue Screen................................................................................. 33
■ Activating Panel Button Lock......................................................................... 33
■ Setting the Film Mode.................................................................................... 34
■ Using Game Mode......................................................................................... 34
■ Viewing the Picture in Picture (PIP)............................................................... 35
■ Using the Digital NR (Noise Reduction) Feature ........................................... 37
■ Changing the Sound Standard ...................................................................... 38
■ Customizing the Sound Settings ................................................................... 39
■ Setting the TruSurround XT........................................................................... 40
■ Adjusting the Volume Automatically .............................................................. 40
■ Selecting the Internal Mute............................................................................ 41
■ Setting the Melody Sound ............................................................................. 41
■ Selecting the Sound Mode (depending on the model) .................................. 42
■ Setting and Displaying the Current Time....................................................... 43
■ Setting the Sleep Timer ................................................................................. 44
■ Switching the Television On and Off Automatically ....................................... 45
■ Viewing an External Signal Source ............................................................... 47
continued...
English - 3

◆ USING THE DTV FEATURE
■ Previewing the DTV Menu System .......................................................................... 48
■ Updating the Channel List Automatically ................................................................. 49
■ Updating the Channel List Manually ........................................................................ 50
■ Editing Your Favourite Channels.............................................................................. 51
■ Viewing Channel Managers...................................................................................... 54
■ Displaying Programme Information.......................................................................... 54
■ Viewing the EPG (Electronic Programme Guide) Information................................ 55
■ Using the Scheduled List .......................................................................................... 56
■ Setting the Default Guide.......................................................................................... 57
■ Viewing All Channels and Favourite Channels ....................................................... 58
■ Setting the Preferred Languages ............................................................................. 59
■ Choosing Your Language......................................................................................... 60
■ Adjusting the Translucency Level............................................................................. 60
■ Setting up the Parental Lock..................................................................................... 61
■ Using the Preferred Features ................................................................................... 62
■ Checking the Product Information ............................................................................ 63
■ Checking the Signal Information............................................................................... 63
■ Upgrading the Software (Option).............................................................................. 64
■ Viewing Common Interface ...................................................................................... 65
■ Selecting the CI (Common Interface) Menu ............................................................ 66
■ Resetting.................................................................................................................... 67
■ Freezing the Current Picture..................................................................................... 67
◆ USING THE TELETEXT FEATURE
■ Teletext Feature ............................................................................................ 68
■ Displaying the Teletext Information ............................................................... 69
■ Selecting Display Options.............................................................................. 70
■ Selecting a Teletext Page.............................................................................. 71
◆ ADDITIONAL INFORMATION AND CONNECTIONS
■ Connecting to the External Input/Output ....................................................... 72
■ Connecting to the RCA Input......................................................................... 73
■ Connecting to the S-Video Input.................................................................... 73
■ Connecting to the Component Input.............................................................. 74
■ Connecting to the PC Input ........................................................................... 74
■ Connecting to the HDMI (High Definition Multimedia Interface) Input ........... 75
■ Connecting to the HDMI/DVI Compatible ...................................................... 75
■ Connecting a Digital Audio System ............................................................... 75
■ Connecting Home Theater System ............................................................... 76
■ Setting up Your PC Software (Windows only) .............................................. 77
■ PC Input Mode............................................................................................... 78
◆ RECOMMENDATIONS FOR USE
■ Replacing the Lamp....................................................................................... 79
■ Troubleshooting: Before Contacting Service Personnel................................ 80
■ Technical Specifications ................................................................................ 81
Symbols
Press Important Note
English - 4
☛
➢

Checking Parts
Owner’s Instructions
Remote Control/
AAA Batteries
Replacement Lamp
For purchasing a replacement lamp,
ask at a nearby service center.
•
Use authorized lamps only. The
company cannot guarantee the
quality of the product if an
unauthorized lamp is used.
Warranty Card/
Safety Guide Manual
(Not available in
all locations)
Sold Separately
S-VIDEO Cable
Component Cables
(RCA)
HDMI Cable
PC Cable
Power Cord
Antenna Cable
PC Audio Cable
When installing the product, make sure to keep
➢
it away from the wall (more than 10cm) for
ventilation purposes.
• Poor ventilation may cause an increase
in the internal temperature of the product,
resulting in a shortened component life
and degraded performance.
Scart Cable
HDMI/DVI Cable
Optical Cable
English - 5
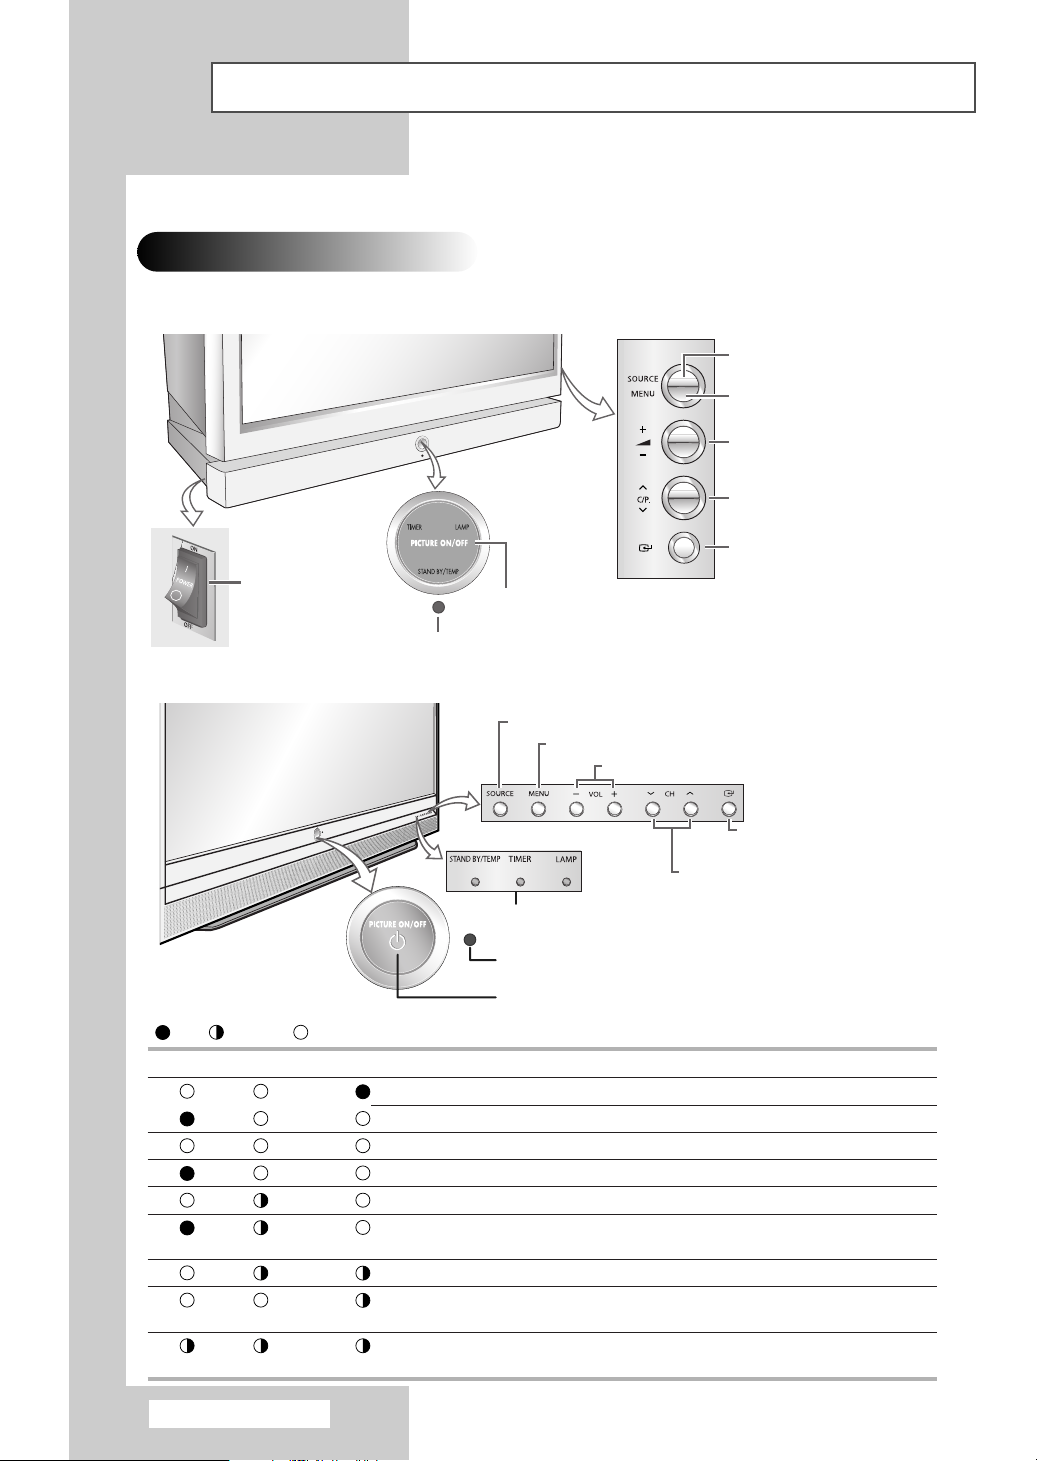
Control Panel
Front of the TV
SP50L6HD/SP67L6HD
The actual configuration on your TV may be different, depending on
➢
your model.
Switch among video input modes
Display the on-screen menu
Adjust the volume
LED Indicators
Switch the
TV On and Off
Remote Control Sensor
Picture On/Off
SP56K3HD
Switch among video input modes
Display the on-screen menu
LED Indicators
Remote Control Sensor
Picture On/Off
( :On, :Blinking, :Off)
TIMER LAMP STAND BY/TEMP Indication
Standby mode.
A timer pilot lights when Timer Auto On or Off is selected.
Normal operation.
Normal operation (when Timer Auto On or Off is selected).
Lamp is warming up. The normal picture comes on after 25 seconds.
The normal picture comes on after 25 seconds. (when Timer Auto On or
Off is selected)
Air vent cover in the rear of the TV is not properly installed.
Inside temperature of the TV is over normal. Clean the air vent cover in the
rear of the TV. Turn the TV back on after 1 hour.
The lamp does not work, please contact an authorized Service Center for
assistance.
English - 6
Select the channels
Access to the selected option on
the menu system
Adjust the volume
Access to the selected option
on the menu system
Select the channels
continued...
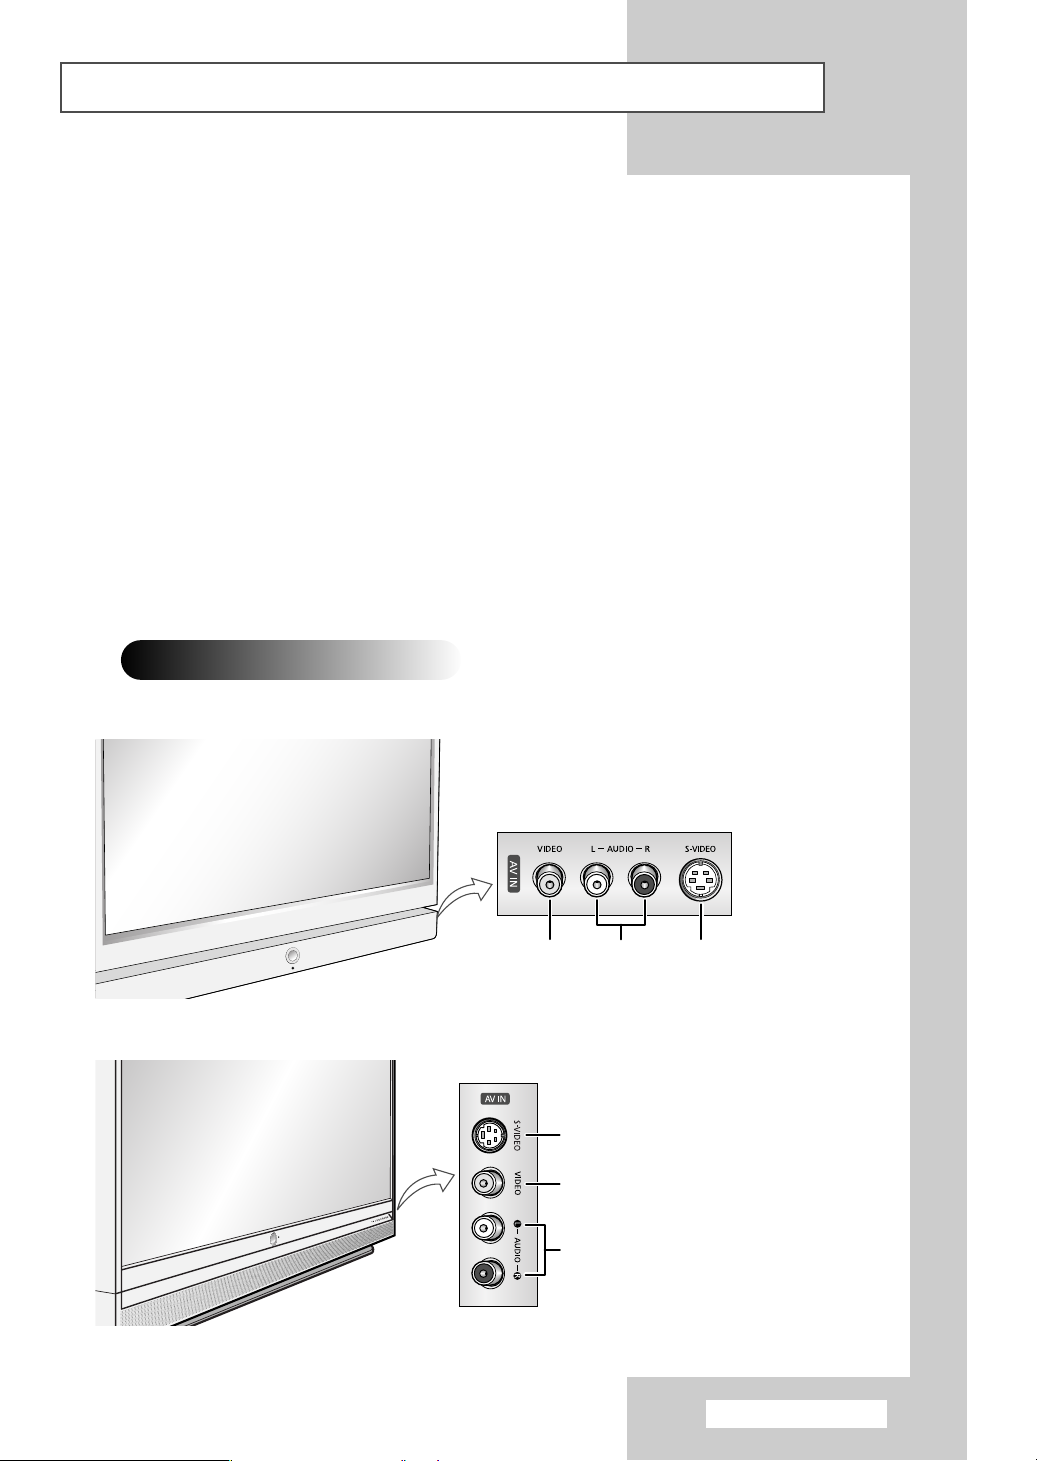
Connection Panel
The actual configuration on your TV may be different, depending on
➢
your model.
◆
➢
You can use the channel selection buttons to switch on the TV when it is in standby mode
depending on the model.
◆
When using the on-screen menu the volume adjustment and channel selection buttons
have the same function as the
◆
If the remote control no longer works or your have lost it, you can use controls on the
panel of the TV.
◆
Press the "I" side of the POWER switch to supply power to the TV. If the "I" side of the
POWER switch is not pressed, the
On/Off switch on the front panel of the TV will not work.
◆
Press the MENU button once in DTV mode, then the DTV menu is displayed.
…/†/œ/√ buttons on the remote control.
POWER button on the remote control and the Picture
Side of the TV
SP50L6HD/SP67L6HD
SP56K3HD
Video Input
S-Video Input
Video Input
Audio Input
Audio Input S-Video Input
continued...
English - 7

Rear of the TV
Please insert
the card as
shown.
a) EXT 1(RGB), 2(Y/C)
Inputs or outputs for external devices, such as VCR, DVD,
video game device or video disc players.
b) COMPONENT IN
Video (Y/PB/PR) and audio (AUDIO L/R) inputs for Component.
c) PC IN (PC / AUDIO)
Connect to the video and audio output jack on your PC.
d) HDMI/DVI IN
- Connect to the HDMI jack of a device with HDMI output.
These inputs can also be used as a DVI connection with
separate analog audio inputs. An optional HDMI/DVI cable
will be necessary to make this connection.
When using the optional HDMI/DVI adapter, the DVI analog
audio inputs on your TV allow you to receive left and right
audio from your DVI device. (Not compatible with PC)
- When connecting this product via HDMI or DVI to a
Set Top Box, DVD Player or Games Console etc, make sure
that it has been set to a compatible video output mode as
shown in the table below. Failure to observe this may result
in picture distortion, image breakup or no picture.
Supported modes for DVI or HDMI
➢
50Hz
60Hz
Component
480i
O
480p
576i
576p
720p
X
O
X
X
O
O
O
X
X
O
O
1080i
O
O
O
O
O
O
- Do not attempt to connect the HDMI/DVI connector to a
PC or Laptop Graphics Card.
(This will result in a blank screen being displayed)
e) DVI IN (AUDIO L/R)
DVI audio inputs for external devices.
English - 8
f) AUDIO OUT
Connect to the external audio amplifier.
g) DIGITAL AUDIO OUT (OPTICAL)
Connect to a Digital Audio Component.
h) SERVICE PORT
Connector for service only.
i) ANT IN
Coaxial connector for Aerial/Cable Network.
j) DTV SERVICE
Connector for service only.
k) Common Interface Slot
Insert CI (Common Interface) card into the slot. (refer to page 66)
- When not inserting "CI CARD" in some channels, "Scramble
Signal" is displayed on the screen.
- The pairing information containing a telephone number, CI
CARD ID, Host ID, and other information will be displayed
in about 2~3 minutes.
If an error message is displayed, please contact your service
provider.
- When the channel information configuration has finished,
the message "Updating Completed" is displayed, indicating
that the channel list is now updated.
You must obtain a CI CARD from a local cable service provider.
➢
Remove the CI CARD by carefully pulling it out with your hands
since dropping the CI CARD may cause damage to it.
For further details about connection, refer to pages 73~76.
➢
Whenever you connect an audio or video system to your
➢
television, ensure that all elements are switched off. Refer to
the documentation supplied with your equipment for detailed
connection instructions and associated safety precautions.

Infrared Remote Control
Selects a target device to be
controlled by the Samsung remote
control (TV, DVD, STB, CABLE, VCR)
Turns the TV on and off
Direct channel selection
One or two-digit channel selection
TV and DTV mode Selection
DTV Channel list display
VCR/DVD Function
(Rewind, Stop, Play/Pause, Fast/Forward)
Volume increase
Volume decrease
Temporary sound switch-off
Menu display/
Teletext index
Move to the required menu option/
Adjust an option value
respectively
External input selection/
Teletext mode selection (LIST/FLOF)
Switch repeatedly between the last two
channels displayed/
Teletext Sub-page
Automatic switch-off
(Refer to page 44)
DTV menu display
Next channel/
Teletext next page
Previous channel/
Teletext previous page
Exit menu/
Teletext cancel
Electronic Program Guide (EPG)
Information display/Teletext reveal
Picture still (Refer to page 30, 67)
Used during set up of this Samsung
remote control, so that it will work
compatibly with other devices (VCR,
➢
➢
(Refer to page 24)
Picture-In-Picture On/Off/
Teletext page hold
Picture effect selection /
Teletext size selection
Sound mode selection
Cable Box and DVD).
The performance of the remote control may be affected by bright light.
This is a special remote control for the visually impaired, and has Braille points.
display
Teletext display/
Mix both teletext information and
the normal broadcast
Fastext topic selection
Picture size
Sound effect selection/Teletext store
(Refer to page 38)
Digital subtitle display
TruSurround XT mode selection
(Refer to page 40)
If your remote control is not functioning
properly, take out the batteries and
press the reset button for about 2~3
seconds.
Re-insert the batteries and try using the
remote control again.
(Refer to page 29)
English - 9

Inserting the Batteries in the Remote Control
You must insert or replace the batteries in the remote control when
you:
◆ Purchase the television
◆ Find that the remote control is no longer operating
correctly
1 Lift the cover at the back of the remote control upward as shown in
the figure.
2 Install two AAA size batteries.
Make sure to match the “+” and “–” ends of the batteries with
➢
the diagram inside the compartment.
3 Close the cover as shown in the figure.
Remove the batteries and store them in a cool, dry place if
➢
you won’t be using the remote control for a long time.
The remote control can be used up to about 23 feet from the
TV. (Assuming typical TV usage, the batteries last for about
one year.)
English - 10

Connecting to an Aerial or Cable Television Network
To view television channels correctly, a signal must be received by
the set from one of the following sources:
◆ An outdoor aerial
◆ A cable television network
◆ A satellite network
1 In the first three cases, connect the aerial or network input cable to
the ANT IN jack on the rear of the television.
2 If you are using an indoor aerial, you may need to turn it when
tuning your television until you obtain a picture that is both sharp
and clear.
For further details, refer to:
◆ “Storing Channels Automatically” on page 17.
◆ “Storing Channels Manually” on page 18.
When installing or re-installing your TV, be sure to use the
➢
supplied coaxial antenna cable. If you connect using a different
coaxial cable, there is risk of noise or interference to the screen
image. (You must not use another general purpose cable.
Use the 3M/5M/7M cable supplied by Samsung.)
Rear of the TV
or
Cable Television
Network
Connecting a Satellite Receiver or Decoder
In order to watch television programmes broadcast via a satellite network,
you must connect a satellite receiver to the rear of TV. Also, in order to
descramble a coded transmission signal, you must connect a decoder to the
rear of TV.
◆ Using a SCART cable
Connect the receiver (or decoder) SCART cable to one of the
SCART connectors on the rear of the television.
◆ Using a coaxial cable
Connect a coaxial cable to the:
-
Receiver (or Decoder) output socket.
-
Television aerial input socket.
➢ If you wish to connect both a satellite receiver (or decoder) and
a VCR, you should connect the:
◆ Receiver (or Decoder) to the VCR
◆ VCR to the television
Otherwise, connect the receiver (or decoder) directly to the
television.
Rear of the TV
Coaxial
cable
Satellite Receiver/Decoder
SCART
cable
English - 11

Switching Your Television On and Off
The mains lead is attached to the rear of your television.
1 Plug the mains lead into an appropriate socket.
The main voltage is indicated on the rear of the television
➢
and the frequency is 50 or 60Hz.
2 Press the power switch on the side of the television toward
“
ON” (I).
3 Press the POWER () button on the remote control (or the
button on the front of the television).
Result
: The programme that you were watching last is re-
selected automatically.
If you have not yet stored any channels, No clear picture
➢
appears. Refer to “Storing Channels Automatically” on
page 16 or “Storing Channels Manually” on page 18.
4 To switch your television off, press the power switch toward
“
OFF” (O).
Placing Your Television in Standby Mode
Your television can be placed in Standby mode, in order to reduce
the power consumption.
The Standby mode can be useful when you wish to interrupt
viewing temporarily (during a meal, for example).
English - 12
1 Press the POWER () button on the remote control to turn the
screen off.
Result
: The STAND BY/TEMP indicator on the front of the
television lights.
2 To turn the screen back on, simply press the POWER () button
again.
You can also switch on by pressing the P /, TV/DTV or
➢
numeric button.
Do not leave your television in Standby mode for long
☛
periods of time (when you are away on holiday, for
example). Turn your television off by pressing the power
switch on the back of the set. It is best to unplug the set
from the mains and aerial.

Becoming Familiar with the Remote Control
The remote control is used mainly to:
◆ Change channels and adjust the volume.
◆ Set up the television using the on-screen menu system.
The following table presents the most frequently used buttons and
their functions.
Button Viewing Function Menu Function
P
to
Used to display the next
stored channel.
Used to display the
previous stored channel.
Used to display the corresponding channels.
-
-
-/--
MUTE
()
MENU
()
EXIT
()
PRE-CH
Used to select a channel numbered ten or over.
Press this button, and the “
--
” symbol is displayed.
Enter the two-digit channel number.
Used to increase the volume.
Used to decrease the volume.
Used to switch the sound off temporarily.
➢
To turn the sound back on, press this button
again, or press the or button.
Used to display the
on-screen menu system.
-
-
Press the
channel viewed. To quickly switch between two channels
that are far apart, select the first channel, then use the
numeric buttons to select the second channel. Then, use the
PRE-CH button to quickly alternate between them.
PRE-CH button. The TV will switch to the last
Used to return to the previous
menu or normal viewing.
Used to:
◆ Display a sub-menu
containing selections for
the current menu option.
◆ Increase/decrease a
menu option value.
Used to confirm your choice.
Used to exit from the menu
system and return to normal
viewing directly.
English - 13

Plug & Play Feature
Plug & Play
Start Plug & Play
OK
Enter Exit
Plug & Play
Language
Move Enter Skip
Check antenna input.
Country
Move Enter Skip
Auto Store
P 1 C
Clock Set
Enter Skip
English
Deutsch
Français
Italiano
Svenska
Plug & Play
OK
Enter Skip
Plug & Play
Belgium
France
Germany
Italy
Plug & Play
--
40 MHz
Start
Enter Skip
Plug & Play
--:--
Plug & Play
Clock Set 00 : 00
0 %
When the television is initially powered on, several basic customer
settings proceed automatically and subsequently.
The following settings are available.
1 If the television is in standby mode, press the POWER ()button
on the remote control.
: The message to start Plug & Play is displayed.
Result
2 To start Plug & Play, press the ENTER/OK () button.
: The Language menu is displayed.
Result
The Language menu will automatically appear after several
➢
seconds, even if the
ENTER/OK () button is not pressed.
3 Select the appropriate language by pressing the … or † button.
Press the
Result
ENTER/OK () button.
: The message to check the connected status of the
antenna is displayed.
4 Make sure that the antenna is connected to the TV.
Press the
Result
➢
ENTER/OK () button.
: The Country menu is displayed.
If you do not press the ENTER/OK () button, the clock
setting menu appears after several seconds.
5 Select your country or area by pressing the … or † button.
Press the
Result
ENTER/OK () button.
: The menu to select channels is displayed.
6 To start channel store, press the ENTER/OK () button.
Result
: The search will end automatically. Channels are sorted
and stored in the order which reflects their position in
the frequency range (with lowest first and highest last).
When this has finished, the menu to set the time will be
displayed.
To stop the search before it has finished or return to normal
➢
viewing, press the
MENU () or the ENTER/OK ()
button.
Press the ENTER/OK () button to set the clock.
➢
7 Press the œ or √ button to select the hour or minute.
Set these by pressing the … or † button.
You can enter the hours or minutes by using the numeric
➢
buttons on the remote control.
Move Adjust Enter Skip
Plug & Play
Scanning for digital services...
Services found : 24 Channel : 38
Stop
Skip
English - 14
35%
8 Press the ENTER/OK () button to confirm your setting.
The DTV channel scan menu appears and the DTV channel is
automatically updated.
If the DTV channel is updated, the Source in the source list
➢
of the Input menu is automatically changed to DTV.
For detailed descriptions about DTV channel update, refer
➢
to page 49 of this manual.
continued...
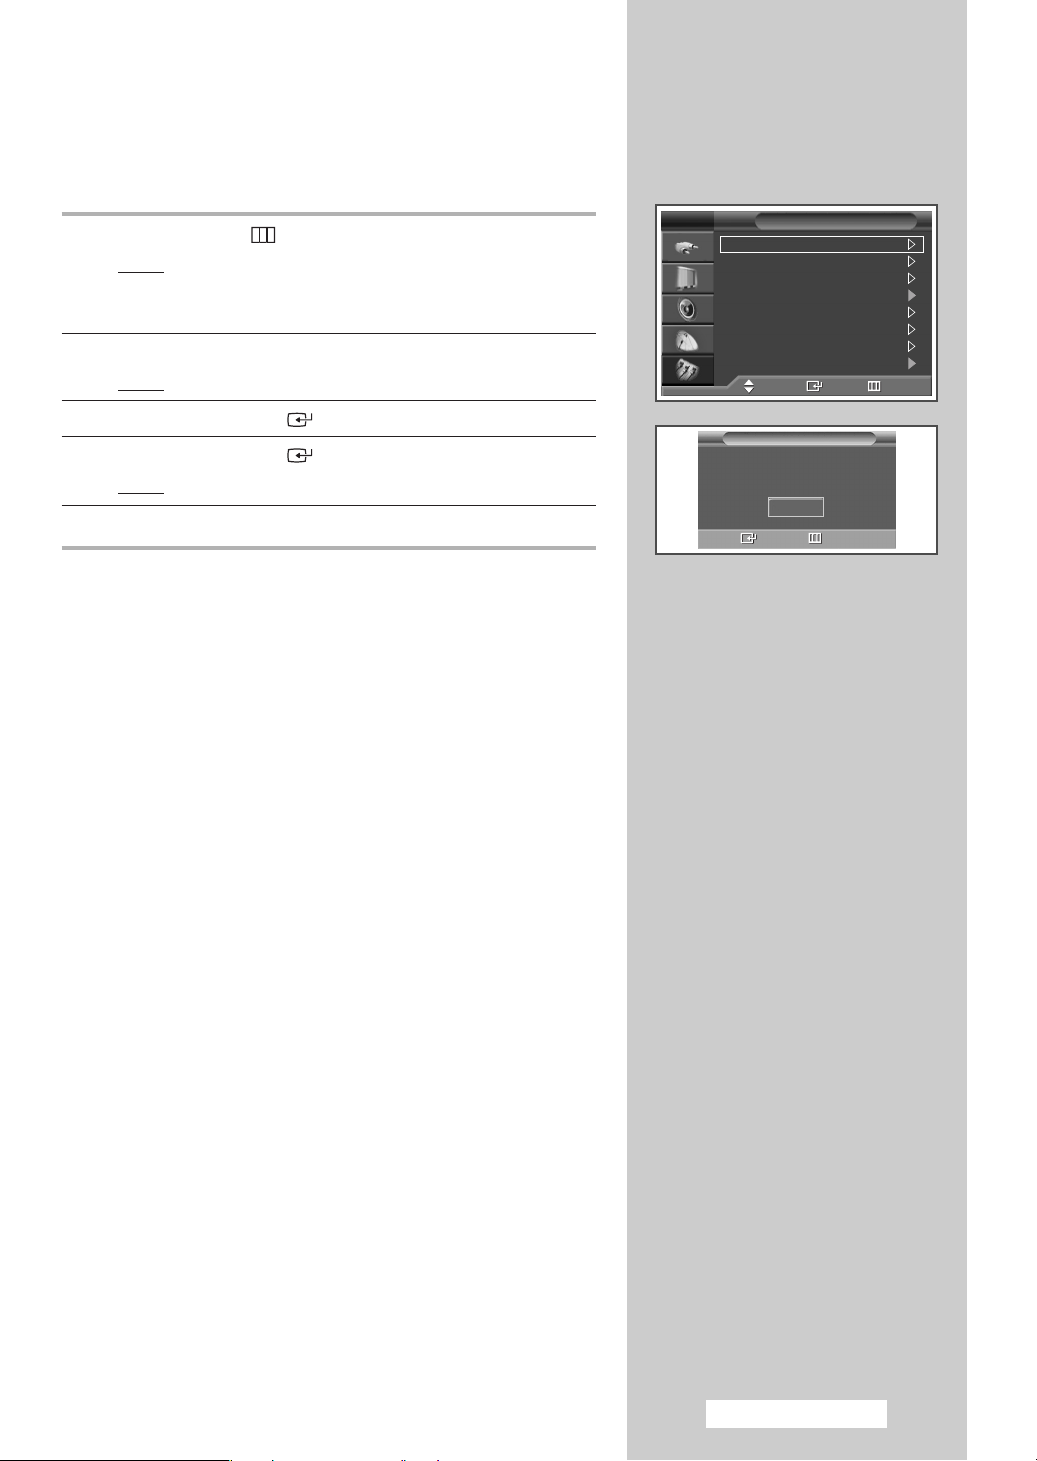
If you want to reset this feature...
1 Press the MENU ()button.
Result
: The main menu is displayed.
This function is not available in DTV and other source
➢
modes.
2 Press the … or † button to select Setup.
Result
: The
Setup menu is displayed.
TV
Plug & Play
Language : English
Time
Game Mode : Off
Blue Screen : Off
Melody : On
Panel Lock : Off
PC
Move Enter Return
Setup
3 Press the ENTER/OK () button.
4 Press the ENTER/OK () button again to select Plug & Play.
Result
: The message to start Plug & Play is displayed.
5 For further details on settings, refer to the previous page.
Plug & Play
Start Plug & Play
OK
Enter Return
English - 15
TV
Plug & Play
Language : English
Time
Game Mode : Off
Blue Screen : Off
Melody : On
Panel Lock : Off
PC
Move Enter Return
TV
Plug & Play
Language :English
Time
Game Mode : Off
Blue Screen : Off
Melody : On
Panel Lock : Off
PC
Move Enter Return
Choosing Your Language
When you start using your television for the first time, you must
Setup
Setup
English
Deutsch
Français
Italiano
Svenska
select the language which will be used for displaying menus and
indications.
1 Press the MENU ()button.
Result
: The main menu is displayed.
2 Press the … or † button to select Setup.
Result
: The Setup menu is displayed.
3 Press the ENTER/OK () button.
4 Press the … or † button to select Language.
Press the
Result
: The available languages are listed.
5 Select the appropriate language by pressing the … or † button.
Press the
6 Press the EXIT button to exit.
ENTER/OK () button.
ENTER/OK () button.
English - 16
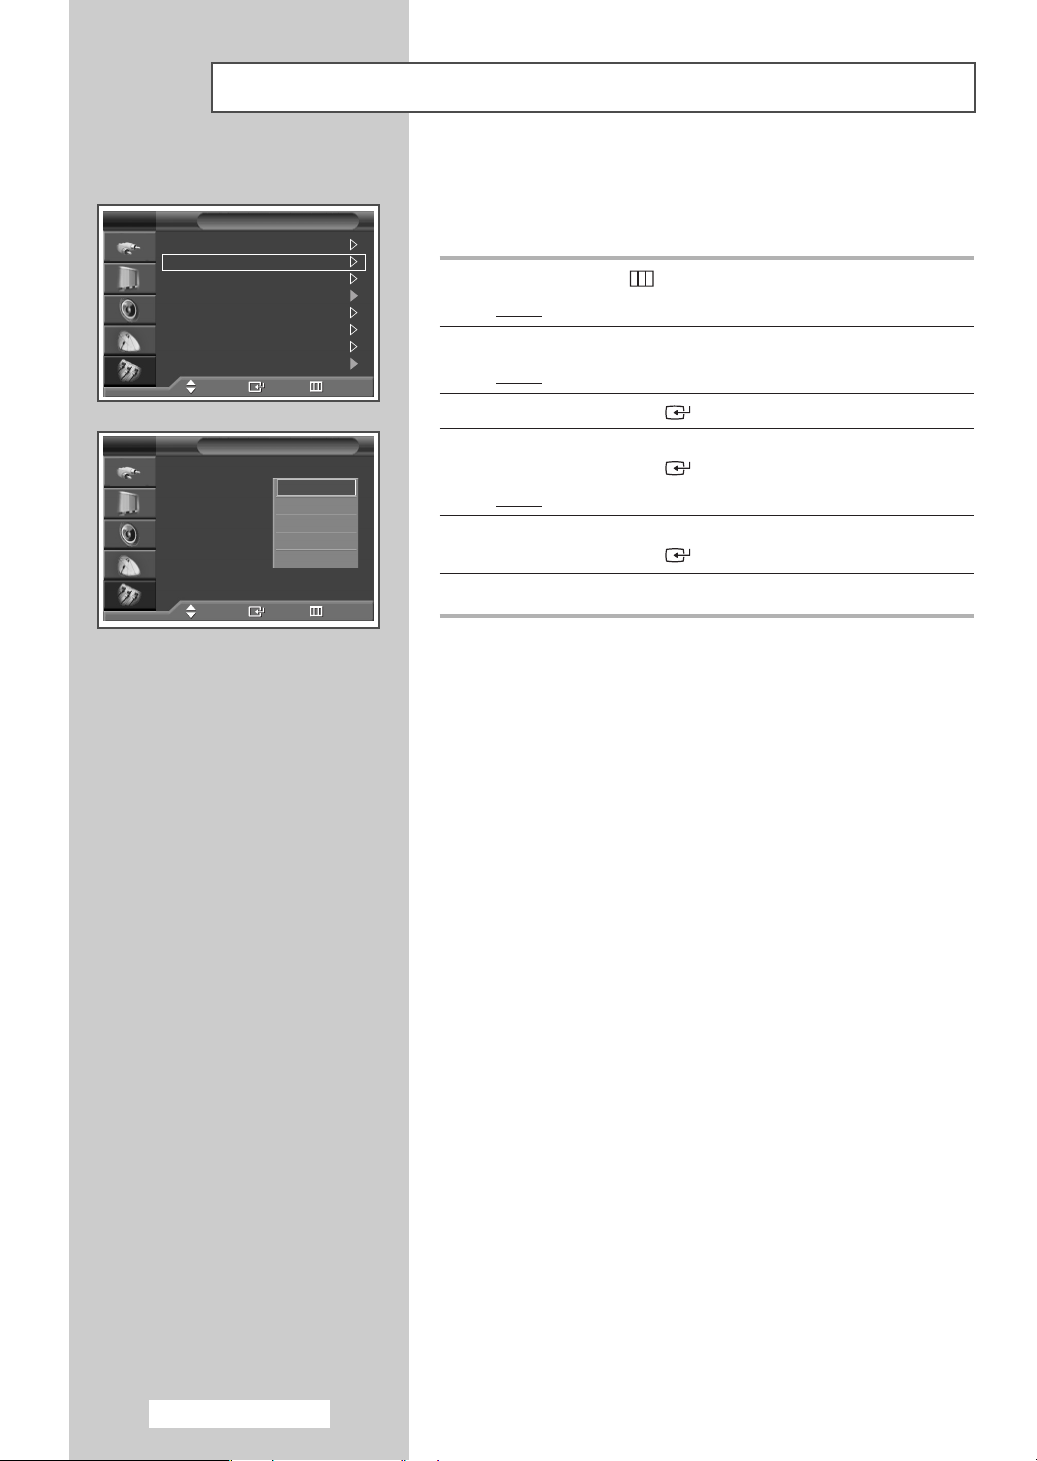
Storing Channels Automatically
Not available in DTV or external input mode.
➢
You can scan for the frequency ranges available to you (availability
depends on your country). Automatically allocated programme numbers
may not correspond to actual or desired programme numbers. However
you can sort numbers manually and clear any channels you do not wish
to watch.
1 Press the MENU ()button.
Result
: The main menu is displayed.
2 Press the … or † button to select Channel.
Result
: The Channel menu is displayed.
3 Press the ENTER/OK () button.
Result
: The Country is selected.
4 Press the ENTER/OK () button again.
Result
: The available countrys are listed.
5 Select your Country by pressing the … or † button.
➢ If you have selected the Others option but do not wish to
scan the PAL frequency range, store the channels manually
(“Storing Channels Manually” on page 19).
6 Press the ENTER/OK () button.
7 Press the … or † button to select Auto Store.
Press the
Result
8 Press the ENTER/OK () button again to start the search.
Result
➢ To stop the search before it has finished, press the MENU
9 When the channels have been stored, you can:
◆ Sort them in the order required (“Sorting the Stored
◆ Fine-tune channel reception if necessary (“Fine Tuning
◆ Assign a name to the stored channels (“Assigning Names to
◆ Activate/deactivate the Digital NR (Noise Reduction) feature
◆ Activate/deactivate the LNA (Low Noise Amplifier) feature
ENTER/OK () button.
: The
Auto Store menu is displayed.
: The search will end automatically. Channels are sorted
and stored in the order which reflects their position in
the frequency range (with lowest first and highest last).
The programme originally selected is then displayed.
() or the ENTER/OK () button.
Channels” on page 21).
Channel Reception” on page 24).
Channels” on page 22).
(“Using the Digital NR (
(“Using the LNA (
Noise Reduction) Feature” on page 37).
Low Noise Amplifier) Feature” on page 23).
TV
Country : Belgium
Auto Store
Manual Store
Channel Manager
Sort
Name
Fine Tune
LNA : Off
Move Enter Return
TV
Country : Belgium
Auto Store
Manual Store
Channel Manager
Sort
Name
Fine Tune
LNA : Off
Move Enter Return
TV
Country : Belgium
Auto Store
Manual Store
Channel Manager
Sort
Name
Fine Tune
LNA : Off
Move Enter Return
Auto Store
P 1 C
Enter Return
--
Start
Channel
Channel
Belgium
France
Germany
Italy
Netherlands
Spain
Channel
40 MHz
0 %
English - 17

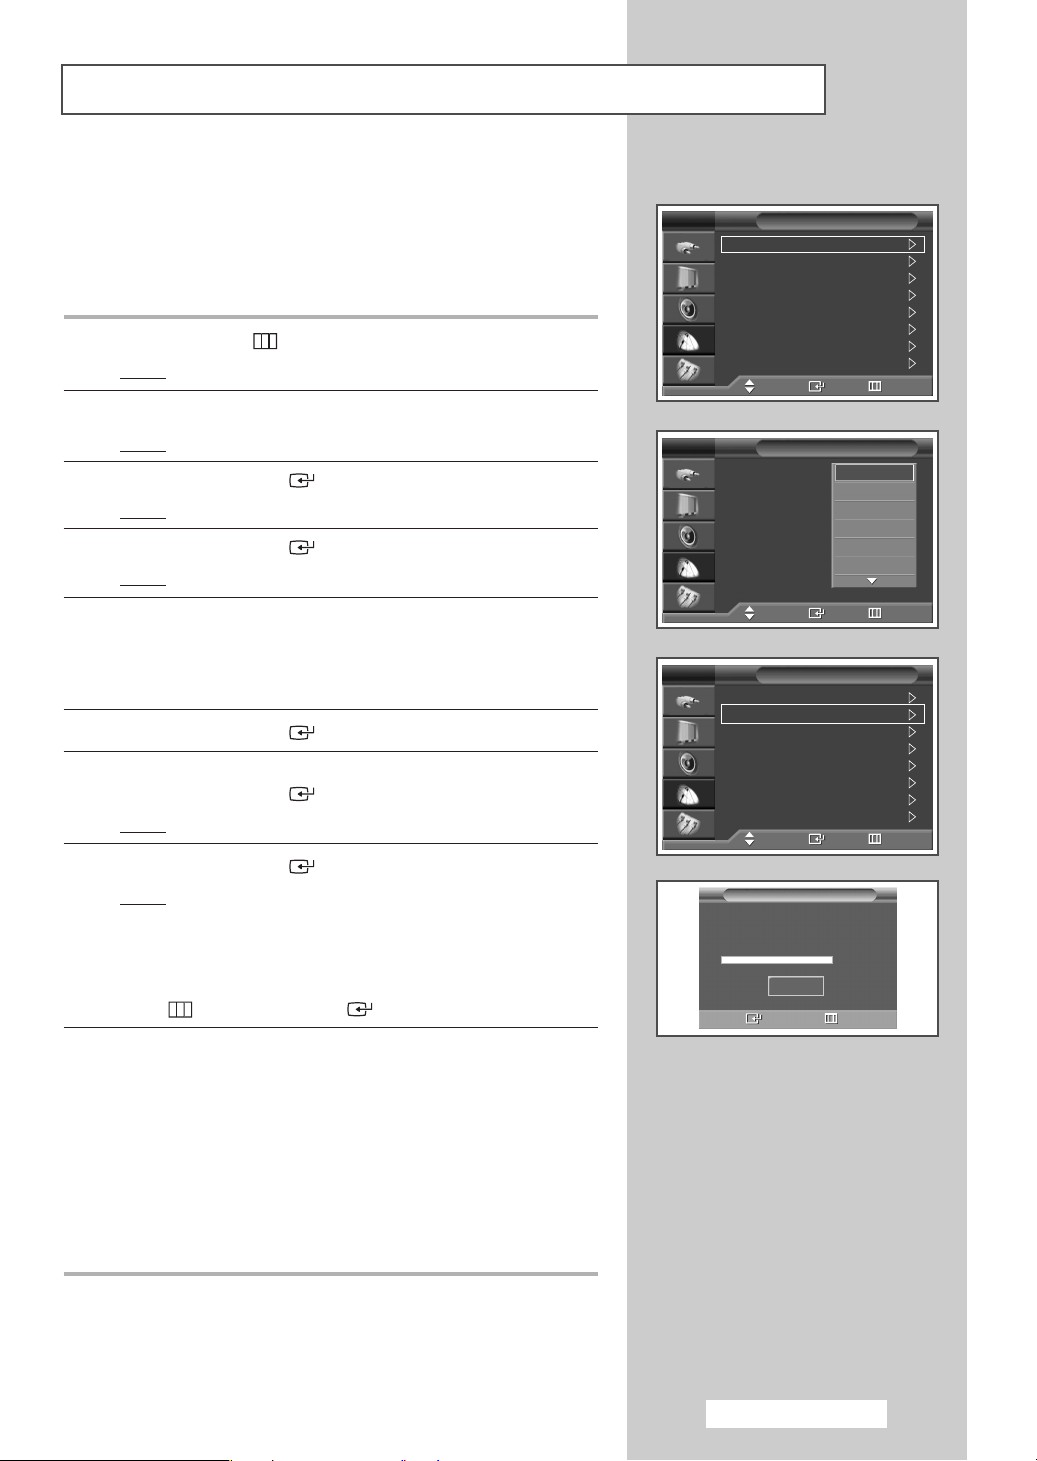
Storing Channels Manually
Not available in DTV or external input mode.
➢
TV
Country : Belgium
Auto Store
Manual Store
Channel Manager
Sort
Name
Fine Tune
LNA : Off
Move Enter Return
TV
Programme : P 1
Colour System : AUTO
Sound System : BG
Channel : C 5
Search : 175 MHz
Store : ?
Move Enter Return
TV
Programme : P 1
Colour System : AUTO
Sound System : BG
Channel : C 2
Search : 48 MHz
Store : ?
Move Enter Return
Channel
Manual Store
Manual Store
AUTO
SECAM
NTSC 4.43
PAL
You can store television channels, including those received via cable
networks.
When storing channels manually, you can choose:
◆ Whether or not to store each of the channels found.
◆ The programme number of each stored channel which you
wish to identify.
1 Press the MENU ()button.
Result
: The main menu is displayed.
2 Press the … or † button to select Channel.
Result
: The Channel menu is displayed.
3 Press the ENTER/OK () button.
4 Press the … or † button to select Manual Store.
Press the
Result
ENTER/OK () button.
: The Manual Store menu is displayed.
5 If necessary, select the broadcasting standard required.
Press the
Press the
… or † button to select Colour System.
ENTER/OK () button.
6 Select the required colour standard by pressing the … or †
button. Press the ENTER/OK () button.
Result
: The following options are available.
(depending on the model)
AUTO - PAL - SECAM - NTSC 4.43
TV
Programme : P 1
Colour System : AUTO
Sound System : BG
Channel : C 2
Search : 48 MHz
Store : ?
Move Enter Return
English - 18
Manual Store
BG
DK
7 Press the … or † button to select Sound System.
Press the
ENTER/OK () button.
8 Select the required sound standard by pressing the … or †
I
L
button. Press the ENTER/OK () button.
Result
: The following options are available.
BG - DK - I - L
continued...
9 If you know the number of the channel to be stored, see the
following steps.
◆
Press the … or † button to select Channel.
Press the
◆
Press the … or † button to select C (Air channel) or
ENTER/OK () button.
S (Cable channel).
◆
Press the √ button.
◆
Press the … or † button to select the required number.
Press the
You can select the channel directly by pressing
➢
ENTER/OK () button.
the numeric buttons on the remote control.
If there is abnormal sound or no sound, re-select the
➢
sound standard required.
10 If you do not know the channel numbers, select Search by
pressing the
Press the
Press the
Result
… or † button. Press the ENTER/OK () button.
… or † button to start the search.
ENTER/OK () button.
: The tuner scans the frequency range until the first
channel or the channel that you selected is received on
your screen.
11 To assign a programme number to a channel, select Programme
by pressing the … or † button. Press the ENTER/OK ()
button.
12 Press the … or † button until you find the correct number.
Press the
➢
ENTER/OK () button.
You can select the programme directly by pressing
the numeric buttons on the remote control.
TV
Programme : P 1
Colour System : AUTO
Sound System : BG
Channel : C 05
Search : 175 MHz
Store : ?
Adjust Enter Return
TV
Programme : P 1
Colour System : AUTO
Sound System : BG
Channel : C 5
Search : 175 MHz
Store : ?
Adjust Enter Return
TV
Programme : P 1
Colour System : AUTO
Sound System : BG
Channel : C 5
Search : 175 MHz
Store : OK
Move Enter Return
Manual Store
Manual Store
Manual Store
13 To store the channel and associated programme number, select
Store by pressing the … or † button. Set to OK by pressing the
ENTER/OK () button.
14 Repeat steps 9 to 13 for each channel to be stored.
15 Press the EXIT button to exit.
Channel mode
☛
◆ P (Programme mode): When completing tuning, the
broadcasting stations in your area have been assigned to
position numbers from P00 to P99. You can select a
channel by entering the position number in this mode.
◆ C (Air channel mode): You can select a channel by entering
the assigned number to each air broadcasting station in this
mode.
◆ S (Cable channel mode): You can select a channel by entering
the assigned number for each cable channel in this mode.
English - 19

TV
Country : Belgium
Auto Store
Manual Store
Channel Manager
Sort
Name
Fine Tune
LNA : Off
Move Enter Return
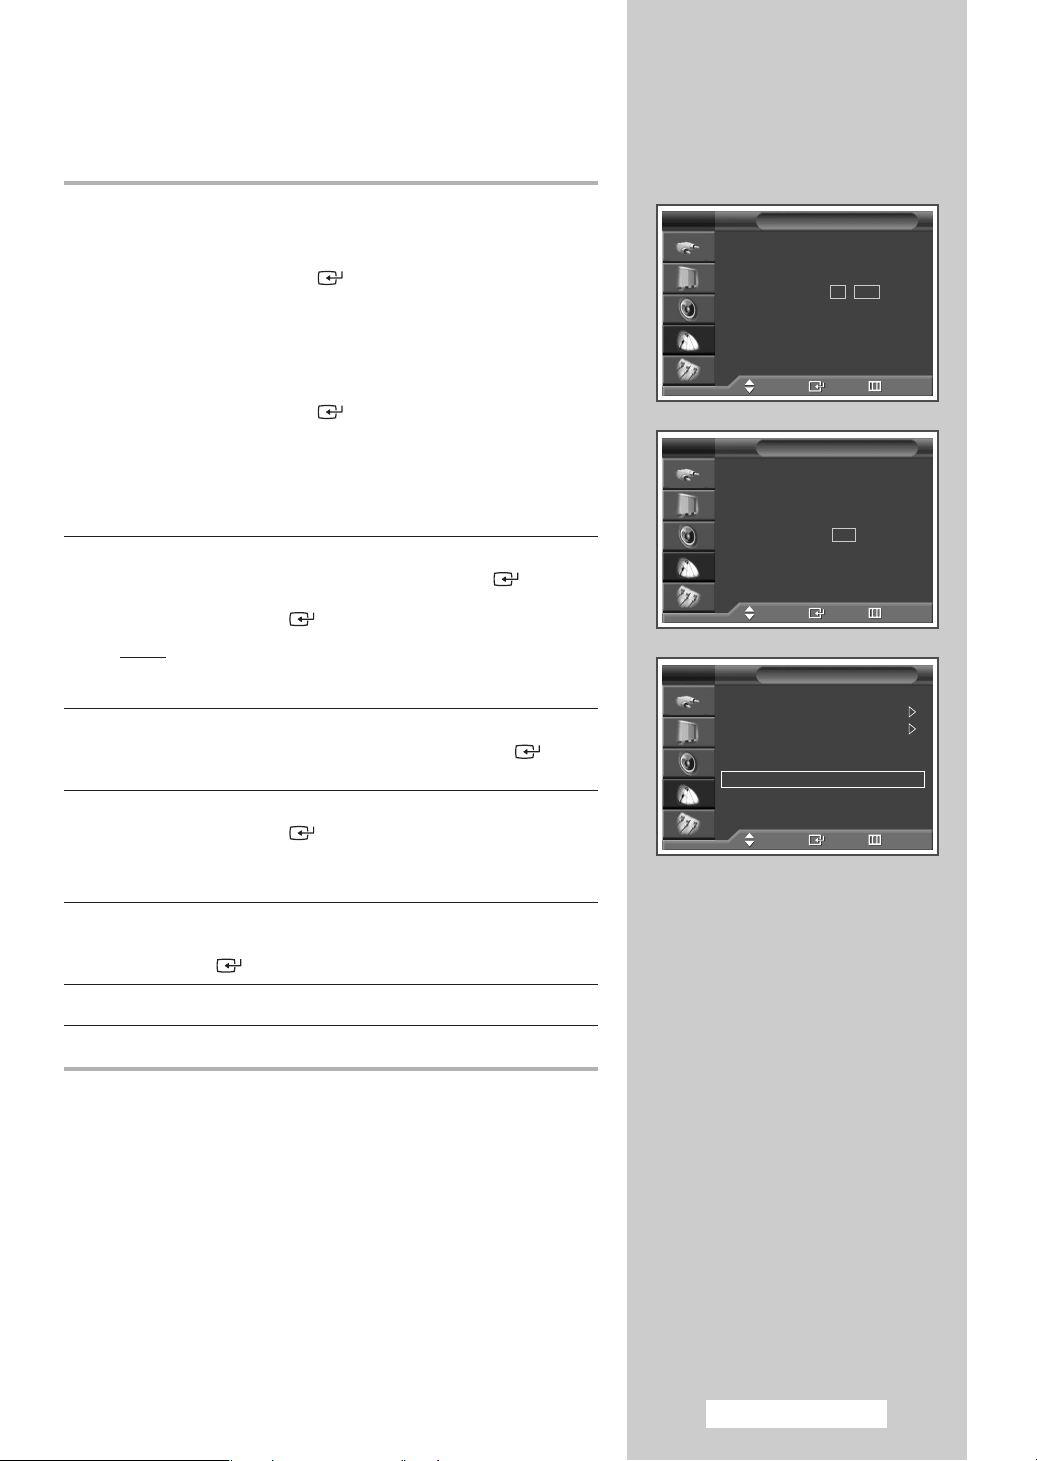
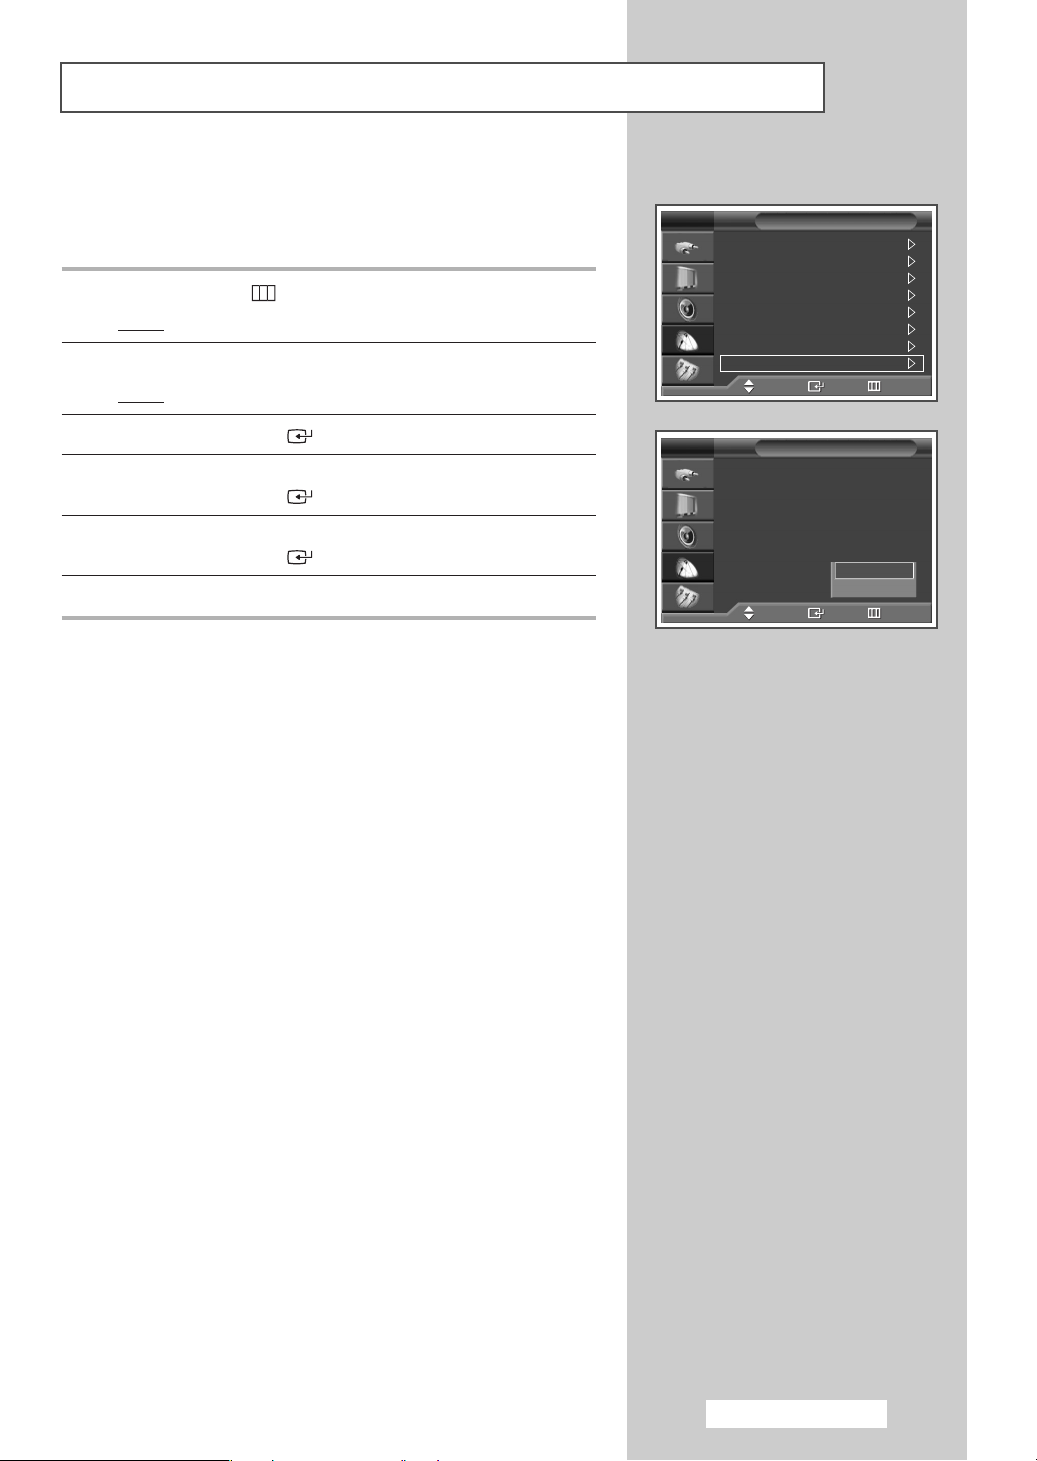
Adding / Locking Channels
Not available in DTV or external input mode.
➢
Using the Channel Manager, you can conveniently lock or add channels.
Channel
1 Press the MENU () button.
Result
: The main menu is displayed.
2 Press the … or † button to select Channel.
Result
: The Channel menu is displayed.
3 Press the ENTER/OK () button.
TV
Channel Manager
Chile Lock : Off
P 1 C 1
Channel Manager
Move Enter Return
Channel Manager
Prog.
0 C
--
1C 1
2C 3
3C 5
4C 8
5C 9
6C 10
7C 11
8C 12
9S 12
Add Lock
Move Enter
Page Exit
1 / 10
4 Press the … or † button to select Channel Manager.
Press the
◆
ENTER/OK () button.
Adding channel
Using the Channel Manager, you can add channels.
5 Move to the ( ) field by pressing the …/†/œ/√ buttons, select a
channel to be added, and press the
add the channel.
If you press the ENTER/OK () button again, the ( )
➢
symbol next to the channel disappears and the channel is not
added.
◆
Locking channels
This feature allows you to prevent unauthorized users, such as
children, from watching unsuitable programmes by muting out
video and audio.
ENTER/OK () button to
6 Press the … or † button to select Child Lock, then press the
ENTER/OK () button.
7 Select On by pressing the … or † buttons, then press the
ENTER/OK () button.
8 Press the … or † buttons to select the Channel Manager, then
press the
ENTER/OK () button.
9 Move to the ( ) field by pressing the …/†/œ/√ buttons, select a
channel to be locked, and press the
If you press the ENTER/OK () button again, the ( )
➢
symbol next to the channel disappears and the channel lock
is canceled.
A blue screen is displayed when Child Lock is activated.
➢
ENTER/OK () button.
English - 20
10 Press the EXIT button to exit.
\
☛
You can select these options simply by pressing the
CH MGR button on the remote control.
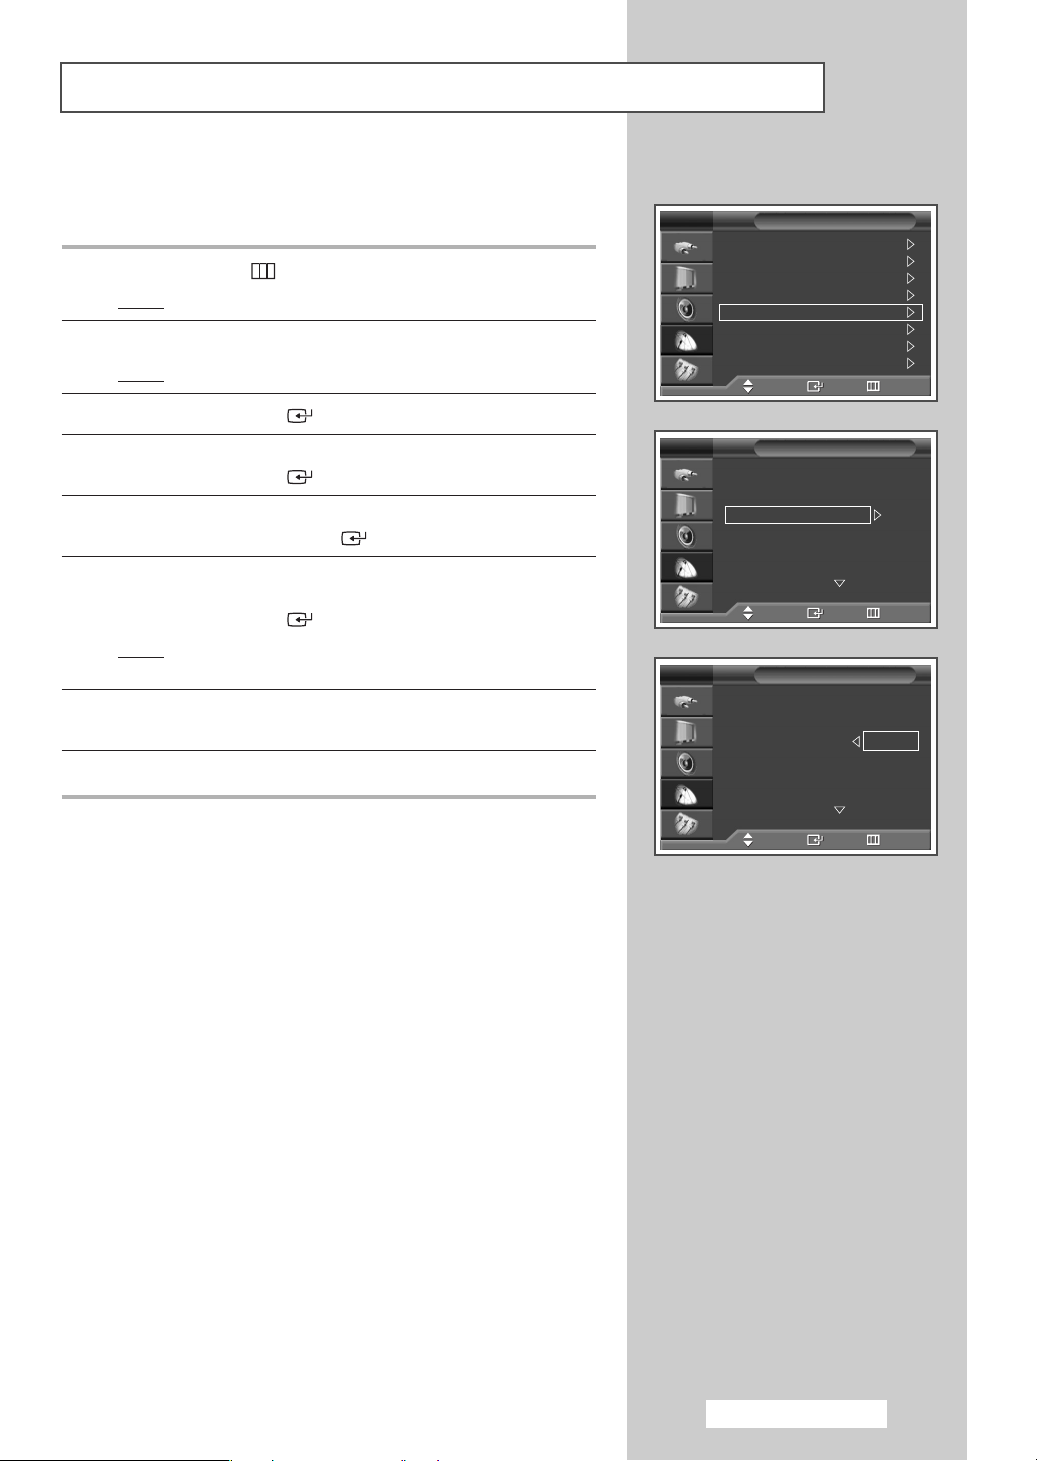
Sorting the Stored Channels
Not available in DTV or external input mode.
➢
This operation allows you to change the programme numbers of
stored channels. This operation may be necessary after using auto store.
1 Press the MENU ()button.
Result
: The main menu is displayed.
2 Press the … or † button to select Channel.
Result
: The Channel menu is displayed.
3 Press the ENTER/OK () button.
4 Press the … or † button to select Sort.
Press the
5 Select the channel that you wish to move by pressing the … or †
button. Press the ENTER/OK () button.
6 Select the number of the programme to which the channel is to
be moved by pressing the
Press the
Result
7 Repeat steps 5 to 6 until you have moved all the channels to the
required programme numbers.
8 Press the EXIT button to exit.
ENTER/OK () button.
… or † button.
ENTER/OK () button.
: The channel is moved to its new position and all other
channels are shifted accordingly.
TV
Country : Belgium
Auto Store
Manual Store
Channel Manager
Sort
Name
Fine Tune
LNA : Off
Move Enter Return
TV
Prog. Channel Name
0C
1C 7
2C 19
3C 25
4C 26
Move Enter Return
TV
Prog. Channel Name
0C
2C 19
3C 25
4C 26
Channel
Sort
--
Sort
--
C 7
Move Enter Return
English - 21

TV
Country : Belgium
Auto Store
Manual Store
Channel Manager
Sort
Name
Fine Tune
LNA : Off
Move Enter Return
Assigning Names to Channels
Not available in DTV or external input mode.
➢
Channel names will be assigned automatically when channel information is
Channel
broadcast. These names can be changed, allowing you to assign new
names.
1 Press the MENU ()button.
Result
: The main menu is displayed.
2 Press the … or † button to select Channel.
Result
: The
Channel menu is displayed.
TV
Prog. Channel Name
0C
1C 7
2C 19
3C 25
4C 26
Move Enter Return
TV
Prog. Channel Name
0C
1C 7
2C 19
3C 25
4C 26
Move Adjust Return
Name
-- -----
-----
-----
-----
-----
Name
-- -----
A
-----
-----
-----
3 Press the ENTER/OK () button.
4 Press the … or † button to select Name.
Press the
Result
ENTER/OK () button.
: The Name menu is displayed with the current channel
selected.
5 Press the … or † button to select the channel to be assigned to a
new name. Press the
Result
: Arrow indications are displayed around the name box.
ENTER/OK () button.
6 Press the … or † button to select a letter (A~Z), a number (0~9),
or a symbol. Move on to the previous or next letter by pressing the
œ or √ button.
7 Press the ENTER/OK () button.
8 Repeat steps 5 to 7 for each channel to be assigned to a new
name.
9 Press the EXIT button to exit.
English - 22
Using the LNA (Low Noise Amplifier) Feature
This function is very useful in the situation that the TV is used in weak
signal. LNA amplifies the TV signal in the weak signal area, a low-noise
preamplifier boosts the incoming signal.
1 Press the MENU ()button.
Result
: The main menu is displayed.
2 Press the … or † button to select Channel.
Result
: The Channel menu is displayed.
TV
Country : Belgium
Auto Store
Manual Store
Channel Manager
Sort
Name
Fine Tune
LNA : Off
Move Enter Return
Channel
3 Press the ENTER/OK () button.
4 Press the … or † button to select LNA .
Press the
ENTER/OK () button.
5 Select Off or On by pressing the … or † button.
Press the
ENTER/OK () button.
6 Press the EXIT button to exit.
◆ If the picture is noisy with the LNA set to On, select Off .
➢
◆ LNA setting is to be made for each channel.
◆ Depending on areas, factory mode of LNA will be set up
as
On or Off.
TV
Country : Belgium
Auto Store
Manual Store
Channel Manager
Sort
Name
Fine Tune
LNA : Off
Move Enter Return
Channel
Off
On
English - 23

TV
Country : Belgium
Auto Store
Manual Store
Channel Manager
Sort
Name
Fine Tune
LNA : Off
Move Enter Return
Fine Tune
P 1
Adjust Save
Fine Tune
P 1
Adjust Save
Fine Tune
P 1 *
Adjust Save
Fine Tuning Channel Reception
Not available in DTV or external input mode.
➢
If the reception is clear, you do not have to fine tune the channel,
Channel
0
Reset
Return
+3
Reset
Return
+3
Reset
Return
as this is done automatically during the search and store operation.
If the signal is weak or distorted, you may have to fine tune the
channel manually.
1 Press the MENU ()button.
Result
: The main menu is displayed.
2 Press the … or † button to select Channel.
Result
: The
Channel menu is displayed.
3 Press the ENTER/OK () button.
4 Press the … or † button to select Fine Tune.
Press the
Result
ENTER/OK () button.
: The horizontal bar is displayed.
5 To obtain a sharp and clear picture and good sound quality,
press the
œ or √ button until you reach the optimal setting.
6 To store the fine tuning setting in the TV’s memory, press the
ENTER/OK () button.
Result
: The programme number changes to red and is
marked with a “*”.
7 To reset the fine tuning to 0, select Reset by pressing the … or †
button then press the ENTER/OK () button.
8 Press the EXIT button to exit.
P 1 *
Mono
Displaying Information
P 1
Mono
Picture : Standard
Sound : Custom
SRS TSXT : Off
00 : 00
English - 24
If you are unable to fine tune a channel, check that the
➢
Colour System and Sound System settings are correct.
Fine Tune Store will change the colour of the Channel OSD
➢
(On Screen Display) from White to Red and add the “
*” mark.
You can view the channel information and setting status you have
selected by pressing the INFO
()
button on the remote control.
The information displayed varies according to the selected source.
Changing the Picture Standard
You can select the type of picture which best corresponds to your
viewing requirements.
1 Press the MENU ()button.
Result
: The main menu is displayed.
2 Press the … or † button to select Picture.
Result
:
The
Picture menu is displayed.
3 Press the ENTER/OK () button.
Result
:
The
Mode is selected.
4 Press the ENTER/OK () button again.
Result
:
The
Mode menu is displayed.
5 Press the ENTER/OK () button.
Result
: The following
Dynamic - Standard - Movie - Custom
◆ Choose Dynamic for viewing the TV during the day or
➢
when there is bright light in the room.
◆ Choose Standard for the standard factory settings.
◆ Choose Movie when viewing the movie.
◆ Choose Custom if you want to adjust the settings
according to personal preference (see “Customizing the
Picture Settings”, page 26).
6 Select the required option by pressing the … or † button.
Press the
ENTER/OK () button.
7 Press the EXIT button to exit.
options
are available.
TV
Mode : Standard
Size : Auto Wide
Digital NR : On
DNIe Demo : Off
My Colour Control
Film Mode : Off
PIP
Move Enter Return
TV
Mode : Standard
Contrast 80
Brightness 50
Sharpness 50
Colour 50
Tint G 50 R 50
Colour Tone : Cool 1
Reset
Move Enter Return
TV
Mode : Dynamic
Contrast 80
Brightness 50
Sharpness 50
Colour 50
Tint G 50 R 50
Colour Tone : Cool 1
Reset
Move Enter Return
Picture
Mode
Mode
Dynamic
Standard
Movie
Custom
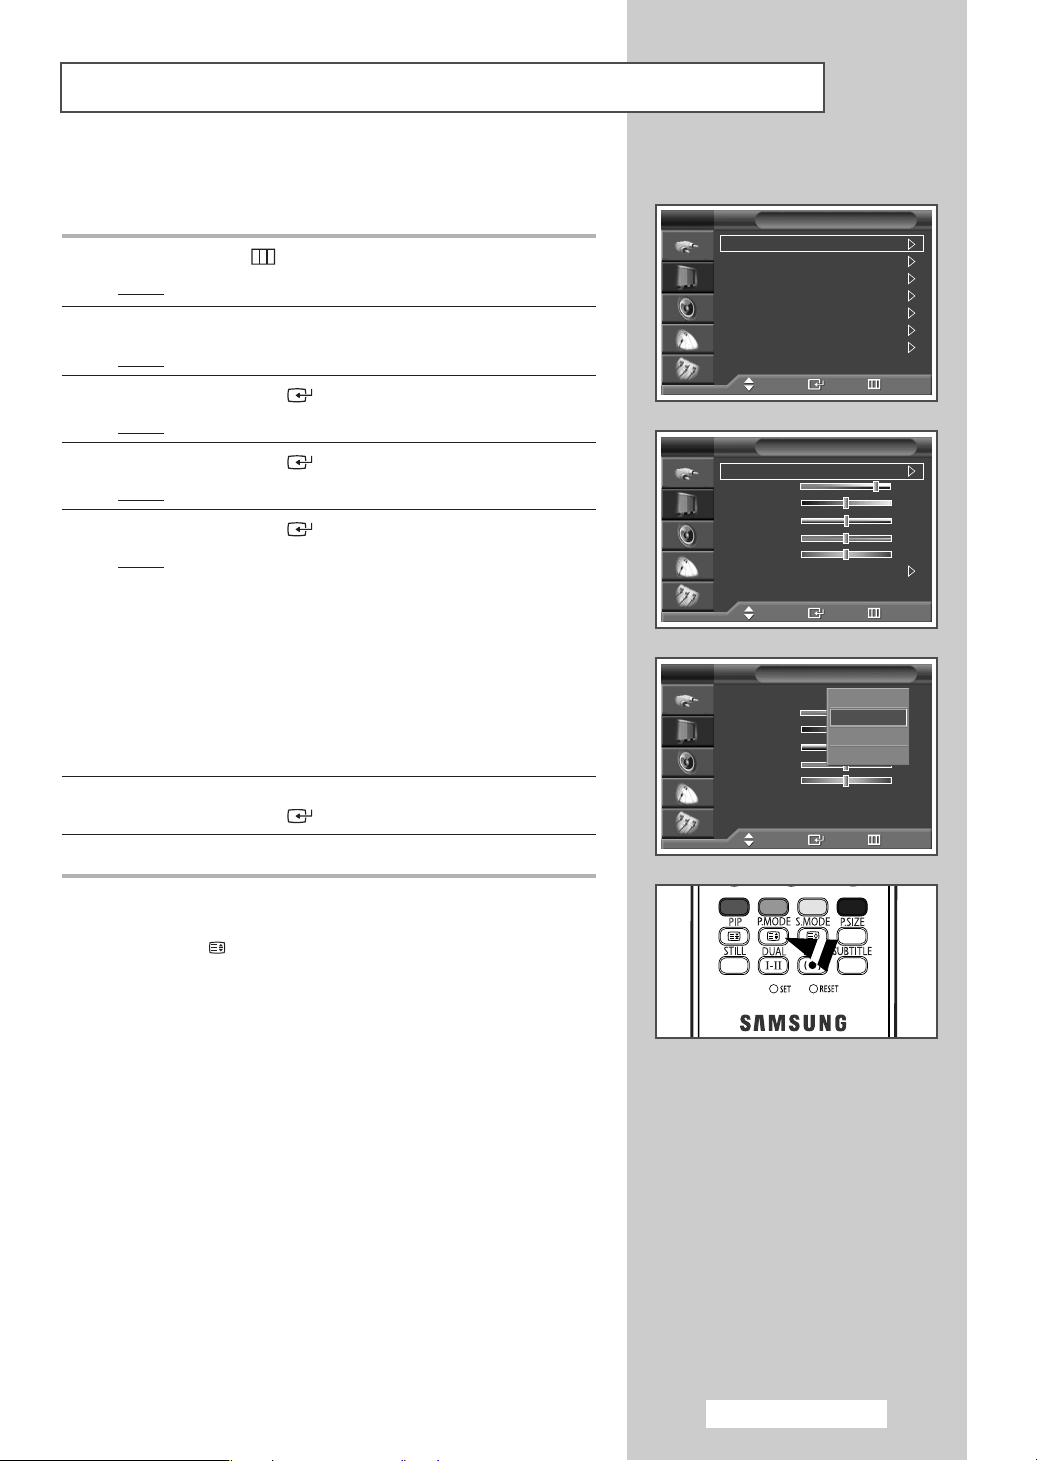
You can also set these options simply by pressing the
➢
P.MODE (: Picture Mode) button on the remote control.
English - 25

Customizing the Picture Settings
Your television has several setting options that allow you to control
the picture quality.
TV
Mode : Standard
Size : Auto Wide
Digital NR : On
DNIe Demo : Off
My Colour Control
Film Mode : Off
PIP
TV
Mode : Custom
Contrast 80
Brightness 50
Sharpness 50
Colour 50
Tint G 50 R 50
Colour Tone : Cool 1
Reset
Contrast 80
TV
Mode : Custom
Contrast 80
Brightness 50
Sharpness 50
Colour 50
Tint G 50 R 50
Colour Tone : Cool 1
Reset
TV
Mode : Custom
Contrast 80
Brightness 50
Sharpness 50
Colour 50
Tint G 50 R 50
Colour Tone : Cool 1
Reset
Picture
Move Enter Return
Mode
Move Enter Return
Mode
Cool 2
Cool 1
Normal
Warm 1
Warm 2
Move Enter Return
Mode
Move Enter Return
1 Press the MENU ()button.
: The main menu is displayed.
Result
2 Press the … or † button to select Picture.
:
The
Result
Picture menu is displayed.
3 Press the ENTER/OK () button.
:
The
Result
Mode is selected.
4 Press the ENTER/OK () button again.
:
The
Result
Mode menu is displayed.
5 Press the ENTER/OK () button.
options
: The following
Result
are available.
Dynamic - Standard - Movie - Custom
6 Select the required option by pressing the … or † button.
7 Press the ENTER/OK () button.
8 Select the required option by pressing the … or † button.
: The following
Result
◆ Contrast - Brightness - Sharpness - Colour Tint (NTSC only)
◆ Contrast - Brightness : PC mode.
options
are available.
9 Press the ENTER/OK () button.
: The horizontal bar is displayed.
Result
Press the œ or √ button until you reach the optimal
setting.
◆ Press the … or † button to select other option(s).
➢
◆ The settings values may vary depending on the input
source. (ex. RF, Video, Component, PC, or HDMI.)
10 Press the MENU () button to return to Mode menu.
Press the
Press the
… or † button to select Colour Tone.
ENTER/OK () button.
11 Select the required option by pressing the … or † button.
: The following
Result
Cool 2 - Cool 1 - Normal - Warm 1 - Warm 2
options
are available.
12 Press the ENTER/OK () button.
13 To return the factory defaults, select Reset by pressing the
… or † button. Press the ENTER/OK () button.
: The previously adjusted settings will be reset to the
Result
➢
➢
factory defaults.
The reset function is set for each mode (Dynamic,
Standard, Movie, or Custom).
The reset function is also set for each Colour Tone (Cool 2,
Cool 1, Normal, Warm 1, or Warm 2).
English - 26
14 Press the EXIT button to exit.
 Loading...