

Page 1
Disassembly and Reassembly
Samsung Electronics 4-1
4. Disassembly and Reassembly
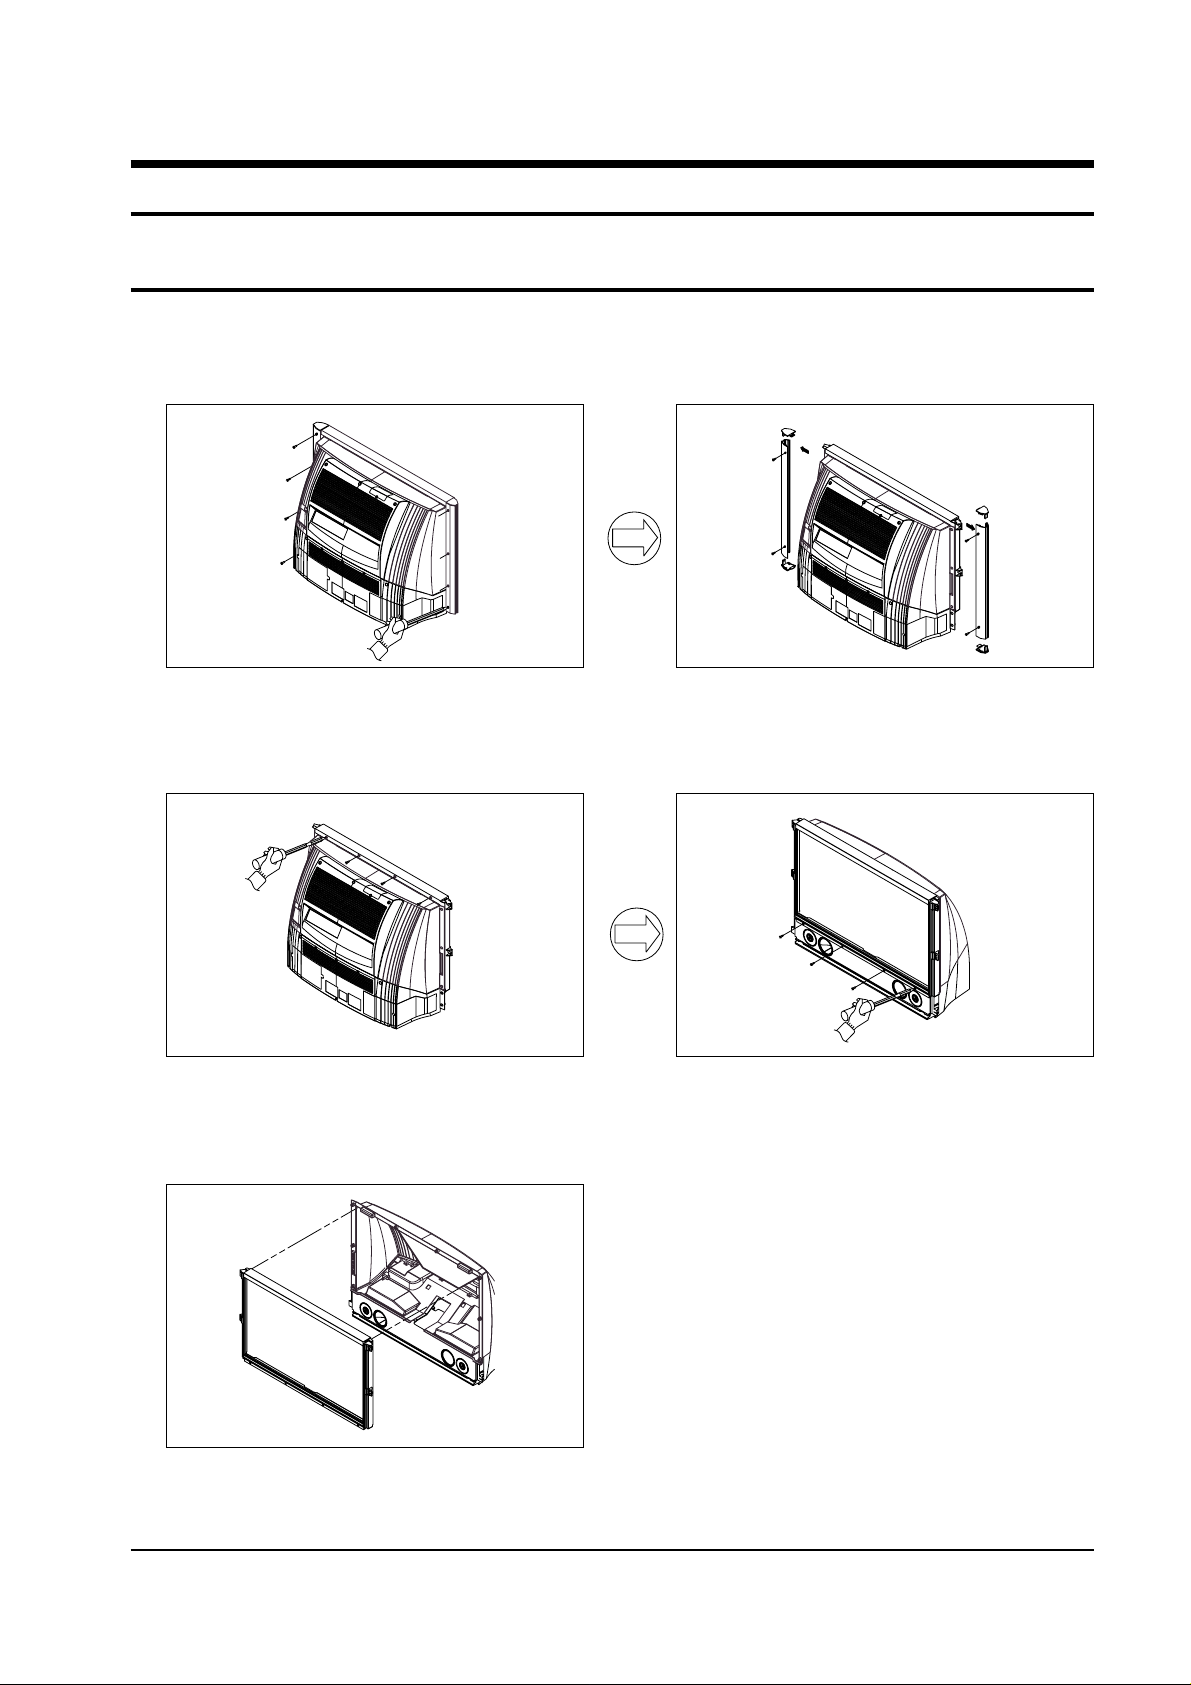
4-1 Back Cover Removal
1. After removing the screws, pull the bottom and side holder part of the cabinet back wards.
2. Loosen the screws and remove the supporter.
4. Loosen the screws. Remove the front mask.
3. After loosening the screws, remove the lens
cover and fan duct.
Page 2

Disassembly and Reassembly
4-2 Samsung Electronics
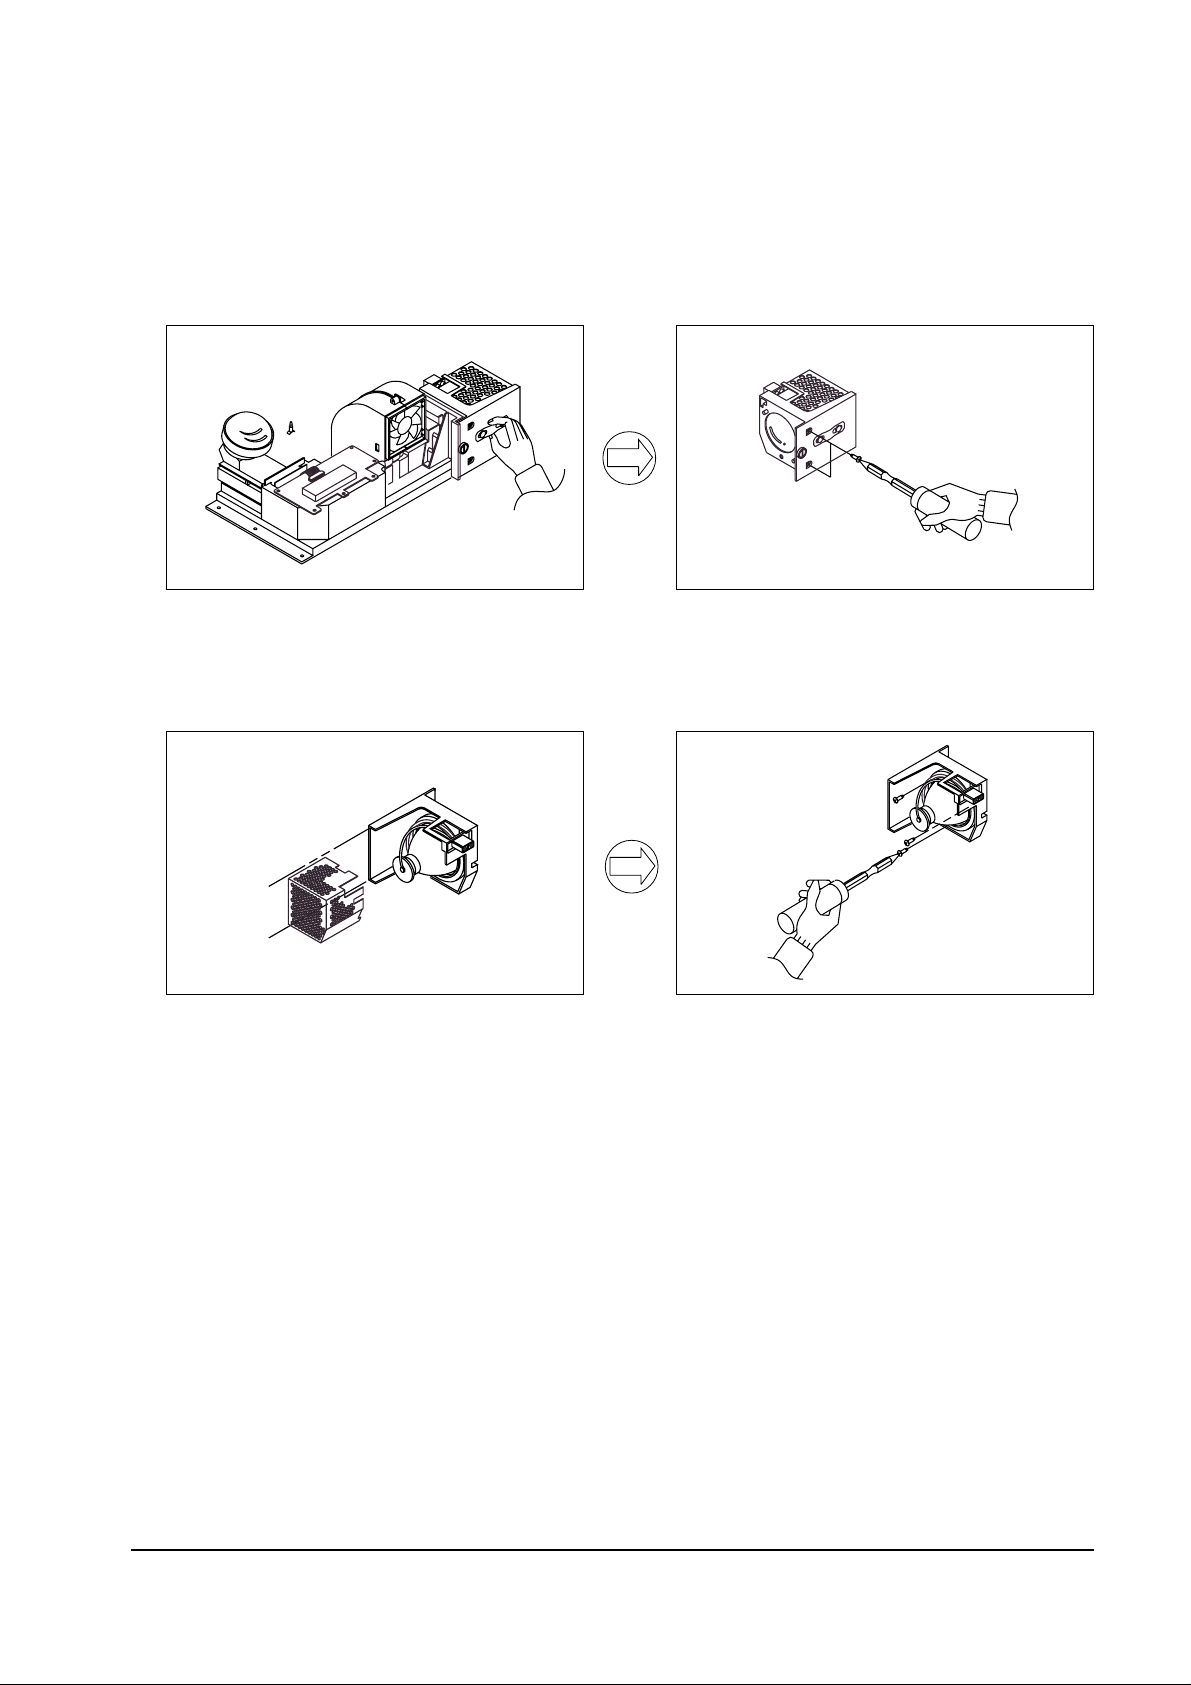
4-2 Lamp Replacement
1. Loosen the screw.
3. Using a (-)driver, loosen the screw that secure
the lamp.
2. Remove the cover.
4. Pull out the lamp.
5. PROCEDURE
After completing the lamp replacement, enter
the Service Mode
Press the remote control Keys in the following
sequence:
“Display ➔ P.STD ➔ Mute ➔ Power”
(1) Select 01 (lamp life) with using the joystick
downward, then moving the joystick to right
directior(See the figure below).
(2) Press the Cancel key to reset the lamp life
(“00000”).
(3) Press the Power key to save the factory
value.
(4) Press the DISPLAY key to verify that the
lamp use time is ø.
00 Lamp Total time (05999)
01 Lamp Life (05999)
Page 3
Disassembly and Reassembly
Samsung Electronics 4-3
4-2-1 Lamp (Bulb only) Replacement
1. Loosen the screw.
3. After loosening bracket, remove the lampholder and wires.
2. Remove the lamp-bracket after loosen two
screws from the lamp assembly.
4. After loosening screws, remove the bulb.
Page 4

Disassembly and Reassembly
4-4 Samsung Electronics
4-3 Air Filter Check
2. Remove the cover.
3. After removing the holder and filter from the
cover, clean the filter.
1. Loosen the screw.
Page 5

Disassembly and Reassembly
Samsung Electronics 4-5
4-4 Liquid Crystal Panel Replacement
1. After removing the 16 screws, pull the cabinet
backwards.
3. Remove the dust cover and disjoint the FPCconnector.
5. Pull out the LCD panel.
2. Loosen the 2 screws and remove the airfilter
at the right side then pull out the optical
engine.
4. Loosen the 2 screws and be careful to do not
bend the LCD panel bracket.
6. Be careful there is no finger print or dust on
the LCD panel.
 Loading...