

Samsung SM-T239M service manual Direy
Level
7.
Disassembly and Assembly Instructions
7-1.
Repair
2
7-1-1.
1)
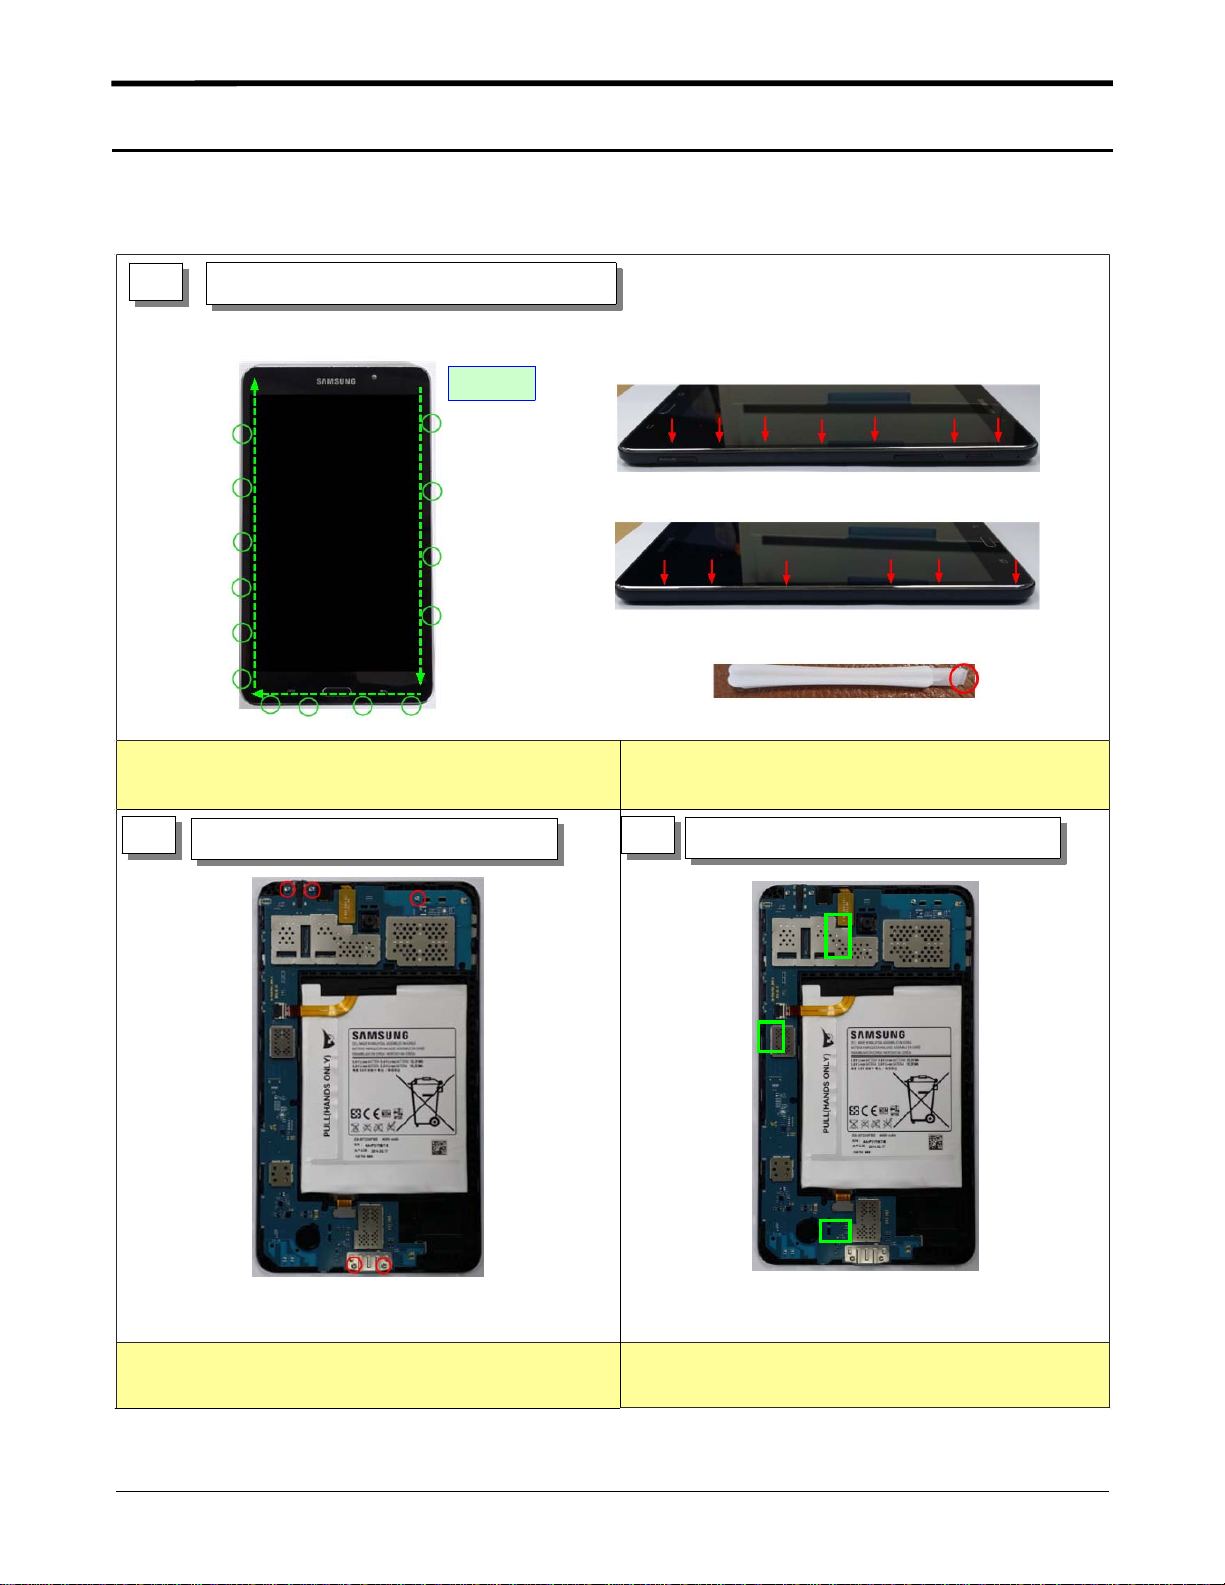
Disassembly
1
Be careful not to make scratch and molding damage!
Disjoint Hook at REAR // Disassemble REAR
START
Use Band point of disassembly jig
1)
2
Disassemble SCREW
Disassemble SCREW(5Points)
1)
Be careful nottoscratch FPCB
2)
3
Disassemble FPCB connector
Detach FPCB connector(3point)
1)
Be careful nottoscratch FPCB
2)
7-1
Confidential and proprietary-the contents in this service guide subject to change without prior notice.
Distribution, transmission, or infringement of any content or data from this document without Samsung’swritten authorization is strictly prohibited.
Level2Repair
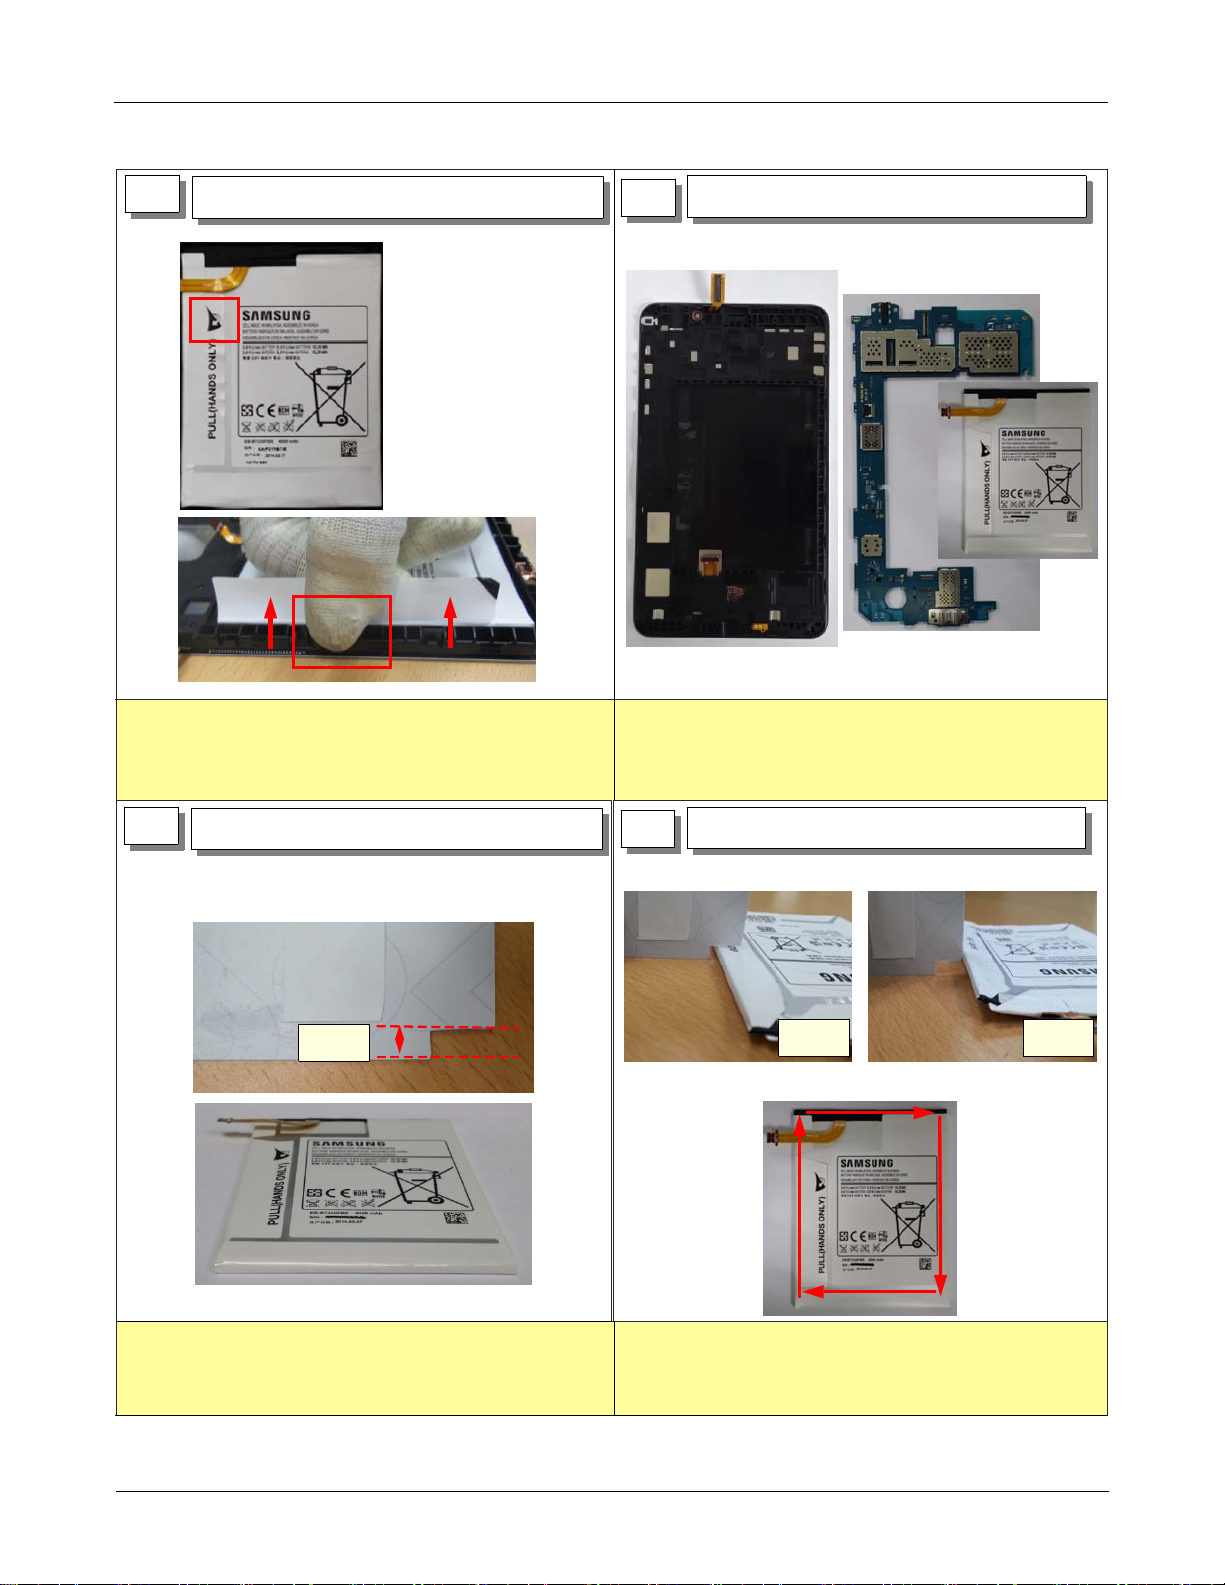
4
Pull marked point.
1)
DISASSEMBLE BATTERY.
2)
Disassemble BATTERY
Battery demolition be used only hand.
The disable tweezers, Driver, JIG
Disassemble PBA
5
Check each part.
1)
6
Check Battery flatness
5.7mm
Prepare the ruler or the card which can check
1)
mm thickness.
5.7
Place the Battery on the flat surface like the picture
2)
Printed image should be top)
(
※
Check Battery flatness
6-1
OK NG
Check the battery flatness using the ruler or the card
1)
In case of NG, battery should be replaced with
2)
new one.
7-2
Confidential and proprietary-the contents in this service guide subject to change without prior notice.
Distribution, transmission, or infringement of any content or data from this document without Samsung’swritten authorization is strictly prohibited.
 Loading...