

Samsung SM-G965F Service Manual - Direy-6
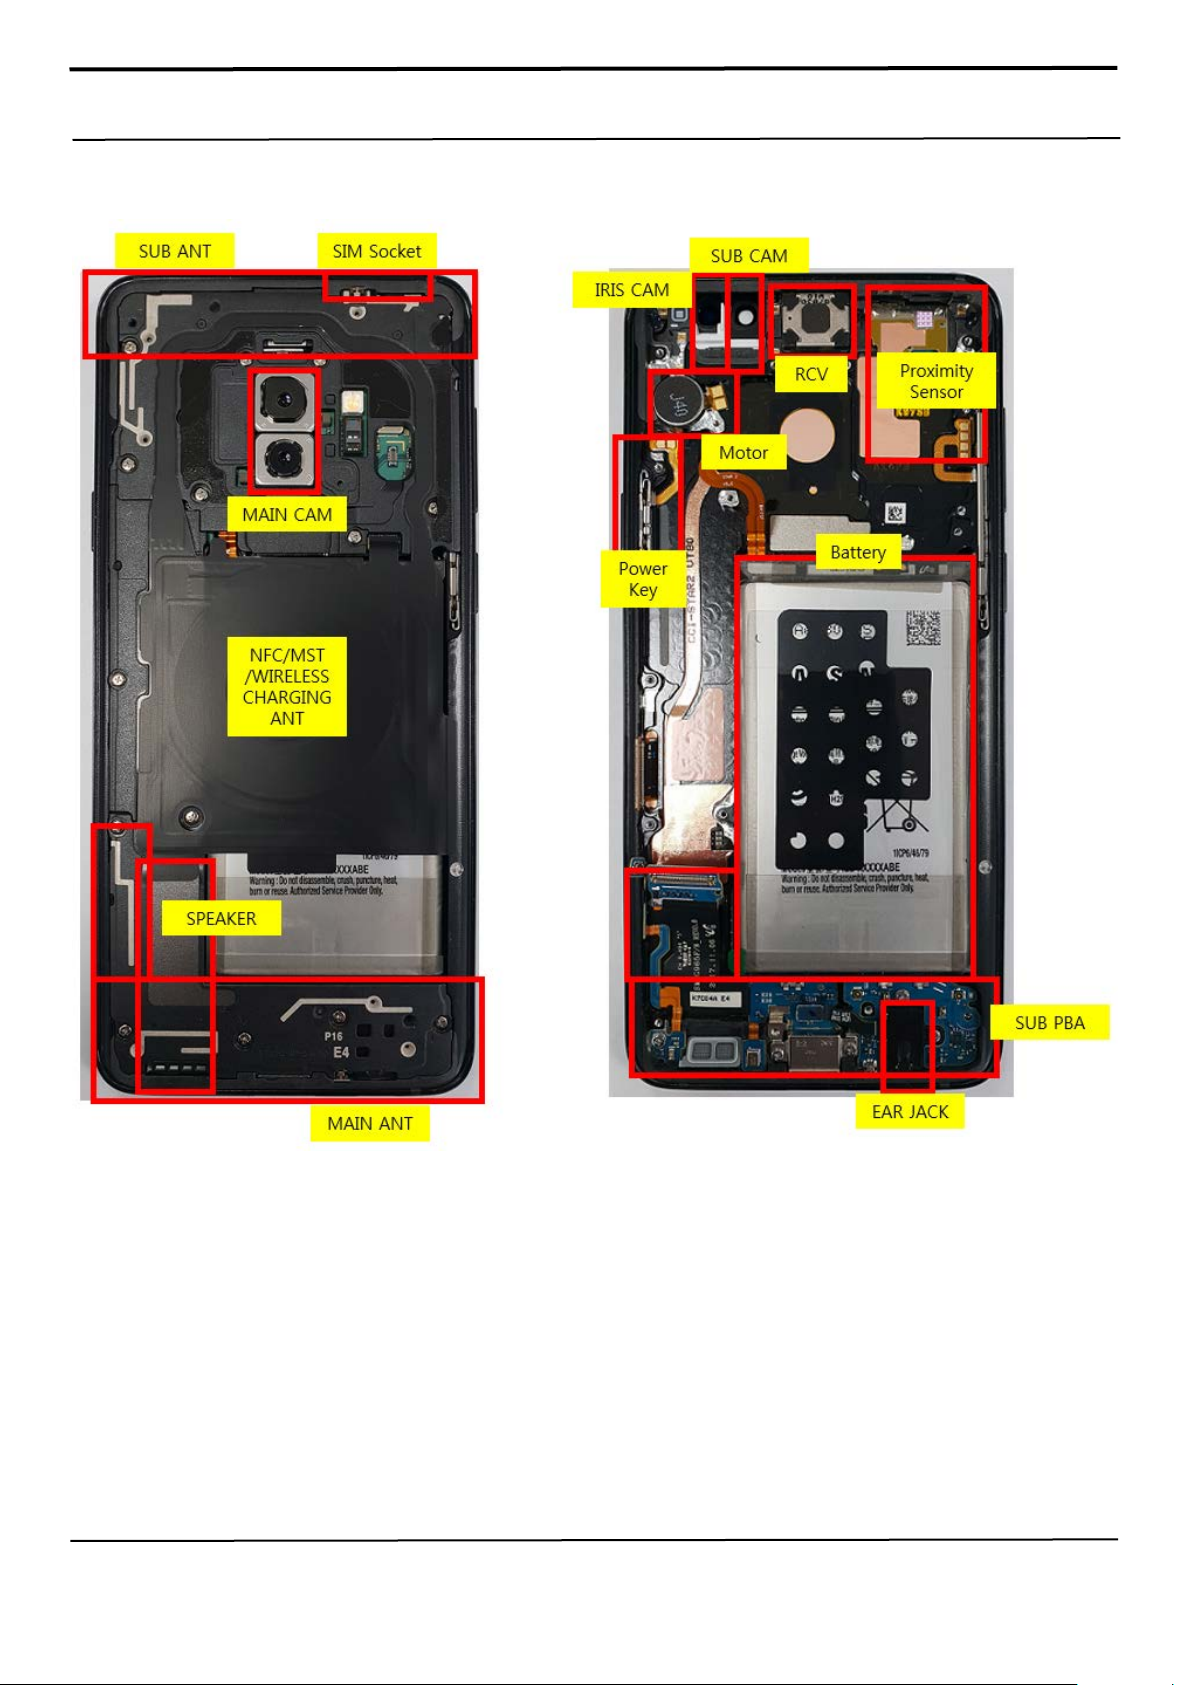
7. Level 2 Repair
7-1. Components on the Rear Case
Confidential and pr oprietary-the c ontents in this ser vice guide subject to change wi thout prior noti ce
Distribution, t ransmissio n, or infrin gement of an y c ontent or data from this d ocument without Samsung’s written authorization is strict ly prohibited.
7. Level 2 Repair
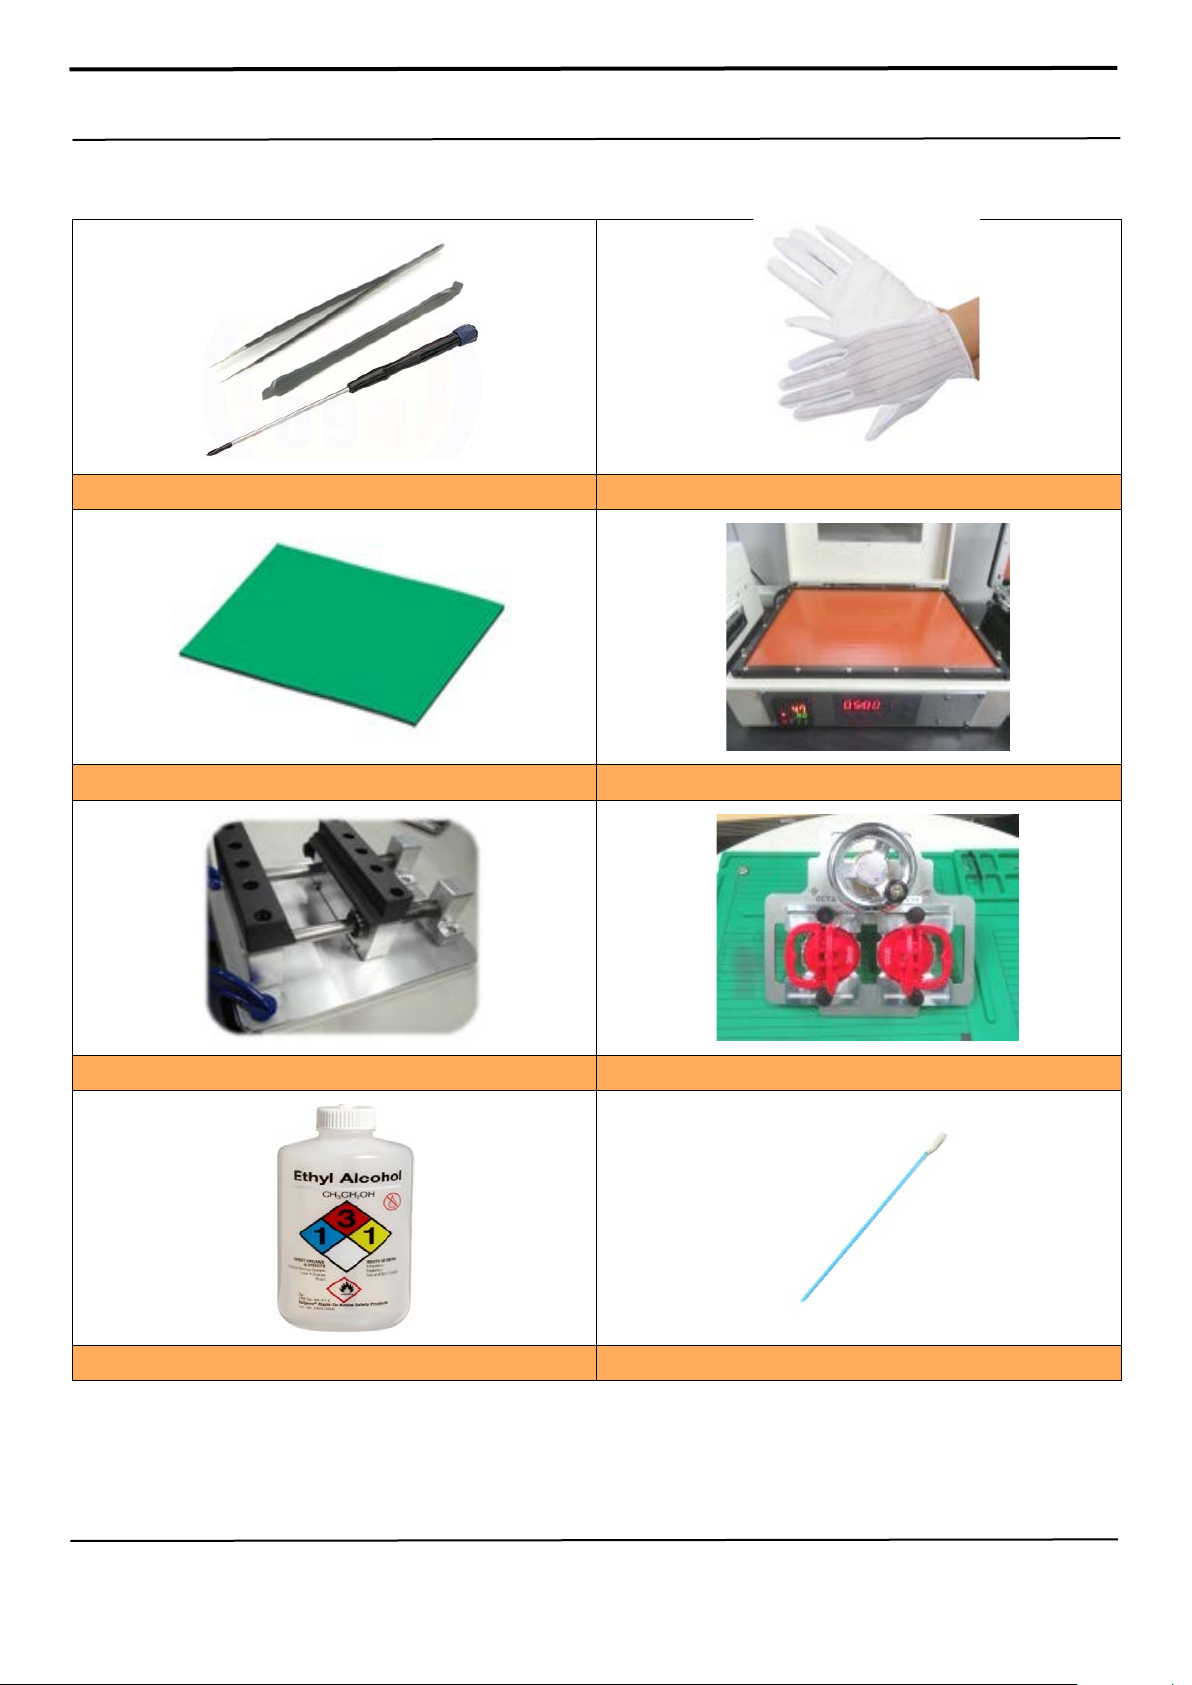
Tweezers / Disass'y Stick / Screw Driver
Anti-static Gloves
7-2. Pre-requisite
Anti-static Mat
Hot Plate
A OCTA Disassembly Holder
OCTA Disassembly Upper
Ethyl Alcohol Cotton Swab
Confidential and pr oprietary-the c ontents in this ser vice guide subject to change wi thout prior noti ce
Distribution, t ransmissio n, or infrin gement of an y c ontent or data from this d ocument without Samsung’s written authorization is strict ly prohibited.
7. Level 2 Repair
Replace for Back
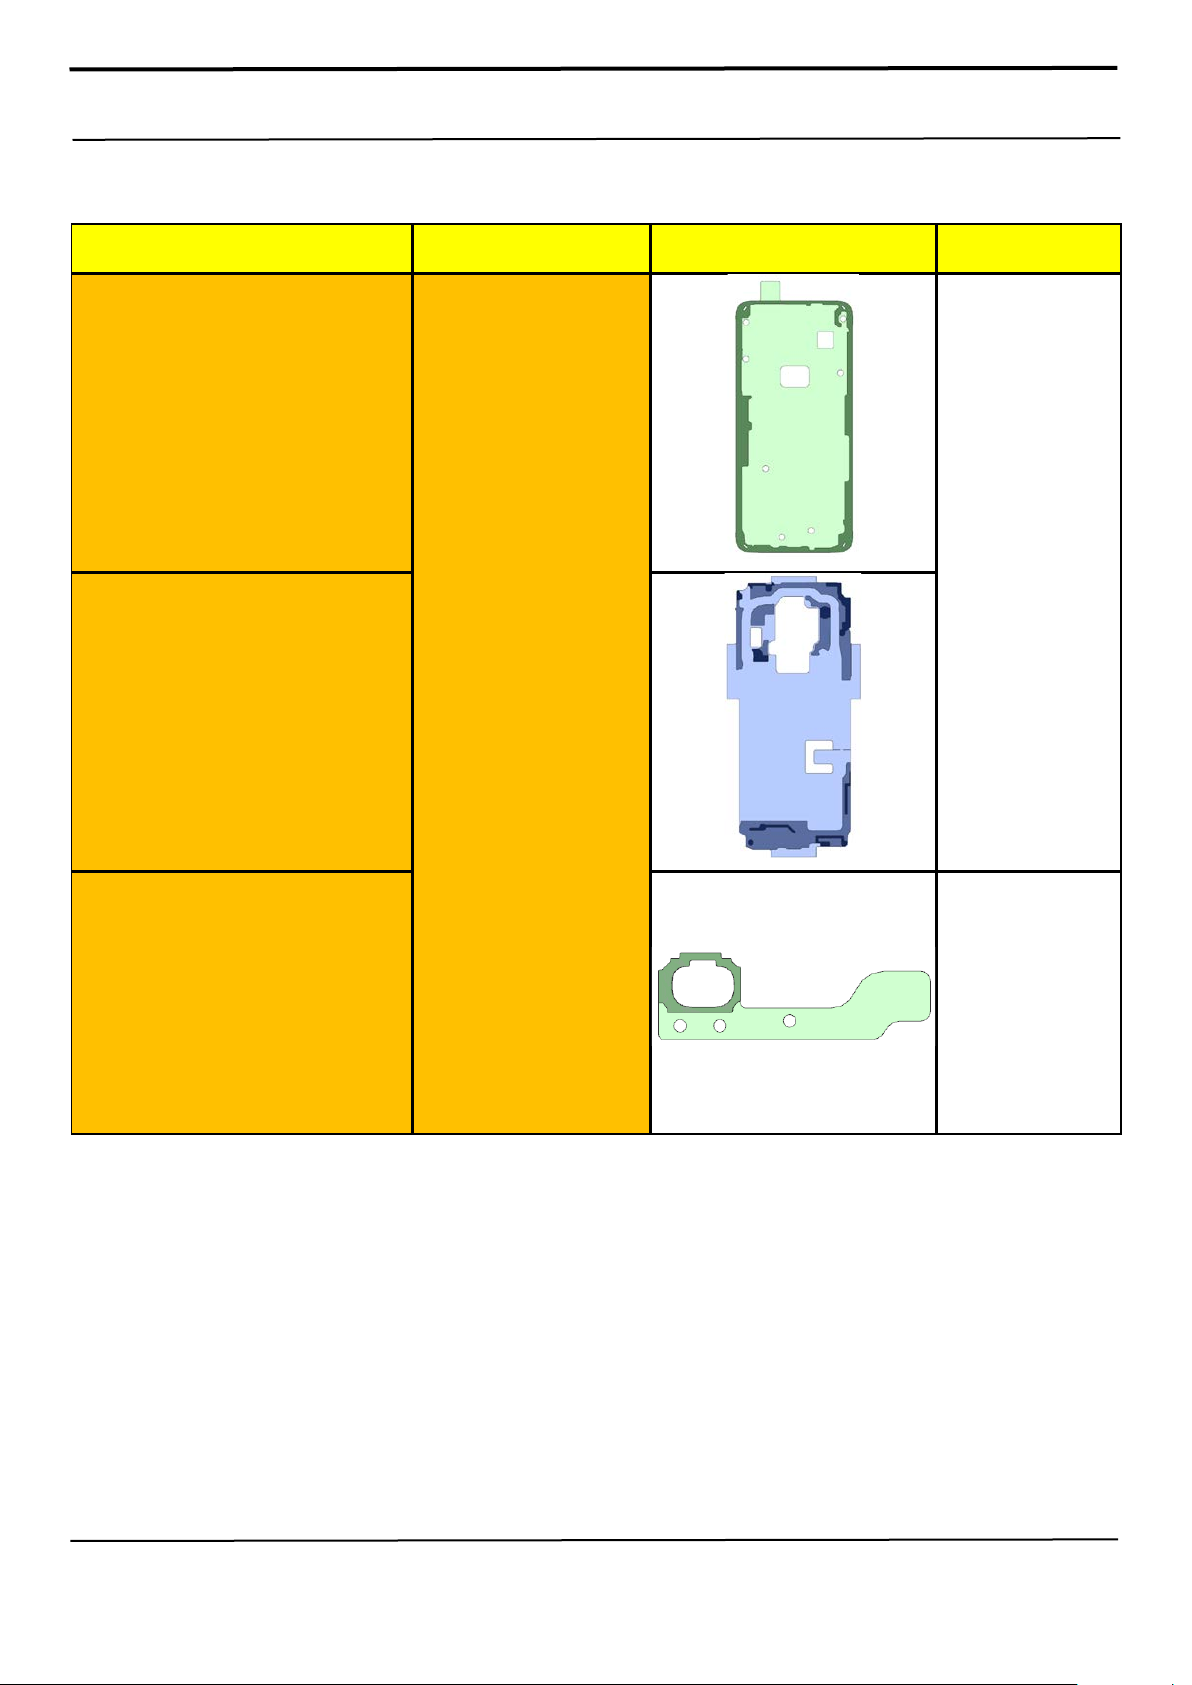
7-3. Parts which must be changed after repair
BOM description & part code KIT CODE Image Remarks
A/S-SVC TAPE BG WP OUTER
(Common)
[GH81-15386A]
A/S-SVC TAPE BG INNER
(EUR)
[GH81-15387A]
TAPE FP MODULE
[GH02-15926A]
A/S REWORK KITSM-G965F (EUR)
[GH82-15964A]
Include Waterproof
Tape
KIT Package
- BG WP Outer Tape
- BG INNER Tape
- FP Module Tape
- Camera Sealing
Tape 1EA
- MIC Sealing
Tape 2EA
Replace for
Back Glass
repair
Glass
Or Finger print
sensor repair
Distribution, t ransmissio n, or infrin gement of an y c ontent or data from this d ocument without Samsung’s written authorization is strict ly prohibited.
Confidential and pr oprietary-the c ontents in this ser vice guide subject to change wi thout prior noti ce
7. Level 2 Repair
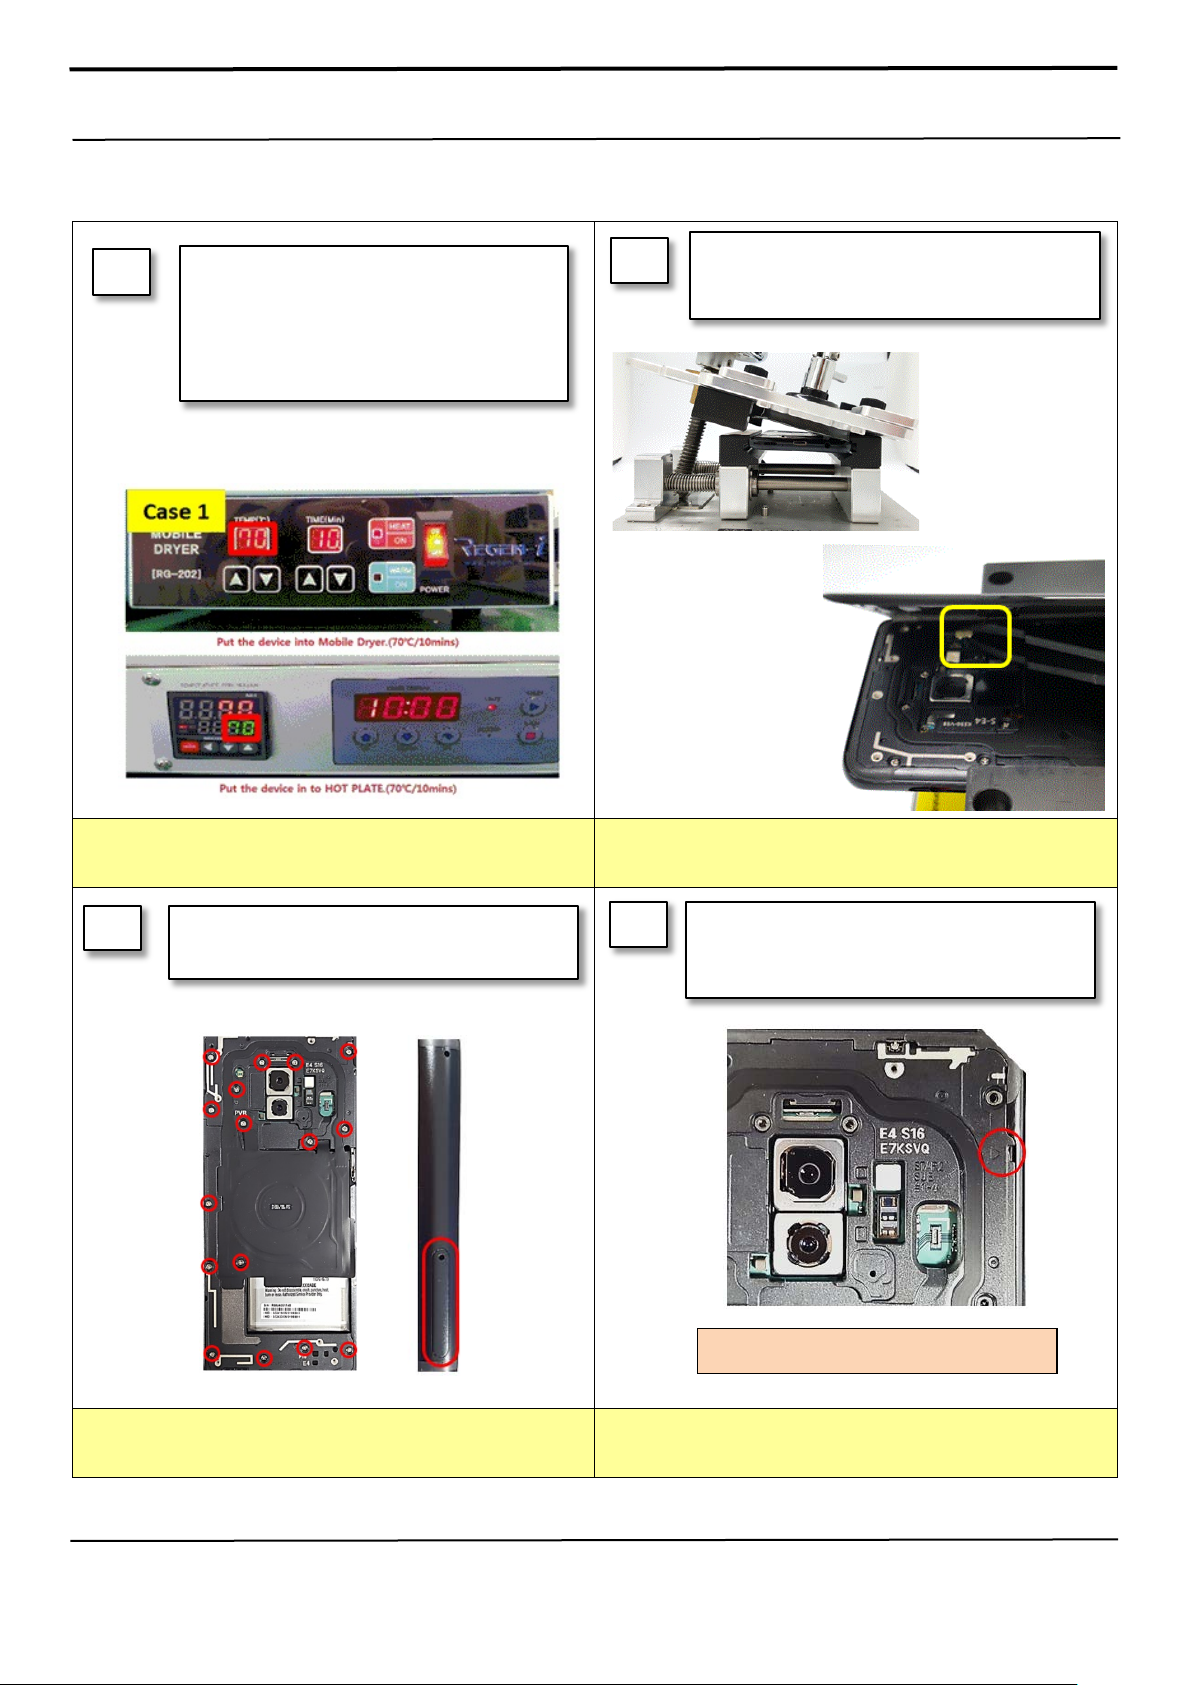
2) Be care of Rear and connector damage
Rea r To p disassemble hole.
Please confirm the heating condition
7-4. Disassembly
1
Put the device in the chamber as following
below heating condition
- SOC 68%↓: 70℃/10~20 minute
- SOC 68%↑: 70℃/10~20 minute
※
released lastly, and follow it.
2
Detach the Back Glass. And Finger sensor
1) Detach the left side of Back glass
2) Detach the Finger sensor connector
※ C a uti o n
Be care of scratch
3
Unscrew 16 Point and disassemble SIM Tray
from device
※ C a u ti o n
Be care of scratch
4
Disassemble Upper Rear.
(Use disassemble hole left/right side of Rear to
detach it)
※ C a u ti o n
Be care of Rear damage
Confidential and pr oprietary-the c ontents in this ser vice guide subject to change wi thout prior noti ce
Distribution, t ransmissio n, or infrin gement of an y c ontent or data from this d ocument without Samsung’s written authorization is strict ly prohibited.
※ C a u ti o n
1) Be care of scratch
 Loading...