

Samsung SME-2220N, SME-4220N, SME-4221N, SME-4220P, SME-4221P Quick User Manual
English-1
2VJDL/FUXPSL4FUVQ(VJEF
Connecting to the network using router
SME-2220N/4220N/4221N/4220P/4221P
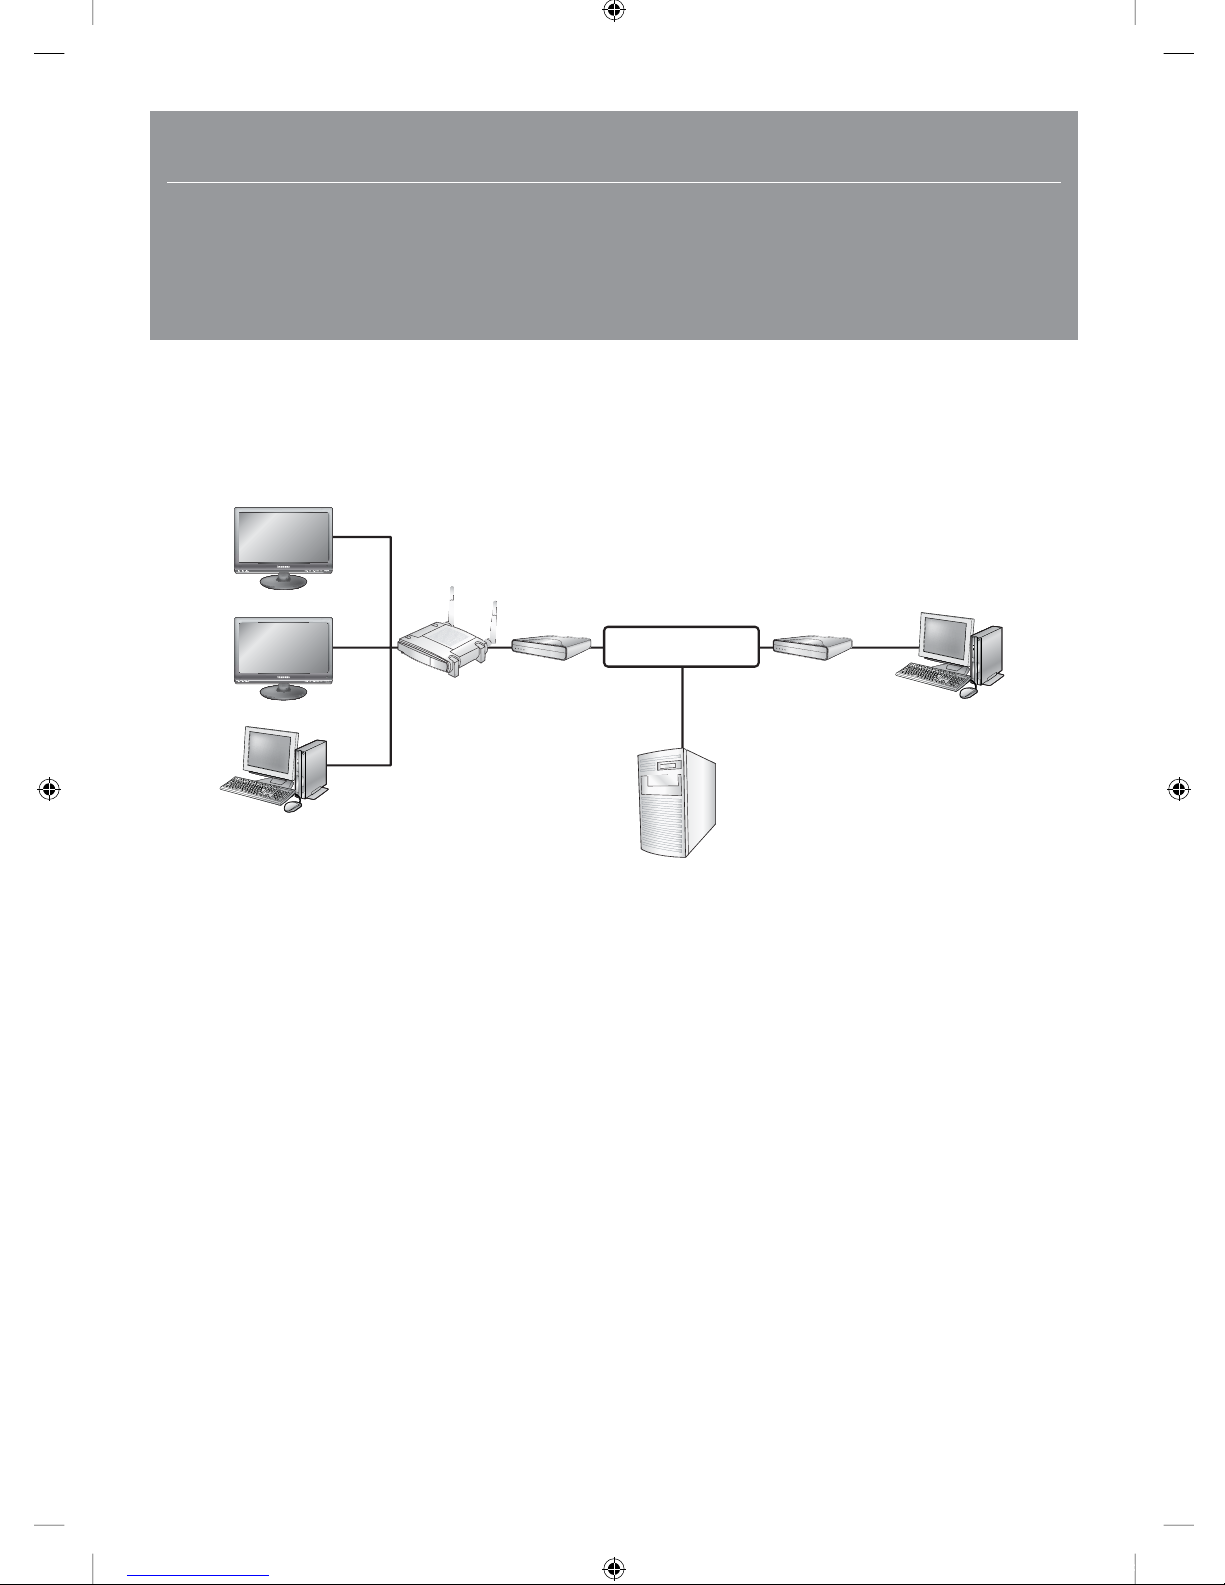
By using a router, you can connect your computer and 1 ~ 3 DVR machines to the internet by sharing 1 internet connection via
xDSL or cable modem.
This installation guide aims at casual users, not for network professionals.
For proper use of the router, strictly follow the steps 1 to 5.
Configure your router, computer and DVR equipments as described in the following steps.
Step 1. Connecting Cables
Step 2. Connecting your local computer to the router
Step 3. Connecting DVR to the router
Step 4. Connecting the router to the internet service line
Step 5. Configuring router’s port forwarding
Step 6. Accessing DVR using DDNS service in dynamic IP environment
DVR
DVR
Local PC
IP Sharer
xDSL or
Cable Modem
xDSL or
Cable Modem
External
Remote PC
DDNS Server
(websamsung.net)
INTERNET
]_W`XYW_WXhztlTYYYWyTxnTXGGGX YWXWTW_TW`GGG㝘䟸G[aW]aZ`
English-2
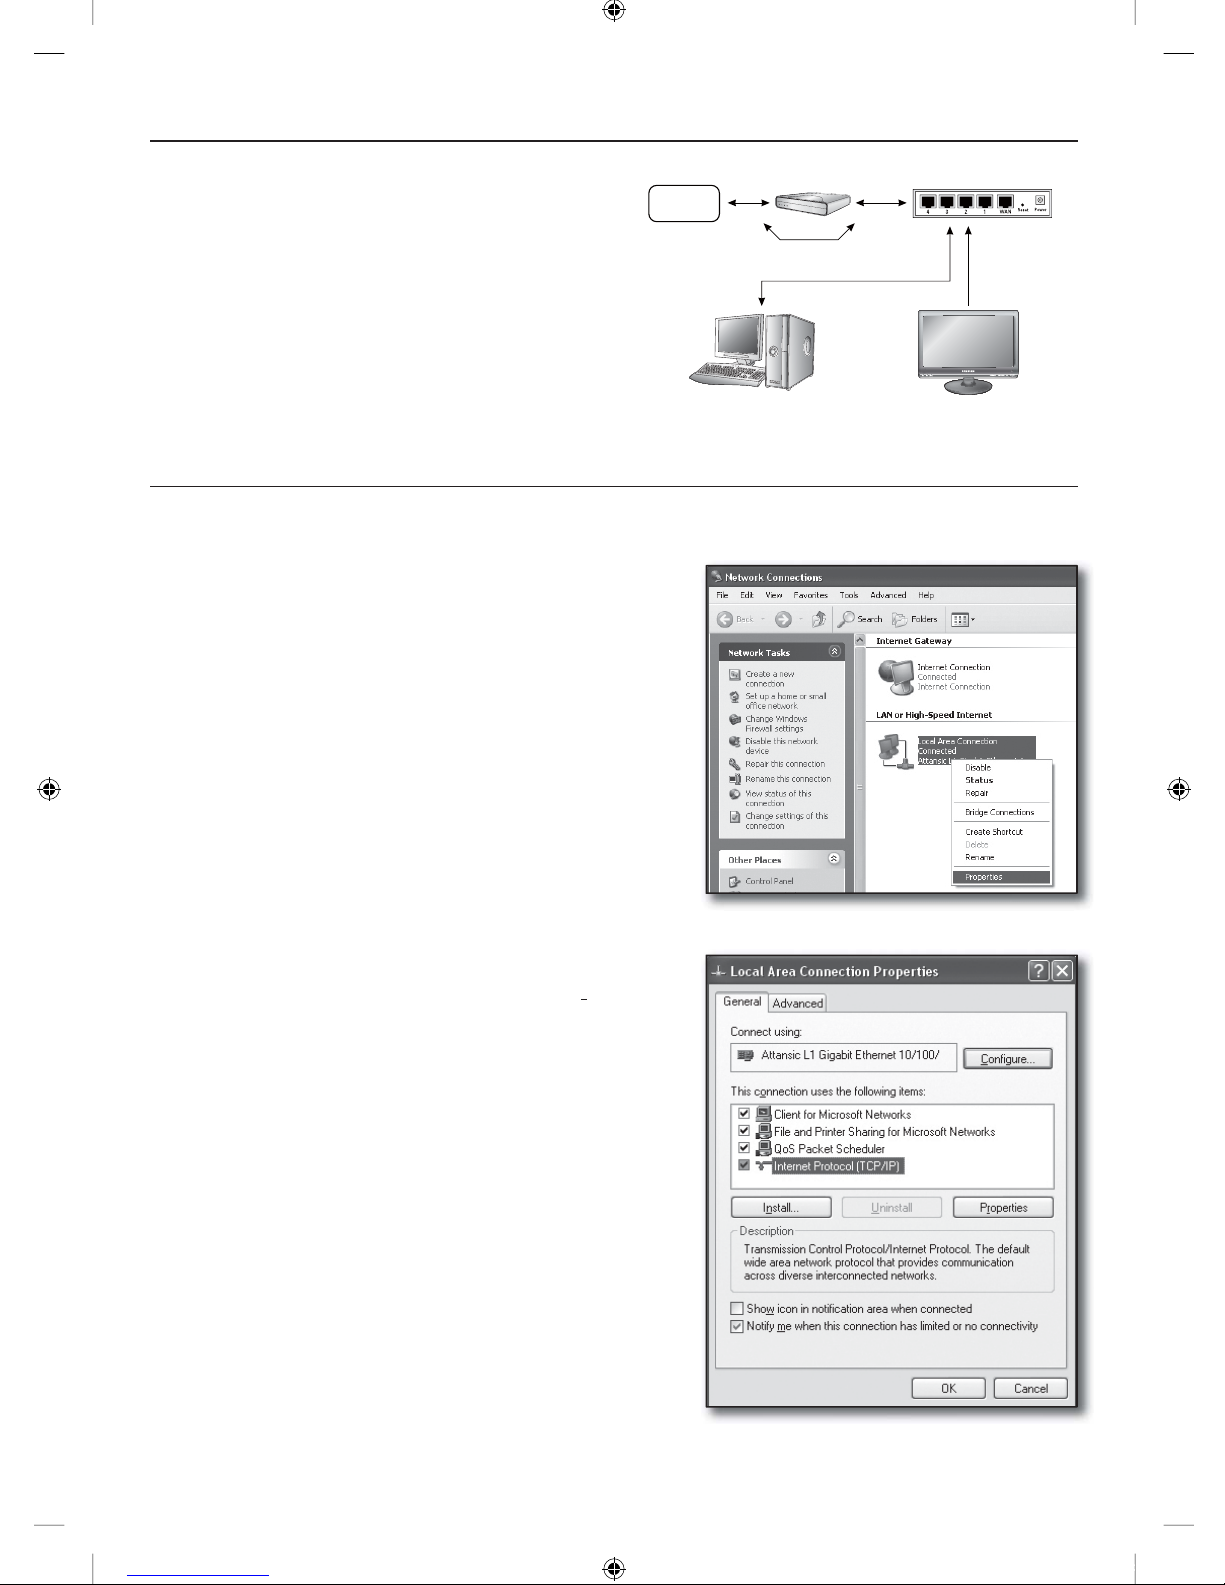
Step 1. Connecting Cables
Connect the internet service line (xDSL/Cable Modem)
to your router’s Internet (WAN) port.
Connect Ethernet cables from your computer and
DVRs to the LAN (1 to 4) ports of the router.
Step 2. Connecting your local computer to the router
Step 2.1 Connection Setup
Click [Start] on your computer.
Open the <Control Panel>-<Network Connections>.
The “Network Connections” window appears.
Select <Local Area Connection> and right click on it.
Select <Properties>.
“Local Area Connection Properties” window appears.
Select <Internet Protocol (TCP/IP)> and click [Properties]
button.
1.
2.
1.
2.
3.
4.
5.
6.
IP Router
Cable/ADSL/VDSL
Direct LAN
(Dynamic/Static IP)
INTERNET
or
DDNS Server
(websamsung.net)
Local PC
DVR
]_W`XYW_WXhztlTYYYWyTxnTYGGGY YWXWTW_TW`GGG㝘䟸G[aW]aZ`
English-3
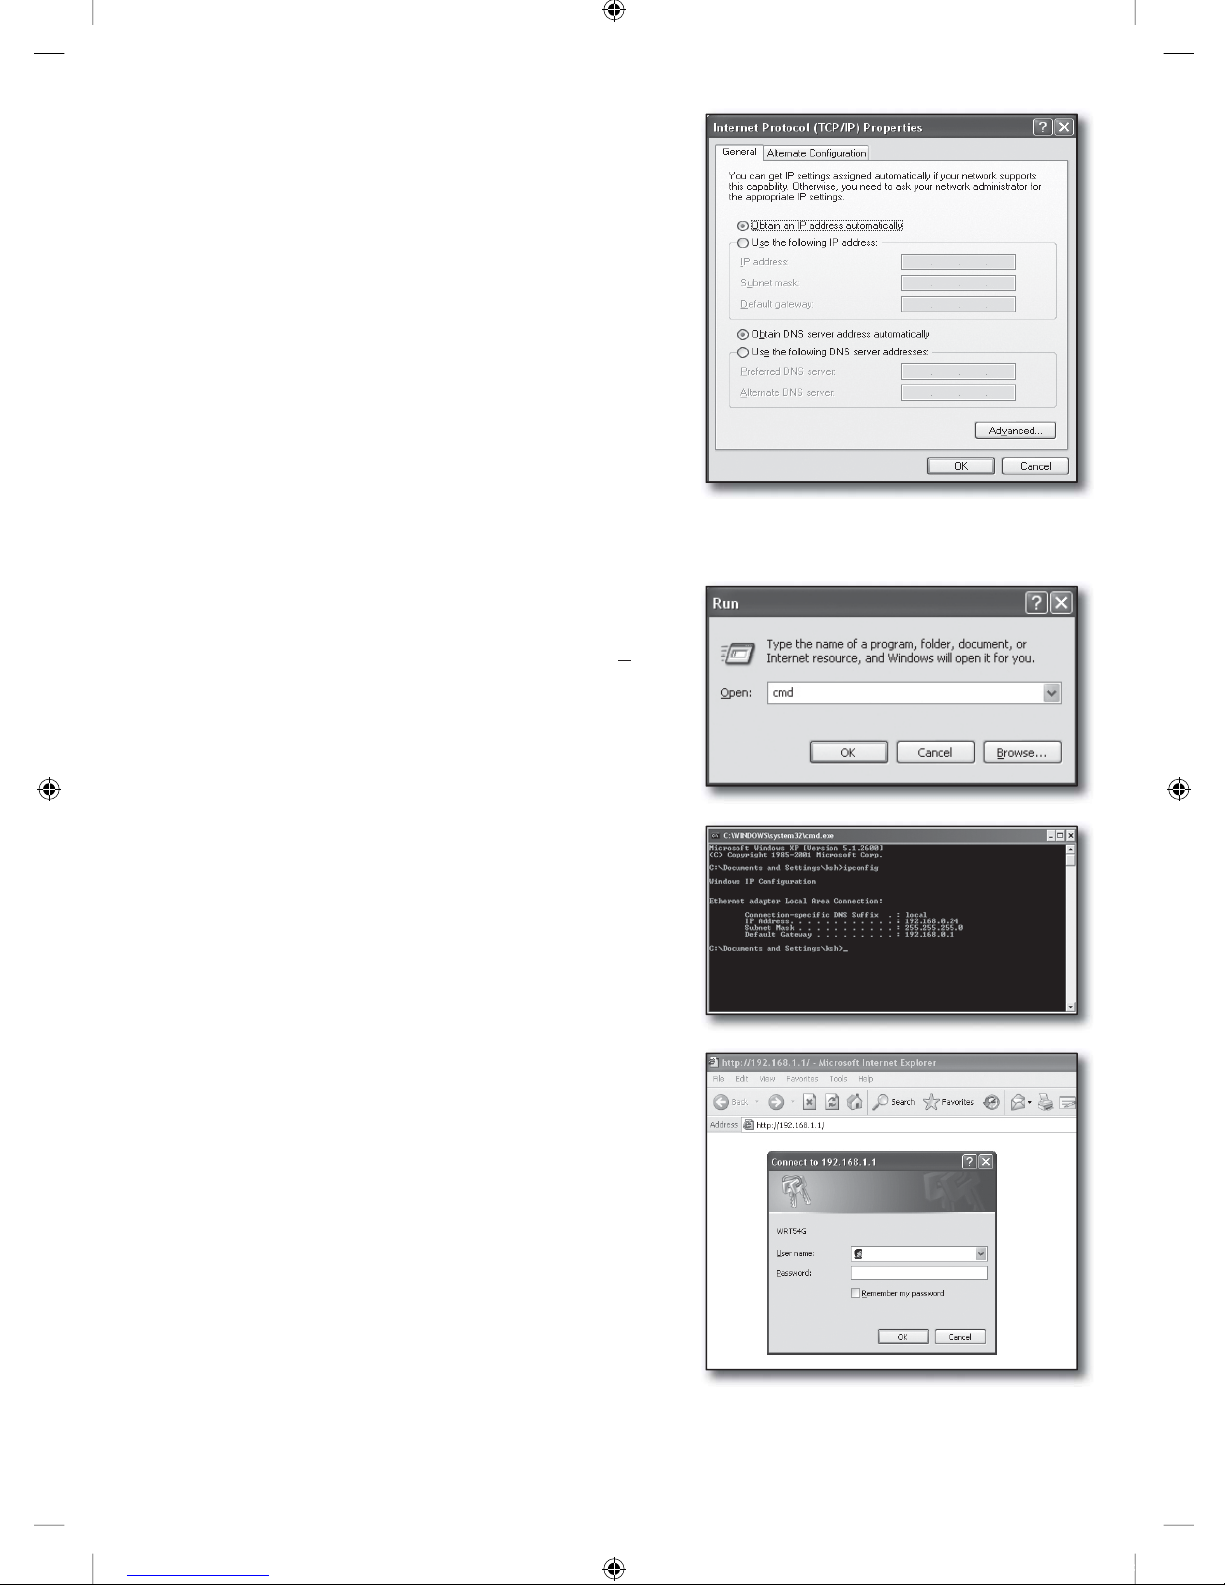
Select <Obtain an IP address automatically> and <Obtain
DNS server address automatically>, and click [OK] button.
Click [OK] button to finish the setup.
Step 2.2 Confirming the Connection
Click [Start] on your computer.
Click [Run…].
On the appeared command dialog, type ‘cmd’ in the <Open>
box and click [OK].
In the DOS command window [cmd.exe], type ‘ipconfig’ and
press [Enter].
Run the Internet Explorer, and enter the <Default Gateway>
IP address found from the “cmd.exe” window into the address
field, and press [Enter].
The router’s login page will appear if all connections are properly
established.
7.
8.
1.
2.
3.
4.
5.
6.
]_W`XYW_WXhztlTYYYWyTxnTZGGGZ YWXWTW_TW`GGG㝘䟸G[aW]a[W
English-4
If the connection does not establish, check all cable connections
and go to step 2.1 and select <Repair>.
On the “Local Area Connection Status” window, click
<Support> tab and check <Default Gateway> if matches to the
one found in the [cmd.exe], and check the connection again.
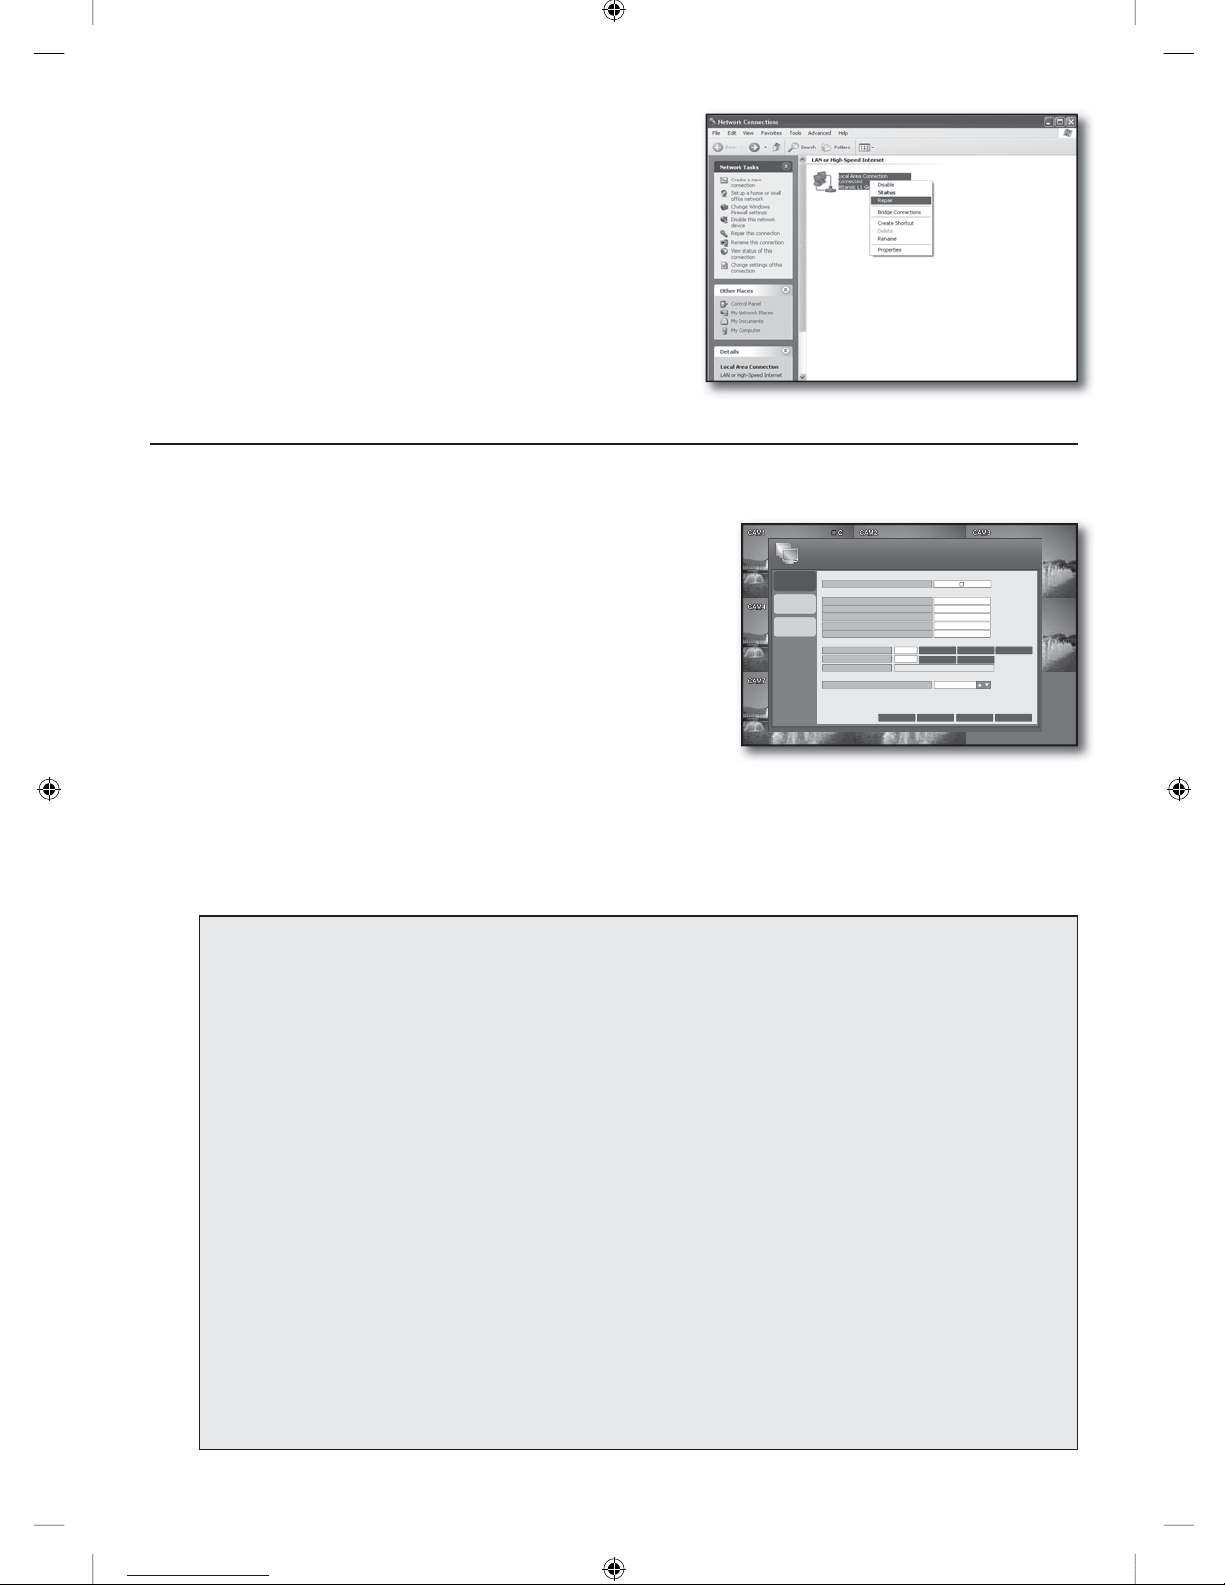
Step 3. Connecting DVR to the router
Step 3.1 Configuring DVR router setup
Press [MENU] button and select <SYSTEM SETUP> when setup
menu appears.
When the login window appears, enter the Password (Default: 4321)
and press the [ENTER] button.
In system setup menu, select <NETWORK> icon and press the
[ENTER] button.
Use direction buttons (▲▼◄►) to move to a desired item.
Enter the <IP ADDRESS>.
The IP address consists of 4 fields, and the first 3 fields should be
same to those of <Default Gateway> address of your computer
which can be found in Step 2, and the last field should be unoccupied number (between 2 and 254).
ex) IP ADDRESS : 192.168.1.200
Enter the <GATEWAY> and <SUBNET MASK> as same to those of your computer found in Step 2.
Set the <RTSP SERVICE PORT> and <WEB SERVER PORT>.
Set the RTSP Service Port and Web Server Port by referring to the below.
What is port?
As usual, the <WEB SERVER PORT> uses port 80.
If the port is not setted, it is atomatically regarded to 80 in http protocol.
For example, http://www.yahoo.com and http://www.yahoo.com:80 are regarded the same.
Hence, if the <WEB SERVER PORT> has been changed other than 80, you need to specify the address as:
http://<IP ADDRESS>:<WEB SERVER PORT>
ex) http://192.168.1.200:8080 to connect to the DVR using internet browser.
(Only when the port is set to 80, you can omit the port in the address.)
It is recommended to set <WEB SERVER PORT> to port number between 1024 and 65535.
If the port is not set to 80, accessing can be restricted depending on your service provider’s security policy or
firewall configuration.
DVR uses <WEB SERVER PORT> and <RTSP SERVICE PORT> for web connections.
<WEB SERVER PORT> is used for accessing DVR by using an internet browser.
<RTSP SERVICE PORT> is used for receiving video from DVR to internet browser.
When configuring multiple DVR, <WEB SERVER PORT> and <RTSP SERVICE PORT> settings should be configured
differently for each device.
ex) DVR #1 RTSP SERVICE PORT : 554, WEB SERVER PORT : 8080
DVR #2 RTSP SERVICE PORT : 50000, WEB SERVER PORT : 2000
J
7.
1.
2.
3.
4.
5.
6.
7.
CANCEL
APPLY CLOSE
NETWORK
DHCP
HELP
AUTO PORT
IP ADDRESS
GATEWAY
SUBNET MASK
1st DNS SERVER
2nd DNS SERVER
RTSP SERVICE PORT
DDNS HOST NAME
MAX TX SPEED
192.168.1.200
192.168.1.1
255.255.255.0
168.126.63.1
168.126.63.2
8192 KBYTE
554
8080
DELETE PORT
PORT TEST
AUTO PORT
DELETE PORT
WEB SERVER PORT
IP SETUP
DDNS
E-MAIL
http://ff00000 .websamsung.net:8080
]_W`XYW_WXhztlTYYYWyTxnT[GGG[ YWXWTW_TW`GGG㝘䟸G[aW]a[W
English-5
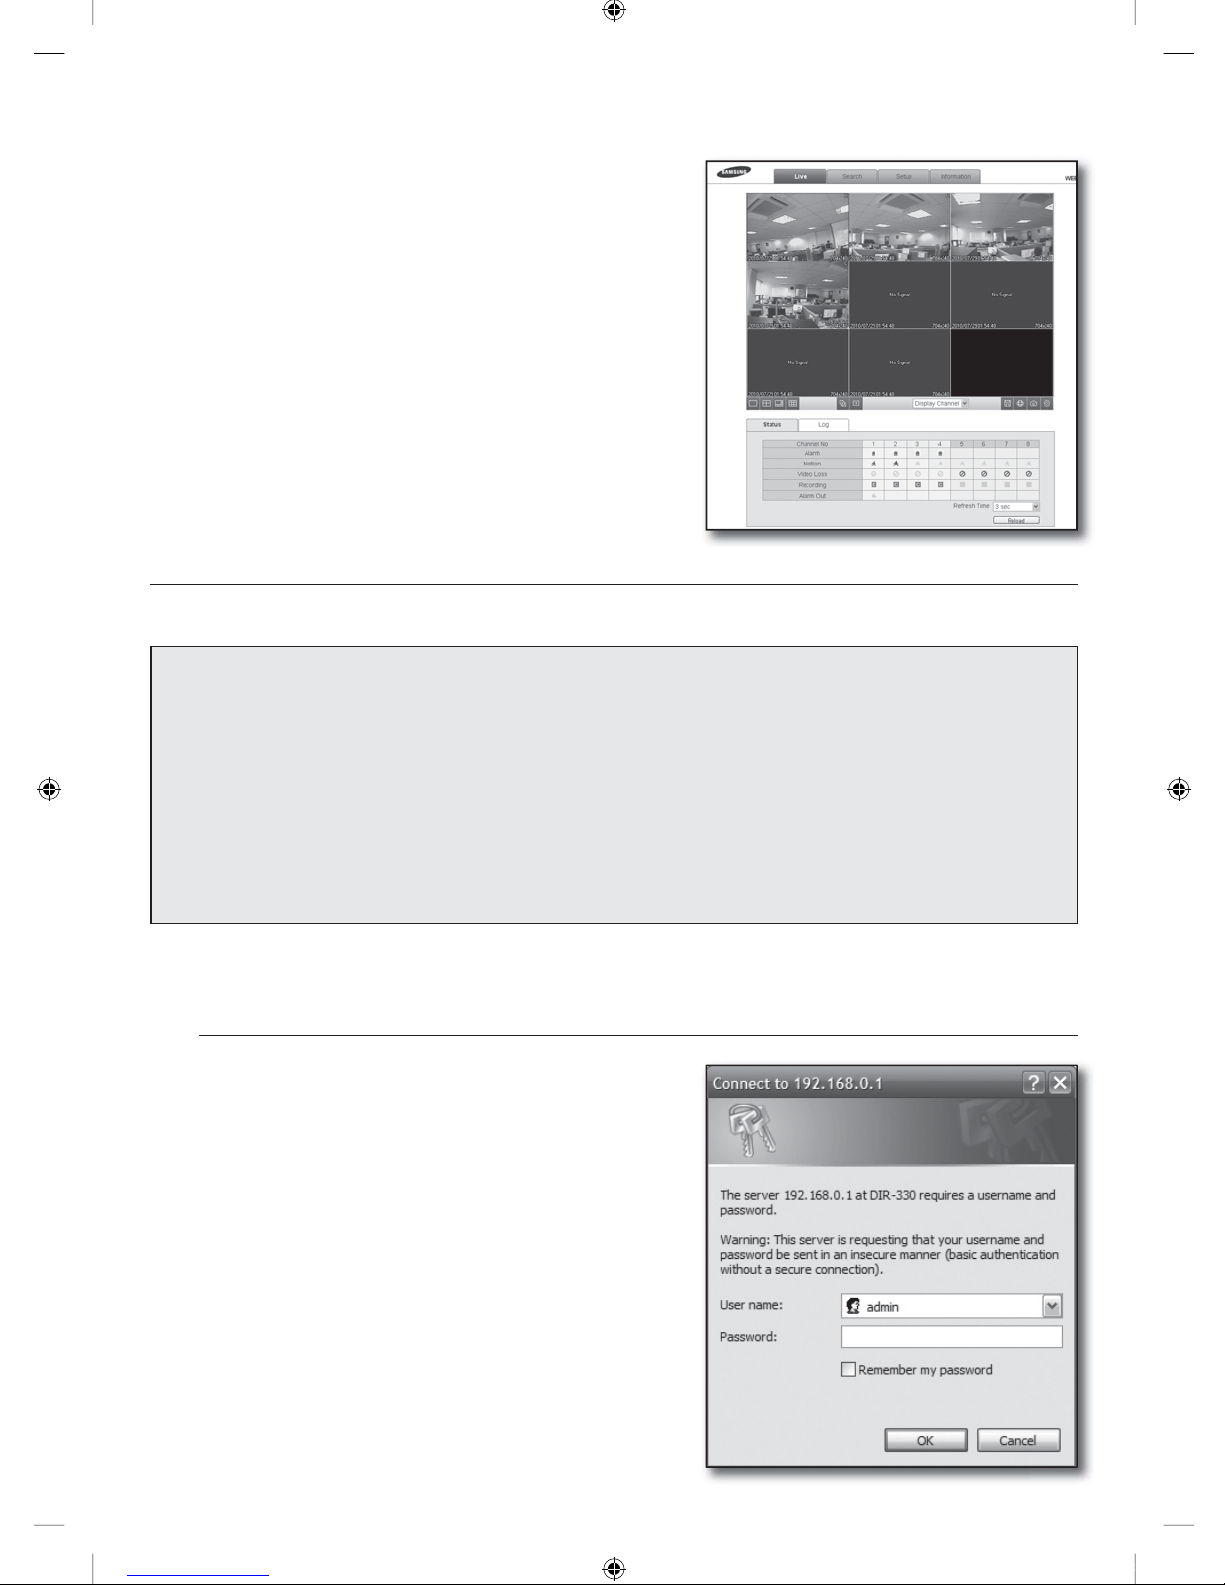
Step 3.2 Checking DVR connection on your computer
Run the Internet Explorer, and enter the <IP ADDRESS> and
<WEB SERVER PORT> of the DVR into the address, and press
[Enter].
ex) http://192.168.1.200:8080
If the connection establishes properly, the Web Viewer screen
appears.
If the connection fails, check Steps 1, 2 and 3 to confirm the
connection setup.
Step 4. Connecting the router to the internet service line
Internet connection setup method and steps may differ from routers, check your router’s setup method.
Connection types according to your internet service
Setting the internet connection may differ from internet service types, check your environment before proceeding and
select the appropriate connection type.
DHCP: Dynamic IP environment which allocates IP address automatically.
Static (PUBLIC, FIXED) IP: Bigger organizations and companies usually construct their own IP network environments
using public IP addresses.
PPPoE: Common in DSL environments, which requires ADSL access ID and password.
Ask your internet service provider for the user ID and password.
Name of each type described above may differ from router manufacturers.
•
•
•
Step 4.1 Connection guide by routers
Step 4.1-Case 1. D-LINK DIR-330
Run the Internet Explorer and enter the <Default Gateway>
found in Step 2 into the address field and press [Enter].
When the router login screen appears, enter the <User name>
and <Password>.
Refer to the router user manual for ID and password.
1.
2.
3.
1.
2.
]_W`XYW_WXhztlTYYYWyTxnT\GGG\ YWXWTW_TW`GGG㝘䟸G[aW]a[X
English-6
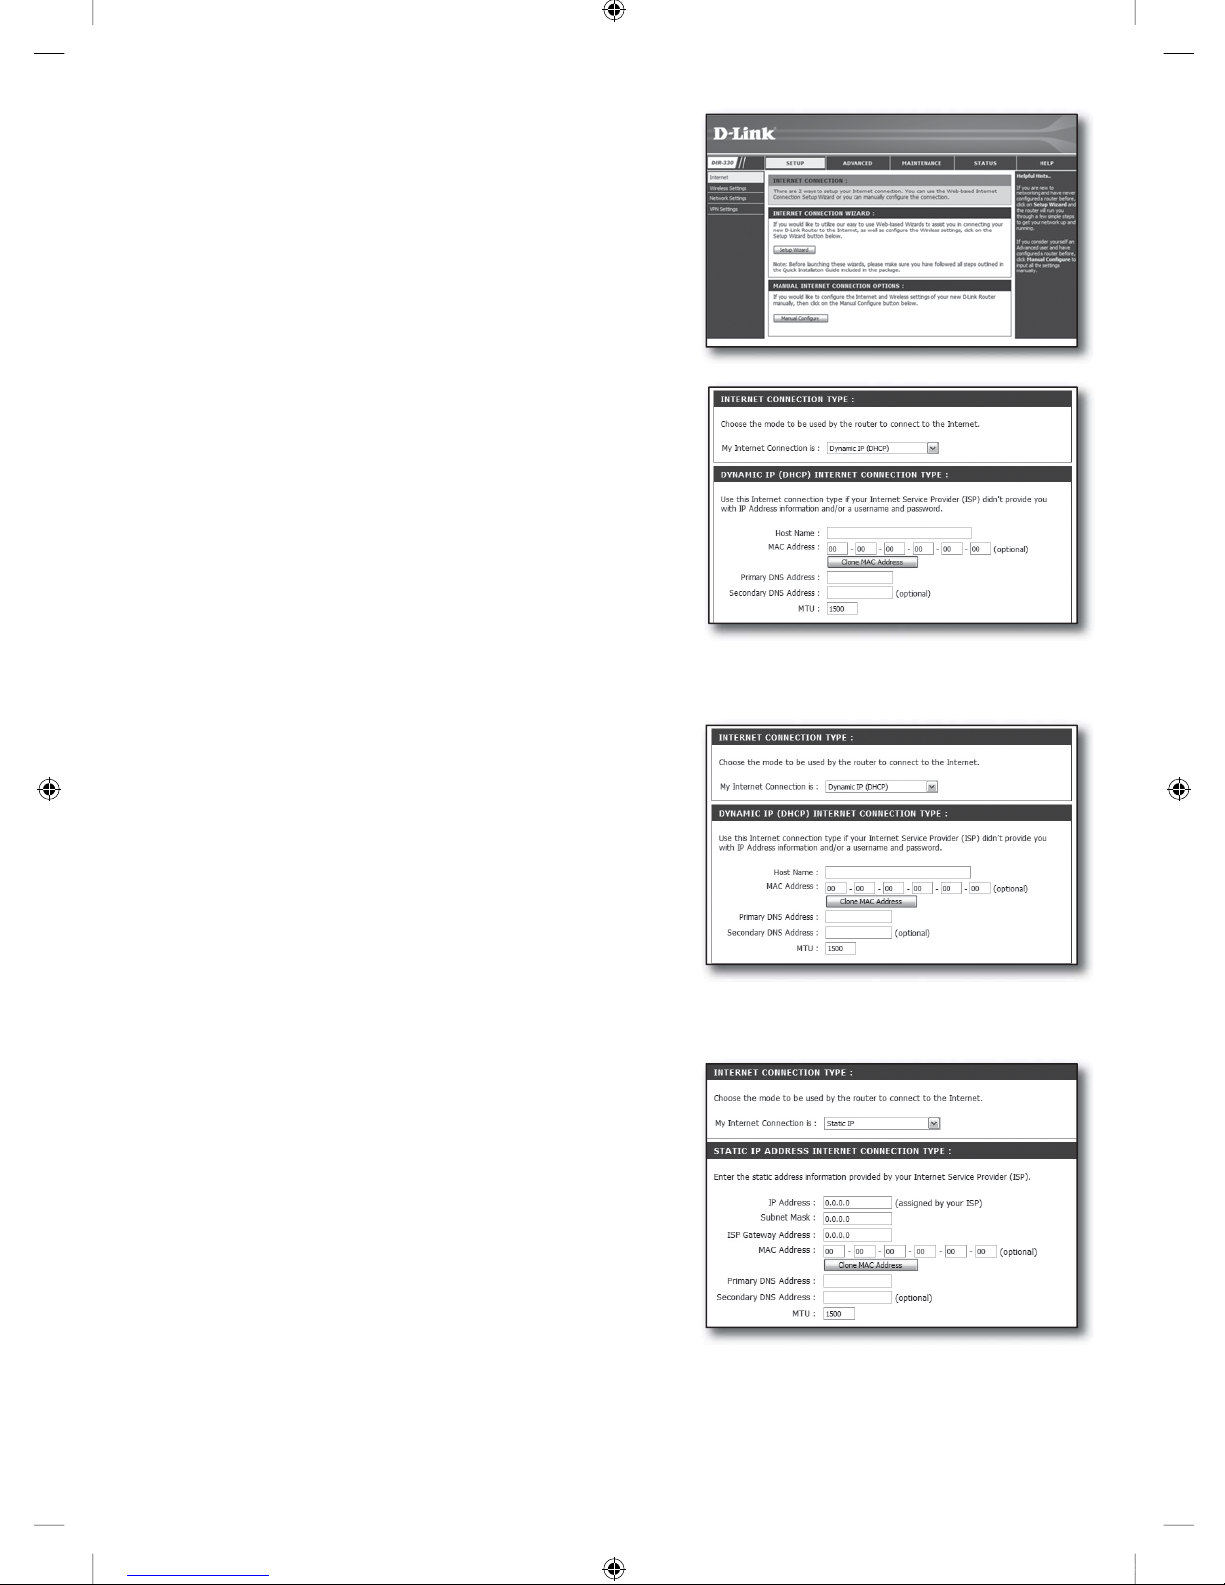
Select internet connection method from connection setup wizard
and manual setup.
Selecting the Internet Connection Setup Wizard automatically
moves to the next step.
For manual setups, click <Manual Configure>.
Select your <Internet Connection Type>.
Dynamic IP Address Environment
Select <Dynamic IP (DHCP)>.
Click [Save Settings] button.
Static IP Address Environment
Select <Static IP>.
Enter the <IP Address>, <Subnet Mask>, and <ISP Gateway
Address> assigned by your ISP.
Click [Save Settings] button.
3.
4.
5.
6.
7.
6.
7.
8.
]_W`XYW_WXhztlTYYYWyTxnT]GGG] YWXWTW_TW`GGG㝘䟸G[aW]a[X
 Loading...