

Samsung SMARTCAMERA WB150, SMARTCAMERA WB150F, SMARTCAMERA WB152, SMARTCAMERA WB151, SMARTCAMERA WB151F User Manual
...
SamsungSMARTCAMERA
UAI_
WB150/WB150F/WB151/WB152/WB152F
Ttiis tis®r manual iT_clude,sd®taiJedusage
instructions for }/our O8['[/@1"F_ J')I@F;/S@..!@8([I
tiqis manual tho_oughlx/
Click a topic
ViewingphotosorvideosinPlaybackmode
Learn how to play back photos or videos and how to manage files.
Starting Playback mode
View photos or play videos stored in your camera.
Press [Ell.
• The most recent filewill be displayed.
• ifthe camera is off, it will turn on and displaythe most recent
file.
Press [_J@] to scroll through fibs
• Pressandhold[_/_,._]to scrollthroughfilesquickly.
" t } )u want to view f es stored n the n_erTlalmemory, remove yc
memory care
• }urea notDeaD_etoeatsrpJa} backflesthatwereca,tureaw_r
o_nercameras aue to uneuoDortea s£e8 _ge sze, e_c :c lees
use a cornsu_eror anotner aev ce to eal_c play eack these fies,
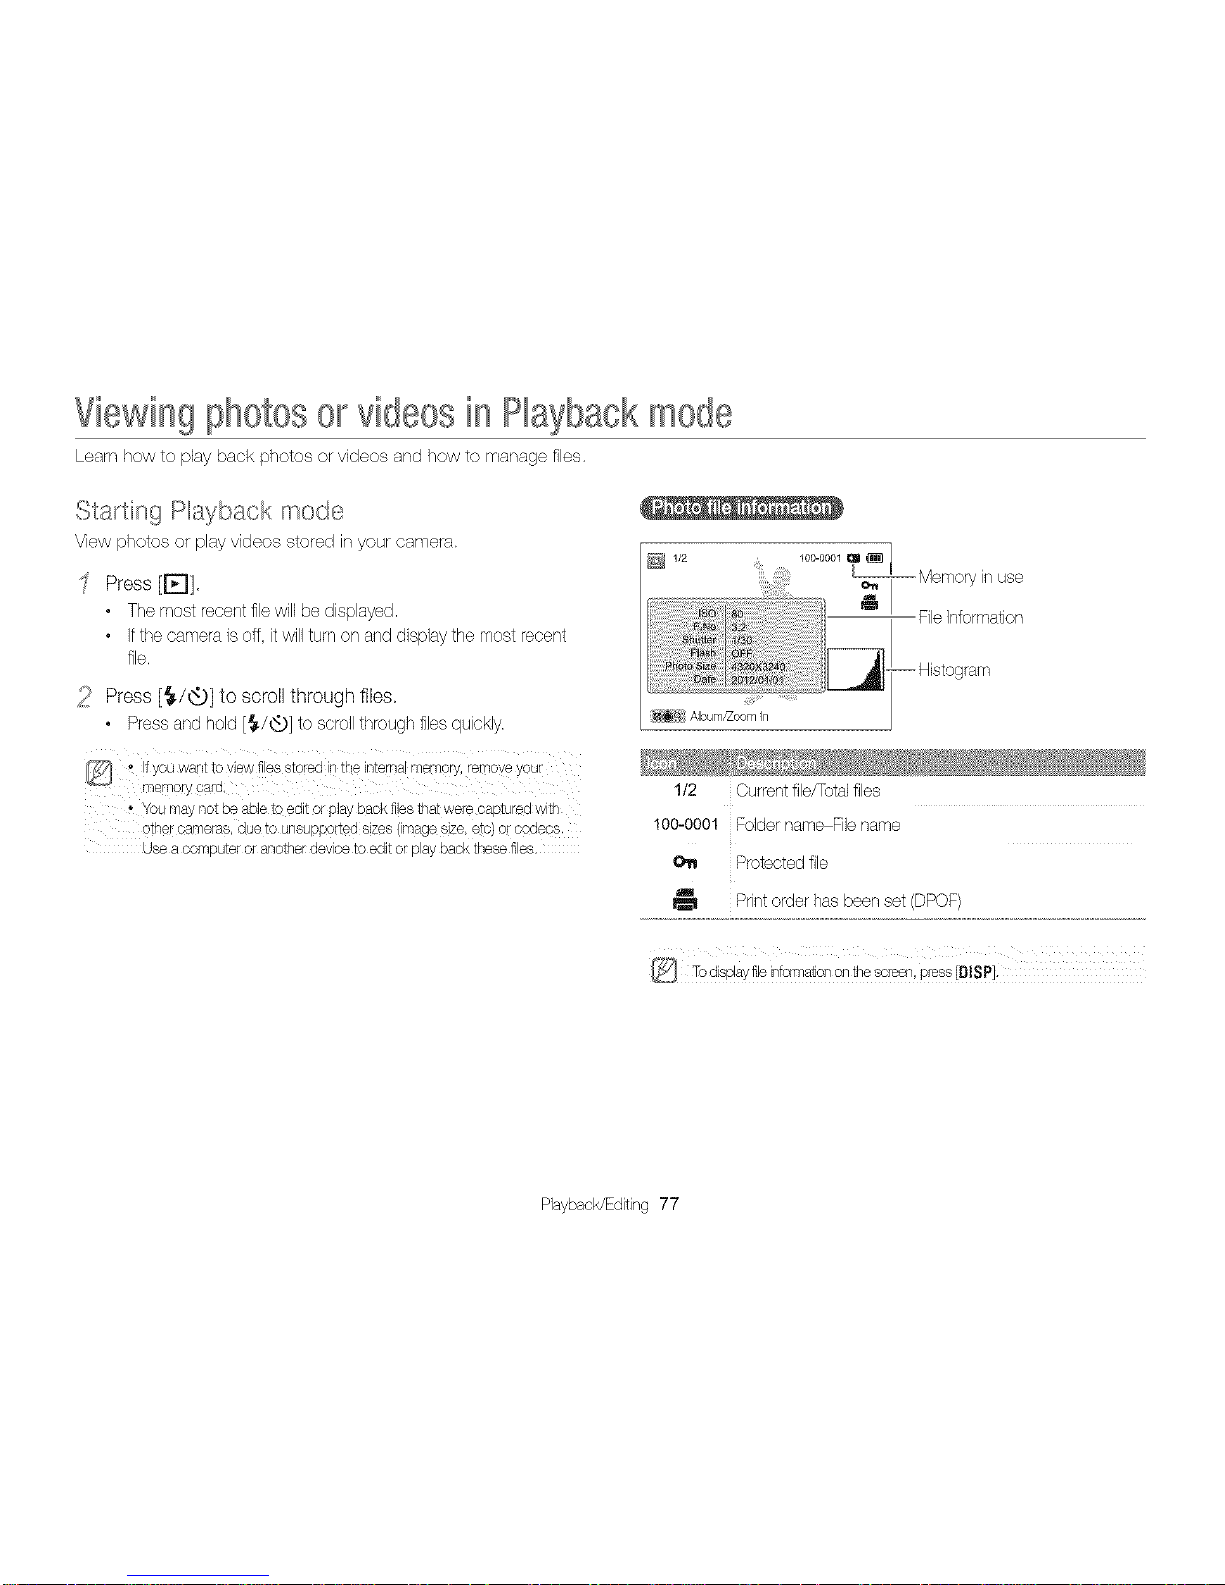
al_ Memory in use
@
1/2 1o0-oool
1/2 Current file/Totalfiles
100-0001 Folder name File name
Protected file
I_ Print order has been set (DPOF)
Playback/Editing77
{ { { {:{ }
File information
You can rank your favodte faces, The favorite face feature is
available only when you insert a rnernory card into the camera,
' In Playback mode, press [MENU],
Select Face List,
1/2 Current file/Totalfiles
100-0002 Foldername Fibname
00:00 Current playback time
00:20 Video length
Protected file
{J_Press [MENU],
_:SSelect Edit Ranking,
{!} Select a face, and then press [OK].
(!_ Press [_./xt_)]to change the ranking of the face, and then
press [_].
PlaybacWEditing78

{ { { {:{ }
You car/delete pur favorite faces. The favorite face teature is
available only when you insert a memory card into the camera.
In Playback mode, press [MENU],
_ii} Select Face List,
{_ Press [MENU]
_S SeJect Cancel My Star
_!; SeJect a face, and then press [OK],
_i_ Press [_1,
/ When the pop-up message appears, seled Yes.
Viewfilesby category,suchasdate. face,or filetype.
in Playback mode, rotate [Zoom] to the left.
2 Press [MENU],
_ Select Filter _a category,
_L All: Viewfiles normally.
Date: View files by the date they were saved,
Face List: View files by recognized faces and favorite
faces. (Upto 20 people)
File Type: View files by the file type,
PlaybacWEditing79
{ ( { {:{ )
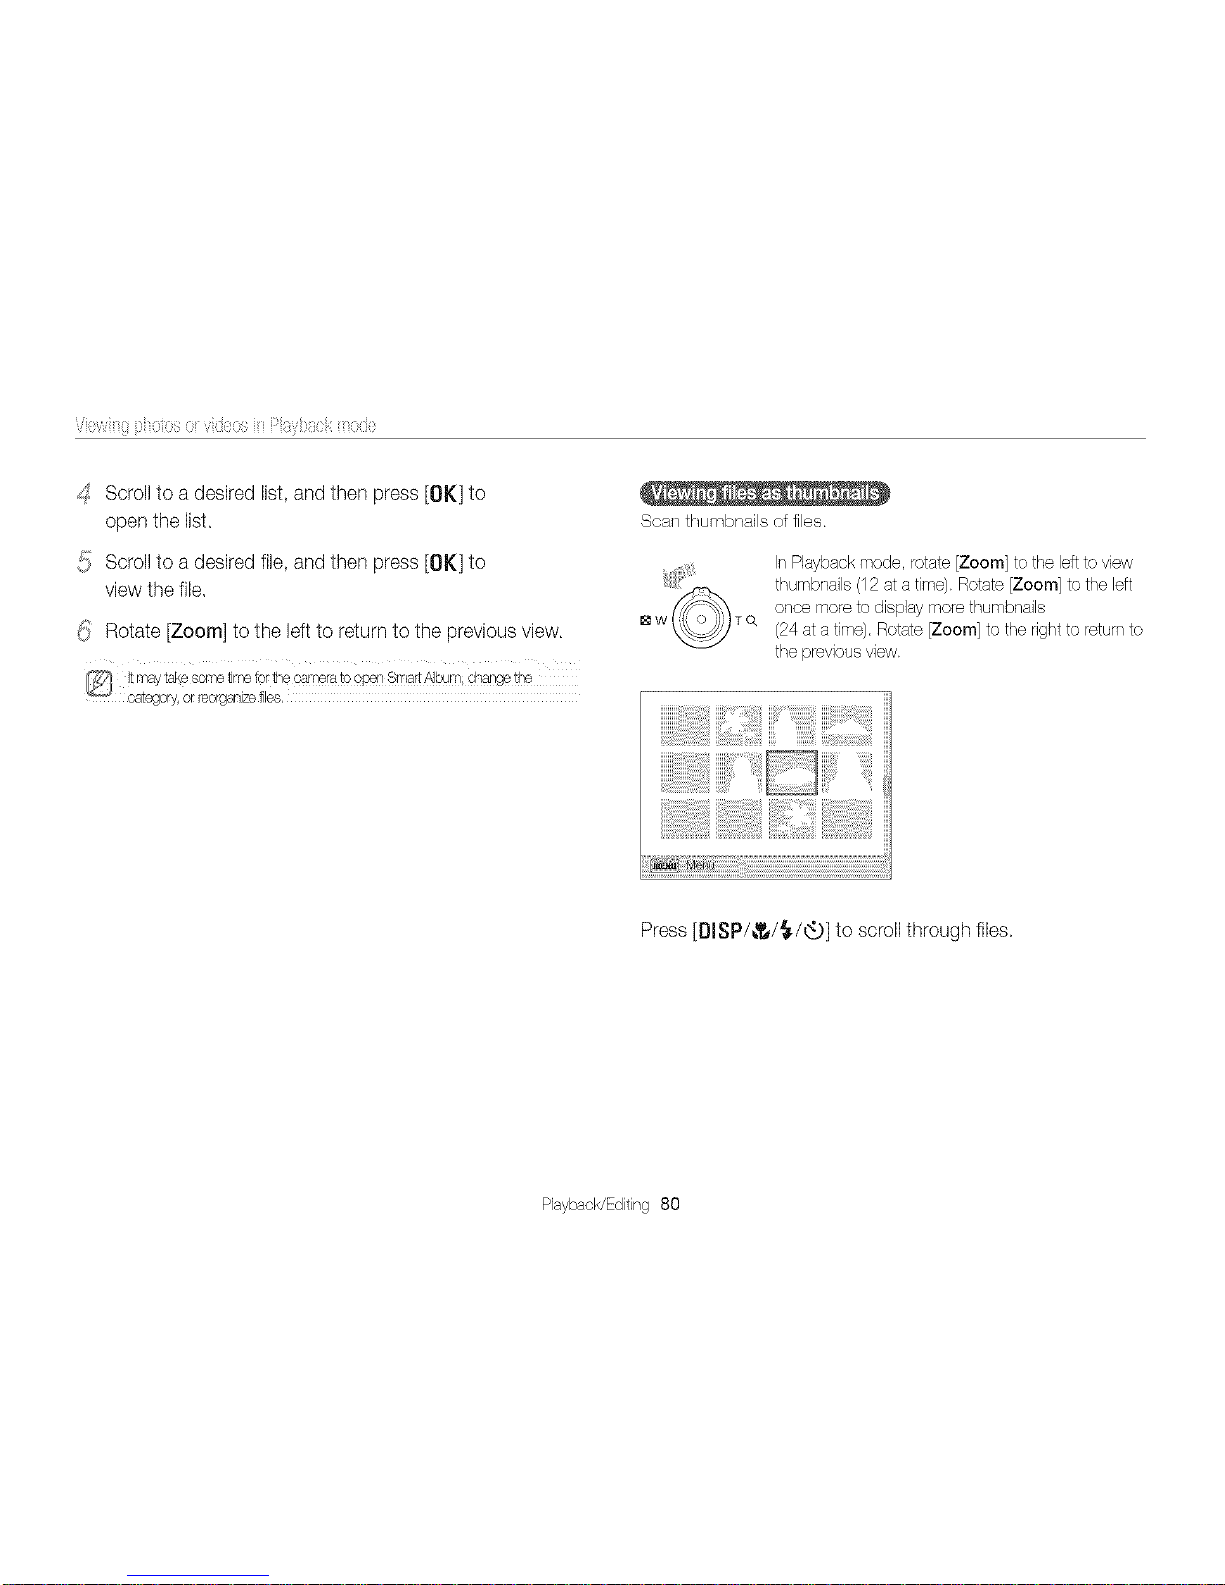
4 Scroll to a desired list, and then press [OK] to
open the list,
::; Scroll to a desired file, and then press [OK] to
_J
view the file.
_ Rotate [Zoom] to the left to return to the previous view.
Scan thumbnails of files.
In Playbackmode, rotate [Zoom] to the lett to view
thumbnails (12 at a time). Rotate [Zoom] to the left
once more to display more thumbnails
(24 ata time), Rotate[Zoom] to the nght to return to
the previous view.
_!,!,_!!!!!i!ii!iiii!iiiiiiiiiiiiiiiiiiiiiiilii!i!i!ii_>_i!!!_i_i!i_!_I_I_I_'_,_i_!i_ili!il
iiiiiii!i_ii!iiiii!ii!ii!ii!iii!i!iiiiiiiiii!iiiii!iiii!i!i!i!i!i!ii!i_!iiiiiii!i_ii!iiiii!ii!ii!ii!iii!i!iiiiiiiiii!iiiiii!iiiiii!!!iiii_iiiiiii!ii_ii!!i!!_!i!i!i!i!i_iiiiiiiiiiiiiiiiiiiiiii!iii!ii!i!iliiiiiii!i_ii!iiiii!ii!ii!ii!iii!i!iiiiiiiiii!iiiii!iiii!i!i!i!i!i!ii!i_!
ill¸ iii_!_i!!!!!!!!!i!!iii!!!!!!!!!!!!i_i_i_i_i_i_i_i_i_i_i_i_i_i_i_i_i_i_i_i_i_i_i_i_i_i_i_i_i_
Press [BISP/_/_./@] to scroll through files
PlaybacWEditing 80
{ { { {;{ }
Protect your files from acddental deletion.
InPlayback mode, press [MENU],
_' SelectProtect _On.
Youcannot debte orrotatea proteot÷Jfie:
Select files to delete in Playback mode.
Deleting a single file
You can select one file, and then delete it.
' in Playback mode, select afile, and then press [_].
When the pop-up message appears, select Yes,
Youca-, alsodeletefiles inPlaybackmode by pressirq [MENU], aid fl-_en
selectingDelete 7_Delete 7_Yes,
PlaybacWEditing 81
Vlw:{ p :q::s::' {:{qsy:ack
Deleting multiple files
You can select multiple files, and then delete them at once.
' In Playback mode, press [_].
• When inthumbnails view, press [MENU], select
Delete _ Select, and then skip to step 3, or press [_'],
select Select, and then skip to step 3.
_ii!'When the pop-up message appears, select Multiple
Delete.
{_ Scroll to each file you want to delete, and then
press [OK],
• Press[OK]againtocancelyourselection.
4 Press [_],
{!} When the pop-up message appears, seled Yes.
Deleting all fibs
You can select allfiles, and then delete them at once.
In Playback mode, press [MERU],
• When inthumbnaib view, press [MENU],select
Delete , Delete All, and then skip to step 3, or press [_'],
select Delete All, and then skip to step 3.
_ii_ Select Delete _Delete All,
{_ When the pop-up message appears, select Yes.
• Allunprotected filesare deleted.
Copy files from the internal memory to a memory card.
InPlayback mode, press [MERU],
_ii!'Select Copy to Card
Playback/Editing 82
{ { { {:{ }
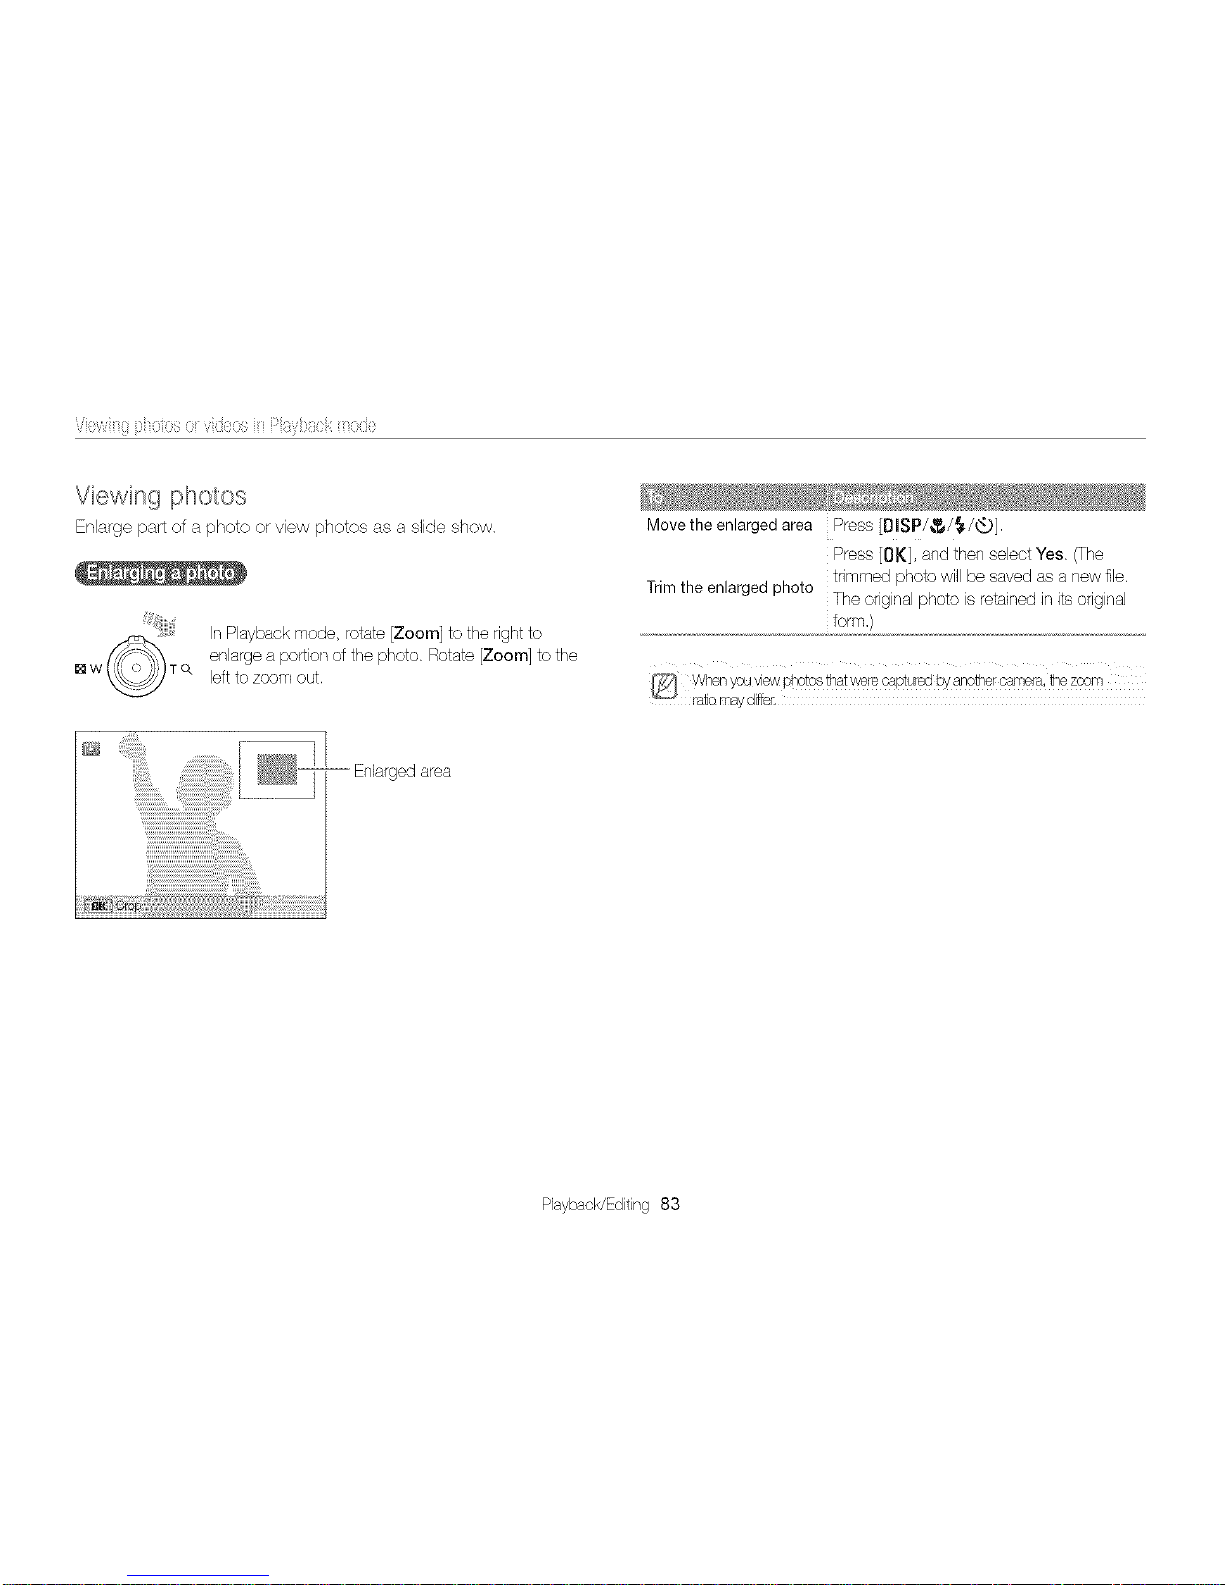
Viewing photos
Enlarge part of a photo or view photos as a slide show.
[]w
InPlayback mode, rotate [Zoom] to the right to
enlargea portion of the photo. Rotate [Zoom] to the
leftto zoom out.
' ' _@ 5s "..... '
Move the enlarged area Press [DISP/_/{/_t_],
Press [OK], and then select Yes. (The
Trimthe enlargedphoto trimmed photo will besaved as a newfile.
The original photo is retainedin its original
form,)
Enlargedarea
PlaybacWEditing 83
{ { { {:{ }
View photos captured in Live Panorarna rhode,
InPlayback mode, press [_./_t_p]to scroll to a desired
panoramic photo.
• Theentirepanoramicphotoappearsonthe screen.
2 Press [OK]
• The camera automatically scrolls through the photo from left to
right tot a honzontalpanoramic photo and from top to bottom
tot a vertical panoramic photo. The camera then switches to
Playback mode.
• While playing back a panoramic photo, press [OK] to pause
or resume.
• Atteryou have paused the playback of a panoramic photo,
press [BISP/_/_/@] to move tile photo horizontallyor
vertically,depending on the direction you moved when
capturing the photo.
{_i_Press [_] to return to Playback mode,
Apply effects and audio to a slide show of your photos. The slide
show function does not work for videos,
InPlayback mode, press [MENU].
_ii_ Select Slide Show Options
{_ Select a slide show effect option.
• Skiptostep4to startaslideshowwithnoeftects,
* Default
Setwhether or not to repeatthe slide show,
Play Mode (One Play*, Repeat)
• Set the intervalbetween photos.
Interval (1sec*, 3 sec, 5 sec, 10 sec)
° You mustset the Effectoption to Off to set the
interval.
Music
Effect
• Set ascene change effectbetween photos,
(Off, Calm*, Shine, Relax, Lively, Sweet)
• Select Off to cancel effects.
• When you use the Effect option, the interval
between photos will be set to 1second,
PlaybacWEditing 84

{ { { {:{ }
4 Press [_].
_!_Select Start Slide Show.
_!_View the slide show.
• Press[OK]to pausetheslideshow.
• Press[OK]againtoresumetheslideshow.
Playing a video
ItsPlayback mode you can view a video, and then capture or trim
parts of the playing video. You can save the captured or trimmed
segments as new files.
in Playback mode, select a video, andthen press [OK].
View the video.
, Rotate [Zoom] to the left or right to adjust the volume level,
Scan backward
Pause or resume
playback
Scan forward
Adjust the volume level
Press [_]. Each time you press [_],
you change the scan speed inthis
order: 2X, 4X, 8X.
Press [OK].
Press [6.)]. Each time you press [@],
you change the scan speed inthis
order: 2X, 4X, 8X.
Rotate [Zoom] to the left or right.
PlaybacWEditing 85
{ ( { {:{ )
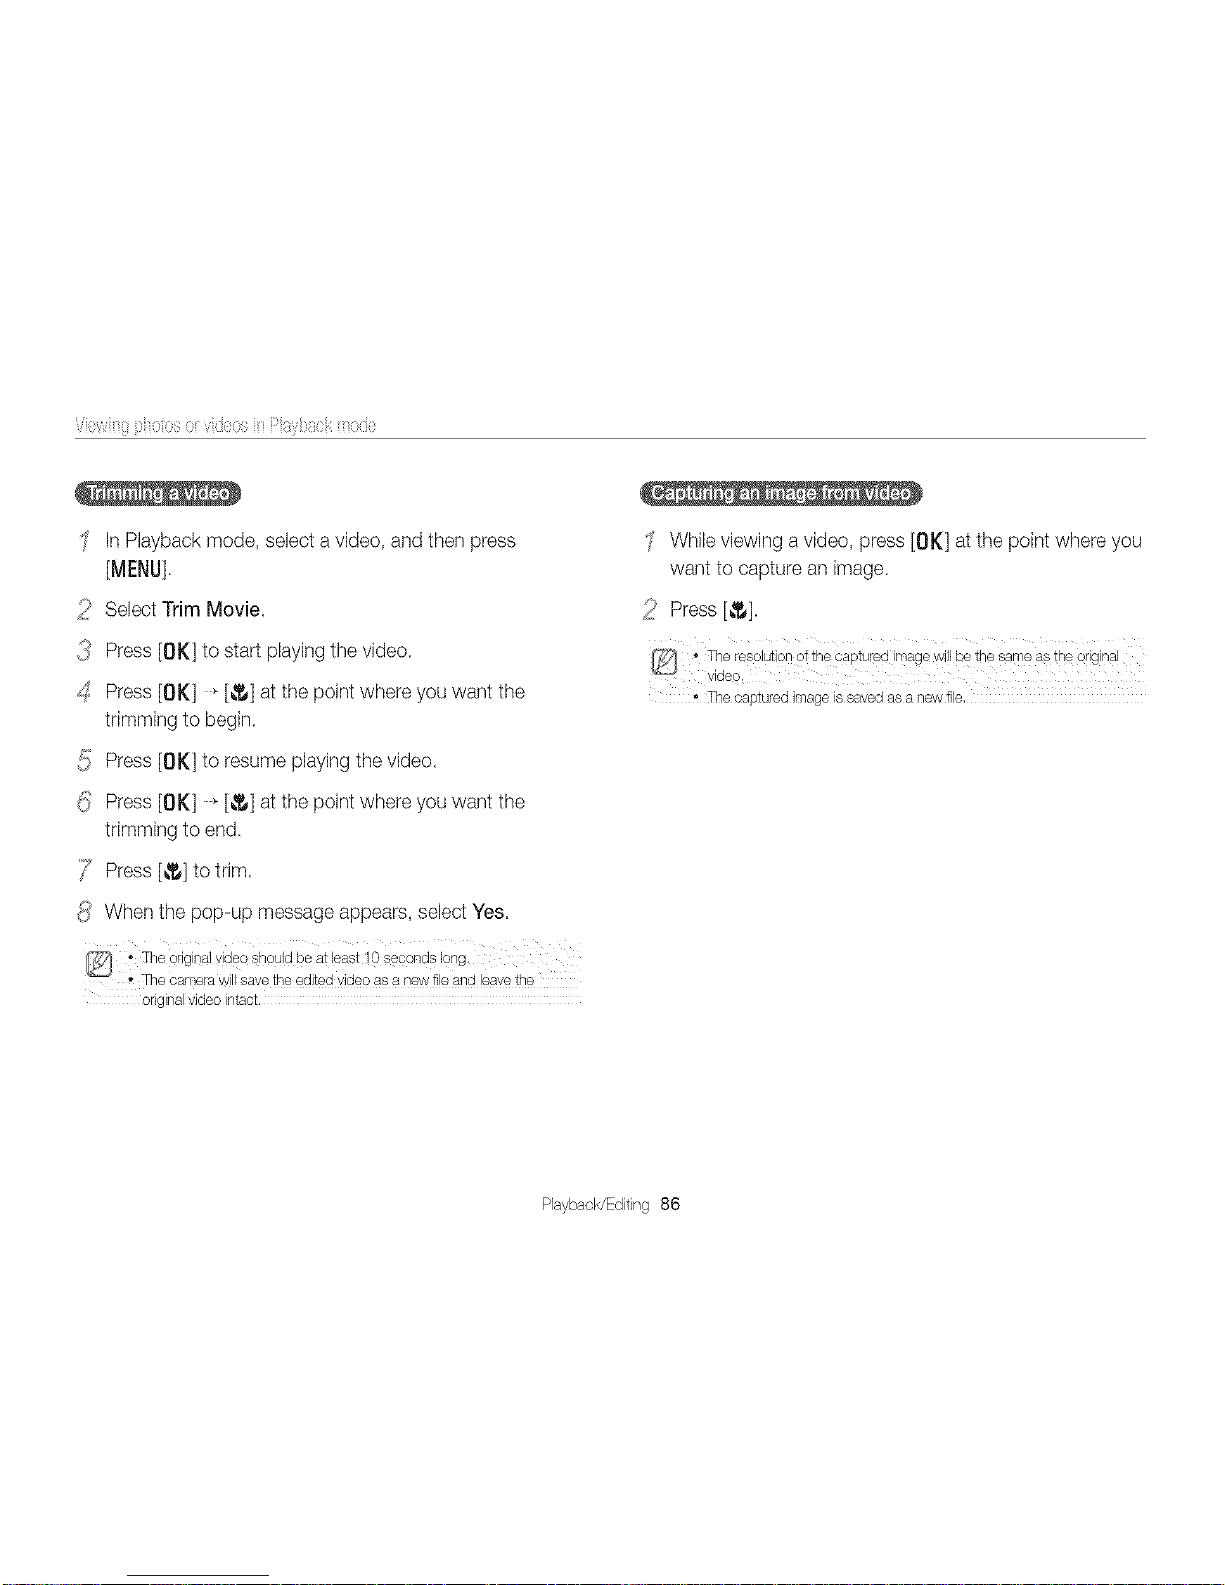
InPlayback mode, select a video, and then press
[MENU].
_ii_ Select Trim Movie,
_ Press [OK] to start playing the video
_:SPress [OK] _[_] at the point where you want the
trimming to begin.
_!_Press [OK] to resume playing the video.
_!_Press [OK] _[_] at the point where you want the
trimming to end.
/ Press [_] to trim.
4!i:When the pop-up message appears, select Yes.
" The original video shouU be at least !0 seconds long,
* The Camerawill save the edited Video as a new file and leave the
o%inal video intact,
' While viewing a video, press [OK] at the point where you
want to capture an image.
Press [_].
* The captured image is saved as a new file,
PlaybacWEditing 86
Editingaphoto
Learnhowto edit photos,
a lower resdution,
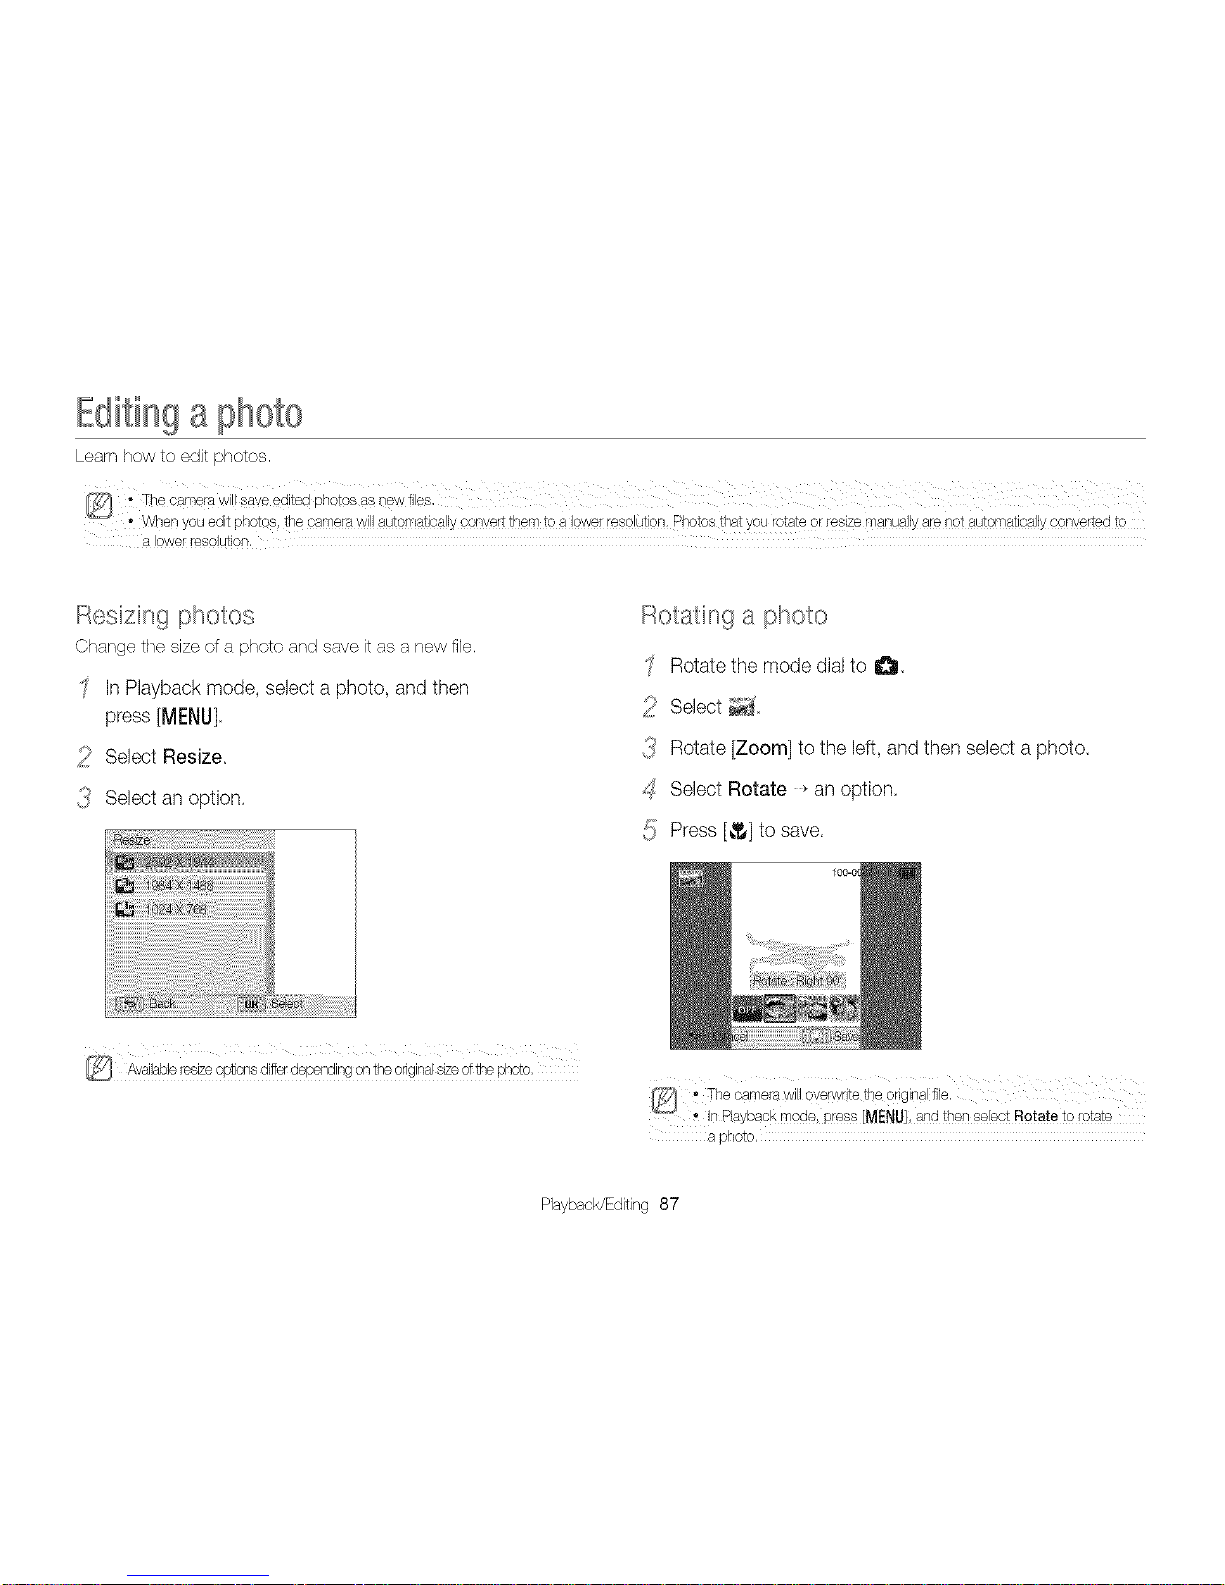
Resizing photos
Changethe sizeofa photo and saveitasa newfile.
InPlayback mode, select a photo, and then
press [MENU]
_ii_ Select Resize
{_ Select an option.
Rotating a photo
Rotatethe mode dialto 0.
_ii_ Select
{_ Rotate [Zoom] to the left, and then select a photo.
_:SSelect Rotate _an option
5 Press [_] to save
Q Ava!abl_resizeop!on8 d!fferd_pending or! theoqginaJ8_z__f lf_ephoto:
a photo,
Playback/Editing87
iiidiiin{isphoto
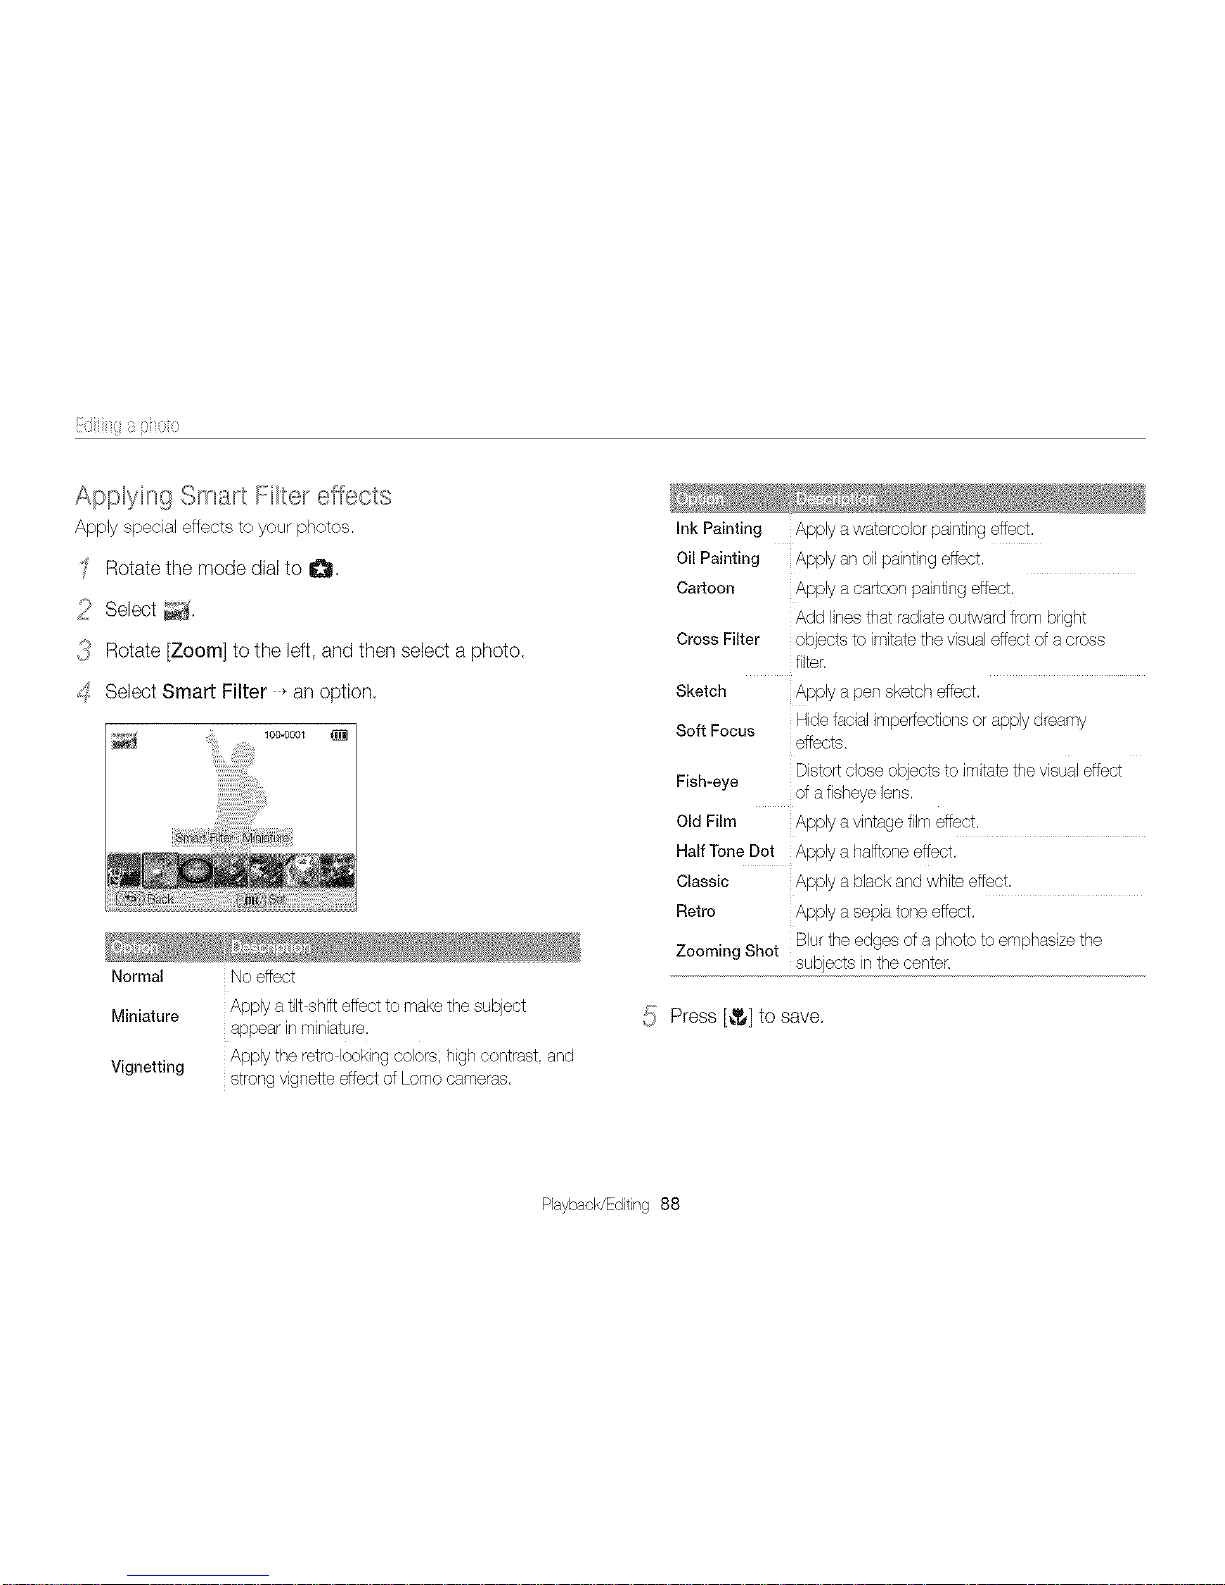
Applying Smart Filter effects
Apply special effects to your photos.
Rotate the mode dial to I_.
_ii> Select
{_ Rotate [Zoom] to the left, and then select a photo
_:S Select Smart Filter _ an option
Normal
Miniature
Vignetting
No effect
Apply atilt shift effect to makethe subject
appear in miniature,
Apply the retro looking colors, high contrast, and
strong vignette effect of Lomo cameras,
Ink Painting Apply a watercolorpainting effect,
Oil Painting Apply an oil painting effect.
Cartoon Apply a cartoon paintingeffect.
Add linesthat radiate outward from bright
Cross Filter objects to imitatethe visual effectof a cross
filter,
Sketch Apply a pen sketch effect.
Soft Focus Hide facialimperfections or apply dreamy
effects,
Distort dose objects to imitate the visual effect
Fish-eye of afisheye lens.
Old Film Apply a vintagefilm effect,
Half Tone Dot Apply a halftoneeffect.
Classic Apply a black andwhite effect,
Retro Apply a sepia toneeffect.
Zooming Shot Blur the edges of a photo to emphasize the
subjects in the center,
:; Press [_,_] to save
_J
Playback/Editing 88
iiidiiin{i s photo
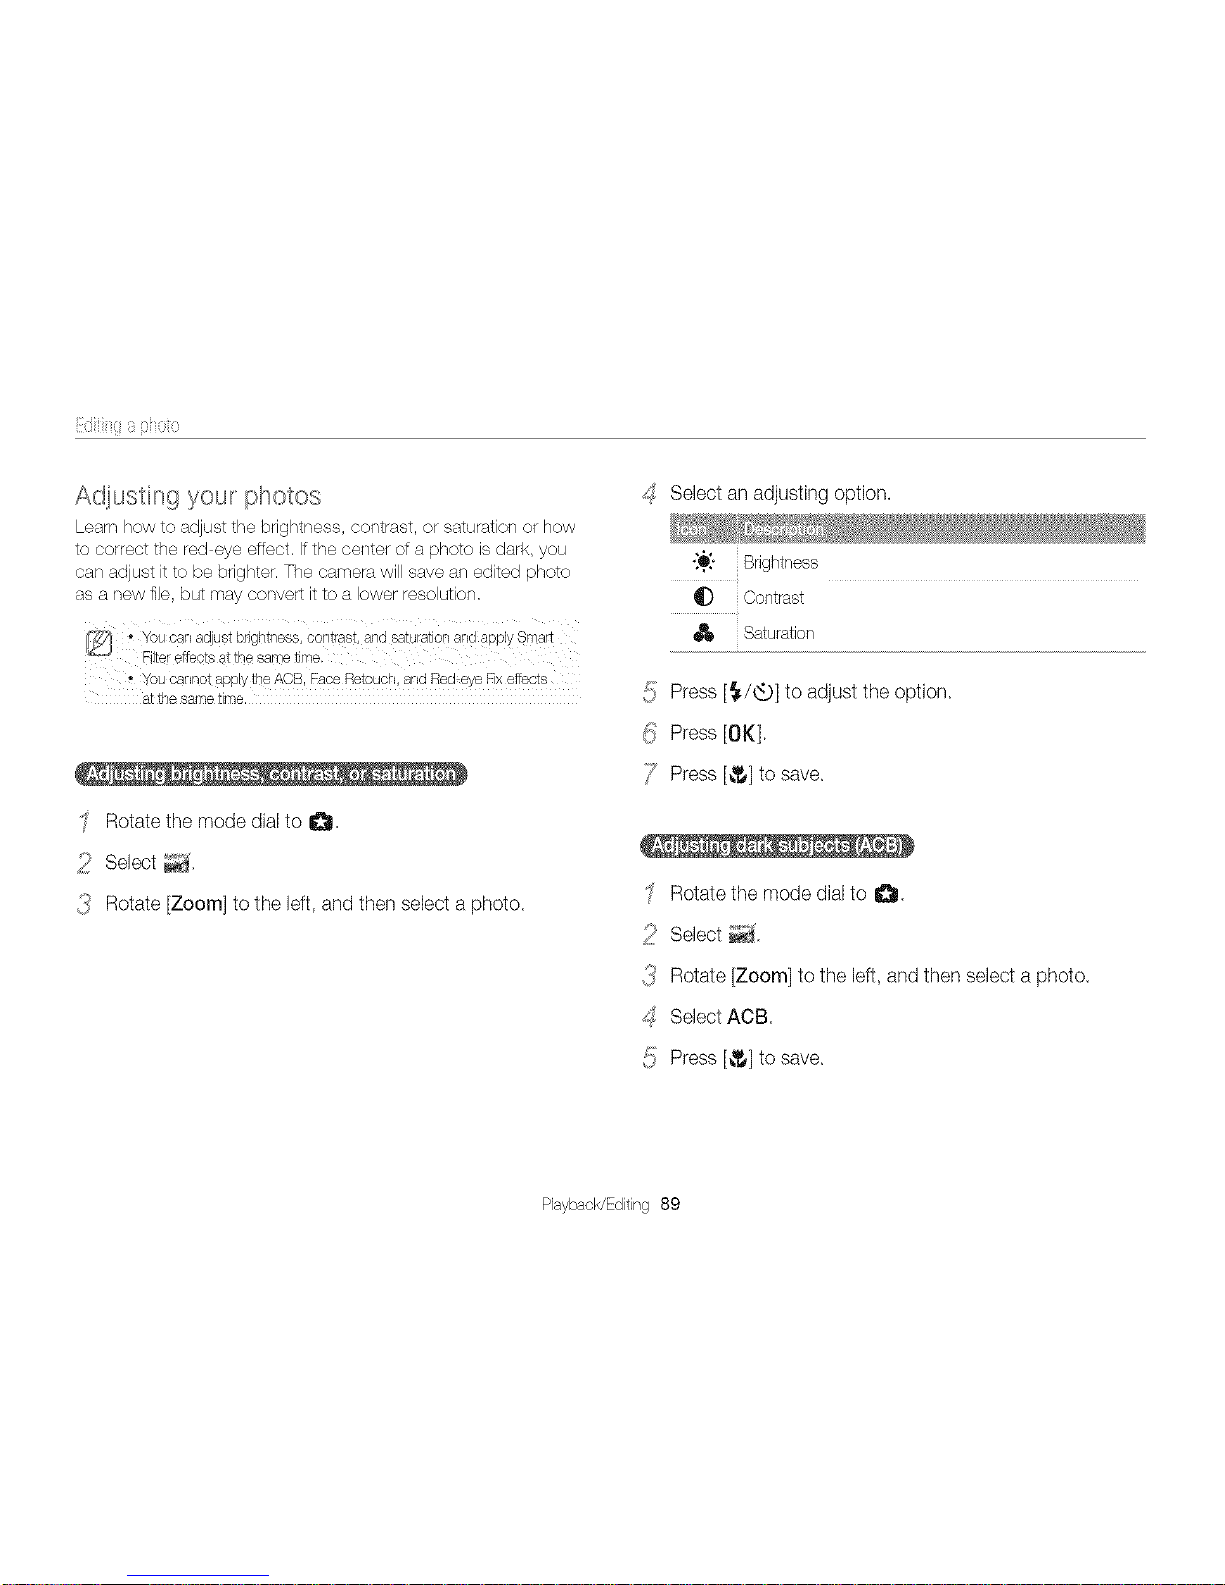
Adiusting your photos
Learnhowto adjustthe brightness,contrast,or saturationorhow
to correctthe red eyeeffect,Ifthe centerof aphoto isdark, you
can adjustit to bebnghter,Thecamerawillsaveaneditedphoto
as anewfiJe,but mayconvertitto a lowerresolution,
You cannot apply theACB, Face Retouch, and Red eye Fix eftects
atthe same time,
Rotatethe mode dialto 0.
2 Select _J,
_ Rotate [Zoom] to the left, and then seled a photo.
_SSelect an adjusting option.
{_[" Brightness
_D Contrast
Saturation
::; Press [_/6_.p]to adjust the option
_J
_i_ Press [OK],
/7 Press [_] to save.
Rotatethe mode dialto 0.
2 Select _.
{_ Rotate [Zoom] to the left, and then seled a photo.
_SSelect ACB.
5 Press [_] to save.
Playback/Editing 89
iiidiiig{i g pi_oto
Rotatethe mode dialto I_.
2 Select _.
{_ Rotate [Zoom] to the left, and then select a photo.
_:SSelect Face Retouch.
5 Press [_./6_)]to adjust the option.
• Asthenumberincreases,the skintonebecomesbnghterand
smoother.
Creating a pnnt o_de_(DPOF)
Selectphotosto printandsaveprintoptions intheDigitalPrint
OrderFormat(DPOF),Thisintormationis savedinthe MISCfolder
onyour memorycardfor convenientprintingon
DPOFcompatibleprinters.
InPlayback mode, select a photo you want to print, and
then press [MI:NU],
_ii_ Select DPOF.
{_ Press [DISP/_] to select the number of copies, and
(!_ Press [_] to save.
Rotatethe mode dialto I_.
2 Select _.
_ Rotate [Zoom] to the left, and then select a photo.
_:SSelect Red-eye Fix.
5 Press [_] to save.
then press [OK].
_,J • _ou carl _aKethe memoly cad toa print shop 1flatsupports DPOF
(DigIa PdntOrder Format sryou san pnn_photos alrec_ly_nreugna
DPOF come sup e onn_era_home
• _hotos with dlmerisio _ that are wlaer _n_1ins paper may se out off
_n tne left and lght edges. Ensurethat you Dno_oalmens ons are
3omDa_Jelewl_ntr/e eaDeryou sele £,
ou oar _etset DPOFoouons tot phOtOSs_orean the n[eul£
91Tie,y,
- _you specly the pnnt size, you san prn_ photos onyw_n
DPOF 1.1 comea_m)lesnn_ers
Playback/Editing 90
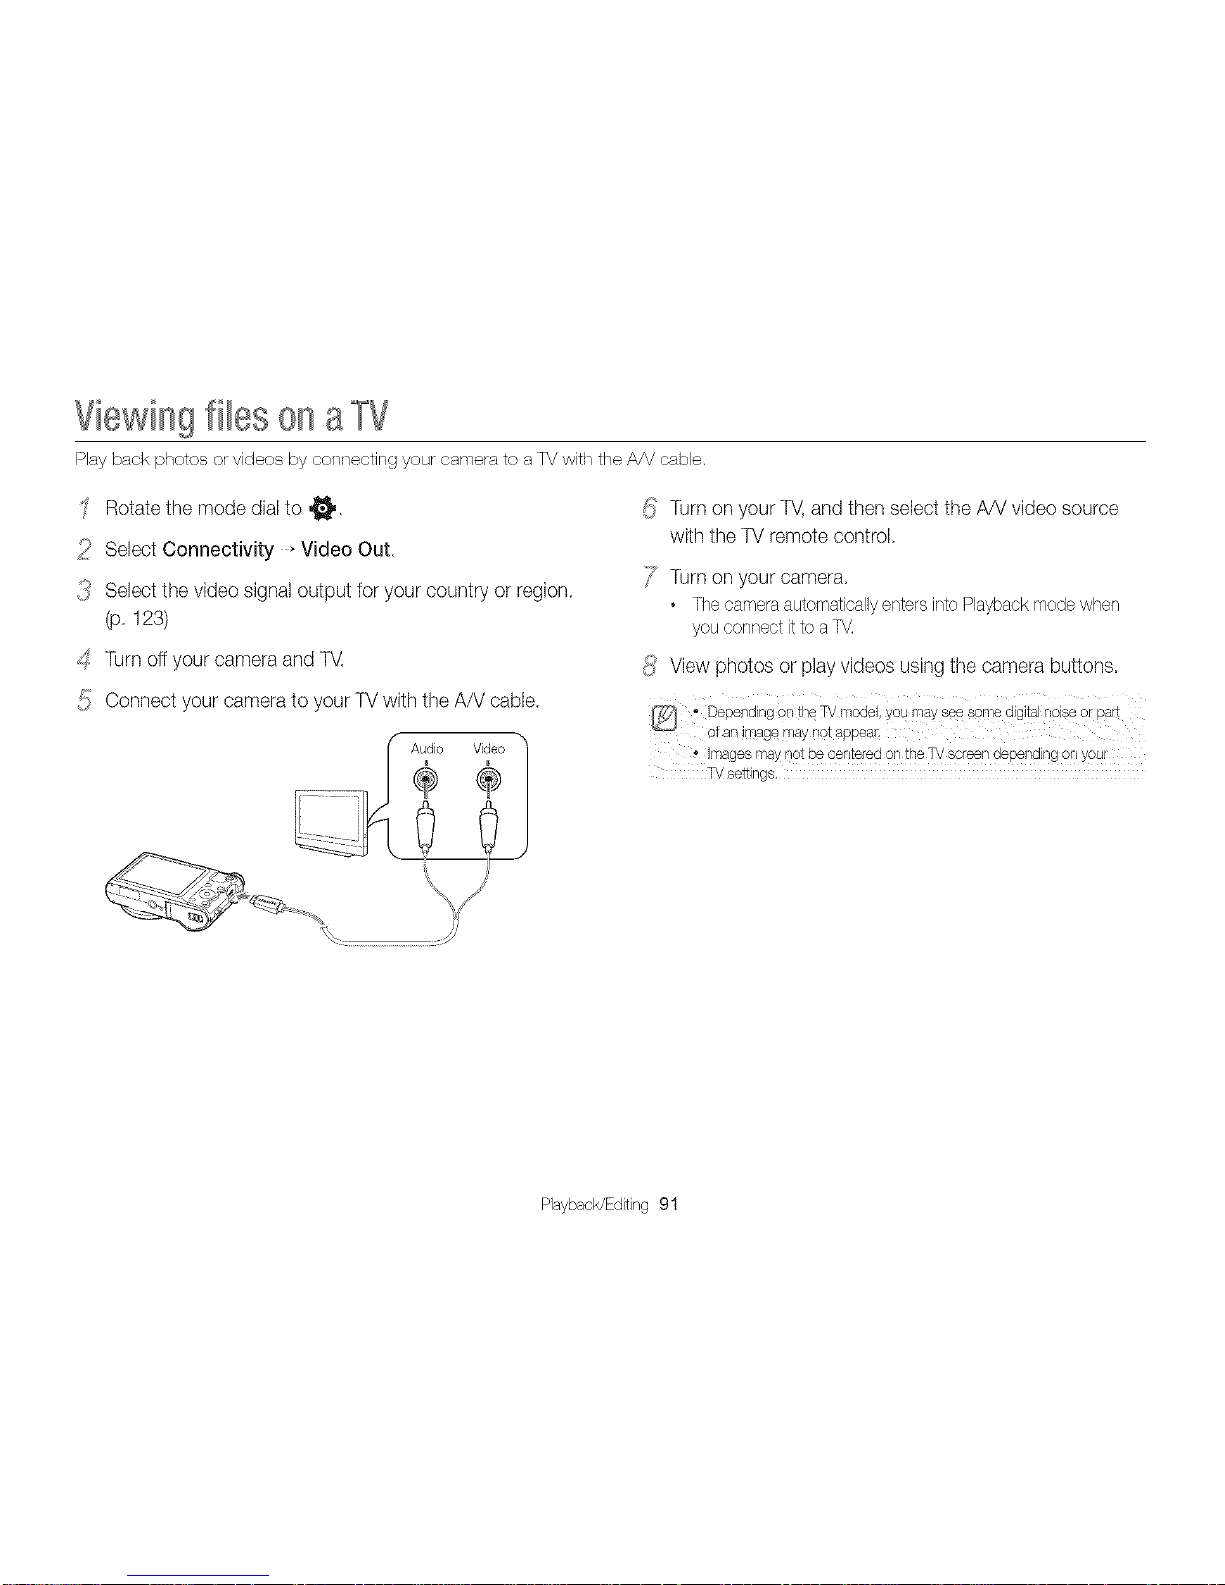
Viewingfiles onaTV
Playback photosor videosby connectingyour ear-herato aTVwith the AA/cable.
Rotatethe mode dialto _.
_ii_ Select Connectivity * Video Out
{_ Select the video signal output for your country or region
(p. 123)
_:STurn off your camera andTV.
_!_Connect your camera to your TVwith the A/V cable.
_!_Turn on your TV,and then select the A/V video source
with the TV remote control.
_7 Turn on your camera
• ThecameraautomaticallyentersintoPlaybackmodewhen
youconnectitto aT_
4};:View photos or play videos usingthe camera buttons.
@ " Depending on theTV rnodel, you may see some digital nobe or part
ofarl image may not appea_.
Images may not be cente/sd en the TVscreen dependhg on your
TV ae_lr/gs,
PlaybacWEditing 91
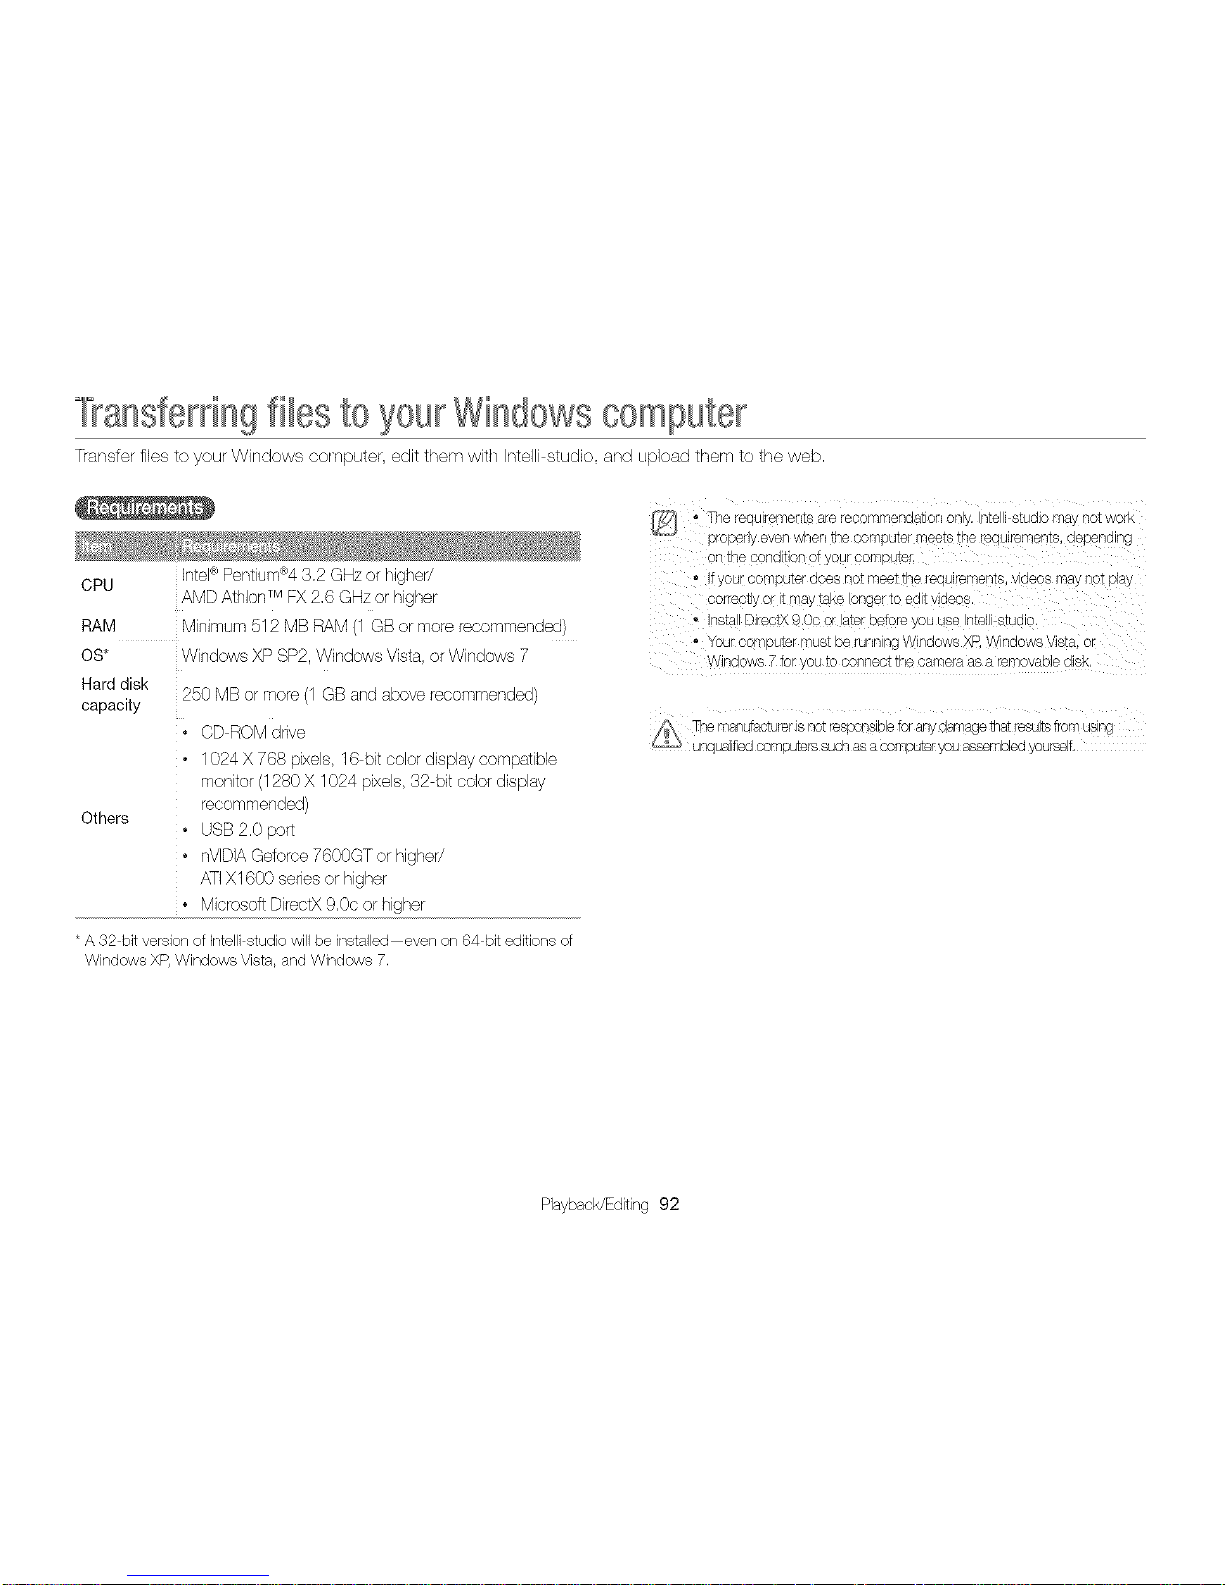
]?ansferdngfileste yeurWindewscemputer
Transfer files to your Windows eornpute_, edit them with Intelli studio and upload them to the web,
IntePPentium:%3.2 GHz or higher/
CPU
AMD AthlonTM FX2,6 GHz or higher
RAM Minimum 512 MB RAM (1 GB or more recommended)
aS* Windows XP SP2,Windows Vista, or Windows 7
Hard disk
250 MB or more (1 GB and above recommended)
capacity
OD RaM drive
• 1024 X 768 pixels, 16 bit color display compatible
monitor (1280 X 1024 pixels, 32 bit odor display
recommended)
Others
• USB 2.0 port
• nVIDIAGdorce 7600GT or higher/
AT1X1600 series or higher
. Microsoft DirectX 9,00 or higher
* A 82 bit version of Intelli studio will be installed even on 64 bit editions at
Windows XR Windows Vista. and Windows 7,
, The rec Jremen_sare recommenaa_on or y, n_ei s_uaJon ay lot work
properl_ even when me cc 9u_ermee_sins _@u_remer_8,@eDenalng
_r rns oonaJl9Dat your compute
Ityour computer aces no_meel ins reaul_men_s, v leas may _ K play
_orTeotlyor t may _aKeanger ro eo _vlqeo8
• ns_a DJrectX9,00 or a_el )store you use ntell stud )
• our oc -_'EJter must Derut 2 vwnaows (R W ndows Vista Dr
Windows 7 fo ou _oconnec_ rne oanle_ as a removable OISK
Thema]utactu_er s not resp'onsbe for any damage _/at resultstramusng
Jr]uaJfed con- )ureassucn asacon su_e_you assemDea yourself
PlaybacWEditing 92
Tiaiisi(!_ixiii{iiiies ie }io_iiWiii_iiowscoiYipiiix_i¸
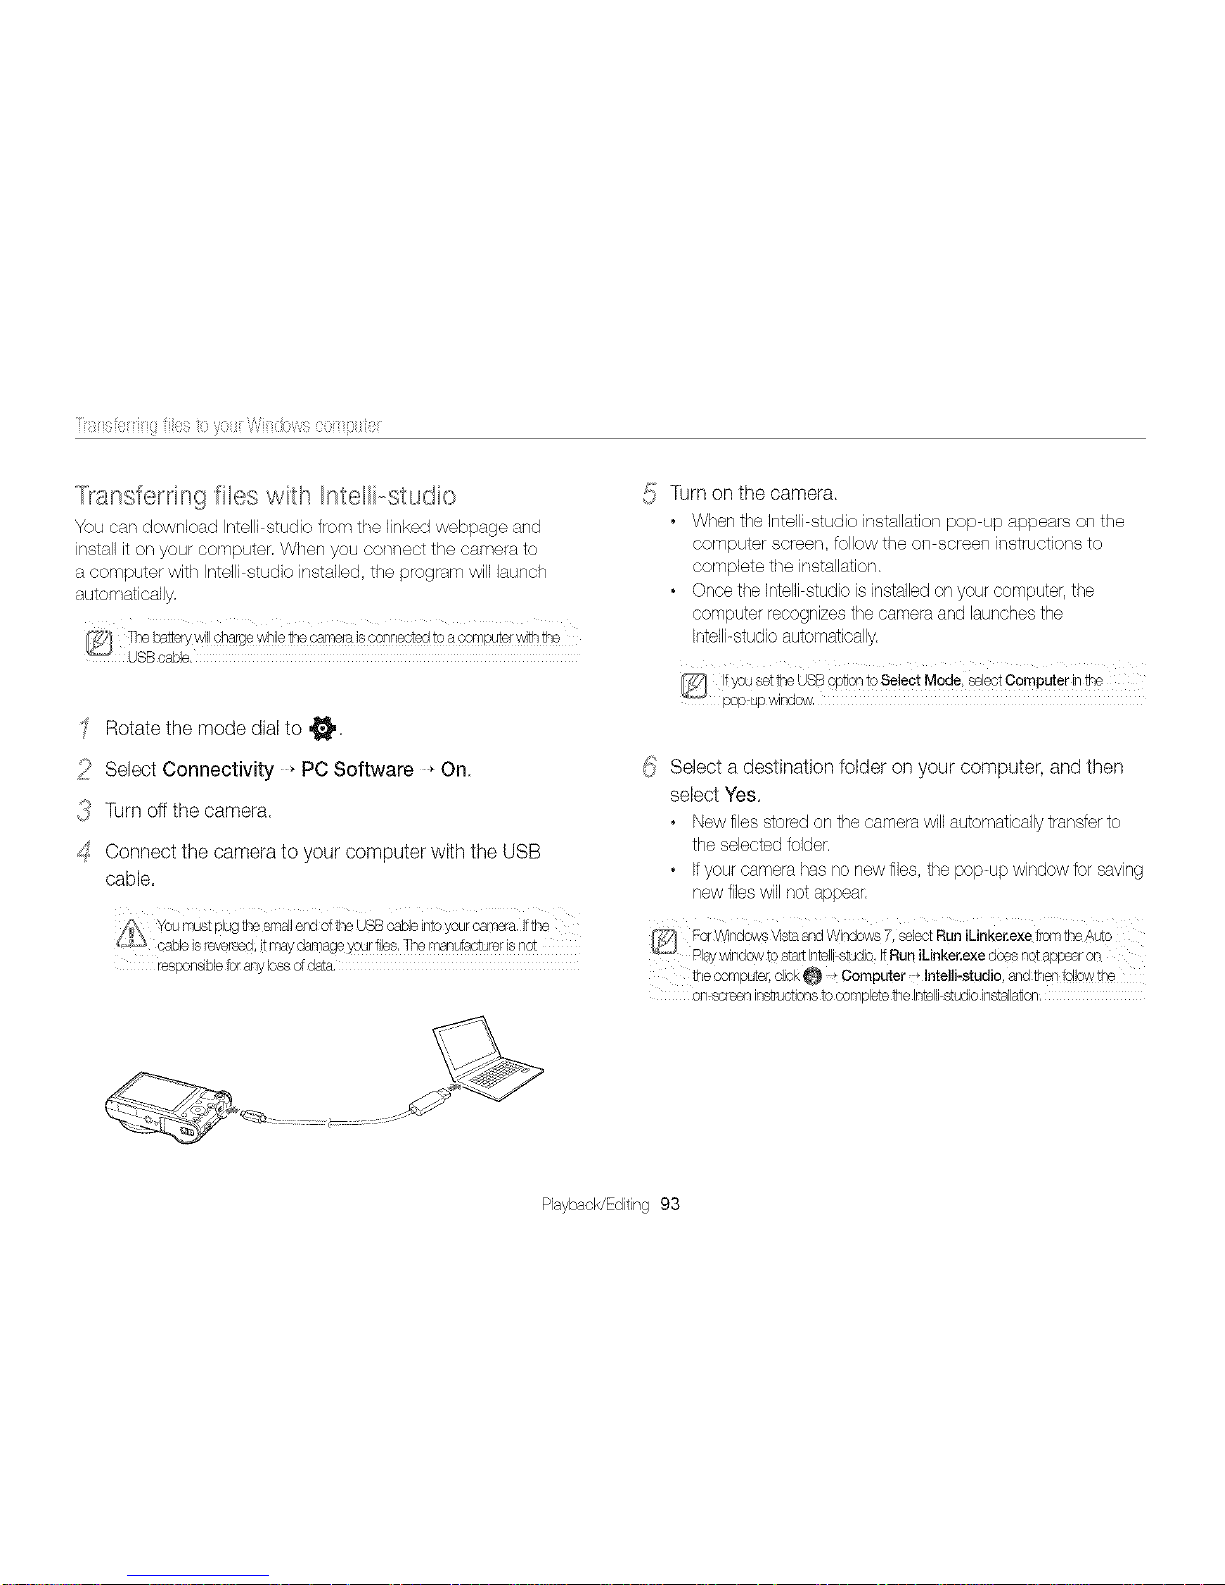
T_ansfe_dngflies with Intelli studio
You car/download Intelli studio from the linked webpage and
install it on your computer, When you connect the camera to
a computer with Intelli studio installed, the program will launch
automatically,
Rotatethe mode dialto
_ii_ Select Connectivity * PC Software * On
_ Turn off the camera
_S Connect the camera to your computer with the USB
cable.
responsibbtotarlylossofdata.
{!} Turn on the camera.
• When the Intelli studio installation pop up appears on the
cornputer screen, tollow the on screen instructions to
complete the installation.
• Once the Intelli studio is installed on your computer, the
computer recognizes the camera and launches the
Intelli-studio automatically.
_!_ Select a destination folder on your computer, and then
select Yes.
• New files stored on the camera will automatically transfer to
the selected tolder.
° Ifyour camera has no new files, the pop-up window for saving
new files will not appear.
lJ'-_ecompute:,dick _ ; Computer _r_Intelli_studio, and 1hentdlewthe
on sa-een ins#uctions tocompletefl/e Intelli_studioinsts]JaScn,
PlaybacWEditing 93
i_isi01iiii{i fii(_six}yo_i_Wiii_iows (}oiYipiiiei¸
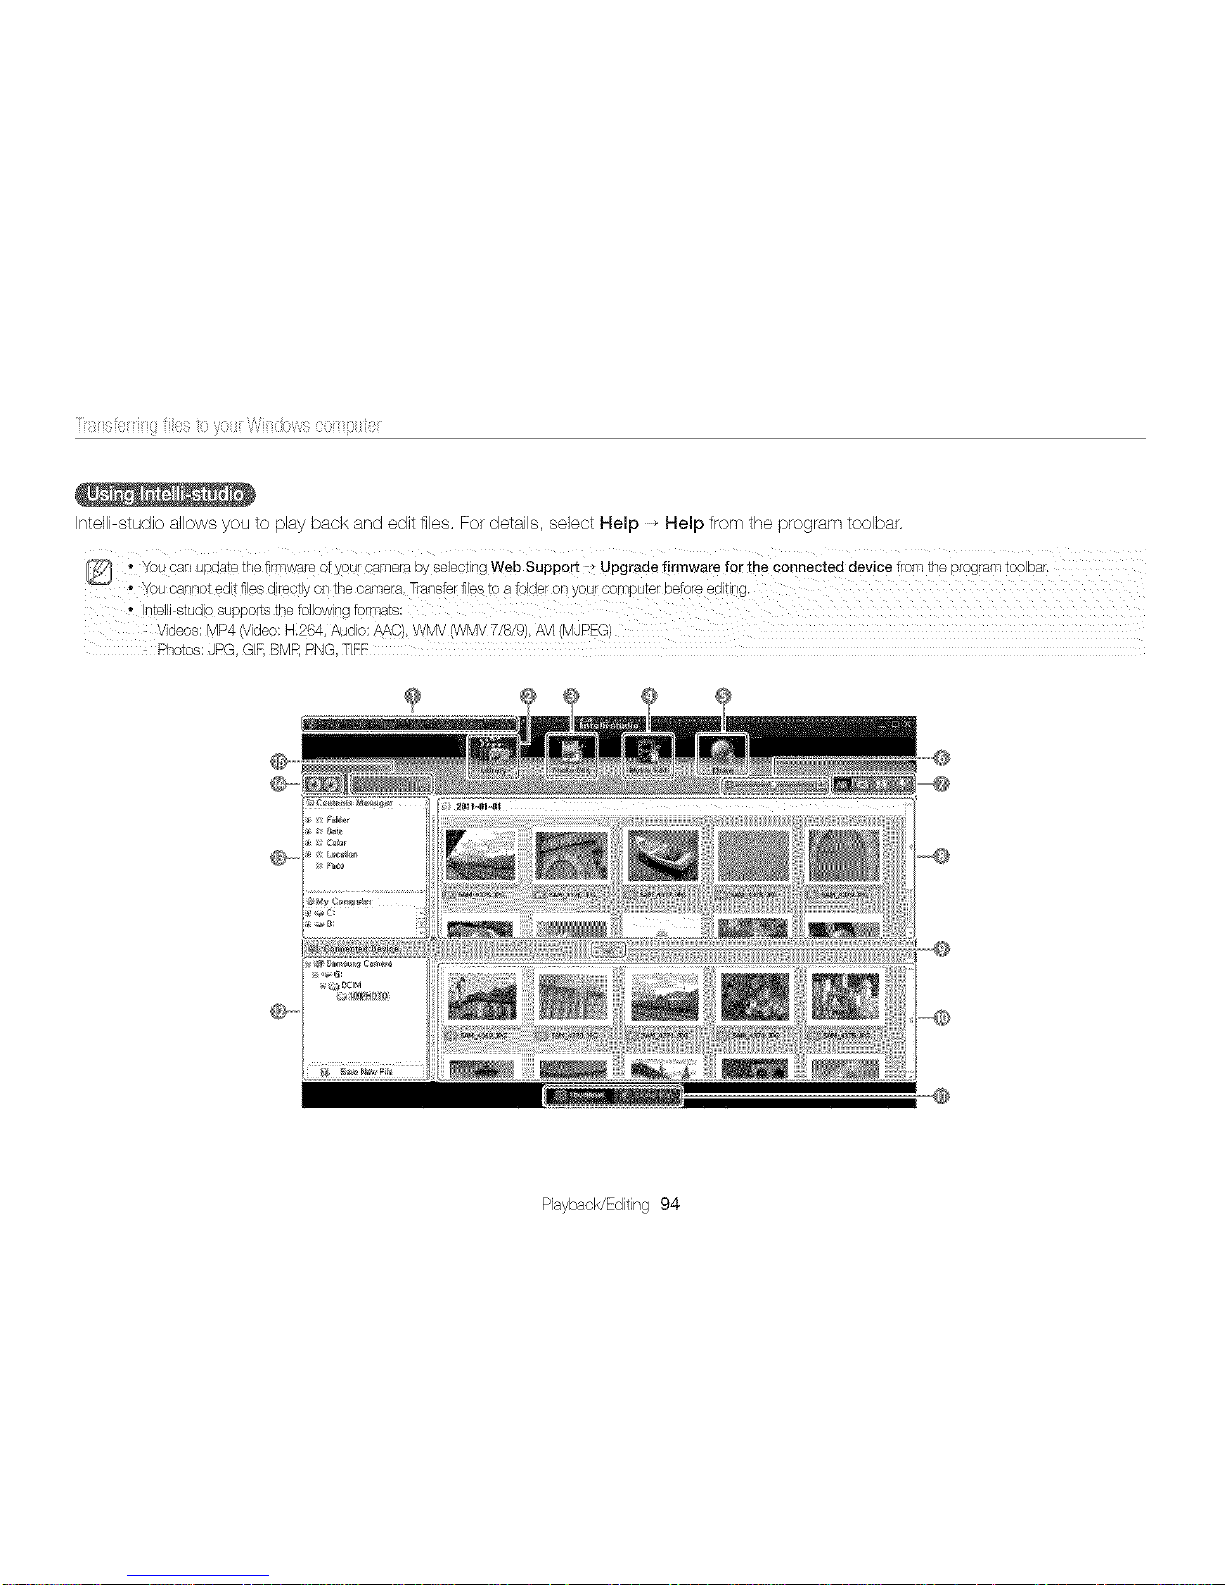
Int÷lli studio allows you to play back and edit files. For details, select Help _ Help frx}m the program toolbar.
Photos: ,JPG,GIF, BMR PNG, TIFF
@
Playback/Editing94
Tiaifii_i(!_ixiii{iiiiesio}io_iiWifii<iiowsfix}fifiipiiii_i¸
@ Openmenus,
@ Displayfilesintheselectedfdder
@ SwitchtothePhotoeditmode,
@ SwitchtotheVideoeditmode,
@ SwitchtotheSharingmode(tosendfilesbyemailor
uploadfilestowebsites,suchasFlickrorYouTube),
@ Enlargeorreducethethumbnailsinthelist,
@ Selectafiletype,
@ Viewfilesintheselectedfolderonyourcomputer,
@ Showorhidefilesontheconnectedcamera,
@ Viewfilesintheselectedfolderonthecamera,
@ Viewfilesasthumbnailsoronamap,
@ Browsefoldersstoredonthecamera,
@ Browsefoldersstoredonyourcomputer,
@ Movetothepreviousornextfolder,
@ Printfiles,viewfilesonamap,storefilesinMyFolder,or
registerfaces,
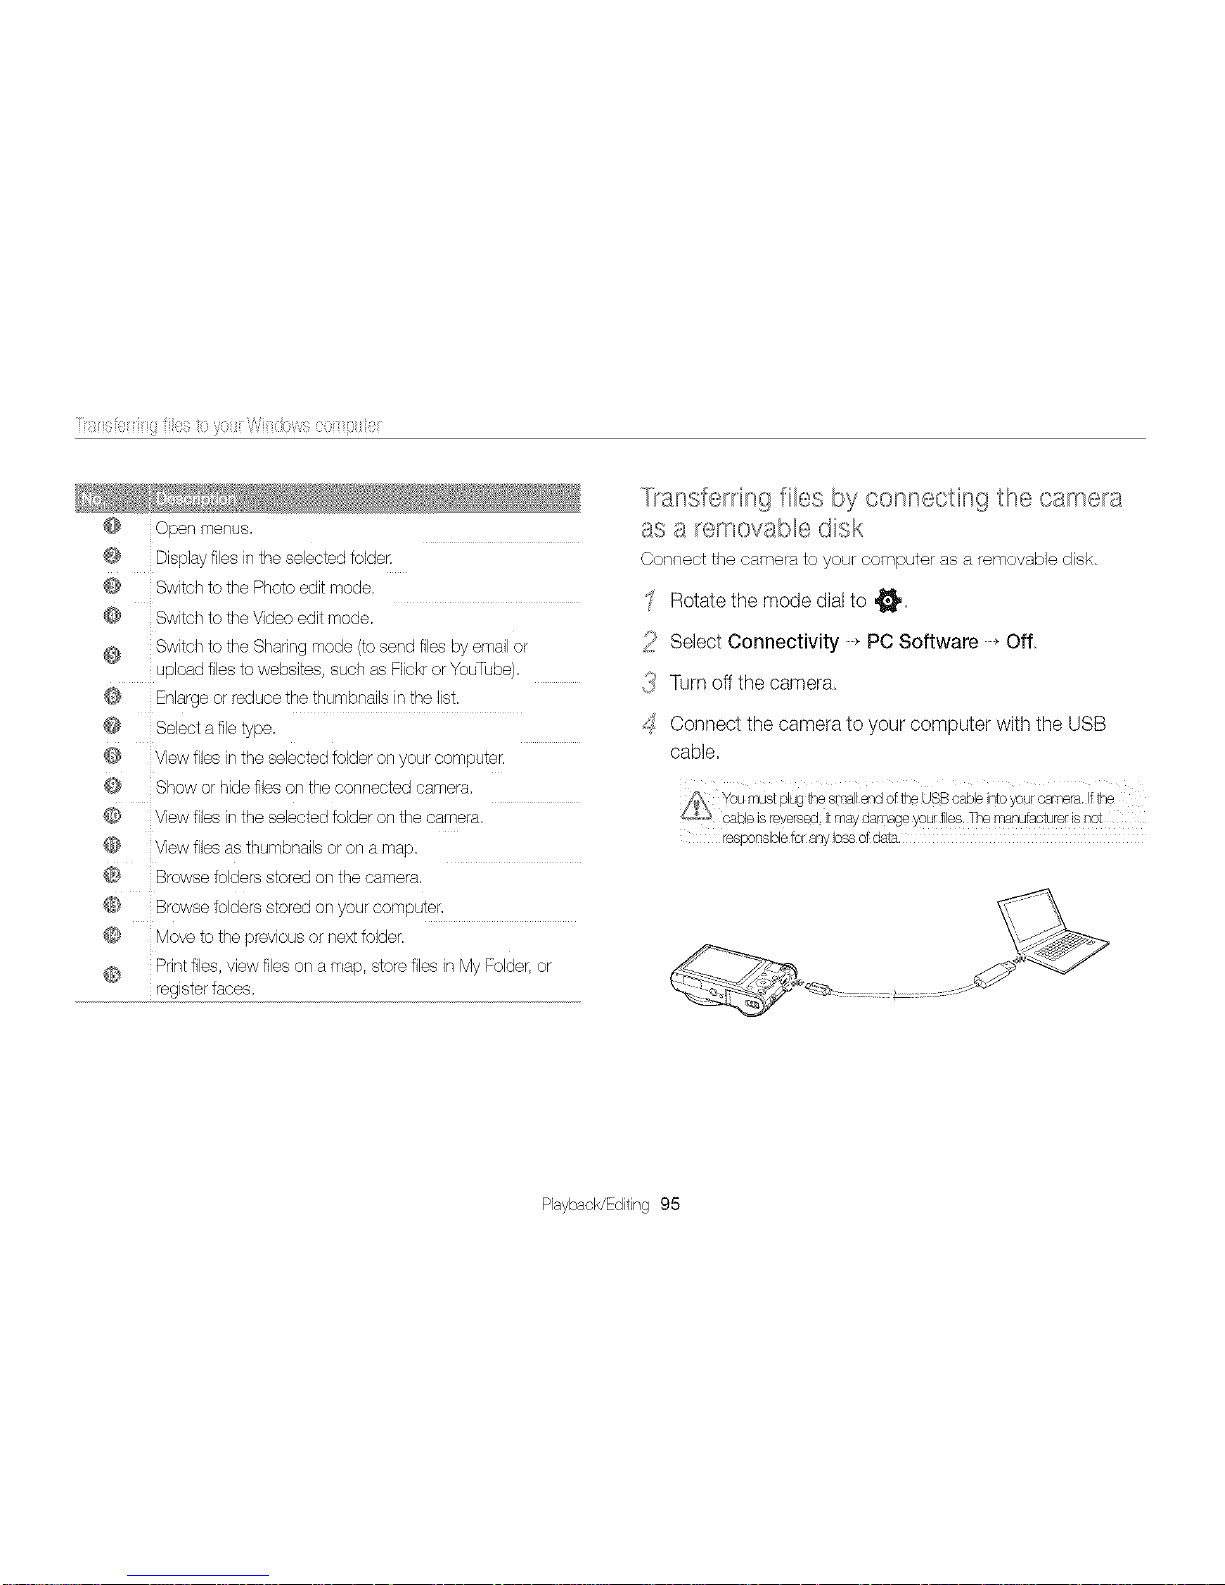
/_ansfe_dng flies by connecting the came_a
as a _emovable disk
Connect the camera to your computer as a removable disk.
Rotate the mode dial to
_ii_ Select Connectivity _ PC Software _ Off
{_ Turn off the camera
_S Connect the camera to your computer with the USB
cable.
_s\ Youmustplugfl-8smallendof fl-leUSBcableintoyourcamera,Iffl-_e
_.s cableis_eversed;itmaydanlageyourfiles.Themar_utacturerisnot
resp'onsibletcranyJossofdata,
Playback/Editing 95
Tiaii_i;i(!_ixiii{iiiies io }io_iiWiiidows coiYipiiix_i¸
:; Turn on the camera.
_J
• Thecomputerrecognizesthecameraautomatically,
@ Ifyou set1he USBeptlon to Select Mode, _lect Computer it!1he
pop_upwindow,
_!_On your computer, select My Computer _Removable
Disk _ DCIM _IOOPHOTO.
_? Drag or save fibs to your computer.
Disconnecting the camera (for Windows XP}
WithWindowsVistaandWindows7,the methodsfor
disconnectingthe cameraare similar.
Verifythat the status lamp is not blinking.
• Thestatuslampblinkswhentransferringfiles.Waituntilit
steps,
_ii!'Click _ on the tool bar at the bottom right of your
computer screen,
_ Click the pop-up message
d{ Click the message box that indicates the camera can be
removed safely,
{? Removethe USB cable.
PlaybacWEditing 96
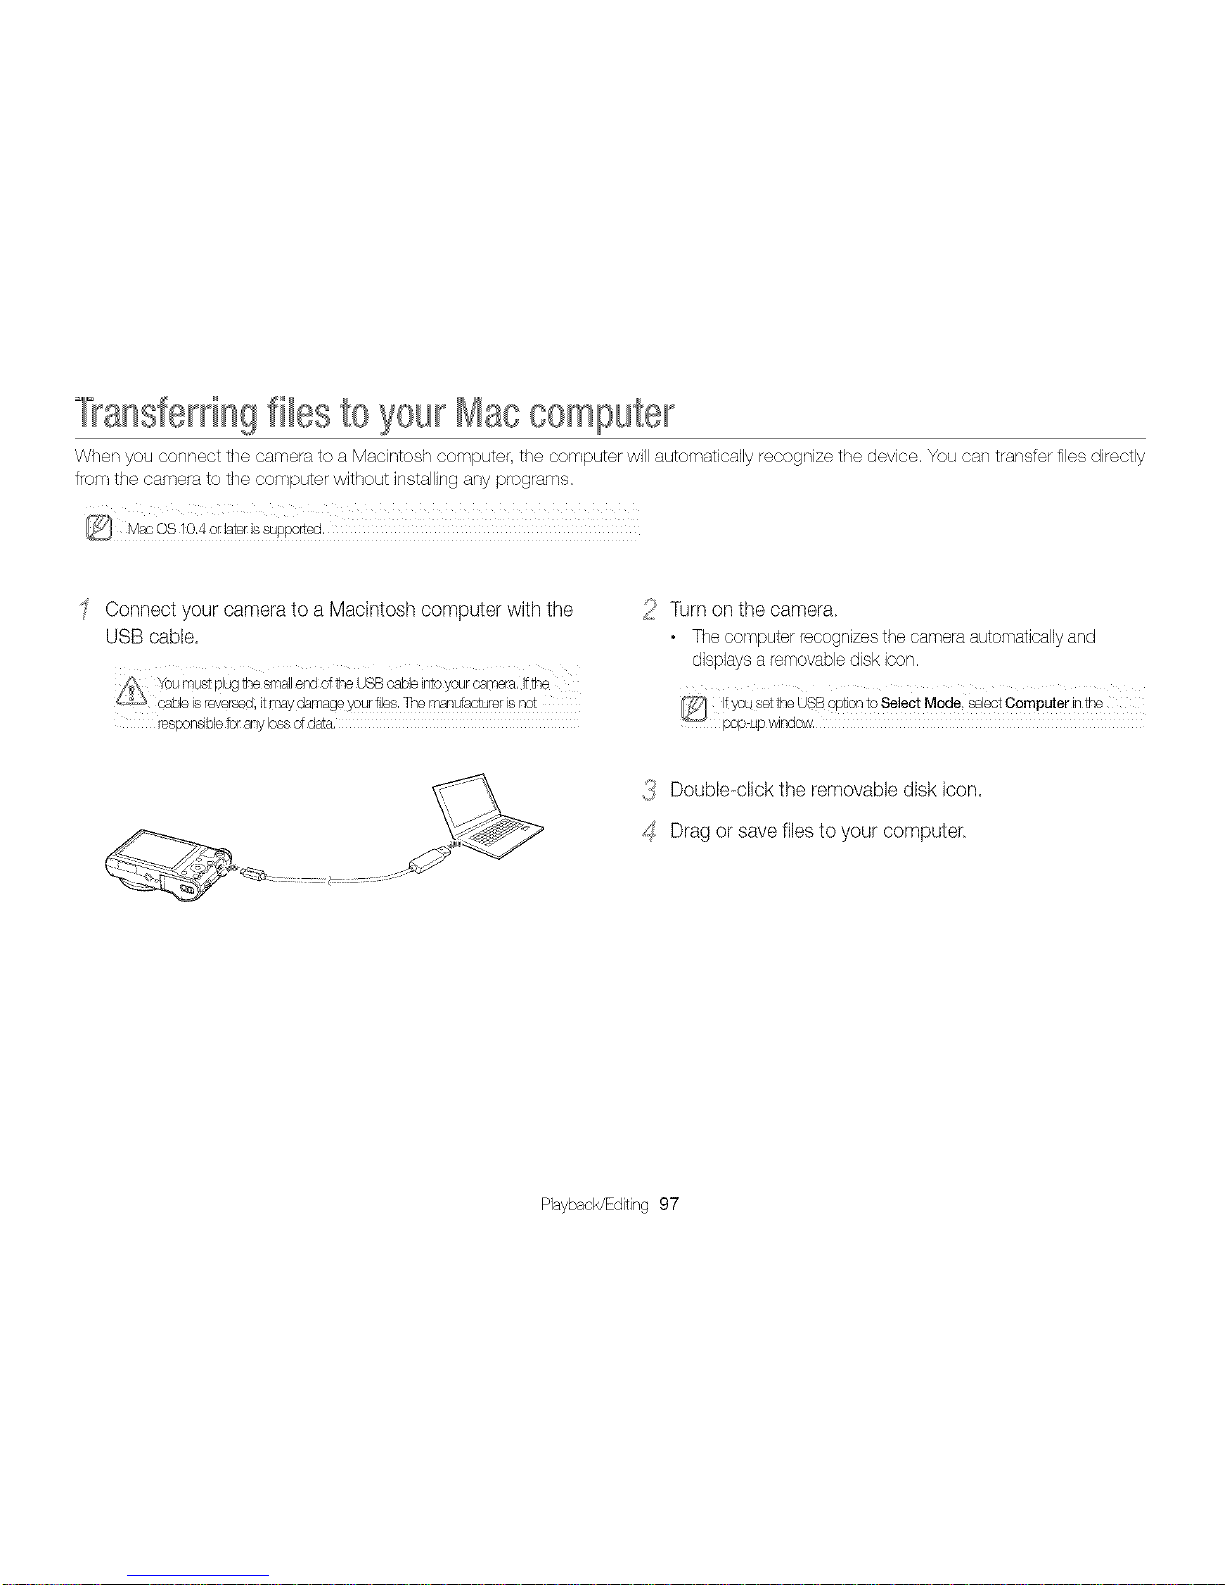
°l?ansferdngfilesto 70urMaccomputer
When you connect the camera to a Macintosh computer, the computer win automatically recognize the device. You can transfer files directly
from the camera to the computer without installing any programs,
@ Mac©S!Q.4orlaterissu_p_rted:
Connect your camera to a Macintosh computer with the
USB cable,
responsibletotanylossofdata,
Turn on the camera.
• The computer recognizes the camera automatically and
displays a removable disk icon,
{_ Double-click the removabb disk icon.
_S Drag or save fibs to your computer
Playback/Editing 97
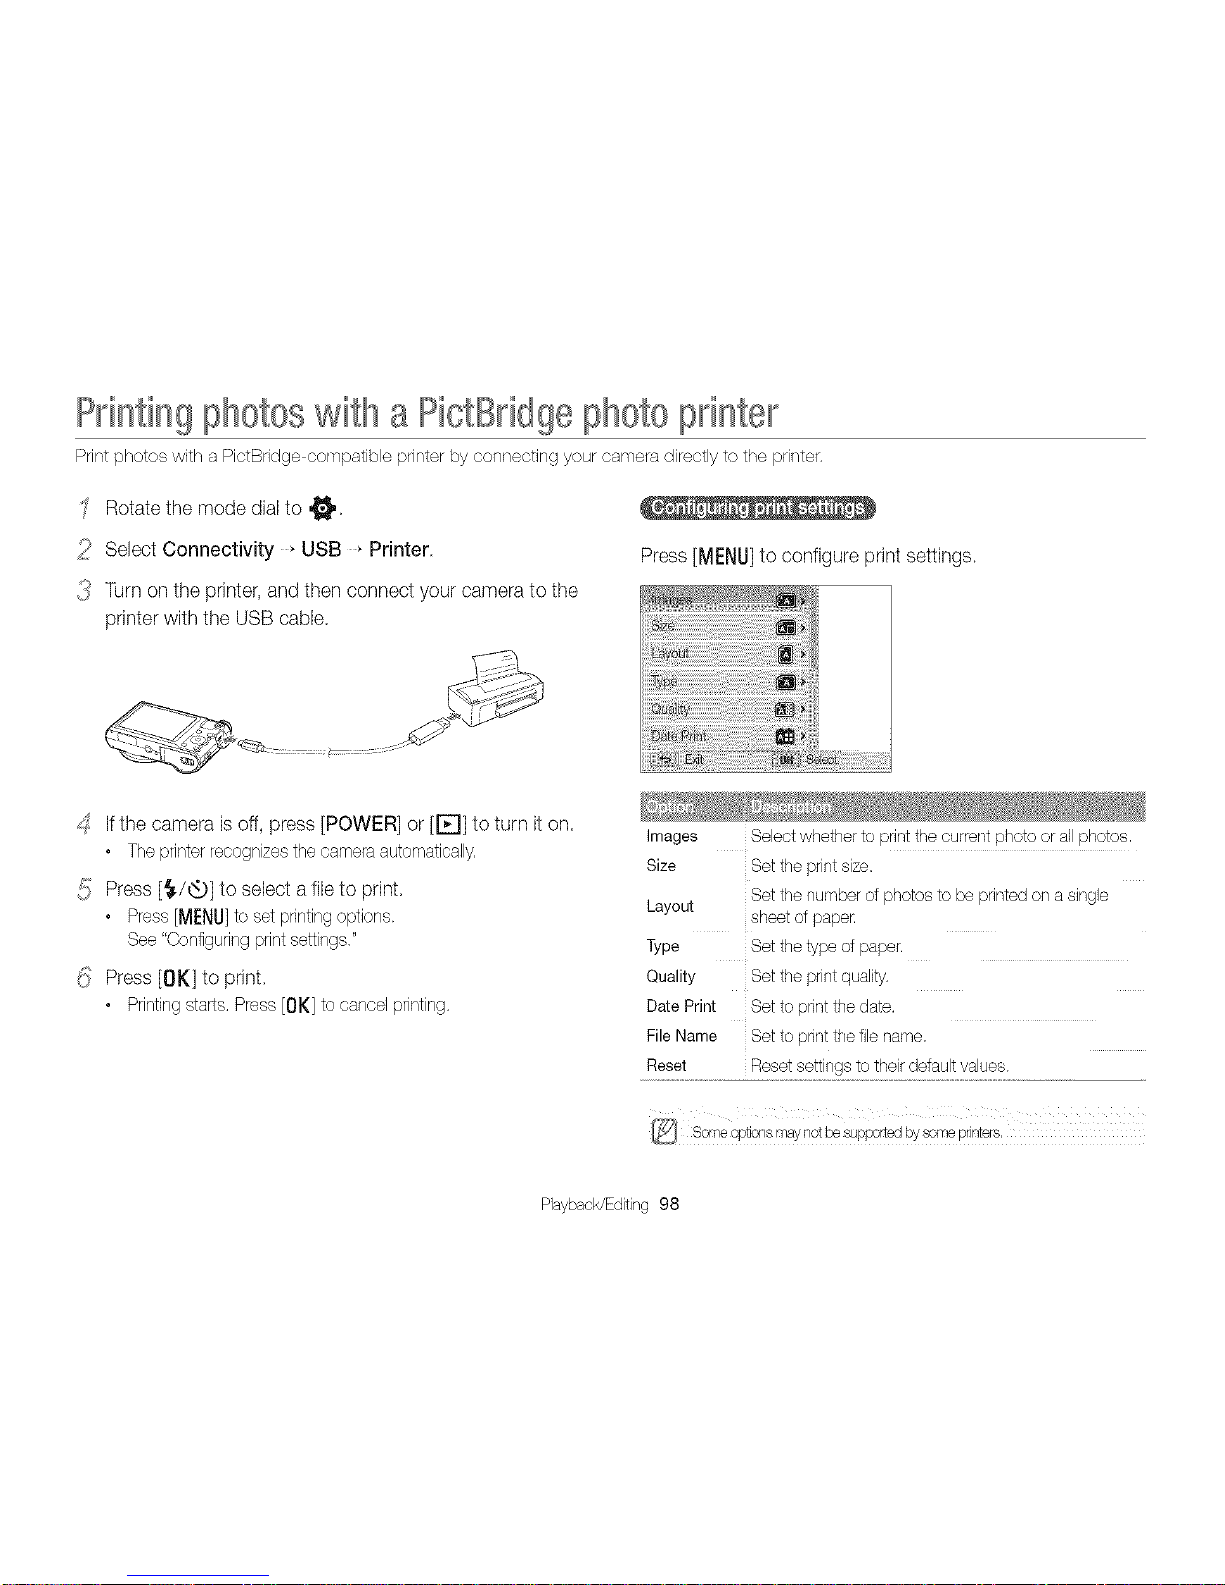
Printingphotoswitha PictBndgephotoprinter
Print photos with a PictBndge compatible printer by connecting your camera directly to the printer.
' Rotatethe mode dialto ,_
_::_!_Select Connectivity _USB _Printer
_ Turn on the printer, and then connect your camera to the
printerwith the USB cable.
Press [MENU]to configure print settings.
_S If the camera is off, press [POWER] or [E]] to turn it on.
• The printer recognizes the camera automatically.
{!} Press [_./_t_.P]to select a file to print.
• Press [MENU]to set pnntingoptions.
See "Configuring print settings."
(!_ Press [OK] to print.
• Printing starts. Press [OK] to cancel printing.
images Selectwhether to print the current photo or allphotos.
Size Set the print size.
Set the number of photos to beprinted on a single
Layout sheet of paper
Type Set the type of paper.
Quality Set the print quality.
Date Print
File Name Set to pint the filename.
Reset Resetsettings totheir defaultvalues.
Playback/Editing 98
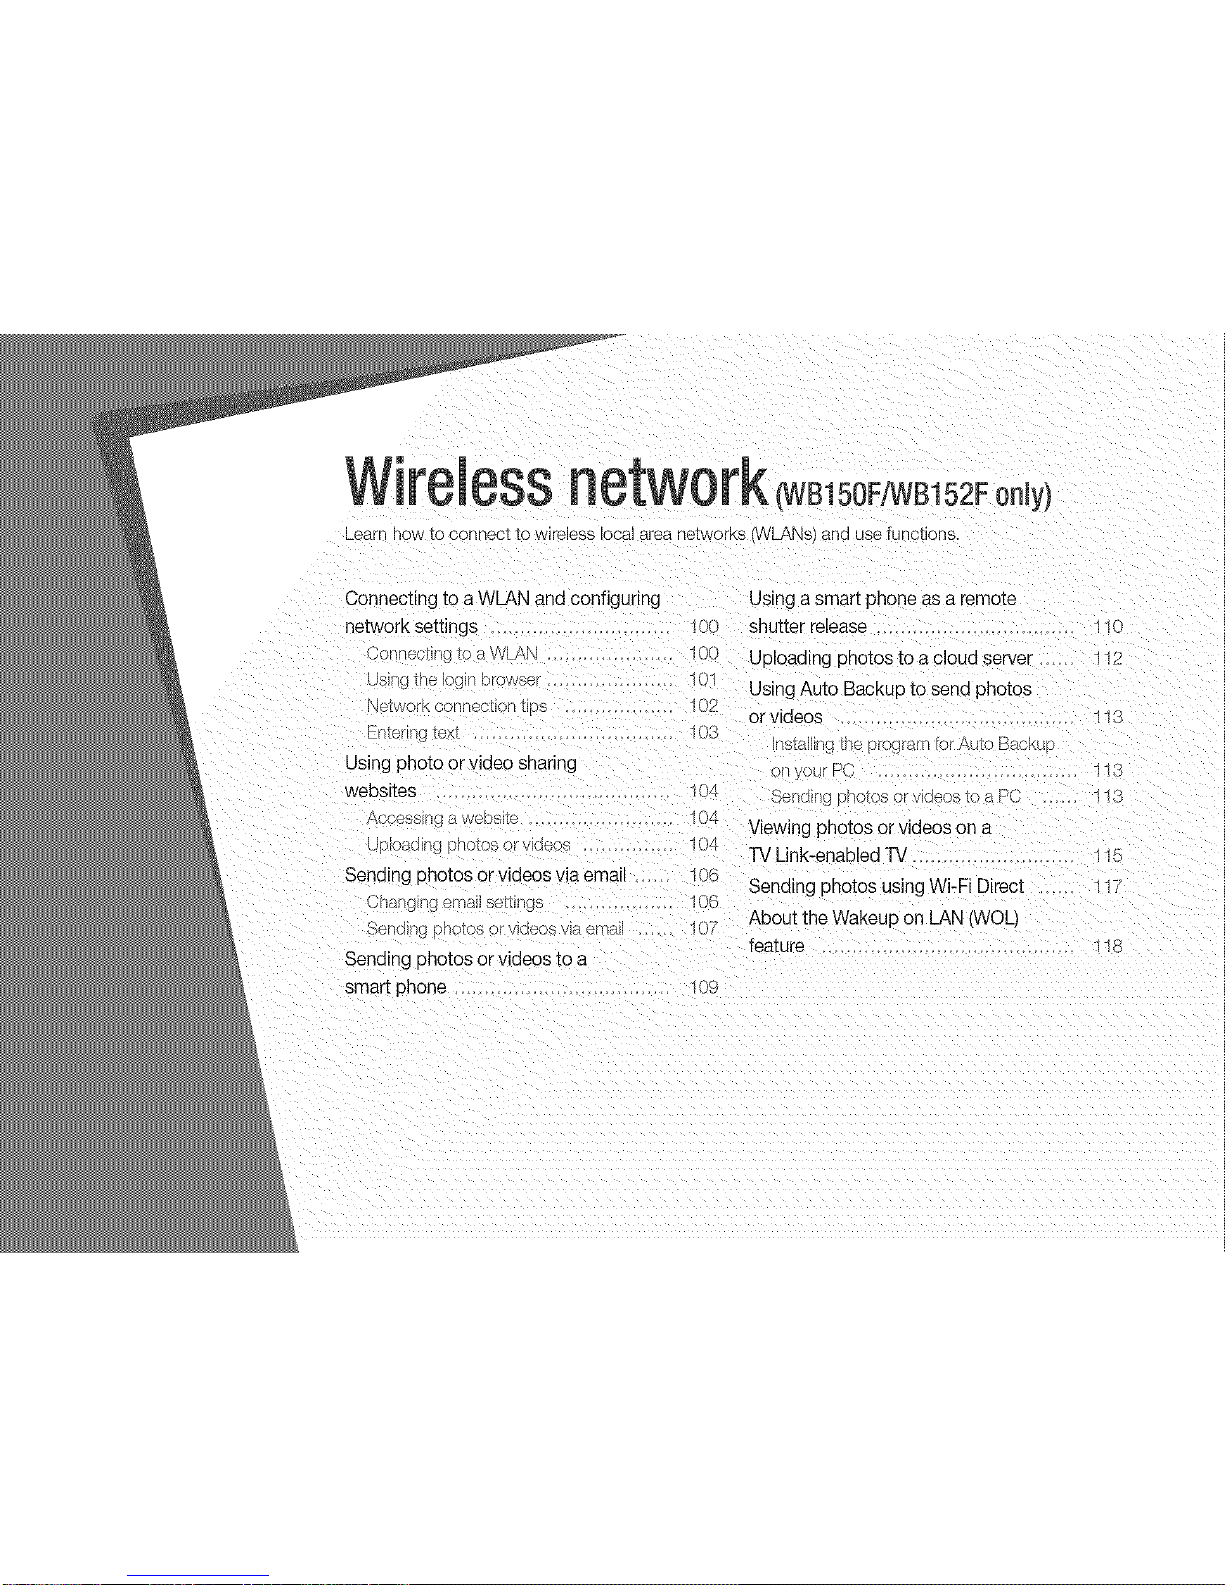
Wireless nE 2FooJyl
LearF qow to CoRRecI IO wireless local area ReIWOrKS (WLANs}and use functions.
Connecting to a WLAN and configuring Using a smart phone as a remote
network settings 10d shutter release 110
3onnec_ng to a VVLAN lUU Uploading photos to a cloud server 112
using _ne_c. o_ov,/a_ . . 10 Using Auto Backup to send photos
S[WOrK CO[I[]GC[IOH I _S 102
or videos 11S
Enter j _ex_ ........
ns[alllnfl _neproL "am lot Auto Baa_,_
Using photo or video sharing four PC 118
websites 104 bendirlg aids or w_e,_s_) a HC ...... 11{5
/-_cueaal_lga _Dsl[e _ IL_ Viewing photos or videos on a
Jsa_ng )no[as orvlaeos 104
TV Link-enabled TV ..... - _
Sending photos or videos via email 10b Sending photos using Wi-Fi Direct _. 11/
3ha/_gingem_Hse[tlngs 10C
About the Wakeup on LAN (WOL)
Send 3t ]oso[ xeosvlaern_ 1C
feature ..................................... __
Sending photos or videos _o a
smart phone ........ lC :_

Connectingto a andconfigunngnetworkseSings
Learn to connect via an access point (AP)when you are ina range of a WLAN, You can also configure network settings.
Connecting to a WLAN
Rotatethe mode dialto Wi-Fi,
2 Select @, @, _>, 2, or _,
{_ Press [MENU],and then select AP Setting,
• Insomemodes,press[MENU]orto/owthe onscreen
instructionsuntiltheAPSettingscreenappears.
• Thecameraautomaticallysearchestot availableAP devices.
_:SSelect an AR
Samsung 2 (_1_) "@ !_
Samsung 3 _ _ _"
Sat,suing4 _ a _' i_!
• Select WPS PBC to connect to a WPS AR
• Select Refresh to refresh connectable APs,
• Select Add wireless network to add anAP manually,
¢i_) iAd hoc AP
I_ Secured AP
WPS AP
iSignalstrength
Press [Q] to open AP setting options
• When you select a secured AR a pop-up window appears,
Enter the required passwords to connect to the WLAN, For
information about entering text, refer to "Entering text".
(p. 103)
• When a Iogin page appears, reterto "Using the Iogin browser".
(p, 101)
• When you select an unsecured AR the camera wi/connect
to the WLAN.
• Ifyou select a WPS profile supported AR select WPS PIN,
and then enter a PIN on the AP device, You can also connect
to a WPS profile supported AP by selecting WPS PBC on the
camera, and then pushing the WPS button on the AP device.
Wirelessnetwork(VVB150F/WB152Fonly) 100
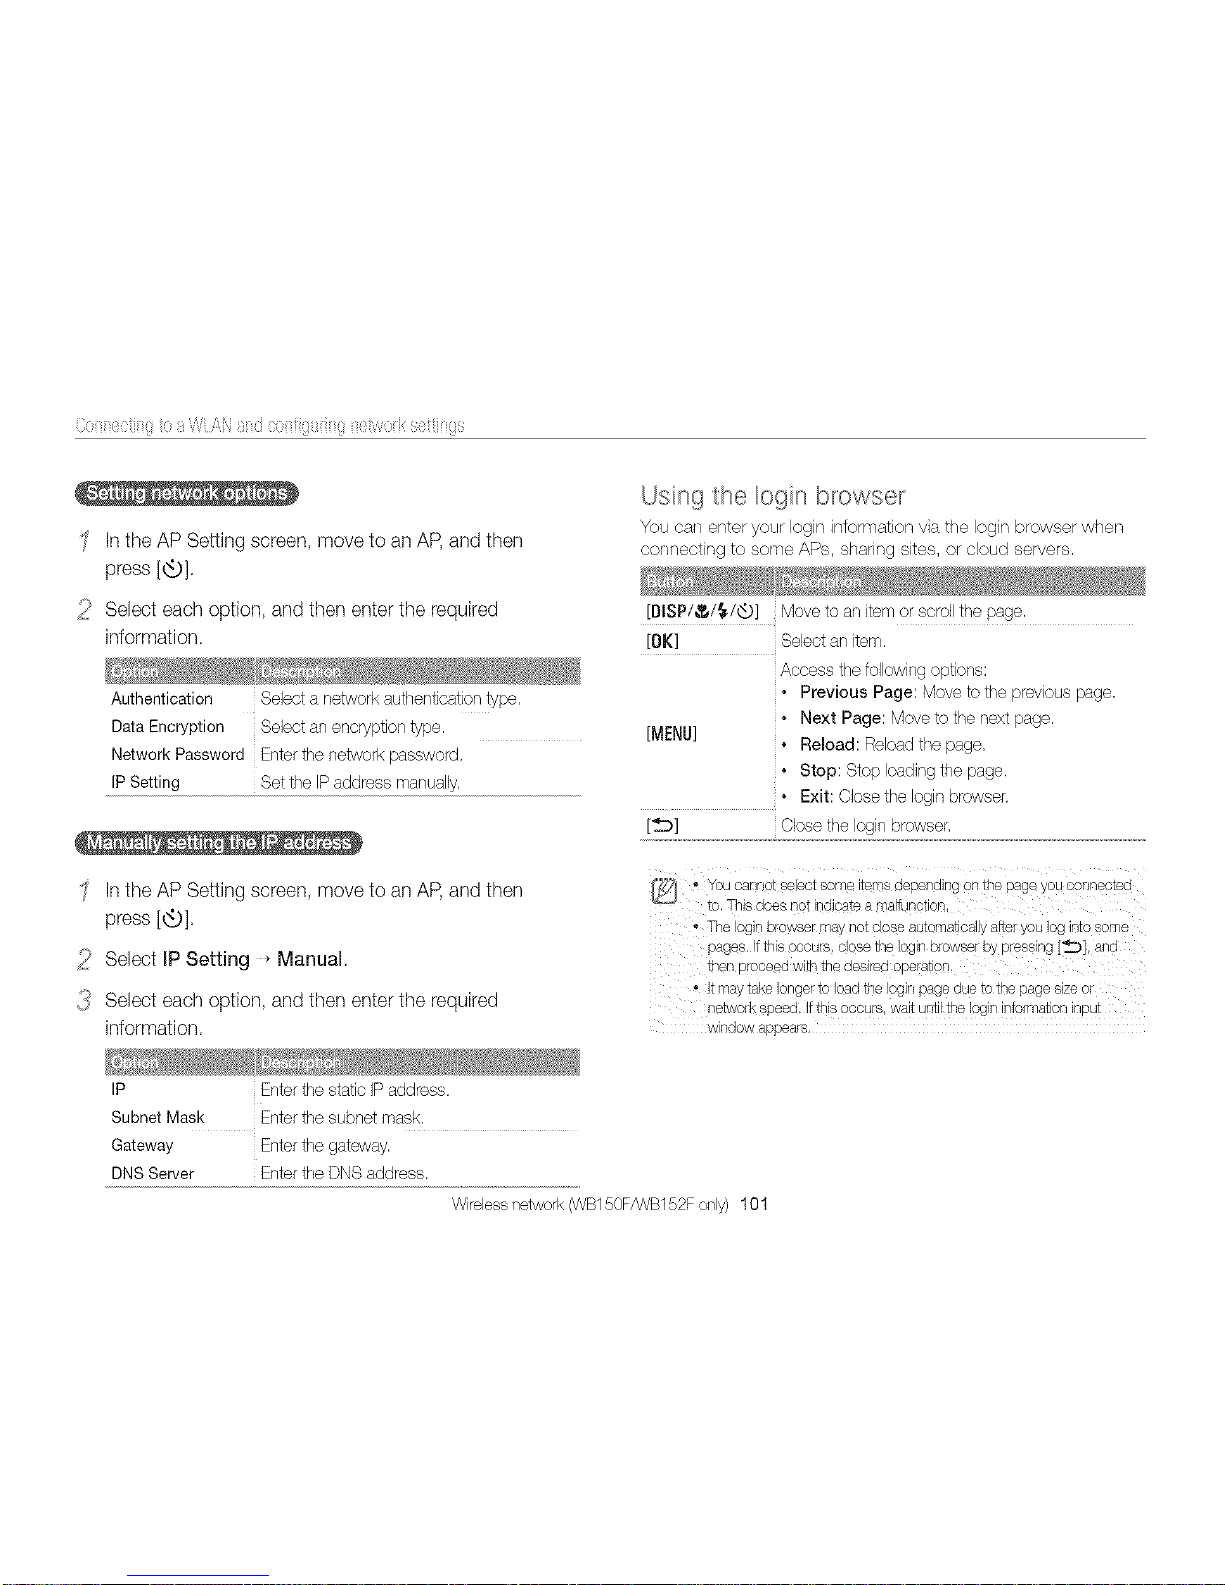
Cogg0ciig{iio_}_WLi\Ngr_:icogii!ii_iiiii{iueiv,_oii<seitii_{is
IntheAPSettingscreen,movetoanAP,andthen
press[_t_)].
_ii!'Selecteachoption,andthenentertherequired
information.
AuthenticationSelectanetworkauthenticationtype,
DataEncryptionSelectanencryptJontype,
NetworkPasswordEnterthenetworkpassword.
IPSetting SettheIPaddressmanually,
Using the Iogin browse_
You can enter your Iogin information via the Iogin browser when
connecting to sorne APs, sharing sites, or cloud servers,
[DISP/,_t,/I/Q] Move to an _temor scroll tne sage
[OK] Seect an ter_
Access the folow ng c xions
. Previous Page love to the }revous )age
. Next Page: Move to one nex_page
[MENU:
° Reload: Reoad _ne }ace
. Stop Stop oadingthe page
• Exit: Close the log n Drowser
[_:D] }lose the oc orowse
Inthe AP Setting screen, move to anAP, and then
press [_t_.)].
z_!_ Seiect IP Setting _Manual.
_J Seiect each option, and then enter the required
information.
IP EnterthestaticIPaddress.
SubnetMask Enterthesubnetmask.
Gateway Enterthegateway.
DNSServer EntertheDNSaddress.
• 7OUcanno_seieo[ some _emsaepenol/g on [ne page you connec_eo
to. This does not r 9ioate a matunct or
• The oglnorowserma} qo_coseau_omatcalJyatteryoulog [oeome
pages, tth s occurs, close the logn orowse W press ng [_] ant
then oroceea wl_nthe aesl,eo ooerauon
, _may taKe longer_oioaa the ogln pageaue _otne page size o
_le_?o eDeed, ltthlsoccu/s wa_unt tnelogin ntorlqlatorlinput
wnaow aE)ears,
Wireless network (VVB150FA/VB152F only) 101
 Loading...