

Page 1

u
Samsung's OMS (Optical Media Solution) Customer Support Website
(http://samsung-ODD.com) offers the latest versions of firmware for ODD products,
user instructions and product information.
Select Lang
English
Page 2

Select Languages
g
English
Main Page
Safety Precautions
Safety Precautions
During Installation
During Operating
Others
RoHS & WEEE
Installing DVD Writer and Connecting
Cables
Installing Drive
Connecting Cables
Features
Exterior
System Requirements
Features
Installing Device Driver and Confirming
The Installation
Firmware Update
Confirming the Installation of Device Driver
Installing the MS-DOS device driver
How To Use The DVD Writer
How to Use the Drive
How to Use DVD±R/RW and Other Discs
MAGIC SPEED
Deleting Utilities
Troubleshootin
Troubleshooting
Caution: Possible Errors
Product Specifications
Storing/Cleaning Drive and Disc
Cleaning the Drive
Storing the Disc
Cleaning the Disc
When the on/off Light Blinks
Page 3

Select Languages
English
This symbol indicates explanations about extremely dangerous matters. If users ignore this
symbol and handle the device the wrong way, serious injury or death could result.
This symbol indicates explanations about dangerous matters. If users ignore this symbol a nd
handle the device the wrong way, damage to home or property could result.
Important to read and understand at all times
Do not disassemble
Always make sure that the disc does not have a crack before use. If the disc has a crack (especially
around the center hole), it is recommended to make a copy immediately and use the copy instead.
When a cracked disc is used continuously, the size of the crack is likely to grow and this will
eventually result in irreparable damage to the disc.
Page 4
Select Languages
A
A
English
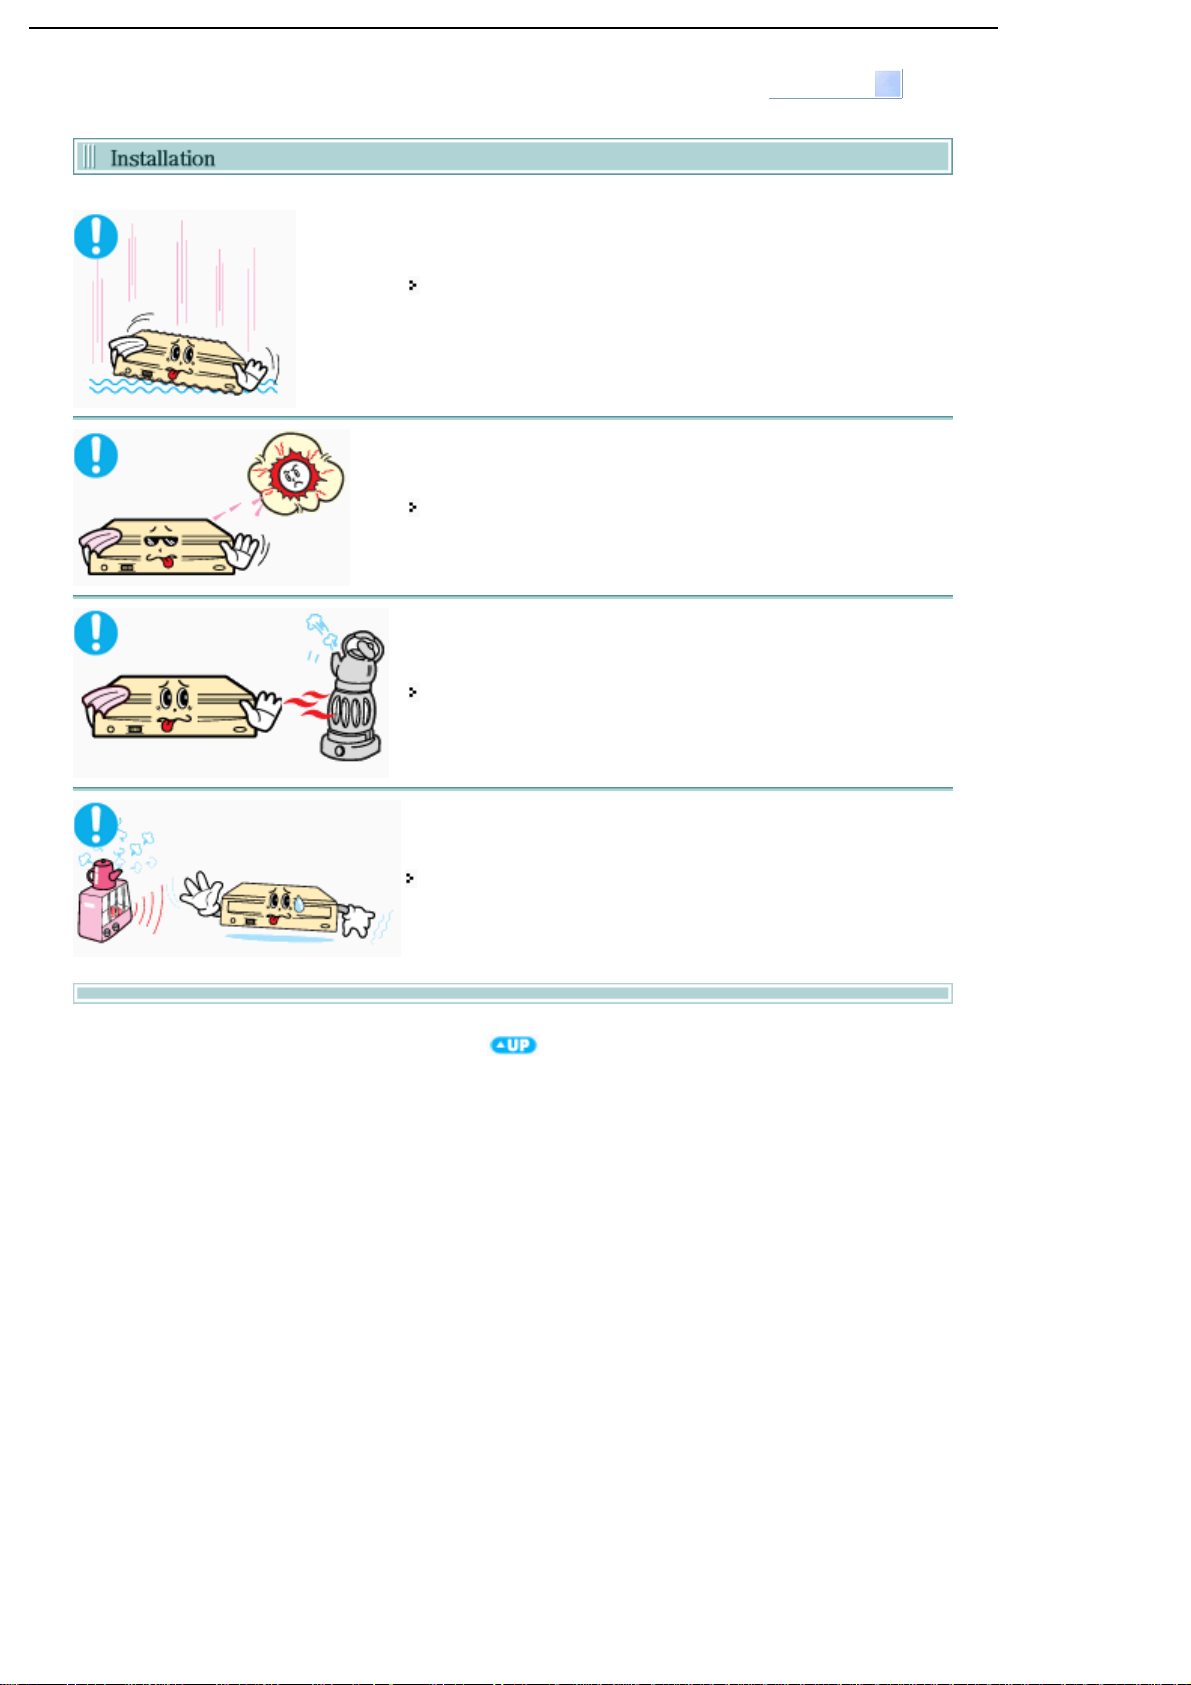
Do not drop the drive, and protect it from severe shocks.
- It can damage the drive or cause it to malfunction.
Do not place the drive in direct sunlight.
void low or high temperature environments.
void high-humidity environments.
Page 5

Select Languages
English
Handle with caution to prevent damage from external shock.
Do not drop the drive, and protect it from severe shocks.
- It can damage the drive or cause it to malfunction.
Do not move the drive while in operation and do not attempt to open
the disc tray by force.
Make sure to close all working programs before attempting to open the
tray and always use the open/close button.
Do not insert a pin into the emergency opening while in operation.
Do not insert hands in the tray while in operation.
This may cause damage to the product or human body
Do not use cracked, distorted or damaged discs.
In particular, a disc with a crack on the inner tracks may break
while in use.
Always check to be sure the disc is not cracked before use. If you find a crack on the disc
(especially around the center hole), make a copy of the disc immediately and use the copy instead.
Continued use of a cracked disc will cause the crack to become bigger, resulting in irreparable damage
to the disc.
Do not use low-quality discs (illegal, scratched, damaged, etc.).
Samsung is not responsible for any loss resulting from the use of such discs.
Page 6
Select Languages
English
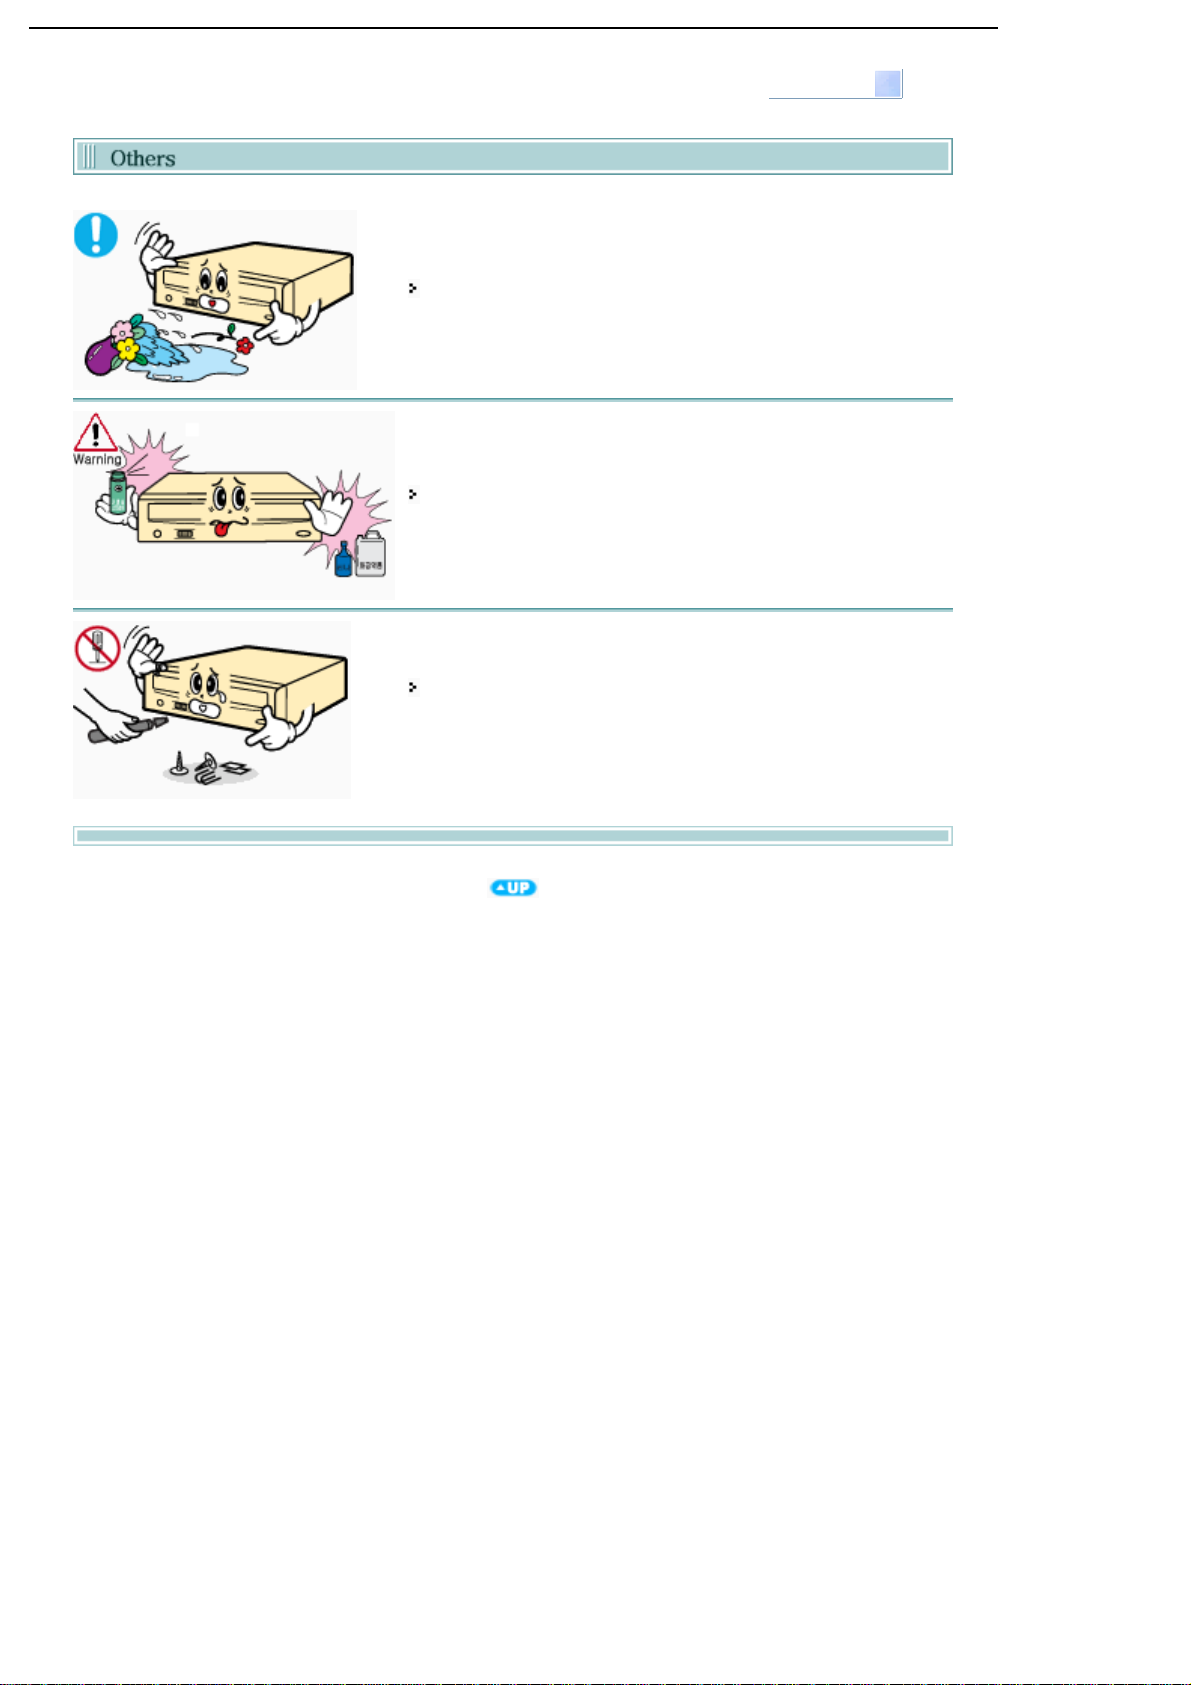
Never allow food particles or foreign substances to enter the drive
casing.
To protect against the risk of fire, do not spill such liquids as
alcohol and benzene on the drive.
Do not disassemble, attempt to repair or modify the device
without express approval as directed in the manual.
- To reduce the risk of damage, electric shock, and fire.
Page 7

Select Languages
English
Samsung Eco-mark
The Samsung’s own Eco mark helps consumers
to easily understand that Samsung develops
eco-friendly products. This mark represents
Samsung’s continuous effort to develop ecofriendly products.
(Restriction of the use of certain hazardous substances in electrical and electronic eq uipment)The
RoHS
RoHS, the environment regulation announced by European Union, restricts the use of lead, mercury,
cadmium, hexavalent chromium, PBB, and PBDE in products put on the market in The European Union
after July 1, 2006.
Correct Disposal of This Product (Waste Electrical & Electronic Equipment)
(Applicable in the European Union and other European countries with separate collection systems)
This marking shown on the product or its literature, indicates that it should not be disposed
with other household wastes at the end of its working life. To prevent possible harm to the
environment or human health from uncontrolled waste disposal, plea se separate this from
other types of wastes and recycle it responsibly to promote the sustainable reuse of
material resources.
Household users should contact either the retailer where they purchased this product, or
their local government office, for details of where and how they can take this item for
environmentally safe recycling.
Business users should contact their supplier and check the terms and conditions of the
purchase contract. This product should not be mixed with other commercial wastes for
disposal.
Page 8

Select Languages
r
English
Emergency Hole
1.
Open/Close Button
3.
On/Off Lamp
2.
Disc Tray
4.
z
Design and specifications are subject to change without prior notice.
Sound Output Port
1.
Master/Slave Selection Port
3.
Interface Port
2.
Power Port
4.
DVD Write
40-pin interface cable
four screws to install the drive
drive installation instruction sheets
software programs
(Software: Nero Express 6, In CD 4, Nero Vision Express, Nero ShowTime, Nero BackItUp,
Nero Recode)
z
In case you need to return the purchased product, be sure to include all the accessories provided
with the product to receive a refund.
z
The type of accessories varies depending on product model.
Page 9

You need to have an IBM-compatible PC with the following specifications.
Item Description
Select Languages
English
OS
CPU
RAM
Microsoft Windows 98 SE/2000/Me/XP(SP 1.0 or higher)
Pentium3 800MHz or greater IBM-compatible PC
(Recommendation: Pentium4 2.0GHz or higher)
256Mbytes or greater
Page 10

Select Languages
English
Versatile Multimedia Features
DVD-R: Read / Write DVD-RW: Read / Write / Rewrite allowed
DVD+R: Read / Write DVD+RW: Read / Write / Rewrite allowed
DVD-ROM: Read DVD+R Dual: Read / Write
DVD-R Dual: Read / Write CD-R: Read / Write
CD-RW: Read / Write / Rewrite allowed
DVD-RAM: Read / Write / Rewrite allowed
See table below for details
Disc Type Writable Rewritable Read Labeling
CD-STAMP × × O ×
CD
DVD
Writable :
CD-R O × O ×
CD-RW (O) O O ×
Light Scribe Media O × O O
DVD-STAMP × × O ×
DVD-R For General Ver 2.1 O × O ×
DVD-RW Ver 1.1 (O) O O ×
DVD+R(Dual) Basic Ver 1.11 O × O ×
DVD-R(Dual) O × O ×
DVD+RW Basic Ver 1.2 (O) O
Light Scribe Media O × O O
DVD-RAM (O) O
write once, read many times.
Supports Read (playback) for various types of
discs
O×
O×
Rewritable :
DVD Recommended Disc Types
DVD-R Media
Taiyo-Yuden, TDK, MKM, Hitachi, Maxell, Fuji Film, PVC, Panasonic, RiTEK, CMC, UNIFINO
DVD-RW Media
TDK, MKM, JVC, PVC, RiTEK, CMC
DVD+R Media
RICOH, Taiyo-Yuden, MKM, RiTEK, CMC, Prodisc, Optdisc
DVD+RW Media
RICOH, MKM, RiTEK, CMC
DVD±R Dual
MKM
DVD-RAM
Mexell
CD Recommended Disc Types
CD-R Media
write data one or more times.
Page 11

Taiyo-Yuden, RICOH, MKM, Hitachi, Maxell, Fuji Film, RiTEK(Phtharo), CMC, Pioneer, Princo, TDK
CD-RW Media
RICOH, MKM, RiTEK, CMC
HS CD-RW Media
RICOH, MKM, CMC
US CD-RW Media
MKM
Light Scribe
CD: MKM, MBI, CMC
DVD: MKM
Buffer underrun prevention technology included
What is " buffer underrun prevention technology "?
A technology to prevent
fast as the data writing speed when data is being recorded on a CD.
Reading / Recording Speed
Reading Speed(MAX)
DVD-ROM(S)(16X), DVD-ROM(D)(8X), DVD-R (12X), DVD-RW (8X), DVD+R (12X), DVD+RW (8X),
CD-ROM (48X), CD-R (40X), CD-RW (40X), DVD+R DUAL (8X), DVD-R DUAL (8X), DVD-RAM(12X)
"buffer underrun"
errors in which the data transmission speed is not as
Recording Speed(MAX)
DVD+R DUAL (8X), DVD+RW (8X), DVD-R (18X), DVD+R (18X), DVD-RW (6X), CD-R (48X),
CD-RW (32X), DVD-R DUAL (8X), DVD-RAM(12X)
Page 12

Turn the PC off.
1.
Open the cover as shown in the picture.
2.
If necessary, attach the support devices on both sides of
3.
the drive
- The support devices are PC accessories. Purchase a
pair if necessary.
(SCREW : M3 X 6 X 4 )
Select Languages
English
Insert the DVD Writer after removing the plate as below
4.
Be sure to use the screws (M3x6) provided with the product.
- Using screws other than M3x6 may cause malfunction.
Be sure that the screws are tightened securely in place.
Loosely tightened screws may result in an increased level of noise.
Page 13

Select Languages
English
Connecting the Power Cable
Hold the power cable (with four pins) in the power box within the computer with the cutoff edges( )
facing up and connect it to the power port in the back of the DVD Writer
+5V DC
1
Ground
Cutoff edges
A -
Improperly connected power cable may cause malfunction. Check the direction of the
power cable and the cutoff edges before connecting the cable.
2
Ground
3
+12V DC
4
Page 14

Connecting E-IDE Cable
r
y
)
(
When you use one E-IDE cable
Set the jumper to SL (slave) in the Master/Slave port in the back of the DVD Write
a : Slave Drive (Select the SL jumper)
b: HDD
c : MotherBoard
When you use two E-IDE cables
Set the jumper to MA (Master) in the Master/Slave port in the back of the DVD Writer.
When
a : Master Drive (Select the MA jumper) b : HDD
c : Motherboard d : Primary 1
e : Secondary 1
ou have one DVD Writer: Set it to MA (Master
When you have one DVD Writer and the other ODD products: Set it to MA (Master) / SL
Slave),
Page 15

a : Master Drive (Select the MA jumper) b : Slave Drive (Select the SL jumper)
c : HDD d : Motherboard
e : Primary 1 f : Secondary 1
Connecting the Jumper to the Master/Slave Port
Connect the jumper to the slot in the back of the DVD Writer.
When you connect the jumper to MA (Master), the drive runs as the master, and when you connect it
to SL (Slave), the drive runs as the slave.
When you connect it to CS (CSEL), you can control the device using the host interface signal CSEL.
(Connection to MA is recommended.)
MA : Master
SL : Slave
CS : Cable Select(CSEL)
Page 16

Connecting the Audio Cable (When Connected to the Sound Card)
To listen to the sound from the drive in Analog mode, connect the audio output on the DVD Writer to
the audio input of the sound card using an audio cable (4-pin).
Connecting the Digital output terminal.
For clearer sound, use a digital output terminal.
Digital output terminal is only available with the Sound card which support Digi tal output.
For using Digital output terminal, recommend to buy & use the sound card.
Page 17

Go to http://samsung-ODD.com
1.
Click Firmware on the menu bar (in the upper right-hand corner).
2.
Click Firmware Downloads. Check for your drive model and start downloading.
3.
Select Languages
English
Page 18

Confirming Using [Device Manager]
Windows 98 SE/Me
Select Languages
English
Click [Start] - [Settings] - [Control Panel] -
1.
[System]
Click on the [Device Manager] tab in the
2.
System Properties window.
Click CDROM drive in the Device
3.
Manager window.
1 in the picture in the left appear if the
driver is installed properly.
Windows 2000
Click [Start] - [Settings] - [Control Panel] -
1.
[System]
Click on the [Hardware] tab in the System
2.
Properties window and then click on the
[Device Manager] tab.
Click DVD/CD-ROM drive in the Device
3.
Manager window.
1 in the picture in the left appear if the
driver is installed properly.
Windows XP
Go to [Start] - [Settings] - [Control Panel] -
1.
[Performance and Maintenance]
Click [Administrative Tools] icon in the
2.
Performance and Maintenance window.
Click [Computer Management] icon in the
3.
Administrative Tools window.
Click [Device Manager] icon in the
4.
Administrative Tools window and then
click DVD/CD-ROM drive.
1 in the picture in the left appear if the
driver is installed properly.
Page 19

Select Languages
English
When the On/Off light is orange, do not turn the PC off or remove the DVD Writer as it may cause
damage in the drive.
How to Use a Horizontally Installed Drive
You can use
discs.
The drive cannot read the disc properly if any part of the
disc is place outside the tray guiding line.
How to Use a Vertically Installed Drive
This drive can be installed vertically.
You can use only the
(You cannot use the 3.15 Inch (8cm) discs)
The drive cannot read the disc properly if any part of the
disc is place outside the tray guiding line.
3.15 Inch or 4.72 Inch (8cm or 12cm)
4.72 Inch (12cm) discs.
Page 20

Select Languages
English
The DVD Writer allows writing DVD RW discs using Nero Express and enables
"packet writing" (high-speed recording) using InCD.
The drive also allows writing DVD R discs using Nero Express.
Unauthorized copying of DVD or software titles is ille ga l and the individuals that make
illegal copies will be held responsible for any copyright infringement.
Using low-quality discs may lengthen the recording time or not supporting due to
reduction in double speed.
You can use the DVD Writer to playback music CDs, CD-ROM, CD-R/RW, or DVD-ROM discs, like a CDROM drive or a DVD-ROM drive. If your computer recognizes the [CD-ROM] icon designated to the DVD
Writer as the 'E:' drive, insert a CD-ROM or a DVD-ROM disc and access the 'E:' drive.
(The actual drive letter of the DVD Writer may vary depending on the user's system environment.)
To Playback a DVD Video Disc :
You need a DVD decoder board or the DVD decoder software program.
(Provided with WinDVD Show TIME)
Use WinDVD Show TIME to change the region code of the DVD Writer.
DVD Region Protection Coding (RPC):
The RPC feature is supported on DVD players and is used with DVD-video discs (such as movies). Currently,
the motionpicture industry has divided the worldinto different regions or zones thatcorrespond to the regional
markets intowhich the motion picture industry releasesmovies. Simply put, RPC codes are placedon movies
marketed throughout the world,based on the region of the world inwhich they are being sold. These
RPCcodes help control and prevent piratingof new movies into other motion pictureregions prior to their true
releasedates within those markets.
The SH-S182M DVD Writer supports RPCphase II. In the RPC-2 mode, the localcode can be changed by
users. RPC-2is selected by default for the SH-S182M DVD Writer.
You can change the region code up tofive times via an MPEG application.
Please contact your dealer or local SAMSUNG representative if you wish tochange the local code more than
fivetimes.
Page 21

Select Languages
English
What is a MAGIC SPEED?
MAGIC SPEED is a program that supports users to select at his or her discretion the reading speed of
CD disc between two modes offered by drive: Maximum Speed Mode (Max Mode) and Silent Mode.
Development Background
ODD products launching nowadays are providing a high reading speed.
With the increased reading speed, faster data processing has become possible. However, high rotation
speed often causes louder noise, and it is more possible to crash the cracked or bent discs. Against this
backdrop, our Company has developed a speed-down algorithm and applied this technology to new
launching products to provide safer and more comfortable environments for PC users.
※ What is Speed-down Algorithm?
It establishes a safer disc reading speed in operating the device in order to prevent possible di sc
crashes in using CDs with cracks in start. In addition, for customers who want to play CDs at its
maximum speed, MAGIC SPEED program offers the function of selecting reading speed, so that
customers can set the speed as they want. (Recording speed will run at recordable speed without
limit)
What Are MAGIC SPEED Modes and How to Use
MAGIC SPEED Modes
●
Max Mode: Setting reading speed to its maximum level provided by drive.
●
Silent Mode: Setting reading speed to a stable low speed.
●
Since modes set by MAGIC SPEED function will be maintained in using the drive connecting other
PC, please confirm first the setting status before use.
Caution
such disc in Silent Mode, or make a copy immediately before use.
How to Use MAGIC SPEED
●
●
●
●
> We recommend you to use “Max Mode” for data copy or disc copy, and “Silent Mode” for normal
> Other functions
: A disc with crack may be crashed in playing with Max Mode. We recommend you to use
First, install MAGIC SPEED program registered on our website.
On MAGIC SPEED tray icon, select right-click to execute the program.
Select the mode you want to use on Program Execution Window and select “settings”. Then,
reading speed of the drive will run in selected mode.
Select “Close” to exit Program Execution Window.
In this occasion, reading speed will be run in the set speed if there is no separate mode change or
program exit.
operation.
▶
To disable Auto Run
This is a default program that automatically runs in every PC booting.
If you want to quit this auto run function, deselect the auto run item selected on tray icon
menu.
Where Can I Download MAGIC SPEED?
Visit our website for customer support (URL:www.samsung-ODD.com), and select Firmware → MAGIC
SPEED.
Page 22

Select Languages
English
Click [Start] - [Setting] - [Control Panel] - [Add/Remove Programs] and a window as shown
below appears.
[ Windows 98 / Me ]
Click the [Add/Remove] button to remove the program.
[ Windows 2000 ]
[ Windows XP ]
Click the [Add/Remove] button to remove the program.
Click the [Add/Remove] button to remove the program.
Page 23

Turn the PC off and pull out the drive.
Remove any foreign objects from the surface of the drive using soft cloth.
- Do not use benzene, paint thinner, or any other solvents.
- Cleaning the interior of the unit with such things as a cotton
swab may cause failure or loss of functionality.
Select Languages
English
Page 24

This part of the manual is to prevent damage s or data loss.
Read carefully and use the device properly.
Do not place it under the direct sunlight.
Place it so that it sits on its side on a flat surface.
Do not scratch or place a label on the disc.
Handle the disc with caution to prevent damage from external shock.
Do not expose it to severe temperature fluctuations.
(Exposure to such environment may cause congealing.)
Select Languages
English
Page 25

Select Languages
prop
English
This part of the manual is to prevent damage s or data loss.
Read carefully and use the device properly.
Do not touch the surface of the disc.
Place your fingers on the edge of the disc to hold.
Clean the disc lightly with soft cotton cloth, starting from the center and move to
the edge of the disc.
Use only disc cleaning liquids. Do not use benzene, paint thinner, or any other solvents.
If the disc surface becomes dirty with fingerprints, foreign substances or dust, the disc may not
function
erly.
Page 26
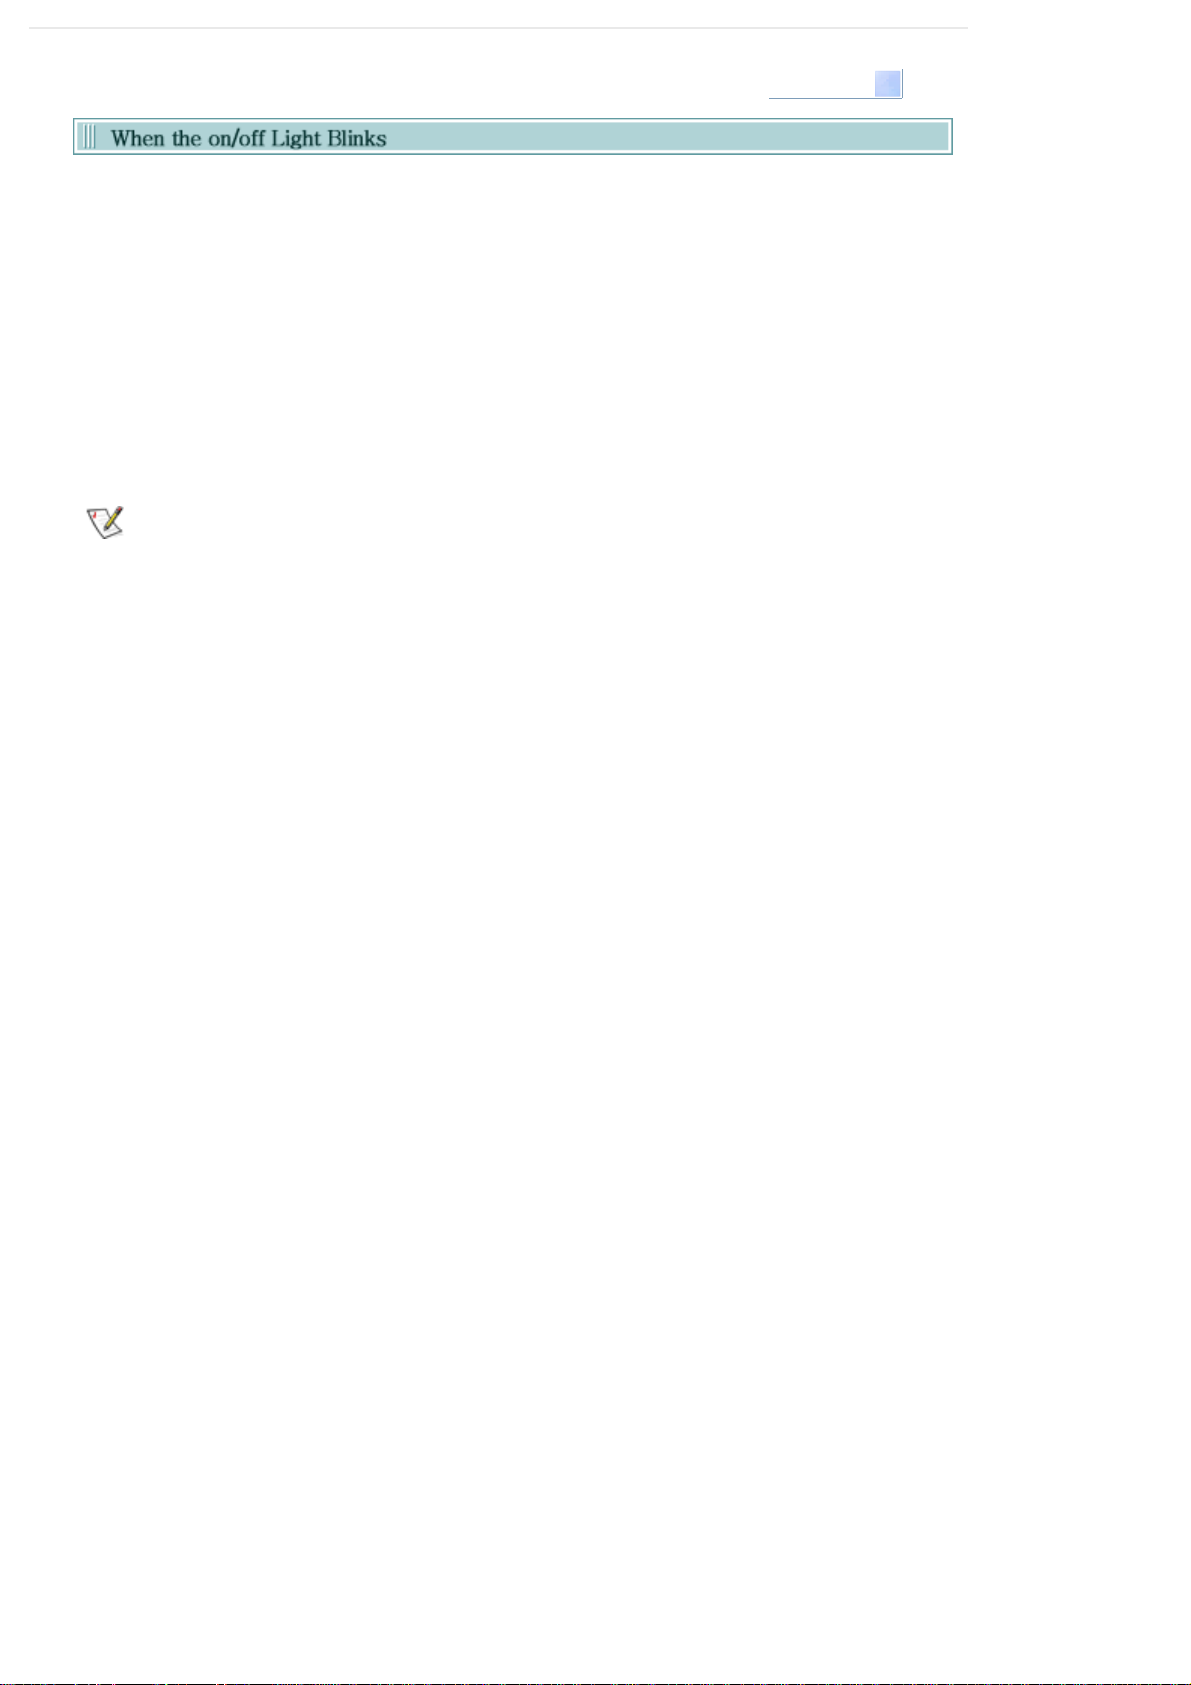
On/Off Lamp Meaning
Disc Lead-In
Writing
Reading
Audio Playback [Analog Mode]
Audio Playback [Digital Mode]
Standby
No Disc
The indicator light turns off when the drive is not in use (standby) after disc lead-in.
Green: Blinks every 0.3 seconds.
Green: Blinks every 0.3 seconds.
Green: Blinks every 0.3 seconds.
Green: Blinks every 0.3 seconds.
Green: Blinks every 0.3 seconds.
Off
Off
Select Languages
English
Page 27

Select Languages
English
Problem Meaning / Solution
The tray won't open.
The tray won't close.
The PC is not working properly.
The drive is not working properly.
No sound is heard from an audio
CD.
The Window OS can't detect the
drive.
See if the PC on.
Make sure the power cable within the PC is connected properly.
If the tray still won't open with the power on, turn the power off and
insert a pin(paper clip) into the emergency hole to open.
Make sure the disc has been inserted properly.
See if the jumper(s) is properly connected to the Master/Slave
Selection port.
See if the drive is properly connected to the PC.
See if the floppy disc remains in the PC.
See if the drive is connected properly to the PC.
See if the device drive program has been installed properly.
Check whether the audio cable is correctly connected to the sound
output terminal on the drive and the sound card CD-IN terminal.
Check that the sound card is operational.
If the Digital CD Audio Output box is checked, no sound comes
out of the analog audio outputterminal of the driver.
Check the condition of the CD and wipe the surface of the CD
clean before use.
See if the device drive program has been installed properly.
Can be an OS problem. Try reinstalling the Windows OS program.
The system won't read the disc.
The drive is connected to the
sound card but cannot seem to
detect it.
See if the system detects the drive.
Make sure you use the types of discs that are supported by the drive.
See if the on/off light turns into green.
Make sure you inserted the disc with the label facing up.
Make sure you are using the right program for disc playback.
See if the disc is clean.
See if any congealing has occurred.
Make sure the region code of the drive matches the disc number.
Your sound card is using AT BUS interface.
Connect the card to the E-IDE port or replace the card with a new
card with the built-in E-IDE interface capacity.
Page 28

Select Languages
English
DVD Writers record data on the disc by applying laser light onto the surface of the CD DVD, and therefore
writing errors may occur if you use a damaged CD DVD , for example . Be sure to eliminate the following
error-causing elements before you start writing:
* The following settings are recommended for all DVD Writers:
Avoid a situation that requires multitasking , and remove turn off the screen saver.
A buffer underrun may occur if the system multitasks while the DVD±R/RW CD-RW drive is
writing/erasing.
Block any outside attempt to access the host PC during a writing session.
An error may occur if another user accesses the printer connected to his/her the system via the
network during a writing session.
Disable the CD auto - run feature of the CD
Inserting an auto - run-enabled CD in to another drive connected to the same system during a
writing/erasing session may cause an error.
How to disable the auto-run feature: Windows 98/ME
GO to Start Settings Control Panel System Hardware Device Manger CD- ROM
Settings . Disable Insert AutoRun.
It is recommended that you use the image file format when you write a large number of smallsized files.
When there are a large number of small-sized files to write , the system's transmission rate drops
and the Superlink feature works at a more frequent rate, resulting in lower writing quality.
If you are doing a CD-to-CD write , it is not necessary to check to see if you have available space
on your hard disc beforehand.
.
However, in the case of image files, it is recommended that you be sure you have at least twice the
amount of space needed for the data on your hard disc , as image files are copied to the hard disc
before they are copied to the CD.
Use a regulation-length (46cm) or shorter E-IDE cable.
Using an E-IDE cable longer than 46cm may cause a transmission error.
Do not use more than one type of writing software.
Before you install a writing program, be sure to first uninstall existing version s of the prog ram or
other writing program ( s ) and reboot the system first .
(The Windows operating system may be damaged if you install the Korean version while the
English version remains on the system.)
Use only the writing software provided by Samsung.
You may experience writing errors if you use with other writing programs
T he disc has bad properties data , and or there are other discs with different prope rties
available under the same ID.
The drive's write strategy is set in a way that the drive examines to examine the disc properties and
determine s the optimal write conditions for those properties.
For example, many disc makers do not bother to insert property information distinguishing 48X disc
s from 32X disc s . Since the two types of discs have the same properties data , although they
actually have different properties, it is often impossible to respond to the situation with a single write
strategy. In order to ensure stable writing , it is necessary to downgrade the write speed.
.
If discs from two different disc makers have the same write speed according to the labels , but
actually have different write speed s , I i t is necessary to downgrade the write speed to ensure
stable writing.
Samsung' s Standards for Write Speed Restriction
Write speed is downgraded for the sake of write stability , if high-speed
Standards 1
discs available in the market have particularly bad properties data , or there
are low-speed discs available under the same ID.
Speed-restricted discs go through further examination and adjustments
later. If high-speed discs are available under the same ID with as low-speed
Page 29

discs (speed restricted at present), the speed restriction is removed when
Standards 2
You may experience lower write quality in case if you use disc products by some disc makers
which that are not registered with the product's firmware.
Therefore, it is recommended that you use only discs by recommended companies . Even , and
even if the write session is completed successfully, check the write quality before you put the disc
in storage , especially in case of an important data backup.
(Samsung is not responsible for any loss resulting from data backup failure.)
We update the list of supported media on a regular basis through our firmware upgrades
the low-speed counterparts become no longer a una vailable in th e market
under the same ID.
Page 30

Category
: DVD-R, DVD-RW, DVD+R, DVD+RW, DVD-ROM,
DVD
DVD-Video, DVD+R (Dual), DVD-R (Dual), LightScribe
DVD±R, DVD-RAM
: CD-ROM, CD-R, CD-RW, CD-DA, CD+E(G)
Usable Discs
DISC
Disc
Diameter
Interface
Interface Support
ACCESS TIME
(Random)
Setting Titles only Titles and contents
Disc
Labeling
Time
Data Transfer Speed
Buffer Memory
Drive Installation
Operating Environment
Size(Width x Height x Length)
Weight
Best
Normal
Draft
(Max)
Note
Does not support DVD-R for Authoring.
Cannot playback or record on both sides of a two-sided disc simultaneously.
The read/write capacity of the supported discs depends on the condition of the disc
and the recording format of the drive. Therefore, the read/write quality may not be perfect.
Severe vibration or external impact may decrease the quality of printed images.
Please firmly place the product onto the PC before use.
In case of disk identification error message, thoroughly clean the surface of the disk
Port
PIO mode PIO Mode 4: 16.6MB/sec
DMA mode Ultra DMA Mode 2: 33.3MB/sec
CD-ROM 110ms (Random)
DVD-ROM 130ms (Random)
Less than 4 min Less than 9 min Less than 36 min
Less than 3 min Less than 7 min Less than 28 min
Less than 2 min Less than 4 min Less than 20 min
DVD+R CAV 18X (24.3MB/sec) CAV 12X (16.2MB/sec)
DVD+RW Z-CLV 8X (10.8MB/sec) CAV 8X (10.8MB/sec)
DVD+R DUAL Z-CLV 8X (10.8MB/sec) CAV 8X (10.8MB/sec)
DVD-R DUAL Z-CLV 8X (10.8MB/sec) CAV 8X (10.8MB/sec)
DVD-R CAV 18X (24.3MB/sec) CAV 12X (16.2MB/sec)
DVD-RW Z-CLV 6X (8.1MB/sec) CAV 8X (10.8MB/sec)
DVD-ROM(Single) - CAV 16X (21.6MB/sec)
DVD-ROM(Dual) - CAV 8X (10.8MB/sec)
DVD-RAM CAV 12X(16.2MB/sec) CAV 12X(16.2MB/sec)
CD-ROM - CAV 48X(7.2MB/s)
CD-R PCAV 48X (7.2MB/sec) CAV 40X (6.0MB/sec)
US-RW Z-CLV 32X (4.8MB/sec) CAV 40X (6.0MB/sec)
HS-RW CLV 10X (1.5MB/sec) CAV 40X (6.0MB/sec)
CD-RW CLV 4X (0.6MB/sec) CAV 40X (6.0MB/sec)
Temperature 41°F ~ 122°F (5°C ~ 45°C)
Humidity 5% ~ 80% (RH)
CD
CD-MIDI, CD-TEXT, CD-ROM XA, Mixed Mode CD
CD-I, CD-I Bridge (Photo-CD, Video-CD),
Multisession CD (Photo-CD, CD-EXTRA, Portforio)
LightScribe CD-R
4.72 Inch or 3.15 Inch (120mm or 80mm)
ATA/ATAPI (E-IDE)
Media Type
SH-S182M(TS-H652M)
DVD Writer
Write
2MB
Horizontal / Vertical
5.83 X1.65 X 6.69 Inch (148.2 X 42 X 170mm)
750g
Select Languages
English
The entire label area
(including graphics)
Read
Page 31

where the label is presented and then start printing.
The quality of the printed image cannot be ensured if printing an image on the area
which is already used for printing.
For more information on the writing and duplicating the Lightscribe disk label,
install Nero software and refer to the HELP section.
Fcc information to the user
This equipment has been tested and found to comply with the limits for a class B digital device. pursuant
to part 15 of the FCC rules.
These limits are designed to provide reasonable protection against harmful interference in a residential
installation. this equipment generates.
Uses and can radiate radio frequency energy and. if not installed and used in accordance with the
instructions. may cause harmful interference to radio communications However. there is no guarantee
that interference will not occur in a particular installation.
If this equipment does cause harmful interference to radio or television reception.
Wiich can be determined by tuming the equipment off and on. the user is encouraged to try to correct
the interference by one or more of the following measures.
Reorient or relocate the receiving antenna.
Increase the separation between the equipment and receiver.
Connect the equipment into an outlet on a circuit different from that to which the receiver is connected.
Consult the dealer or experienced radio TV technician for help.
CAUTION
Change or modifications not expressly approded by the manufacturer responslble for comliance could
void the user's authority to operate the equipment.
Laser Standand
IEC 60825-1 : 1993 + A1 : 1997 + A2 : 2001
The product specifications above may be changed improve device performance without prior
notice.
 Loading...