

Samsung SGH-T399 User Manual
DRAFT
Internal Use Only
Removing Music Files
1. From within the
2. Touch and hold a song entry to reveal the on-screen
context menu.
Delete
3. Ta p
Music
application, tap the
➔
OK.
The music file(s) is deleted.
Songs
tab.
Music Hub
Samsung Music Hub makes your device a personal music
manager. It lets you access, buy, and download millions of
music tracks. Access top albums, top tracks, featured
albums, and new releases as well as search for tracks,
albums and artist. Enjoy music samples before you download
them from your device.
Apps)
1. From the Home screen, tap (
(
Music Hub
Start
2. Ta p
Hub Home screen displays.
Note:
You must sign in to your Samsung account before you
can use the application.
).
to continue or (
➔
Back
) to exit. The Music
4. Choose from any of the following options: MY MUSIC,
STORE, RADIO, RECOMMENDED, RECENT,TAGGED,
Tagged, or Q (Queue).
Note:
You have to be signed in to use some options.
To sign in without your Samsung account, tap
and use the keyboard to enter your
Music Hub Password
Tap
Create account
5. Tap (
word or phrase to search for tracks, albums, or artists.
.
to set up a new account.
Search
) and use the keyboard to enter a key
Email address
Sign in
and
3. If prompted, follow the on-screen instructions to log
into your Samsung account.
Applications and Development 175
DRAFT
Internal Use Only
Making a Purchase
:30
You can use Music Hub to buy albums or individual tracks.
You can also build your own album from various tracks.
Apps)
Preview
Options
➔
) hear a 30
) choose
1. From the Home screen, tap (
(
Music Hub
2. Select an album or a track.
3. To the right of the entry, tap (
second preview of the current selection.
– or –
4. To the far right of the entry, tap (
from: Add to queue, Buy song, View album, View artist,
Find similar music.
Buy song
5. Tap
complete your purchase.
) ➔
Store
.
and follow the on-screen instructions to
176
My Files
This application allows you to manage your sounds, images,
videos, bluetooth files, Android files, and other memory card
data in one convenient location. This application allows you
to launch a file if the associated application is already on
your phone (ex: MP4).
From the Home screen, tap (
(
My Files
).
Note:
Navigation in this viewer works on a hierarchy structure
with folders, subfolders, etc.
Note:
The application lets you view supported image files and
text files on both your internal storage and microSD
card.
Apps)
➔
DRAFT
Internal Use Only
Opening and Navigating within Files
DCIM is the default location for pictures or video taken by the
device. These files are actually stored in the DCIM folder
location.
To open files:
1. From the Home screen, tap (
(
My Files
) ➔
All files
Note:
If avaiable you can also select the internal microSD card.
2. Tap a folder and scroll down or up until you locate your
selected file.
•Home tab
•Up tab
•
Press and then tap
are displayed on-screen. Choose from:
Thumbnail
or
•
Press for these additional options:
Create folder
allows you to back up to the root directory.
allows you to back up into a higher directory.
View by
.
,
Search, View by, Sort by
Apps)
➔
.
to change the way the files
List, List and details
Select all,
, and
Settings
,
.
To navigate:
1. Ta p
All files ➔ Device storage/SD memory card
the contents of either device or your internal SD card.
2. The following folders may display:
•ShareShot
•Alarms
•Android
•Application
• Bluetooth
•DCIM
• Download
•Movies
•Music
• Notifications
•Pictures
•Podcasts
: displays the files shared via a group share shot
session.
: this folder contains any alarm files you may have.
: the Android folder stores files that are used in Android
applications.
: this folder contains app info for S Memo.
: this folder stores files sent via a Bluetooth device.
: this is the default location for pictures and videos taken
by the device. Tap
video files.
have received.
DCIM ➔ Camera
: this folder contains downloads you have made.
: this folder contains your Video and Movie files.
: this folder contains your Music files.
: this folder contains all of the notifications you
: this folder contains your photos.
: this folder contains all of your podcasts.
Applications and Development 177
to view the picture or
to see
DRAFT
Internal Use Only
•Ringtones
Note:
Different folders may appear depending on how your
phone is configured.
3. Once you have located your file, tap the file name to
launch the associated application.
: this folder contains any ringtones you have
purchased.
Navigation
Google Maps Navigation (Beta) is an internet-connected
turn-by-turn, GPS navigation system with voice guidance.
Caution!
Traffic data is not real-time and directions may be
wrong, dangerous, prohibited, or involve ferries.
Important!
To receive better GPS signals, avoid using your
device in the following conditions:
- inside a building or between buildings
- in a tunnel or underground passage
- in poor weather
- around high-voltage or electromagnetic fields
- in a vehicle with tinted windows
178
1. From the Home screen, tap (
(
Navigation
2. Read the on-screen disclaimer regarding the current
release status of the Navigation app and tap Accept.
).
Apps)
➔

DRAFT
Internal Use Only
Enabling Location
1. From the main
services
Use GPS satellites
2. Ta p
Use wireless networks
3. Ta p
from sources such as Wi-Fi and mobile networks to
provide a better approximation of your current location.
My places
4. Ta p
locations.
Settings
page, tap
More
.
to enable the GPS satellite.
to allow apps to use data
to enable the storage of your favorite
tab ➔
Location
Navigation options
1. From the Home screen, tap (
(
Navigation
configured from the main screen.
2. If prompted, read the on-screen disclaimer and tap
Accept
.
3. Choose from the following on-screen options:
• Driving/Walking/Bicycling
method of travel. Selection of Walking would negate the need
to track traffic jams and obstructions.
• Speak destination
feature to search for matching locations in your area.
). The navigation application can be
: allows you to use the voice recognition
Apps)
➔
: tap to configure the
• Type destination
address (via the on-screen keypad).
•Go home
location.
–
When prompted initially to setup a home address, enter the
location into the
•Map
: enables the on-screen real-time map functionality.
: allows you to manually enter a destination
: allows you to return to a designated “Home”
Enter an address
field and tap Save.
Navigation Map options
Once on the map screen, you can access the following
features:
•
Destination
screen.
•
Search by voice
•
Layers
: returns you to the previous Navigation options
: Speak your destination instead of typing.
: allows you to switch map views:
•Traffic view
conditions are displayed over roads as color-coded lines. Each
color represents how fast the traffic is moving.
•Satellite
Satellite images are not real-time. Google Earth acquires the
best imagery available, most of which is approximately one to
three years old.
: (available only in selected areas) Real-time traffic
: Maps uses the same satellite data as Google Earth.
Applications and Development 179
DRAFT
Internal Use Only
• Parking
: displays parking information relative to your current
location.
• Gas stations
current location.
•ATMs & banks
your current location.
• Restaurants
to your current location.
While on the map screen, press to access additional
options:
•
Set destination
where you can access a destination by either Speaking, Typing, or
selecting from a Contacts entry or Starred Place.
•
Search
: manually search for a destination address, place, name
of business, or even a type of business.
•
Layers
: allows you to switch map views. See previous
description.
•
Settings
dimming) and Information (Terms, privacy & notices).
•
Exit navigation
•
Help
: provides on-screen help.
180
: displays gas station location relative to your
: displays ATM and Bank locations relative to
: displays restaurant and eatery locations relative
: returns you to the navigation options screen
: provides access to both Power settings (Screen
: terminates the application.
Phone
This application provides the ability to make or answering
calls, access the Contacts list, which is used to store contact
information.
From the Home screen, tap (
For more information, refer to “Call Functions and Contacts
List” on page 47.
Phone
).
Play Books
Formerly known as Google Books, this application allows you
to read over 3 million ebooks on the go.
Build your ebooks library in the cloud with Play Books: jump
right into a bestseller or select from nearly 3 million free
ebooks. Personalize the reader to your liking, pick up reading
where you left off on your phone or computer, and settle
down with a great book on your Android phone!
Note:
You must logged into your Google account prior to using
this feature.
Apps)
1. From the Home screen, tap (
(
Play Books
).
➔
DRAFT
Internal Use Only
2. If prompted, tap
books you have previously selected between your
Books account and your device.
3. Tap to begin searching for both free and paid
ebooks.
4. Follow the on-screen prompts to download the ebook
to your device.
Turn sync on
. This synchronizes your
Play Magazines
With Google Play Magazines, you can subscribe to your
favorite magazines and have them available to read on your
device at any time or any place.
1. From the Home screen, tap (
(
Play Magazines
2. Log on to your Google account if you have not already
done so. For more information, refer to “Gmail” on
page 148.
3. At the Welcome! display, tap the shop icon to
browse the full catalog.
).
Apps)
➔
4. Read the Google Play Terms of Service and tap
5. Sweep the screen to the left or right to view
Categories, Home, Top Selling, and New Arrivals.
6. Tap a magazine to see more information and
subscribe.
7. Follow the on-screen instructions to subscribe to a
magazine.
Accept
Play Movies & TV
This application allows you to connect to the Play Store,
download a movie and then watch it instantly.
Choose from thousands of movies, including new releases and
HD titles in the Play Store and stream them instantly on your
Android device.
Movies, previously rented via the Play Store are automatically
added to your My Movies library across your devices.
Learn more about Google Play Movies at:
http://play.google.com/about/movies
1. From the Home screen, tap (
(
Play Movies & TV
Applications and Development 181
.
Apps)
➔
).
.
DRAFT
Internal Use Only
2. Log on to your Google account if you have not already
done so. A list of videos sorted on the SD card displays
in the Video list.
3. Following the on-screen instructions for renting and
viewing movies.
MOVIES
4. Tap the
5. Tap the
6. Tap the
on your device or memory card.
tab to view movies you have rented.
TV SHOWS
tab to view shows you have rented.
PERSONAL VIDEOS
tab to view movies you have
182
Play Music
Also known as Google Music, allows you to browse, shop,
and playback songs purchased from the Play Store. The
music you choose is automatically stored in your Google
Music library and instantly ready to play or download.
Access the new music tab from within your Play Store
application.
The Music application contains a music player that plays
music and other audio files that you copy from your computer.
1. From the Home screen, tap (
(
Play Music
The Music app searches both your online library and
your device’s internal storage for music and playlists;
this can take from a few seconds to several minutes,
depending on the amount of new music added since
you last opened the application. It then displays a
carousel view of your new and recent music, organized
by album.
2. If prompted, follow the on-screen instructions to link
your current account to Google Play Music.
).
Apps)
➔
DRAFT
Internal Use Only
3. Tap an on-screen account to add it or select
account
to use a new account.
4. At the free songs screen, select either
Skip
.
•
Get free songs are downloaded via either the Internet or Play
Store.
•
Follow the on-screen download and installation instructions.
5. Swipe left or right to browse through your new and
available music. Music, albums, and artists are
grouped into categories.
6. Tap an on-screen album to open it and begin playback.
7. Return to the Library screen from most other screens
in the Music application by tapping the Music
application icon (
top-left of the Application bar.
Music notification icon
Add
Get free songs
) at the
or
Changing Library View
You can change the way you view the contents of your
library.
Apps)
➔
1. From the Home screen, tap (
(
Play Music
2. While in a selection or screen, tap (near the
top-left of the Application bar) and then scroll left or
right to access the various tabs.
3. Available tabs include:
ALBUMS, SONGS
Note:
The contents of your library display in a scrolling grid or
list view, depending on the view.
).
PLAYLISTS, RECENT, ARTISTS
, or
GENRES
.
Applications and Development 183
,

DRAFT
Internal Use Only
Searching for Music in Your Library
1. From within the
(
Search
2. Type the name of an artist, album, song, or playlist.
Matching songs are displayed in a list below the search
box.
3. Tap a matching song to play it, tap a matching album,
artist or playlist to view a list of its’ songs.
Play Music
) to search through your available songs.
application, tap
Changing Music Settings
From within the
then make a selection.
• Choose on device music
you add to your online library, you can play music stored on
your device’s internal storage. Then you can listen to music
when you have no Internet connection. To do this, make some
of your online music available offline. For more information,
refer to
page 188.
• Settings
•Help
184
Play Music
“Making Online Music Available Offline”
: Provides access to the Play Music settings.
: Displays application help information.
application, press and
: In addition to playing the music that
on
Listening to Music
You can listen to music by using your device’s built-in
speakers, through a wired headset, or through a wireless
Bluetooth stereo headset.
Press the volume keys on the side of the device to
activate on-screen volume control, then touch and
drag on the scale to set volume.
Playing Music
From within the
your library to listen to it.
Now playing
The
touched or the first song in the album or playlist starts
to play. The tracks in the current list play in order until
you reach the end of the list (unless you choose a
repeat option). Otherwise, playback stops only if you
stop it, even when you switch applications.
Note:
If you navigate away from the
Music application, the Now Playing bar appears at the
bottom of the screen.
Play Music
screen opens and the song you
application, tap a song in
Now playing
screen in the
DRAFT
Internal Use Only
Displaying the Now Playing Screen
If you navigate away from the
Now playing
to the
Tap the name of the current song in the Now Playing
bar.
– or –
In a single motion, touch and drag (
notification icon
song title from the Notifications area. You can also
pause and resume playback and skip to the next song
in the panel. For more information, refer to
“Notification Bar” on page 36.
screen from other Music screens:
Now playing
) down from the Status bar and tap the
screen, to return
Music
Tab Options
There are various options available from the various tabs:
From within the
the following tabs and tap to access an available
option.
•PLAYLISTS:
• RECENT:
•ARTISTS:
•ALBUMS:
for artist.
•SONGS:
•GENRES:
for artist.
Play Music
Add to queue, Rename, Delete, or Keep on device.
to display the most recently played songs and albums
Add to queue, Add to playlist, or Shop for artist.
Add to queue, Add to playlist, More by artist, or Shop
Add to queue, Add to playlist, Shop for artist, or Delete.
Add to queue, Add to playlist, More by artist, or Shop
Applications and Development 185
application, select one of

DRAFT
Internal Use Only
Options While Playing a Song
When you play a song, the
There are various options and controls available while a song
is playing:
1. From within the
song.
2. From the Now playing screen, press (
display the following options:
•Equalizer
•Clear queue
• Save queue
• Settings
•Help
: applies selected equalizer features such as:
FX booster, Bass boost, and 3D effect.
: Allows you to view and assign various music settings,
and view different application-specific information.
: Provides an on-screen series of related help topics.
Now playing
Play Music
: clears the current queue.
: stores the current queue.
application, tap an album or
screen displays.
Menu
) to
186
3. Tap ➔
– or –
Tap ➔ ➔
a playlist.
Now playing
The
can tap to control the playback of songs, albums, and
playlists:
Add to playlist
screen contains several buttons that you
Tap to go back to the previous song. Touch and
hold to scan backward through the current song.
Tap to resume playback.
Tap to pause playback.
Tap to advance to the next song. Touch and hold to
scan forward through the current song.
When Shuffle mode is enabled via
songs play in random order. When disabled
(as shown), songs play in the order they appear
in List view.
to add the song to a playlist.
Add to playlist
to add the song to
Show Options
,
DRAFT
Internal Use Only
When Shuffle mode is enabled via
songs play in random order. When enabled,
songs play in random order.
Tap to repeat the current song,
repeat all songs, or disable repeat mode.
Show Options
,
Creating a Playlist
1. From within the
song list and play a song.
2. Tap ➔ adjacent to the song name and
select
3. Ta p
New playlist
for the playlist.
4. Ta p
OK
Play Music
Add to playlist
➔
to save the new playlist.
application, tap an album or
.
Playlist name
field to enter a name
Adding Songs to Playlists
1. From within the
song list and play a song.
2. Tap ➔ adjacent to the song name and
select
3. Select the desired target playlist.
Play Music
Add to playlist
application, tap an album or
.
Playing a Playlist
1. From within the
PLAYLISTS
2. Tap a playlist entry, then select an entry.
tab.
Play Music
application, select the
Deleting a Playlist
1. From within the
PLAYLISTS
2. Tap next to a playlist title and tap
Play Music
library view.
Applications and Development 187
application, display the
Delete
.
DRAFT
Internal Use Only
Shopping for Music at the Play Store
To visit the Google PlayTM Store where you can find and buy
music:
From within the
Store
in the Application Bar.
The Google Play Store music section displays.
Play Music
application, tap
Play
Making Online Music Available Offline
In addition to playing the music that you add to your online
library, you can play music stored on your device’s internal
storage. Then you can listen to music when you have no
Internet connection. To do this, make some of your online
music available offline.
Tip:
You can also copy music directly from your computer to
your device.
188
To make your online music available offline on your device:
1. From within the
library view to Albums, Artists, or playlists.
2. Tap the album or song entry you want to make
available offline. A blue pin indicates that the item
is already available offline.
Darker pins appear next to the items you can make
available offline. A bar at the bottom of the screen
shows how much space is available on your device for
music and other files.
Dim blue pins indicate songs or albums that you copied
directly from a computer to your device.
3. Tap the dark pin next to each item you want to make
available offline or tap a blue pin to stop making it
available offline. You can switch to other views of your
library to make other kinds of items available offline as
well.
4. Tap
Done
5. The Music application starts downloading the items to
your device.
Play Music
in the bar at the bottom of the screen.
application, change your
DRAFT
Internal Use Only
Play Store
Formerly known as the “Android Market”, this application
provides access to downloadable applications and games to
install on your phone. The Play Store also allows you to
provide feedback and comments about an application, or flag
an application that might be incompatible with your phone.
Before using the Play Store, you must have a Google
Account.
Accessing the Play Store
1. From the Home screen, tap (
(
Play Store
).
2. If not already logged in with your Google account, tap
Next
.
Existing
3. Ta p
information.
4. Ta p
and enter your Google account
Accept
to agree to the Play Store terms of service.
Apps)
➔
Downloading a New Google
Application
To download a new application, you will need to use your
Google account to sign in to the Play Store. The home page
provides several ways to find applications. The home page
features applications and includes a list of item applications
by category, a list of games, a link to search, and a link to My
apps.
Apps)
1. From the Home screen, tap (
(
Play Store
).
2. Browse through the categories, find an application
you're interested in, and tap the name.
3. Read the application descriptions.
Applications and Development 189
➔
DRAFT
Internal Use Only
Important!
If the selected application requires access to data
or control of a function on your device, the Play
Store displays the information the application will
access.
OK
if you agree to the conditions of the
Ta p
OK
application. Once you tap
responsible for using this application on the device
and the amount of data it uses. Use this feature
with caution.
on this screen you are
7. On the main Play Store screen, press and then
tap
My apps
, tap an installed application in the list, and
Open
then tap
Tip:
The newly downloaded applications display in the
applications list and are shown in alphabetical order if the
View Type is set to Alphabetical grid or Alphabetical list, or
at the end of the list if View type is set to Customizable
grid.
.
Install ➔ ACCEPT
4. Tap
Note:
Use caution with applications which request access to
any personal data, functions, or significant amounts of
data usage times.
5. If prompted, follow the on-screen instructions to pay
for the application.
6. Check the progress of the current download by
opening the Notifications panel. The content download
icon
bar.
190
appears in the notification area of the status
.
Note:
A data plan is required to use this feature. Charges may
apply. Please contact your service provider for further
details.

DRAFT
Internal Use Only
Launching an Installed Google
Application
1. From the Home screen, tap (
2. Tap the newly installed application. This application is
typically located on the last Applications page.
Unknown sources
This feature can be used for Android application
development. The feature allows developers to install
non-Play Store applications.
From the main
Unknown sources
➔
Unknown sources displays a check mark to indicate it
is active.
Note:
If Unknown sources is disabled, those applications
without a certificate will not be allowed to download to
your device.
Settings
.
page, tap
Apps
More
).
tab ➔
Security
Manage applications
This feature allows you to manage and remove installed
applications. You can also view the amount of memory or
resources used as well as the remaining memory and
resources for each of the applications on your device and
clear the data, cache, or defaults.
From the main
Application manager
Clearing application cache and data
1. From the main
Application manager
2. Tap an application in which to clear the cache or data.
Force stop, Uninstall, Clear data, Clear cache
3. Ta p
Clear defaults
Uninstalling third-party applications
You can uninstall any application you downloaded and
installed from the Play Store.
1. From the main
Application manager ➔ Downloaded
2. Tap the third-party application, and from the
screen, tap
Settings
page, tap
.
Settings
page, tap
.
.
Settings
page, tap
Uninstall
.
Applications and Development 191
More
More
More
.
tab ➔
tab ➔
tab ➔
App info
, or
DRAFT
Internal Use Only
S Translator
Allows you can easily translate words and phrases (verbal or
text messages) into many different languages.
Note:
Access to this feature requires that you already be
logged in to your Samsung account application. For
more information, refer to “Creating a Samsung
Account” on page 18.
Apps)
1. From the Home screen, tap (
S Translator
(
2. If prompted, follow the on-screen instructions to log
into your Samsung account.
To translate text:
1. At the S Translator screen, tap the top language bar to
select your target/source language. Default is Spanish.
2. Tap the bottom language bar to select the destination
language that you would like to translate to. Default is
English (US).
3. Enter text into the top box and it will automatically be
translated into the lower box.
192
).
➔
4. Tap the selected
bottom field. The top target language field is then
updated with the new translation.
To translate using your voice:
Important!
The two on-screen buttons at the bottom of the
application correspond to the two currently
selected languages.
1. At the S Translator screen, tap the left voice button to
verbally speak the selected language (corresponds to
top field).
2. Wait a few seconds until the on-screen notification
shows “Speak in...” then speak using the selected
language.
3. Within a few seconds, confirm the translated text now
appears in the other translation field.
(
Tra ns la te
) button within the
DRAFT
Internal Use Only
4. Tap the selected
using your selected input language and voice.
•
Example, if trying to speak in English and get a Spanish
translation, tap the
the text to appear on-screen.
5. Press for additional options. Choose from:
TTS readout speed, Auto redout, and Help
(
Speak
) button to translate
Speak (English (US))
button and wait for
Using S Voice
This is a voice recognition application used to activate a wide
variety of functions on your device. This is a natural language
recognition application.
This goes beyond the Google Search Voice Actions feature
that simply recognizes Google commands and search terms.
You can ask it questions (Is it raining in Dallas?) or give it
commands (Show me where to find cheap gas).
(
Apps
1. From the Home screen, tap
(
S Voice
).
2. Read the on-screen disclaimer information and tap
Confirm
to continue.
3. Review the Terms of Service and tap
4. Navigate through the following on-screen tutorial
screens by reading the information and tapping
or tap
Skip
to continue without reading the information.
5. Wake up the application by repeating the phrase
Hi Galaxy
.
Note:
The wake-up command/phrase can be changed from
“Hi Galaxy” to anything else.
Applications and Development 193
) ➔
Agree
to continue.
Next
,
DRAFT
Internal Use Only
Speak
6. Tap (
to give it a command.
Example 1:
•
I want to find the best pizza online.
•
Tap and say “Find me the best Pizza”. This launches
an Internet search.
Example 2:
•
I want to go to Cambridge.
•
Tap and say “Navigate to Cambridge”. This launches
the Map application and indicates where this is in relation to
your current position.
) if the device does not hear you or
194
Samsung Apps
Allows you to easily download an abundance of applications
that are directly compatible with your device. This includes
games, news, reference, social networking, navigation, and
more. Samsung Apps makes your Smartphone smarter.
Note:
Access to this feature requires that you already be
logged in to your Samsung account application. For
more information, refer to “Creating a Samsung
Account” on page 18.
1. Confirm you are currently signed into your Samsung
account.
Apps)
2. From the Home screen, tap (
(
Samsung Apps
3. If prompted, read the Disclaimer, Terms and conditions,
and Privacy policy and tap
4. Follow the on-screen instructions.
).
Accept
➔
.

DRAFT
Internal Use Only
Settings
This icon navigates to the sound and phone settings for your
phone. It includes such settings as: display, security,
memory, and any extra settings associated with your phone.
From the Home screen, tap (
(
Settings
).
– or –
From the Home screen press and then tap
Settings
.
For more information, refer to “Changing Your Settings” on
page 214.
Apps)
➔
T-Mobile My Account
This application provides you online access to account
information such as your current activity, billing information,
service plans, downloads, and other information.
Note:
Wi-Fi connection must be disabled prior to use, this
application requires use of a T-Mobile network
connection.
Apps)
1. From the Home screen, tap (
(
T-Mobile My Account
2. If prompted, follow the on-screen information for
what’s new in the app.
Note:
Some features may require you to log into your account.
3. The application screen provides several available
options:
•Account Info
such as: Notifications.
• Device Support
summary.
provides access to account-specific features
provides details about your current billing
Applications and Development 195
).
➔
DRAFT
Internal Use Only
• Notifications
available plans and other related services.
• MobileLife FamilyWhere
related information.
provides about both your current plan, other
provides links to other T-Mobile
T-Mobile Name ID
Allows you to modify the on-screen Caller ID information.
Name ID identifies unknown callers by Name, City, and State.
Apps)
1. From the Home screen, tap (
(
T-Mobile Name ID
2. Choose an on-screen option.
).
➔
T-Mobile TV
T-Mobile TV is an application that allows you to get live TV
and Video on Demand.
1. From the Home screen, tap (
(
T-Mob ile TV
page displays.
Note:
A data plan is required to use this feature. Charges may
apply. Please contact your service provider for further
details.
Accept
2. Tap
– or –
Exit
Tap
Note:
T-Mobile TV must be initialized over a cellular network
before it can be used. During this initial registration
process, any Wi-Fi connections must be disabled.
). The T-Mobile Terms and Conditions
if you accept the Terms and Conditions.
to close the application.
Apps)
➔
196
3. Tap
connection.
Disable Wi-Fi
if you currently have an active Wi-Fi
DRAFT
Internal Use Only
4. Ta p
Start Trial
to begin a free 30-day trial of the
service.
– or –
Not now
Ta p
Purchase Options
Tap any of the following categories to begin viewing:
Home, Live TV, TV Shows, Favorites, Help, Search, More Info,
, or
Browse
to keep viewing the free content or
to buy the paid features.
Live Channels
.
Video
The Video application plays video files stored on the SD card.
This device is able to playback DivX videos.
1. From the Home screen, tap (
(
Video
). A list of available videos displays in the
Video list.
2. Tap a video file to begin viewing.
Sharing Videos
1. From the Home screen, tap (
(
Video
). After a few seconds, each
on-screen video begins to cycle through a preview of
the first five seconds of the clip.
2. Press and then tap
3. Select either individual videos or tap
Done
4. Click
5. Select a sharing option. Choose from: Add to Dropbox,
Bluetooth, Email, Gmail, Google+, Messaging, Picassa,
Wi-Fi Direct, or YouTube.
to complete the process or
Applications and Development 197
Share via
Apps)
Apps)
.
Select all
➔
➔
Cancel
.
to quit.

DRAFT
Internal Use Only
Visual Voicemail
Visual Voicemail enables users to view a list of people who
left a voicemail message, and listen to the any message they
want without being limited to chronological order.
From the Home screen, tap (
(
Visual Voicemail
For more information, refer to “Visual Voicemail” on page
20.
).
Apps
) ➔
198
Voice Recorder
The Voice Recorder allows you to record an audio file up to
one minute long and then immediately send it as a message.
1. From the Home screen, tap (
(
Voice Recorder
2. Tap (
3. Tap (
automatically saves to the Voice list.
4. Tap (
file.
5. Tap (
file.
6. Tap (
7. Tap (
quality. Choose from: Normal or High quality recording.
8. From the Recorded files page, press and then
select one of the following:
Record
Stop
Pause
Cancel
).
) to record an audio file.
) to stop recording. The file
) to pause the recording of an audio
) to cancel the recording of an audio
List
) to display a list of current recordings.
Recording quality
Apps)
➔
) to adjust the recording

DRAFT
Internal Use Only
•Share via
•Delete
•Settings
and select a method in which to share this audio file.
Selections are: Add to Dropbox, Bluetooth, Email, Gmail,
Messaging, or Wi-Fi Direct. Refer to each specific section,
depending on the method you selected to send this voice
recording.
: allows you to delete one or more voice recordings. Tap
Delete
the recordings to delete and tap
: the following settings are available:
–
Storage
: allows you to choose where your recordings will be
saved. Select between Device or memory card.
–
Recording quality
High or Normal.
–
Limit for multimedia messages
Off. If you Limit for MMS by selecting On, you will be assured
that the recording can be sent in a message.
–
Contextual filename
adjust the filename based on contextual information such as
your current GPS location.
: allows you to set the recording quality to
: (requires GPS tagging) allows you to
.
: allows you to select On or
–
Default name
recordings. For example, if your Default name is Voice, your
recordings would be named Voice 001, Voice 002, Voice 003,
etc.
–
Noise reduction
noise suppression.
–
Recording volume
quality of your current location so the device can better detect
audio. Choose from High or Low.
–
Channel
or Stereo.
–
Skip interval
•End
: allows you to exit the application.
: allows you to choose the name prefix for your
: allows you to activate/deactivate background
: allows you to assign the ambient noise
: allows you to assign recording mode to either Mono
: allows you to assign a skip length.
Voice Search
Launches the Google Now application that is used for voice
to text Internet searching.
Apps)
1. From the Home screen, tap (
(
Voice Search
2. When prompted, speak into the built-in microphone.
3. Use the on-screen options to find a matching search
term.
).
Applications and Development 199
➔
DRAFT
Internal Use Only
YouTube
YouTube is a video sharing website on which users can
upload and share videos, and view them in MPEG-4 format.
1. From the Home screen, tap (
(
YouTube
).
2. Tap the search field
scroll down to browse through the main page
thumbnails, or scroll to the bottom to explore additional
options.
3. To view a video, tap an available preview thumbnail or
tap the title link.
To configure YouTube Settings:
Press and then tap
following parameters:
• General
–
High quality on mobile
videos in high quality mode while you are connected to a mobile
network.
–
Caption font size
on-screen captions. Choose from: Small, Medium, Large, or
Huge.
200
allows you to set the font size used by
Apps)
➔
to search for specific videos,
Settings
and configure the
, when enabled, allows you to start all
–
Uploads
specifies network preferences for uploads.
–
Content localization
videos from a specific country or region.
–
Improve YouTube
information to help improve the application.
• Connected TVs
–
allows you to add or configure existing paired TVs.
•Search
–
Clear search history
searches from showing up in the YouTube search box.
–
Never remember history
store search history information.
–
SafeSearch filtering
videos containing restricted content. This option blocks these
videos from appearing within your search results. Choose from:
Don’t filter, Moderate, or Strict.
•Preloading
–
Preload subscriptions
while on Wi-Fi and charging) your subscription videos.
allows you to prioritize channels and
allows you to anonymously send YouTube
allows you to clear previous YouTube
allows you to force YouTube to never
allows you to configure block settings for
allows you to preload (or go get videos

DRAFT
Internal Use Only
–
Preload watch later
on selected videos so you can watch them later. Read the data
usage information and tap
Note:
Preloading YouTube videos will use some of your
device’s storage space and may result in additional
charges if your Wi-Fi plan is not unlimited.
•About
–
Help
provides answers to most YouTube questions.
–
Feedback
–
Google Mobile Terms of Service
–
YouTube Terms of Service
–
Google Mobile Privacy Policy
–
YouTube Privacy Policy
–
Open source licenses
–
App version
YouTube application.
To watch a high quality video:
Press and then tap
quality on mobile
allows you to enable the preload function
OK
to accept the terms.
allows you to provide user feedback to YouTube.
displays the software version for the current
Settings
➔
General
➔
High
.
Applications and Development 201
DRAFT
Internal Use Only
Section 9: Connections
Your device is equipped with features that allow you to
quickly connect to the Web.
Bluetooth
About Bluetooth
Bluetooth is a short-range communications technology that
allows you to connect wirelessly to a number of Bluetooth
devices, such as headsets and hands-free car kits, and
Bluetooth-enabled handhelds, computers, printers, and
wireless devices. The Bluetooth communication range is
usually up to approximately 30 feet.
Turning Bluetooth On and Off
To turn Bluetooth on:
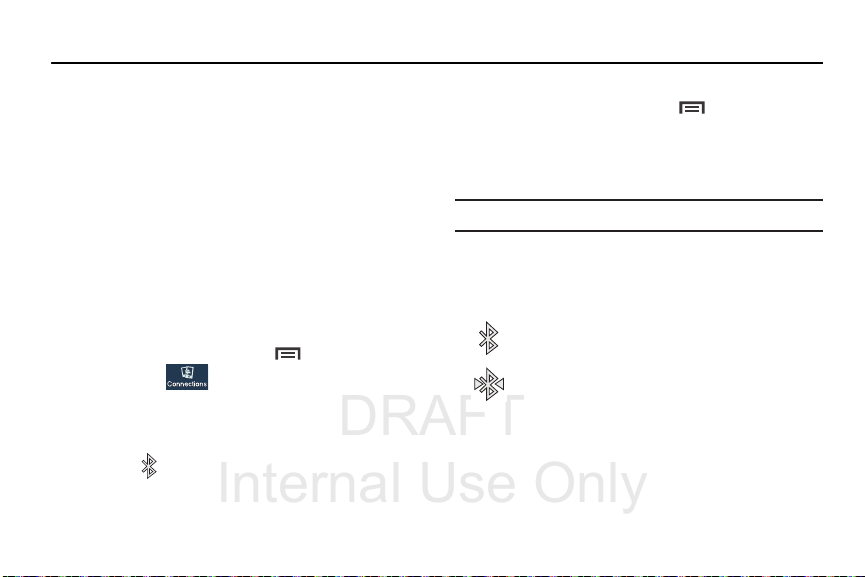
1. From the Home screen, press and then tap
Settings
➔ (
2. In a single motion touch and slide the
to the right to turn it on.
The slider color indicates the activation status. When
active,
Connections
displays in the Status area.
tab).
Bluetooth
slider
202
To turn Bluetooth off:
1. From the Home screen, press and then tap
Settings ➔ Connections
2. In a single motion touch and slide the
to the left to turn it off.
Note:
Bluetooth must be enabled prior to use.
Bluetooth Status Indicators
The following icons show your Bluetooth connection status
at a glance:
Displays when Bluetooth is active.
Displays when Bluetooth is connected (paired) and
communicating.
tab.
Bluetooth
slider

DRAFT
Internal Use Only
Bluetooth Settings
ON
ON
The Bluetooth settings menu allows you to set up many of
the characteristics of your device’s Bluetooth service,
including:
•
Entering or changing the name your device uses for Bluetooth
communication and description
•
Setting your device’s visibility (or “discoverability”) for other
Bluetooth devices
•
Displaying your device’s Bluetooth address
To a ccess th e Blueto oth Settings menu:
1. From the Home screen, press and then tap
Settings
➔
Connections
2. Verify Bluetooth is active (indicated by ).
3. Press and tap the
Help
fields to set the options.
and
tab ➔
Bluetooth
.
Visibility timeout, Received files
,
To change your Bluetooth name:
1. Verify Bluetooth is active.
2. From the Home screen, press and then tap
Settings
➔
More
tab ➔
About device
3. Tap th e
4. Tap to erase the current device name and enter
5. Ta p
To set visibility:
1. Verify your Bluetooth is active.
2. From the top of the Bluetooth settings page, toggle the
Note:
Device name
keyboard to edit the current device name.
a new name for this device using the keyboard.
OK
to confirm your setting.
state of the visibility check mark. Activating this feature
enabled your device visible allows other devices to pair
and communicate.
Your device visibility is based on the time set within the
Visible time-out field (2 Minutes, 5 Minutes, 1 Hour, or
Never timeout). Press (
This value appears as a countdown within this
timeout
field.
field and use the on-screen
Menu
.
) ➔
Visibility timeout
Visibility
Connections 203
.

DRAFT
Internal Use Only
To scan for Bluetooth devices:
1. Verify Bluetooth is active.
2. From the bottom of the Bluetooth settings page, tap
Scan
to search for visible external
Bluetooth-compatible devices such as headsets,
devices, printers, and computers.
To review your Bluetooth received files:
1. Verify Bluetooth is active.
2. From the Bluetooth settings page, press and then
Received files
tap
.
204
Pairing Bluetooth Devices
The Bluetooth pairing process allows you to establish trusted
connections between your device and another Bluetooth
device. When you pair devices, they share a passkey,
allowing for fast, secure connections while bypassing the
discovery and authentication process.
Note:
Pairing between two Bluetooth devices is a one-time
process. Once pairing is established the devices
continue to recognize their partnership and exchange
information without entering a passcode.
To pair your device with another Bluetooth device:
1. Verify Bluetooth is active.
2. From the Bluetooth settings page, tap the
(shown by the device name).
Your device must be visible to successfully pair with an
external device. This is shown by a green check mark.
3. Tap
Scan
. Your device displays a list of discovered in-
range Bluetooth devices.
4. Tap a device from the list to initiate pairing.
5. Enter the passkey or PIN code, if needed, and tap
Visibility
field
OK
.
 Loading...