

Samsung SGH-S7330, GT-S7330 Disassembly & Reassembly
Disassembly and Assembly Instructions
7.
Disassembly
7-1.
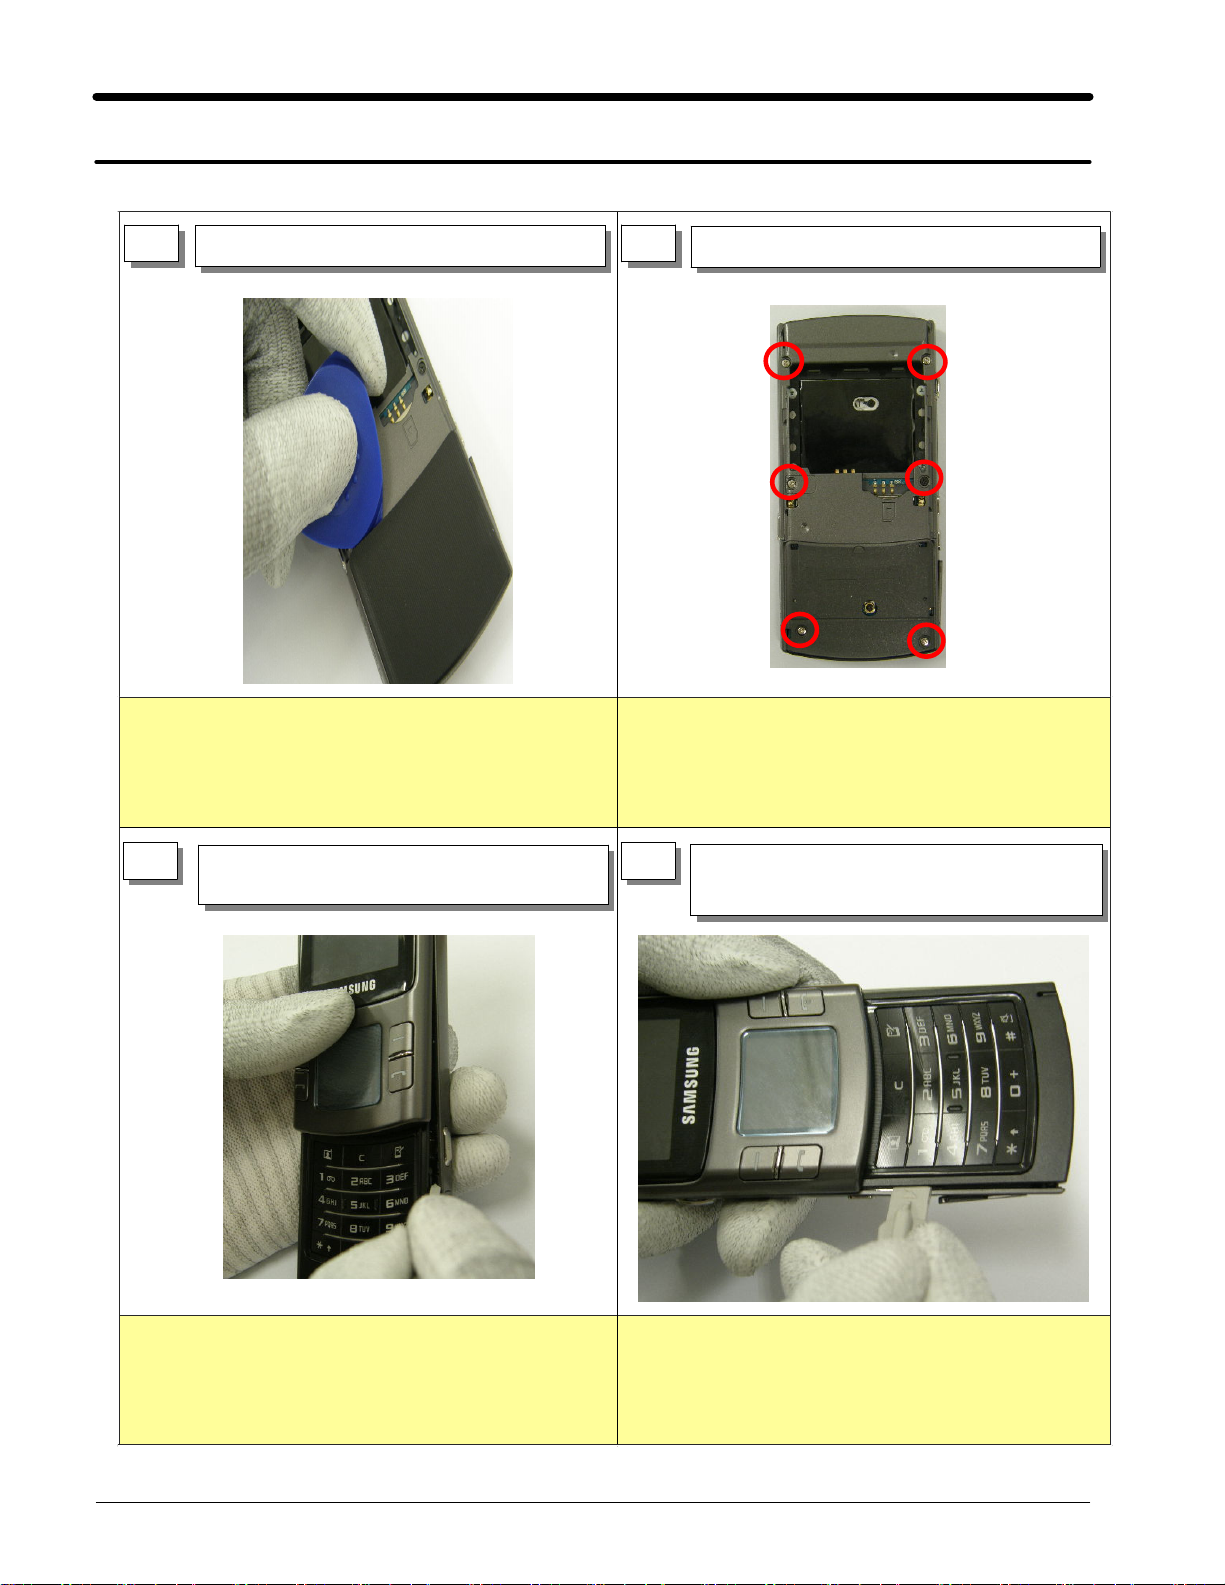
1
1) Remove REAR COVER
1) Be careful not to make any scratch on mechanical
parts during removing rear cover.
2
1) Remove Screw (6 point) of Rear
1) Be careful not to make any scratch on mechanical
parts during removing process.
3 4
1) Remove Rear side part by using
disassemble knife
1) Be careful not to make any scratch on mechanical
parts during removing process.
1) Remove Rear side part by using
disassemble knife
1) Be careful not to make any scratch on mechanical
parts during removing process.
7-1
SAMSUNG Proprietary-Contents may change without notice
This Document can not be used without Samsung's authorization

Exploded View and Parts List
5 6
1) Disassemble Front Assay and Rear
1) Remove KEY Connector using tweezers
1) Be careful not to make any damage of connector
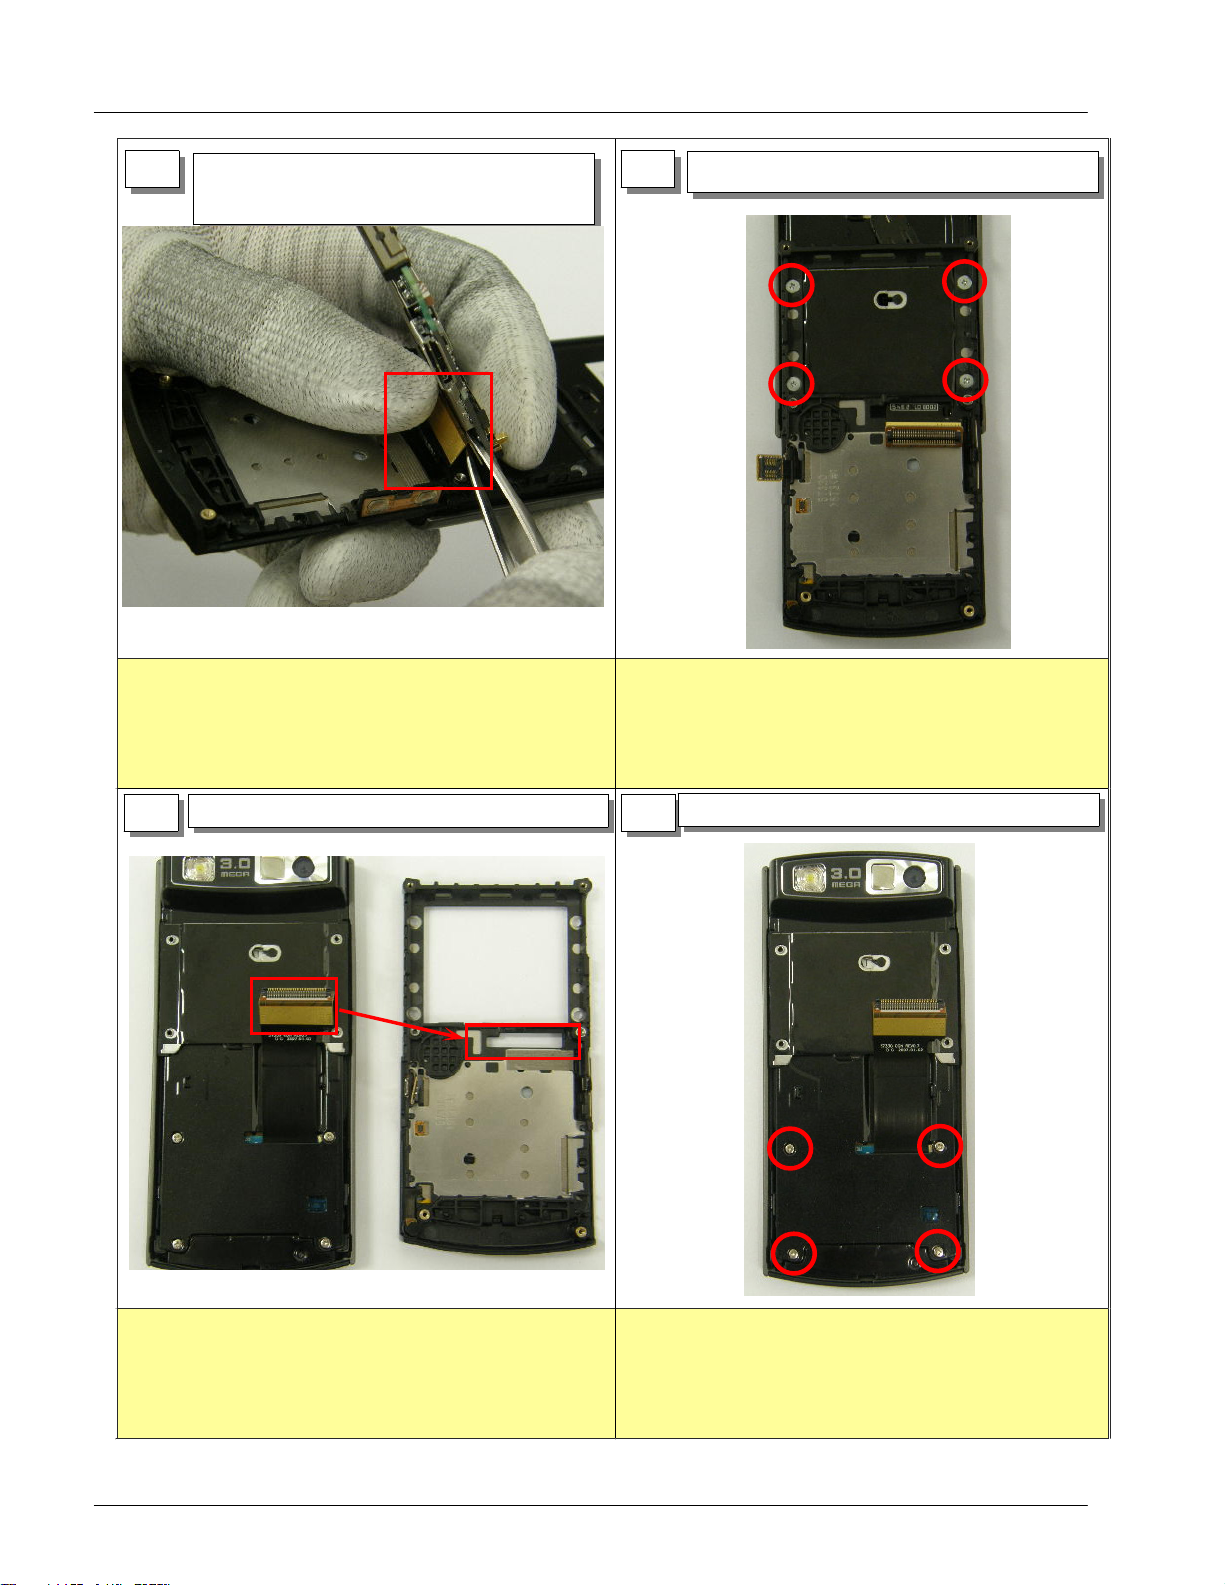
7 8
1) Detach motor using tweezers
1) Raise PBA up the left of FRONT
1) Be careful not to make damage of any mechanical
parts
SAMSUNG Proprietary-Contents may change without notice
This Document can not be used without Samsung's authorization
1) Be careful not to make any damage of connector
7-2
Exploded View and Parts List
9 10
1) Detach slide FPCB connector using
tweezers
1) Be careful not to make any damage of connector
1) Remove Screw (4 point) of front
1) Be careful not to make any scratch on mechanical
parts during removing process.
1) Disassemble slide Assay and front
11 12
1) Be careful not to make any scratch on mechanical
1) Remove Screw (4 point) of rower
parts during removing process.
7-3
SAMSUNG Proprietary-Contents may change without notice
This Document can not be used without Samsung's authorization
Exploded View and Parts List
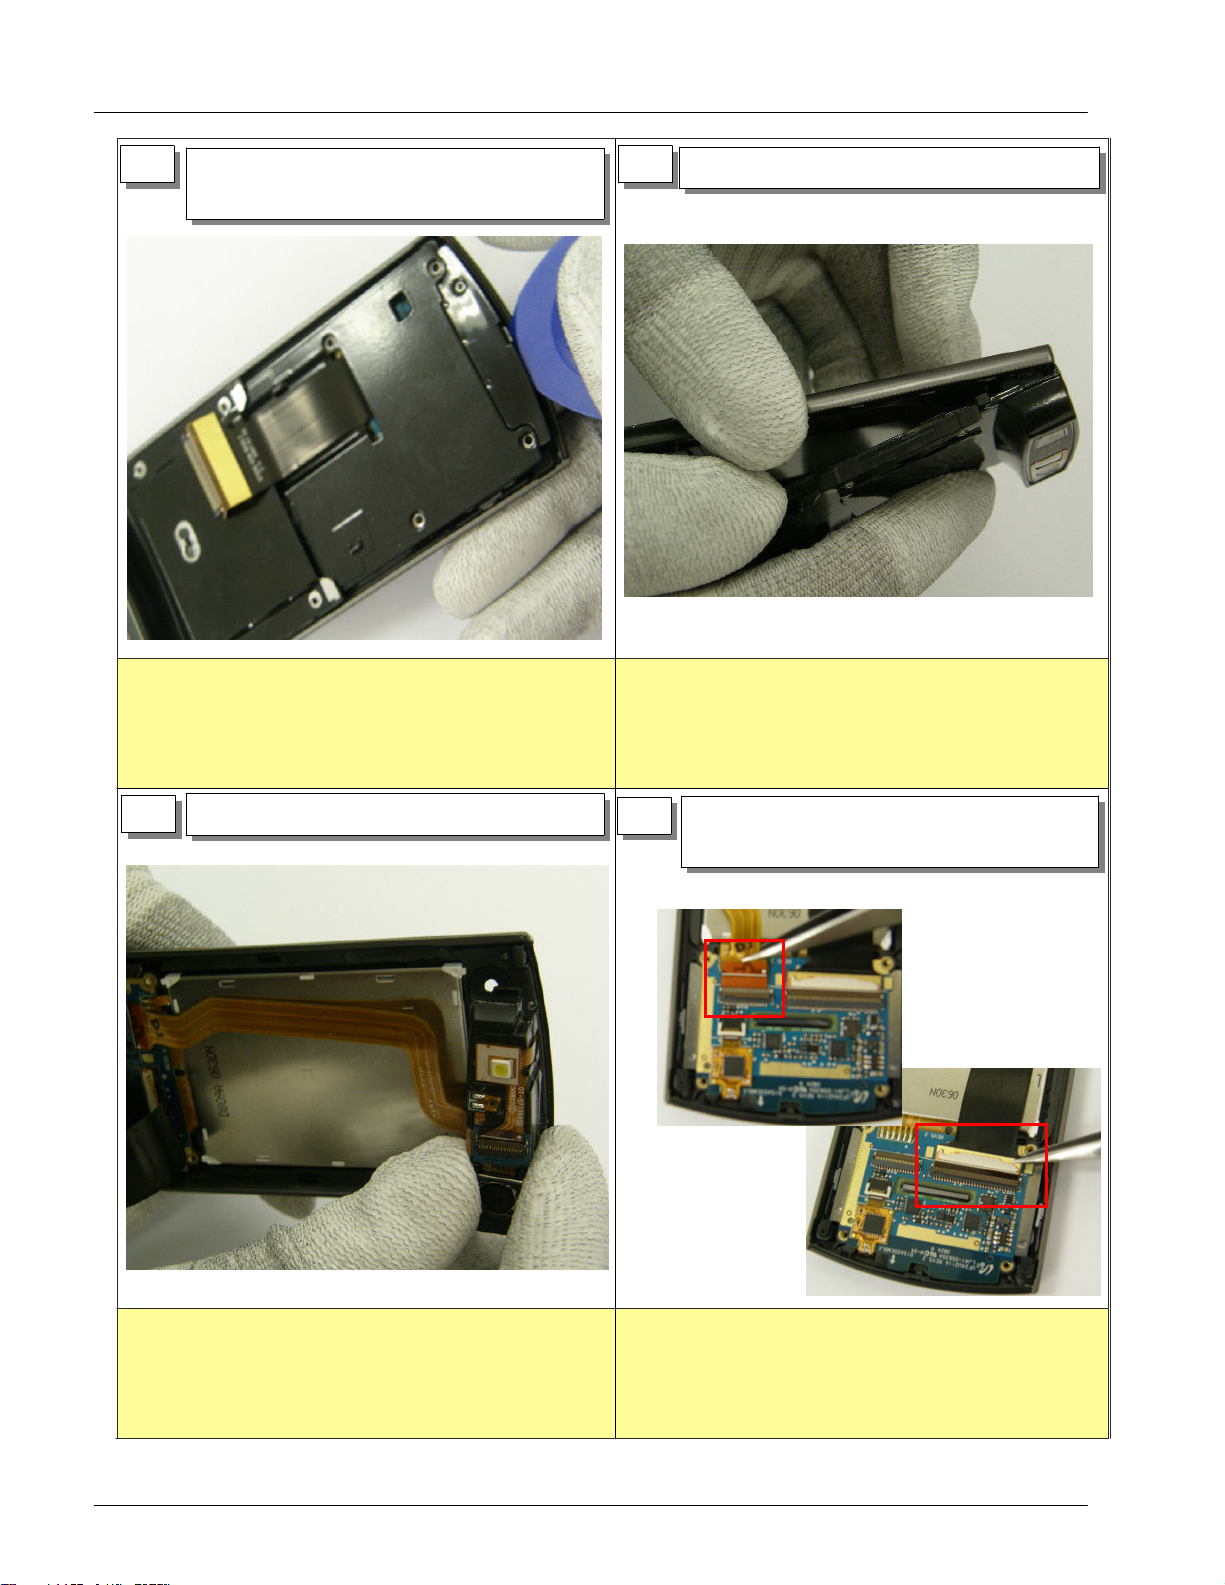
13 14
1) Remove Rower under part by using
disassemble knife.
1) Be careful not to make any scratch on mechanical
parts during removing rower
1) Disassemble upper and rower
1) Be careful not to make any damage of rower hook,
SPK module and Slide FPCB
15
1) Detach SPK module
16
1) Remove SPK module FPCB using tweezers
2) Remove Slide FPCB using tweezers
1) Be careful not to make any damage of FPCB 1) Be careful not to make any damage of FPCB
7-4
SAMSUNG Proprietary-Contents may change without notice
This Document can not be used without Samsung's authorization
 Loading...