

Samsung SGH-S730M User Manual

SGH-S730M
PORTABLE
QUAD-BAND
MOBILE PHONE
User Manual
Please read this manual before operating your
phone and keep it for future reference.

Intellectual Property
All Intellectual Property, as defined below, owned by or which is otherwise
the property of Samsung or its respective suppliers relating to the
SAMSUNG Phone, including but not limited to, accessories, parts, or
software relating there to (the “Phone System”), is proprietary to Samsung
and protected under federal laws, state laws, and international treaty
provisions. Intellectual Property includes, but is not limited to, inventions
(patentable or unpatentable), patents, trade secrets, copyrights, software,
computer programs, and related documentation and other works of
authorship. You may not infringe or otherwise violate the rights secured by
the Intellectual Property. Moreover, you agree that you will not (and will not
attempt to) modify, prepare derivative works of, reverse engineer,
decompile, disassemble, or otherwise attempt to create source code from
the software. No title to or ownership in the Intellectual Property is
transferred to you. All applicable rights of the Intellectual Property shall
remain with SAMSUNG and its suppliers.
Open Source Software
Some software components of this product incorporate source code
covered under GNU General Public License (GPL), GNU Lesser General
Public License (LGPL), OpenSSL License, BSD License and other open
source licenses. T o obtain the source code covered under the open source
licenses, please visit:
http://opensource.samsung.com
.

Disclaimer of Warranties; Exclusion of
Liability
EXCEPT AS SET FORTH IN THE EXPRESS WARRANTY CONTAINED
ON THE WARRANTY P A GE ENCLO SED WITH THE PRODUCT, THE
PURCHASER TAKES THE PRODUCT "AS IS", AND SAMSUNG MAKES
NO EXPRESS OR IMPLIED WARRANTY OF ANY KIND WHATSOEVER
WITH RESPECT TO THE PRODUCT , INCLUDING BUT NOT LIMITED T O
THE MERCHANTABILITY OF THE PRODUCT OR ITS FITNESS FOR
ANY PARTICULAR PURPOSE OR USE; THE DESIGN, CONDITION OR
QUALITY OF THE PRODUCT; THE PERFORMANCE OF THE
PRODUCT ; THE WO RKMANSHIP OF THE PRODUCT OR THE
COMPONENTS CONTAINED THEREIN; OR COMPLIANCE OF THE
PRODUCT WITH THE REQUIREMENTS OF ANY LAW, RULE,
SPECIFICATION OR CONTRACT PERTAINING THERETO. NOTHING
CONTAINED IN THE INSTRUCTION MANUAL SHALL BE CONSTRUED
TO CREATE AN EXPRESS OR IMPLIED WARRANTY OF ANY KIND
WHATSOEVER WITH RESPECT TO THE PRODUCT. IN ADDITION,
SAMSUNG SHALL NOT BE LIABLE FOR ANY DAMAGES OF ANY KIND
RESULTING FROM THE PURCHASE OR USE OF THE PRODUCT OR
ARISING FROM THE BREACH OF THE EXPRESS WARRANTY,
INCLUDING INCIDENTAL, SPECIAL OR CONSEQUENTIAL DAMAGES,
OR LOSS OF ANTICIP ATED PROFITS OR BENEFITS.
SAMSUNG IS NOT LIABLE FOR PERFORMANCE ISSUES OR
INCOMPATIBILITIES CAUSED BY YOUR EDITING OF REGISTRY
SETTINGS, OR YOUR MODIFICATION OF OPERATING SYSTEM
SOFTWARE.
USING CUSTOM OPERATING SYSTEM SOFTWARE MAY CAUSE
YOUR DEVICE AND APPLICATIONS TO WORK IMPROPERLY.

©2012 Samsung Electronics Canada, Inc.
SAMSUNG is a registered trademark of Samsung Electronics Co., Ltd. and
its related entities.
Nuance®, VSuite™, T9® Text Input, and the Nuance logo are trademarks
or registered trademarks of Nuance Communications, Inc., or its affiliates
in the United States and/or other countries.
The Bluetooth® word mark, figure mark (stylized “B Design”), and
combination mark (Bluetooth word mark and “B Design”) are registered
trademarks and are wholly owned by the Bluetooth SIG.
microSD™ and the microSD logo are Trademarks of the SD Card
Association.

Table of Contents
Section 1: Getting Started ....................................................... 1
Understanding this User Manual . . . . . . . . . . . . . . . . . . . . . . . . . . . . .1
Battery Cover . . . . . . . . . . . . . . . . . . . . . . . . . . . . . . . . . . . . . . . . . . . .3
Initial Device Configuration . . . . . . . . . . . . . . . . . . . . . . . . . . . . . . . . .7
Switching the Device On or Off . . . . . . . . . . . . . . . . . . . . . . . . . . . . . .8
Locking and Unlocking the Device . . . . . . . . . . . . . . . . . . . . . . . . . . . .8
Creating a New Google Account . . . . . . . . . . . . . . . . . . . . . . . . . . . . .9
Signing into Your Google Account . . . . . . . . . . . . . . . . . . . . . . . . . . .10
Retrieving your Google Account Password . . . . . . . . . . . . . . . . . . . .10
Voice Mail . . . . . . . . . . . . . . . . . . . . . . . . . . . . . . . . . . . . . . . . . . . . .11
Section 2: Understanding Your Device ............................... 13
Features of Your Device . . . . . . . . . . . . . . . . . . . . . . . . . . . . . . . . . .13
Front View . . . . . . . . . . . . . . . . . . . . . . . . . . . . . . . . . . . . . . . . . . . . .15
Back View . . . . . . . . . . . . . . . . . . . . . . . . . . . . . . . . . . . . . . . . . . . . .18
Device Display . . . . . . . . . . . . . . . . . . . . . . . . . . . . . . . . . . . . . . . . . .19
Status Bar . . . . . . . . . . . . . . . . . . . . . . . . . . . . . . . . . . . . . . . . . . . . .20
Function Keys . . . . . . . . . . . . . . . . . . . . . . . . . . . . . . . . . . . . . . . . . .26
Home Screen . . . . . . . . . . . . . . . . . . . . . . . . . . . . . . . . . . . . . . . . . . .27
Applications . . . . . . . . . . . . . . . . . . . . . . . . . . . . . . . . . . . . . . . . . . . .31
Screen Navigation . . . . . . . . . . . . . . . . . . . . . . . . . . . . . . . . . . . . . . .40
Menu Navigation . . . . . . . . . . . . . . . . . . . . . . . . . . . . . . . . . . . . . . . .42
Customizing the Screens . . . . . . . . . . . . . . . . . . . . . . . . . . . . . . . . . .44
Section 3: Memory Card ........................................................ 49
Using the SD Card . . . . . . . . . . . . . . . . . . . . . . . . . . . . . . . . . . . . . . .49
SD card Overview . . . . . . . . . . . . . . . . . . . . . . . . . . . . . . . . . . . . . . .49
Section 4: Call Functions and Contacts List ....................... 54
Displaying Your Phone Number . . . . . . . . . . . . . . . . . . . . . . . . . . . . .54
Making a Call . . . . . . . . . . . . . . . . . . . . . . . . . . . . . . . . . . . . . . . . . . .54
Ending a Call . . . . . . . . . . . . . . . . . . . . . . . . . . . . . . . . . . . . . . . . . . .55
Making Emergency Calls . . . . . . . . . . . . . . . . . . . . . . . . . . . . . . . . . .56
i

Dialing Options . . . . . . . . . . . . . . . . . . . . . . . . . . . . . . . . . . . . . . . . . .57
Answering a Call . . . . . . . . . . . . . . . . . . . . . . . . . . . . . . . . . . . . . . . .58
Using Voice Dialer . . . . . . . . . . . . . . . . . . . . . . . . . . . . . . . . . . . . . . .59
International Calls . . . . . . . . . . . . . . . . . . . . . . . . . . . . . . . . . . . . . . . .60
Pause Dialing . . . . . . . . . . . . . . . . . . . . . . . . . . . . . . . . . . . . . . . . . . .60
Wait Dialing . . . . . . . . . . . . . . . . . . . . . . . . . . . . . . . . . . . . . . . . . . . .61
Redialing the Last Number . . . . . . . . . . . . . . . . . . . . . . . . . . . . . . . . .61
In Call Options . . . . . . . . . . . . . . . . . . . . . . . . . . . . . . . . . . . . . . . . . .62
Call Log Tab . . . . . . . . . . . . . . . . . . . . . . . . . . . . . . . . . . . . . . . . . . . .68
Section 5: Entering Text ........................................................72
Text Input Methods . . . . . . . . . . . . . . . . . . . . . . . . . . . . . . . . . . . . . . .72
Selecting the Text Input Method . . . . . . . . . . . . . . . . . . . . . . . . . . . . .72
Using the Samsung Keyboard . . . . . . . . . . . . . . . . . . . . . . . . . . . . . .73
Using XT9 Predictive Text . . . . . . . . . . . . . . . . . . . . . . . . . . . . . . . . .77
Using the Google Voice Typing . . . . . . . . . . . . . . . . . . . . . . . . . . . . .81
Section 6: Contacts ................................................................83
Accounts . . . . . . . . . . . . . . . . . . . . . . . . . . . . . . . . . . . . . . . . . . . . . . .83
Contacts List . . . . . . . . . . . . . . . . . . . . . . . . . . . . . . . . . . . . . . . . . . . .84
Finding a Contact . . . . . . . . . . . . . . . . . . . . . . . . . . . . . . . . . . . . . . . .88
Contact List Options . . . . . . . . . . . . . . . . . . . . . . . . . . . . . . . . . . . . . .91
Contact Entry Options . . . . . . . . . . . . . . . . . . . . . . . . . . . . . . . . . . . .92
Copying Contact Information . . . . . . . . . . . . . . . . . . . . . . . . . . . . . . .93
Synchronizing Contacts . . . . . . . . . . . . . . . . . . . . . . . . . . . . . . . . . . .94
Display Options . . . . . . . . . . . . . . . . . . . . . . . . . . . . . . . . . . . . . . . . .95
Adding more Contacts via Accounts and Sync . . . . . . . . . . . . . . . . .96
Additional Contact Options . . . . . . . . . . . . . . . . . . . . . . . . . . . . . . . . .97
The Favorites Tab . . . . . . . . . . . . . . . . . . . . . . . . . . . . . . . . . . . . . . .98
The Groups Tab . . . . . . . . . . . . . . . . . . . . . . . . . . . . . . . . . . . . . . . . .98
Section 7: Messages ............................................................101
Types of Messages . . . . . . . . . . . . . . . . . . . . . . . . . . . . . . . . . . . . .101
Creating and Sending Messages . . . . . . . . . . . . . . . . . . . . . . . . . . .102
Message Options . . . . . . . . . . . . . . . . . . . . . . . . . . . . . . . . . . . . . . .103
ii

Viewing Newly Received Messages . . . . . . . . . . . . . . . . . . . . . . . .105
Deleting Messages . . . . . . . . . . . . . . . . . . . . . . . . . . . . . . . . . . . . .108
Message Search . . . . . . . . . . . . . . . . . . . . . . . . . . . . . . . . . . . . . . .109
Messaging Settings . . . . . . . . . . . . . . . . . . . . . . . . . . . . . . . . . . . . .109
Email . . . . . . . . . . . . . . . . . . . . . . . . . . . . . . . . . . . . . . . . . . . . . . . .110
Microsoft Exchange Email (Outlook) . . . . . . . . . . . . . . . . . . . . . . . .116
Using Gmail . . . . . . . . . . . . . . . . . . . . . . . . . . . . . . . . . . . . . . . . . . .123
Google Talk . . . . . . . . . . . . . . . . . . . . . . . . . . . . . . . . . . . . . . . . . . .126
Google + . . . . . . . . . . . . . . . . . . . . . . . . . . . . . . . . . . . . . . . . . . . . .126
Messenger . . . . . . . . . . . . . . . . . . . . . . . . . . . . . . . . . . . . . . . . . . . .127
Section 8: Multimedia .......................................................... 129
Assigning the Default Storage Location . . . . . . . . . . . . . . . . . . . . . .129
Using the Camera . . . . . . . . . . . . . . . . . . . . . . . . . . . . . . . . . . . . . .130
Camera Options . . . . . . . . . . . . . . . . . . . . . . . . . . . . . . . . . . . . . . . .131
Using the Camcorder . . . . . . . . . . . . . . . . . . . . . . . . . . . . . . . . . . . .136
The Gallery . . . . . . . . . . . . . . . . . . . . . . . . . . . . . . . . . . . . . . . . . . .140
Music . . . . . . . . . . . . . . . . . . . . . . . . . . . . . . . . . . . . . . . . . . . . . . . .140
YouTube . . . . . . . . . . . . . . . . . . . . . . . . . . . . . . . . . . . . . . . . . . . . .143
Section 9: Applications and Development ........................ 144
Applications . . . . . . . . . . . . . . . . . . . . . . . . . . . . . . . . . . . . . . . . . . .144
Browser . . . . . . . . . . . . . . . . . . . . . . . . . . . . . . . . . . . . . . . . . . . . . .144
Calculator . . . . . . . . . . . . . . . . . . . . . . . . . . . . . . . . . . . . . . . . . . . . .145
Calendar . . . . . . . . . . . . . . . . . . . . . . . . . . . . . . . . . . . . . . . . . . . . .145
Camera . . . . . . . . . . . . . . . . . . . . . . . . . . . . . . . . . . . . . . . . . . . . . .148
Chrome . . . . . . . . . . . . . . . . . . . . . . . . . . . . . . . . . . . . . . . . . . . . . .148
Clock . . . . . . . . . . . . . . . . . . . . . . . . . . . . . . . . . . . . . . . . . . . . . . . .149
Downloads . . . . . . . . . . . . . . . . . . . . . . . . . . . . . . . . . . . . . . . . . . . .150
Email . . . . . . . . . . . . . . . . . . . . . . . . . . . . . . . . . . . . . . . . . . . . . . . .150
Gallery . . . . . . . . . . . . . . . . . . . . . . . . . . . . . . . . . . . . . . . . . . . . . . .150
Gmail . . . . . . . . . . . . . . . . . . . . . . . . . . . . . . . . . . . . . . . . . . . . . . . .150
Google + . . . . . . . . . . . . . . . . . . . . . . . . . . . . . . . . . . . . . . . . . . . . .151
Latitude . . . . . . . . . . . . . . . . . . . . . . . . . . . . . . . . . . . . . . . . . . . . . .152
Local . . . . . . . . . . . . . . . . . . . . . . . . . . . . . . . . . . . . . . . . . . . . . . . .156
iii

Maps . . . . . . . . . . . . . . . . . . . . . . . . . . . . . . . . . . . . . . . . . . . . . . . . .157
Messaging . . . . . . . . . . . . . . . . . . . . . . . . . . . . . . . . . . . . . . . . . . . .160
Messenger . . . . . . . . . . . . . . . . . . . . . . . . . . . . . . . . . . . . . . . . . . . .161
Music . . . . . . . . . . . . . . . . . . . . . . . . . . . . . . . . . . . . . . . . . . . . . . . .161
Navigation . . . . . . . . . . . . . . . . . . . . . . . . . . . . . . . . . . . . . . . . . . . .161
People . . . . . . . . . . . . . . . . . . . . . . . . . . . . . . . . . . . . . . . . . . . . . . .164
Phone . . . . . . . . . . . . . . . . . . . . . . . . . . . . . . . . . . . . . . . . . . . . . . . .165
Play Books . . . . . . . . . . . . . . . . . . . . . . . . . . . . . . . . . . . . . . . . . . . .166
Play Store . . . . . . . . . . . . . . . . . . . . . . . . . . . . . . . . . . . . . . . . . . . . .166
Downloading a New Google Application . . . . . . . . . . . . . . . . . . . . .167
Launching an Installed Google Application . . . . . . . . . . . . . . . . . . .168
Android Development . . . . . . . . . . . . . . . . . . . . . . . . . . . . . . . . . . . .169
Search . . . . . . . . . . . . . . . . . . . . . . . . . . . . . . . . . . . . . . . . . . . . . . .170
Settings . . . . . . . . . . . . . . . . . . . . . . . . . . . . . . . . . . . . . . . . . . . . . .171
Talk . . . . . . . . . . . . . . . . . . . . . . . . . . . . . . . . . . . . . . . . . . . . . . . . . .171
Voice Dialer . . . . . . . . . . . . . . . . . . . . . . . . . . . . . . . . . . . . . . . . . . .171
YouTube . . . . . . . . . . . . . . . . . . . . . . . . . . . . . . . . . . . . . . . . . . . . . .171
Section 10: Connections ......................................................174
Browser . . . . . . . . . . . . . . . . . . . . . . . . . . . . . . . . . . . . . . . . . . . . . .174
Bluetooth . . . . . . . . . . . . . . . . . . . . . . . . . . . . . . . . . . . . . . . . . . . . .182
Enable Downloading for Web Applications . . . . . . . . . . . . . . . . . . .187
PC Connections . . . . . . . . . . . . . . . . . . . . . . . . . . . . . . . . . . . . . . . .188
Wi-Fi . . . . . . . . . . . . . . . . . . . . . . . . . . . . . . . . . . . . . . . . . . . . . . . . .189
Section 11: Changing Your Settings ..................................193
Accessing Settings . . . . . . . . . . . . . . . . . . . . . . . . . . . . . . . . . . . . . .193
Wi-Fi Settings . . . . . . . . . . . . . . . . . . . . . . . . . . . . . . . . . . . . . . . . . .193
Bluetooth settings . . . . . . . . . . . . . . . . . . . . . . . . . . . . . . . . . . . . . . .195
Data Usage . . . . . . . . . . . . . . . . . . . . . . . . . . . . . . . . . . . . . . . . . . .197
More... Settings . . . . . . . . . . . . . . . . . . . . . . . . . . . . . . . . . . . . . . . .198
Call Settings . . . . . . . . . . . . . . . . . . . . . . . . . . . . . . . . . . . . . . . . . . .202
Sound Settings . . . . . . . . . . . . . . . . . . . . . . . . . . . . . . . . . . . . . . . . .206
Display Settings . . . . . . . . . . . . . . . . . . . . . . . . . . . . . . . . . . . . . . . .210
SD Card & Device Storage . . . . . . . . . . . . . . . . . . . . . . . . . . . . . . . .211
iv

Battery Usage . . . . . . . . . . . . . . . . . . . . . . . . . . . . . . . . . . . . . . . . .211
Applications . . . . . . . . . . . . . . . . . . . . . . . . . . . . . . . . . . . . . . . . . . .212
Accounts and Synchronization . . . . . . . . . . . . . . . . . . . . . . . . . . . . .214
Location Services . . . . . . . . . . . . . . . . . . . . . . . . . . . . . . . . . . . . . . .217
Security . . . . . . . . . . . . . . . . . . . . . . . . . . . . . . . . . . . . . . . . . . . . . .218
Language and Input Settings . . . . . . . . . . . . . . . . . . . . . . . . . . . . . .224
Back up and Reset . . . . . . . . . . . . . . . . . . . . . . . . . . . . . . . . . . . . . .230
Date and Time . . . . . . . . . . . . . . . . . . . . . . . . . . . . . . . . . . . . . . . . .232
Accessibility Settings . . . . . . . . . . . . . . . . . . . . . . . . . . . . . . . . . . . .233
Developer Options . . . . . . . . . . . . . . . . . . . . . . . . . . . . . . . . . . . . . .234
Google Search Settings . . . . . . . . . . . . . . . . . . . . . . . . . . . . . . . . . .237
About Phone . . . . . . . . . . . . . . . . . . . . . . . . . . . . . . . . . . . . . . . . . .238
Software Update . . . . . . . . . . . . . . . . . . . . . . . . . . . . . . . . . . . . . . .239
Index ...................................................................................... 241
v

Section 1: Getting Started
This section explains how to get started with your devic e by installing
and charging the battery, installing the SIM card and optional memory
card, and setting up your voice mail.
Before using your phone for the first time, you’ll need to install and
charge the battery and install the SIM card. The SIM card is loaded
with your subscription details, such as your PIN, available optional
services, and many other features. If desired, you can also inst all an
SD card to store media for use with your phone.
Understanding this User Manual
The sections of this manual generally follow the features of your
phone. Also included is important safety information that you should
know before using your device.
This manual provides navigation instructions according to the default
display settings. If you select other settings, navigatio n may be
different.
Unless otherwise specified, all instructions in this manual assume you
are starting from the Home screen and using the available keys.
1

Note:
Instructions in this manual are based on default settings, and
may vary from your device, depending on the software version on
your device, and any changes to the device’s Settings.
Unless stated otherwise, instructions in this User Manual start
with the device unlocked, at the Home screen.
All screen images in this manual are simulated. Actual displays
may vary, depending on the software version of your phone and
any changes to the device’s Settings.
Special Text
Throughout this manual, you’ll find text that is set apart from the rest.
These are intended to point out important information, share quick
methods for activating features, to define terms, and more. The
definitions for these methods are as follows:
•
Notes
: Presents alternative options for the current feature, menu, or sub-
menu.
•
Tips
: Provides quick or innovative methods, or useful shortcuts.
•
Important
: Points out important information about the current feature that
could affect performance.
•
Warning
: Brings to your attention important information to prevent loss of
data or functionality, or even prevent damage to your phone.
Getting Started 2
Text Conventions
This manual provides condensed information about how to use your
phone. To make this possible, the following text conventions are used
to represent often-used steps:
➔
Example:
Arrows are used to represent the sequence
of selecting successive options in longer, or
repetitive, procedures.
From the Home screen, press (
➔
Bluetooth
.
Menu
) ➔
System settings
Battery Cover
The battery, SIM card and SD card are installed under the battery
cover.
Important!
Caution!
Before removing or replacing the battery cover, make sure
the device is switched off. To turn the device off, hold down
, then tap
Power off ➔ OK
Do not bend or twist the back cover excessively during
installation or removal. Doing so may damage the cover .
To remove the batt ery cover:
1. Hold the device firmly and locate the cover release latch.
2. Place your fingernail in the opening and firmly “pop” the cover
off the device (similar to a soda can).
3
.

Release Latch
To replace the battery cov er:
Position the battery cover over the battery compartment and
press down until you hear a click.
Getting Started 4

Installing the microSD Memory Card
You r device supports an optional (external) microSD™ or
microSDHC™ memory card for storage of media such as music,
pictures, video and other files. The SD card is designed for use with
this mobile phone and other devices.
Note:
microSD memory cards include capacities of up to 2GB.
microSDHC™ memory card types can range from 4GB to up to
32GB.
Note:
This device supports up to a 32GB microSDHC memory card.
The device comes with 2.7GB of on-board available memory.
1. Remove the battery cover .
2. Locate the microSD card slot on the side of the device.
3. Orient the card with the gold strips facing down.
4. Firmly press the card into the slot and make sure that it c atches
with the push-click insertion. For more information on how to
use the SD card see “Using the SD Card” on page 49
Important!
5
Be sure to align the gold contact pins on the card with the
phone’s contacts.

Correct Incorrect
Removing the microSD Memory Card
1. Remove the battery cover.
2. Firmly press the card into the slot and release it. The card
should pop partially out of the slot.
3. Remove the card from the slot.
4. Replace the battery cover.
Getting Started 6

Initial Device Configuration
1. Select a language from the associated field. English is the
default language.
Start
2. Tap
Note:
3. Choose to either
4. Select/deselect the desired Google location services and tap
5. Enter a
6. Read and agree to the Google services notice by tapping
7. Tap
Note:
.
If a SIM card is not already installed, tap
Wi-Fi connection and configure the Date and Time settings.
Sign in
to your existing Google account,
account
by creating a new one, or
•
Once you log in to your account, if prompted to enable purchases,
enter your credit card information and click
- or -
Skip
to continue without entering this information.
Click
Next
.
First
and
Last
name then tap
identify this as your device.
Finish
to complete the setup process.
Enabling Google location services can drain battery power.
Skip
Not now
Save
Next
. This will help to
and set up both a
to continue.
.
Get an
Next
.
7
Switching the Device On or Off
Once the device has been configured, you will not be prompted with
setup screens again.
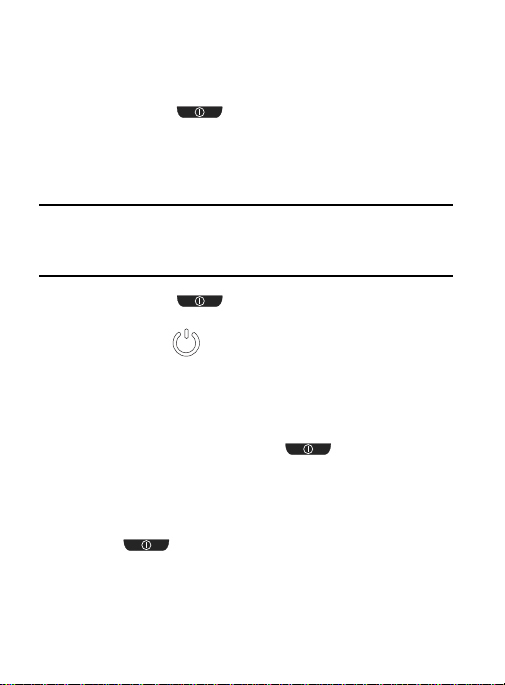
1. Press and hold (
on.
The device searches for your network and after finding it, you
can make or receive calls.
Note:
The display language is preset to English at the factory. To
change the language, use the Language menu. For more
information, refer to “Language and Input Settings” on page224.
2. Press and hold until the device options screen
appears.
Power off
3. Tap
() ➔ OK.
Power/Lock
) until the device switches
Locking and Unlocking the Device
By default, the device screen locks when the backlight turns off.
To unlock your device from the lock screen:
With your device turned on, press (
wake the display and sliding your finger across the screen in
any direction.
To lock your device screen:
Press (
Power/Lock
). The screen goes black.
Power/Lock
) to
Getting Started 8

Note:
You ca n choose to configure lock settings to prevent
unauthorized use of your device. For more information, refer to
“Setting up SIM Card Lock” on page222.
Creating a New Google Account
You should create a Google™ Account when you first use your device
in order to fully utilize the functionality. This account provides access
to several device features such as Gmail, Google Maps, Google
Search, and the Play Store
access Google applications, you must e nter y our acco unt informat ion.
These applications sync between your device and your online Google
account.
To create a new Google Account from your device:
1. From the Home screen, tap ➔ (
2. Read the introduction and tap
Note:
If you do not have data usage on your account, you will be
prompted to establish an active Wi-Fi connection bef ore init iating
data usage.
3. Follow the on-screen instructions to create a Google Account.
– or –
If this is not the first time you are starting the device, tap
➔ (
Gmail
Note:
If you already have a Google account, you only need to sign in.
™
applications. Before you are able to
New
to begin.
).
Play Store
).
9

To create a new Google Account from the Web:
1. From a computer, launch a Web browser and navigate to
www.google.com
2. On the main page, click
3. Follow the on-screen prompts to create your free account.
4. Look for an email from Google in the email box you provided,
and respond to the email to confirm and activate your new
account.
.
Sign-in ➔ Create an account for free
.
Signing into Your Google Account
1. Launch an application that requires a Google account (s uch as
Play Store or Gmail).
Existing
2. Click
3. Tap the
4. Tap
to confirm your information.
5. If prompted, create a new Gmail username by entering a prefix
for your
.
Email
and
Password
fields and enter your information.
Sign in
. Your device communica tes with the Google s ervers
@gmail.com
email address.
Retrieving y our Google Account Password
A Google account password is required for Google applications. If you
misplace or forget your Google Account password, follow these
instructions to retrieve it:
1. From your computer, use an Internet browser and navigate to
http://google.com/accounts.
2. Click on the
3. Follow the on-screen password recovery procedure.
Can’t access your account?
link.
Getting Started 10

Voice Mail
Setting Up Your Voice Mail
Your dev ice automatically transfers all unanswered calls to voicemail,
even if your device is in use or turned off. As soon as your battery is
charged and the SIM card inserted, activate your voicemail account.
Important!
Note:
Always use a password to protect against unauthorized
access.
For new users, follow the instructions below to set up voice mail:
Voicemail setup may be different depending on your network.
1. From the Home screen, tap and then touch and hold the
key until the device dials voice mail.
You may be prompted to enter a password.
2. Follow the tutorial to create a password, a greeting, and a
display name.
Accessing Your Voice M ail
You can ac cess yo ur Voice Mail by either pressing and holding
on the keypad.
To access Voice Mail using your phone dialer:
1. From the Home screen, tap and then touch and hold
until the device dials voice mail.
Note:
Touching and holding will launch Voicemail if it is already
active on your device.
11

2. When connected, follow the voice prompts from the voice mail
center.
Accessing Your Voice Mail From Another Phone
1. Dial your wireless phone number.
2. When you hear your voicemail greeting, press/touch the asterisk
key on the phone you are using.
3. Enter your passcode.
Getting Started 12

Section 2: Understanding Your Device
This section outlines key features of your phone. It also describes the
device’s keys, screen and the icons that display when the device is in
use.
Features of Your Device
Your device is lightweight, easy-to-use and offers many significant
features. The following list outlines a few of the features included in
your device.
•
Touch screen with virtual (on-screen) QWERTY keyb oar d
•
3.5” LCD screen
•
Android v 4.0, Ice Cream Sandwich Platform
•
Compatible with Adobe® Flash® technology
•
Wi-Fi ® Capability
•
Bluetooth enabled
•
Full Integration of Google Mobile™ Services (Gmail, YouTube, Google
Maps, Google Voice Search)
•
Multiple Messaging Options: Text/Picture/Video Messaging and Google
Messenger
•
Corporate and Personal Email
•
3 Megapixel Camera and Camcorder with 4X digital zoom
•
Music Player with multitasking features
•
Over 250,000 Apps available to download from the Play Store™
•
Pre-loaded e-reader applications such as: Play Books™
•
Play Music™
•
Assisted GPS (Google Navigation)
13

•
Webkit-based browser
•
2.7GB of available memory (on-board)
•
Expandable memory slot - supports up to 32GB
•
Google Video Chat via Google Talk
Understanding Your Device 14

Front View
7
9
10
13
4
3
2
12
11
65
1
8
The following illustrations show the main elements of y our device: The
following list correlates to the illustrations.
1.
15
Headset jack
can listen to music.
allows you to connect a hands-free headset so y ou

2.
Volume key
mode (with the phone open) or adjust the vo ice volu me during a
call.
•
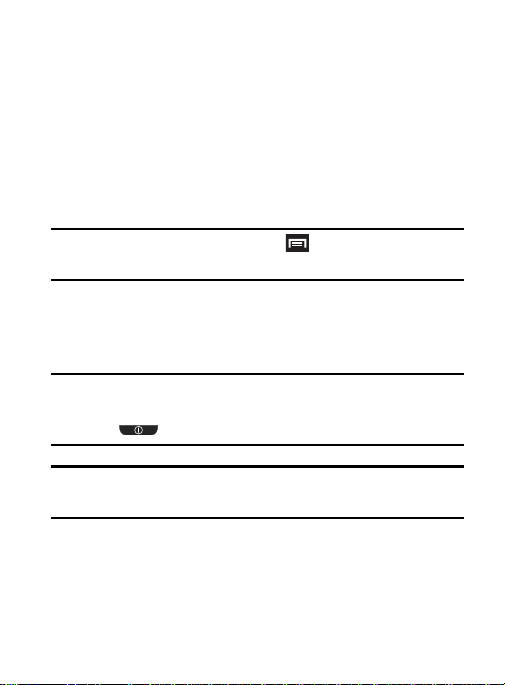
3.
Menu key
screen. From the Home screen it displays Wallpaper, Manage
apps, and System settings.
4.
Home
USB Power/Accessory connector
5.
cable or optional accessories such as a USB/data cable.
Microphone
6.
to hear you clearly when you are speaking to them. It is also
used to make voice note recordings and record stereo audio
during video recordings.
Back key
7.
microSD Card Slot
8.
expand the memory of your phone.
Display
9.
such as the connection status, received signal strength, phone
battery level, and time.
Power/Lock key
10.
device. Press and hold for two seconds to access the device
options creen from where you can toggle the volume mode
(Mute, Vibrate, or Volume on), activate/deactivate Airplane
mode states, or power the device off.
allows you to adjust the ringer volume in standby
When receiving an incoming call:
Pressing the volume key down mutes the ring tone.
displays a list of options available for the current
key displays the Home screen when pressed.
allows you to connect a power
is used during phone calls and allows other callers
redisplays the previous screen or clears entries.
(internal) allows you use a microSD card to
shows all the information needed to operate your phone,
a short press allows you to lock/unlock the
Understanding Your Device 16

11.
Proximity Sensor
the screen. This is typically used to detect when your face is
pressed up against the screen, such as during a phone call.
–
While talking on the phone, the sensor detects talk activity and locks the
keypad to prevent accidental key presses.
12.
Light Sensor
screen brightness/contrast. This sensor decreases screen
brightness in dim light.
•
In a bright light condition (outdoors), the sensors cause the device to
increase the brightness and contrast for better viewing.
•
In dim light conditions, the device increases the screen brightness to
compensate.
13.
Receiver
tones or sounds offered by your phone.
detects how close an object is to the surf ace of
lets you use the ambient light level to adjust the
allows you to hear the other caller and the dif ferent ring
17
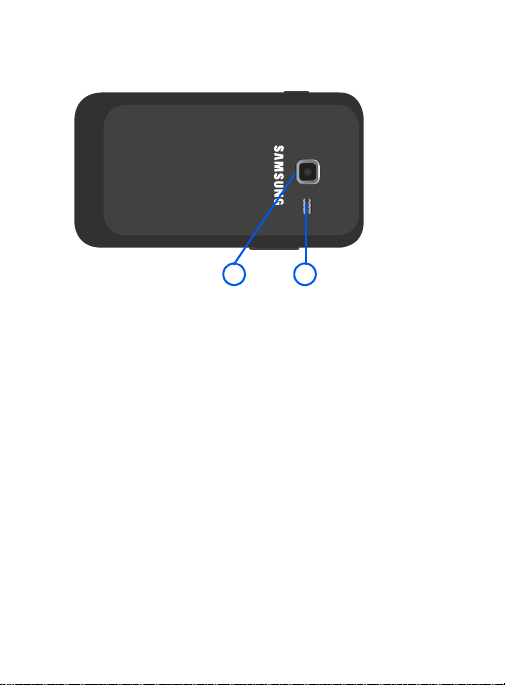
Back View
1 2
The following illustration shows the external elements of your device:
Camera lens
1.
External speaker
2.
sounds offered by your phone.
is used to take photos.
allows you to hear ringers, music, and other
Understanding Your Device 18
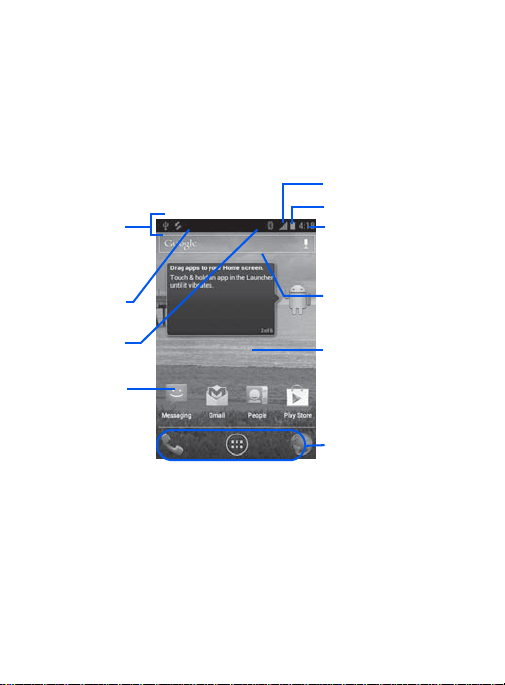
Device Display
Google search
Home Screen
Primary
Notification
Shortcuts
Status Bar
area
Status
area
Shortcuts
Battery status
Time
Signal strength
Your display provides in formation about the device’ s status, and is the
interface to manage features. It indicates your connection status,
signal strength, battery status and time. Icons display at the top of the
device when an incoming call or message is received and also alerts
you at a specified time when an alarm was set.
The screen also displays notifications, and Application (or shortcut)
bar with four primary shortcuts: Phone, Apps, and Browser.
19
Display settings
In this menu, you can change various settings for the wallpaper,
brightness, or backlight.
From the Home screen, tap (
(
Settings
) ➔
Display
. For more information, refer to “Display
Applications
) ➔
Settings” on page 210.
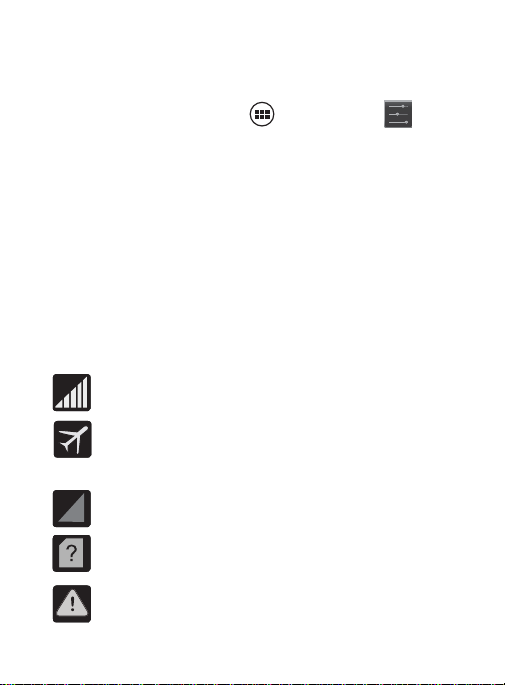
Status Bar
The Status Bar shows information about the connection status, sig nal
strength, battery level, and time, and displays notifications about
incoming messages, calls and other actions.
This list identifies the icons you see on your display screen:
Indicator Icons
This list identifies the symbols you’ll see on your device’s display and
Indicator area:
Displays your current signal strength. The greater
the number of bars, the stronger the signal.
Indicates that the Airplane Mode is active. You
cannot send or receive any calls or access online
information.
Indicates there is no signal available.
Displays when there is no SIM card in the phone.
Displays when there is a system error or alert.
Understanding Your Device 20
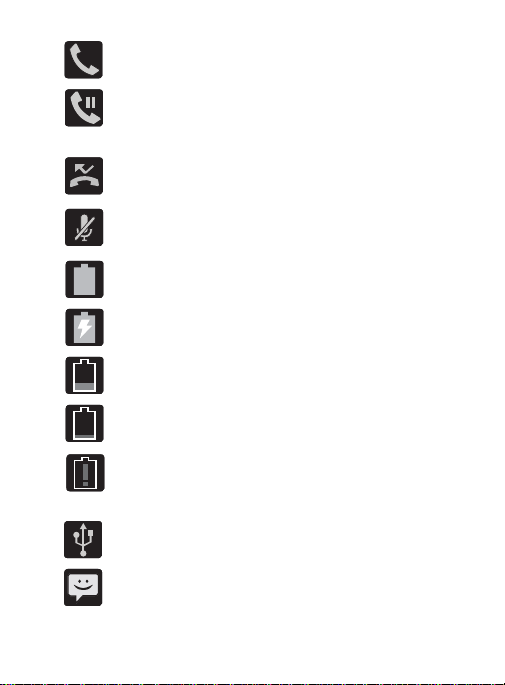
Displays when a call is in progress. Displayed in the
Status bar when the current call is minimized.
Displays when a call is placed on hold and
another function is launched. Displayed in the Status
bar when the current call is minimized.
Displays when you have missed an incoming call.
Displays when the microphone is muted.
Displays your current battery charge level. Icon
shown is fully charged.
Displays your battery is currently charging.
Displays your current battery charge level is
low (Charge: ~28% - 15%).
Displays your current battery charge level is
very low (Charge: ~15% - 5%).
Shows your current battery only has up to 4% power
remaining and will soon shutdown.
(Charge: ~4% - 1%).
Displays when the phone has detected an active
USB connection and is in a USB Debugging mode.
Displays when there is a new text message.
21
 Loading...