

Samsung SGH-M819ZKATMB Quick Start Guide
QUICK REFERENCE MANUAL

My Carrier
This guide provides you with the information
you need to get started. For more information
and additional support, please visit
www.metropcs.com where you can:
• Register via the Manage & Pay tab to check your
minutes, pay your bill, upgrade your phone, and
change your rate plan.
• Get suppor t for your device via the Support option.
• Review your device’s User Manual and
troubleshooting FAQs.
• View the latest troubleshooting solutions in the
Support Forums or ask a question of your own.
NOTE: Devices and software are constantly evolving—the screen
images and icons you see here are for reference only.
NOTE: This devi ce should only be used wi th firmware versions
that have been approved for use by MetroPC S and the
device manufacturer. If unautho rized firmware is placed on
the device it will not function.
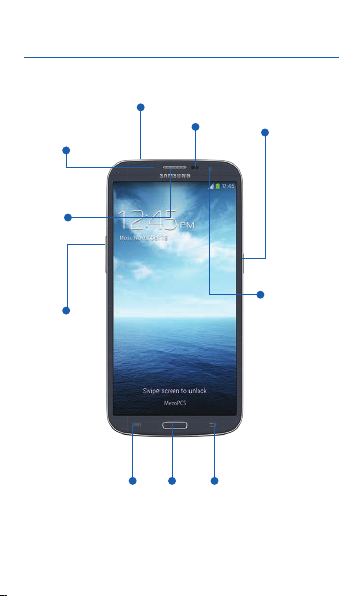
Device Functions
Headset
jack
LED indicator
Sensors
Receiver
Volume
Menu* Home Back*
*Menu and Back illuminates when navigating through the device.
Power/lock
Front
facing
camera
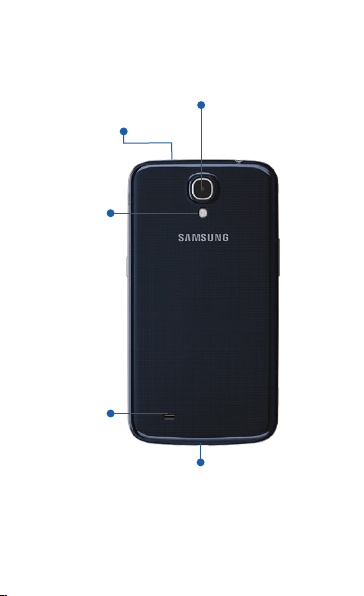
Camera lens
IR Blaster
Flash
Speaker
Charging/USB port
WARNING: Please use only an approved charging accessory
to charge your device. I mproper handling of the
charging port, as well as the use of an incompatible
charger, may cause damage to your device and void
the warranty.
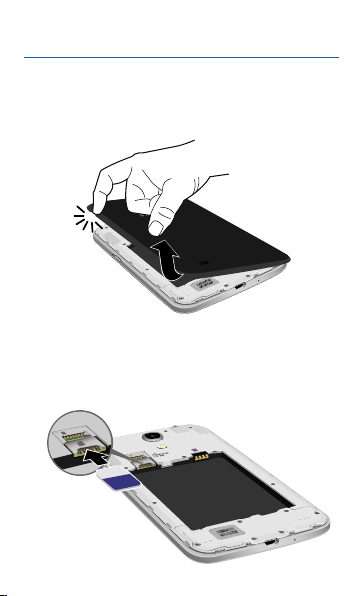
Setting Up Your Device
Step 1. Remove the Back Cover
• Place your fingernail in the groove and firmly
“pop” the cover off the device.
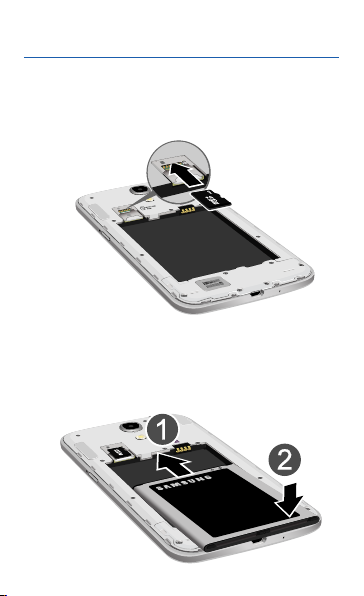
Step 2. Install the SIM Card
• Slide the SIM card into the SIM card slot until it
“clicks” into place.
Step 3. Install the optional microSD card
• Slide the memor y card into the card slot until it
“clicks” into place.
Step 4. Insert the Battery
• Insert the battery, making sure to align the
gold contacts. Press down gently to secure the
bat te ry.
 Loading...