

Samsung SGH-J150 Disassembly & Reassembly
Disassembly and Assembly Instructions
7.
Disassembly
7-1.
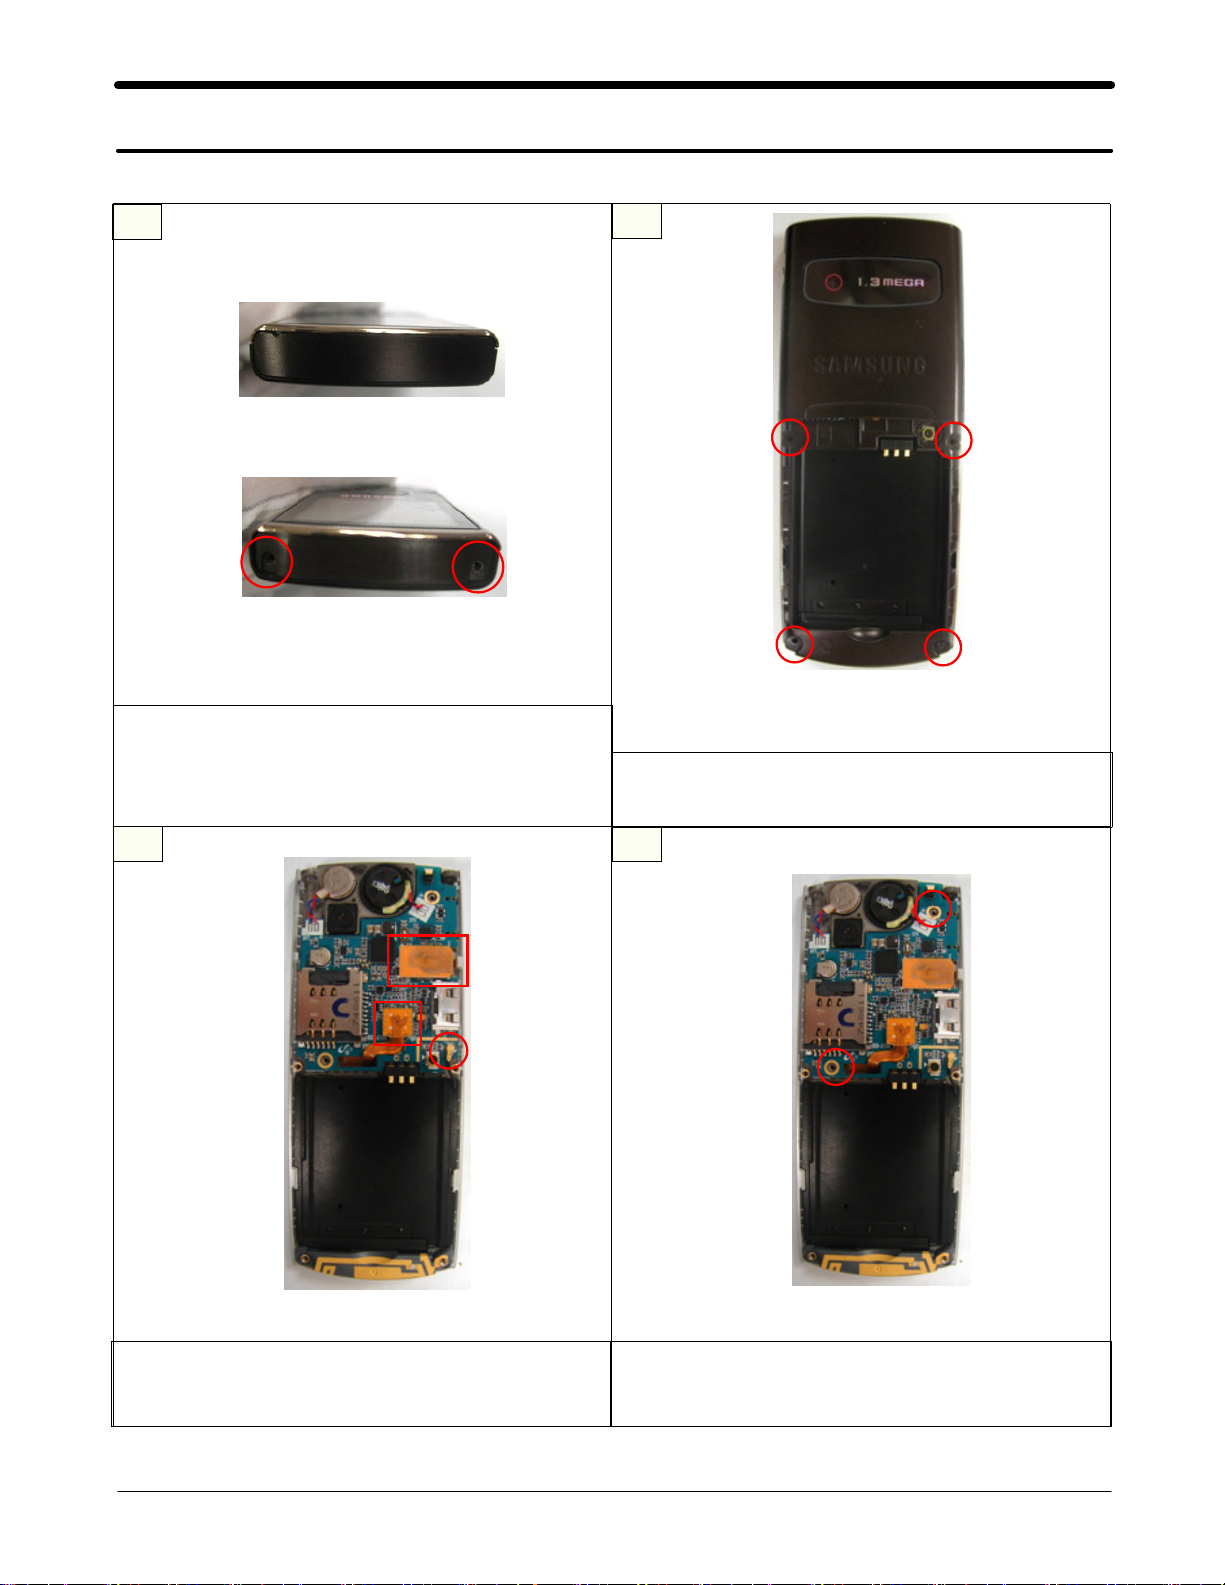
1
Detach Cover fromaset
1)
Release SCREW2POINTS at top
2)
Caution
※
Be careful not to make scratch and molding damage!
1)
2
Release SCREW4POINTS at Rear
1)
Caution
※
Be careful not to make scratch and molding damage!
1)
1)
Seperate connectors from the PBA
Caution
※
Be careful not to make scratch and molding damage!
1)
43
1)
Release SCREW2POINTS at Rear
Caution
※
Be careful not to make scratch and molding damage!
1)
7-1
SAMSUNG Proprietary-Contents may change without notice
This Document can not be used without Samsung's authorization
Exploded View and Parts List
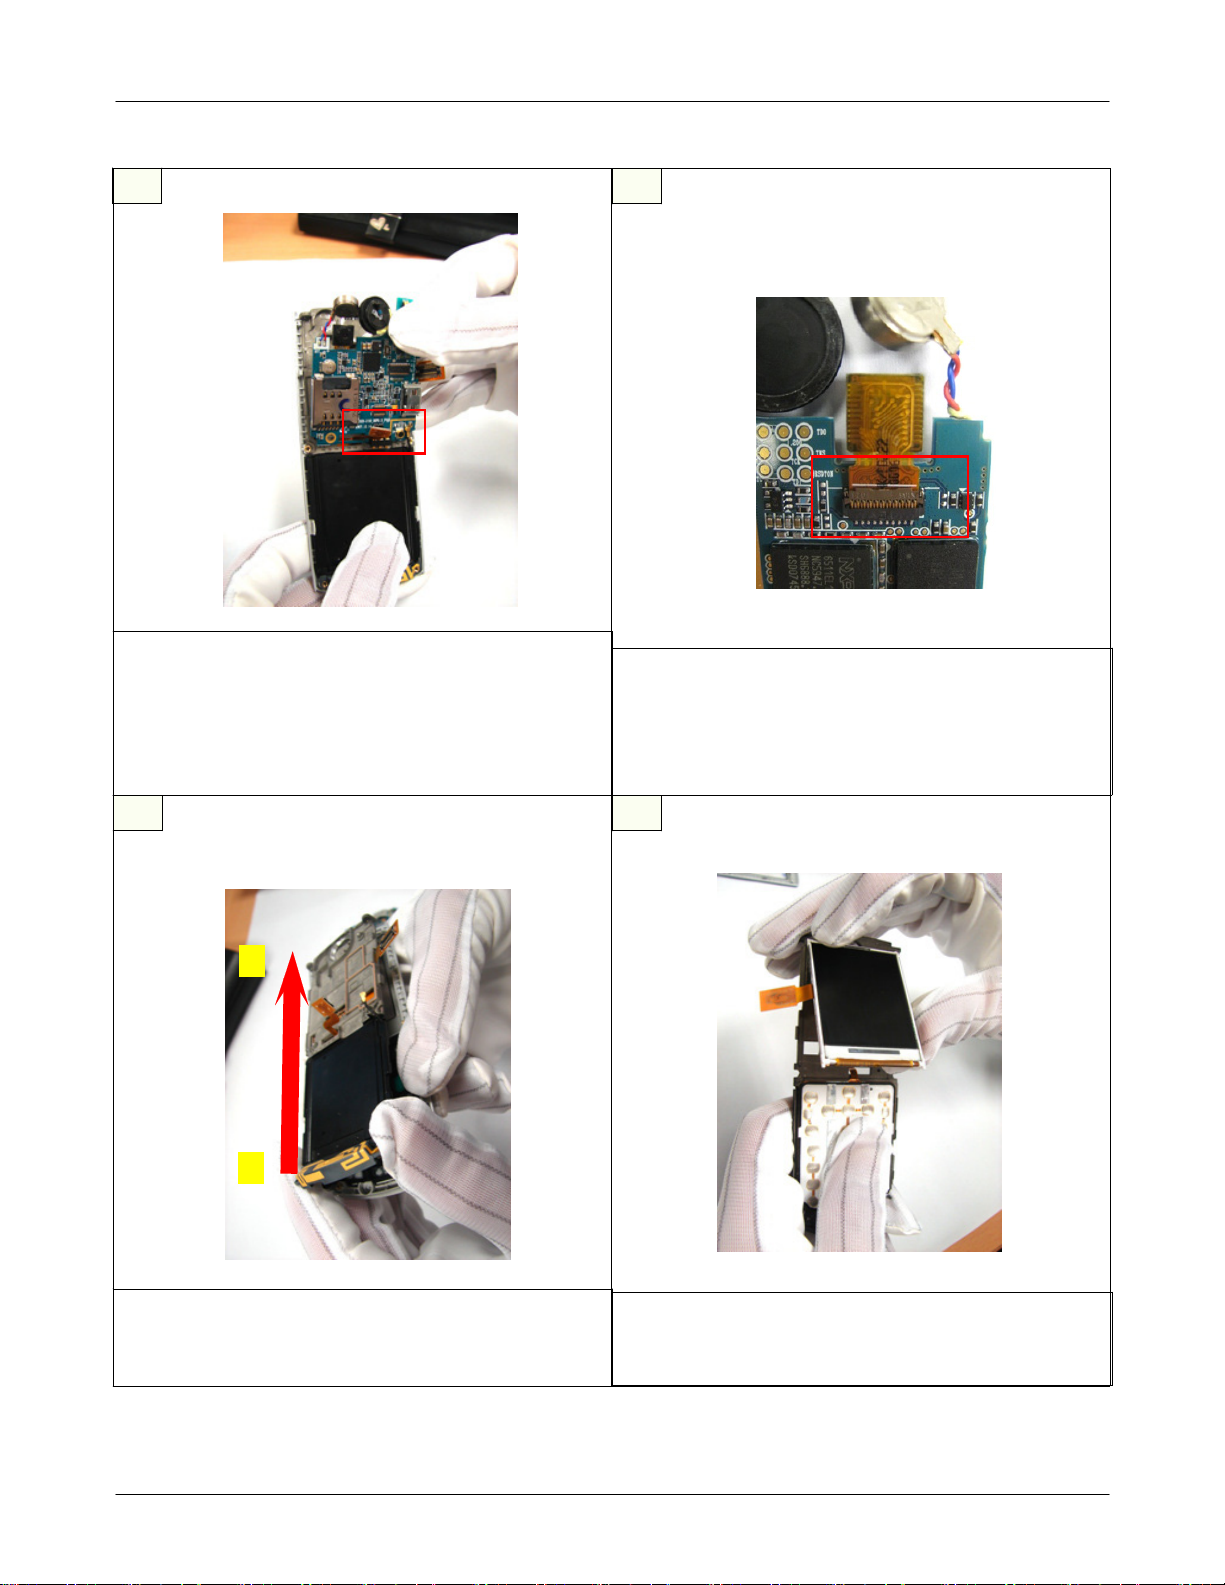
5
1)
Detach the motor and speaker
Seperate the PBA from the bracket
2)
Caution
※
1) Be careful not to make scratch and molding damage!
2) Beware that you do not damage F-PCB.
6
1)
Seperate the camera after release the
connector
Caution
※
1) Be careful not to make scratch and molding damage!
2) Beware that you do not damage F-PCB.
ⓑ
ⓐ
1)
Seperate the bracket fromⓐto
Caution
※
1) Be careful not to make scratch and molding damage!
ⓑ
87
1)
Detach the LCD from the bracket
Caution
※
1) Be careful not to make scratch and molding damage!
7-2
SAMSUNG Proprietary-Contents may change without notice
This Document can not be used without Samsung's authorization
 Loading...