

Samsung SGH-I907 Getting Started Guide
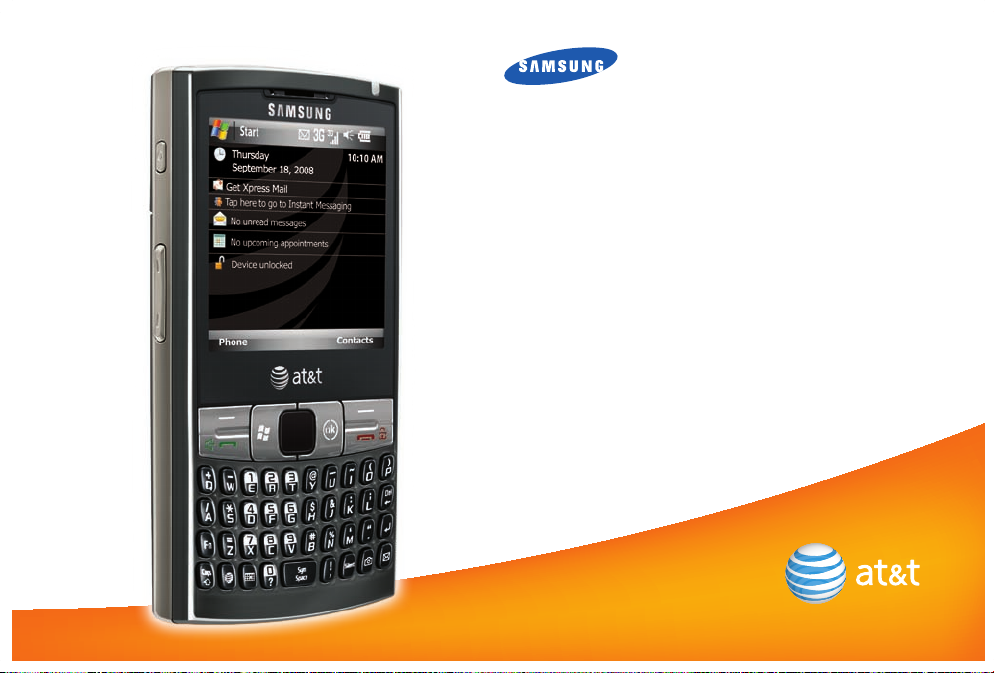
Getting Started Guide
SGH-i907

2
3
Table of Contents
Set up Your i907 6
What’s in the Box? 6
Insert the SIM 6
Insert Battery 7
Charge Battery 7
Insert microSD™ Card 7
Get to Know Your i907 8
Check Your Wireless AT&T Connection 9
Status indicators 9
Today Screen 10
Start Menu 10
Using the Touchscreen 11
Using the Stylus 11
Using the Keypad 11
Using the Keyboard 12
Use the Phone 14
Make a Call 14
Answer a Call 14
Set Up Voicemail 14
Check Voicemail 15
Add a Contact 15
Copy Contact from SIM card to the i907
16
Welcome to AT&T
att.com/WirelessTutorials
Please use our interactive web tutorial available at
for most complete and up-to-date information available to setup
your device and services. The on-line tutorials include detailed
step-by-step instructions and screen shots to assist your learning.
Or use this simple Getting Started Guide to quickly get an overview
of the major features and services available with your smartphone.
Open the back flap
of the Getting Started Guide to review
diagram of device key locations and functions.
We recommend that you keep this diagram open for reference
while working through the guide.
Thanks again for choosing AT&T.

4
5
Table of ContentsTable of Contents
Use Text/Multimedia Messaging & IM 17
Send a Text Message 17
Receive a Text Message 17
Take & Send a Picture 18
Instant Messaging 19
Browse the Web & Shop Online 20
Go to Web Pages 20
Bookmark a Page 20
AT&T Mall 21
Set Up Your Email 22
Choose the Best Email Option for You 22
Personal Email Setup With Xpress Mail 22
Send and Receive Personal Email 25
Set Up Self-Service Corporate Email with Xpress Mail 26
Set Up IT-Managed Corporate Email 26
Personalize Your Device 27
Assign a Ringtone 27
Set up Bluetooth® 28
Set up Bluetooth® 28
Bluetooth® Hands-Free Device 28
Set up AT&T Navigator
29
AT&T Navigator
29
Download and Installation Instructions
29
Login Instructions
30
Generate a Route
30
Exiting AT&T Navigator
30
Listen to Music & Watch Video 31
AT&T Mobile Music 31
Watch CV 32
Transfer Music from a PC 33
Play Music 34
Video Share 35
Make a Call Using Video Share 35
Manage Appointments 37
Schedule an Appointment 37
Wi-Fi 38
About Wi-Fi Networks 38
Turn Wi-Fi On/Off 38
Connect to an Available Wi-Fi Network 38
Tips & Tricks 42

6
7
Set up Your i907Set up Your i907
What’s in the Box?
To get started, we recommend the following:
Carefully follow the step-by-step instructions in this guide to •
set up your device.
Review the User Manual on the Getting Started CD to learn •
about the full power of the i907.
Take note of the following components included in the box:
Insert the SIM
Remove the battery cover.1.
Remove battery.2.
Slide SIM face up (gold contacts 3.
face down) into SIM slot.
Replace battery and battery cover.4.
Insert Battery
Remove the battery cover. 1.
Align the contacts on the battery with the contacts in the back of the device. 2.
Push the battery down until it locks into place. 3.
Replace the battery cover. 4.
Charge Battery
Plug the AC Travel Charger into a standard AC wall outlet. 1.
Plug the travel charger into the jack on the top right side of the phone with the green 2.
arrow facing up. The indicator light at the top of the device is red while charging, and
green when fully charged.
Note: When charging is complete, unplug the charger from the power outlet.
Insert microSD™ Card
A microSD™ Card is a removable memory card that will increase data
storage capacity of the device.
Remove the cover on the right side of the device, that reads microSD™. 1.
Insert the narrow end of the microSD™ Card into the slot, then replace 2.
the cover.
Note: microSD™ Card sold separately.
Travel Charger
Standard Battery
Data Cable
I907
+
I907
3.5 mm Audio Adaptor
Getting Started CD

8
9
Get to Know Your i907Get to Know Your i907
Turn On/Off Your Device
Press and hold the Power ON/OFF button located on the left side of the device.
Lock/Unlock Your Device Keypad
To Lock the device, press and hold the END key. To unlock the device, press the
LEFT SOFT key, followed by the * key (or select unlock). If the device is locked,
and backlight is off, quick press the Power ON/OFF button.
Backlight
In the unlock mode, after 30 seconds the screen will dim to save battery power. It will
finally power off after another 30 seconds. To turn your screen on, quick press the
Power ON/OFF button.
Change Backlight Settings
Press the 1. START key to enter the Start menu, select Settings.
Select the 2. System tab.
Select 3. Backlight.
Change 4. Turn off backlight if device is not used for settings.
Select 5. OK to save your changes and exit.
Check Your Wireless AT&T Connection
On the top right corner of the home screen, you will find the network coverage indicator.
Full wireless 3G data coverage
Full wireless coverage (no data connection)
Wireless is turned off
Status indicators
Battery full
3G
3G
Bluetooth on
3G
3G
New Text message
Battery empty
3G
3G
3G network
3G
3G
New voice mail
Battery charging
Signal strength Wi-Fi on
x
G
3
Power ON/OFF button
10
11
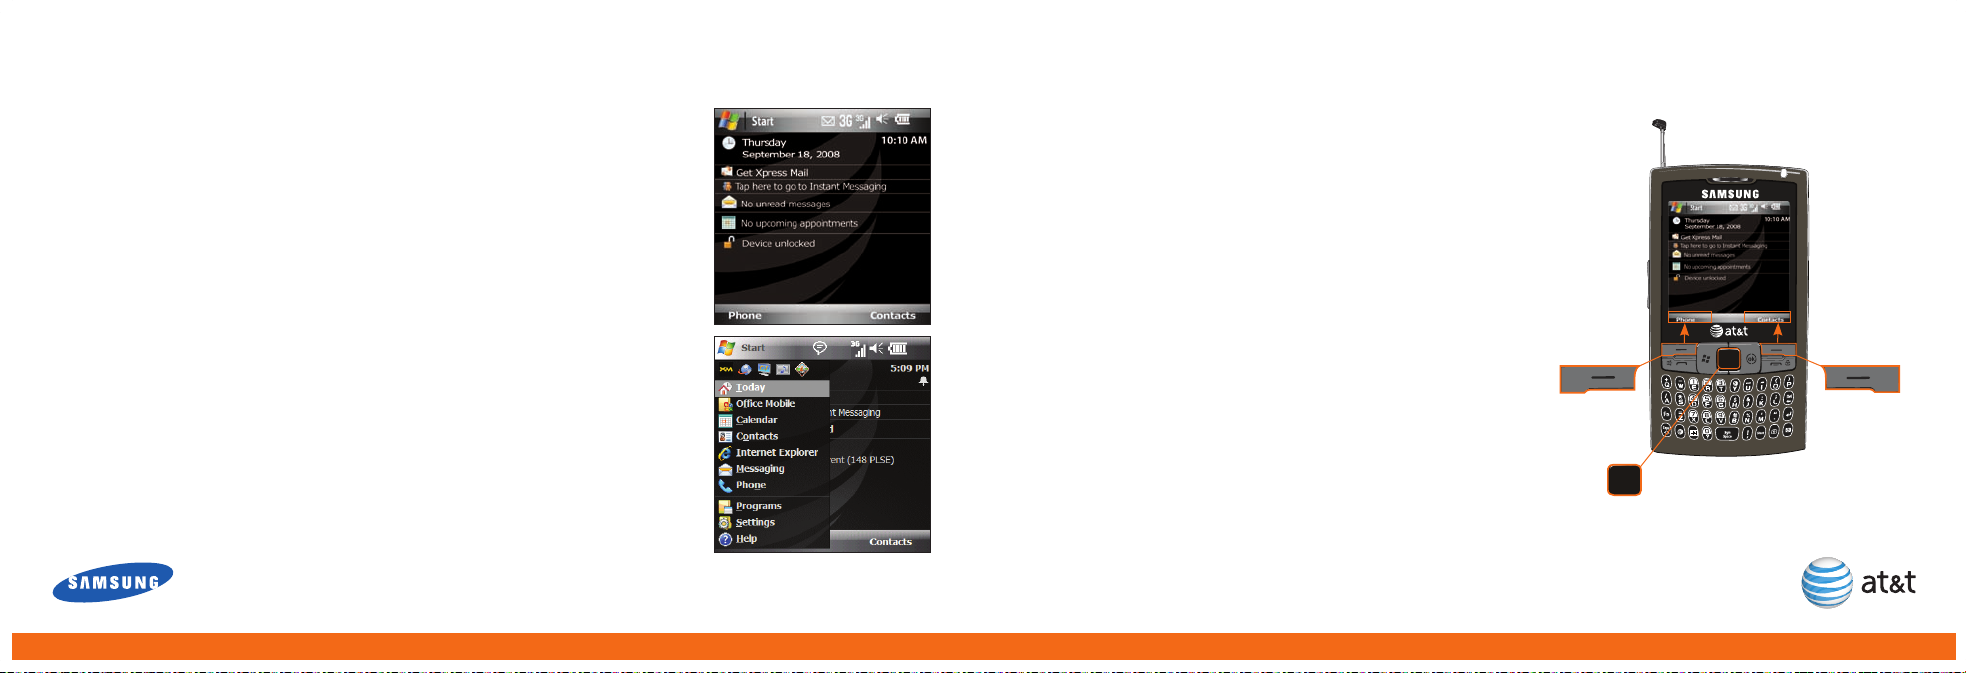
Get to Know Your i907
Today Screen
The Today screen displays important information, such as upcoming appointments, status
indicators, the current date, time, and profile. You can open a program directly by tapping its
associated icon.
Start Menu
There is one main menu used by the i907 called the Start Menu.
The Start menu contains links to all the applications and settings information, similar to that
of a Windows based PC system. To access the Start menu, simply use the stylus to tap in the
upper left corner of the screen on the word Start or press the START key. A drop down menu
list is then displayed, and from there, all other applications and settings can be accessed.
Using the Touchscreen
To navigate the screen using your finger, simply tap on-screen selection
desired. It’s that easy!
Using the Stylus
To navigate the screen with the Stylus, simply tap the on-screen
selection desired. You can enter text and numbers by using the
on-screen keyboard displayed at the bottom of the screen.
In a program, tap the keyboard icon at the bottom of the screen. 1.
Enter text and numbers by tapping keys on the on-screen keyboard.2.
Using the Keypad
To move around the screen, use the NAVIGATION PAD to control the
onscreen mouse pointer to highlight selections. Press the NAVIGATION
PAD to select. You can also use the NAVIGATION PAD in a 4-way
navigation mode. Pressing the FUNCTION and N key when in the
homescreen view will switch between these two modes.
To select the bottom left and right items on the screen, use the
LEFT and RIGHT SOFT keys.
For more information visit att.com/WirelessTutorials.
NAVIGATION
PAD
RIGHT SOFT KEY
activates
menu above
LEFT SOFT KEY
activates
menu above
STYLUS
use to make on
screen selections
12
13
Get to Know Your i907 Get to Know Your i907
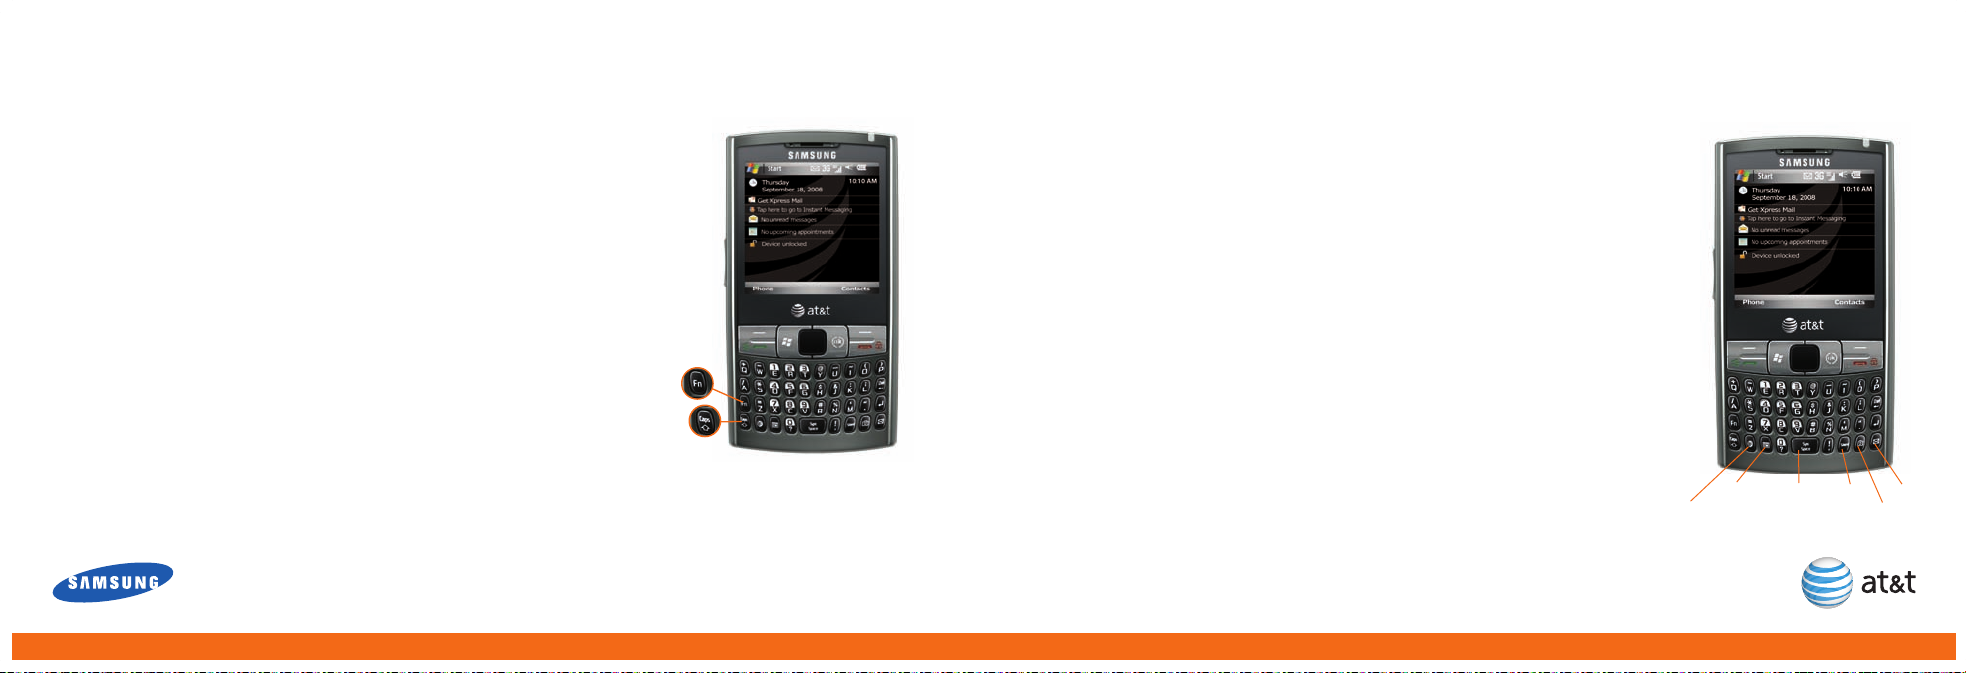
Using the Keyboard
Your i907 is equipped with an innovative keyboard. You can easily and accurately type words
with the keypad. When you select a field that requires text or numbers, the phone automatically selects the appropriate input mode. However, if you need to switch between modes,
press one of the keys listed in the following illustration. See the indicator at the lower center
of the Home Screen to identify the current text mode setting.
Creating Text
To type a single uppercase letter, press CAPS/SHIFT key, and then press the
corresponding key. To enter all CAPS, press the CAPS/SHIFT key twice.
To enter a number or symbol, press the FUNCTION key, and then press the
corresponding key. To enter all numbers or symbols, press the FUNCTION
key twice.
Task Keys
MEdia™ Net - direct access to MEdia™ Net. Short press - you can access MEdia Net.
Long press - you can run Voice Command (only if the Voice Command is enabled).
Calendar - direct access to your calendar.
SYMBOL/SPACE - short press activates phone on Today screen. When in text
mode short press inserts a space/long press brings up additional symbols.
SILENT - turn ringtone on or off.
CAMERA/ZOOM - short press activates camera/long press enters Zoom mode.
For a full description of camera features see page 18.
MAIL - direct access to email and text messaging. See page 17 & 19 for details.
MEdia™ Net
symbol/
space
camera/zoom
mailsilent
CAPS/SHIFT
key
FUNCTION
key
Calendar
 Loading...