

Samsung SGH-C6112 Disassembly & Reassembly
Disassembly and Assembly Instructions
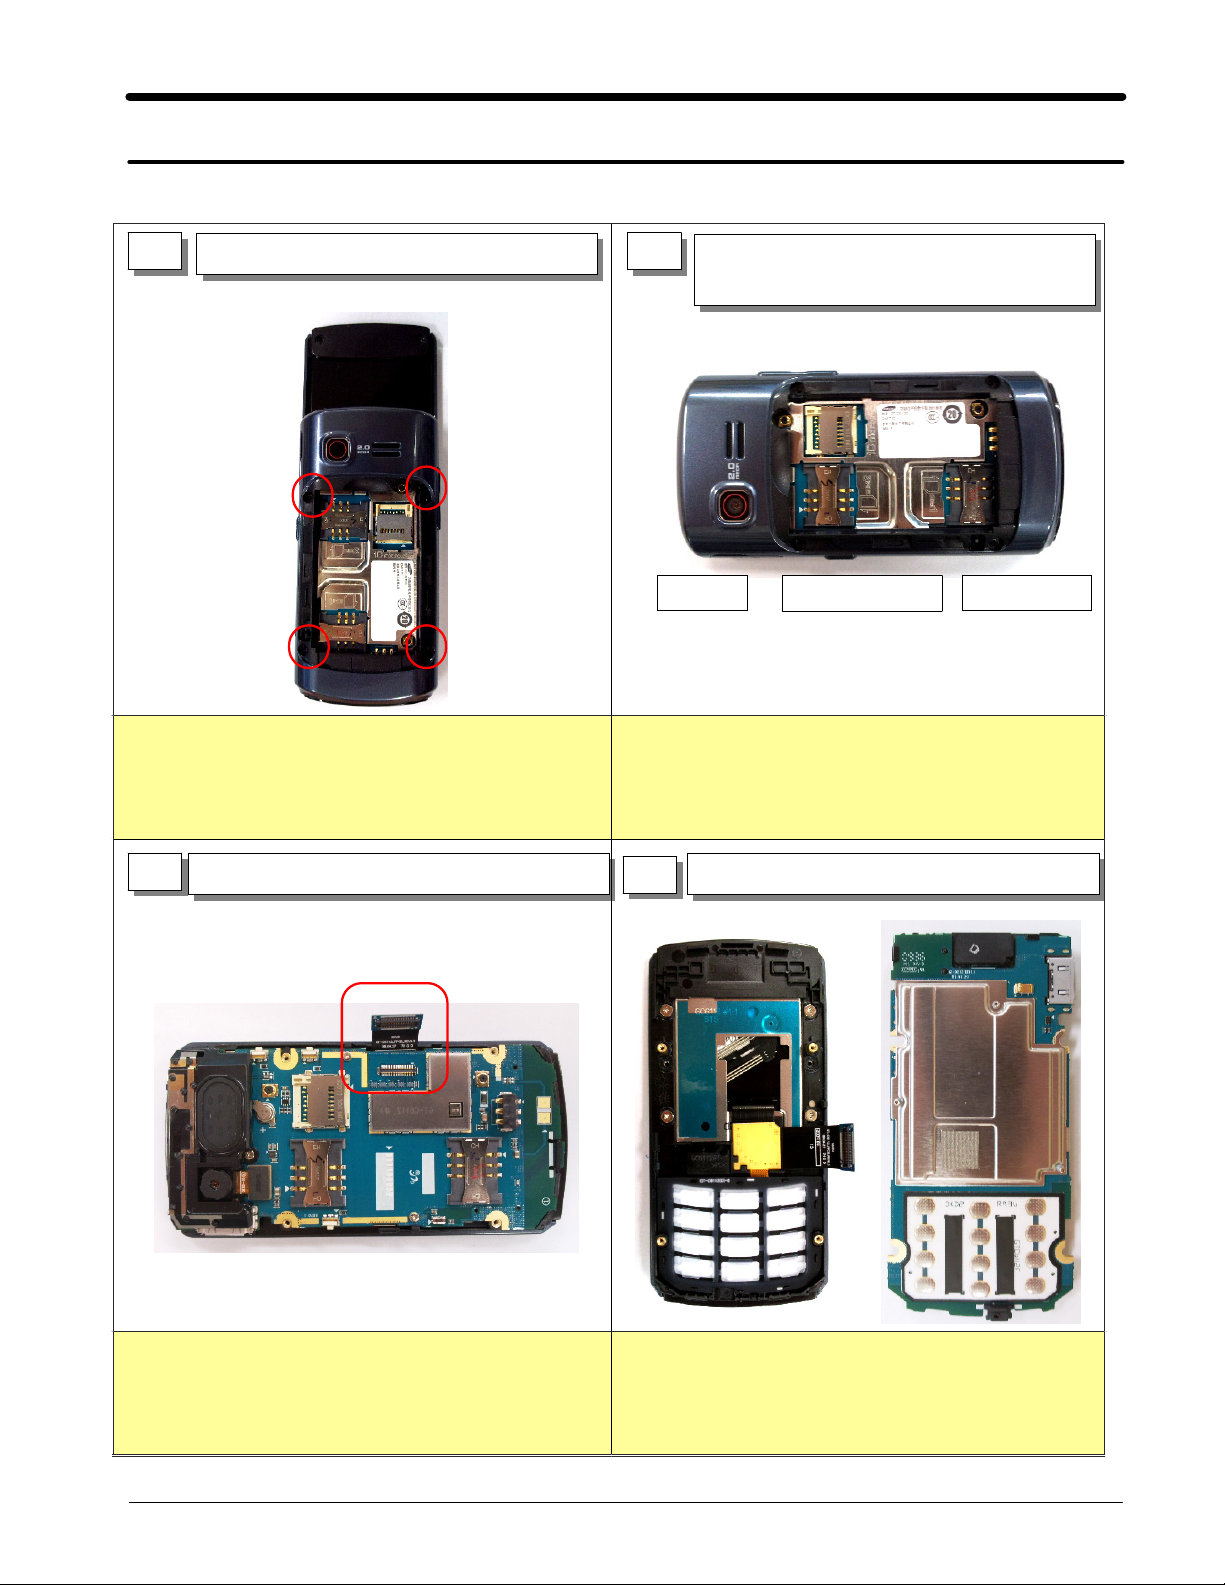
11.
11-1.
1)
Disassembly Instructions
1 2
Unscrew at4points.
Be careful not to make scratch and molding damage!
Separate the REAR from the top by
divider.
TOP
Be careful not to make scratch and molding damage!
1)
CENTER
BOTTOM
3
Detach the main FPCB connector from PBA
Be careful not to make scratch and molding damage!
1)
Be careful not to damage SLIDE FPCB.
2)
Separate PBA ASS'Y from SLIDE ASS'Y
4
Be careful not to make scratch and molding damage!
1)
11-1
SAMSUNG Proprietary-Contents may change without notice
This Document can not be used without Samsung's authorization
Disassembly and Assembly Instructions
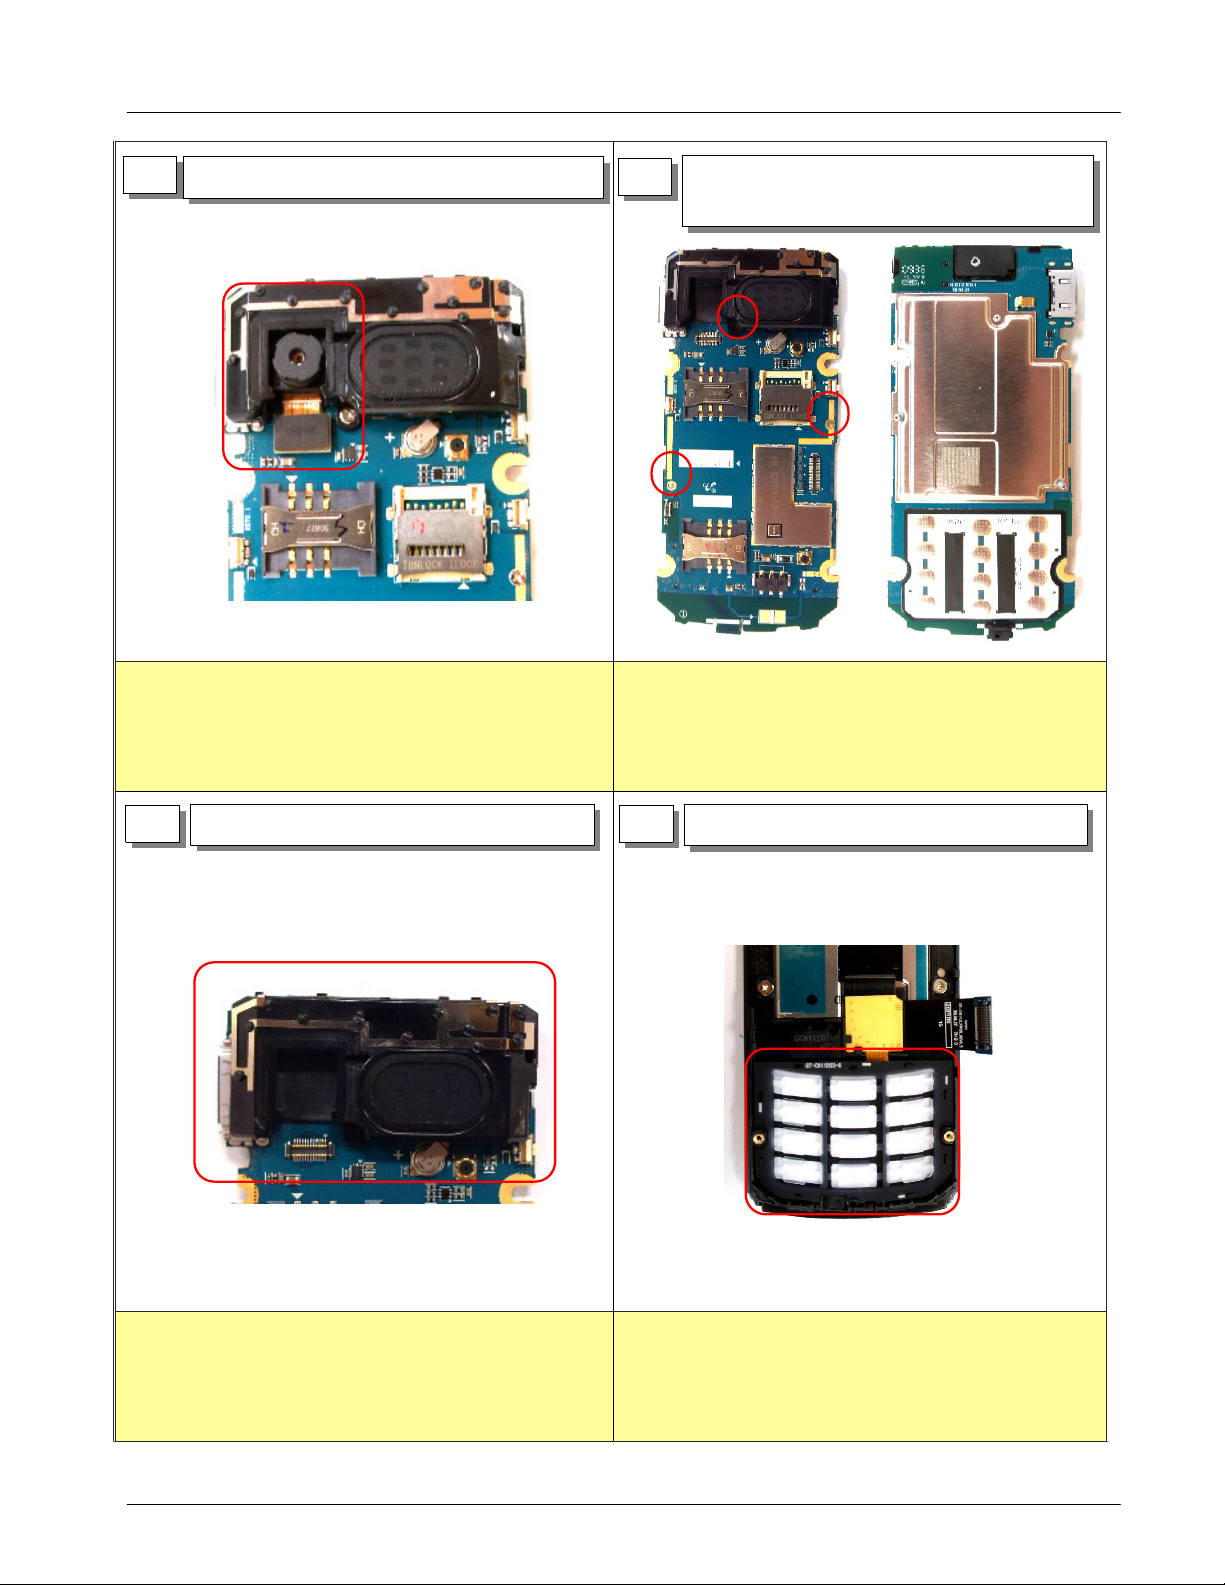
5
Take out CAMERA From PBA ASS'Y
Be careful not to make scratch and molding damage!
1)
Be careful not to damage CAMERA
2)
In order to take out the SHIELD CAN,
6
Unscrew at3points.
Be careful not to make scratch and molding damage!
1)
7
Take out ENCLOSURE
Be careful not to make scratch and molding damage!
1)
8
Separate KEYPAD from Slide ASS'Y.
Be careful not to make scratch and molding damage!
1)
11-2
SAMSUNG Proprietary-Contents may change without notice
This Document can not be used without Samsung's authorization
Disassembly and Assembly Instructions
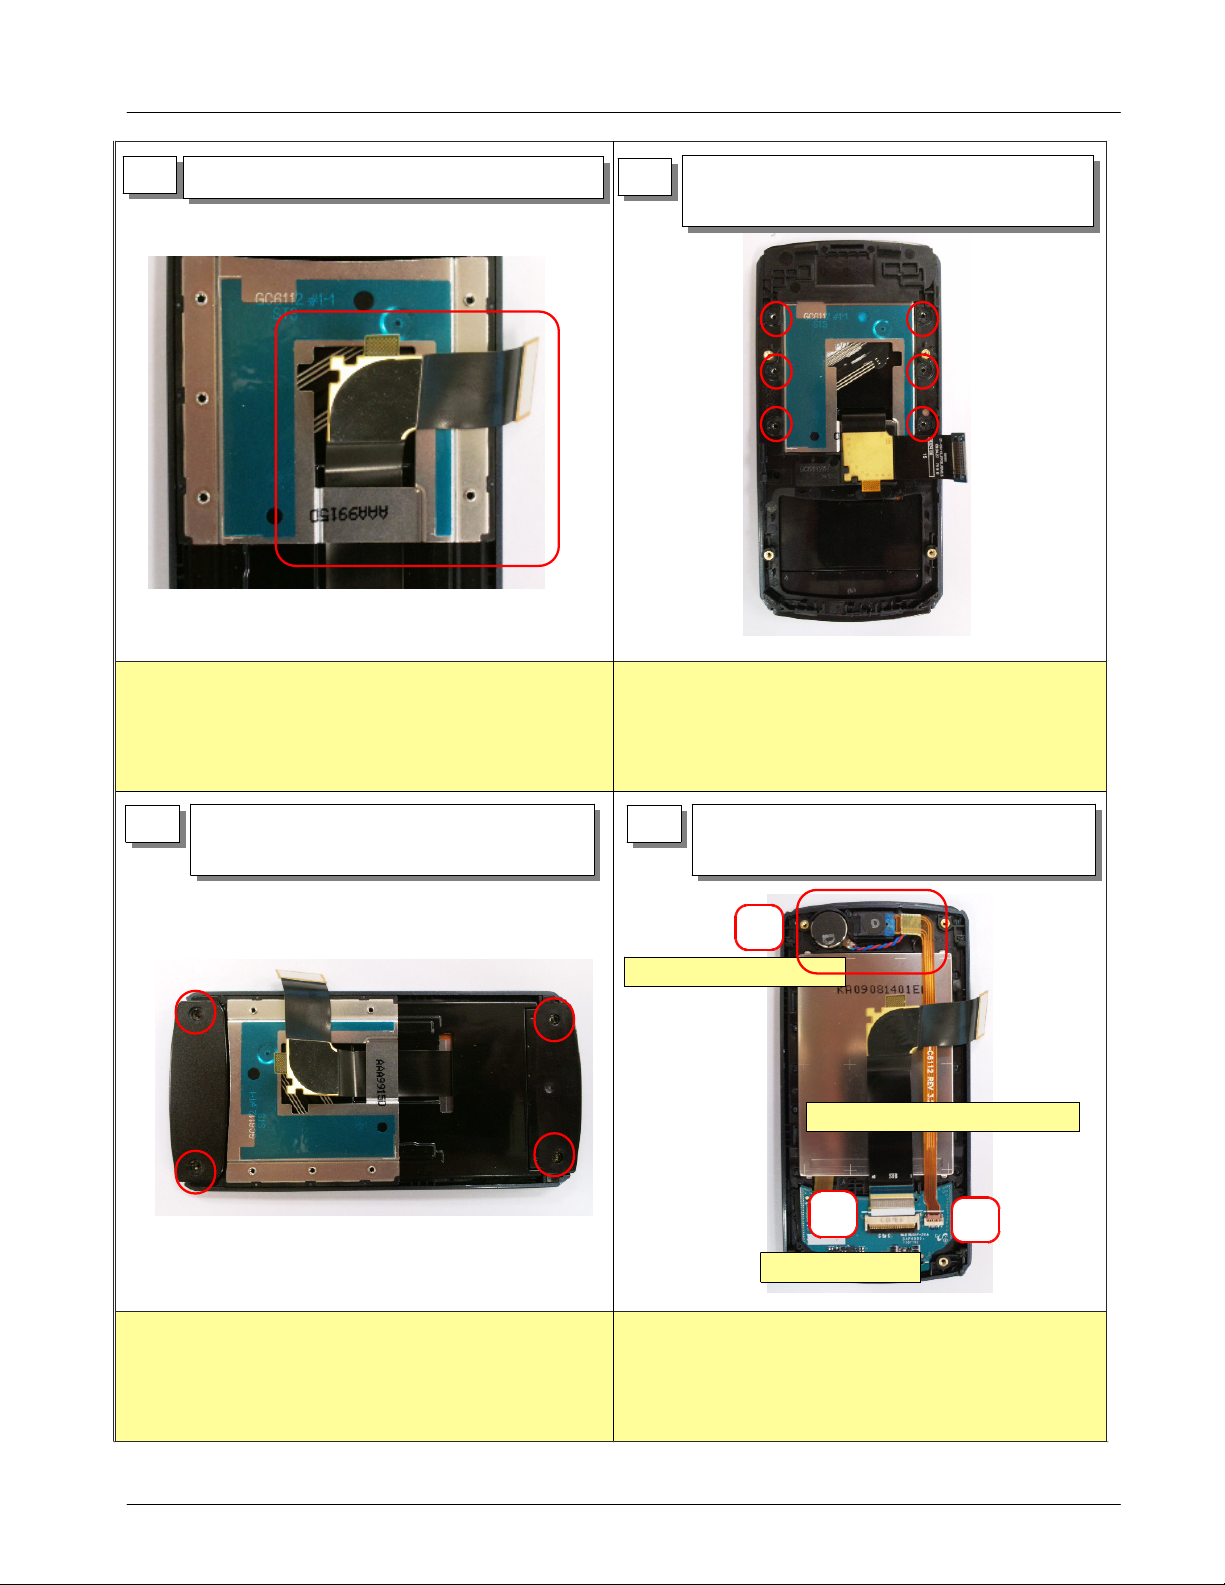
9
Take out SLODE FPCB carefully.
Be careful not to make scratch and molding damage!
1)
In order to take out FRONT, Unscrew at
10
points.
Be careful not to make scratch and molding damage!
1)
6
11
Remove LOWER SCREW CAP, Unscrew
points and take out LOWER.
Be careful not to make scratch and molding damage!
1)
12
3
Separate SLIDE FPCB, RECEIVER
MOTOR+FPCB
+
②
RECEIVER+MOTOR
RECEIVER+MOTOR+FPCB
①
MAIN FPCB
Be careful not to make scratch and molding damage!
1)
Be careful not to damage FPCBs
2)
Be careful not to RECEIVER+MOTOR wire.
3)
③
11-3
SAMSUNG Proprietary-Contents may change without notice
This Document can not be used without Samsung's authorization
Disassembly and Assembly Instructions
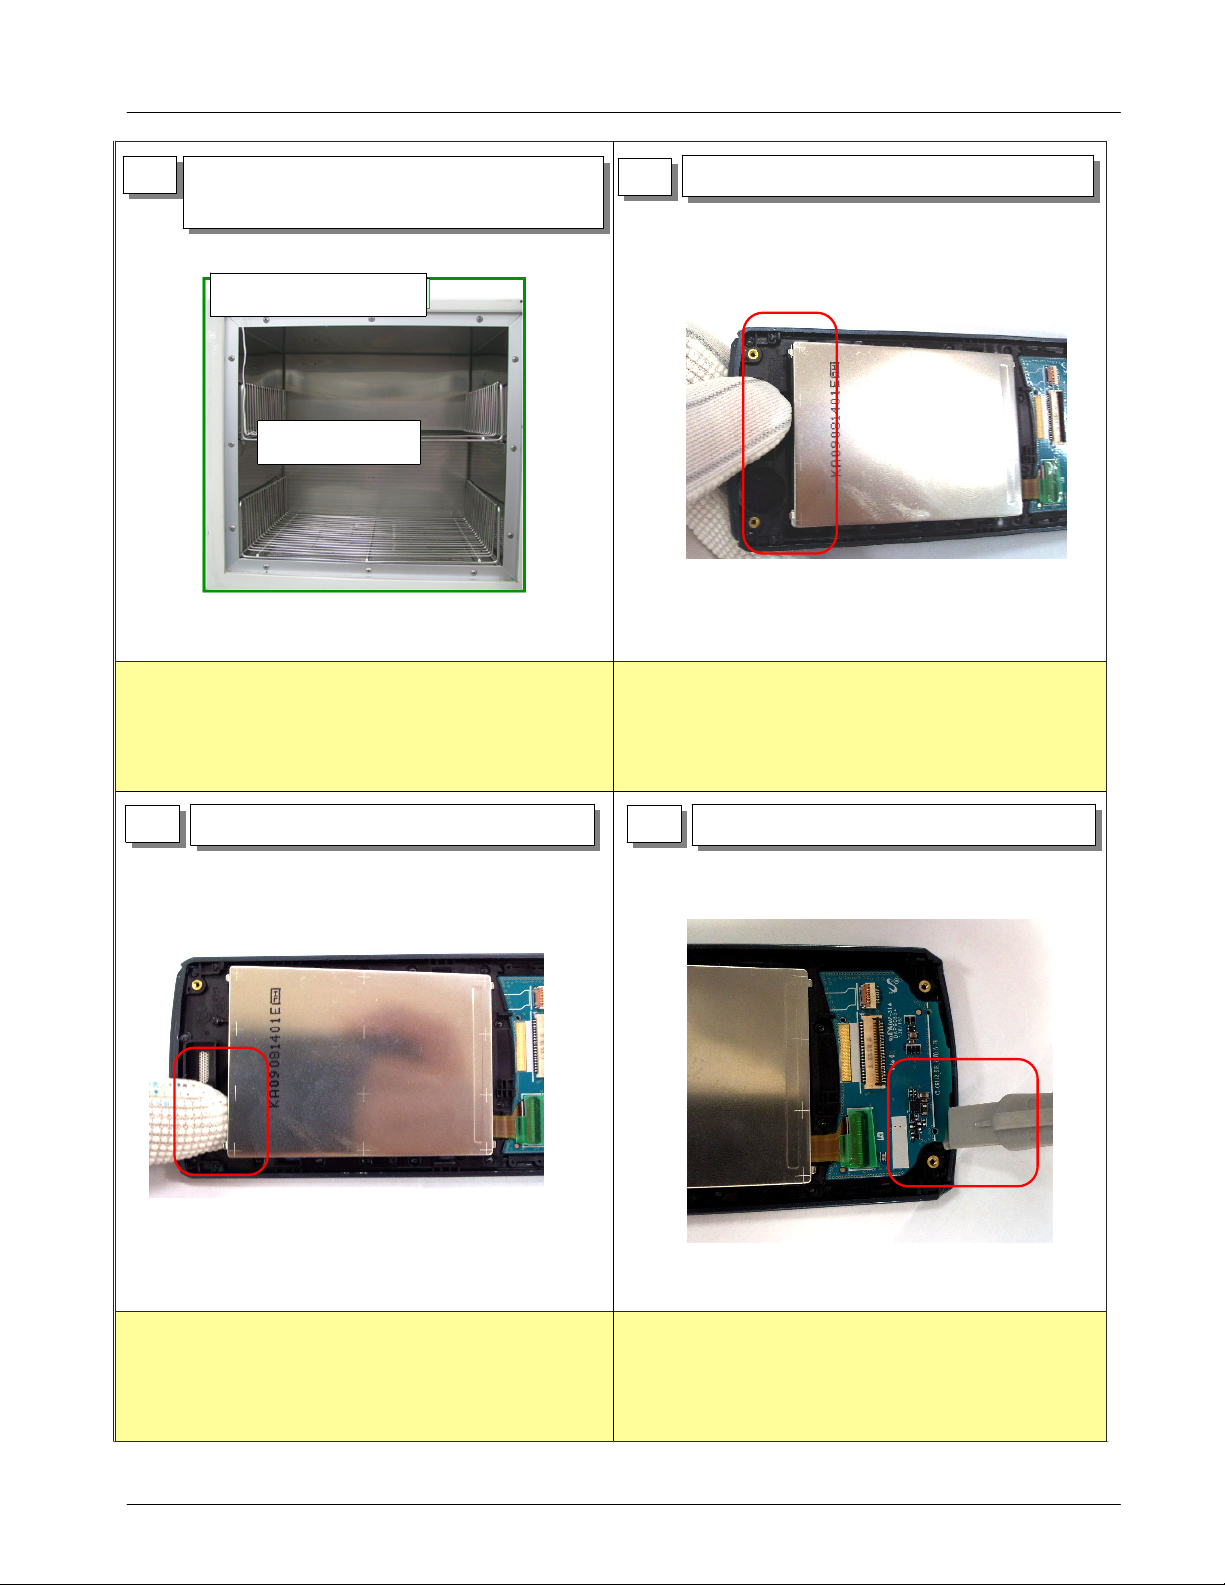
13
Ptu SLIDE ASS;y in chamver and
Disassemble one by one immediately.
70'C / 5~6
min
Sensor
Put out one by one from the chamber.
1)
Set chamber temperature in reference.
2)
In order to separate LCD, lift up upper LCD.
14
Be careful not to make scratch and molding damage!
1)
Be careful not to damage LCD
2)
Be careful not to make FOG CRACK.
3)
15
Be careful not to make scratch and molding damage!
1)
Be careful not to damage LCD
2)
Be careful not to make FOG CRACK.
3)
Lift up left side of LCD.
16
Be careful not to make scratch and molding damage!
1)
Be careful not to damage LCD
2)
Be careful not to make FOG CRACK.
3)
Lift up bottom of sub PCB.
11-4
SAMSUNG Proprietary-Contents may change without notice
This Document can not be used without Samsung's authorization
 Loading...