

Samsung SGH-B7610 Demontage et remontage
Disassembly and Assembly Instructions
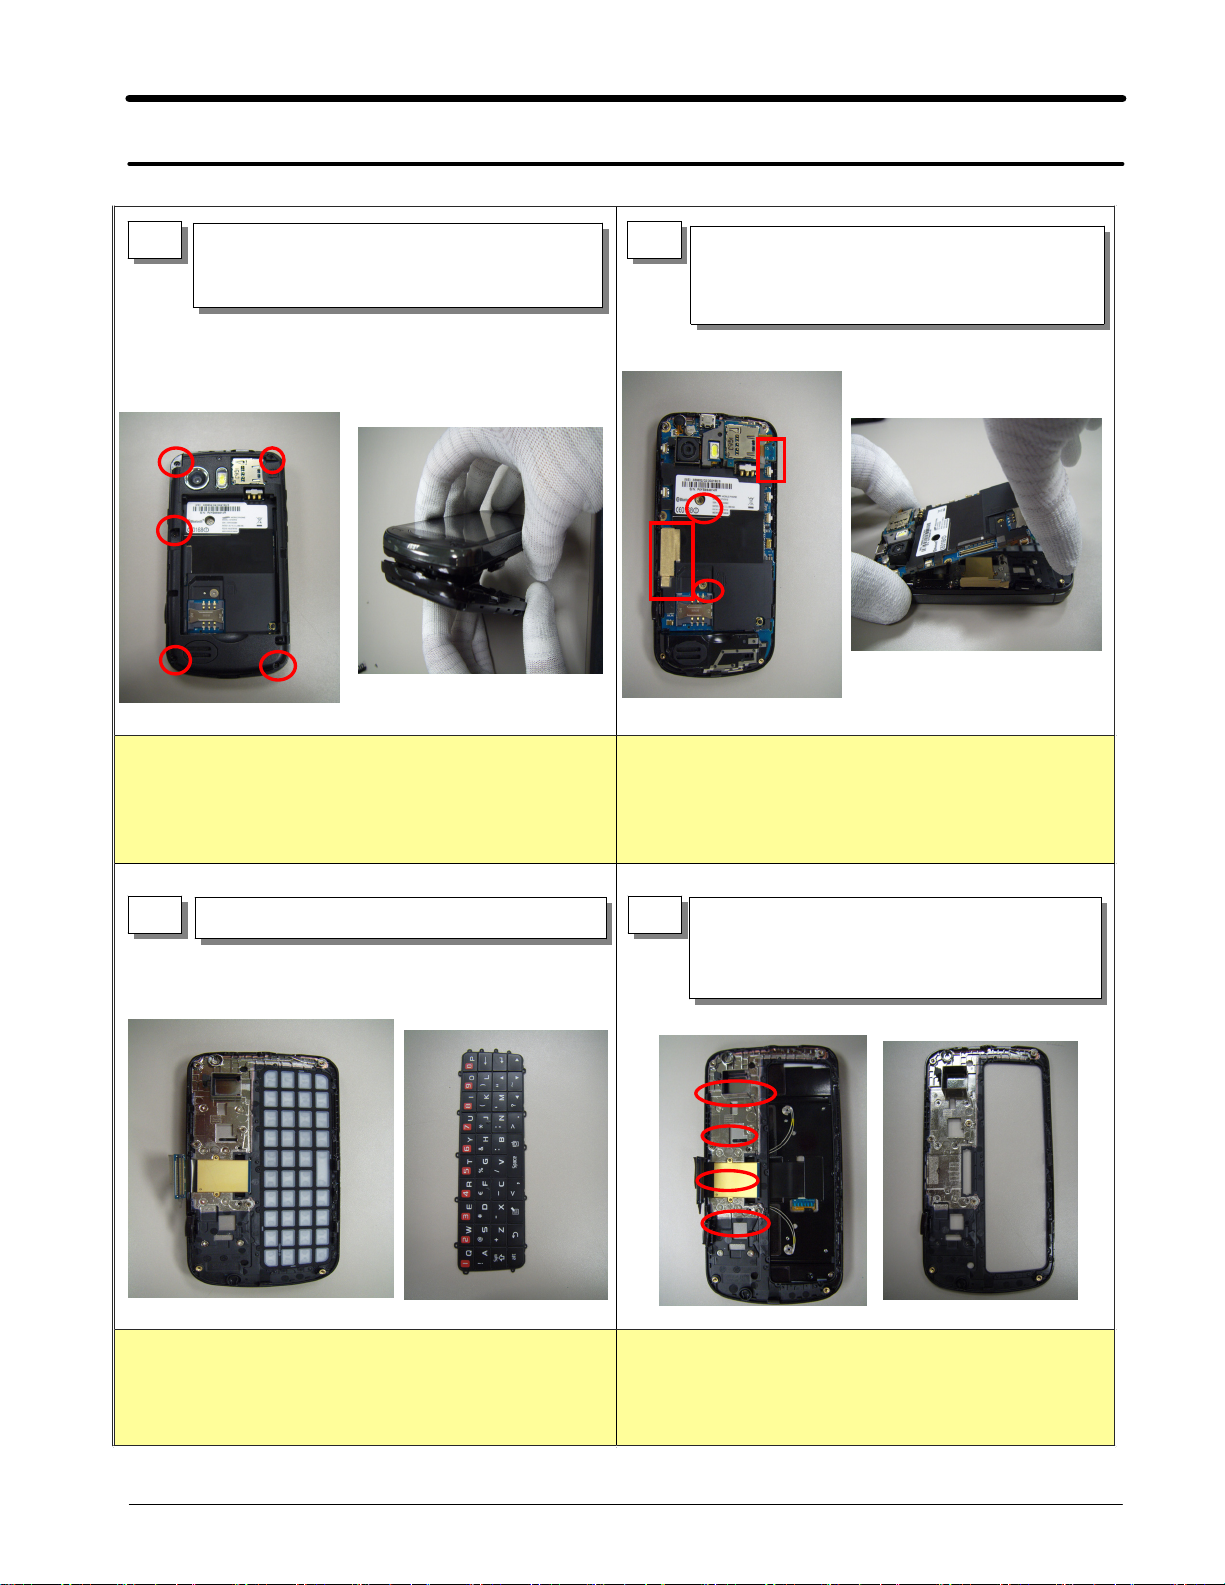
11.
11-1.
Disassembly
1
Caution
※
Be care of scratch and molding damage.
1)
Unscrew the5points.
1)
Separate the REAR from the FRONT ass'y
2)
using disassembly stick.
2
※
Be care of scratch and molding damage.
1)
Be care of damage to slide F-CPB.
2)
Unscrew the2points.
1)
Separate Slide ass'y connector and T-flash
2)
connector
Separate PBA from the Front Case
3)
Caution
3
※
1)
Caution
Seprete the KEYPAD from the slide ass'y.
※
11-1
4
Caution
1)
Unscrew the8points.
1)
Separate the FRONT case from the slide
2)
ass'y.
Be care of scratch and molding damage.
SAMSUNG Proprietary-Contents may change without notice
This Document can not be used without Samsung's authorization
Disassembly and Assembly Instructions
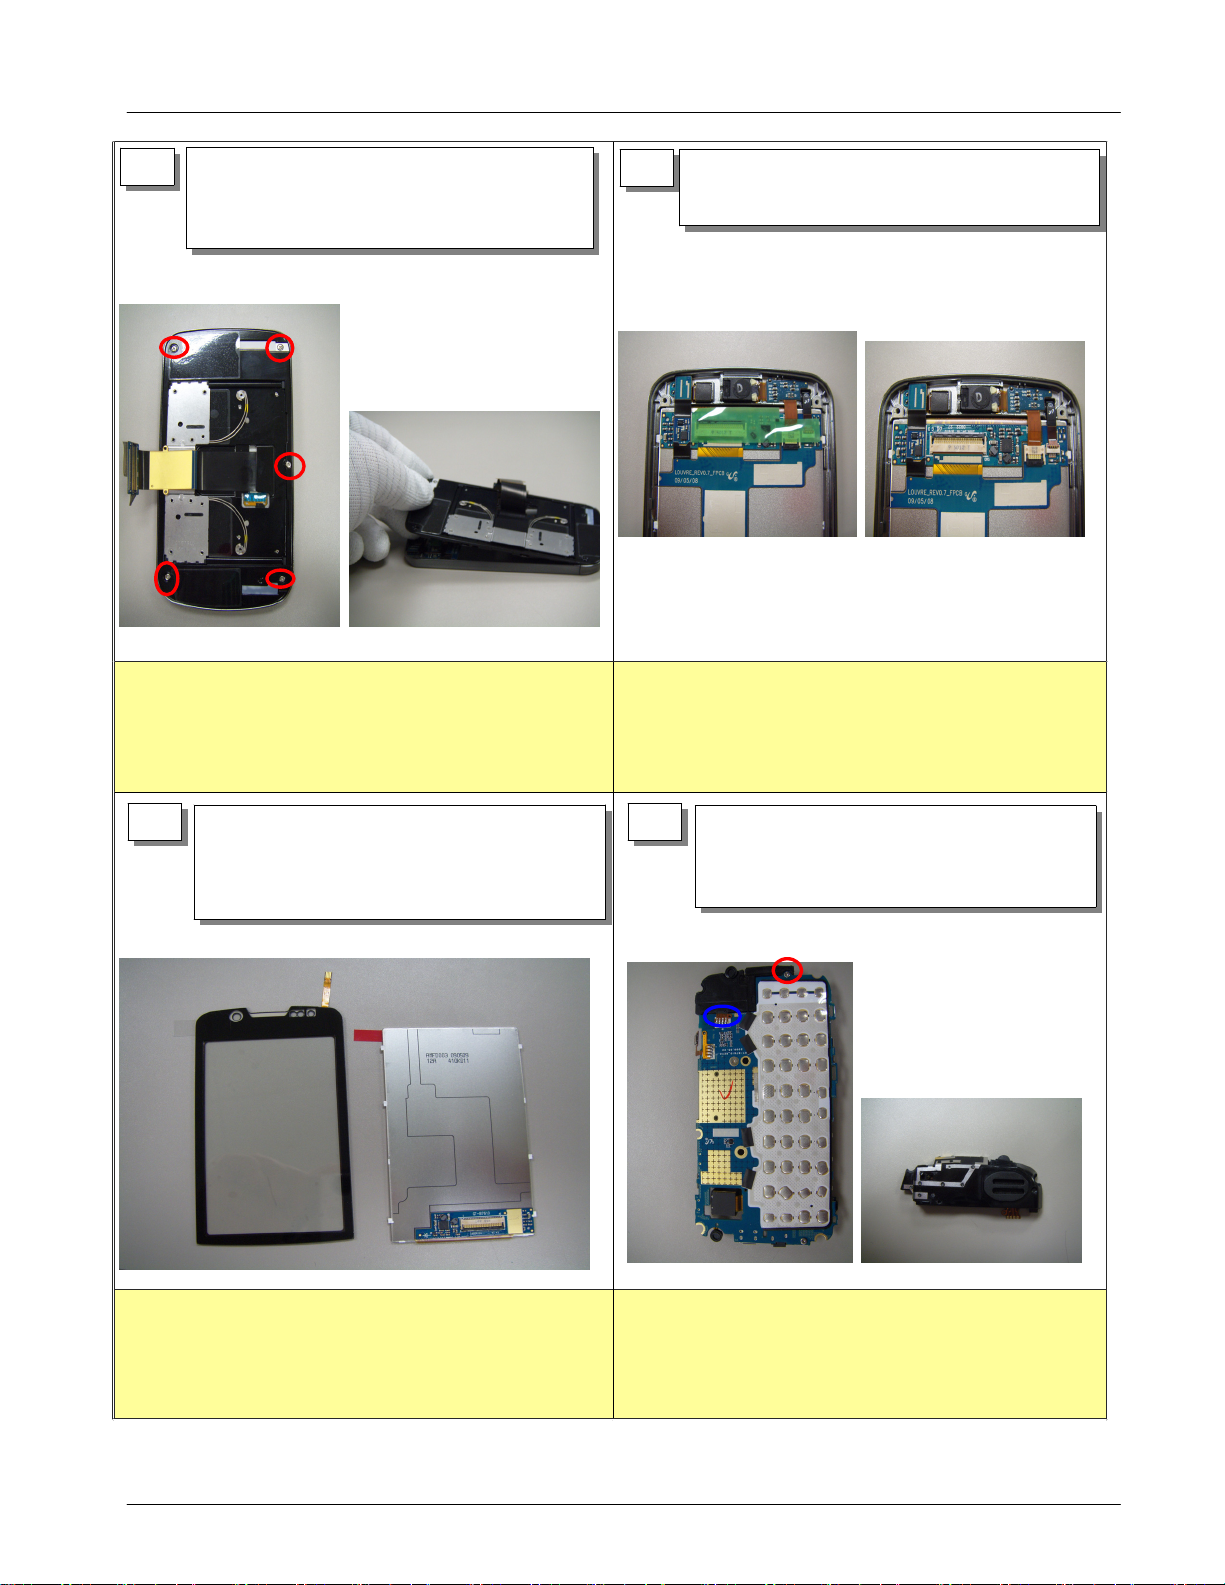
5
Unscrew the5points.
1)
Separate the LOWER case from the
2)
UPPER case.
6
Disassemble the all F-PCB from the sub
2)
PCB.
Remove the Tape.
1)
Caution
※
Be care of scratch and
1)
Be care of damage to slide F-CPB.
2)
7 8
Disassemble the Receiver FPCB, CIF FPCB
1)
and Detach Slide FPCB from LCD module
Separate the LCD module and TSP from
2)
the Upper Case.
molding damage.
Caution
※
Be care of
1)
Be care of damage to the slide F-CPB.
2)
Be care of damage to the connector.
3)
1)
2)
s
cratch and molding damage.
Unscrew the1point.
Detatch the SPK FPCB from the PBA by
soldering designated point(Blue line)
Caution
※
1
Be care of damage to all FPCB
)
2)
Be care of scratch to main WINDOW.
SAMSUNG Proprietary-Contents may change without notice
This Document can not be used without Samsung's authorization
11-2
※
Caution
Disassembly and Assembly Instructions
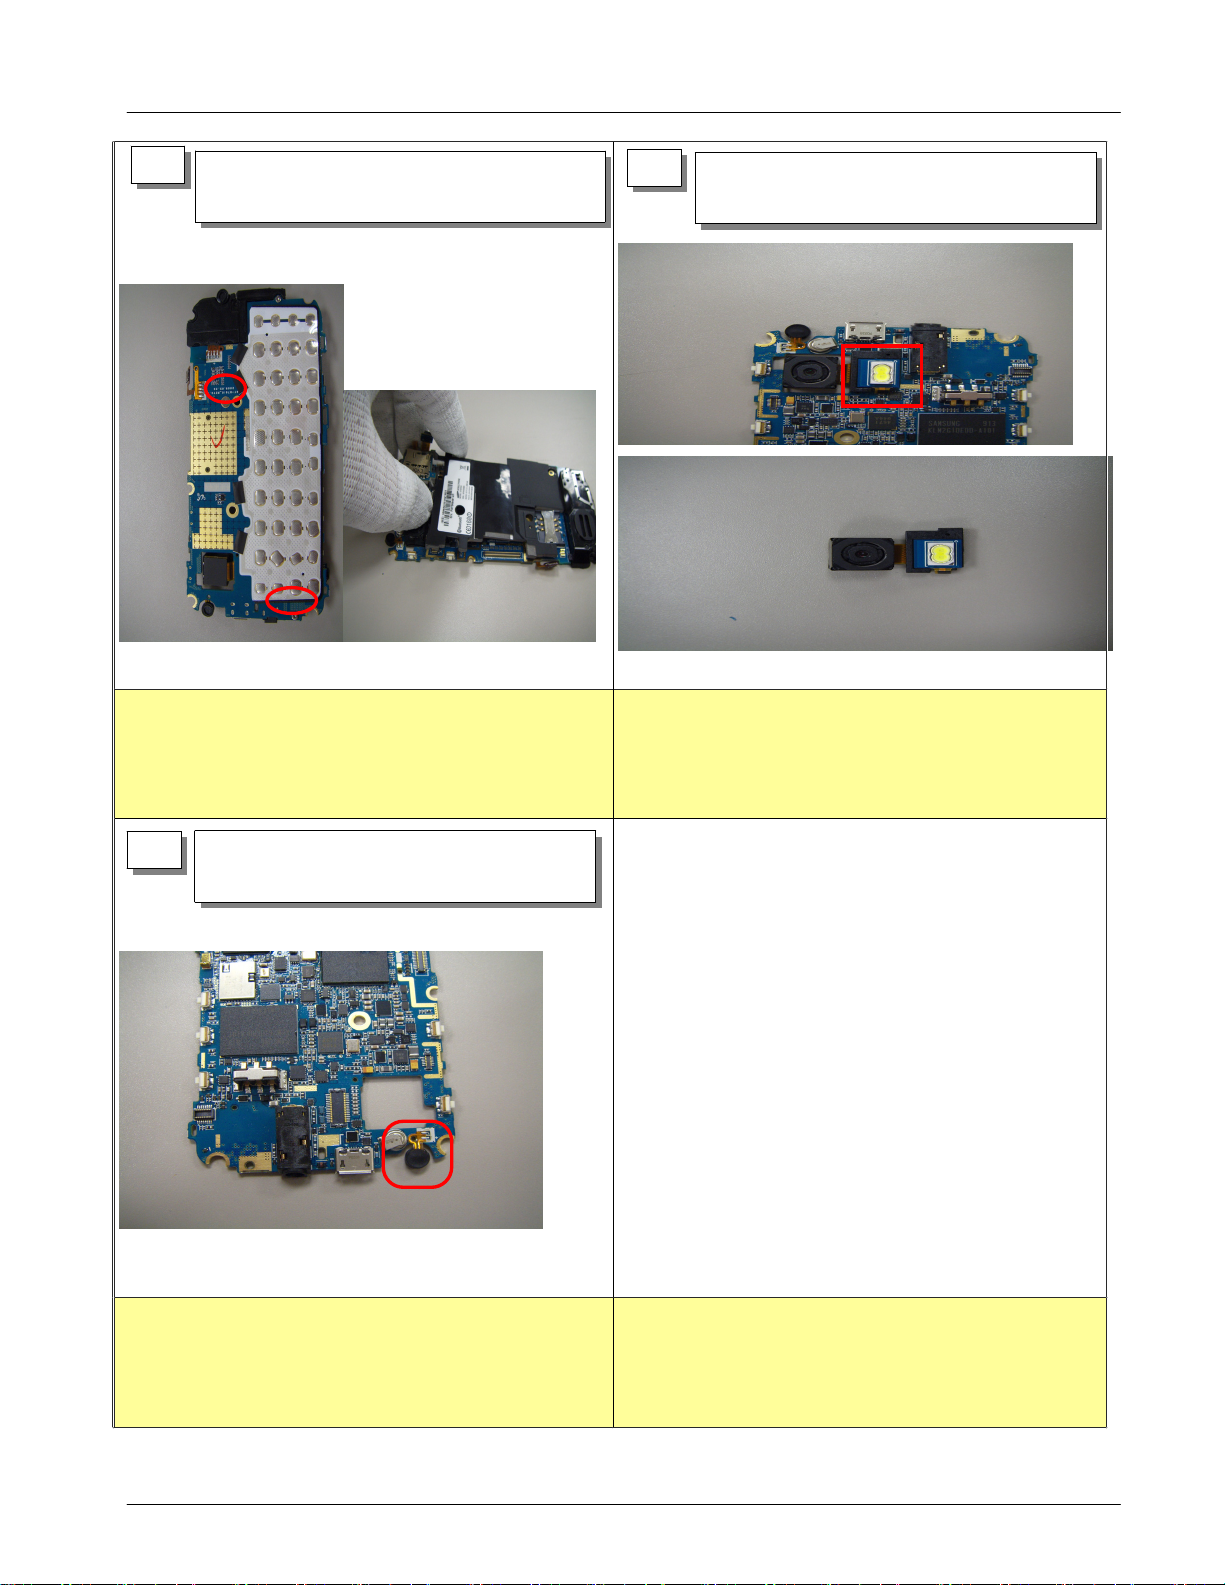
9
Unscrew the2points.
1)
Separate the Shield Can from the PBA
2)
10
Separate the camera module from the
1)
PBA.
※
11
Caution
1)
Detatch the Mic FPCB from the PBA by
soldering designated point
※
Caution
Caution
※
1) Be care of damage to FPCB
SAMSUNG Proprietary-Contents may change without notice
This Document can not be used without Samsung's authorization
11-3
 Loading...