


否
否
是
否
是
否
是
否
是
否
是
否
是
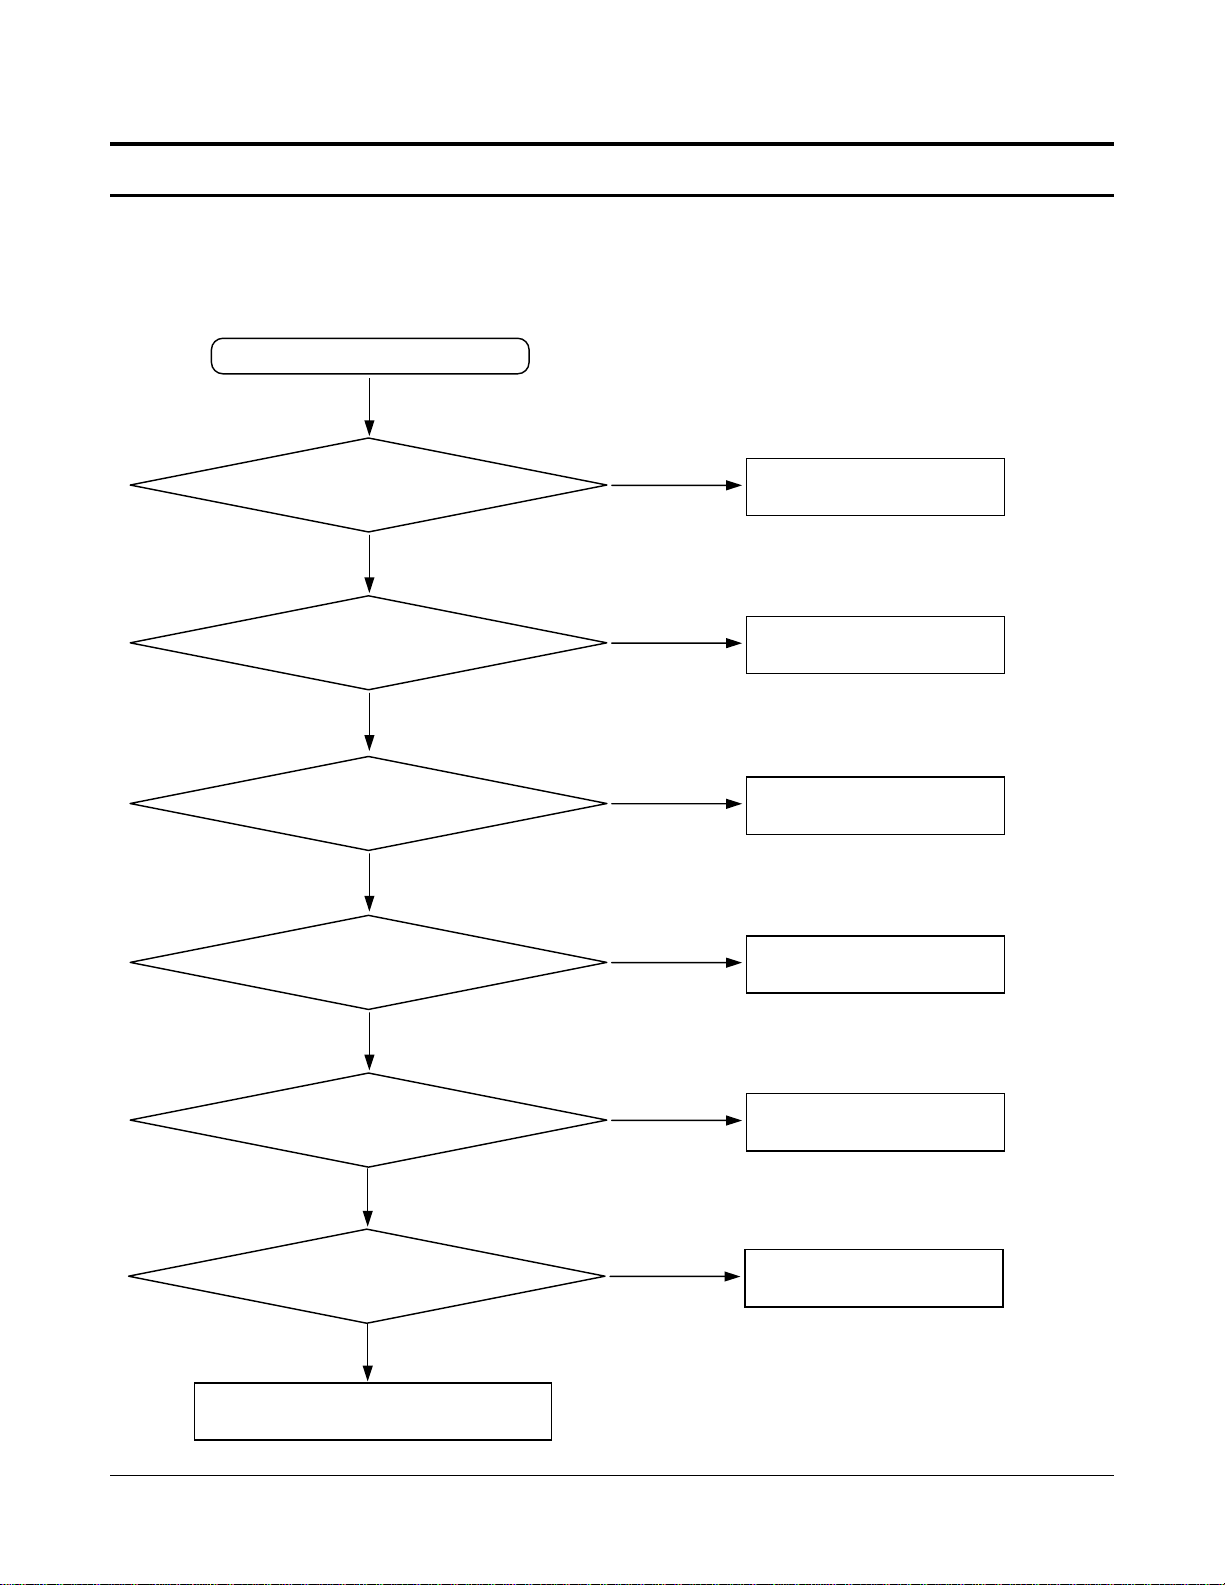
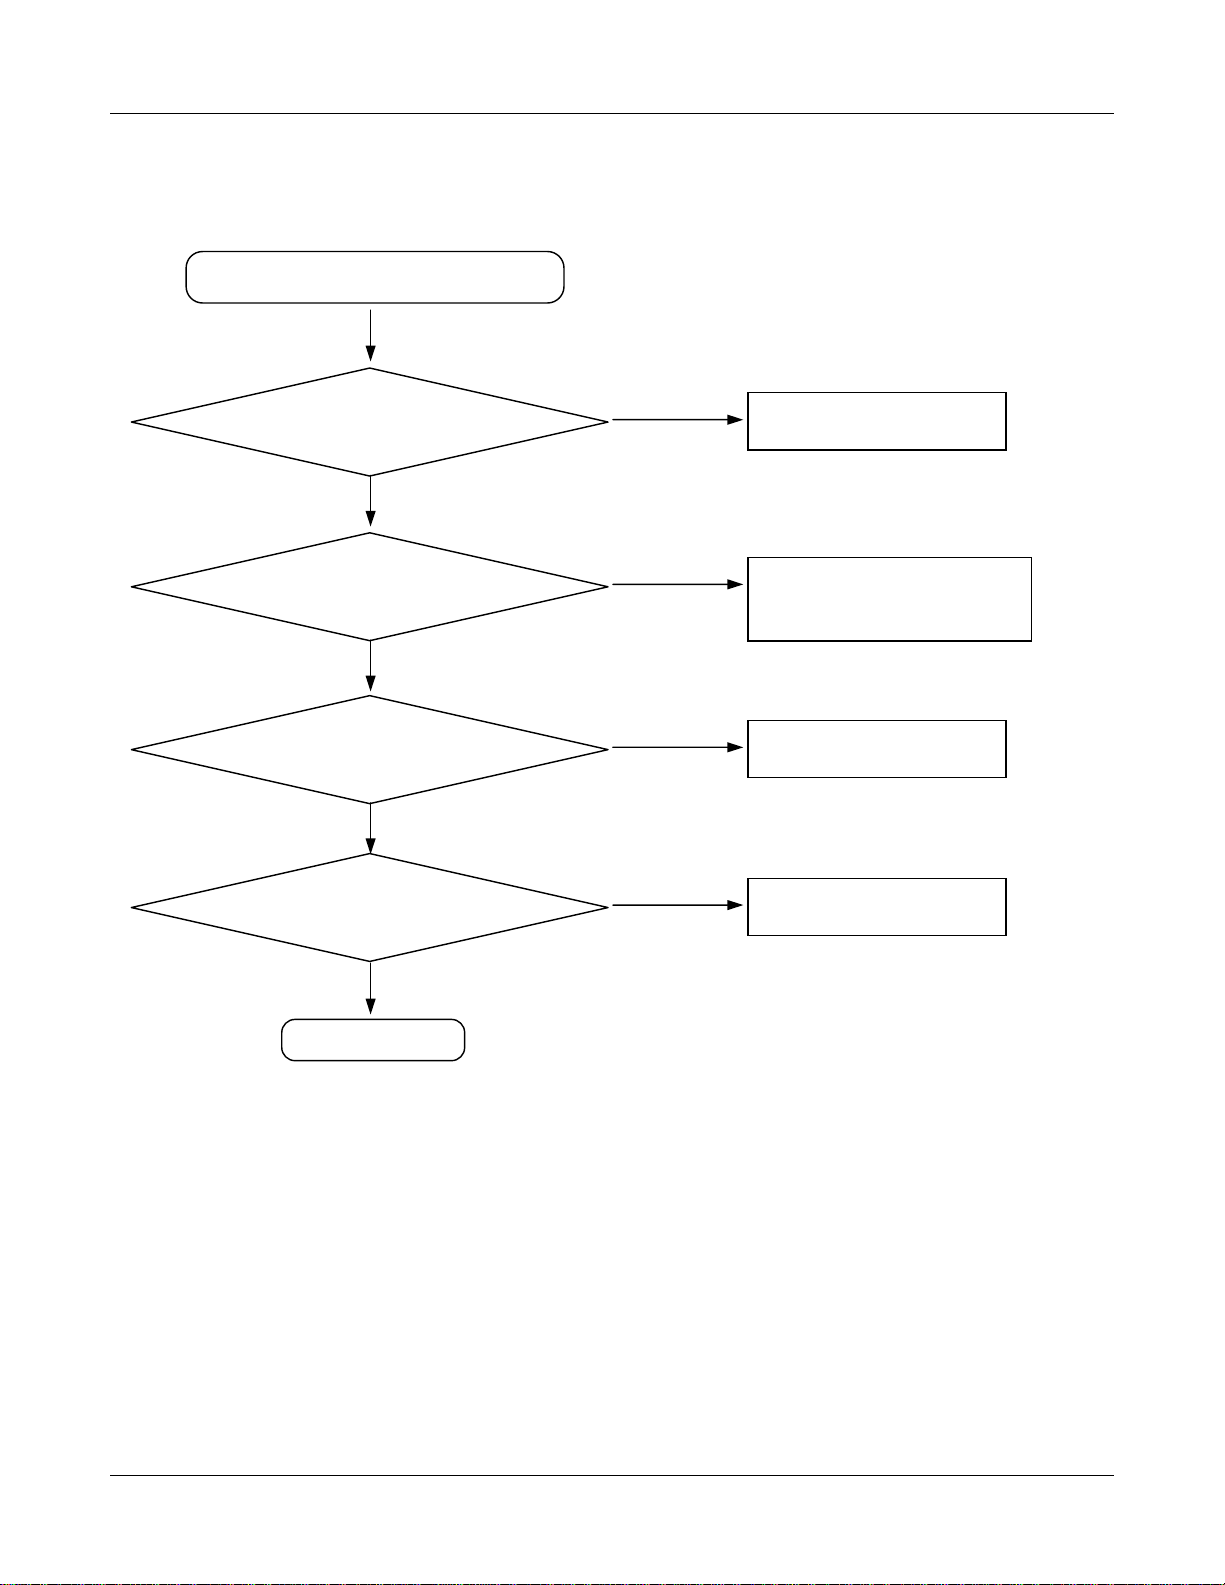
9. 故障排除流程图
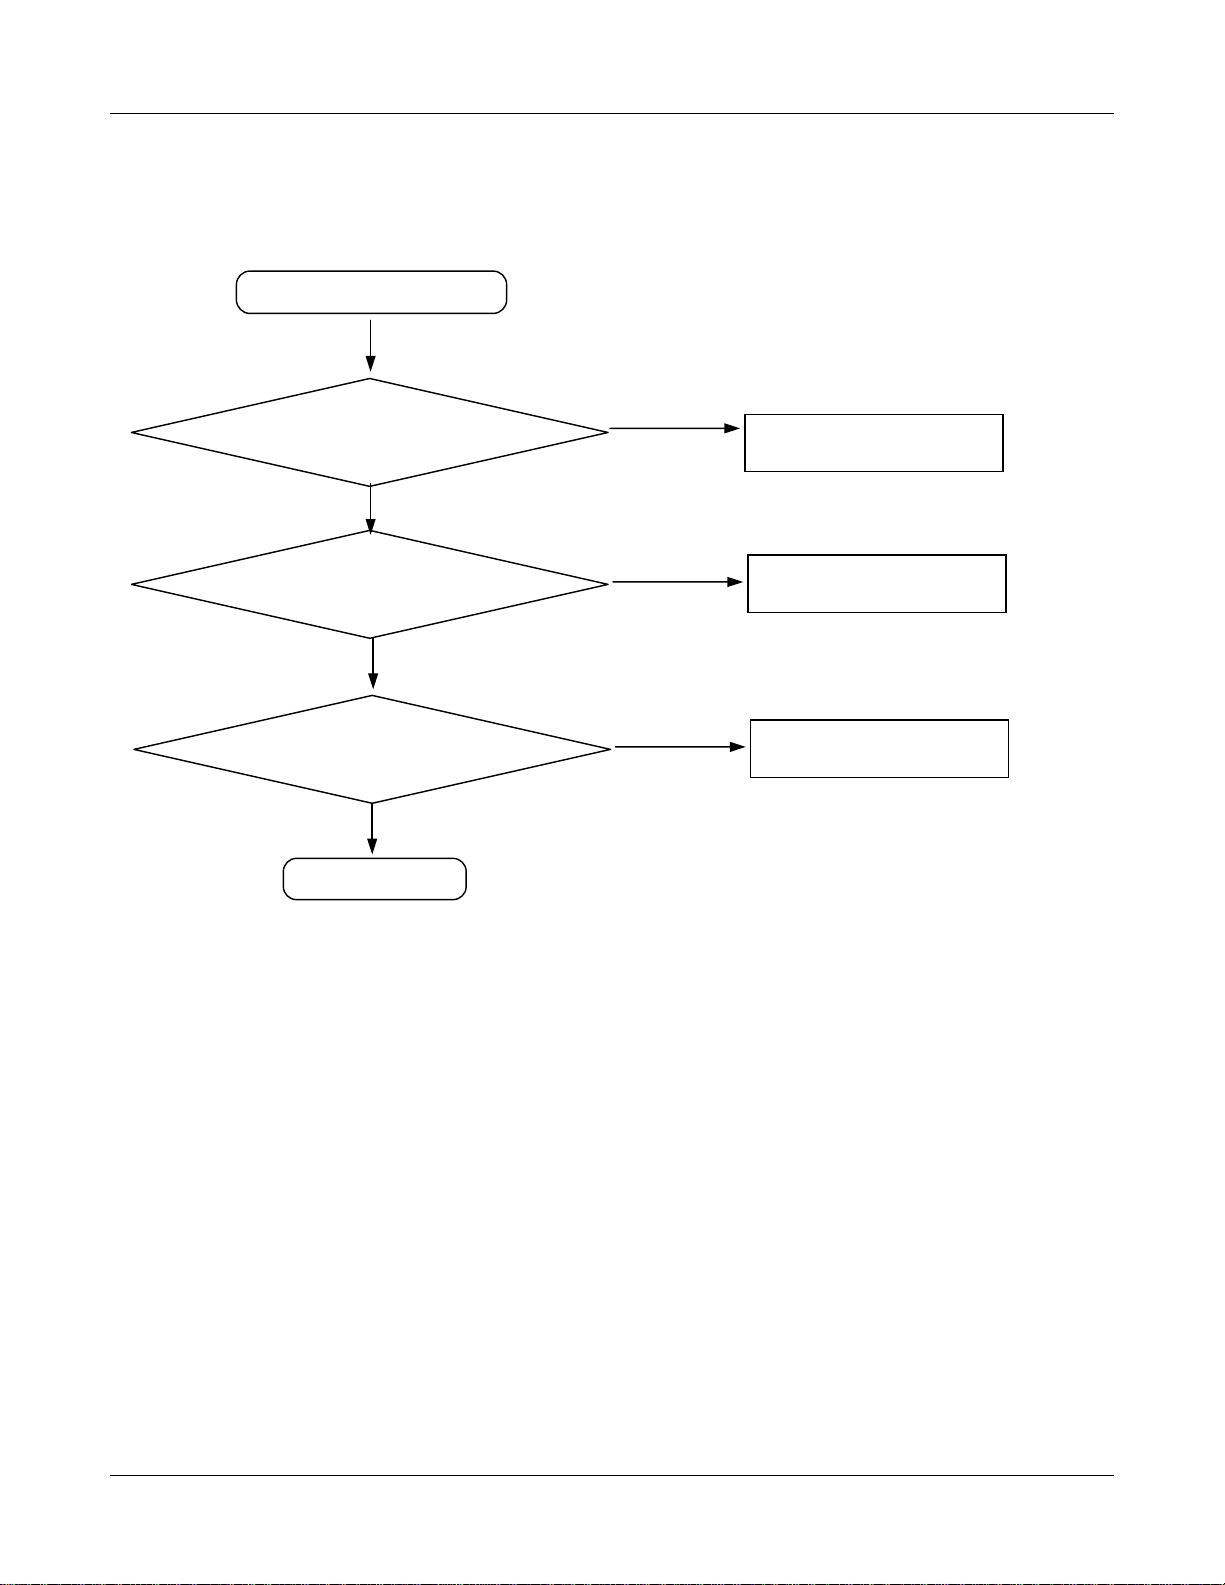
9-1. 开机
9-1-1.PDA 部分
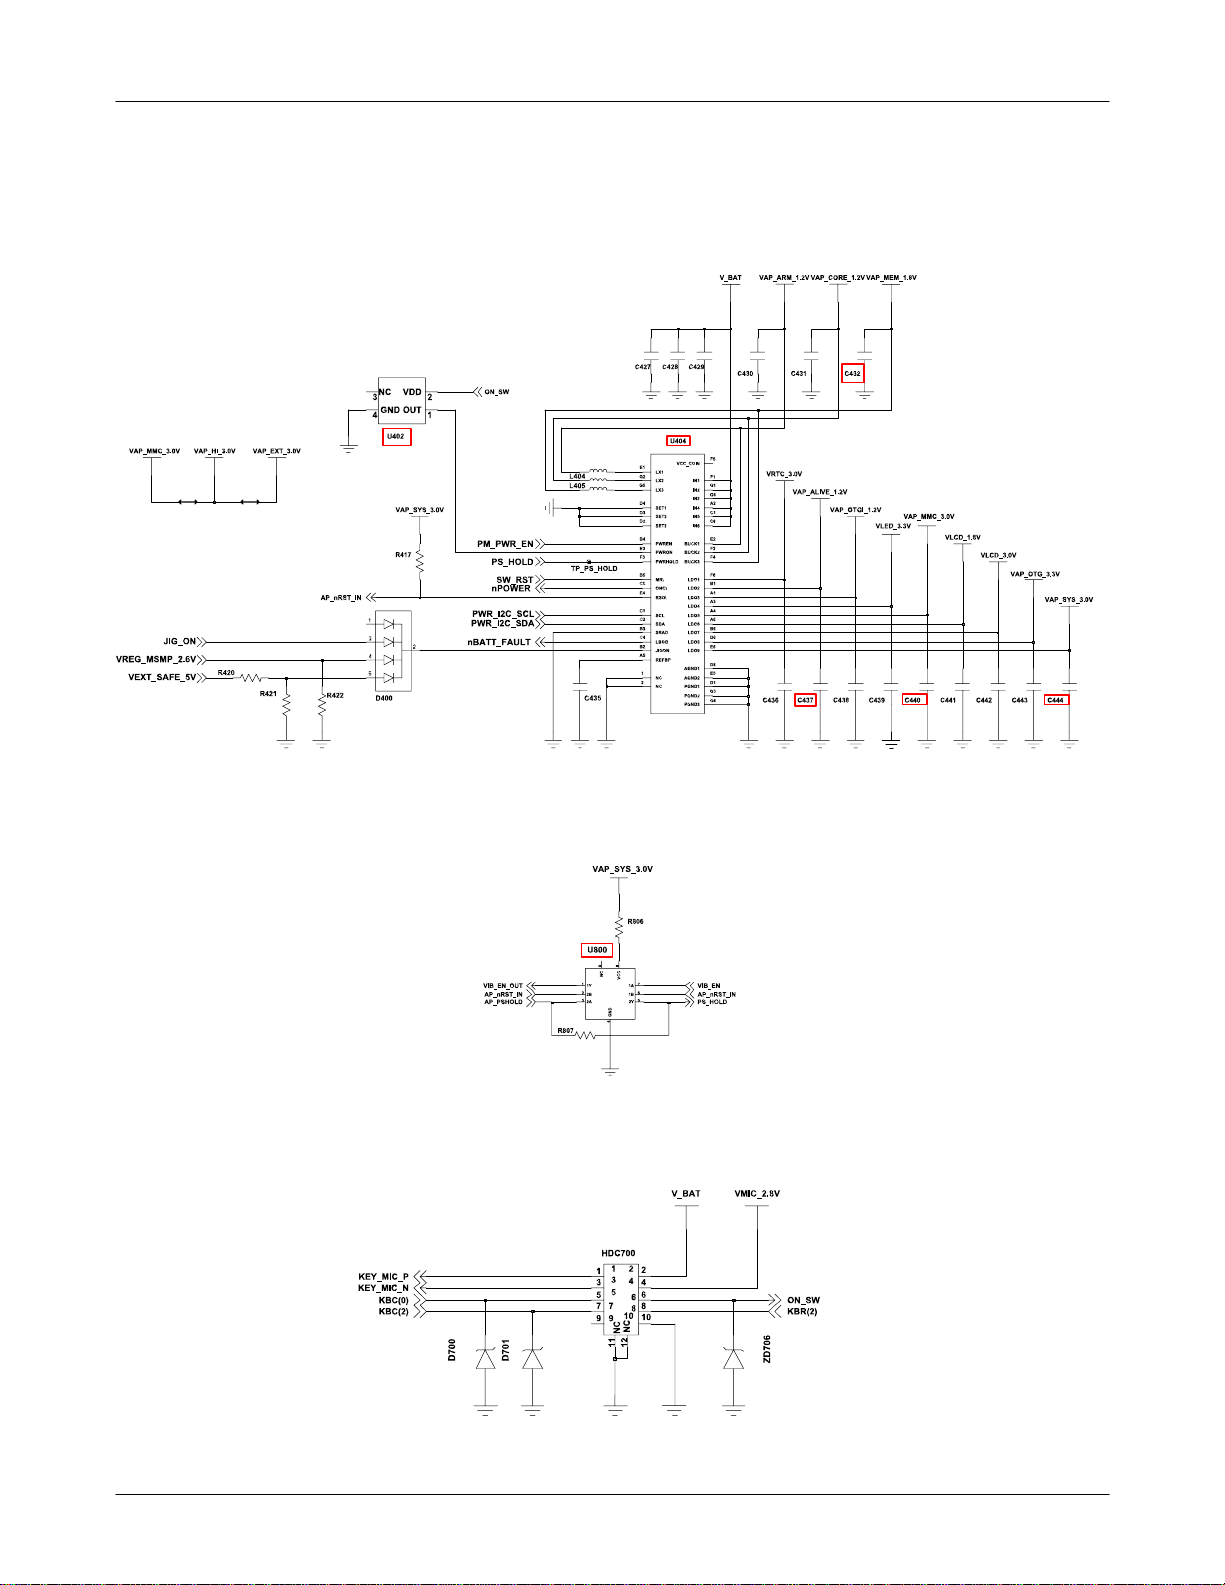
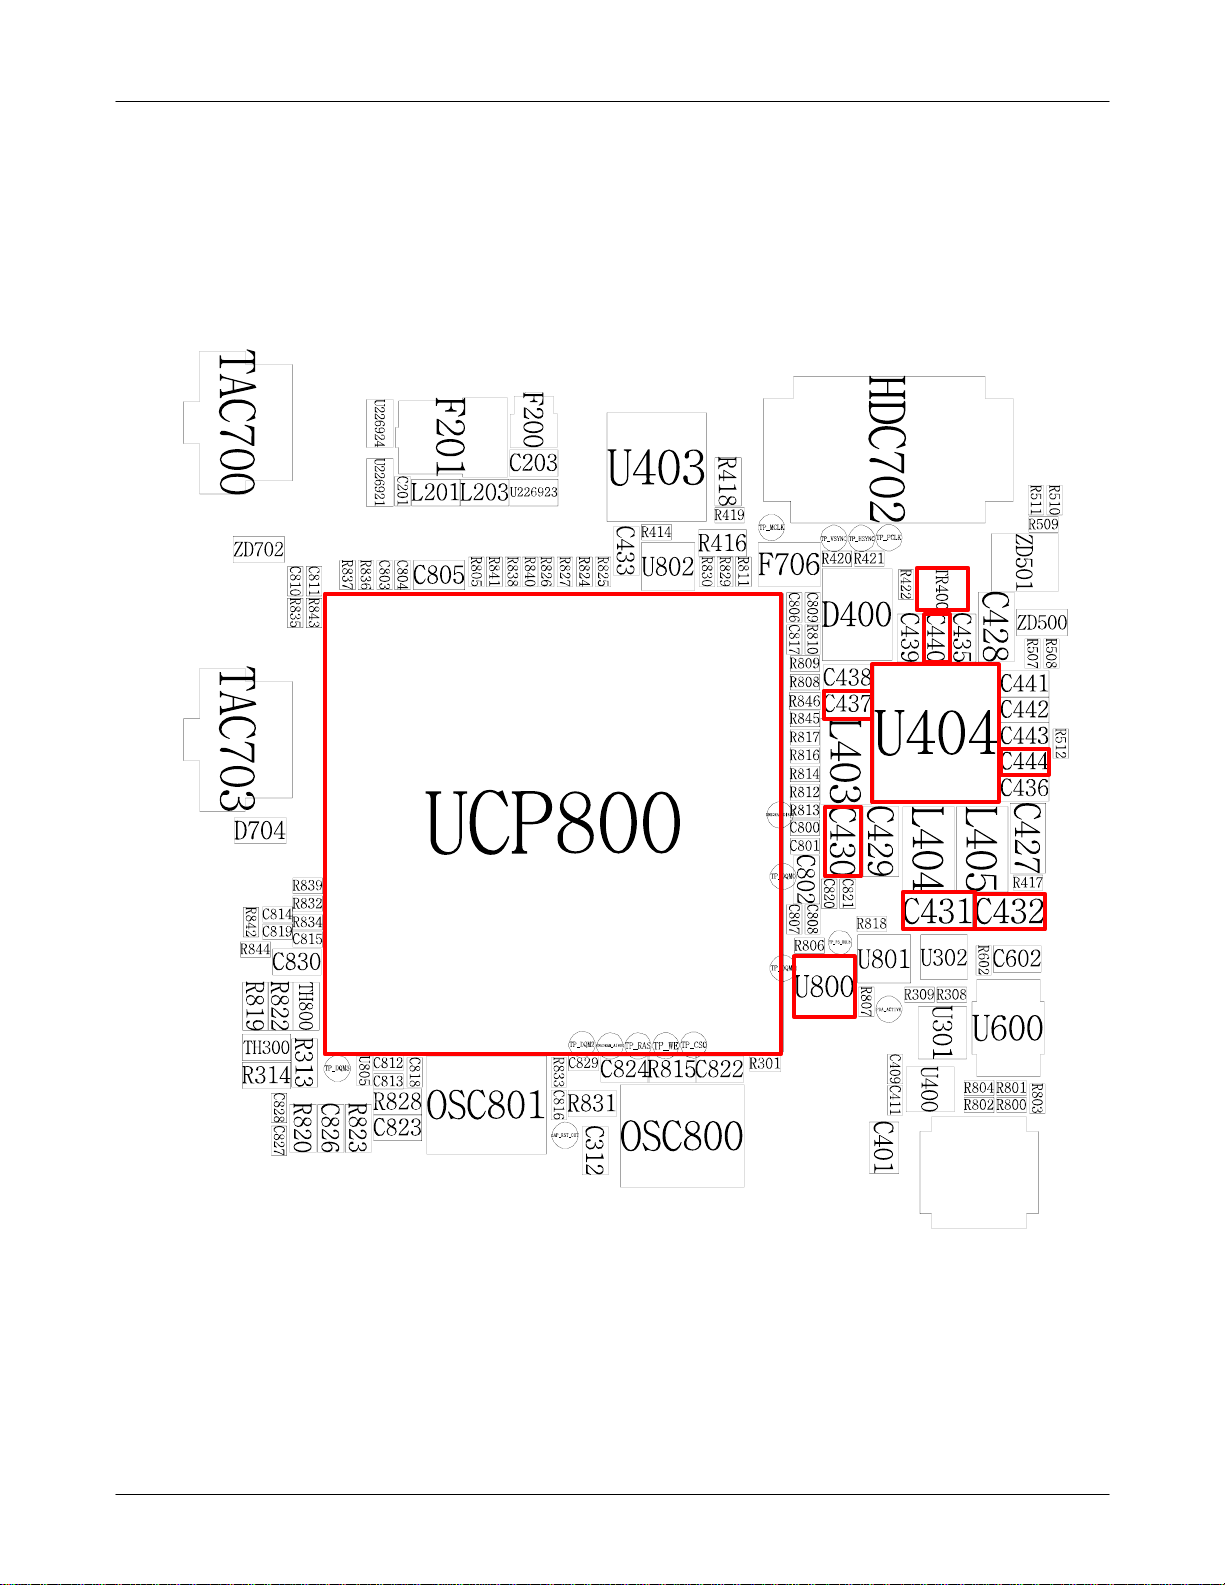
在 U402 上检查 V_BAT 的管
脚 2 电压是否大于 3.1V?
TR400 管脚 1 是否为高电平?
检查 C430、C431 电压是否为 1.2V?
检查 U800 管脚 6 是否为高电平?
接通电源
检查如下电压:
C432是1.8V
C444是3.0V
C440 是 3.0V
检查 C437 是 1.2V
检查其它电源电路
9-1
三星所有—内容可能有变动,恕不另行通知。
未经三星允许,不得使用本文件。
更换电池并检查 ZD706
检查 U404 及相关电路
检查 U404 及相关电路
检查 UCP800
检查 U404 及相关电路
检查 U800 及相关电路。
故障排除流程图
Flow Chart of Troubleshooting
9-2
SAMSUNG Proprietary-Contents may change without notice
This Document can not be used without Samsung's authorization
Flow Chart of Troubleshooting
9-3
SAMSUNG Proprietary-Contents may change without notice
This Document can not be used without Samsung's authorization
故障排除流程图
是
否
是
否
是
否
是
否
是
否
是
否
是
否
是
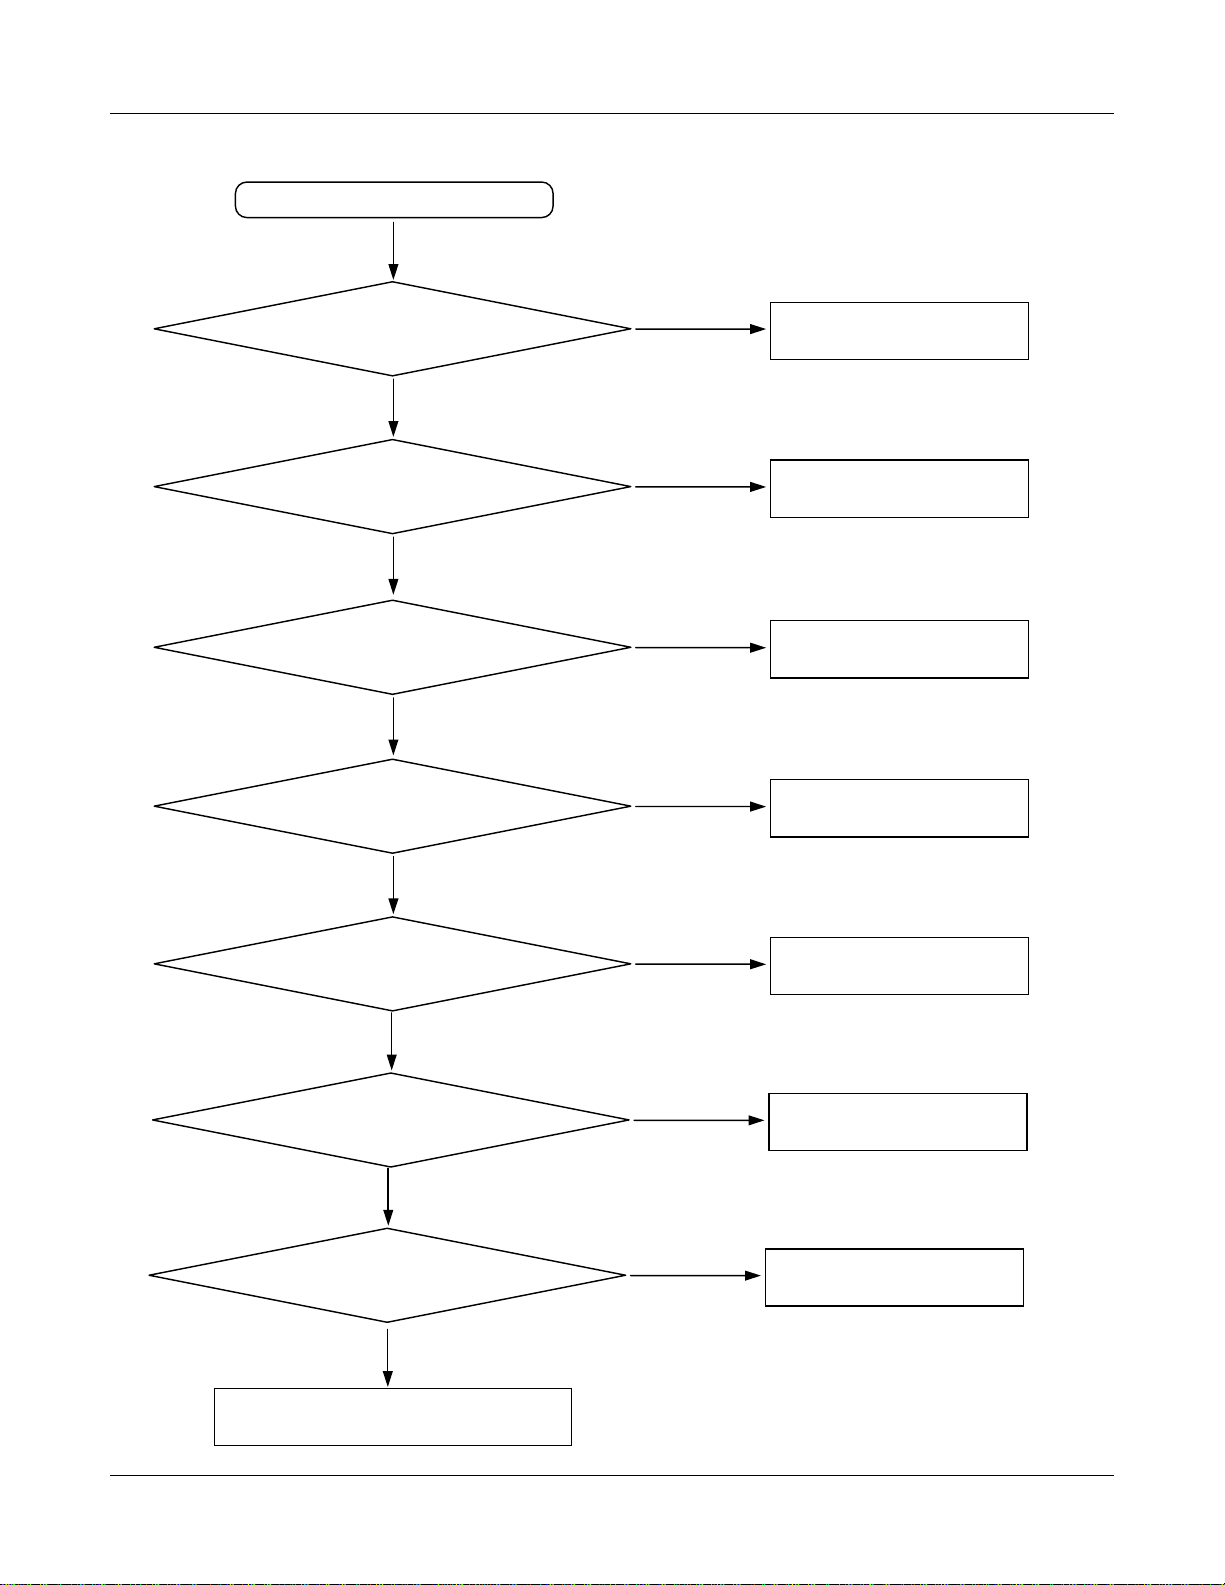
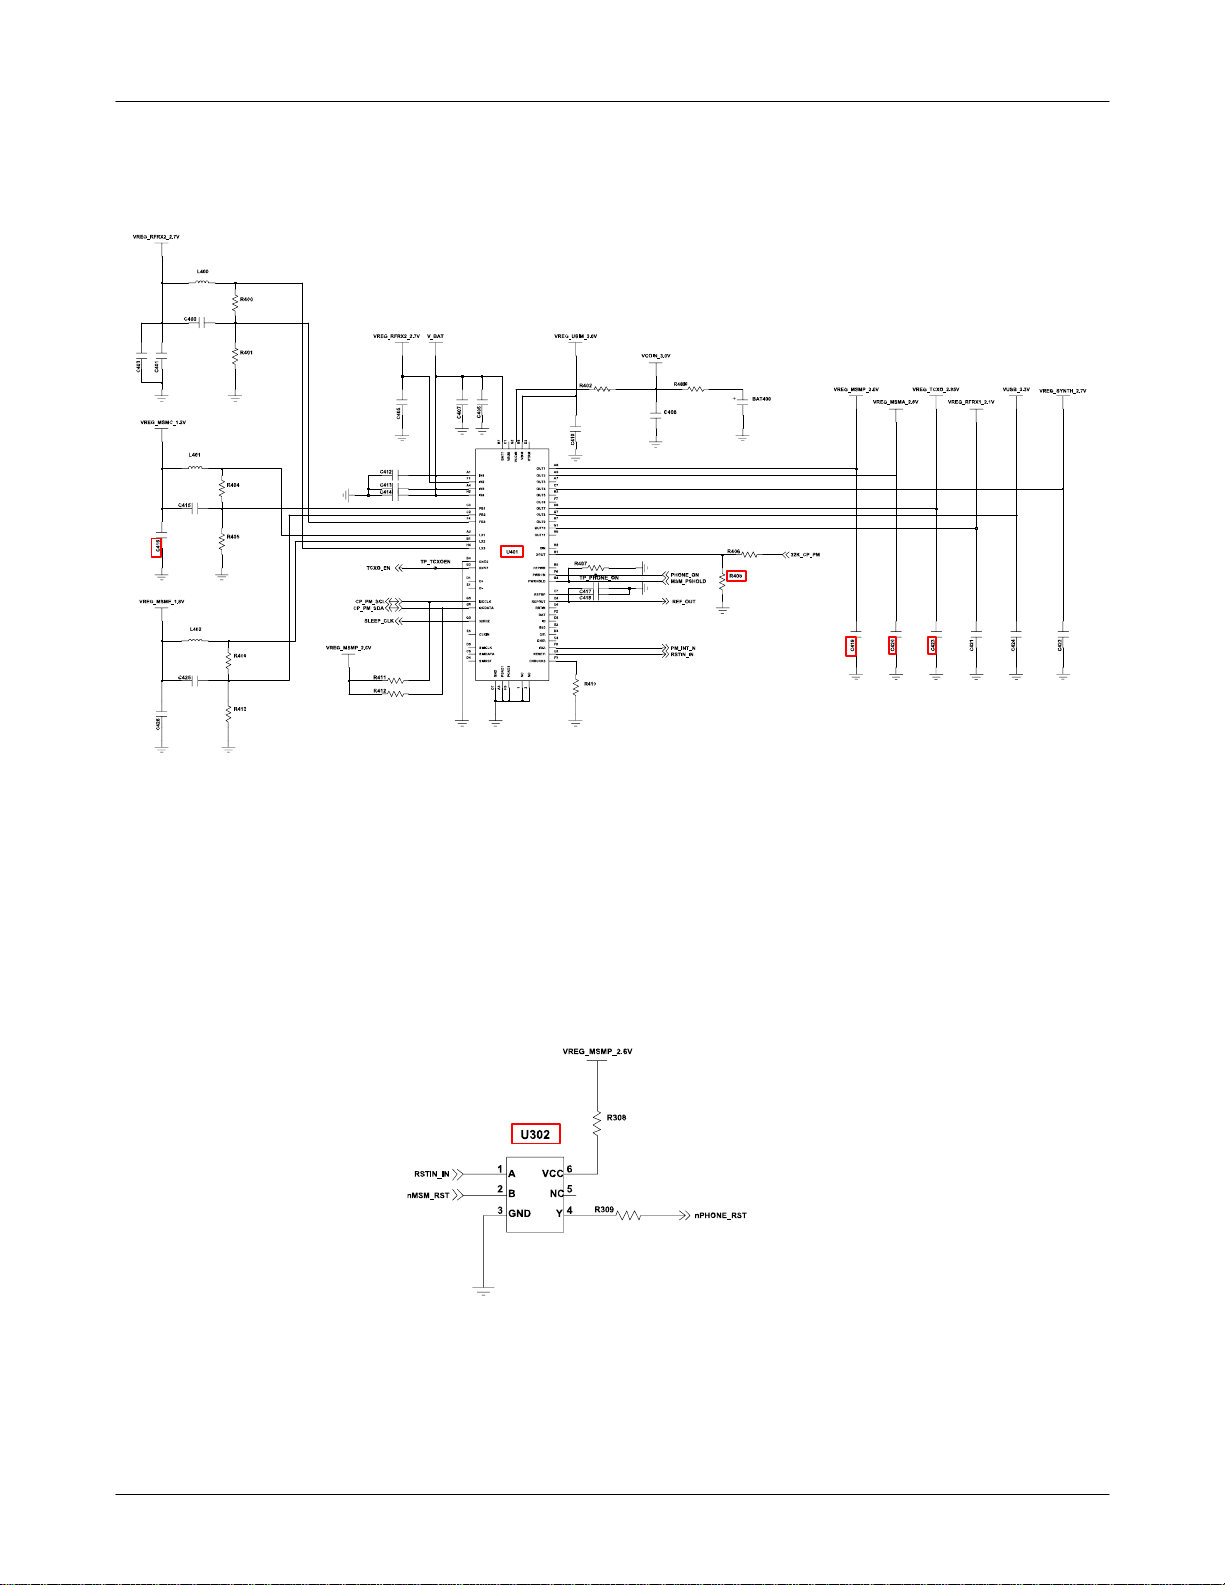
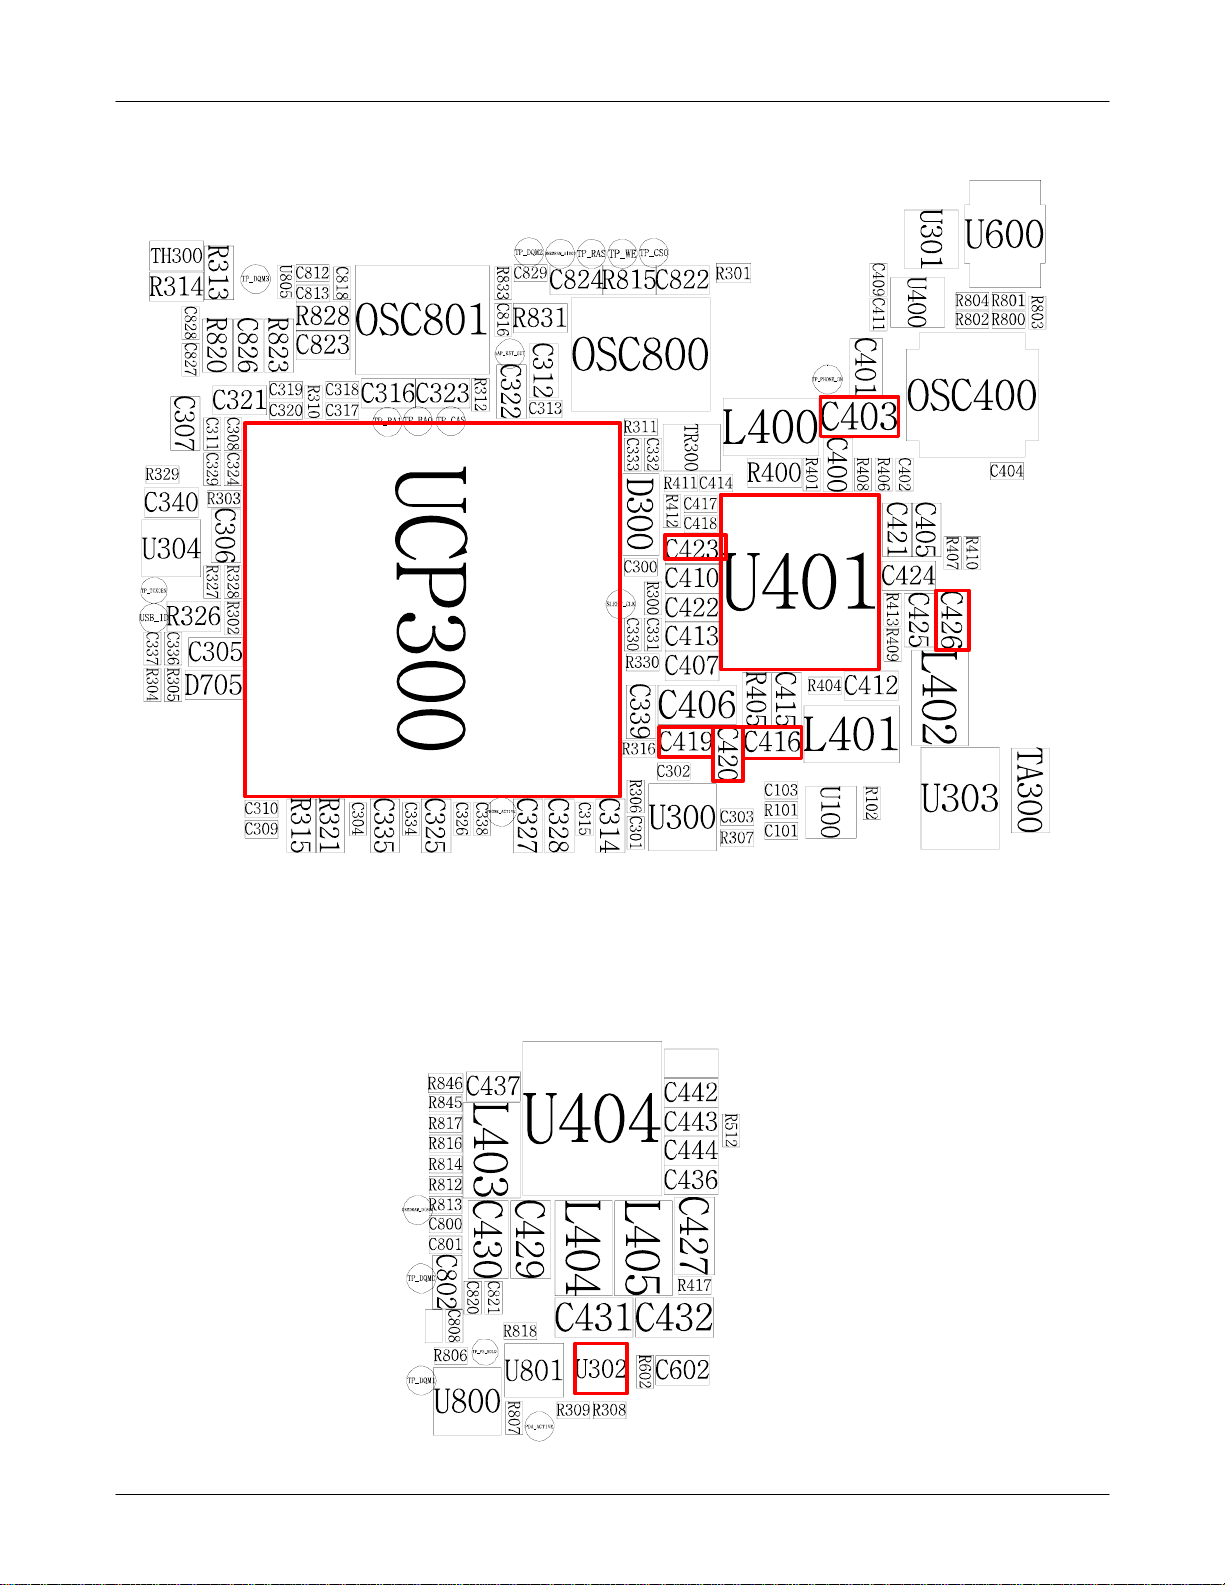
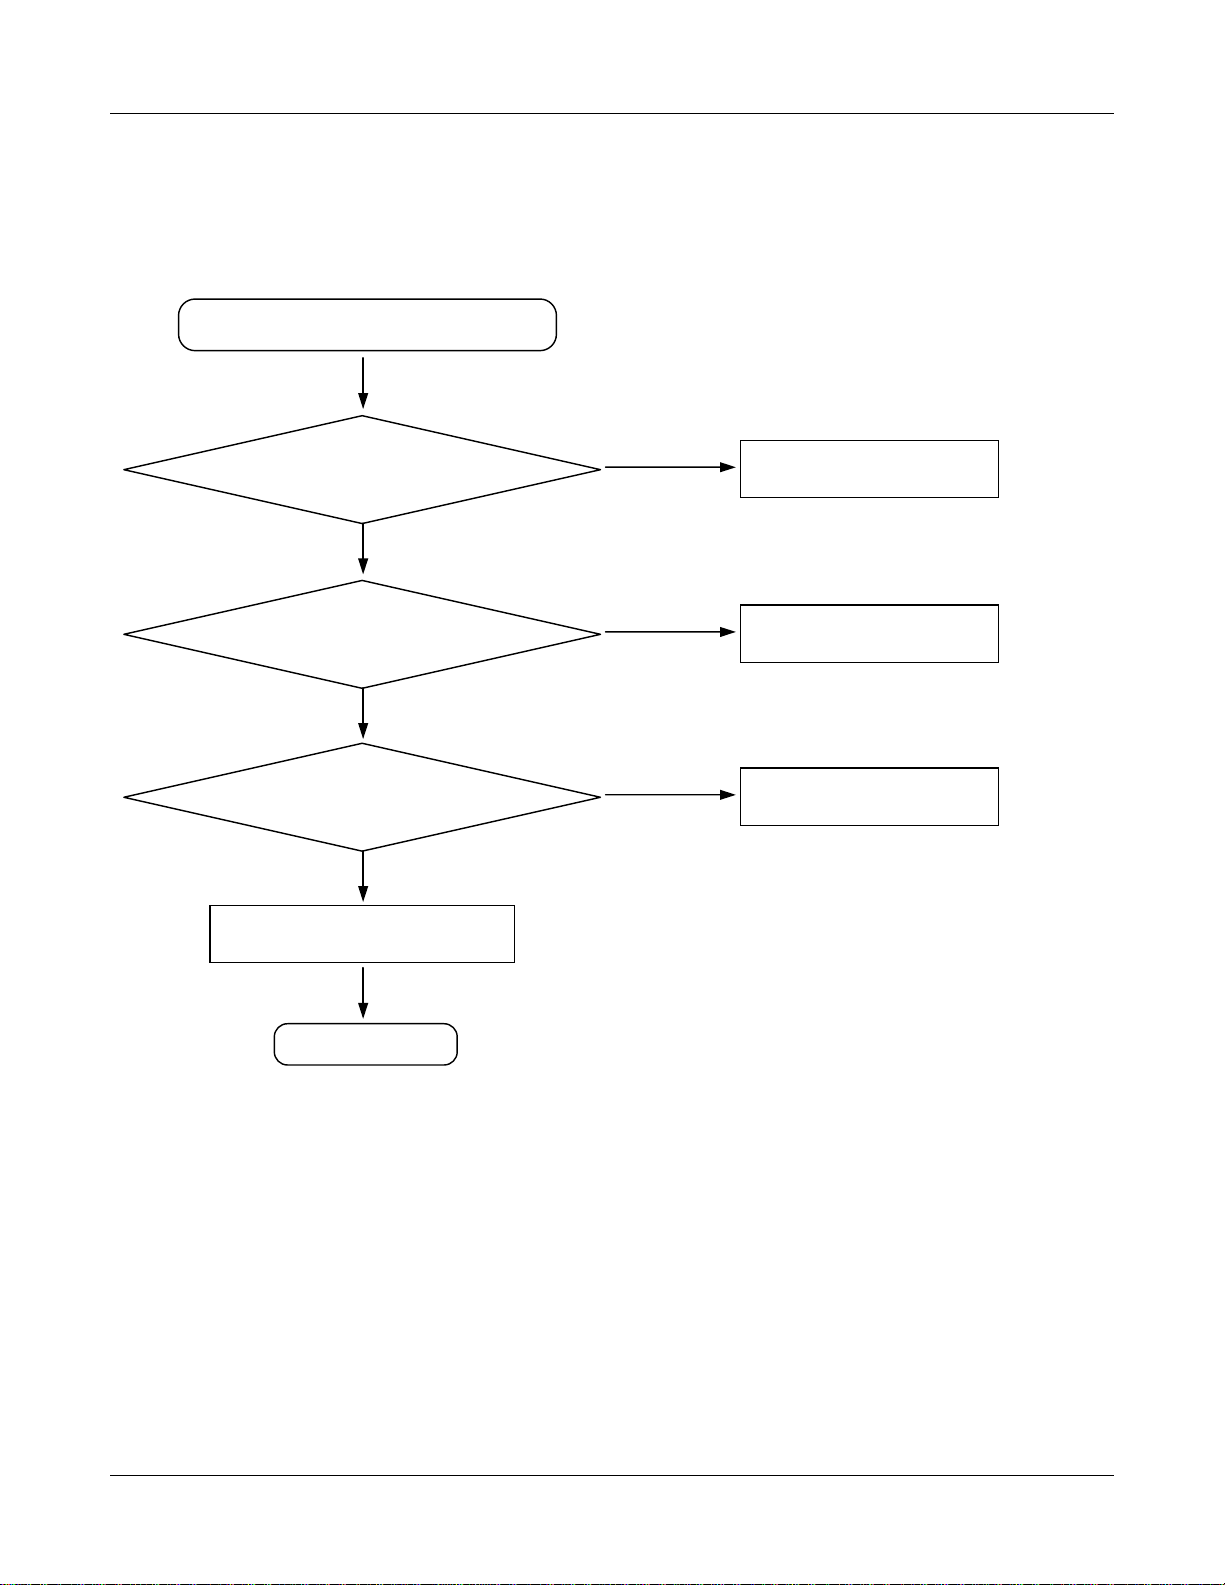
9-1-2 手机部分
手机电源开启但不运作
检查电池电压是否大于 3.5V?
检查如下电压:
C404 是 2.7V
C416 是 1.2V
C426 是 1.8V
检查 C419 是否为 2.6V
检查 U302 的管脚 1 是否为高电平?
更换电池
检查 U401 及相关电路
检查 U401
检查 U302 及相关电路
检查 C420 是否为 2.6V
检查 TP_TCXO_EN 是否为高电平及
C423 为 2.85V
检查 R408 是否为高电平
检查初始化操作
三星所有—内容可能有变动,恕不另行通知。
未经三星允许,不得使用本文件。
检查 U401
检查 U401 及相关电路
检查 UCP300 及相关电路
9-4
Flow Chart of Troubleshooting
9-5
SAMSUNG Proprietary-Contents may change without notice
This Document can not be used without Samsung's authorization
Flow Chart of Troubleshooting
9-6
SAMSUNG Proprietary-Contents may change without notice
This Document can not be used without Samsung's authorization
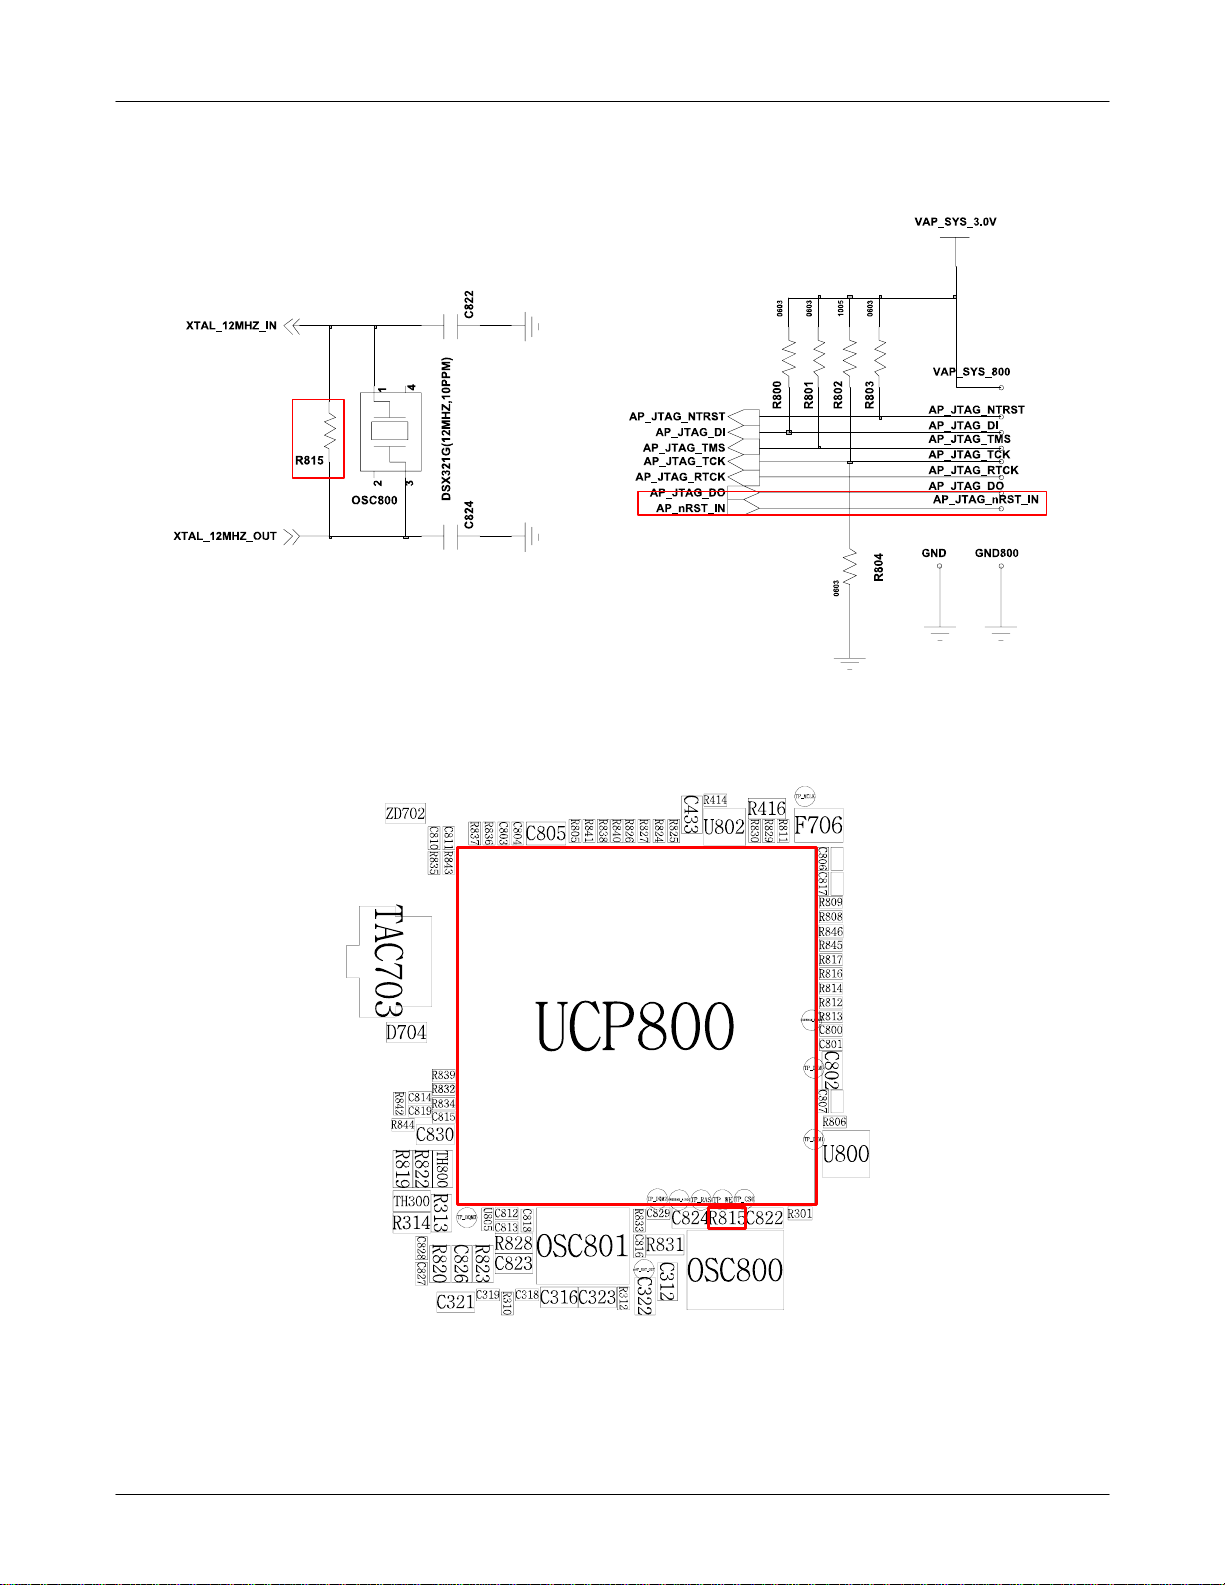
9-2. 初始化
是 是
否
XTAL_12MHZ_IN / OUT 是否正常?
初始化失败
AP_JTAG_nRST_IN = “高电平”?
检查 R815 的 CLK
好
检查 32 字节数据信号及存储器
(UCP800)
结束
好
故障排除流程图
检查相关电路到复位
坏
更换 UCP301
坏
更换主板
9-7
三星所有—内容可能有变动,恕不另行通知。
未经三星允许,不得使用本文件。
Flow Chart of Troubleshooting
9-8
SAMSUNG Proprietary-Contents may change without notice
This Document can not be used without Samsung's authorization
9-3.充电部分
是
是
否
否
是
否
是
充电部分异常
检查 C433> 4.3V
检查 R415=“低电平”?
检查 C434 或 U403 管脚
12=4.2V
结束
故障排除流程图
检查与 VEXT_FET_5V 及
U403 相关的电路
检查与 TA_nCHG 信号相关的电路
重焊或更换 U403
9-9
三星所有—内容可能有变动,恕不另行通知。
未经三星允许,不得使用本文件。

Flow Chart of Troubleshooting
9-10
SAMSUNG Proprietary-Contents may change without notice
This Document can not be used without Samsung's authorization
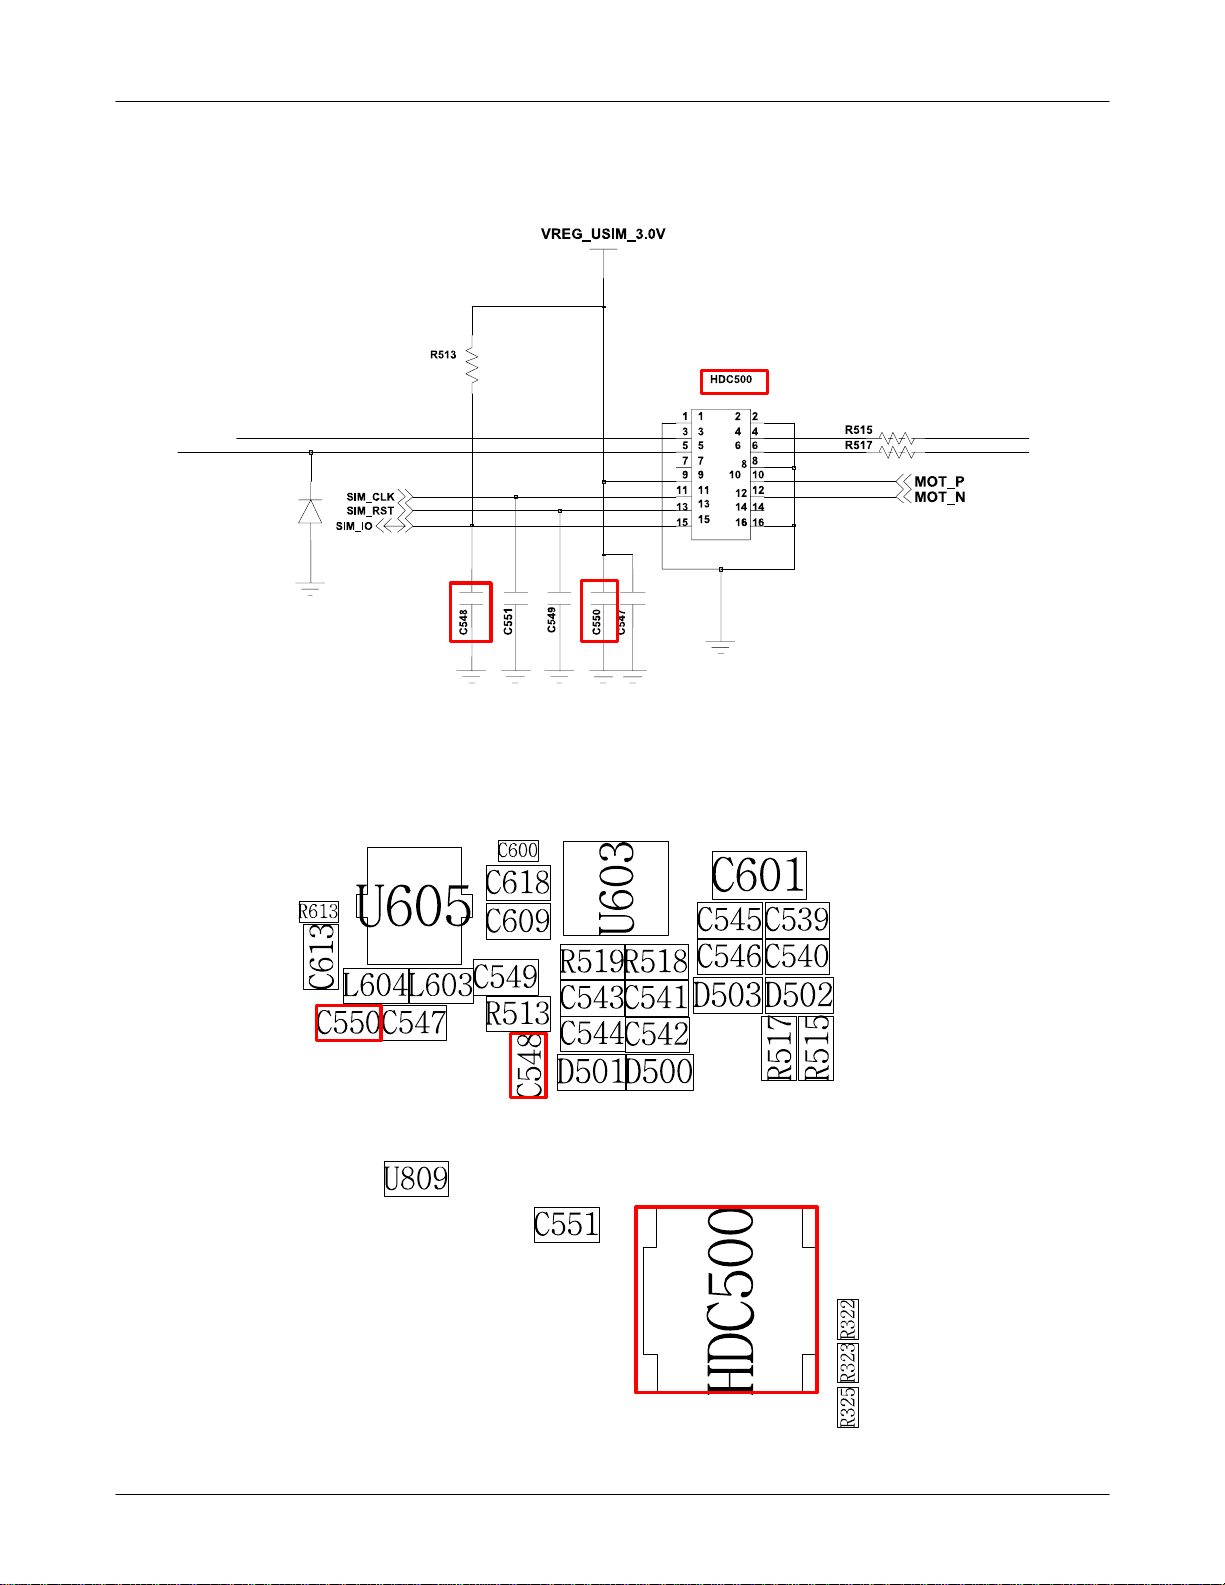
9-4. Sim 部分
是
否
是 否
是 否
是
是
通电后,检查 HDC500 管脚
在 SIM 卡插入后,HDC500 管脚
手机不能访问 SIM 卡
C548、C550 = “3.0V”?
SIM_CLK 的信号。
13=“高电平(SIM_RST)”?
检查 SIM 卡
结束
三星所有—内容可能有变动,恕不另行通知。
9-11
未经三星允许,不得使用本文件。
检查 PMIC(U401)
检查 SIM 时钟
重焊 HDC500 或更换主板
故障排除流程图
Flow Chart of Troubleshooting
9-12
SAMSUNG Proprietary-Contents may change without notice
This Document can not be used without Samsung's authorization
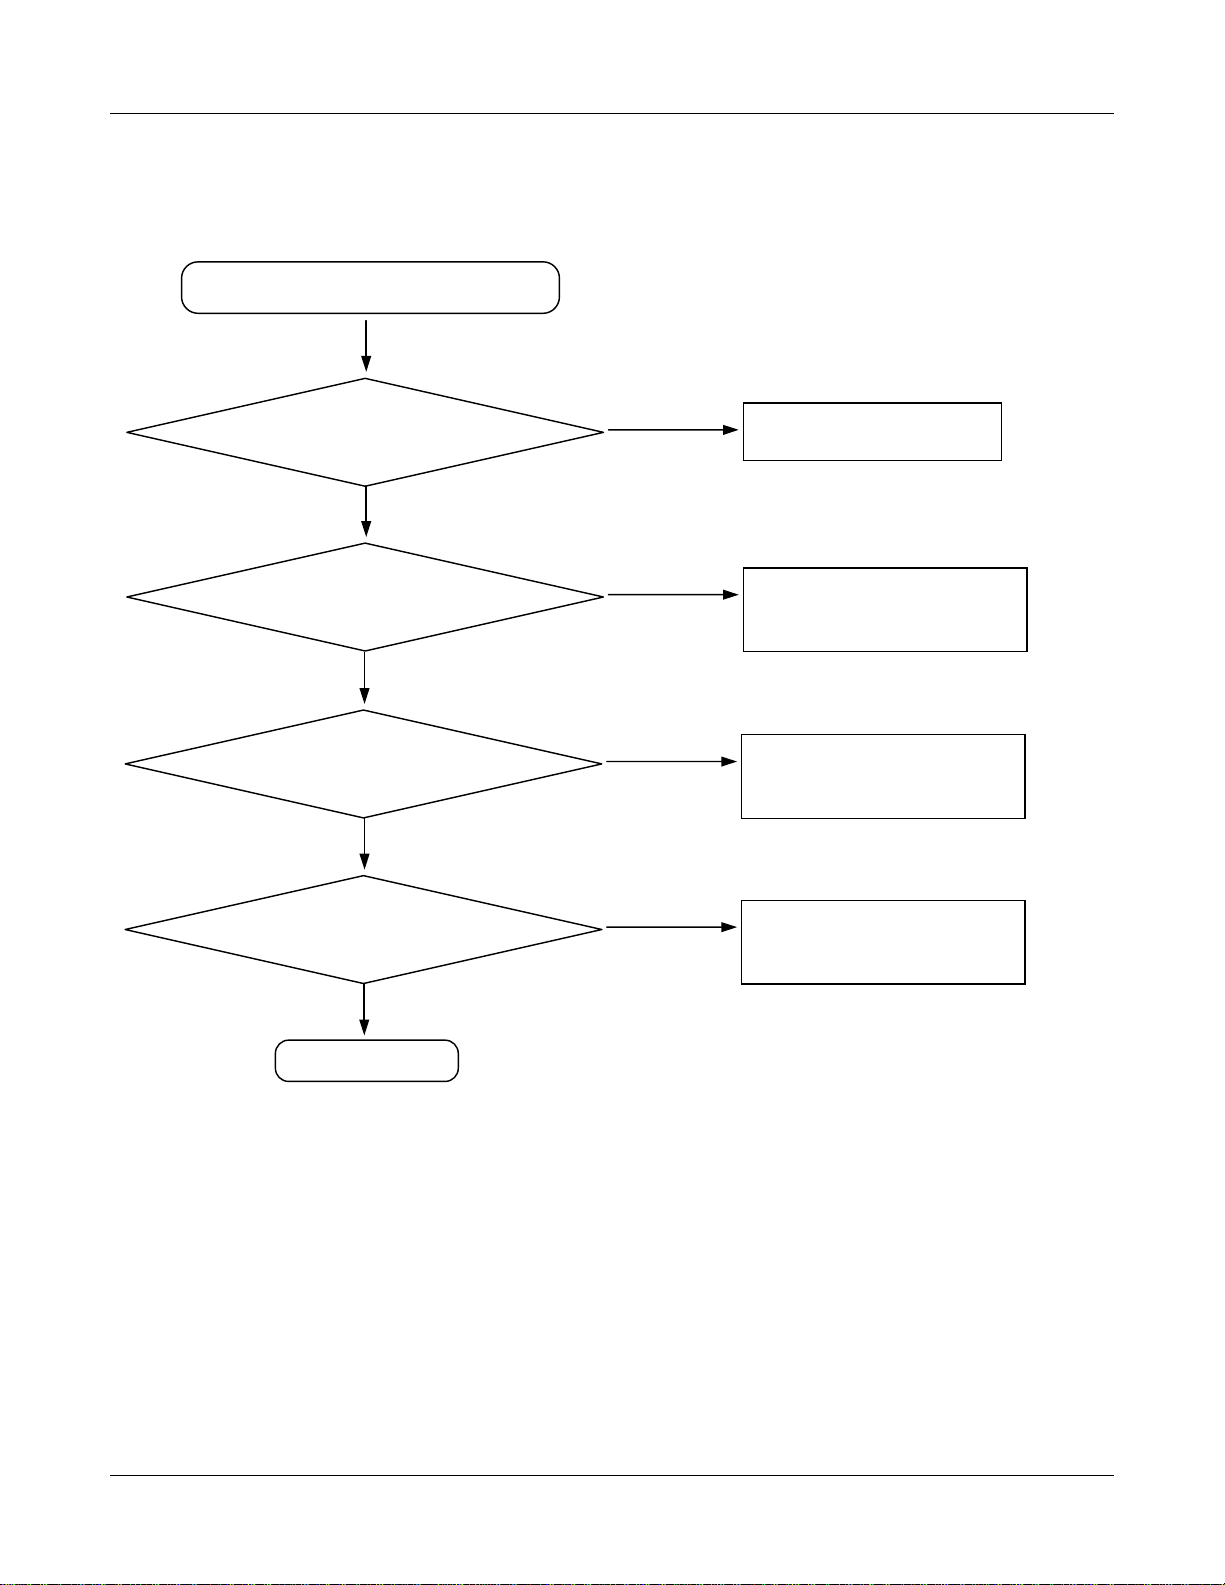
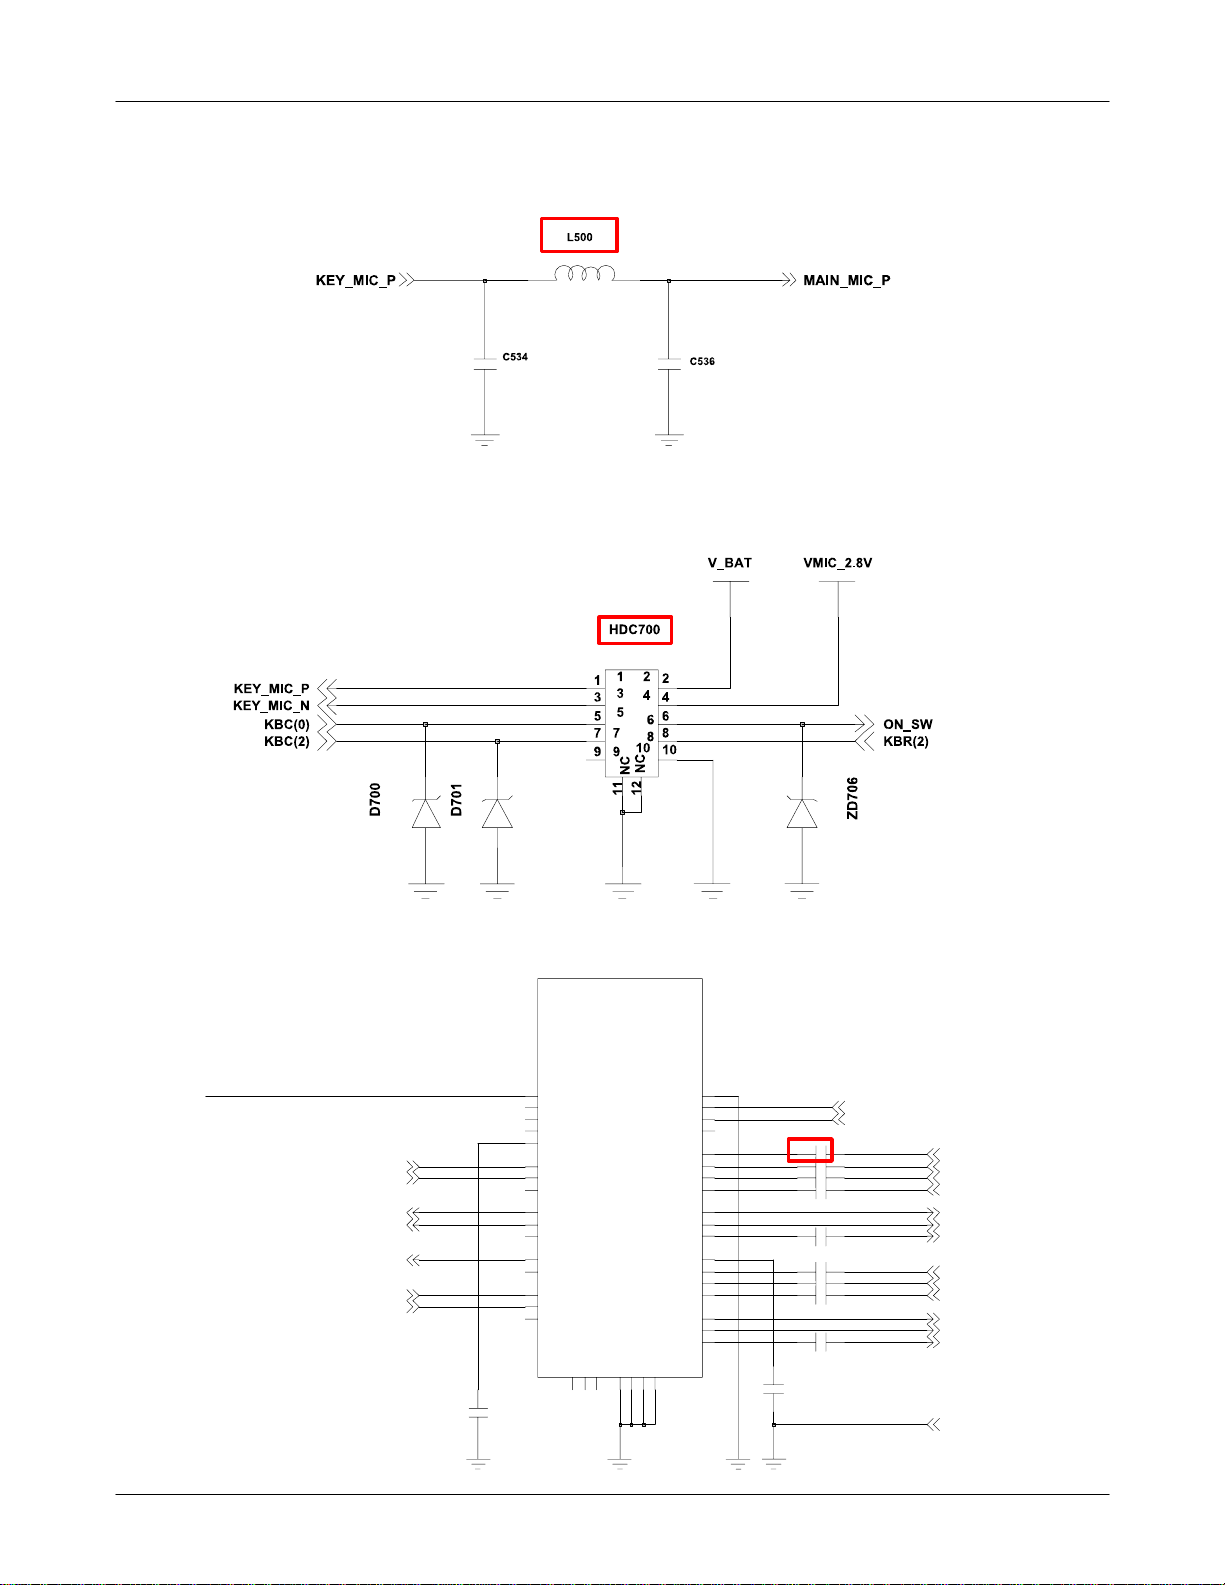
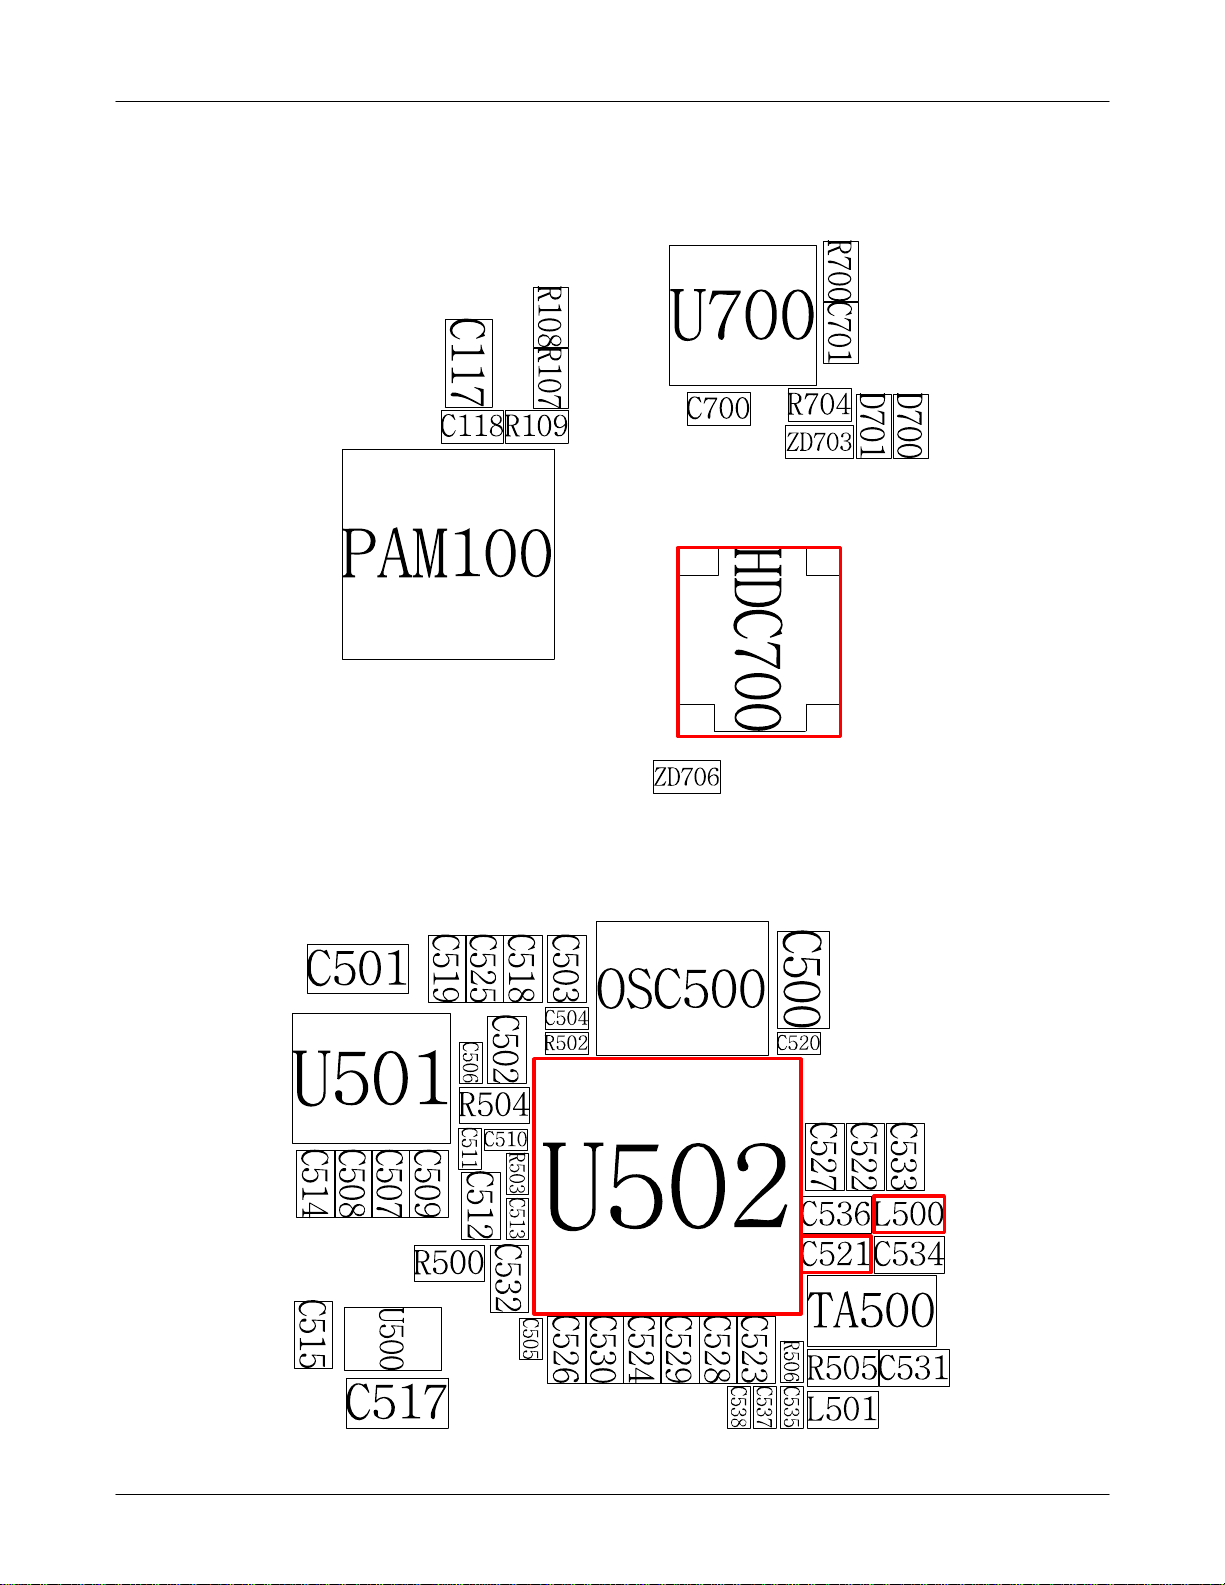
9-5. 话筒部分
是
否
是
手机话筒不工作
检查 HDC700 的连接
正常
检查 U502 的 C521 信号
正常
检查与 U502 相关的电源
正常
话筒是否工作?
结束
不正常
不正常
不正常
故障排除流程图
更换按键 FPCB
再次焊接 C521、L500
重焊或更换 U502
更换主板
9-13
三星所有—内容可能有变动,恕不另行通知。
未经三星允许,不得使用本文件。
Flow Chart of Troubleshooting
R
3
4
S
S
S
S
V
V
7
H
BICKB
CSN|CAD0
CCLK|SCL
CDTI|SDA
CDTO
LIN1||IN1+
LIN2|IN2+
LIN3|IN3+
LIN4|IN4+
LOUT1|RCP
LOUT2
LOUT3|LOP
RIN1|IN1RIN2|IN2RIN4|IN3RIN4|IN4-
ROUT1|RCN
ROUT2
ROUT3|LON
2
1
S
S
S
S
V
V
1
8
9
F
E
B
J6
H6
H8
J2
A2
A3
A4
B5
A7
B9
B6
B2
B3
B4
A5
B7
C9
A6
C521
C522
C523
C524
C526
C527
C528
C529
C530
C533
FM_SCL
FM_SDA
MAIN_MIC_P
RADIO_L
SUB_MIC_P
MSM_SPK_P
RCV_P
MSM_MIC_P
RADIO_R
SUB_MIC_N
MSM_SPK_N
RCV_N
CODEC_OUT_
MSM_MIC_N
KEY_MIC_N
I2C
H4
MCKI
J4
MCKO
A1
MDT
B1
MPWR
C8
MUTET
H1
I2S_SDO
BT_PCM_DO
I2S_SDI
BT_PCM_DI CODEC_OUT_L
BT_PCM_SYNC
I2S_SYNC
AUDIO_EN
2
3
5
C
SDTI
J8
SDTIA
G1
SDTIB
H2
SDTO
G9
SDTOA
F2
SDTOB
H9
SYNCA
F1
SYNCB
J3
LRCK
H3
PDN
A9
TEST
C
C
C
N
N
N
3
2
1
C
9-14
SAMSUNG Proprietary-Contents may change without notice
This Document can not be used without Samsung's authorization
Flow Chart of Troubleshooting
9-15
SAMSUNG Proprietary-Contents may change without notice
This Document can not be used without Samsung's authorization
故障排除流程图
是
否
是
否
是
否
是
否
是
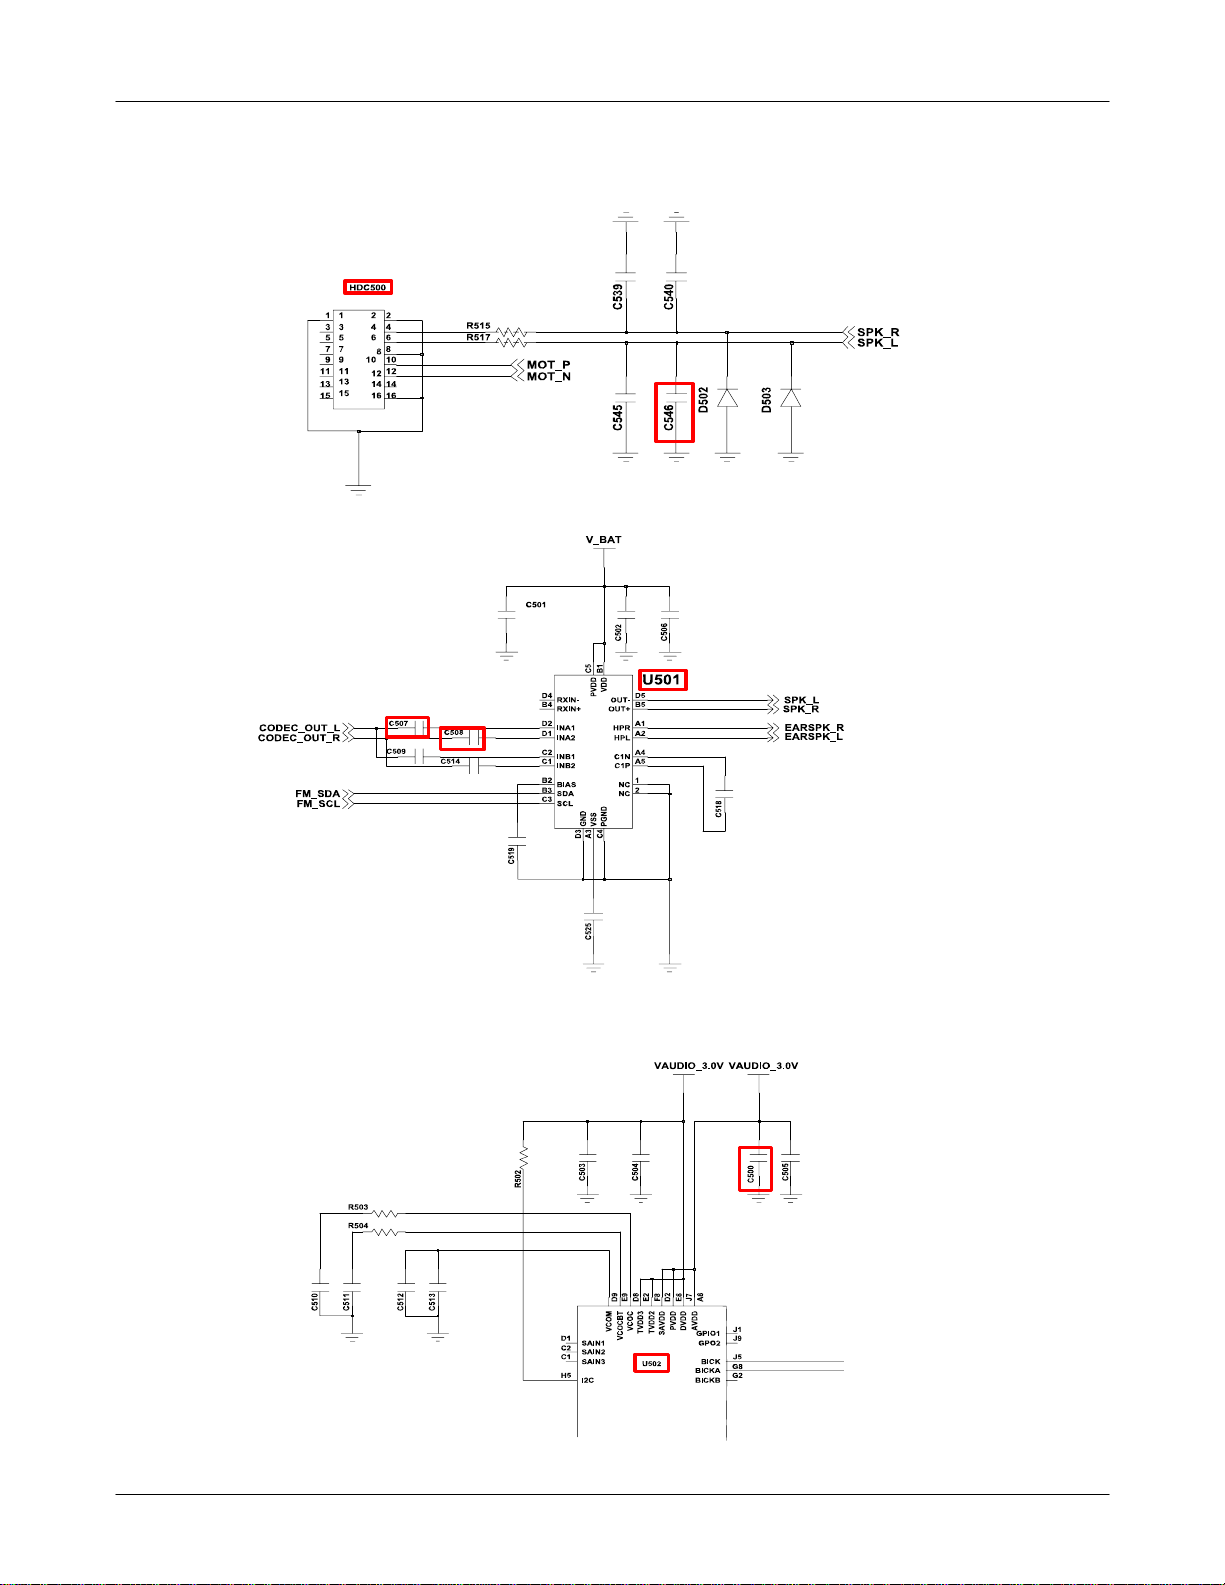
9-6 扬声器部分(铃音)
检查U501上C507、C508的信号
检查HDC500上C500、C546的信号
扬声器不工作
检查 HDC500 的连接
是否正常运作?
结束
更换扬声器模块
检查与 U502 相关的所有电源并重
焊或更换 U502
检查与 U501 相关的所有电源
并重焊或更换 U501
更换主板
9-16
三星所有—内容可能有变动,恕不另行通知。
未经三星允许,不得使用本文件。
Flow Chart of Troubleshooting
9-17
SAMSUNG Proprietary-Contents may change without notice
This Document can not be used without Samsung's authorization