

Samsung SGH-B5722C, GT-B5722C Disassembly & Reassembly
Disassembly and Assembly Instructions
11.
11-1.
Disassembly
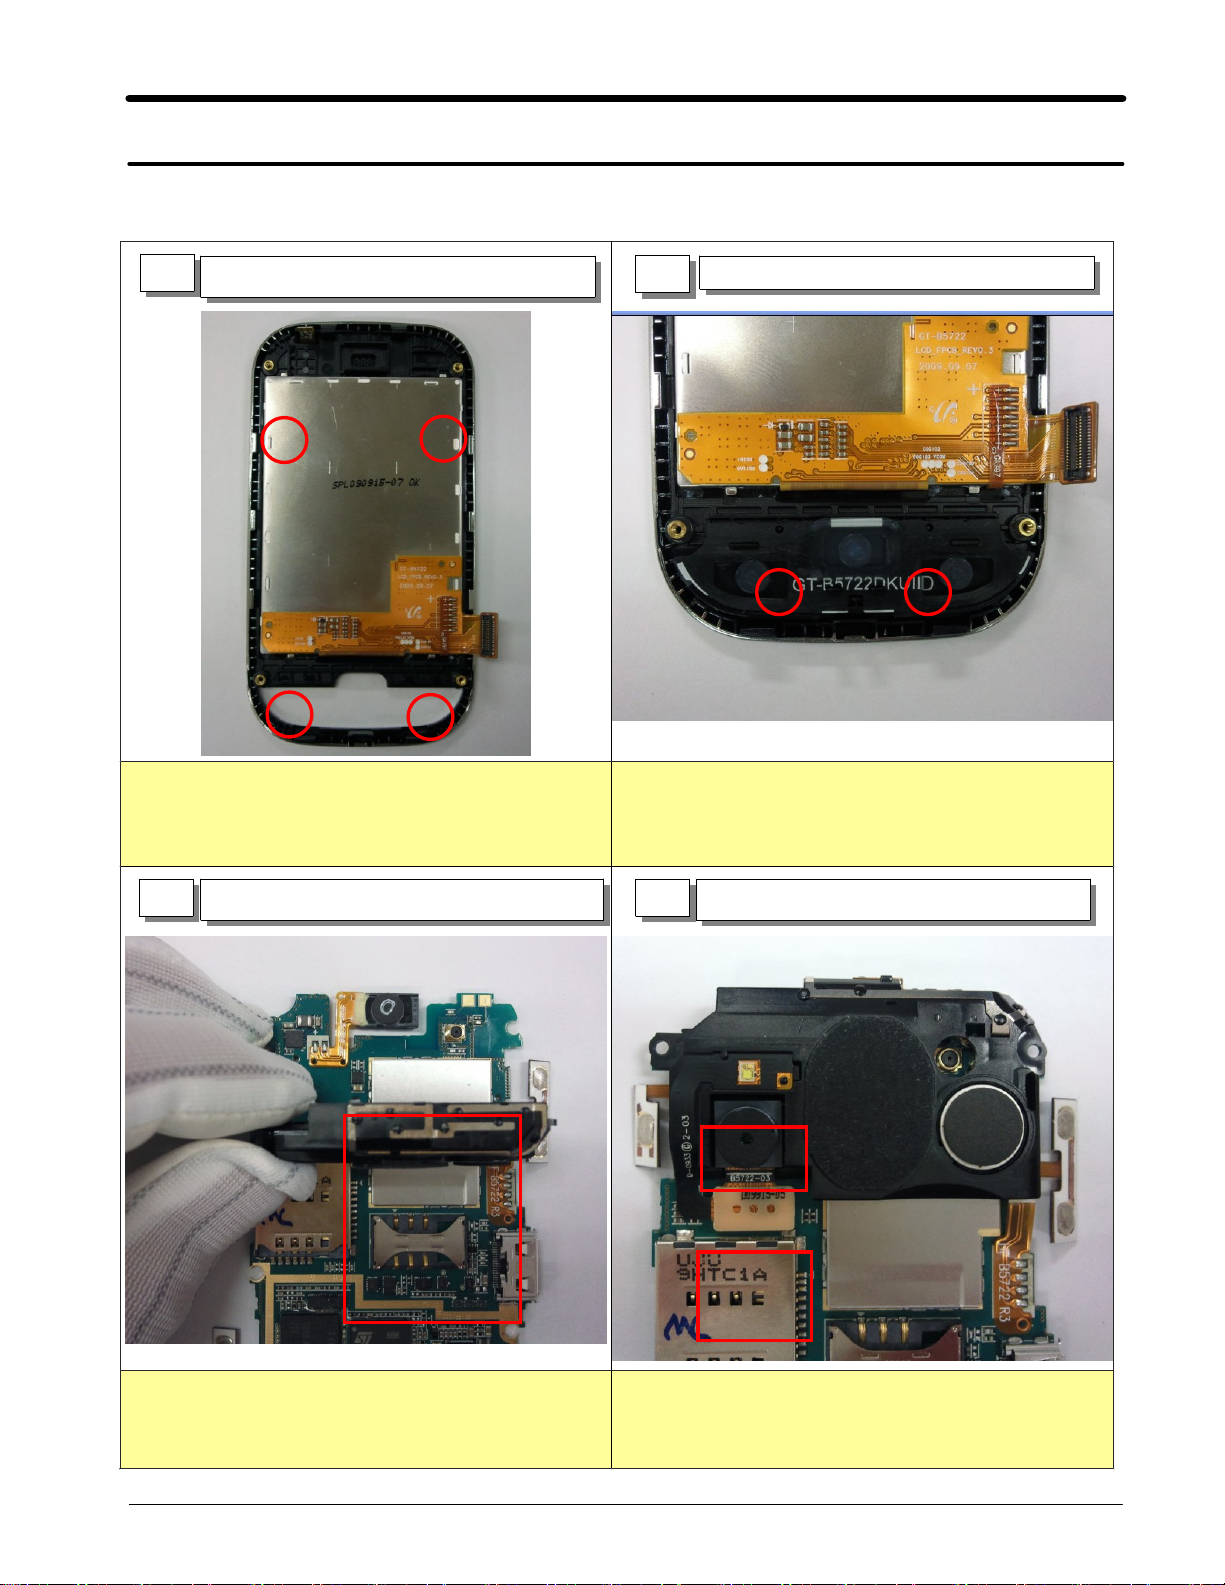
1
Land LCD on the UPPER.
Set for UPPER's LCD place figures and assemble
1.
LCD
Land SUB KEYPAD on the UPPER.
2
Be careful aseemble hooks on keypad.
1.
3
Assemble shield can
Assemble shield can&Check each point Assembled
1.
well.
4
Assemble CIF Camera&FPCB
②
ⓛ
11-1
SAMSUNG Proprietary-Contents may change without notice
This Document can not be used without Samsung's authorization
Exploded View and Parts List
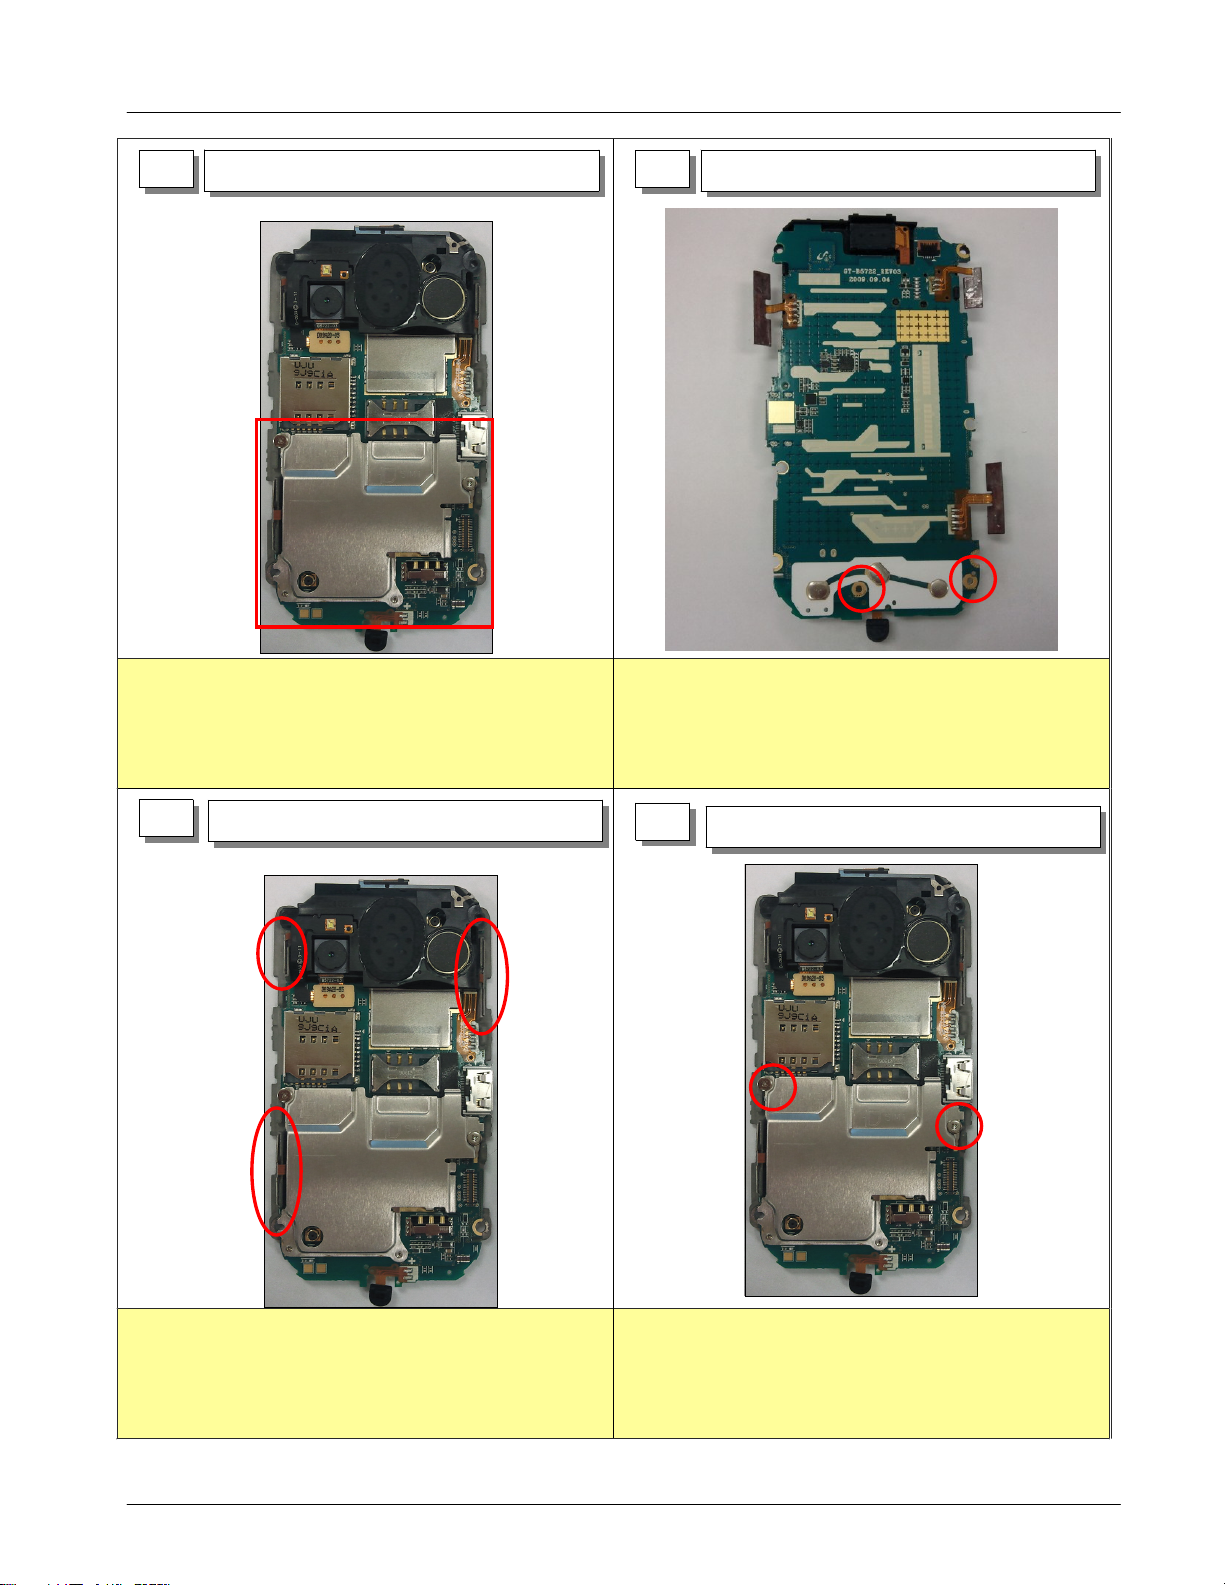
5
Assemble shield can.
6
Screw shield can2Points.
7
Assemble PBA Ass'y.
Land PBA on Bracket&Assemble FPCB3points.
1.
8
Screw PBA Ass'y2Points.
11-2
SAMSUNG Proprietary-Contents may change without notice
This Document can not be used without Samsung's authorization
Exploded View and Parts List
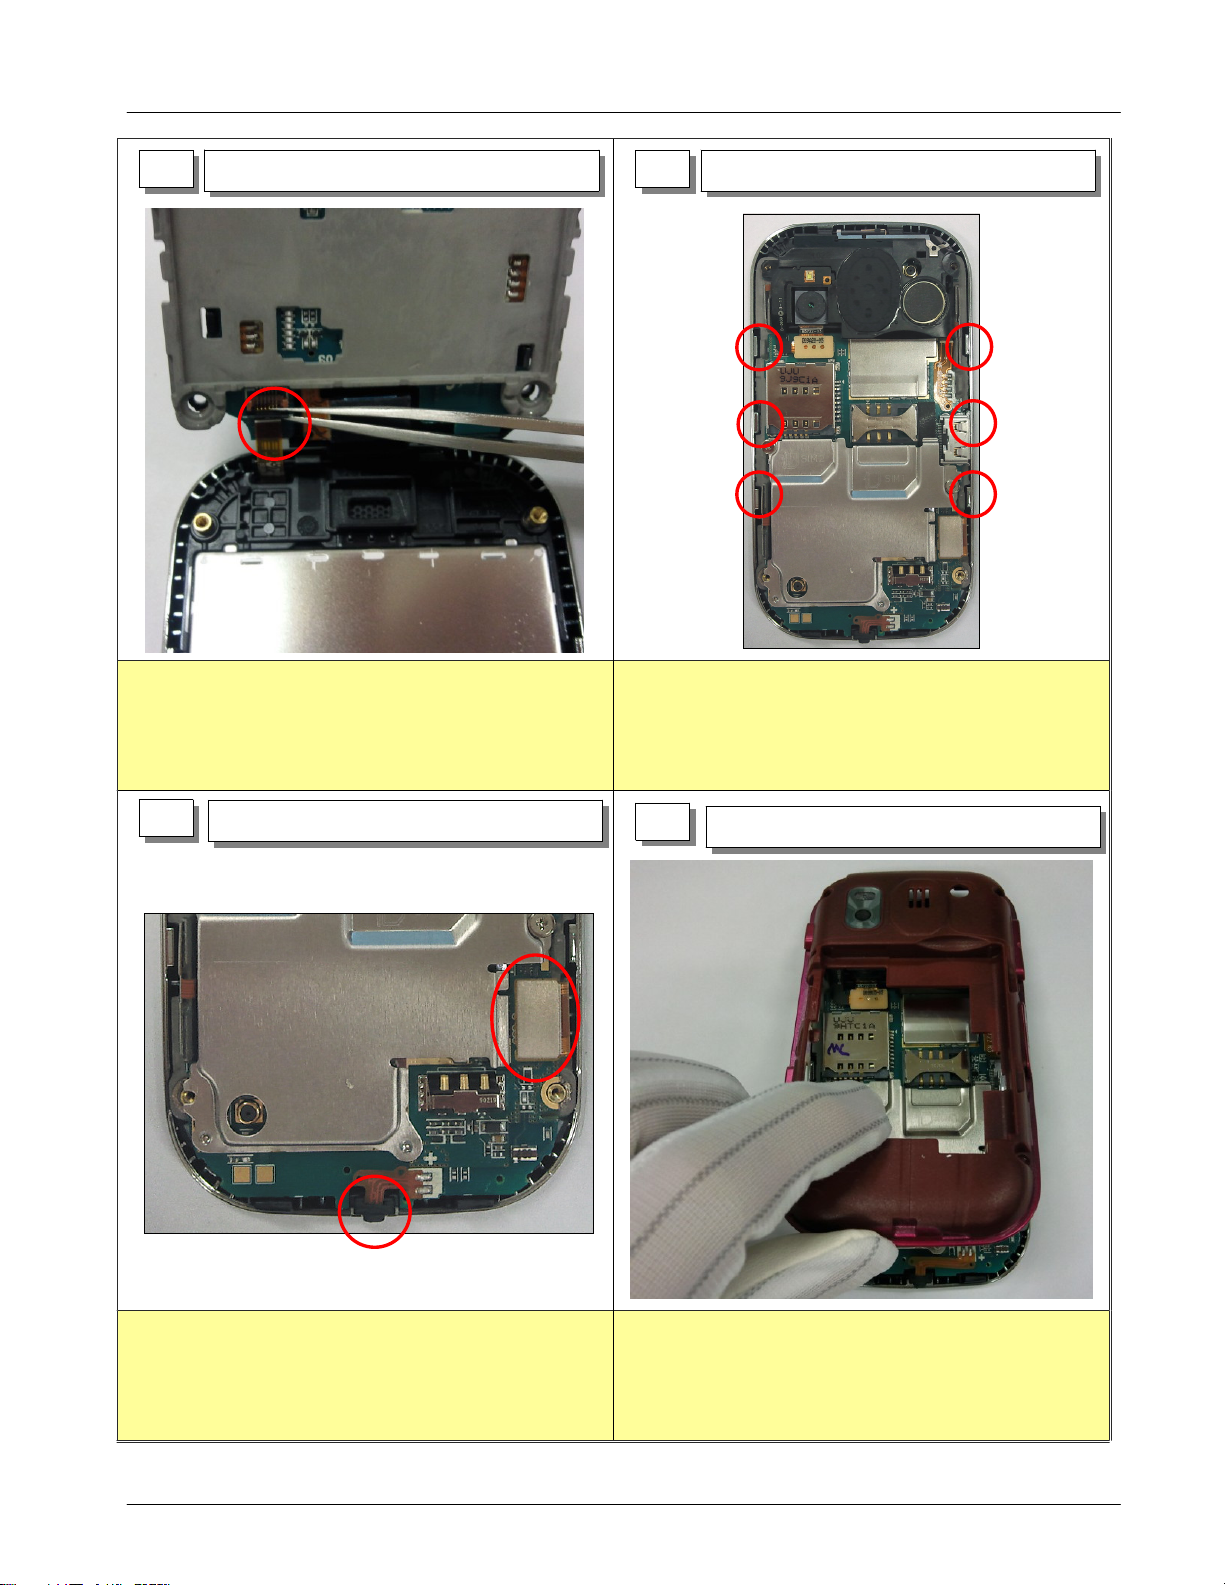
9
Assemble TSP FPCB Connector.
Be careful not to damage TSP FPCB
1.
10
Land PBA Ass'y on FRONT.
Check Hook6Points Locked well.
1.
11
Assemble LCD Connector&MIC
Assemble LCD FPCB Connector.
1.
Assemble MIC on FRONT.
2.
12
Assemble Rear.
Assemble from UPPER's top.
1.
11-3
SAMSUNG Proprietary-Contents may change without notice
This Document can not be used without Samsung's authorization
 Loading...