

Samsung SGH-B5702 Direy

Disassembly and Assembly Instructions
7.
Disassembly
7-1.
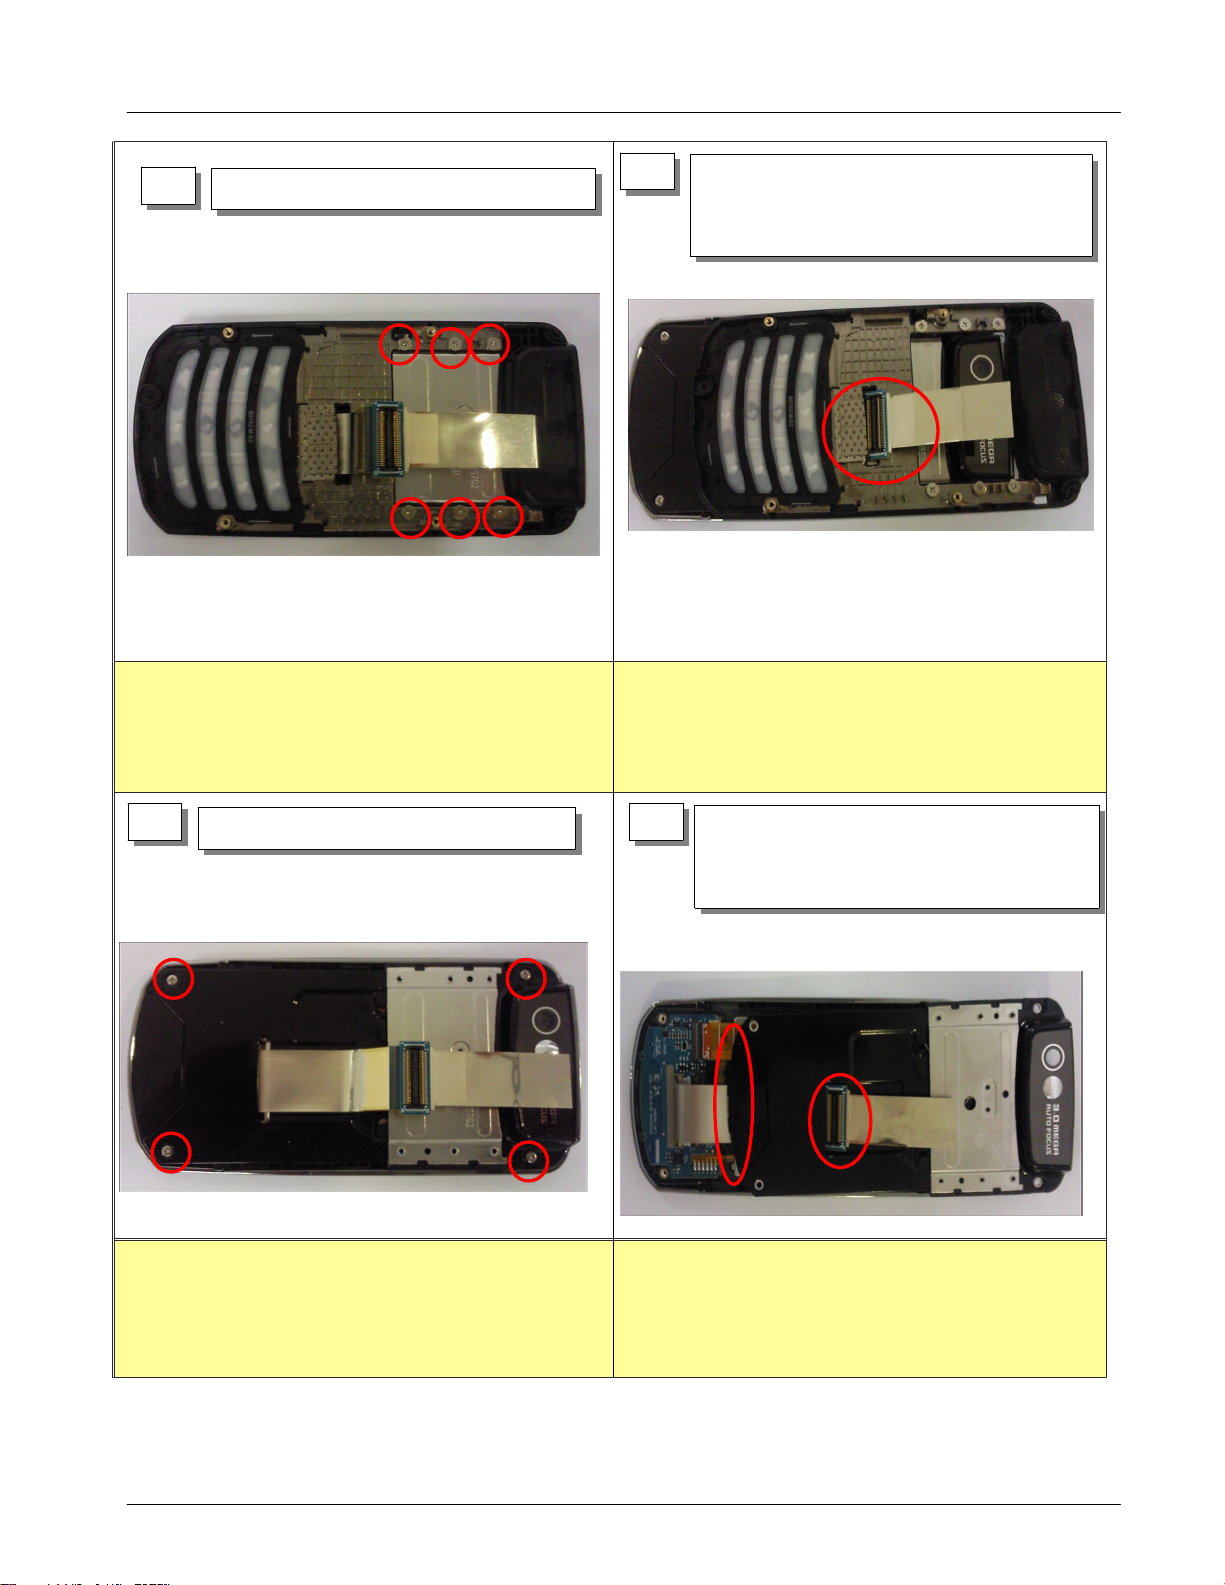
1
3
Unscrew4points in the rear case.
1)
Rear4of the combined separate
1)
call to the top of the PBA
2
-
-
disassembly should note.
Use the dissolution tool and separate
1)
LOCKER after pressing the grooves of the SIDE.
Disassembly tools must be used.
REAR IF connector and will not interference for
4
Before separating PBA MAIN
1)
FPCBandwillseparatethePCB
- MAIN FPCB carefully the separation of the damage is
so CONNECTOR.
7-1
SAMSUNG Proprietary-Contents may change without notice
This Document can not be used without Samsung's authorization
Exploded View and Parts List
5
Unscrew6points in the Front case.
1)
6
Getaseparate Front and Lower
1)
To pay attention to the separation of the
-
damage FPCB Connector
7 8
Unscrew4points in the Lower case.
1)
Separate attention to the Hook
1)
Lower PCB connector to carefully
2)
separate damage
7-2
SAMSUNG Proprietary-Contents may change without notice
This Document can not be used without Samsung's authorization

Exploded View and Parts List
9
Remove the Main FPCB Tape
1)
Main/Camera FPCB separation
2)
after the Connector Open
10
Carefully separate the LCD of Upper
1)
tape.
2
1
2
11 12
Separate Subkey pad after Separate
1)
LCD.
Complete separation
1)
7-3
SAMSUNG Proprietary-Contents may change without notice
This Document can not be used without Samsung's authorization
 Loading...