

Samsung SGH-250 User Manual
C
OK
MENU
45
6
123
78
0
9
GHI
JKL MNO
.
ABC DEF
PQRS
TUV
WXYZ
SGH-250
MOBILE PHONE
Owner’s Instructions
GLOBAL SYSTEM FOR MOBILE COMMUNICATIONS
01-250 4/2/99 11:47 AM Page 1
SIMLOCK
OPEN
AMPHENOL
4 6
1 3
7 9
GHI JKL MNO
.
ABC DEF
PQRS TUV WXYZ
C
OK
MENU
5
2
8
0
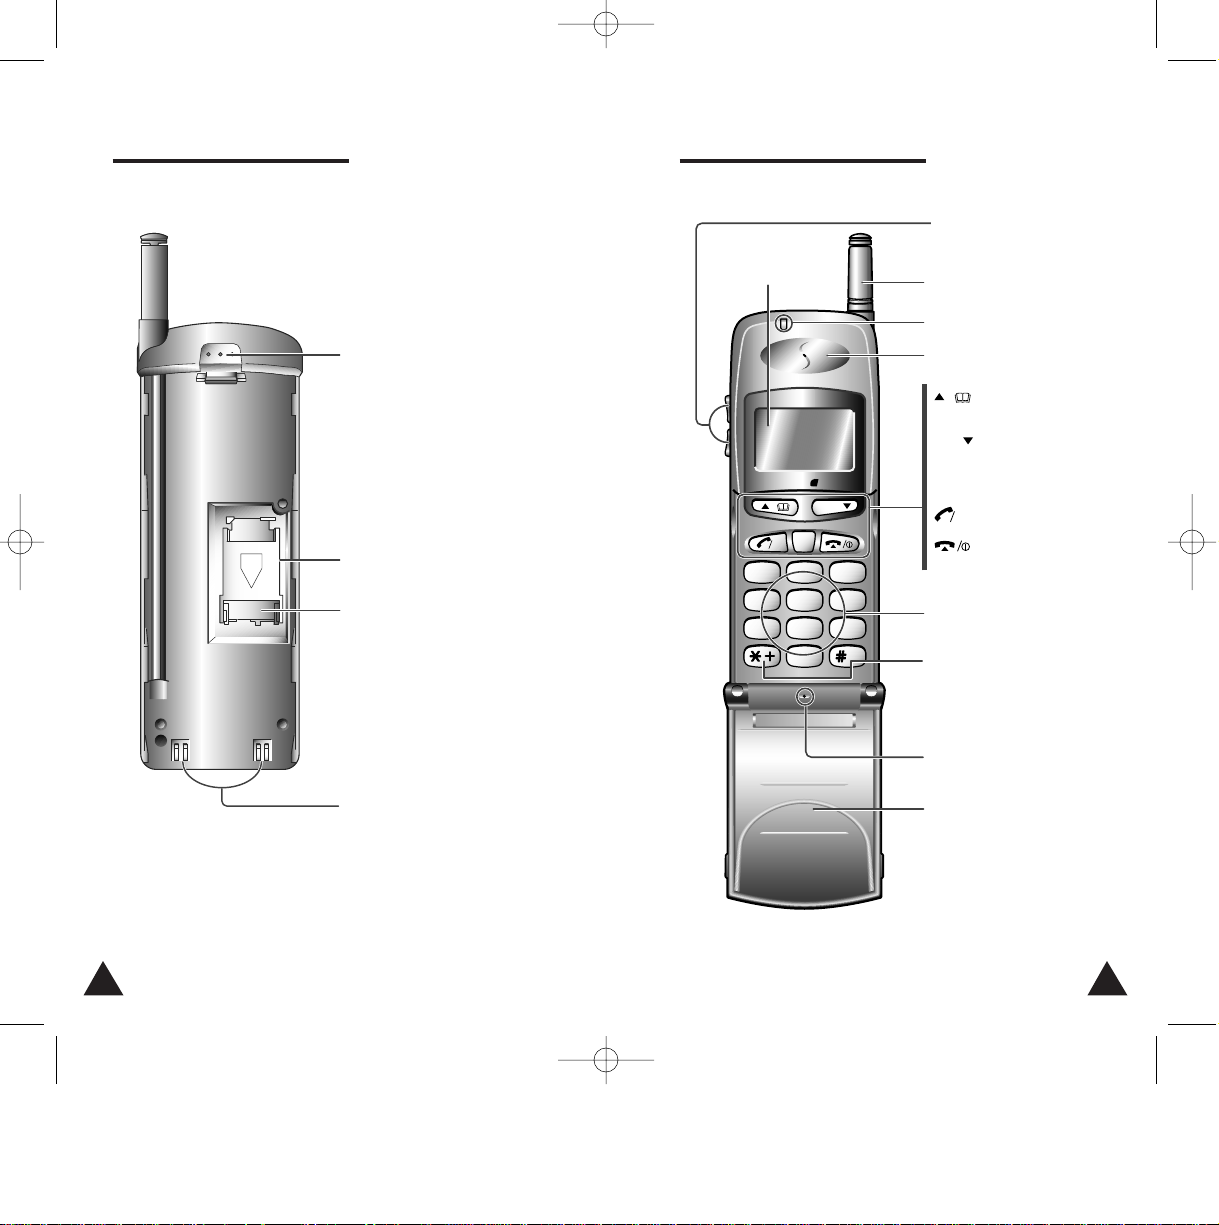
Rear View of the Phone (Without the Battery)
Earpiece
Clear/Cancel button
C
Dial/Entry button
Phonebook/
Menu scroll button
Menu selection/
Menu scroll button
Numeric/letter buttons
Battery release button
Antenna
Volume Up/Down buttons
Flashing indicator
LCD display
End of call/On-Off
button
Special function buttons
Microphone
Flip cover
SIM card holder
SIM card
Battery terminals
Front View of the Phone
2 3
MENU
OK
01-250 4/2/99 11:47 AM Page 2
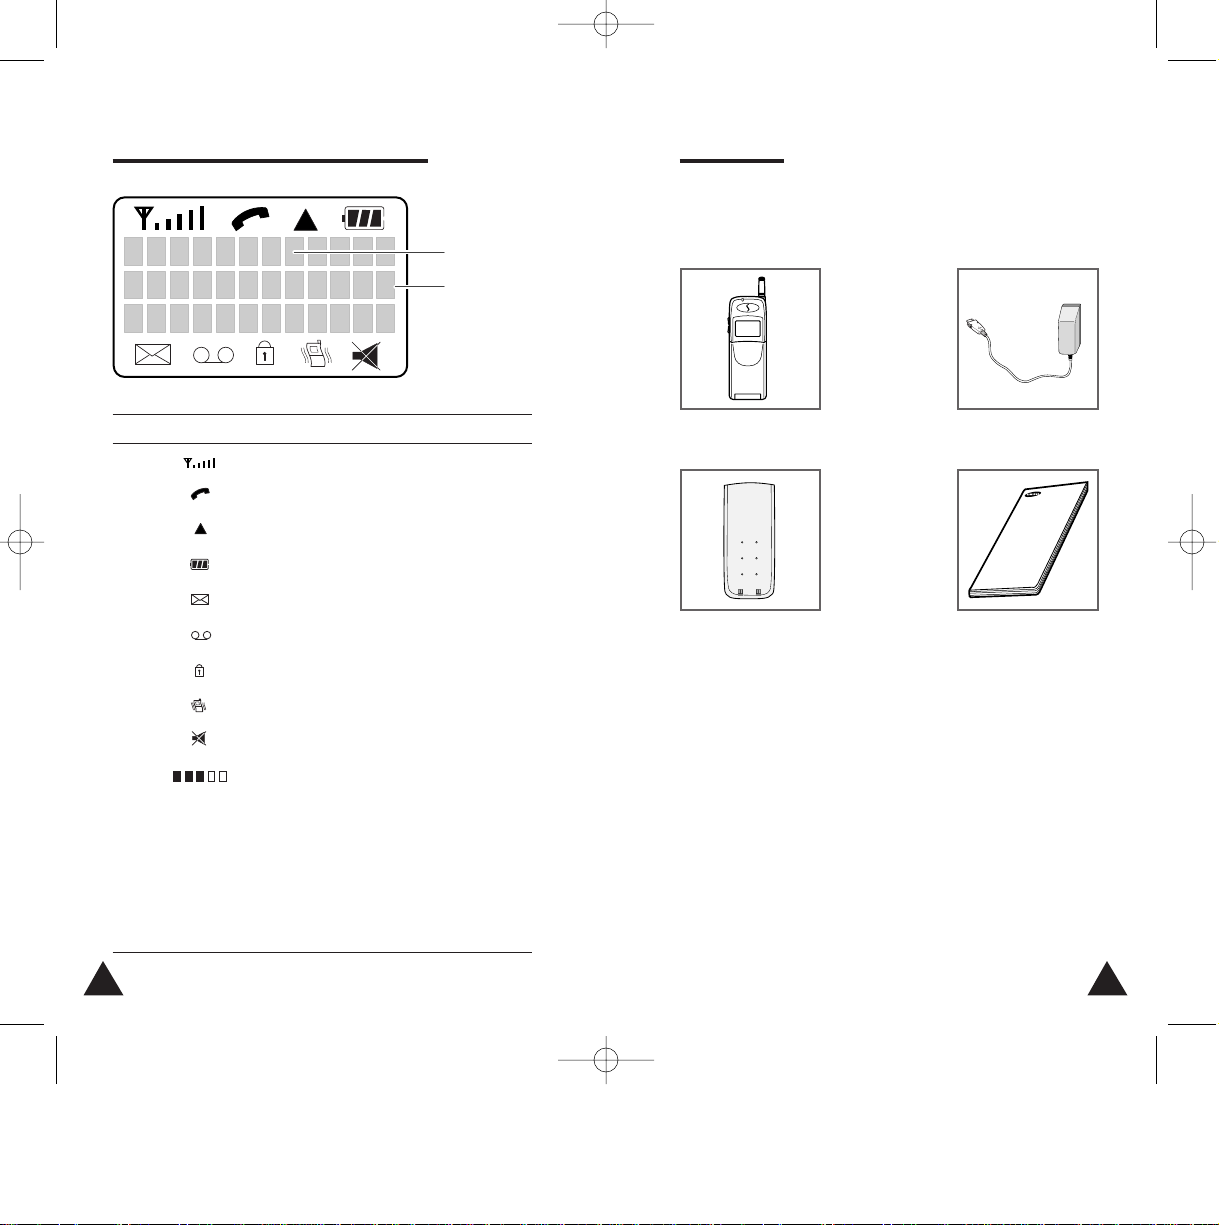
Signal strength
Calling
Roaming
Battery charge level
Incoming Short Message
Voice Mail (Currently not used)
Phone locked
Vibration mode
Muting
Volume level
No service Cellular network or specific
network is not available
Activated Barring password or access to
optional services is accepted
Refused Barring password or access to
optional services is refused
Parts List
5
Handset Display and Indicators
4
Network name
Net
086519412532
Telephone
number
Indicator Description
The SGH-250 product contains the following parts.
In addition, you can obtain the following approved accessories for
your phone, from your local SAMSUNG dealers:
• Desktop charger DT-20
• Cigarette lighter adapter CL-10
• Hands-free Car kits CH-20
(holder + cable + microphone + speaker)
• Light and long-life batteries
Handset Travel Adapter
Slim Battery
Owner’s Instructions
SGH-250
MOBILE PHONE
Owner’s Instructions
GSM Global system for mobile communication
01-250 4/2/99 11:47 AM Page 4

Contents
7
Warranty Details
6
Please record the model and serial numbers of your
unit and the date of purchase and dealer in the space
provided below.
We recommend that you keep your purchase receipt
with this booklet in case your telephone should
require servicing during the warranty period.
YOUR MOBILE PHONE
■ Rear View of the Phone..................................................... 2
■ Front View of the Phone.................................................... 3
■ Handset Display and Indicators........................................ 4
■ Parts List............................................................................ 5
■ Warranty Details............................................................... 6
SAFETY PRECAUTIONS
■ General Safety Precautions............................................... 10
■ Battery Safety Precautions................................................ 12
PREPARING YOUR MOBILE PHONE FOR USE
■ Inserting Your SIM Card.................................................... 14
■ Battery Types..................................................................... 16
■ Attaching and Removing a Battery Pack........................... 17
■ Charging a Battery Pack.................................................... 18
■ Switching the Phone On and Off....................................... 19
■ Entering Your PIN Code..................................................... 20
■ Extending the Antenna ...................................................... 21
■ Selecting a Menu Option.................................................. 22
■ Choosing Your Language................................................... 23
USING THE BASIC CALL FUNCTIONS
■ Placing a Call ..................................................................... 24
■ Receiving a Call ................................................................. 26
■ Viewing Information about Calls....................................... 28
■ Resetting the Call Timer.................................................... 29
■ Selecting the Ringing Tone............................................... 30
■ Adjusting the Ringing Volume........................................... 31
■ Adjusting the Key Volume................................................. 32
■ Adjusting the Earpiece Volume......................................... 32
■ Muting the Microphone.................................................... 33
■ Automatic Redialling......................................................... 34
■ Redialling One of the Last Ten Numbers.......................... 35
Model Number:
Serial Number:
Date of Purchase:
Dealer:
01-250 4/2/99 11:47 AM Page 6
98
Contents (cont.)
MEMORY DIALLING
■ Storing a Phone Number in the Phonebook...................... 36
■ Storing the Last Dialled Numbers in the Phonebook....... 39
■ Dialling a Stored Number.................................................. 40
■ Using Speed Dialling ......................................................... 41
■ Scanning the Phonebook by Names ................................. 42
■ Scanning the Phonebook by Memory Locations ............... 43
■ Deleting a Phonebook Entry by Name.............................. 44
■ Deleting a Phonebook Entry by Memory Location............ 45
USING THE ADVANCED FEATURES
■ Preventing Access to Your Phone Settings....................... 46
■ Preventing Access to the Memory Registers.................... 47
■ Displaying Your Own Phone Number................................ 48
■ Locking the Phone............................................................. 49
■ Preventing Access to Your Phone..................................... 50
■ Changing Your PIN............................................................. 51
■ Changing the Phone’s Password....................................... 52
■ Changing the Greeting Message...................................... 53
■ Customising Your Phone’s Features.................................. 54
■ Resetting the Phone’s Features................................................. 56
SELECTING THE NETWORK
■ Searching for a Network Automatically ........................... 58
■ Searching for a Network Manually................................... 59
■ Editing a Network List....................................................... 60
USING GSM NETWORK SERVICES
■ Call Barring........................................................................ 61
■ Checking the Call Barring Status...................................... 63
■ Changing the Call Barring Service Password................... 64
■ Call Diverting..................................................................... 65
■ Checking the Call Diversion Status................................... 66
■ Using the Call Waiting Features....................................... 67
■ Holding a Call.................................................................... 68
■ Reading a Short Message................................................. 69
■ Creating a Short Message................................................ 71
■ Entering SC Address.......................................................... 73
■ Missed Call Service.................................................... 74
PROBLEMS AND SOLUTIONS
■ Cleaning Your Mobile Phone............................................. 75
■ Problems and Solutions..................................................... 76
GLOSSARY
■ Glossary of Terms.............................................................. 78
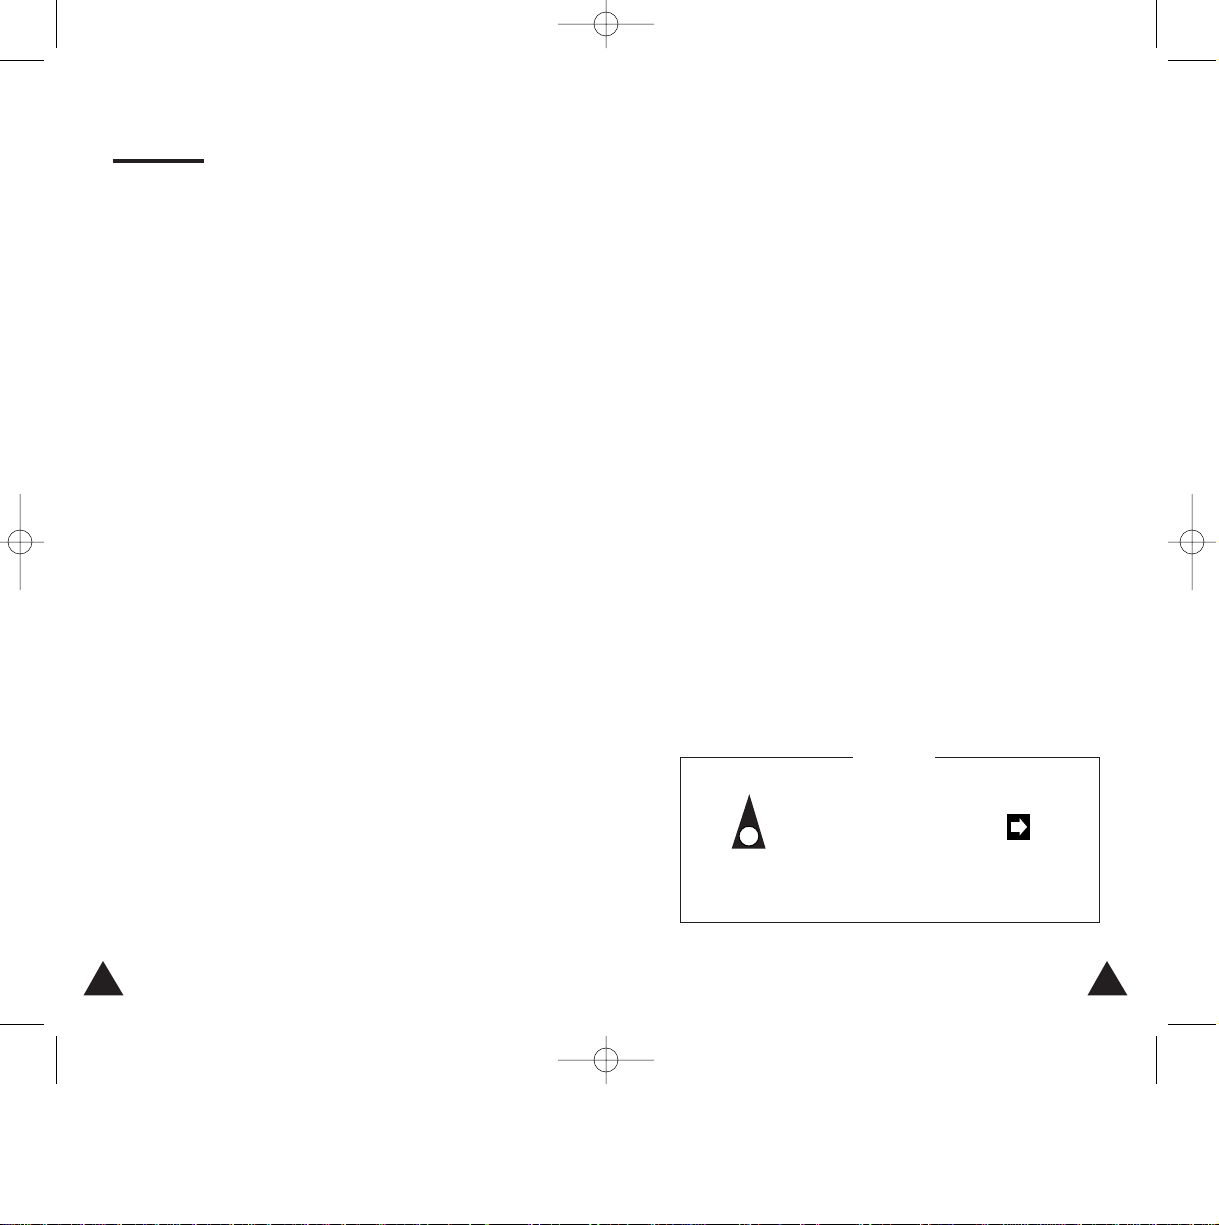
Symbols
☞
Press/Push
① = Step number
Important Note
01-250 4/2/99 11:47 AM Page 8
1
11
General Safety Precautions
10
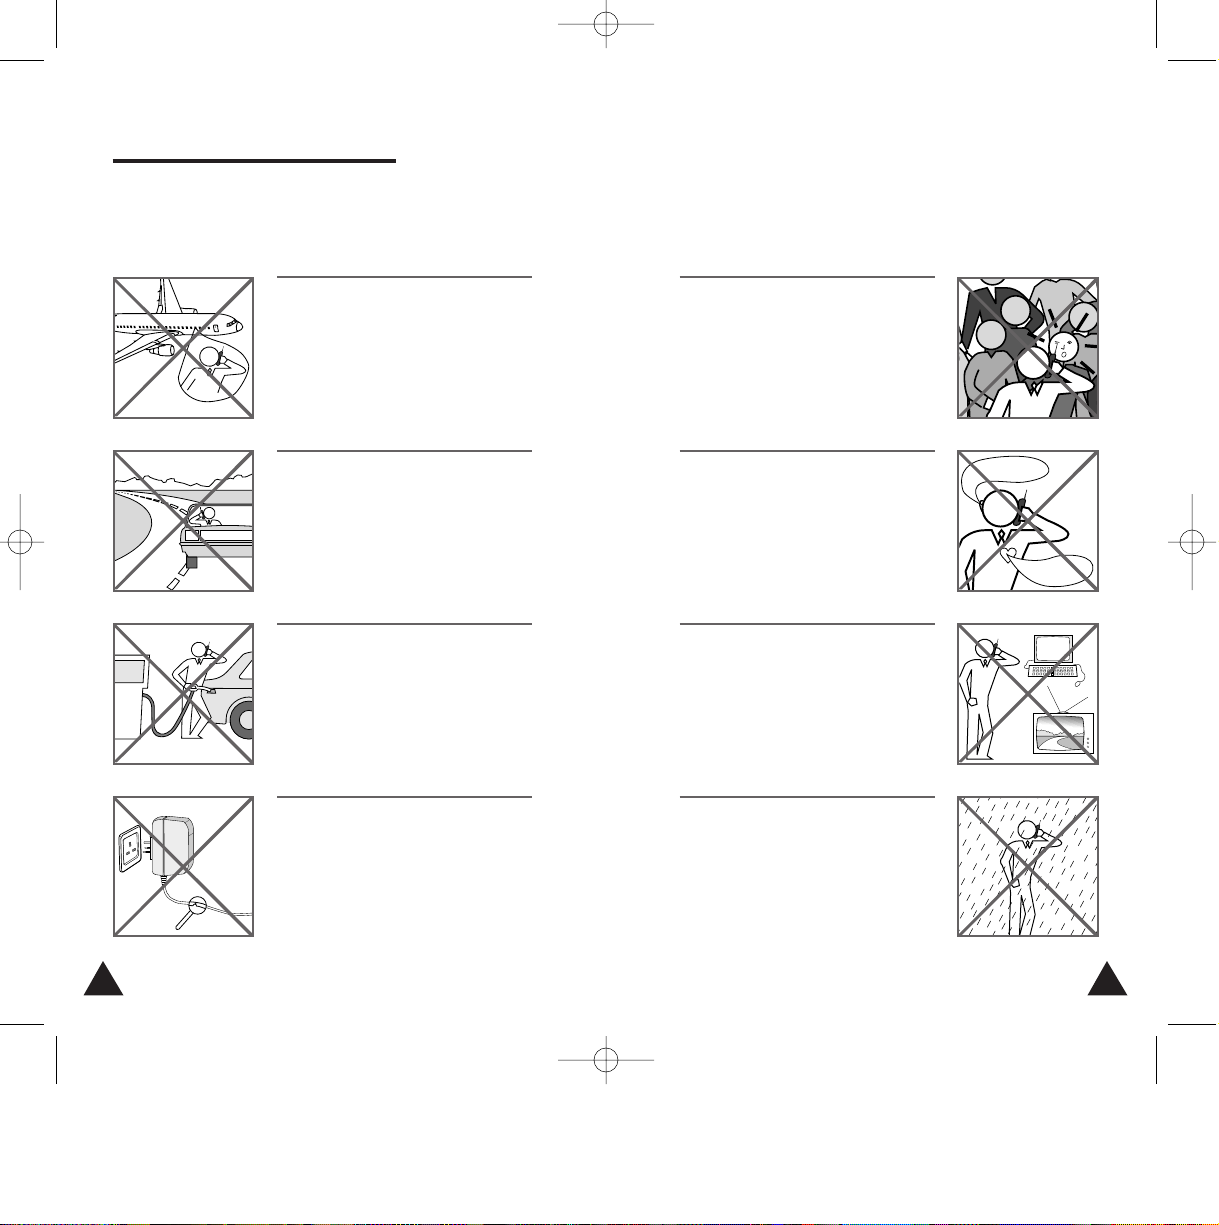
The illustrations below indicate the general safety
precautions to be taken when using your mobile
phone.
The use of mobile phones in aircraft:
◆ Is dangerous to aircraft operations
◆ May disrupt the cellular network
◆ Is illegal
Failure to observe in-flight regulations
may lead to the suspension of cellular
services and/or legal action.
NEVER use your phone while driving,
even if it allows hands-free operation.
Always park your vehicle first.
In some countries, it is illegal to use
mobile and radio telephones whilst
driving.
You are advised to turn off the phone
when at a refuelling point (petrol station
for example).
NEVER store or carry inflammable gas,
liquids or explosive materials in the
same compartment as your mobile
phone.
DO NOT use the travel adapter if:
◆ The power cord is damaged
◆ It has been dropped or undergone a
shock
Have a qualified after-sales service
repair it. NEVER try to repair it yourself.
Avoid contact between the antenna and
the face (especially the eyes) during a
conversation.
Take care with the antenna in crowded
places.
Being very concerned about health
precautions, SAMSUNG recommends
that you avoid using your mobile phone
close to medical devices (pacemakers,
etc.). If in doubt, consult the
manufacturer of the medical device.
Avoid operating your mobile phone
close to other electrical equipment
(telephones, televisions, radios,
personal computers, etc.), as it may
cause interference.
DO NOT expose the phone and
accessories to rain or any liquids.
Remove the battery from your phone
and contact your dealer if the phone and
accessories come into contact with any
liquid.
DO NOT leave them in direct sunlight or
in a humid, dusty or hot environment.
Hearing aid
Pacemaker
01-250 4/2/99 11:47 AM Page 10
Nof jdsk sds dkfjdk
Nof jdsk sds dkfjdk
tzkf ezre îer lktrifr
tzkf ezre îer lktrif lmretr
afflm kglftrtytulkfd
afflm kglftrtytulkh lmgre
tlm kglftrtytulkh grtr
ere îer lktrif lmretr fdfgrt
tlm kglftrtytulkh grtr uirt
Nof jdsk sds dkfjdk
tzkf ezre îer lktrif l
Nof jdsk sds dkfjdk
afflm kglftrtytulkgf
tzkf ezre îer lktrif lmretr
ere îer lktrif lmrefgrt
afflm kglftrtytulkh lmgre
tlm kglftrtytulkh
ere îer lktrif lmretr fdfgrt
tlm kglftrtytulkh grtr uirt
1312
Battery Safety Precautions
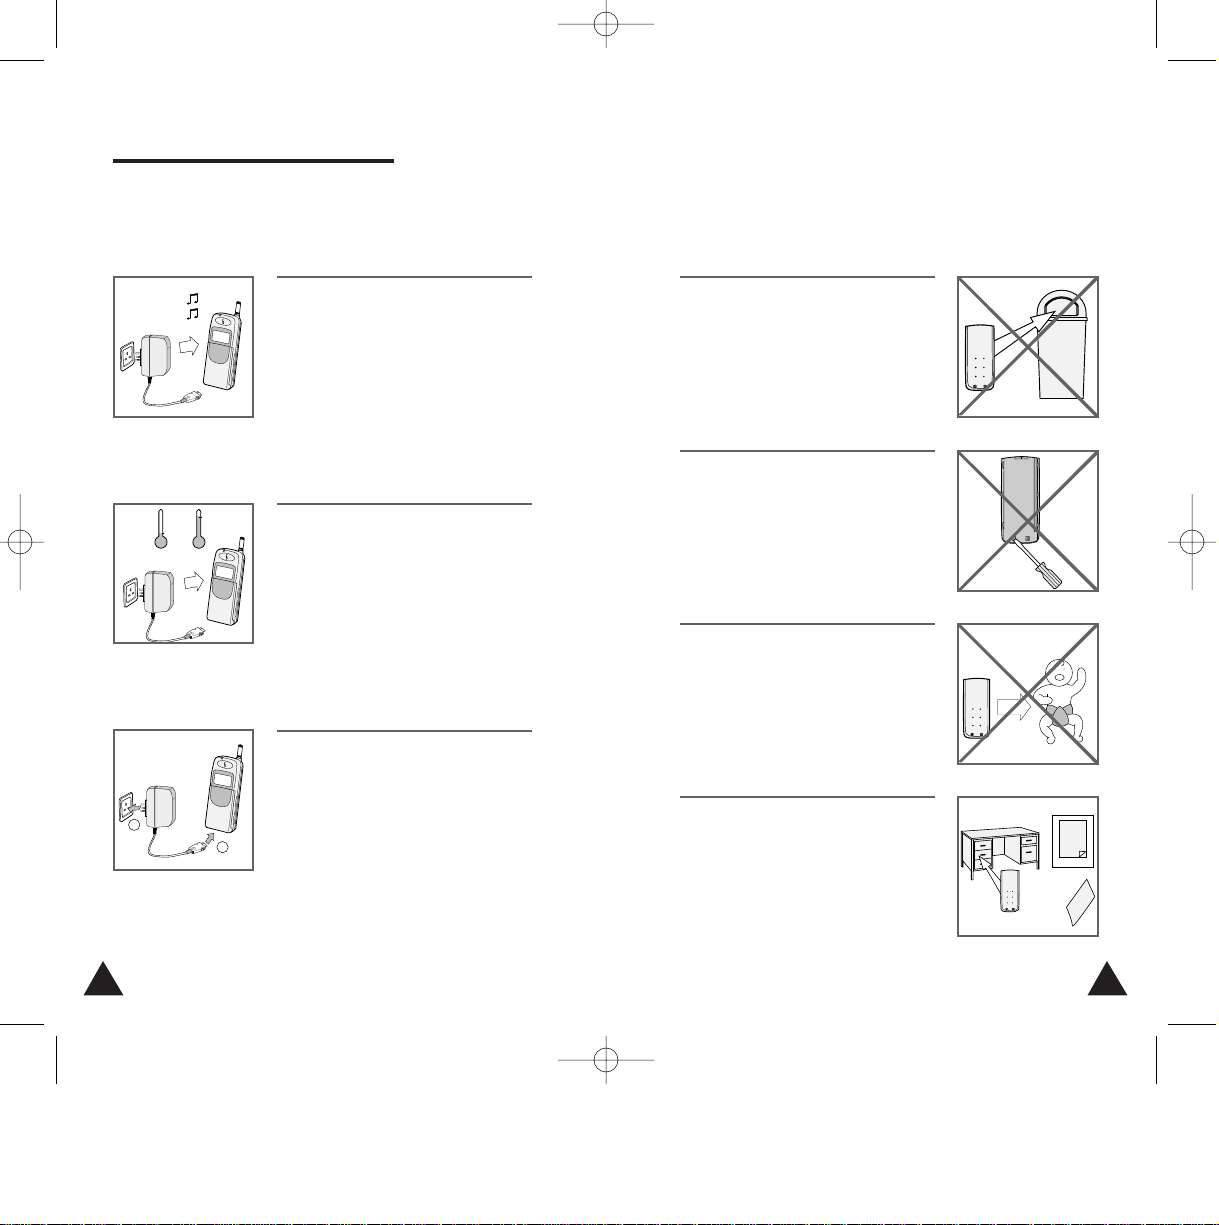
The illustrations below indicate the precautions to be
taken with the battery pack.
To maximise the charging capacity,
avoid repetitive partial discharging and
charging. It is recommended that you
wait until the low battery warning tone
sounds and the Low Battery
message is displayed before charging
the battery.
DO NOT charge the batteries in extreme
temperature conditions:
◆ Above 45° C
◆ Below 5° C
Attach the battery pack to the phone
before charging with the travel adapter.
Any replacement battery pack must be
of the same make and type.
DO NOT dispose of used batteries in a
fire or waste bin. Dispose of them in
accordance with local legislation.
DO NOTdisassemble the battery pack.
There are no user-serviceable parts
inside it.
DO NOT drop the batteries or subject
them to physical shocks.
Keep the battery out of the reach of
children.
If the battery is not used for a long
period of time (about a half year), its
service life may be reduced. Store it in a
cool, dry place.
2
1
01-250 4/2/99 11:47 AM Page 12
Low Battery
5°C
45°C
LITTER
98
January
January
97

Normally you cannot insert the SIM
card in the wrong position, as you
will not be able to close the holder.
If you cannot close the holder, check
that:
• The card is in the correct position
• The SIM card lock is in the OPEN
position
15
1. Remove the battery pack (see page
17).
2. Turn the phone face down.
3. Slide the SIM card lock in the
direction of the OPEN arrow and lift
up the holder.
4. Slide the SIM card into the holder:
◆ The gold-coloured chip should
touch the contacts on the phone
when the holder is closed
◆ The cut corner should be towards
the top of the phone
5. With the SIM card lock in the OPEN
position, push the holder back against
the phone and slide the SIM card lock
in the direction of arrow, until it locks
into position.
6. Replace the battery pack (see page
17).
SIMLOCK
OPEN
AMPHENOL
Inserting Your SIM Card
14
Before you can make a call on your mobile phone, you
must insert a SIM (Subscriber Identification Module)
card.
You are given this card (1/2 in. by 1 in.) when you
take out your subscription with a network operator.
For more details about the SIM card, refer to the
glossary on page 77.
☞ NEVER touch the gold contacts on the chip, as you may
damage the SIM card.
• If you do not insert the SIM card, the Check Card
message is displayed when you switch the phone on.
•
You can make emergency call while you have inserted a SIM card.
(Some networks don’t require a SIM card for emergency calls.
Check with your Air Time Provider.)
• If you wish to block access to the phone registers stored in
the SIM card, see page 47.
2
4
5
3
01-250 4/2/99 11:47 AM Page 14
SIMLOCK
OPEN
AMPHENOL

Battery Type Talk Time Standby Time
Attaching and Removing a Battery Pack
17
Battery Types
16
Your cellular phone is supplied with a slim
rechargeable battery. In addition, you can also
use a long-life battery (options).
The two batteries have different capacities:
• Slim battery: lasts as long as the light battery but is heavier
• Long-life battery: lasts longer than the other two
Operation Times
☞ If Low Battery is displayed and you hear a warning beep
whilst on the phone, finish your call immediately. Otherwise,
the phone may switch off.
You must replace or charge the battery pack on the
rear of the phone when Low Battery is displayed and
you hear a warning beep.
Charging Times
☞ When Low Battery is displayed, charge the battery pack
or replace it with a fully charged battery pack.
Long-life battery 3 hours 20 min. 60 ~ 80 hours
Slim 2 hours 5 hours
Long-life 3 hours 9 hours
1 hour 50 min. 30 ~ 40 hours
Slim battery
Quick Charge Normal Charge
Battery Type
TA DTC CLA DTC
TA = Travel Adapter
DTC = Desktop Charger (option)
CLA = Cigarette Lighter Adapter (option)
1. To reattach the battery pack after
charging, align it with the phone 1/2
inch away from the battery release
button, facing the battery charge
contacts to the phone.
2. Slide the battery pack upwards until
it clicks firmly into position.
3. To remove the battery pack, release it
by:
◆ Holding down the button on the
rear of the phone
◆ Sliding the battery pack downwards about 1/2 inch
4. Lift the battery pack away from the
phone.
01-250 4/2/99 11:47 AM Page 16
1
2
3
4

.
ABC DEF
C
OK
MENU
2
Switching the Phone On and Off
19
Charging a Battery Pack
18
You are supplied with a battery charger that must be
plugged into an appropriate wall socket (230V, 50Hz).
For more details about charging times, see page 16.
• The battery pack may become warm during charging. See
pages 12 and 13 for various safety precautions to be taken
with the battery pack.
• When the battery is discharged, and Low Battery
are displayed. Refer to the table in Step 3.
A mobile phone can only place and receive calls when
it is switched on
.
1. Plug the travel adapter into the
bottom of the handset.
3. When is displayed (charging is
finished), unplug the adapter from the
phone by:
◆ Pressing the two buttons on the
sides of the adapter plug
◆ Pulling the plug
Refer to the table below when
checking the battery status.
2. Plug the travel adapter into an
appropriate wall socket.
Result:
• Charging begins
• The battery status indicator blinks
You can use the phone while
charging the battery pack.
However, the charge time will be
longer.
4. Unplug the adapter from the wall
socket.
Indication Battery Status
Discharged
1/3 full
2/3 full
Fully charged
2. When you have finished using the
phone, switch it off by pressing
again for two seconds.
Result:
• The phone gives a long beep
• Power Off appears
• The display is cleared
• The battery is no longer being used
To enable the phone to lock
automatically when switched off.
See page 49.
/
I
Power Off
1. Switch the phone on by pressing
for at least two seconds.
Result:
• The phone gives a long beep
• The greeting message is displayed
• The phone scans for the available
network; when the network name
is displayed, you can place and
receive calls
• If Phone Lock is displayed,
enter the password first (see
page 49).
• When you switch the telephone on for the first time,
Enter PIN: is displayed
(see page 20).
• If Check Card is displayed,
check that your SIM card is
correctly installed (see page
15).
/
I
01-250 4/2/99 11:48 AM Page 18
1
2
3
4
MENU
C
OK
1
ABC DEF
3
2
.
2

Extending the Antenna
21
Entering Your PIN Code
20
The SIM card is protected by a PIN (Personal
Identification Number) that you must enter the first
time you use your phone or each time it is switched
on, if this option is set (see page 50).
• For more details about the PIN and PUK codes, refer to the
glossary on page 77.
• If you wish to change your PIN, see page 51.
☞ • If you enter the wrong PIN three times in a row, the
card is blocked. To unblock your phone, you must enter the
eight-digit PUK (PIN Unblocking Key) that comes with your
SIM card.
• If you enter the wrong PUK ten times in a row, your
SIM card will be permanently blocked. You must then
contact your network operator.
If the signal received is weak (crackling and background noise during a telephone conversation), you
can pull out the telescopic antenna.
Enter PIN:
1 3
.
ABC DE
C
OK
MENU
2
1. Switch the phone on by pressing
for at least two seconds.
/
I
2. When Enter PIN: is displayed,
enter your PIN.
Result:
A star is displayed to repre-
sent each digit entered.
3. Press .
Result:
• PIN Accepted is displayed
• Searching appears
• The network name is displayed
If you entered the wrong PIN,
Wrong PIN is displayed.
Try again with a correct PIN.
OK
3
2
1. Grasp the knob on the end of the
antenna and carefully pull the
antenna out to its full extension.
Result:
Reception quality is improved.
2. When you have finished the
conversation, push the antenna gently
back in.
If the signal received is sufficiently
strong, you do not need to pull out
the antenna.
The signal strength is indicated on
the display:
Strong signal
Weak signal
1
01-250 4/2/99 11:48 AM Page 20
23
Selecting a Menu Option
22
Most of your phone’s functions are selected via
menus. To select a menu or sub-menu option, proceed
as follows.
6
3
.
ABC DEF
C
OK
5
2
1. In Standby mode, press MENU to
enter the menu system.
Result:
The first menu appears.
4. Adjust the required option by
pressing the appropriate buttons (
„
or , numeric buttons, etc.).
5. To exit... Press...
Each menu level C as often
one by one as required
All menu levels
.
/
I
2. Select a menu option by pressing:
◆ The appropriate numeric button
Example: Press 2 to select the
second menu.
or
by pressing:
◆ „ or as often as required
followed by
◆
Result:
The first sub-menu appears.
OK
3. Select a sub-menu option by
pressing:
◆ Its number directly if you know it
Example:
Press 3 to select the
Any key sub-menu.
or
by pressing:
◆ „ or as often as required
followed by
◆
OK
2
2
2
1
3
5
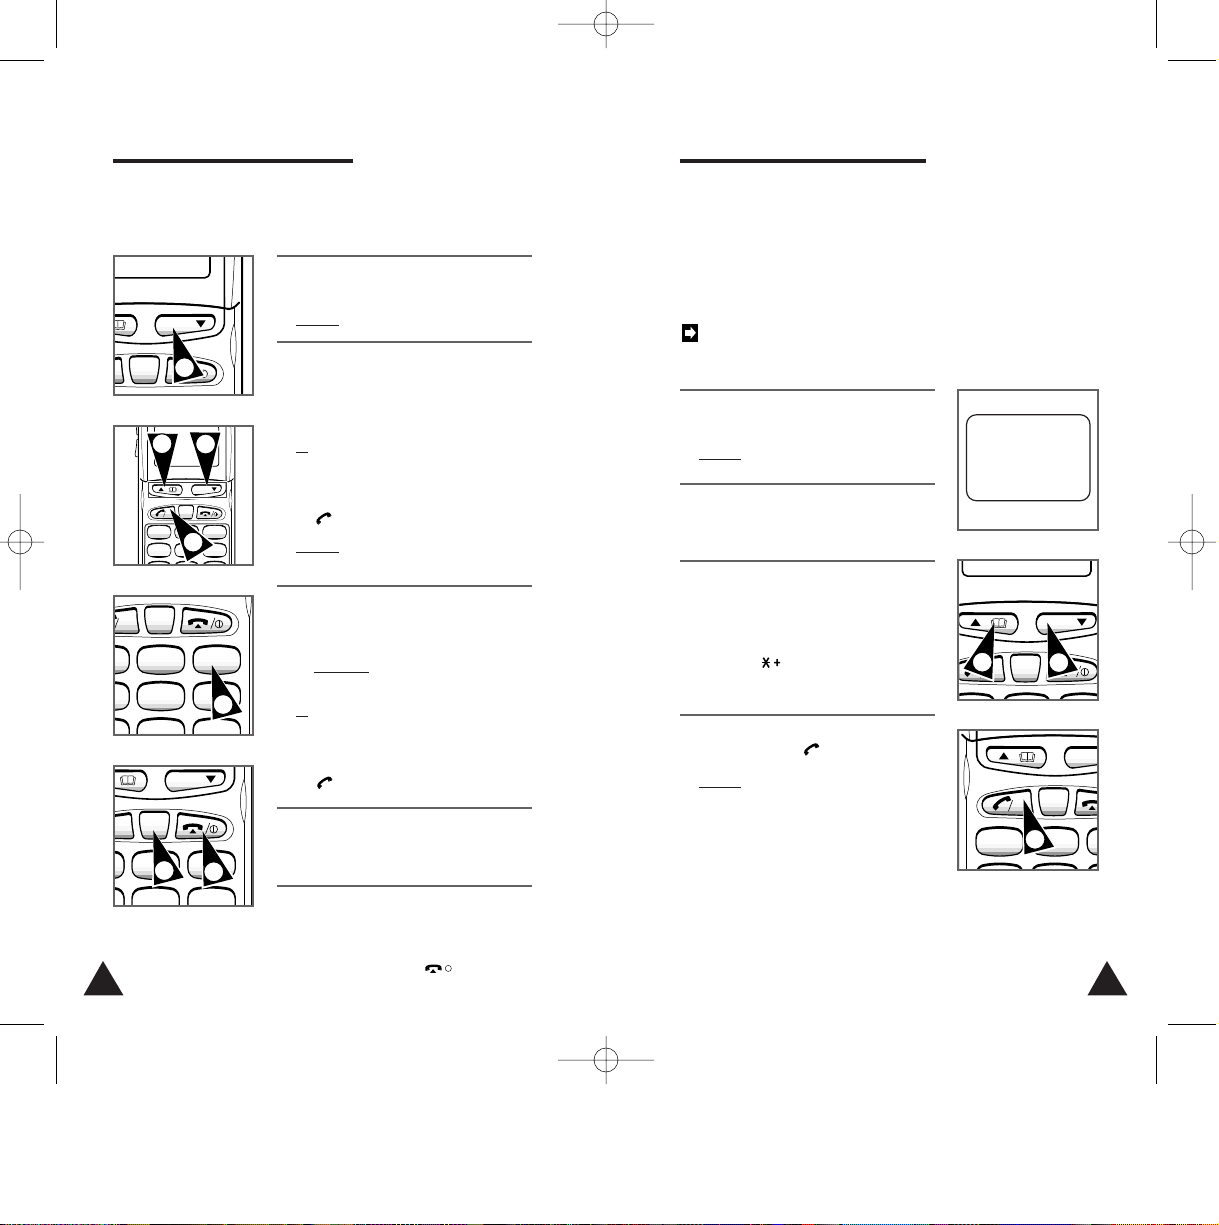
Choosing Your Language
When you start using your cellular phone for the first
time, you must select the language in which the
various menus and indications are displayed. You can
choose between Twelve languages (English, German,
French, Spanish, Italian, Swedish, Danish, Finnish,
Norwegian, Dutch, Portuguese and Turkish).
The default language used by the phone is English.
1. In Standby mode, press MENU to
enter the menu system.
Result:
The first menu appears.
2. Press 4, 1 to access the Language
sub-menu status.
3. Scroll through the various languages
by pressing „ or .
Also you can access the various
language by pressing a number key
including and #.
4. When the required language is
displayed, press .
Result:
• The phone switches to Standby
mode
• From now on, all the menus will be
displayed in the language selected.
/
OK
2 English
3 Italian
4 French
C
OK
MENU
3
U
„
5
01-250 4/2/99 11:48 AM Page 22
C
K
MENU
OK
1 3
.
GHI JKL MNO
4 6
MENU
C
ABC DEF
2
C
ABC DEF
2
5
MENU
3
3
C
OK
4
1
2
.
3
MEN
ABC

2524
7. If you do not wish to receive calls,
switch the phone off by pressing
for a while.
You can:
• Display the length of the call
while phoning
• Specify that the phone must beep
after each minute while you are
on the phone
For further details on these
functions, see page 54.
/
I
Placing a Call
You can only place a call when a network is
displayed.
Tel Number:
+8225413000
+8225413000
00:05
1 3
.
ABC
C
OK
MENU
2
1. Type in the required telephone
number, including the area code.
Result:
The number entered is
displayed.
To place an international call,
insert a “+” before the
international code by pressing
for more than one second.
Example:
+ 82 2 541 3000.
2. If you make a mistake:
◆ Press C one or more times until
the incorrect digit is cleared
◆ Continue typing your number
To clear the whole number, press
C for more than one second.
3. When you have entered the whole
number, press .
Result:
• The number is dialled
• Calling is displayed
OK
4. Hold the phone up to your ear and
wait until the call is answered.
Result:
When your call is answered:
•
+8225413000
appears
• The call timer records the length of
the call (if this option is set; see
page 54.
4. (cont.)
You can adjust the earpiece
volume during a conversation by
pressing the volume button on
the left side.
5. If reception is poor (crackling or
background noise during the
conversation), carefully pull the
antenna out to its full extension. If
you are inside a building, you can
also try moving nearer a window.
6. When you have finished, press .
Result:
•
Call Ended
appears
• Your number is stored in the Redial
memory (see page 35 for further
details on this function)
/
I
Call Ended
3
.
ABC DEF
C
OK
MENU
2
i
6
01-250 4/2/99 11:48 AM Page 24
3
4
5
 Loading...