

Samsung SF5600 Disassemble

1
CCHAPTER 5
Maintenance &
Troubleshooting

5-1
Chapter 5 MAINTENANCE & TROUBLESHOOTING
5.1 PREVENTATIVE MAINTENANCE
The cycle period outlined below is a general guideline for maintenance. The example list is for an average
usage of 50 transmitted and received documents per day. Environmental conditions and actual use will vary
these factors. The cycle period given below is for reference only.
5.2 DIAGNOSTICS
This section describes methods and procedures to isolate the cause of a malfunction in the machine. This
machine displays diagnostic information on the LCD. In addition, it can perform a series of tests that allow
the machine to observe individual machine functions.
5.2.1 ERROR MESSAGES
COMPONENT CLEANING CYCLE REPLACEMENT CYCLE
ADF Roller 1 Year 2 - 3 Years (20,000 pages)
Feed & Exit Roller 1 Year 3 - 5 Years (50,000 pages)
Roll Pinch 1 Year 3 - 5 Years (50,000 pages)
White Roller 6 Months 3 - 5 Years (50,000 pages)
CIS 6 Months -
Error Message
BUSY REDIAL ?
COMM. ERROR
COMPATIBLE ERROR
DOCUMENT JAM
DOOR OPEN
Description
The machine is waiting the
programmed interval to automatically
redial previously.
A problem with the acsimile
communications has occurred.
Remote party did not have the
requested feature, such as a
confidential transmission or relay
transmission.
It also occurs if the remote machine has
insufficient memory space to complete
the operation you are attempting
Loaded document has Jammed in the
feeder.
The top cover is not securely latched.
Drum cartridge is not Installed.
Solution
You can press YES to immediately
redial, or NO to cancel the redial
operation.
Try again.
Reconfirm your remote party's feature.
Clear the document Jam.
Press down on the cover until you feel
it latch securely.
Install the cartridge properly.

Solution
Try again. if failure persists wait an
hour or so for the line to clear then try
again.
Load a document and try again.
Either delete unnecessary documents, or
retransmit after more memory becomes
available, or split the transmission into
more than one operation.
Try again
Make sure the remote machine is OK.
Install the cassette properly.
Install the toner cartridge in place
properly.
Dial the number manually with the
keypad, or assign the number.
Load the recording paper in the paper
cassette.
Your unit will automatically return to
the standby mode when it cools down
to normal operating temperature.
Press STOP and clear the jam.
Clear the jam.
Clear the jam.
Description
You have tried to select a group
location where only a single location
number can be used, such as when
adding locations for a multi-dial
operation.
Your unit cannot connect with the
remote machine, or has lost contact
because of a problem on the phone
line.
You have attempted to set up a
sending operation with no document
loaded.
The memory has become full.
The remote machine was not answered
after all the redial attempts.
The cassette is empty or is installed
improperly.
No toner cartridge in the printer
system. The printer system stops.
The one-touch or speed dial location
you tried to use has no number
assigned to it.
The recording paper has run out.
The printer system stops.
Your fax machine has overheated
possibly as a result of receiving several
nearly all-black faxes.
Recording paper has jammed in paper
feeding area.
Recording paper has jammed inside
the machine.
The Jammed paper still remains inside
the machine.
Error Message
GROUP NOT
AVAILABLE
LINE ERROR
LOAD DOCUMENT
MEMORY FULL
NO ANSWER
NO CASSETTE
NO CARTRIDGE
NO. NOT ASSIGNED
NO PAPER
OVERHEAT
PAPER JAM 0
PAPER JAM 1
PAPER JAM 2
5-2

5-3
Error Message
POLL CODE ERROR
POLLING ERROR
POWER FAILURE
TONER EMPTY
TONER LOW
WARM UP
Description
When setting up to poll another fax
machine, you have used an incorrect
poll code.
The remote fax machine you want to
poll is not ready to respond to your poll.
A power failure has occurred.
The toner is empty.
The printer system stops.
The toner is almost empty.
The printer is warming up and is off
line.
Solution
Enter the correct poll code.
The remote operator should know in
advance that you are polling and have
their fax unit loaded with the original
document.
If there has been documents stored in
memory, Power failure report will be
printed automatically when the power
is restored.
Replace with a new developer and
initialize new development procedure.
After recording about 200 sheets of
letter size recording paper TONER
EMPTY appears in the display, and the
printer system stops.
Replace with a new one.
Wait until the printer is on-line.

5-4
5.2.2 TEST MODE
The test mode is used to test certain functions of the machine. The available tests are:
• Pattern Test • Modem Test
• Switch Test • Memory Test
• CIS Test • ROM Test
To enter the Test Mode:
1. Get into the Tech Mode by pressing Function, #, 1, 9, 3, 4.
2. In Tech Mode, press Function and then the 7 key.
3. Press Yes.
4. Press the No key until the desired test is shown in the display.
5. Press Yes to initiate the test mode.
Pattern Test
There are 7 different pattern tests which can be run to determine the condition of the LPH and the printer
components. The test patterns include various black, medium gray, and light gray scales. If the thermal head
is operating properly, each area appears even, distinct, and with no inconsistencies in printing.
Switch Test
This test checks the operation of the LCD display and the LED indicators that interface the switches on the
operation panel.
CIS Test
This test mode checks the condition of the Contact Image Sensor. This is a true test of the white reference
level.
Modem Test
This test causes the machine to generate a particular frequency to verify the operation of the modem control
circuits and the modem.
Memory Test
This test is used for checking the Random Access Memory (RAM) on the main PBA. If all memory is
working normally, the LCD shows TESTING OK!. When this testing is carried out, any picture data stored
in memory is erased.
ROM Test
This test mode will display and check the current ROM level in your machine.
5-5
5.2.3 MAINTENANCE LIST
A number of reports can be printed from the fax machine within the test mode. The protocol list and
memory dump list all contain detailed information which may be required when contacting technical
support.
To printout the protocol and memory dump lists:
1. Get Into the Tech Mode by pressing Function, #, 1, 9, 3, 4.
2. In Tech Mode, press Function and the 6 keys..
3. Press Yes.
4. Press No 5 times to get to Protocol Dump List or 6 times to get to Memory Dump
5. Press Yes.
SAMPLE OF A PROTOCOL DUMP LIST
PROTOCOL DUMP LIST AUG-20-94 06:35
S/R FCF FIF DATA ASCII
S NSF 61005020003380140200001302090018010000
S CSI 2020202020202020202020202020202020202020
S DIS 00000000 01110111 00010111 00100010
S NSF 61005020003380140200001302090018010000
S CSI 2020202020202020202020220202020220202020
S DIS 00000000 01110111 00010111 00100010
R TSI 2020202020202020202020202020202020202020
R DCS 00000000 01100001 00010101 00000000
S FTT
R TSI 2020202020202020202020202020202020202020
R DCS 00000000 01100001 00010101 00000000
S CFR
R MPS
S MCF
S DCN
Sending/Receiving
Name of signal
(Facsimile Control Field)
FIF data described
in ASCII code
Facsimile Information Field
data described in hexdecmal code
5-6
5.3 REMOTE DIAGNOSTICS AND CONTROL
This feature is available only on the Msys5600/5700 if a special ROM (Read Only Memory) is equipped with
your fax machine.
Remote diagnostics and control is a feature that allows you to manage the end user's machine located in a
remote location. You can diagnose the remote machine and control its system data without visiting the
customer. If your machine displays REMOTE DIAGNOSTICS ? when you enter Function and 9, you can
confirm that your machine has the special ROM installed.
Remote diagnostics and control consists of the following three items:
• GETTING INFORMATION ABOUT A REMOTE FACSIMILE
prints out the hardware and software information of the remote machine
• SETTING REMOTE OPTIONS
changes the system data of the remote machine
• RESETTING LEASE PAGE COUNT
resets the page count of the remote machine to 0. This item is for managing a leased machine.
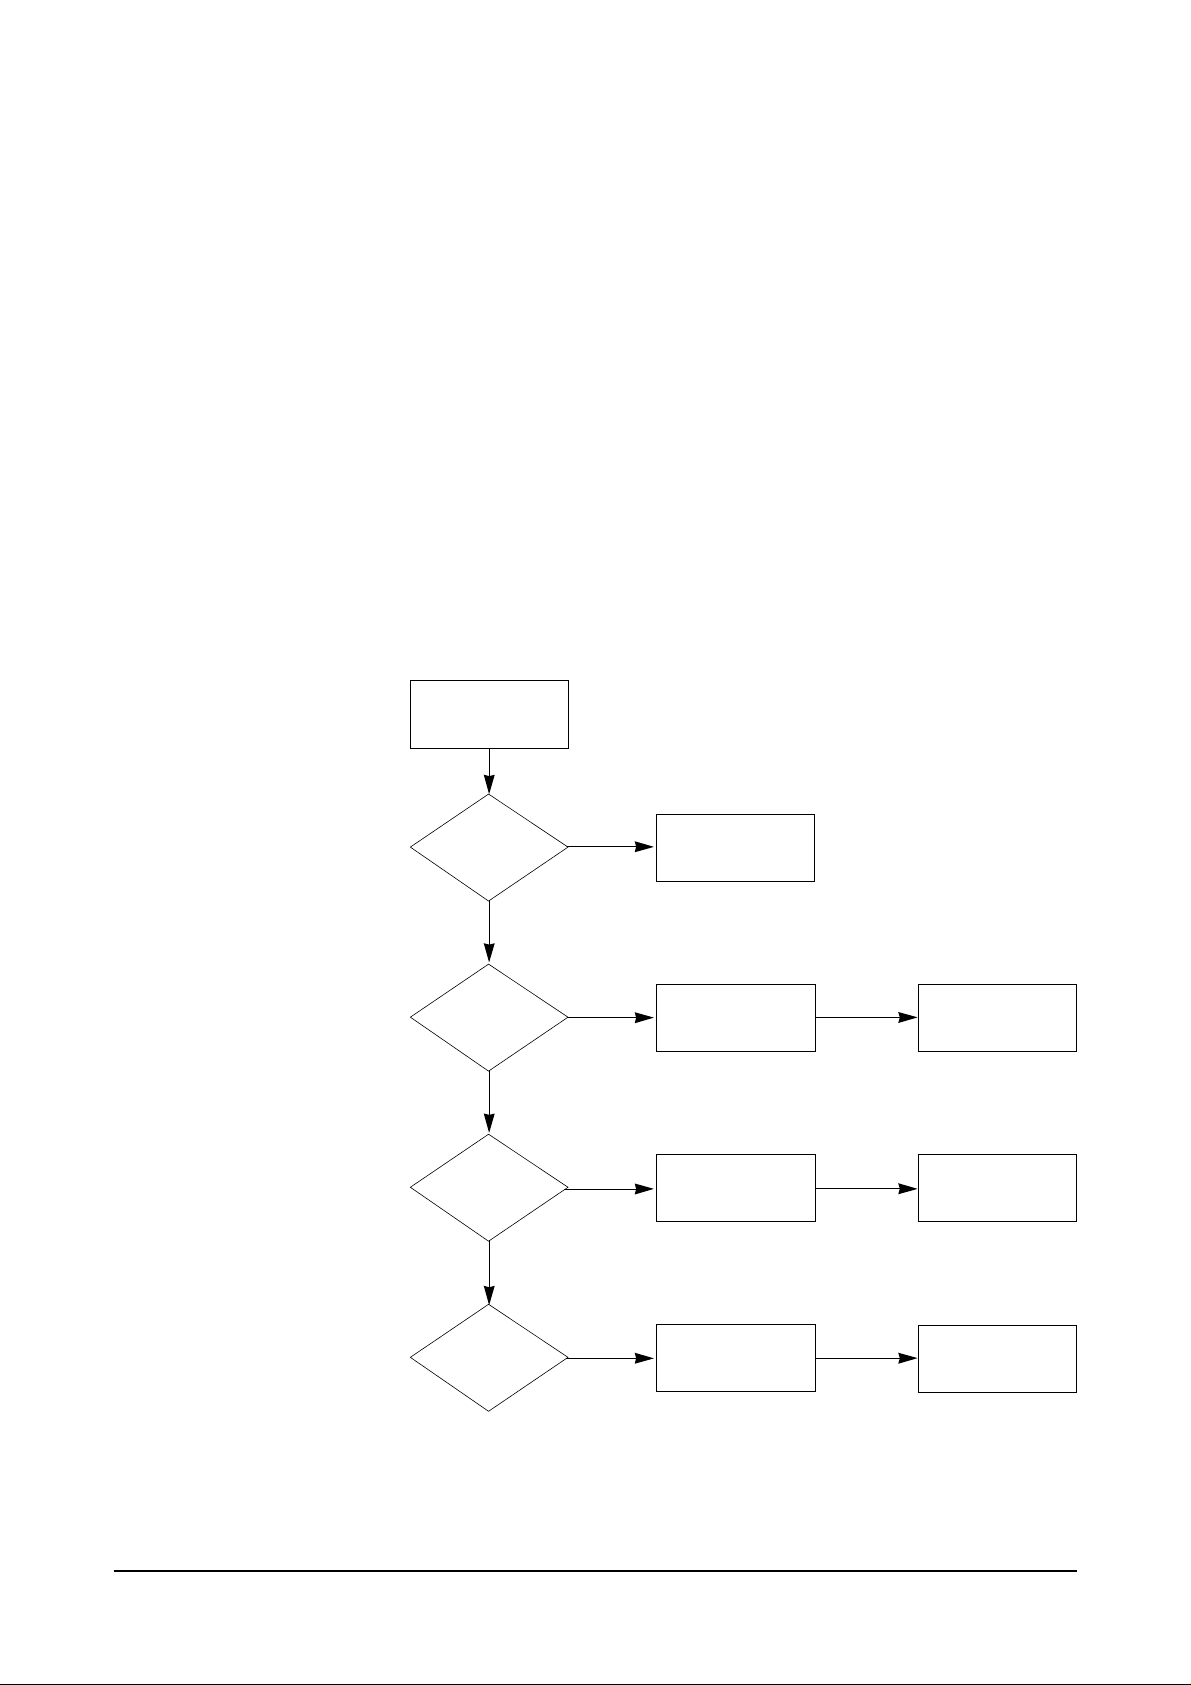
To enter Remote Diagnostics:
1. Get into the Tech Mode by
pressing Function, #, 1, 9, 3, 4.
2. while in Tech Mode, press
Function and then the 9 key.
3. Press Yes.
4. Press No until you get to the
remote diagnostic mode you
5. Press Yes.
REMOTE
DIAGNOSTICS ?
GET REMOTE
REPORT ?
SET REMOTE
OPTION ?
CLEAR
REMOTE
PAGE
COUNT ?
Press FUNCTION
and 9 in tech mode
Get information
about remote
machine.
Set remote
machine's system
data.
Reset lease page
count to 0.
Machine goes to
stand-by mode.
Machine goes to
stand-by mode.
Machine goes to
stand-by mode.
Machine goes to
stand-by mode.
Yes
No
No
No
Yes
Yes

5-7
5.3.1 GETTING INFORMATION ABOUT A REMOTE FACSIMILE
MAY-15 15:30 SAT
TECH MODE
REMOTE
DIAGNOSIS ? Y/N
GET REMOTE
REPORT ? Y/N
REMOTE RAM
TEST ? Y/N
REMOTE MEMORY
TEST ? Y/N
REMOTE OPTION
LIST ? Y/N
REMOTE DATE OF
ROM ? Y/N
REMOTE MODEL
NAME ? Y/N
REMOTE LAMP
TEST ? Y/N
REMOTE
ROM TEST ? Y/N
Once you perform the remote SRAM test, the SRAM of the remote machine will be cleared and the default
value will be stored into the SRAM.
CAUTION: All information about the terminal ID, auto dialer number, etc. will be cleared.
1. Press FUNCTION, then 9 in technician mode.
2. Press YES.
4. If you want to check the released date of the software equipped with the
remote machine, press YES. Otherwise, press NO or SCROLL to skip to
the next menu.
5. If you want to check the model name of the remote machine, press YES.
Otherwise, press NO or SCROLL to skip to the next menu.
6. If you want to test the CIS (Contact Image Sensor) of the lamp equipped
with the remote machine, press YES. Otherwise, press NO or SCROLL
to skip to the next menu.
7. If you want to test the ROM of the remote machine, press YES. Otherwise,
press NO or SCROLL to skip to the next menu.
8. If you want to test the SRAM (static RAM) of the remote machine, press
YES. Otherwise, press NO or SCROLL to skip to the next menu.
9 If you want to test the image memory (DRAM) of the remote machine, press
YES. Otherwise, press NO or SCROLL to skip to the next menu.
Once you perform the remote DRAM test, it will cause the reserved file to
be cleared, so a delayed job such as delay transmission will be canceled
without notification to the remote users.
10. If you want to check the current system data setup of the remote machine,
press YES. Otherwise, press NO or SCROLL to skip to the next menu.
3. Press YES.
The machine displays the menu you can check for the remote machine. If
you do not wish to check the item shown in the display, press SCROLL
or NO. The next menu will be displayed. When the item you wish to check
appears in the display, press YES.

5-8
ENTER TEL. NO
5.3.2 SETTING THE SYSTEM DATA OF THE REMOTE FACSIMILE
Caution: Before you change a system data of the remote fax machine, you have to print out the system data setup list to check the current status of the remote machine. If not, your fax machine displays SET OPTION LIST
AND TRY AGAIN when you try to set system data of the remote machine, then returns to the standby mode.
MAY-15 15:30 SAT
TECH MODE
REMOTE
DIAGNOSIS ? Y/N
GET REMOTE
REPORT ? Y/N
SET REMOTE
REPORT ? Y/N
ENTER TEL. NO
REMOTE TX
REPORT ? Y/N
REMOTE RX
REPORT ? Y/N
11. If you want to get the transmission journal of the remote fax machine,
Press YES. Otherwise, press NO or SCROLL to skip to the next menu.
Once you press YES to get the transmission journal of the remote machine,
your machine skips over step 12. Only one journal may be received during
remote diagnostics.
12. If you want to get the reception journal of the remote fax machine, press
YES. Otherwise, press NO or SCROLL to skip to the next menu.
13. Enter the number of the remote fax machine using the dial keypad. When
the number appears correctly in the display, press YES.
14. Your fax machine (with EPROM) automatically dials the number, confirms
the connection, get information you want to check from the remote
machine, and prints the information on your machine.
1. Press FUNCTION, then 9 in the technican mode.
2. Press YES.
3. Press NO, then YES.
4. The system data will be displayed. The data set-up for a remote machine is
the same as that in section 2.5 System Data set-up.
You can set the option to a special value for the remote machine.
5. Enter the number of the remote fax machine using the dial keypad. When
the number appears correctly in the display, press YES.
6. Your fax machine (with EPROM) automatically dials the number, confirms
the connection, and transfers this system data you have set to the remote
machine.

5-9
5.3.3 RESETTING LEASE PAGE COUNT
MAY-15 15:30 SAT
TECH MODE
REMOTE
DIAGNOSIS ? Y/N
GET REMOTE
REPORT ? Y/N
SET REMOTE
REPORT ? Y/N
ENTER TEL. NO
1. Press FUNCTION, then 9 in the technician mode.
2. Press YES.
3. Press NO repeatedly until ‘CLEAR REMOTE PAGE COUNT ?, then Press
YES.
4. Press YES.
5. Enter the number off the remote fax machine using the dial keypad. When
the number appears correctly in the display, press YES.
5-10
5.4 TROUBLESHOOTING GUIDE
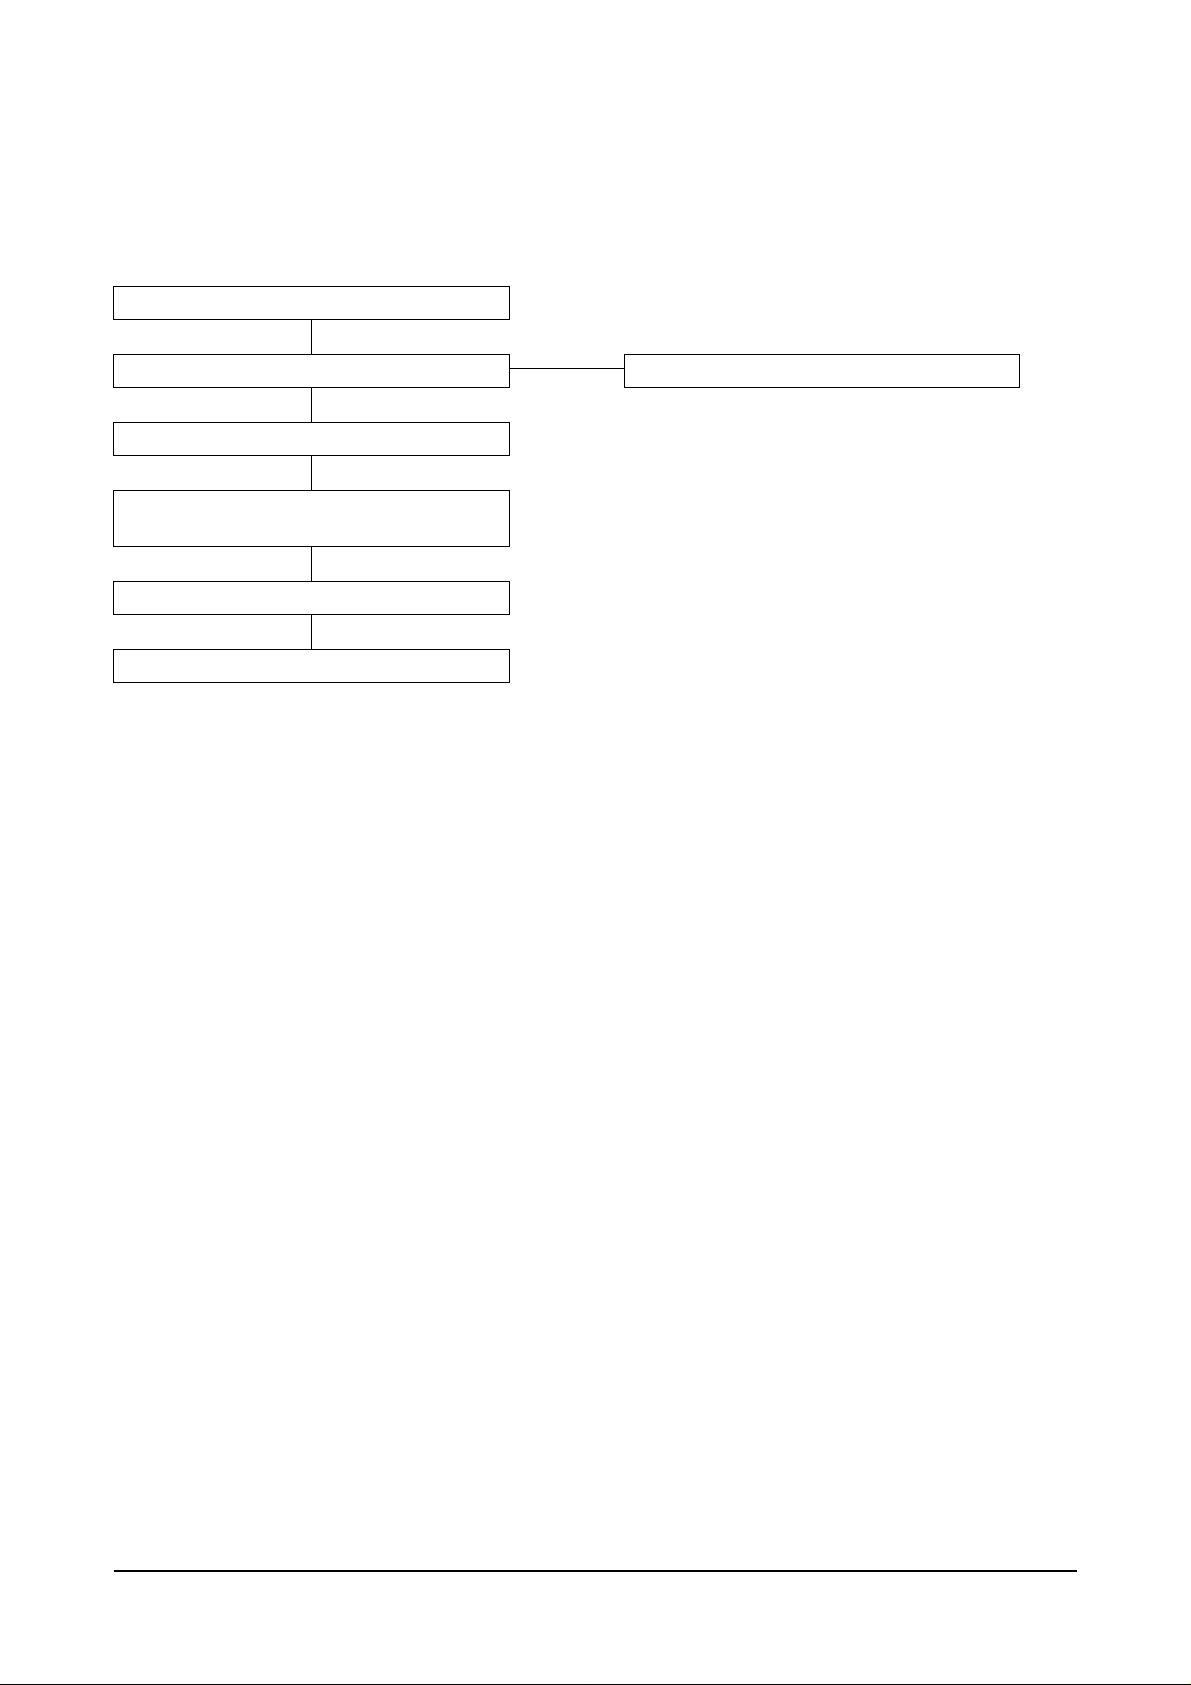
5.4.1 TELEPHONE SCREENING
FLOW CHART FOR FIELD REMEDY
INQUIRY FROM USER
When receiving an inquiry from the user, first ask the nature of the problem in detail. This is because most
problem inquires are the result of:
1) Simple misoperation.
- Document are loaded upside down.
- The recording paper is not loaded properly.
2) A failure with the telephone line.
3) A failure with the other party's machine
In the case of 1), the user can solve the problem through the instructions given from the fax machine (help
list printed out from fax machine).
In the case of 2) or 3), the user can check his/her own machine by performing a communication test with
another (known good) facsimile machine.
INDICATION OF ERROR
During this preliminary screening procedure, the user can clarify the facsimile trouble by referring to the
prompts on the LCD display. If the user is unable to provide this information of his own accord, proceed to
"Recommended Flow For Telephone screening."
Inquiry from user by telephone
No technician dispatch needed.
Inquiry from user by telephone
No solution
No solution
Telephone screening
Technician dispatch (field remedy)
Telephone support to the field technician
from the remote diagnosis center
Field remedy
 Loading...