

Samsung SF4300 Disassemble
Samsung Electronics 4-1
4. Disassembly & Assembly
4-1 Taking Off Front Cover
This section explains with illustrations how to disassemble the printer.
It does not explain how to assemble it, because it is the very reverse of disassembly.
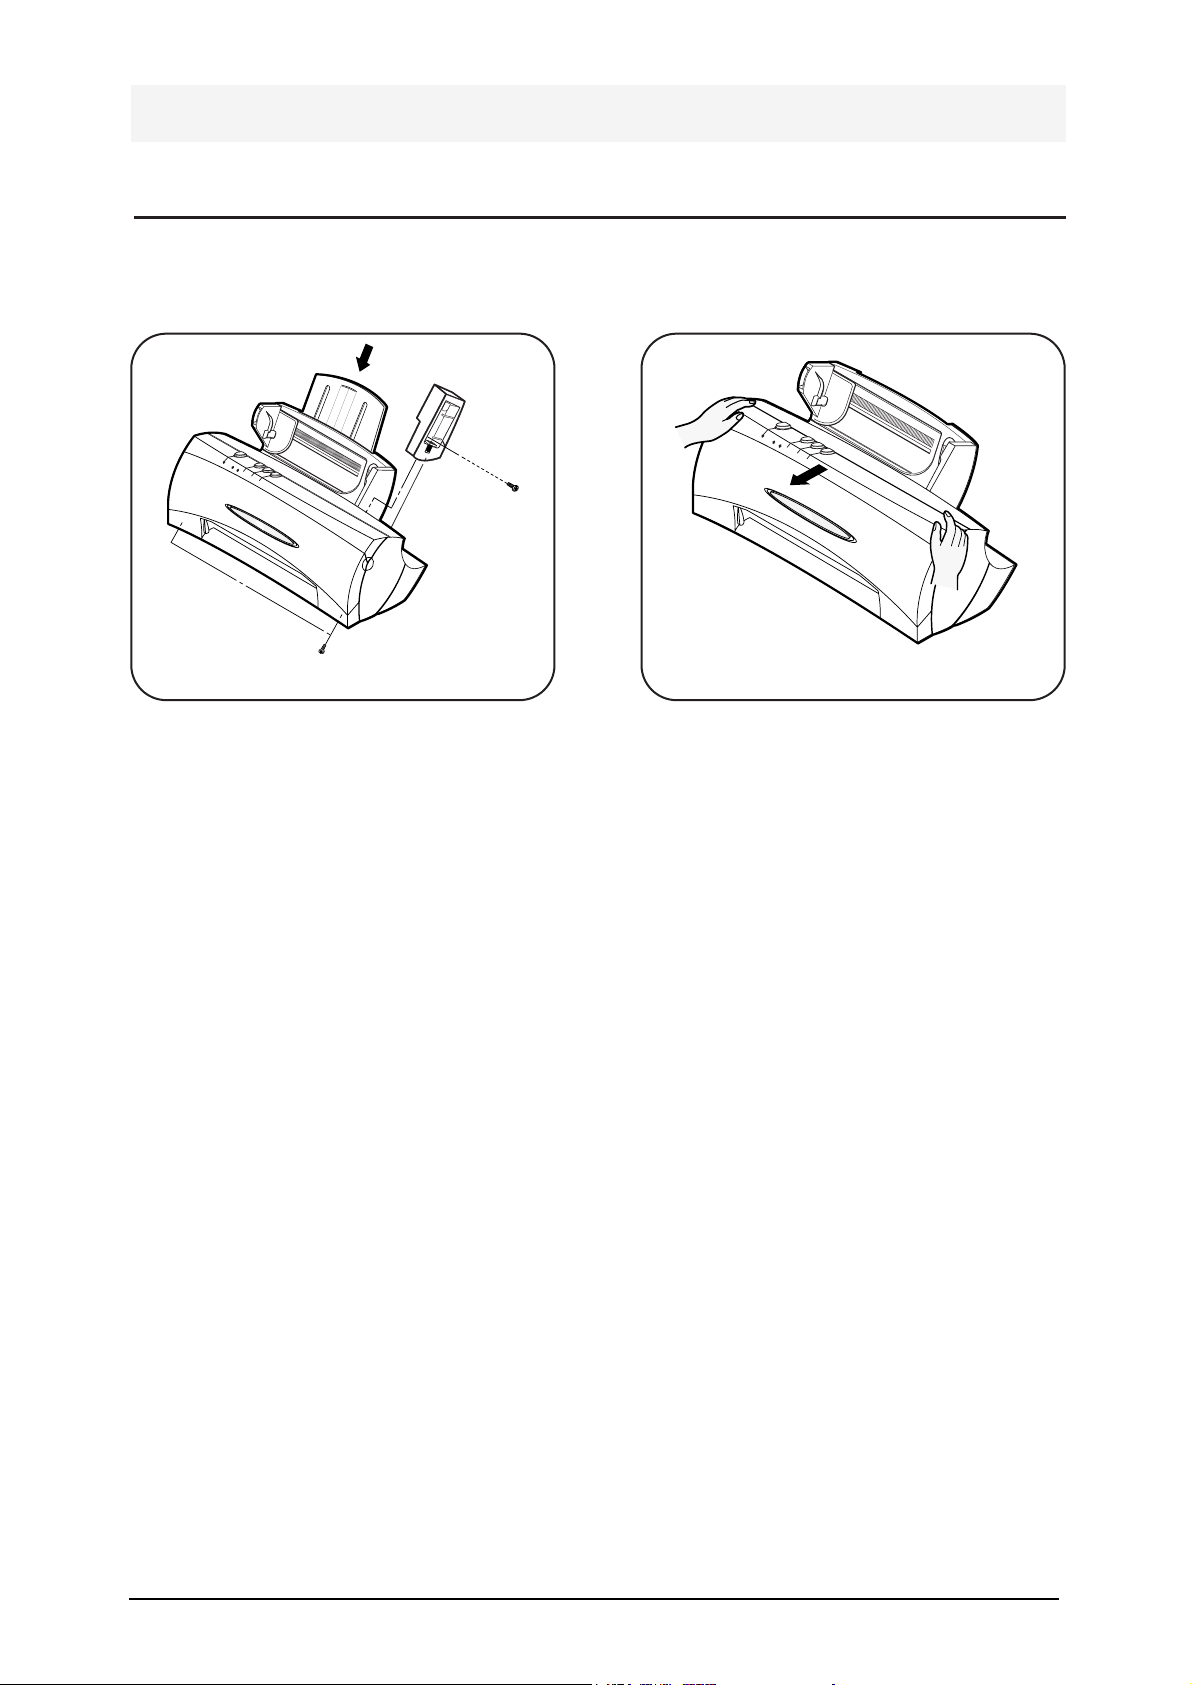
Fig.4-1. Taking Off Front Cover -1 Fig.4-1. Taking Off Front Cover -2
Disconnect power cords and printer cable from
the printer.
Unscrew 1 screws on rear cover to separate ink
cartridge storage.
Push Guide Extension in the direction of the
arrow symbol.
Remove 2 screws between front cover and bottom cover.
▲▲▲▲
Hold the upper part of front cover with both
hands and lift the front cover, holding
down rear cover.
Separate front cover from rear cover in the
direction of the arrow symbol.
▲▲
4-2 Samsung Electronics
4-2 Taking off Rear Cover
4-3 Separating Automatic Sheet Feeder
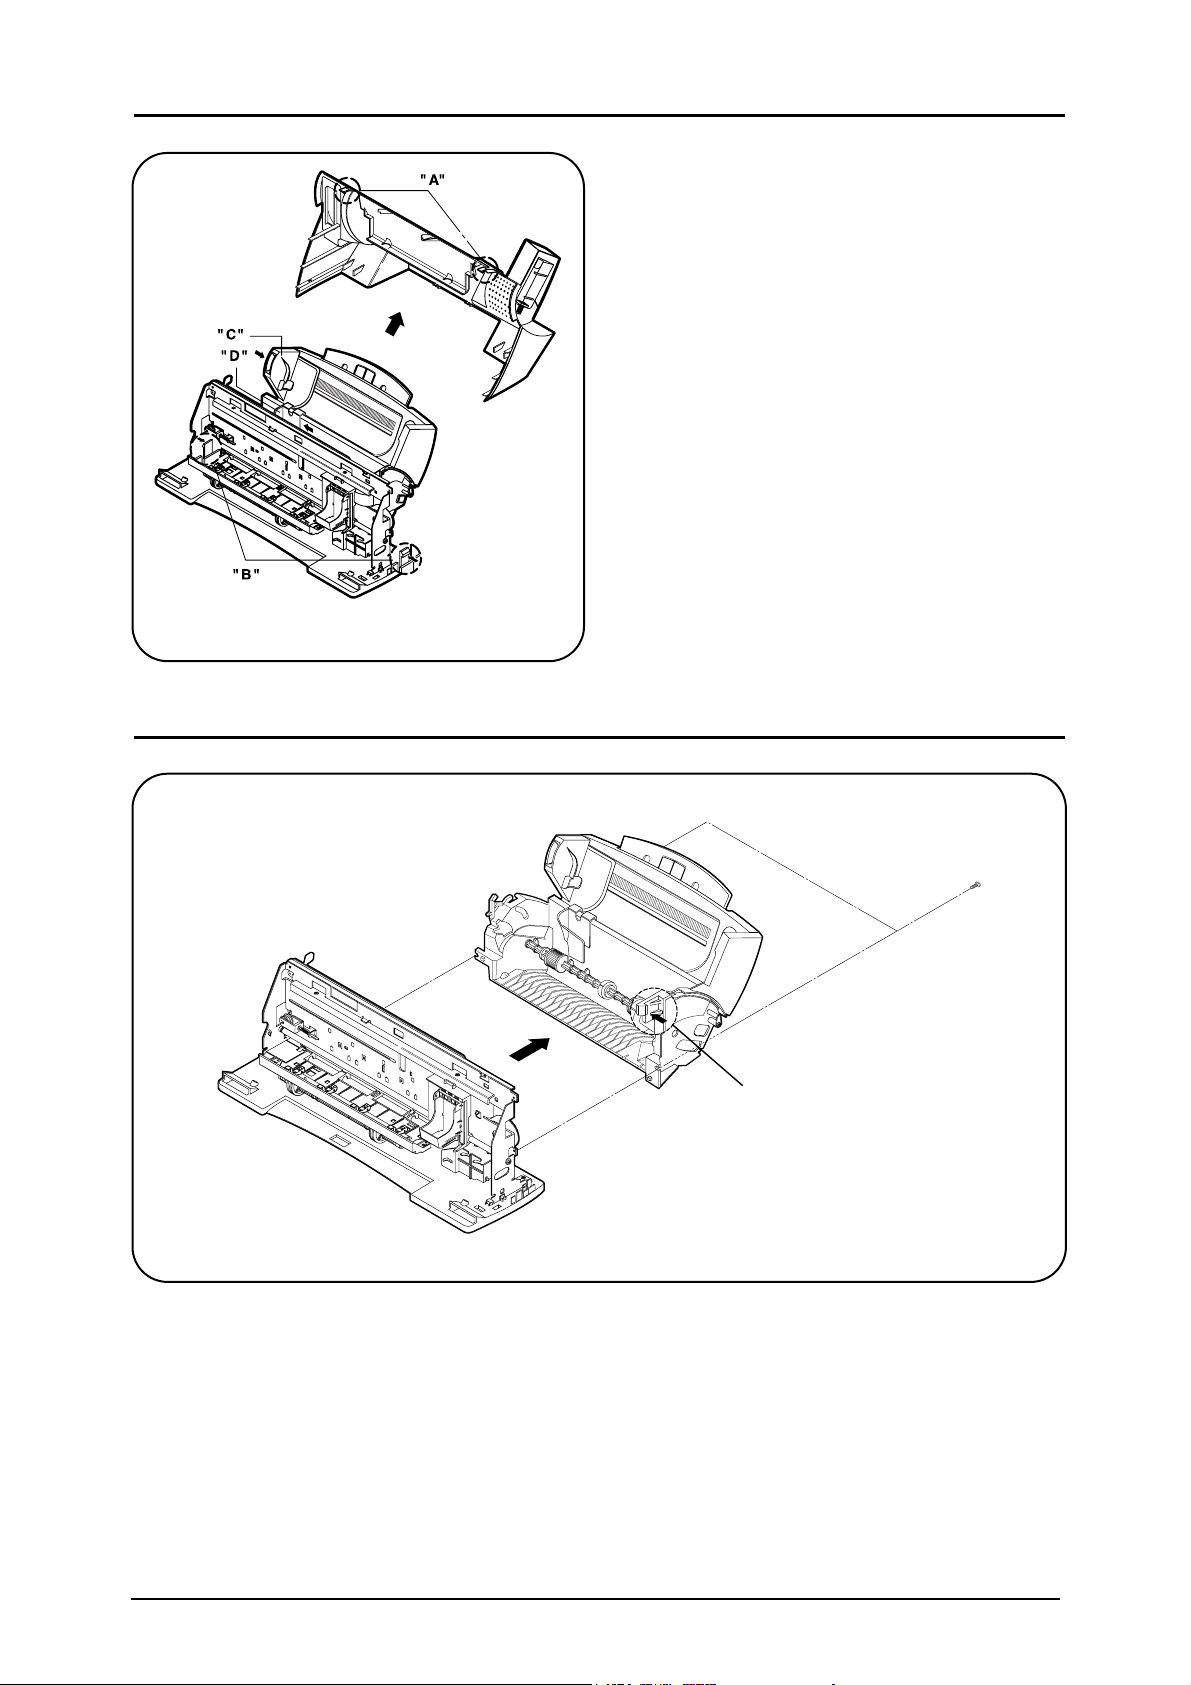
Fig.4-2. Taking Off Rear Cover
Push in the paper guide (ÒCÓ) of automatic
sheet feeder and place it inside of A4 line.
Push the guide manual(L) (ÒDÓ) left.
Unhook right and left hooks(ÒAÓ) on the upper
part of rear cover.
Unhook right and the left hooks of bottom
cover by pushing them in.
Separate rear cover in the same direction that
the automatic sheet feeder is mounted.
▲▲▲▲▲
Fig.4-3. Separating Automatic Sheet Feeder
Remove various wires fixed on the side of automatic sheet feeder.
Unscrew 2 screws on automatic sheet feeder.
Push slightly and disconnect the hook (ÒAÓ) fixed to the main frame.
Separate automatic sheet feeder by pulling it in the direction of the arrow symbol.
▲▲▲▲
“A”
Samsung Electronics 4-3
4-4 Separating Main Circuit Board
Separate various connectors connected with the main board.
Separate head cable connected with the main board.
Unscrew 3 screws fixed to the main board and separate the main board in the
direction of the arrow symbol.
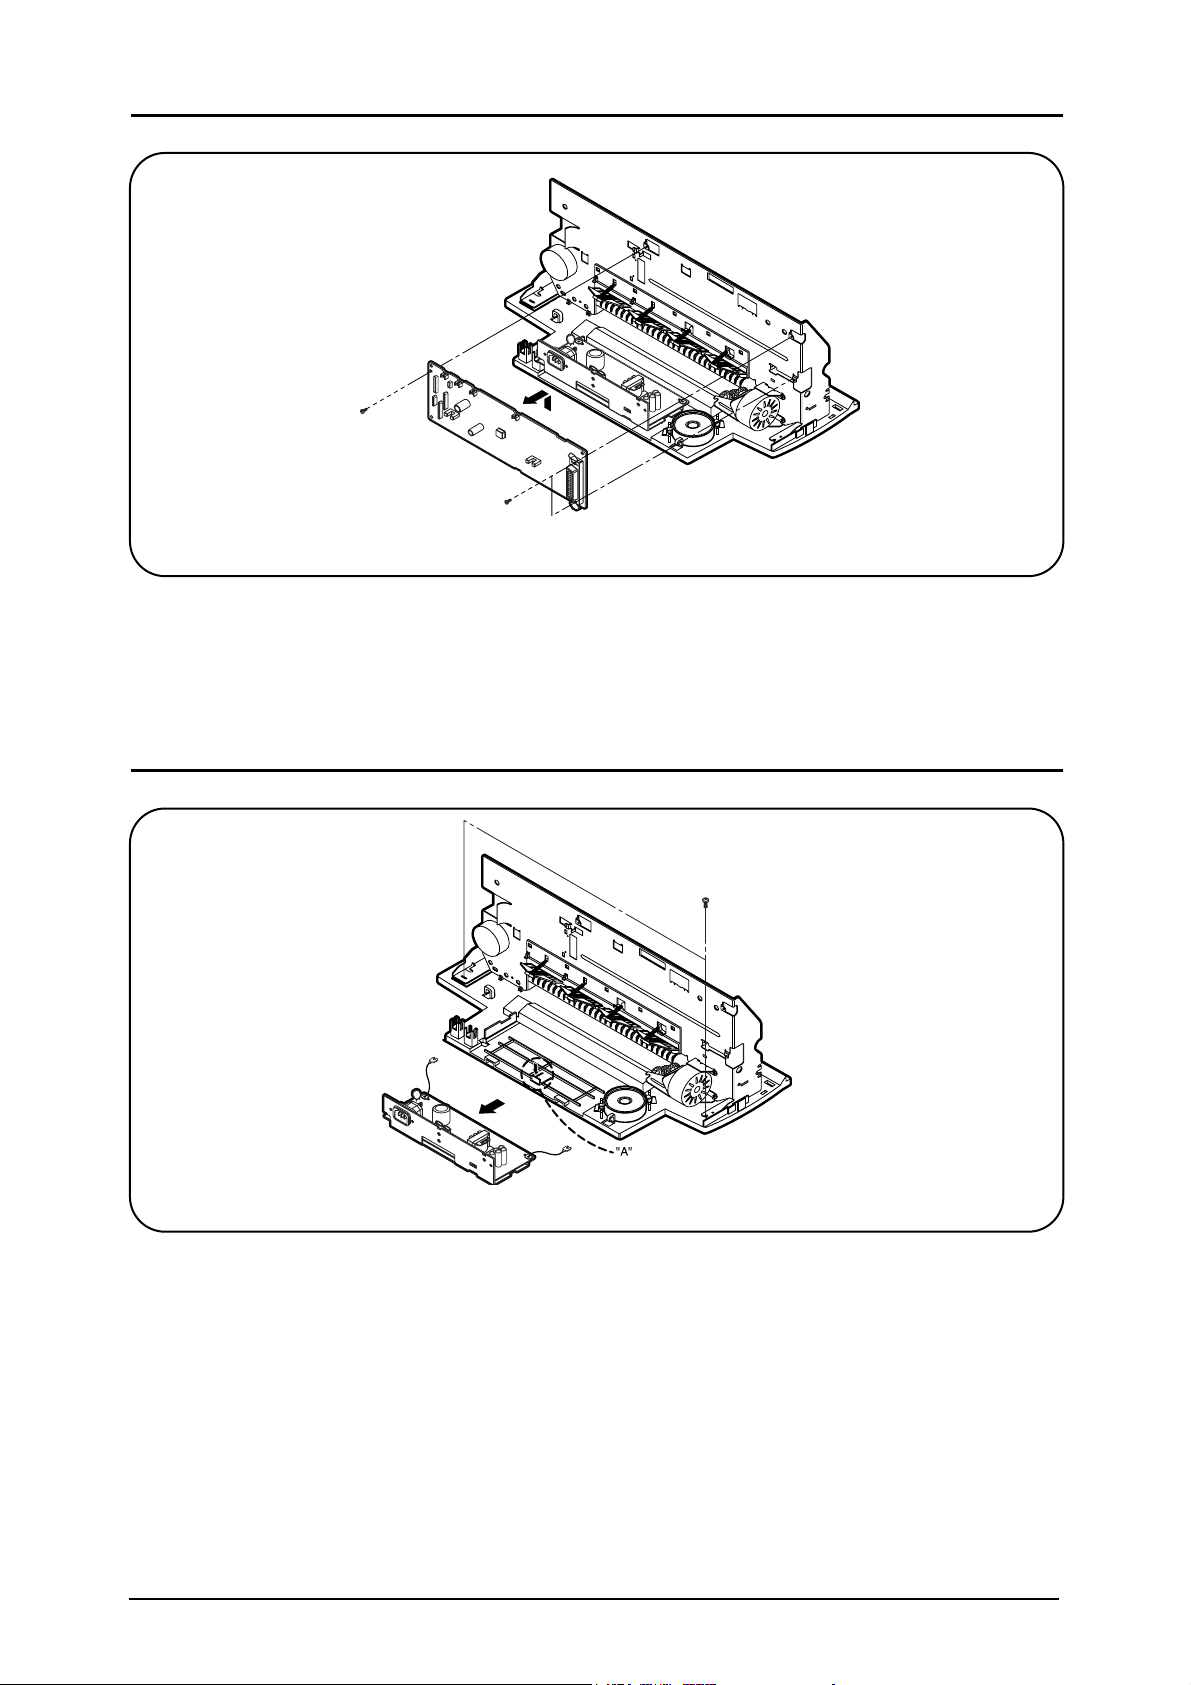
Fig.4-4. Separating Main Circuit Board
4-5 Separating Power Circuit Board
Fig.4-5. Separating Power Circuit Board
▲▲▲
Unscrew 2 screws that fix the right and left ground wire.
Press the hook (ÒAÓ) on the middle of the housing and separate power circuit board.
▲▲
 Loading...